MAKAR Flash - Brain and Speed Challenge! When MR Paper Sumo Meets NPC Battle Mechanism

Brain and Speed Challenge! When MR Paper Sumo Meets NPC Battle Mechanism
With the arrival of the July summer holidays, this month's flash event takes you back to childhood memories with MR paper sumo! This activity upgrades traditional paper sumo to an MR version and adds an NPC battle mechanism, allowing you to experience the excitement of battles anytime, anywhere.
In this course, we will focus on teaching how to use the logic block feature to design game rules and mechanisms. The logic block feature is simple and easy to learn, enabling you to master and apply it to various creative ideas effortlessly. Even if you are a beginner, you can quickly get the hang of it and create your own game content.
We combine paper sumo with an NPC battle mechanism, increasing the game's challenge and fun. By using simple logic blocks to set NPC behaviors, the game becomes richer and more varied.
Through our one-hour course, you can easily create this fun-filled mini-game. Test your hand speed and push your opponent out of the ring with all your might, enjoying the thrill of challenge and victory! Come learn how to make this game and spend a laughter-filled and enjoyable summer holiday with your family. Create your MR toy game and learn how to use the logic block feature to set game mechanisms, enhancing your creative skills!
▌Course Outline
【MAKAR Project Showcase】
1-1. Paper Sumo Showcase
1-2. Case Study Analysis
【MAKAR Project Hands-on Teaching】
2-1. Placing Materials in the MAKAR Project
2-2. Applying Material Ball Effects to 3D Objects
2-3. Creating an NPC Battle Game Using Logic Blocks
3.Q&A Session
▌Course Instructor
Lina Tsai
The course has ended. The complete course video will be available on the MAKAR official YouTube channel on August 29.
MAKAR Flash - 3D Creation Made Easy: Animal Music Box Quick Workshop
3D Creation Made Easy: Animal Music Box Quick Workshop
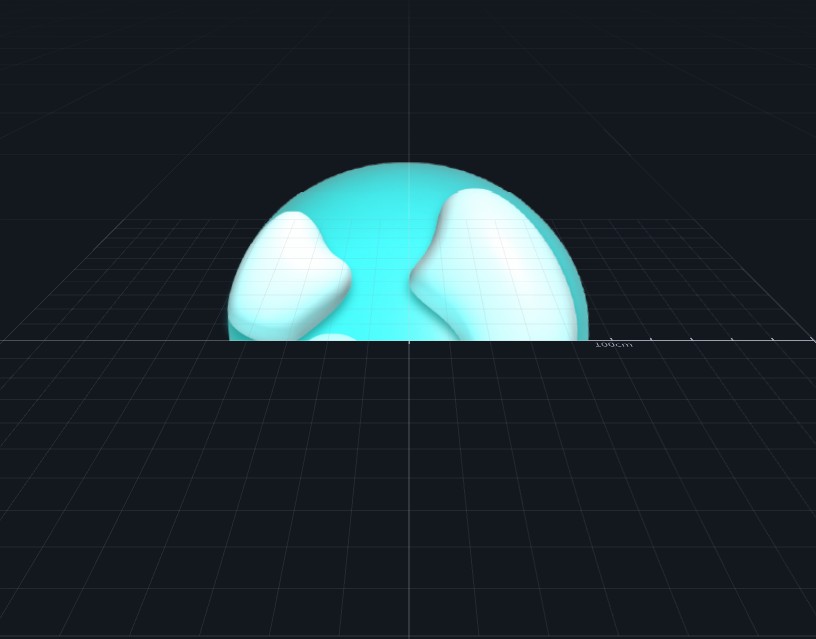
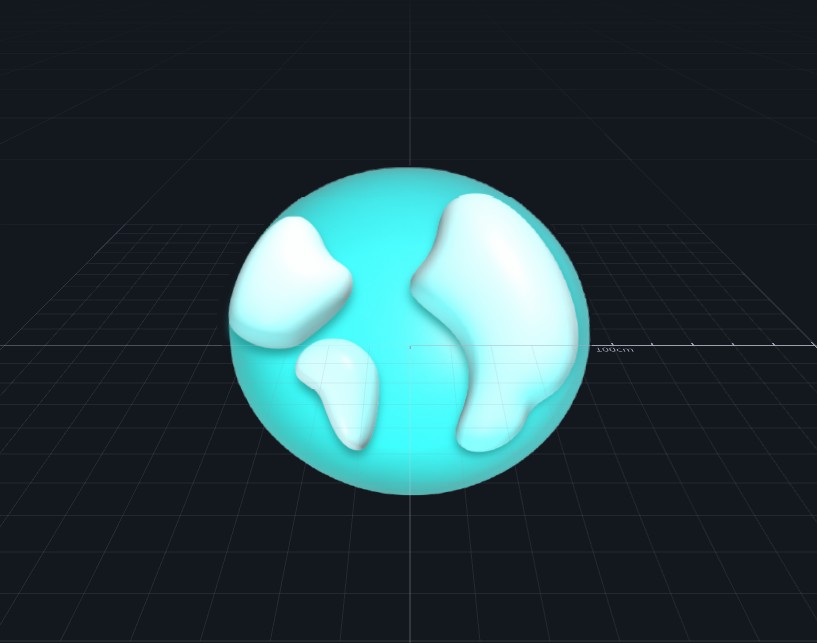
Have you ever struggled with using 3D materials? This month's flash course theme is here to save you! Inspired by the Muzha Zoo, we present the whimsical "Animal Music Box"! In this course, we'll highlight MAKAR's latest features—materials adjustments and the curve object, making 3D creation easier than ever. Explore MAKAR's online material library and use MAKAR Editor's new features to make 3D creation accessible to beginners and experts alike.
Materials adjustments are simple and intuitive, and the curve object allows easy path settings for movement, with step-by-step teaching making your projects more vibrant. Whether you're a 3D novice or a creative expert, you'll find joy in this activity. This project is more than just a musical box to admire; with added info signboards, it can become an engaging project showcase.
Join us, master 3D creation secrets, and explore more ways to make your XR projects lively and fun!
▌Course Outline
【MAKAR Project Showcase】
1-1, Animal Music Box Showcase
1-2, Case Study Analysis
【MAKAR Project Hands-on Teaching】
2-1, Creating Rolling Axles with Logic Blocks
2-2, Importing Materials from Online Library & Adjusting Material Balls
2-3, Using Track Tool to Adjust Background Dynamics
3, Q&A Time
▌Course Instructor
Lina Tsai
MAKAR Flash-Dragon Boat Festival XR Game Creation Crash Course: Mastering MAKAR's Latest Features with AI-Assisted Extended Reality

Dragon Boat Festival XR Game Creation Crash Course: Mastering MAKAR's Latest Features with AI-Assisted Extended Reality
The special Dragon Boat Festival pop-up event is here! Led by Lina Tsai, we will teach you how to create a fun and easy-to-make XR Dragon Boat Fishing game. The event covers the entire XR interactive project creation process, from concept to implementation, helping you overcome any challenges in your metaverse creation journey. We will also delve into the new features introduced in the MAKAR 3.5.0 update, giving you a clear understanding of different XR project types. Using MAKAR Editor’s Extended Reality features and combining them with AI-generated videos, you'll get hands-on experience in creating a Dragon Boat Fishing game, enhancing the game's immersive experience! Join us and experience the charm of XR creation!
📅 Event Highlights:
- Gain in-depth knowledge of MAKAR Editor's extended reality production techniques
- Create a Dragon Boat Festival fishing mini-game to rescue Qu Yuan
- Master the production techniques for various types of MAKAR projects
▌Course Outline
[MAKAR Project Hands-on Teaching]1-1. Introduction to MAKAR Editor Project Types
1-2. AI-Generated Video Tutorial
1-3. Placing Assets in MAKAR Projects
1-4 Creating a Fishing Game with Logic
2.Bonus: Facebook Check-in Prize Draw
3.Q&A Session
▌Instructor
Lina Tsai
【5G Live Learning】Integrated L1-L5 Course Outline for a Total of 12 Hours
Course 1
1、Course Title: 5G Application in AI and SDGs Digital Teaching Material Creation
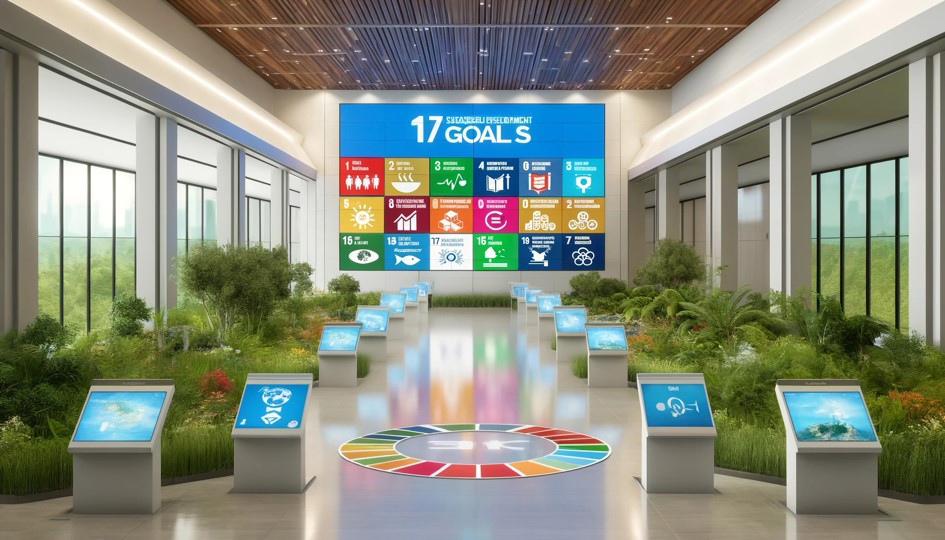
This workshop aims to equip K12 teachers with advanced 5G, AI, and XR technologies, integrating them into their teaching practices. By developing VR virtual reality projects, the course enhances teaching effectiveness and incorporates Sustainable Development Goals (SDGs) into teaching materials, fostering students' environmental awareness and global perspective.
2、Pre-Course Software Installation: 3、Course Outline:
| Day 1(6H) | |
| Time | Course Outline |
| 0900-1000 | XR Extended Reality Digital Learning Material Case Study Experience. Explore actual XR extended reality digital learning material case studies to understand their applications and effects in education. |
| 1000-1200 | VR Digital Curriculum Project Design Planning
|
| 1300-1600 | Using MAKAR XR Platform to Implement VR Virtual Reality Projects
|
| 1600-1700 | Q&A Session Address questions encountered during the course, fostering communication and learning. |

Course Two
1、Course Title:
This course integrates the MAKAR series services with hardware to deliver an unprecedented teaching experience. Participants will immerse themselves in various XR digital content applications, deeply exploring different scenarios and themes.
2、Pre-Course Software Installation 3、Course Outline:
| Day 1 (6H) | |
|---|---|
| Time | Course Outline |
| 0900-1200 |
|
| 1300-1600 |
|
| 1600-1700 | Q&A Session Address questions encountered during the course, fostering communication and learning. |
【XR Creation】Three-Hour Course Outline
.jpg)

This course will help you understand the development trends and future prospects of AR and VR. Within three hours, you will create at least one AR project and one VR project (or focus on one project). After completing the projects, you will learn how to update the content anytime. The course includes basic AR projects and VR guided tour projects, providing comprehensive hands-on experience to help you master core XR technology skills.
| Course Content | Time |
| AR/VR Trends Seminar | 15 minutes |
| AR and VR Digital Textbook Experience | 15 minutes |
|
60 minutes |
|
20 minutes |
|
60 minutes |
| Q&A | 10 minutes |
【XR Creation】Six-Hour Course Outline

This course will help you understand the development trends and future prospects of AR and VR. Within six hours, you will create at least one AR project and one VR project (or focus on one project). After completing the projects, you will learn how to update the content anytime. The course includes basic AR projects and VR guided tour projects, providing comprehensive hands-on experience to help you master core XR technology skills.
| Curriculum planning | Time |
| AR/VR Trends Seminar | 45 minutes |
| Experience Real AR/VR Case Studies | |
| Understanding AR Image Target (Image Tracking and Image Recognition Techniques) | |
| Software Registration and Basic Operation Instructions | 15 minutes |
AR Project Implementation 1
|
120 minutes |
AR Project Implementation 2
|
160 minutes |
| Q&A Session | 20 minutes |
| Day 2 (6H) | |
| Curriculum planning | Time |
| VR 360 Basic Concepts Overview | 45 minutes |
| Understanding VR Elements and Experiencing VR | |
| VR Camera Setup Methods Explanation | |
Implementing VR Project 1
|
300 minutes |
| Q&A Session | 15 minutes |
【XR Creation】Twelve-Hour Course Outline

Common concerns about digital curriculum editing include uncertainties such as: Is creating and editing digital curriculum difficult? Can I complete a project in three hours? Can I learn without an IT background? Can I create it without programming skills?
In fact, you don’t need to learn programming languages for this course. We will use MAKAR Editor to create AR/VR/MR digital curriculum, and after creation, publish it to mobile devices for viewing and learning. This instructional guide will introduce preparation before class, experience descriptions, and curriculum design methods. The course content includes planning for three-hour, six-hour, twelve-hour, or longer sessions.
This course will help you understand the development trends and future prospects of AR and VR. Within twelve hours, you will create at least one AR project and one VR project (or focus on one project). After completing the projects, you will learn how to update the content anytime. The course includes basic AR projects and VR guided tour projects, providing comprehensive hands-on experience to help you master core XR technology skills.
| Curriculum planning | 時間 |
| AR/VR Trends Seminar | 45 minutes |
| Experience Real AR/VR Case Studies | |
| Understanding AR Image Target (Image Tracking and Image Recognition Techniques) | |
| Software Registration and Basic Operation Instructions | 15 minutes |
AR Project Implementation 1
|
120 minutes |
AR Project Implementation 2
|
160 minutes |
| Q&A Session | 20 minutes |
| Day 2 (6H) | |
| Curriculum planning | Time |
| VR 360 Basic Concepts Overview | 45 minutes |
| Understanding VR Elements and Experiencing VR | |
| VR Camera Setup Methods Explanation | |
Implementing VR Project 1
|
300 minutes |
| Q&A Session | 15 minutes |
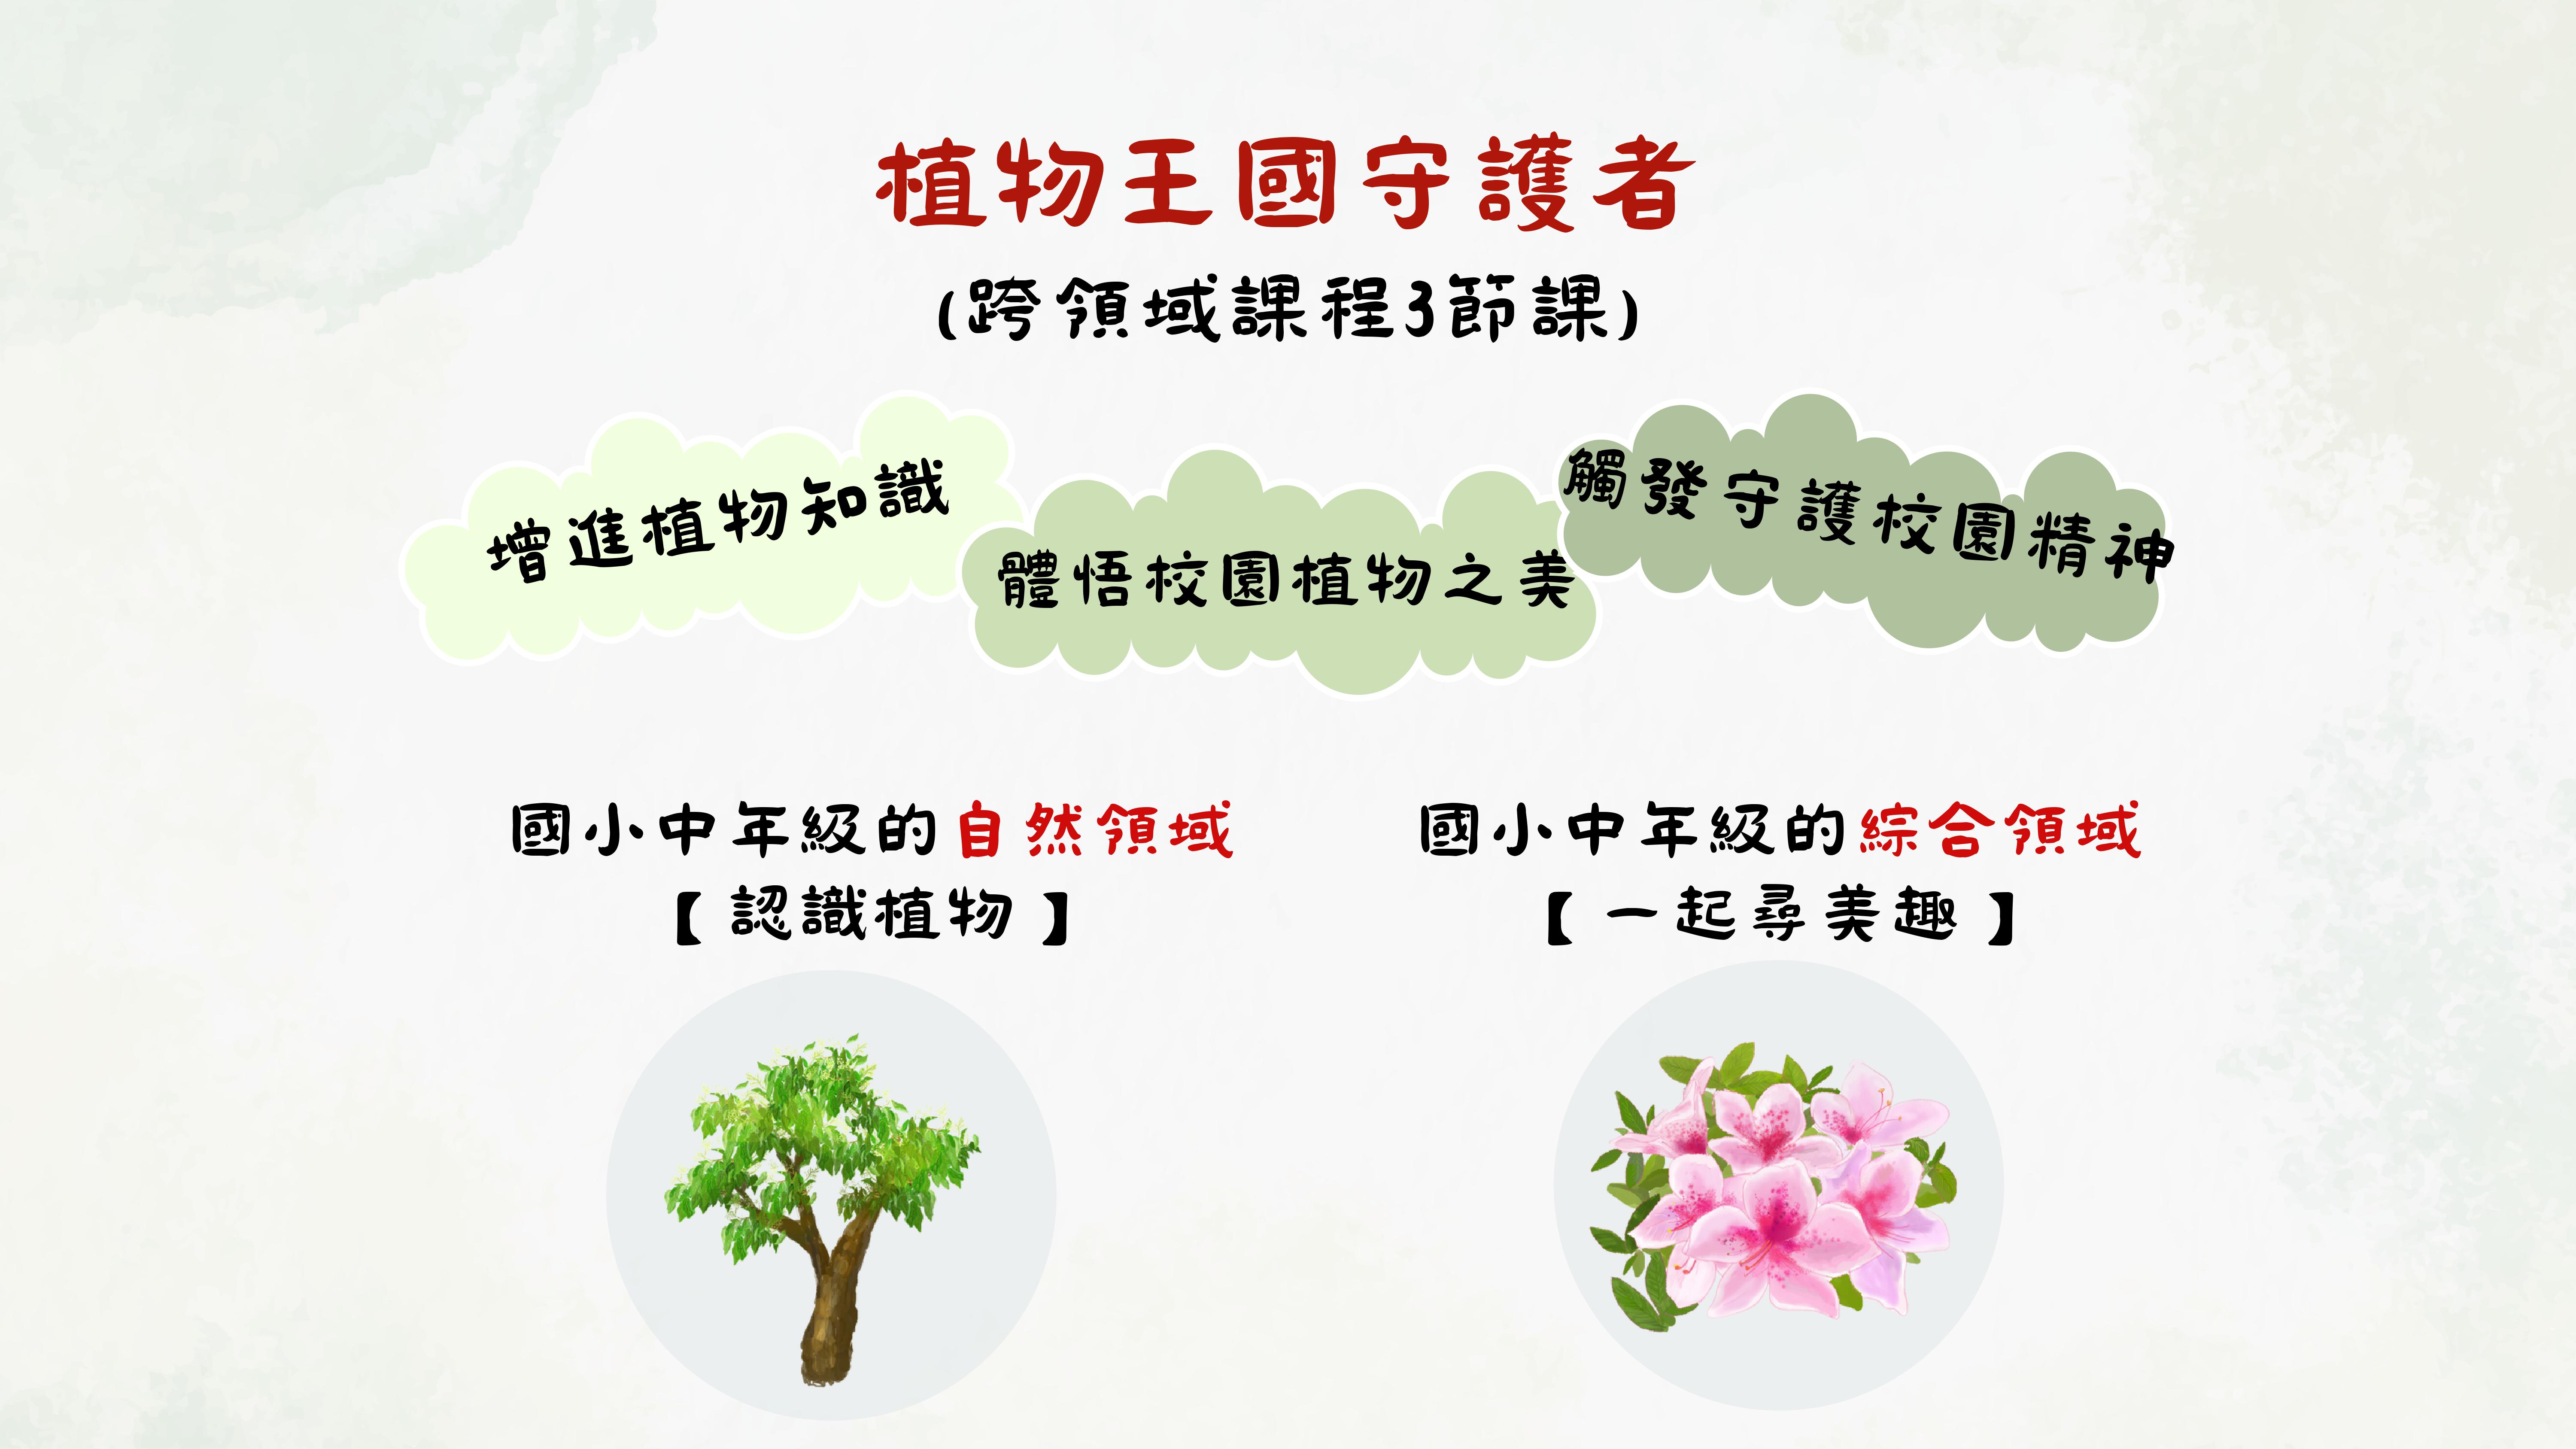
② Guardian Breeder: Guardians of the Plant Kingdom
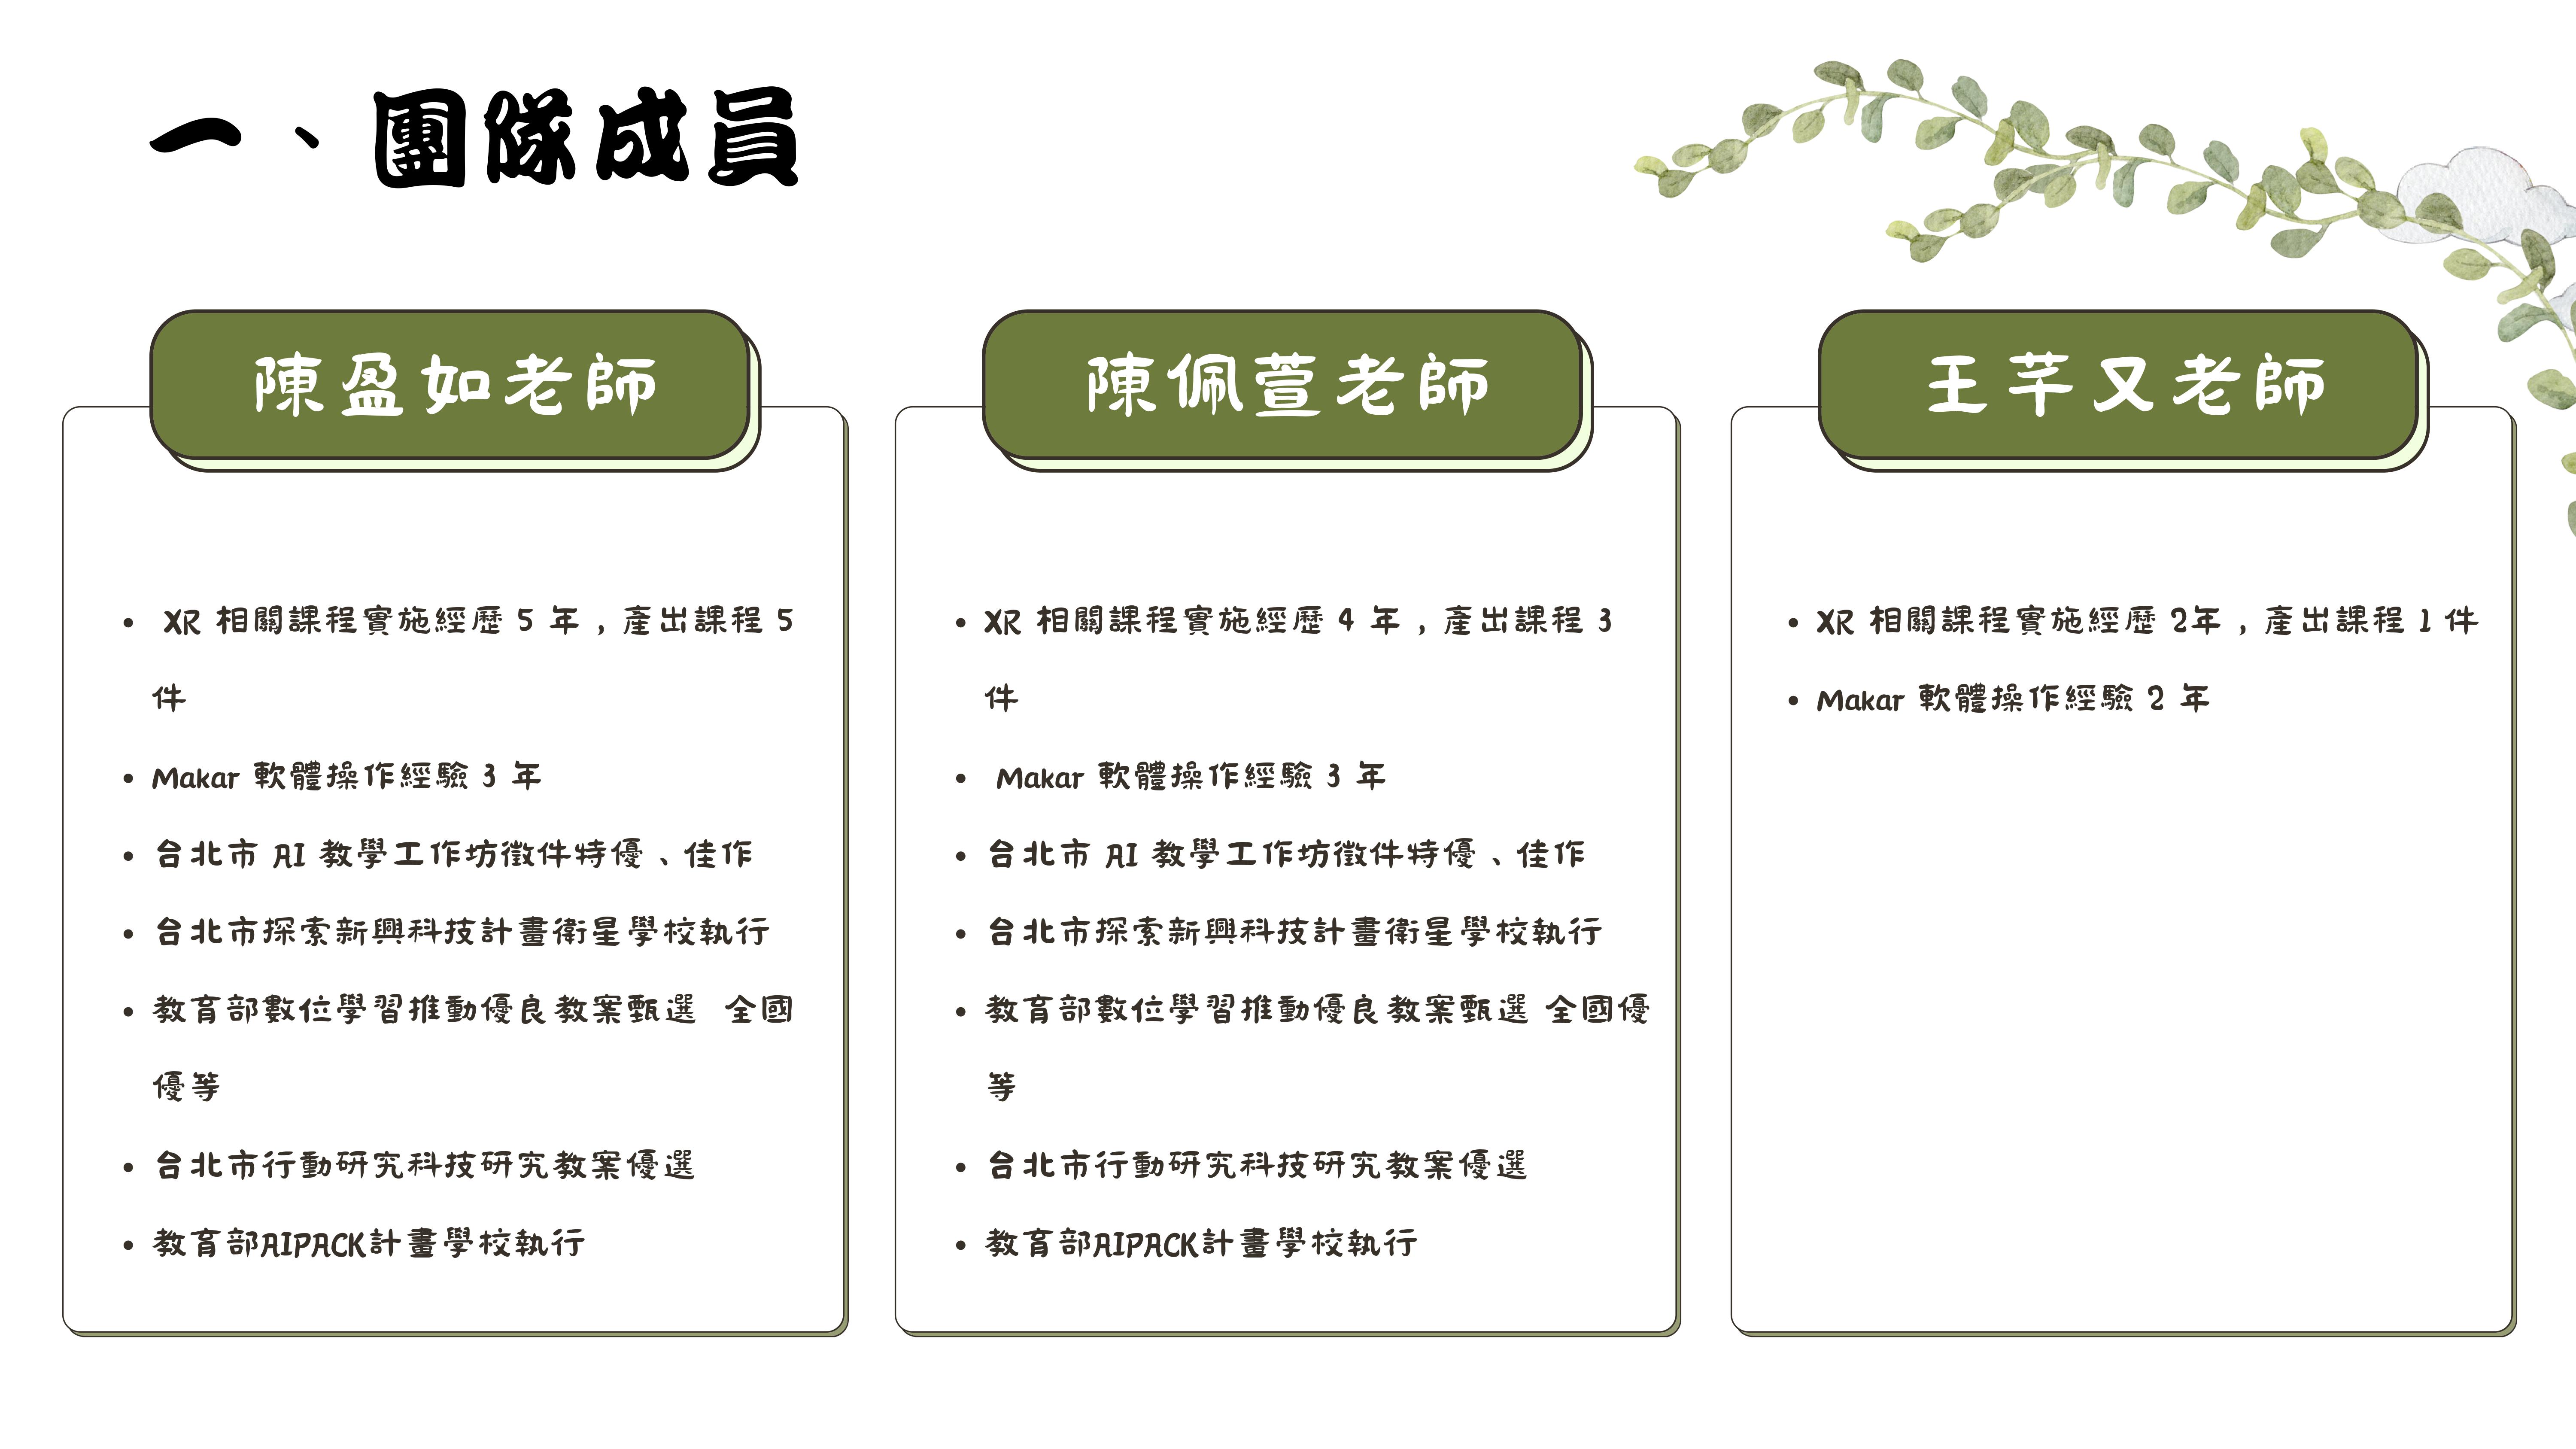
▍Team Introduction
"Guardians’ Mentors," creators of the project "Guardians of the Plant Kingdom," hail from Yong’an Elementary School in Zhongshan District, Taipei City, and Jieshou Elementary School in Fuxing District, Taoyuan City. They were honored with the 2023 XR Reality Education Creative Award for Teachers: the XR New Media Content Teaching Material Creation Excellence Award and the HTC MVP Special Award.
▍Teaching Plan/Material Design Concept
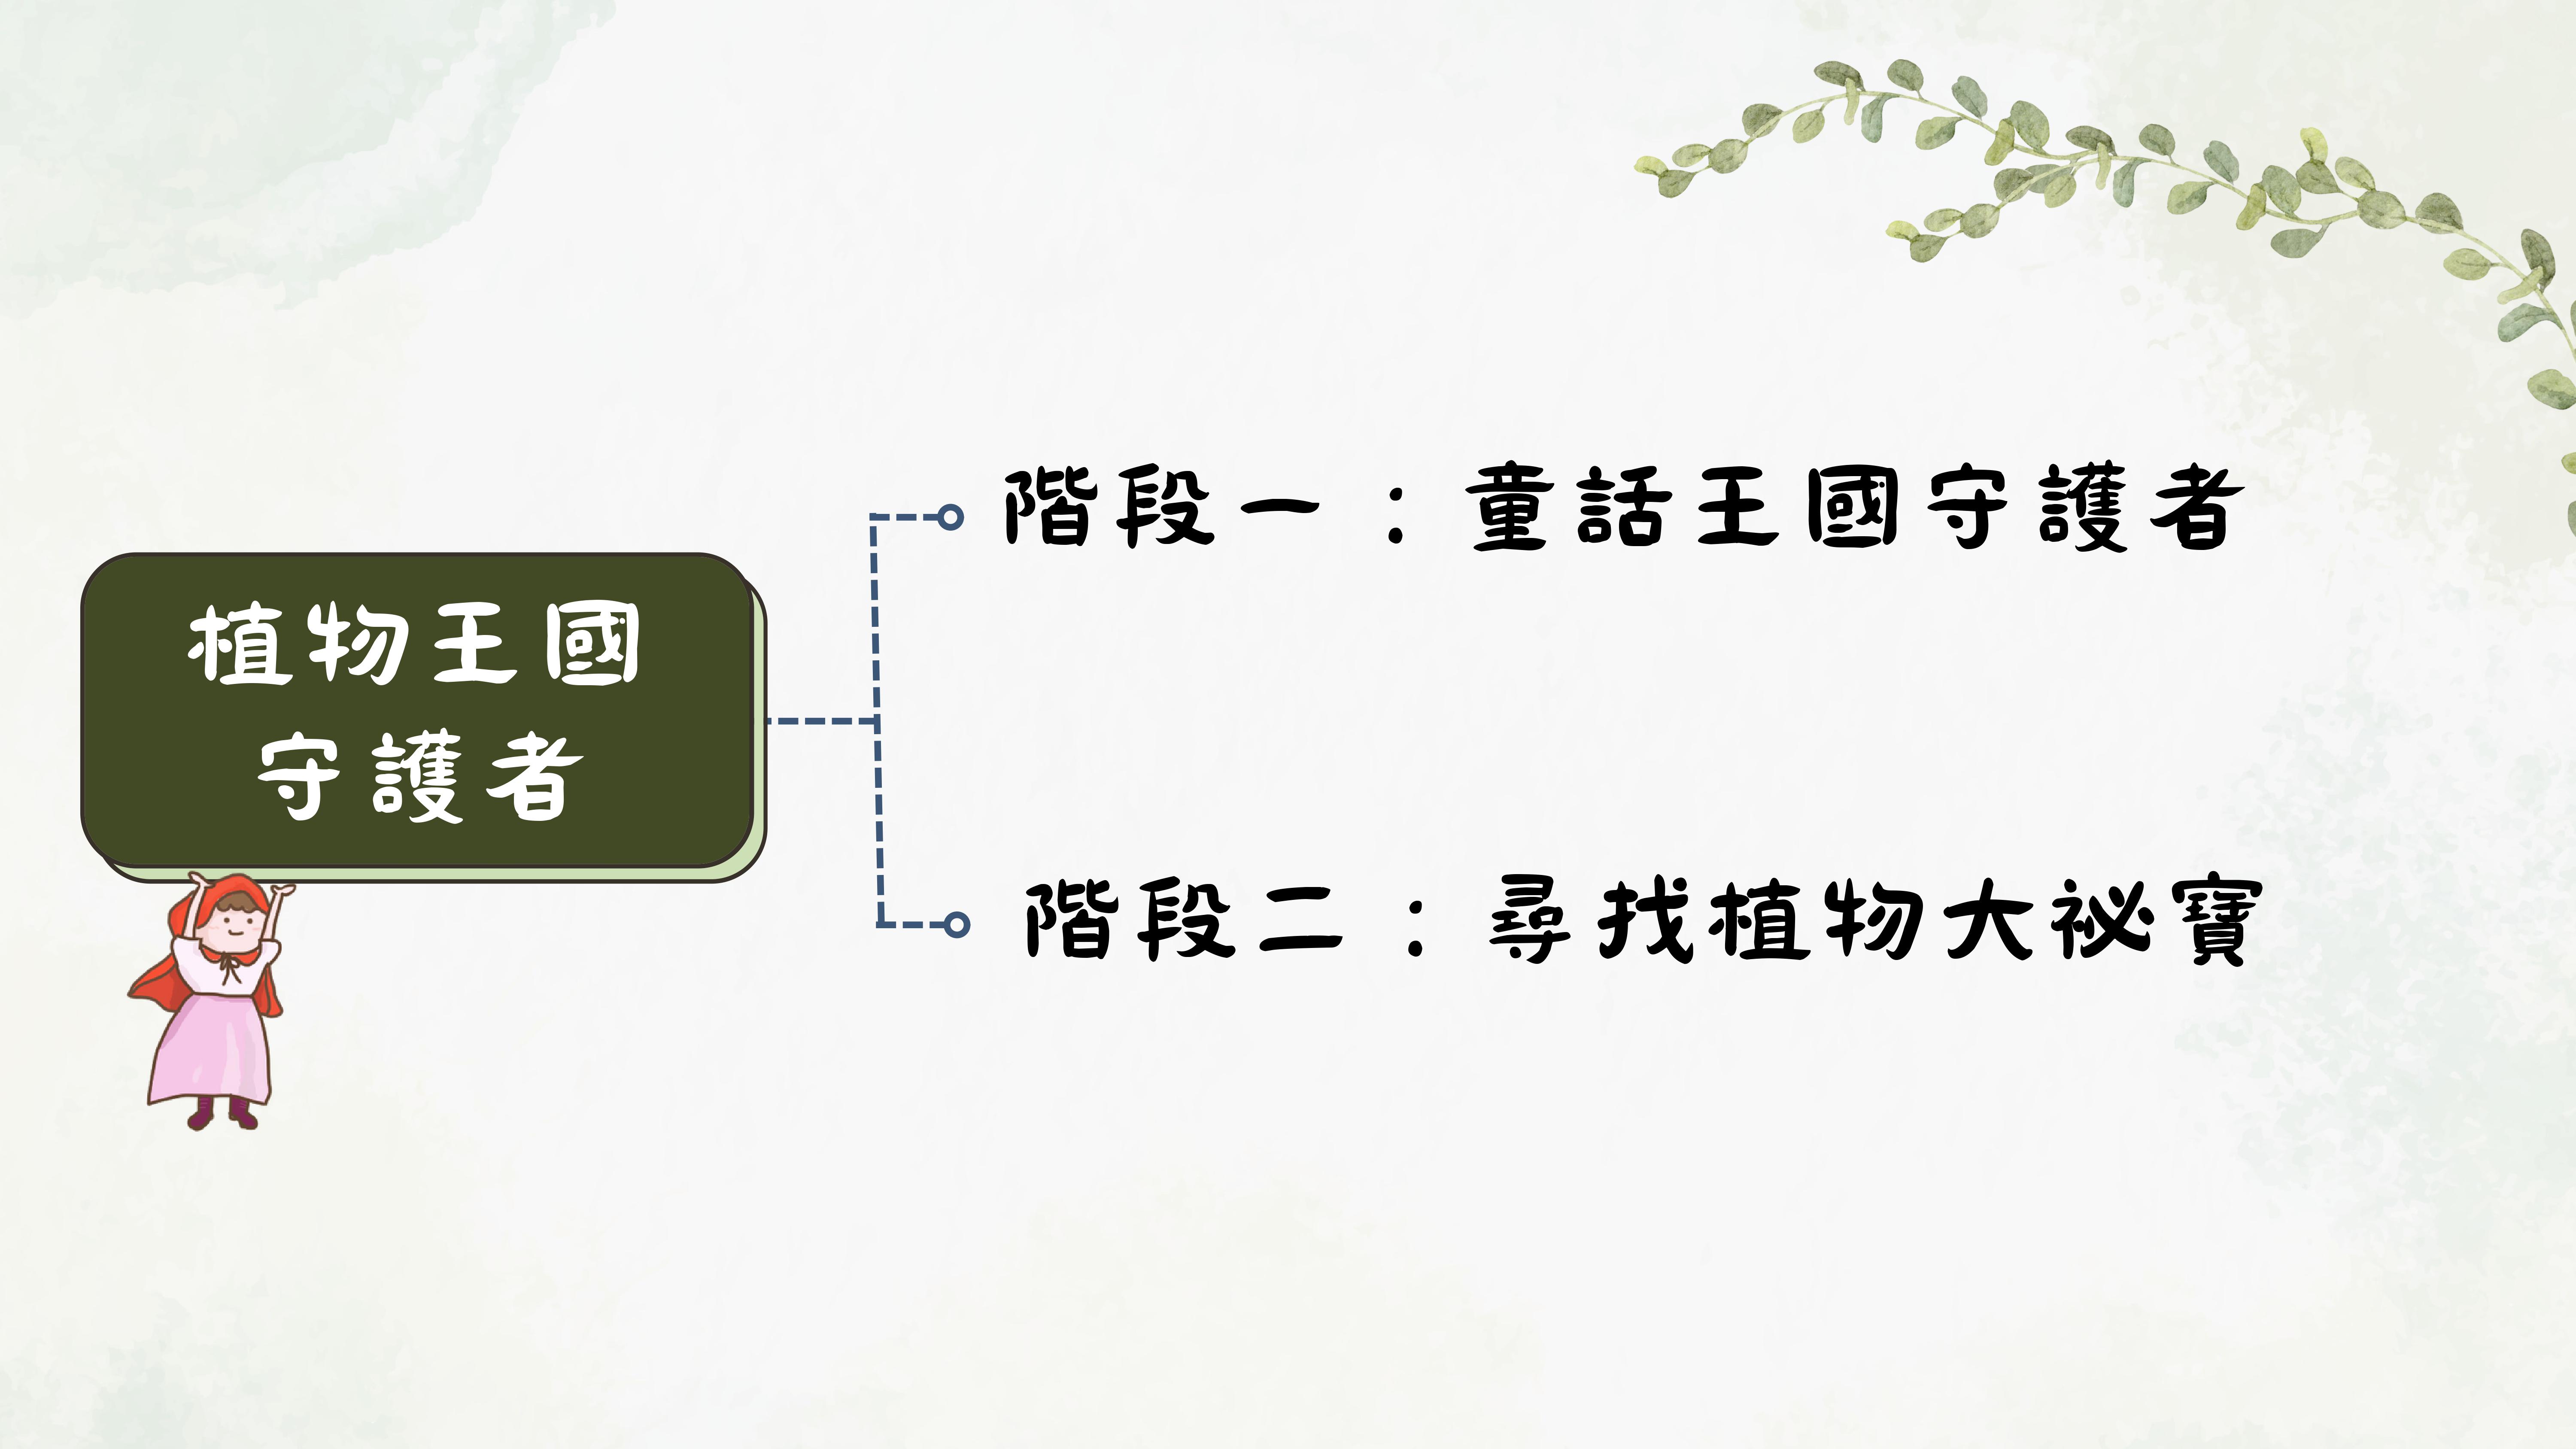
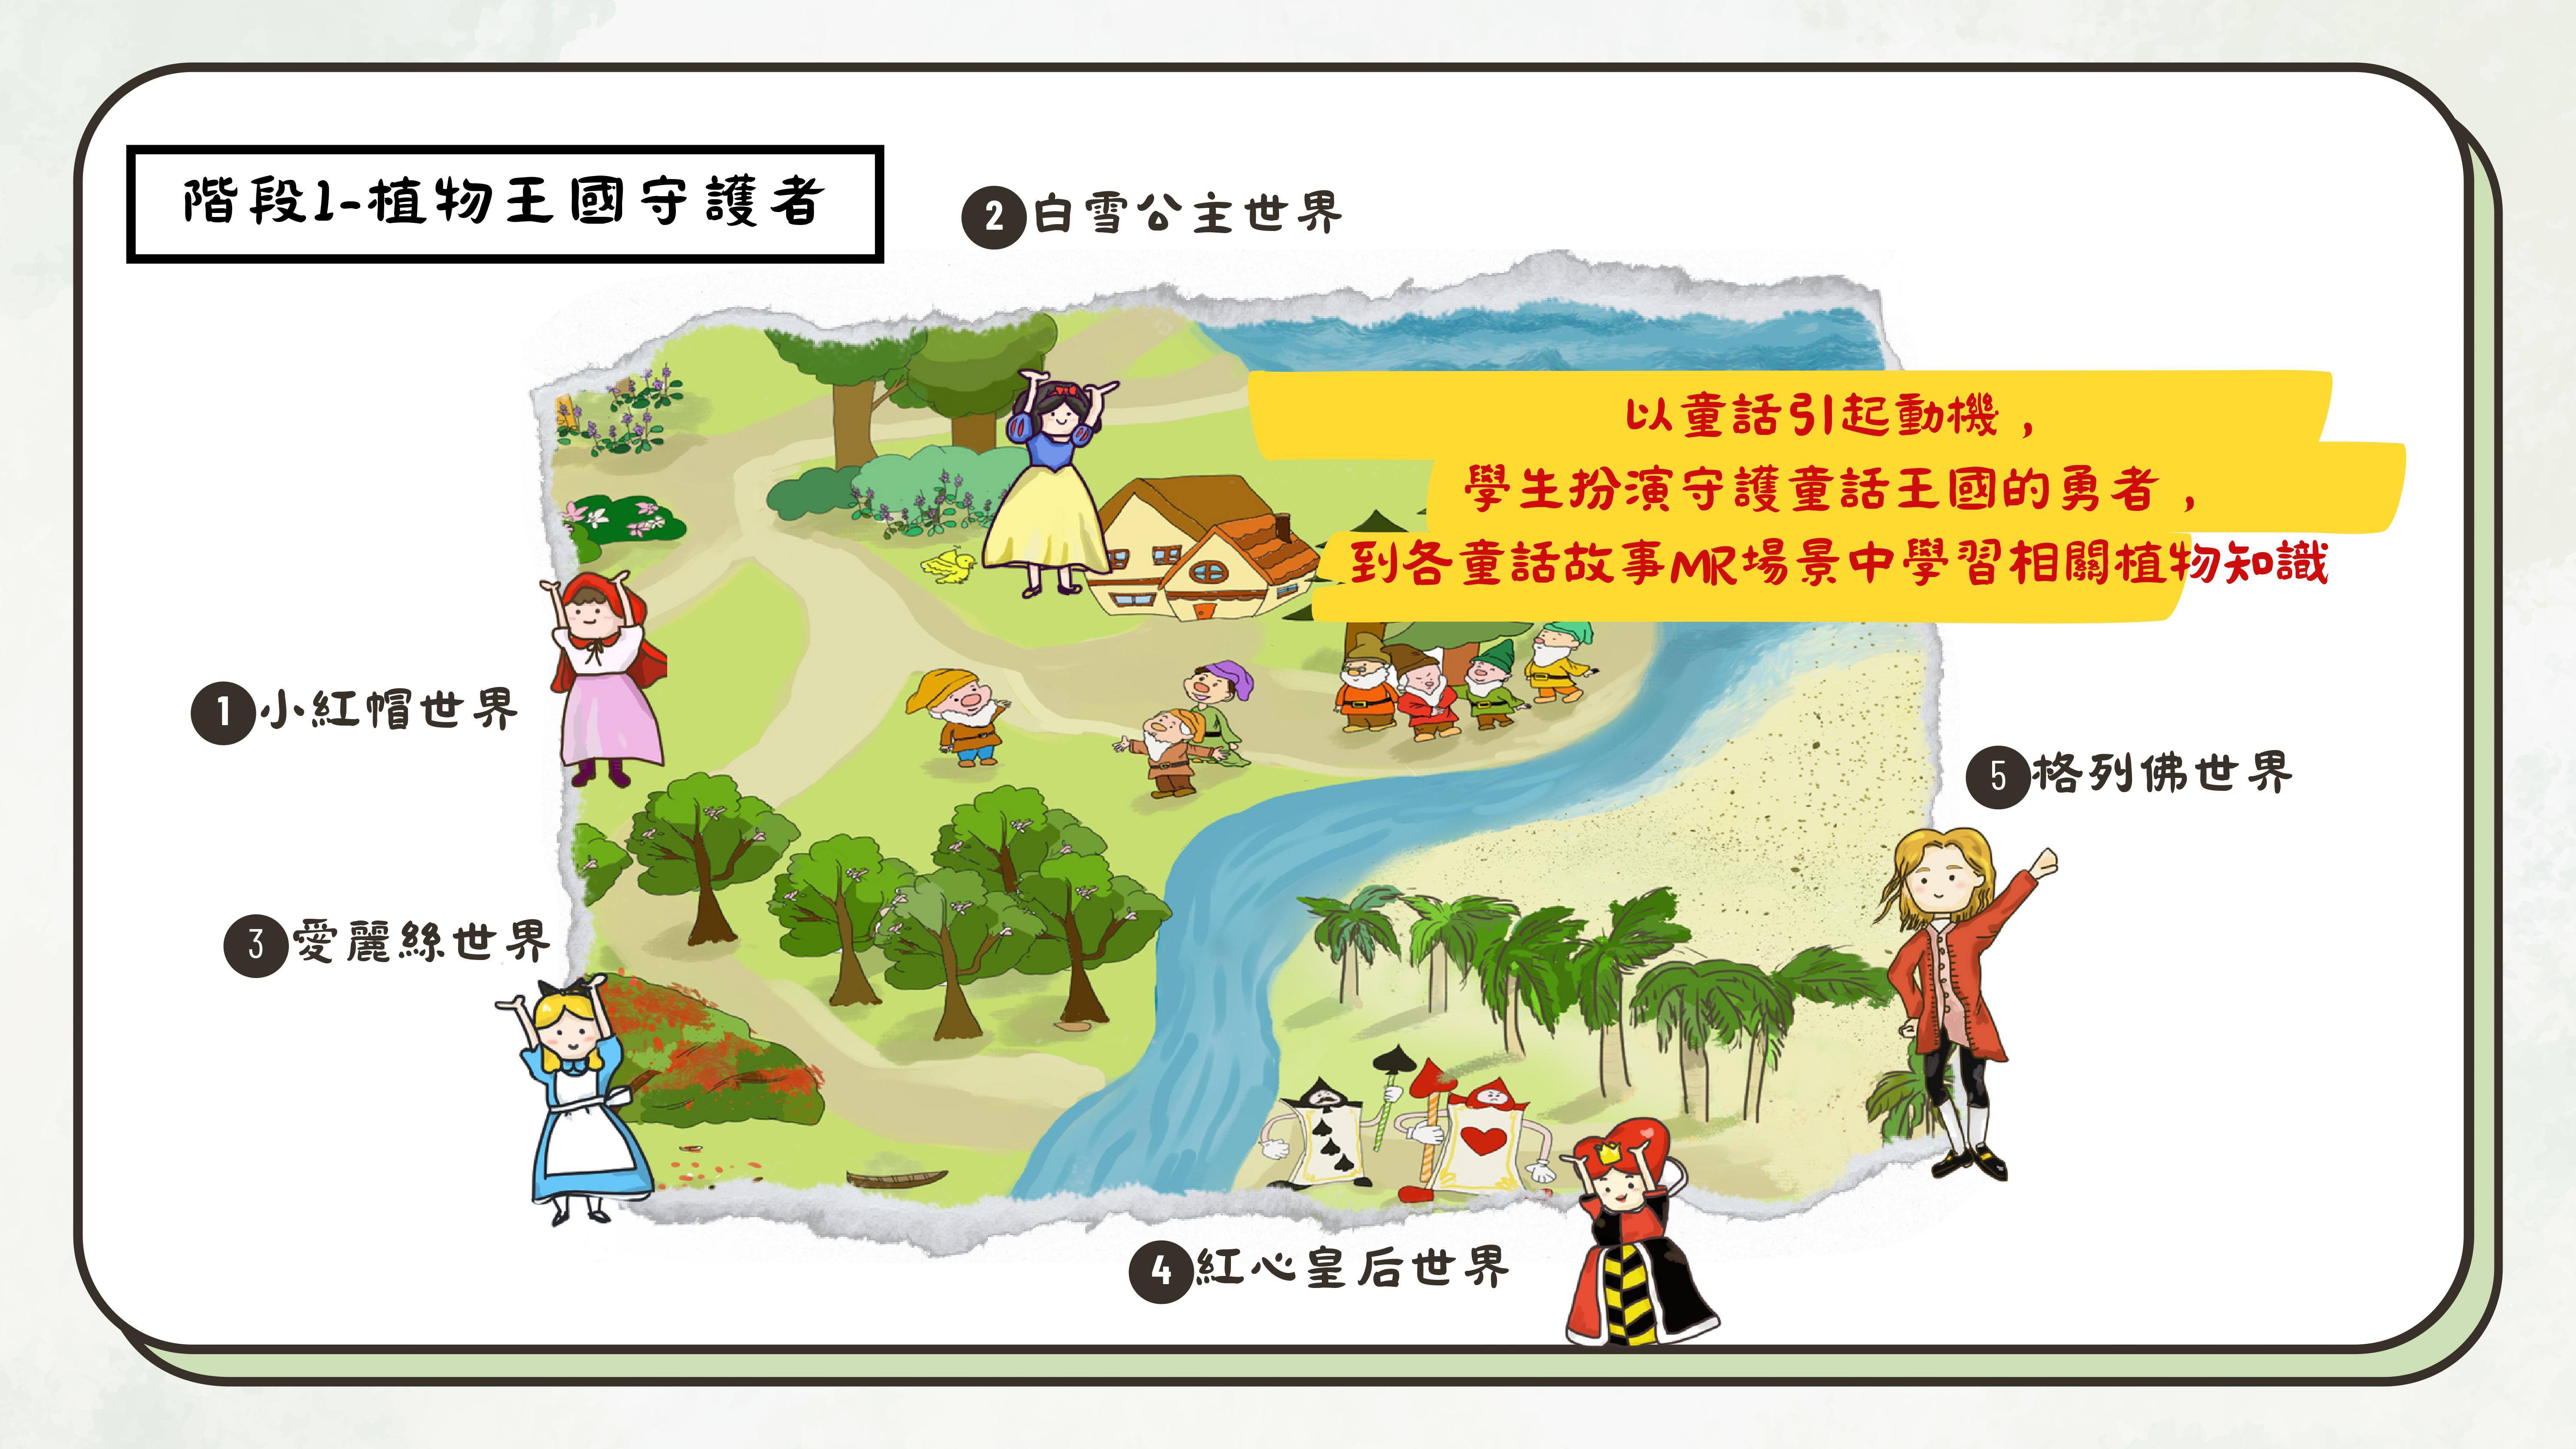
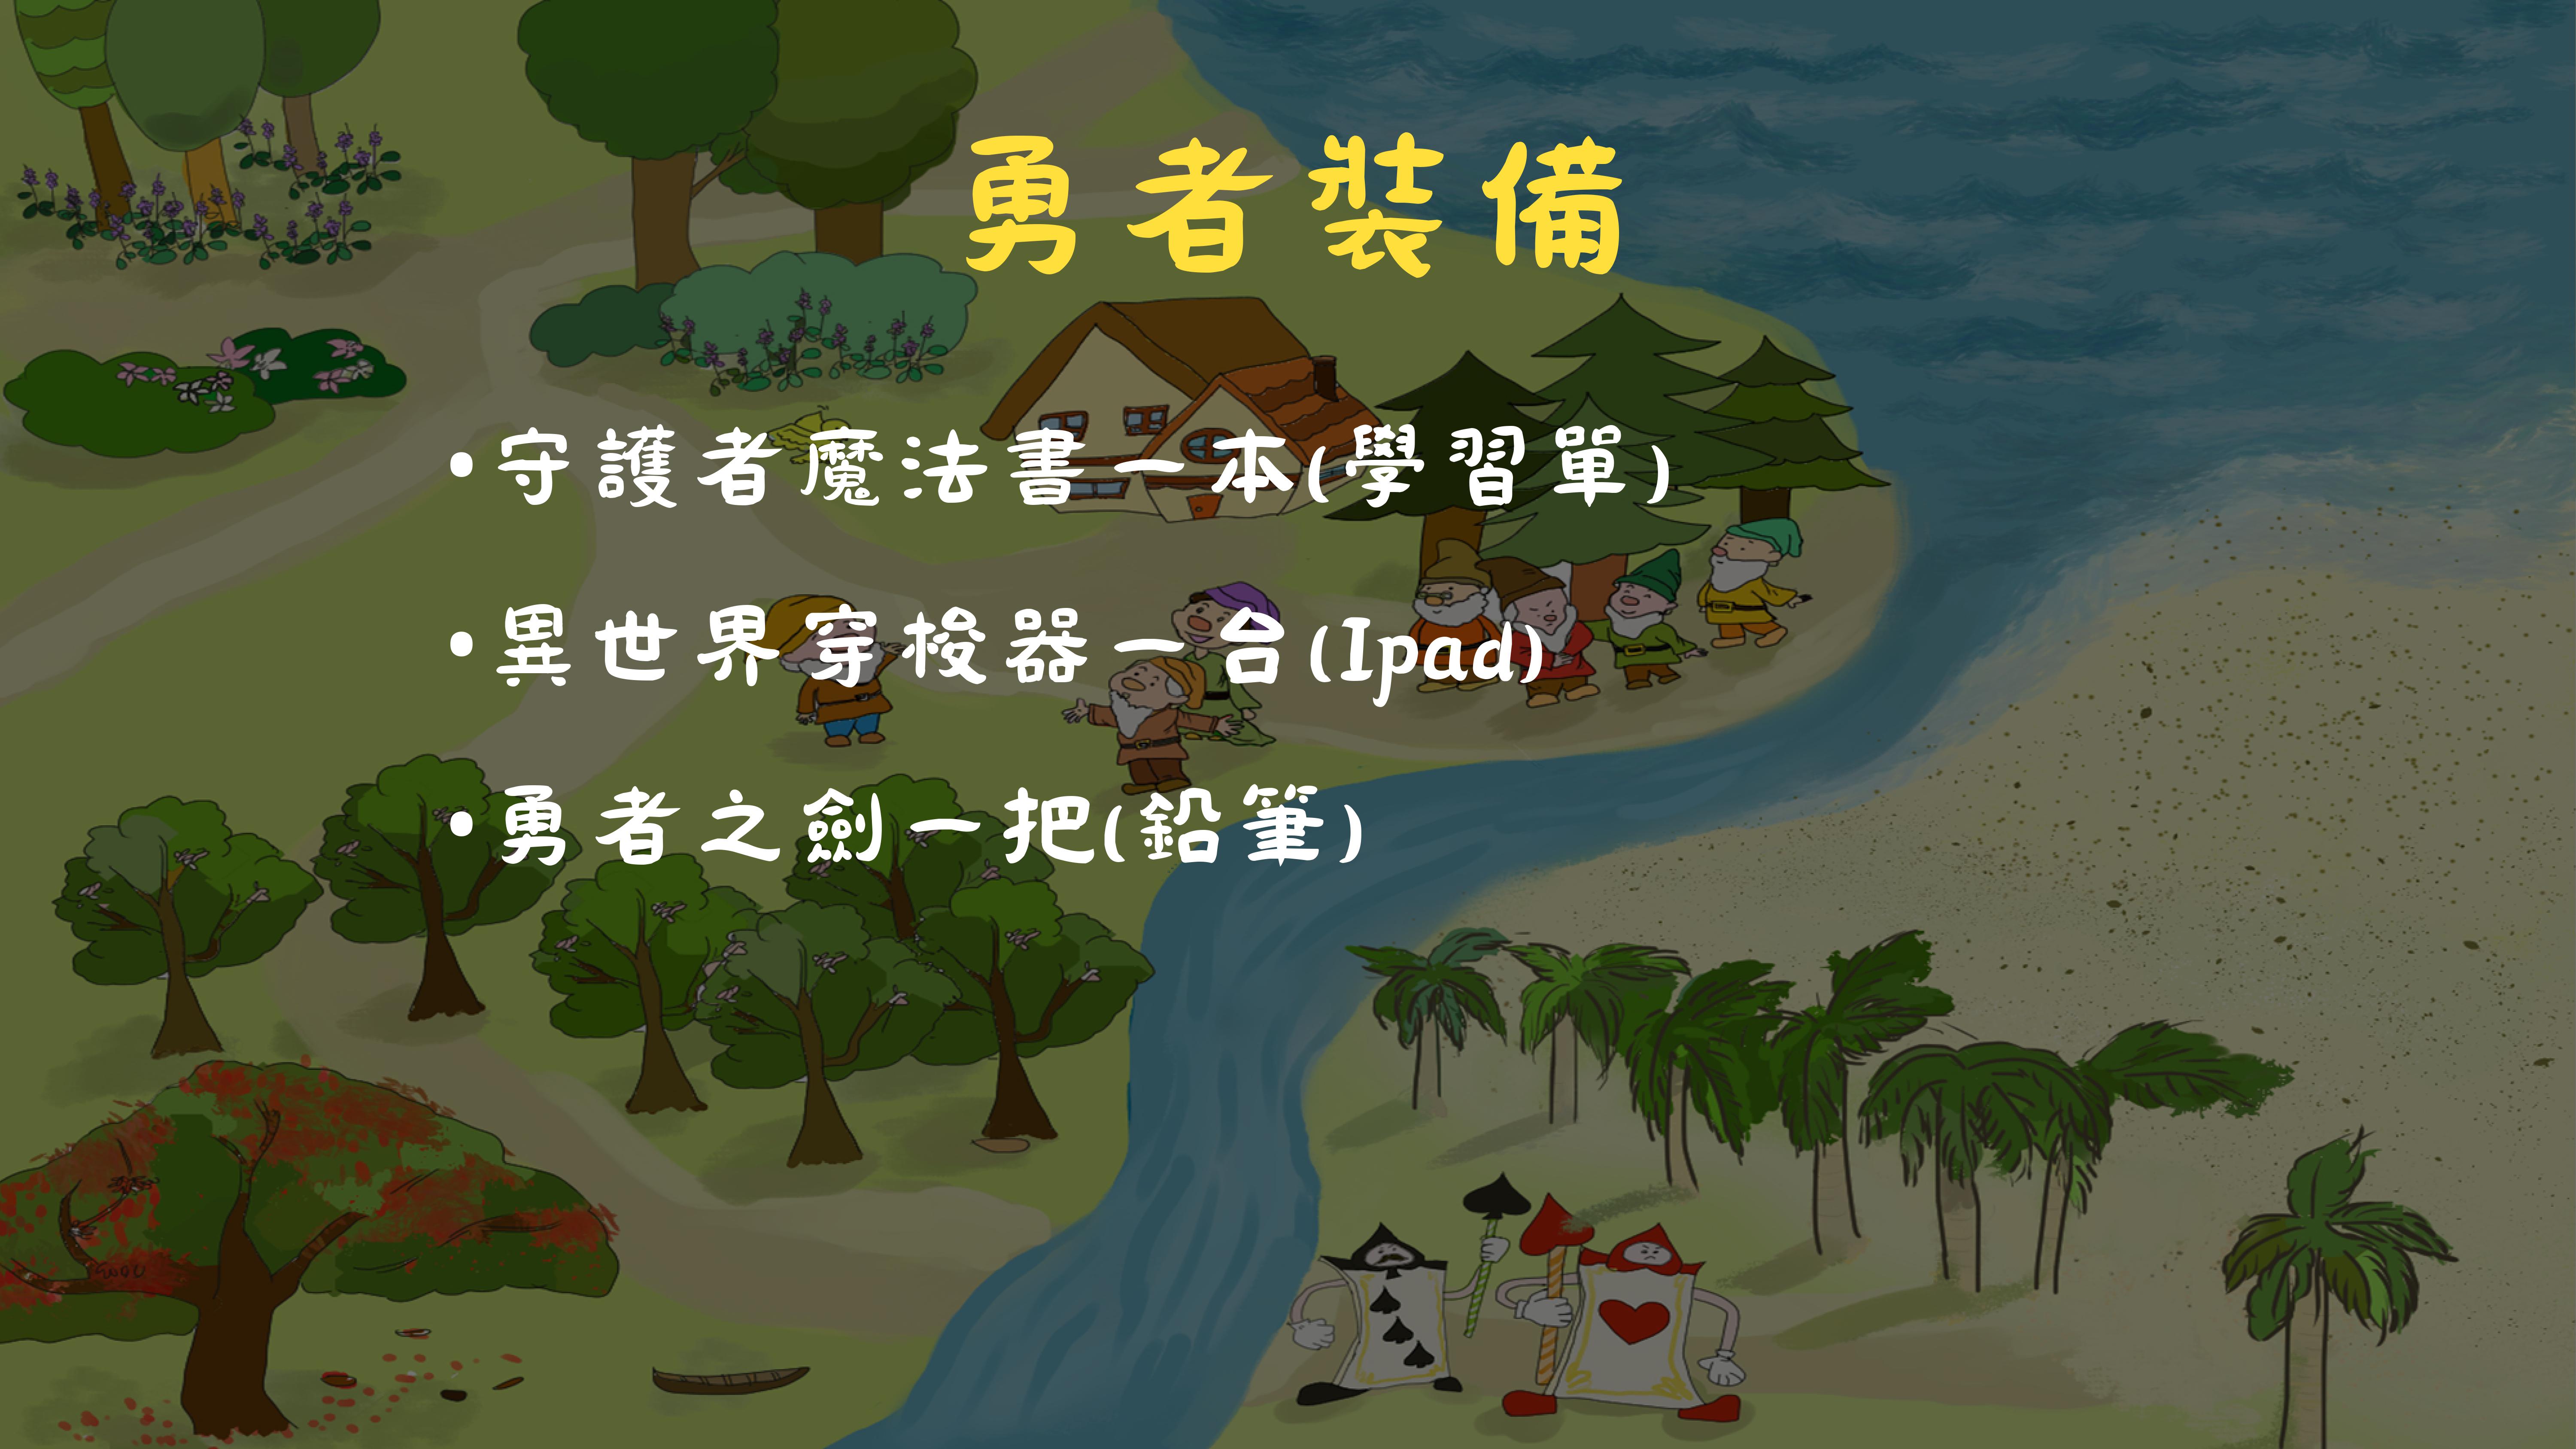
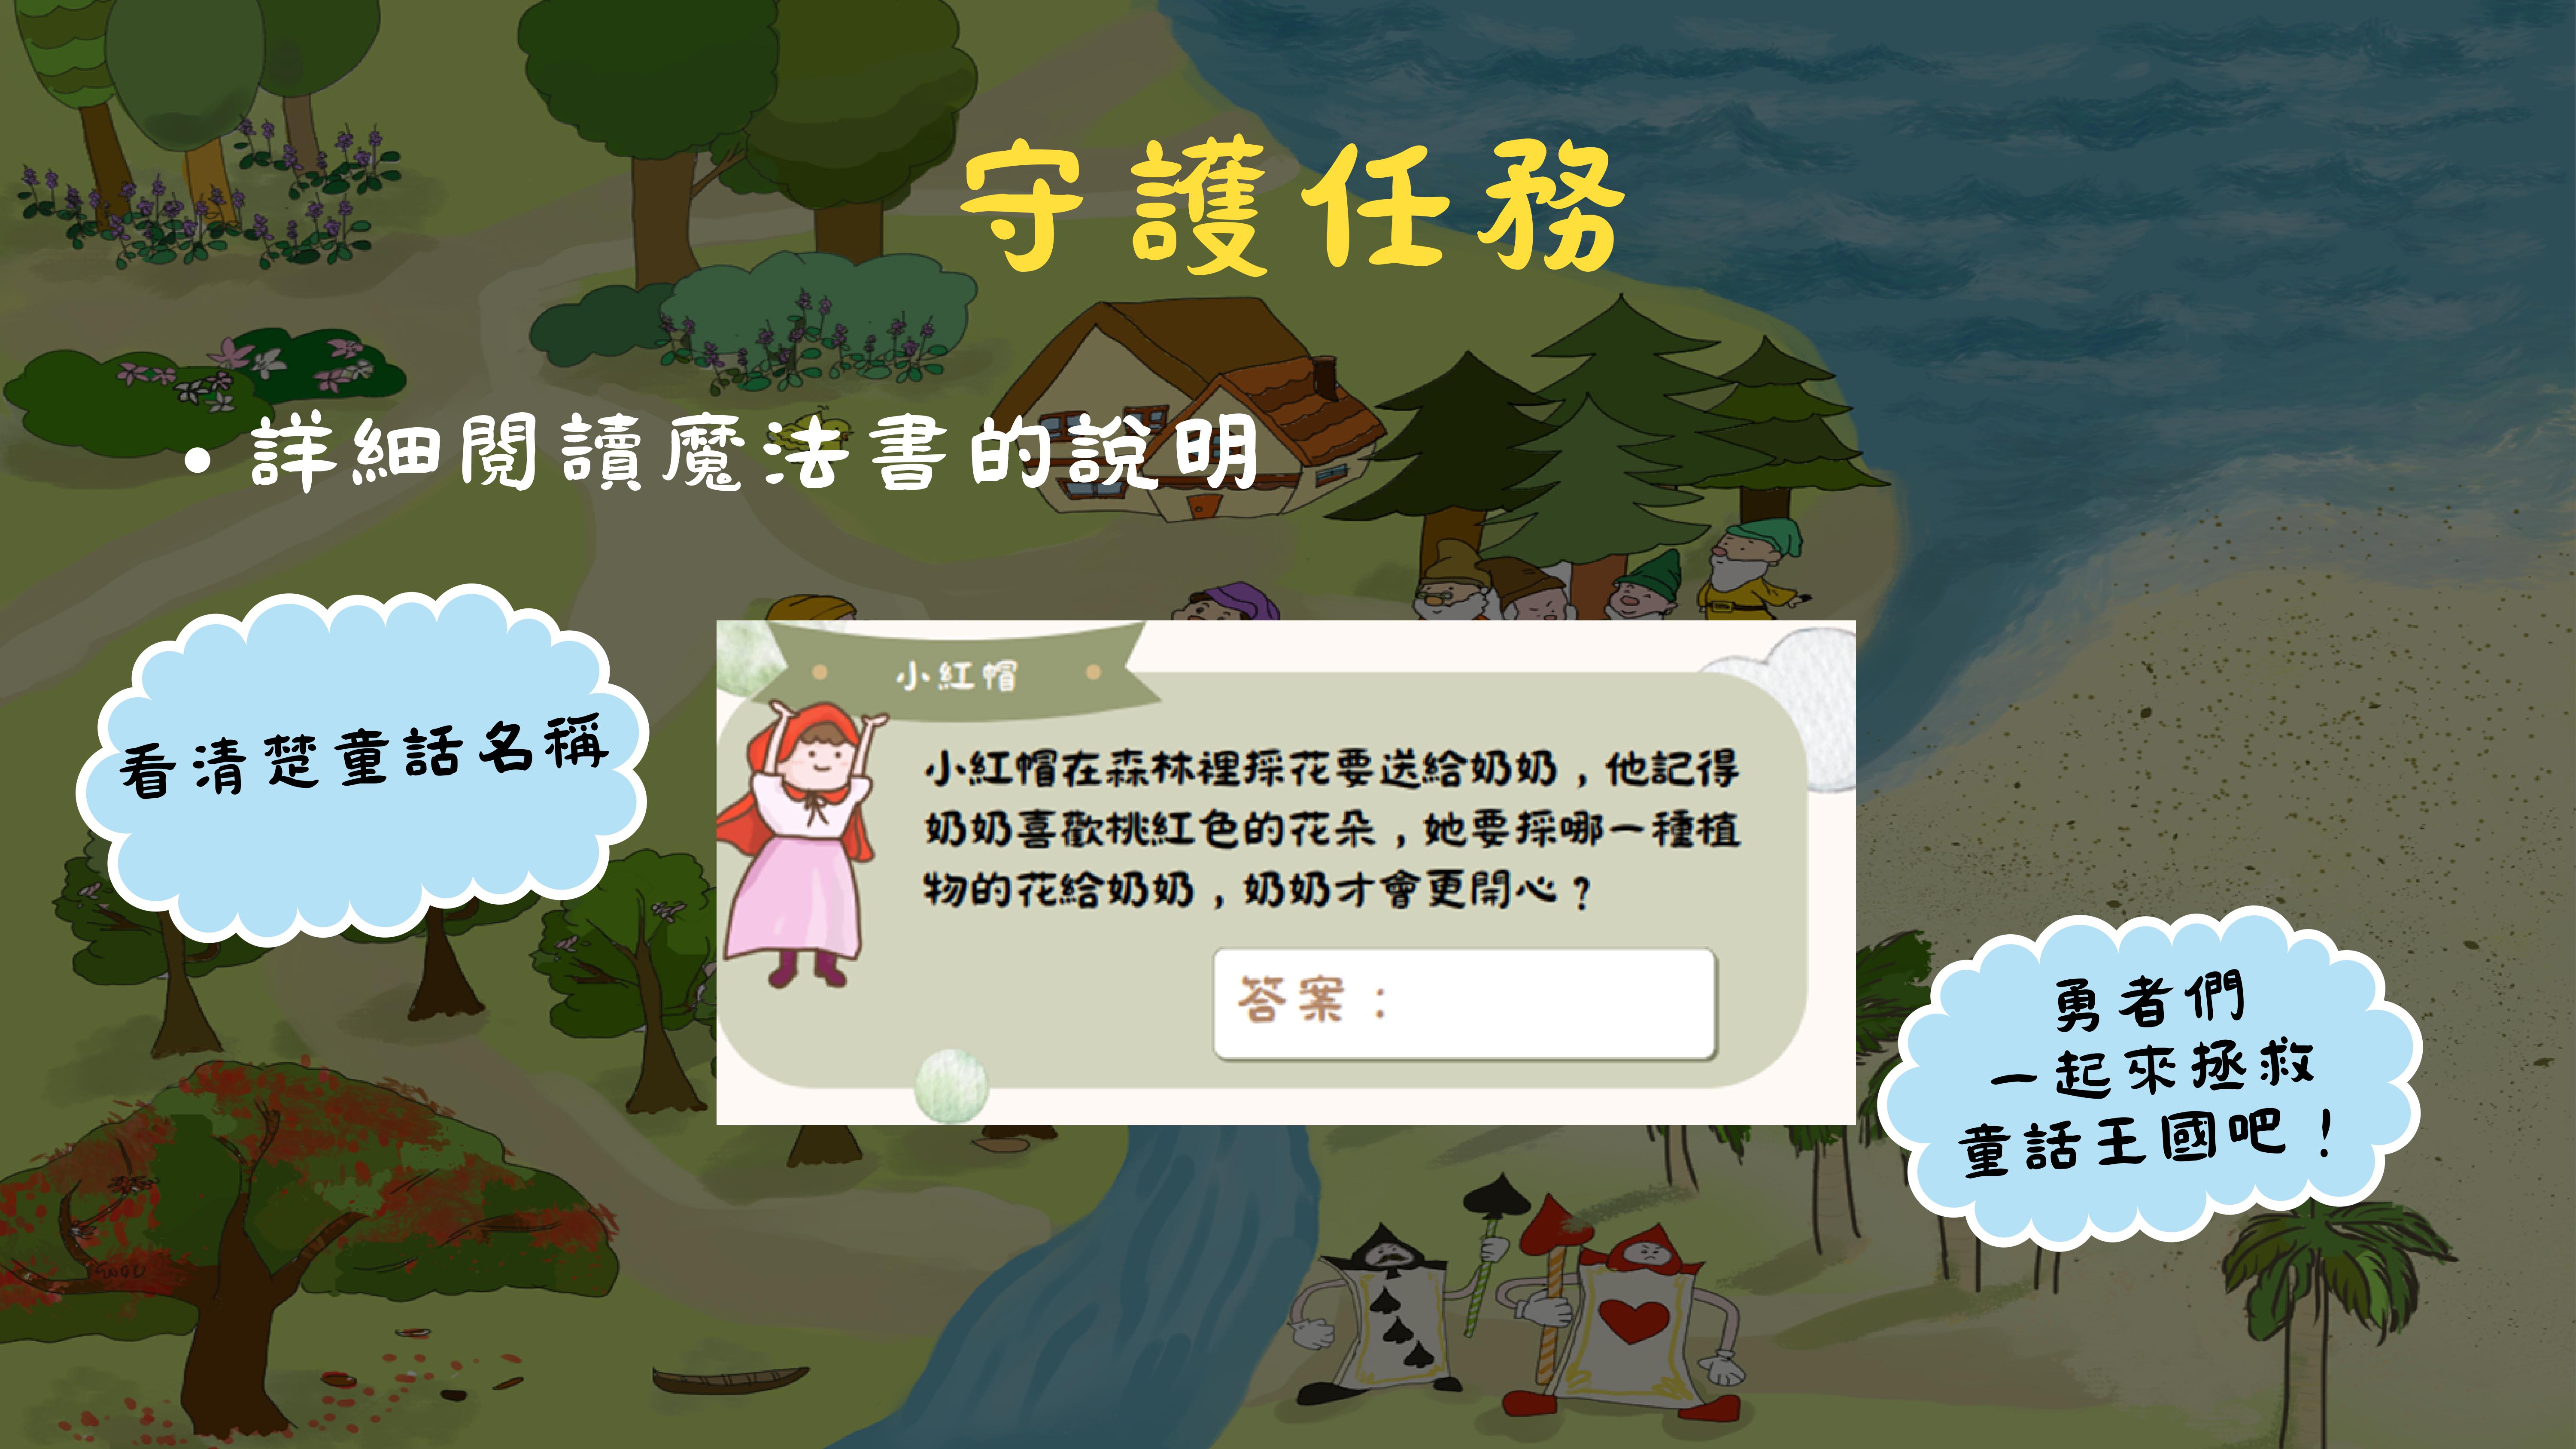
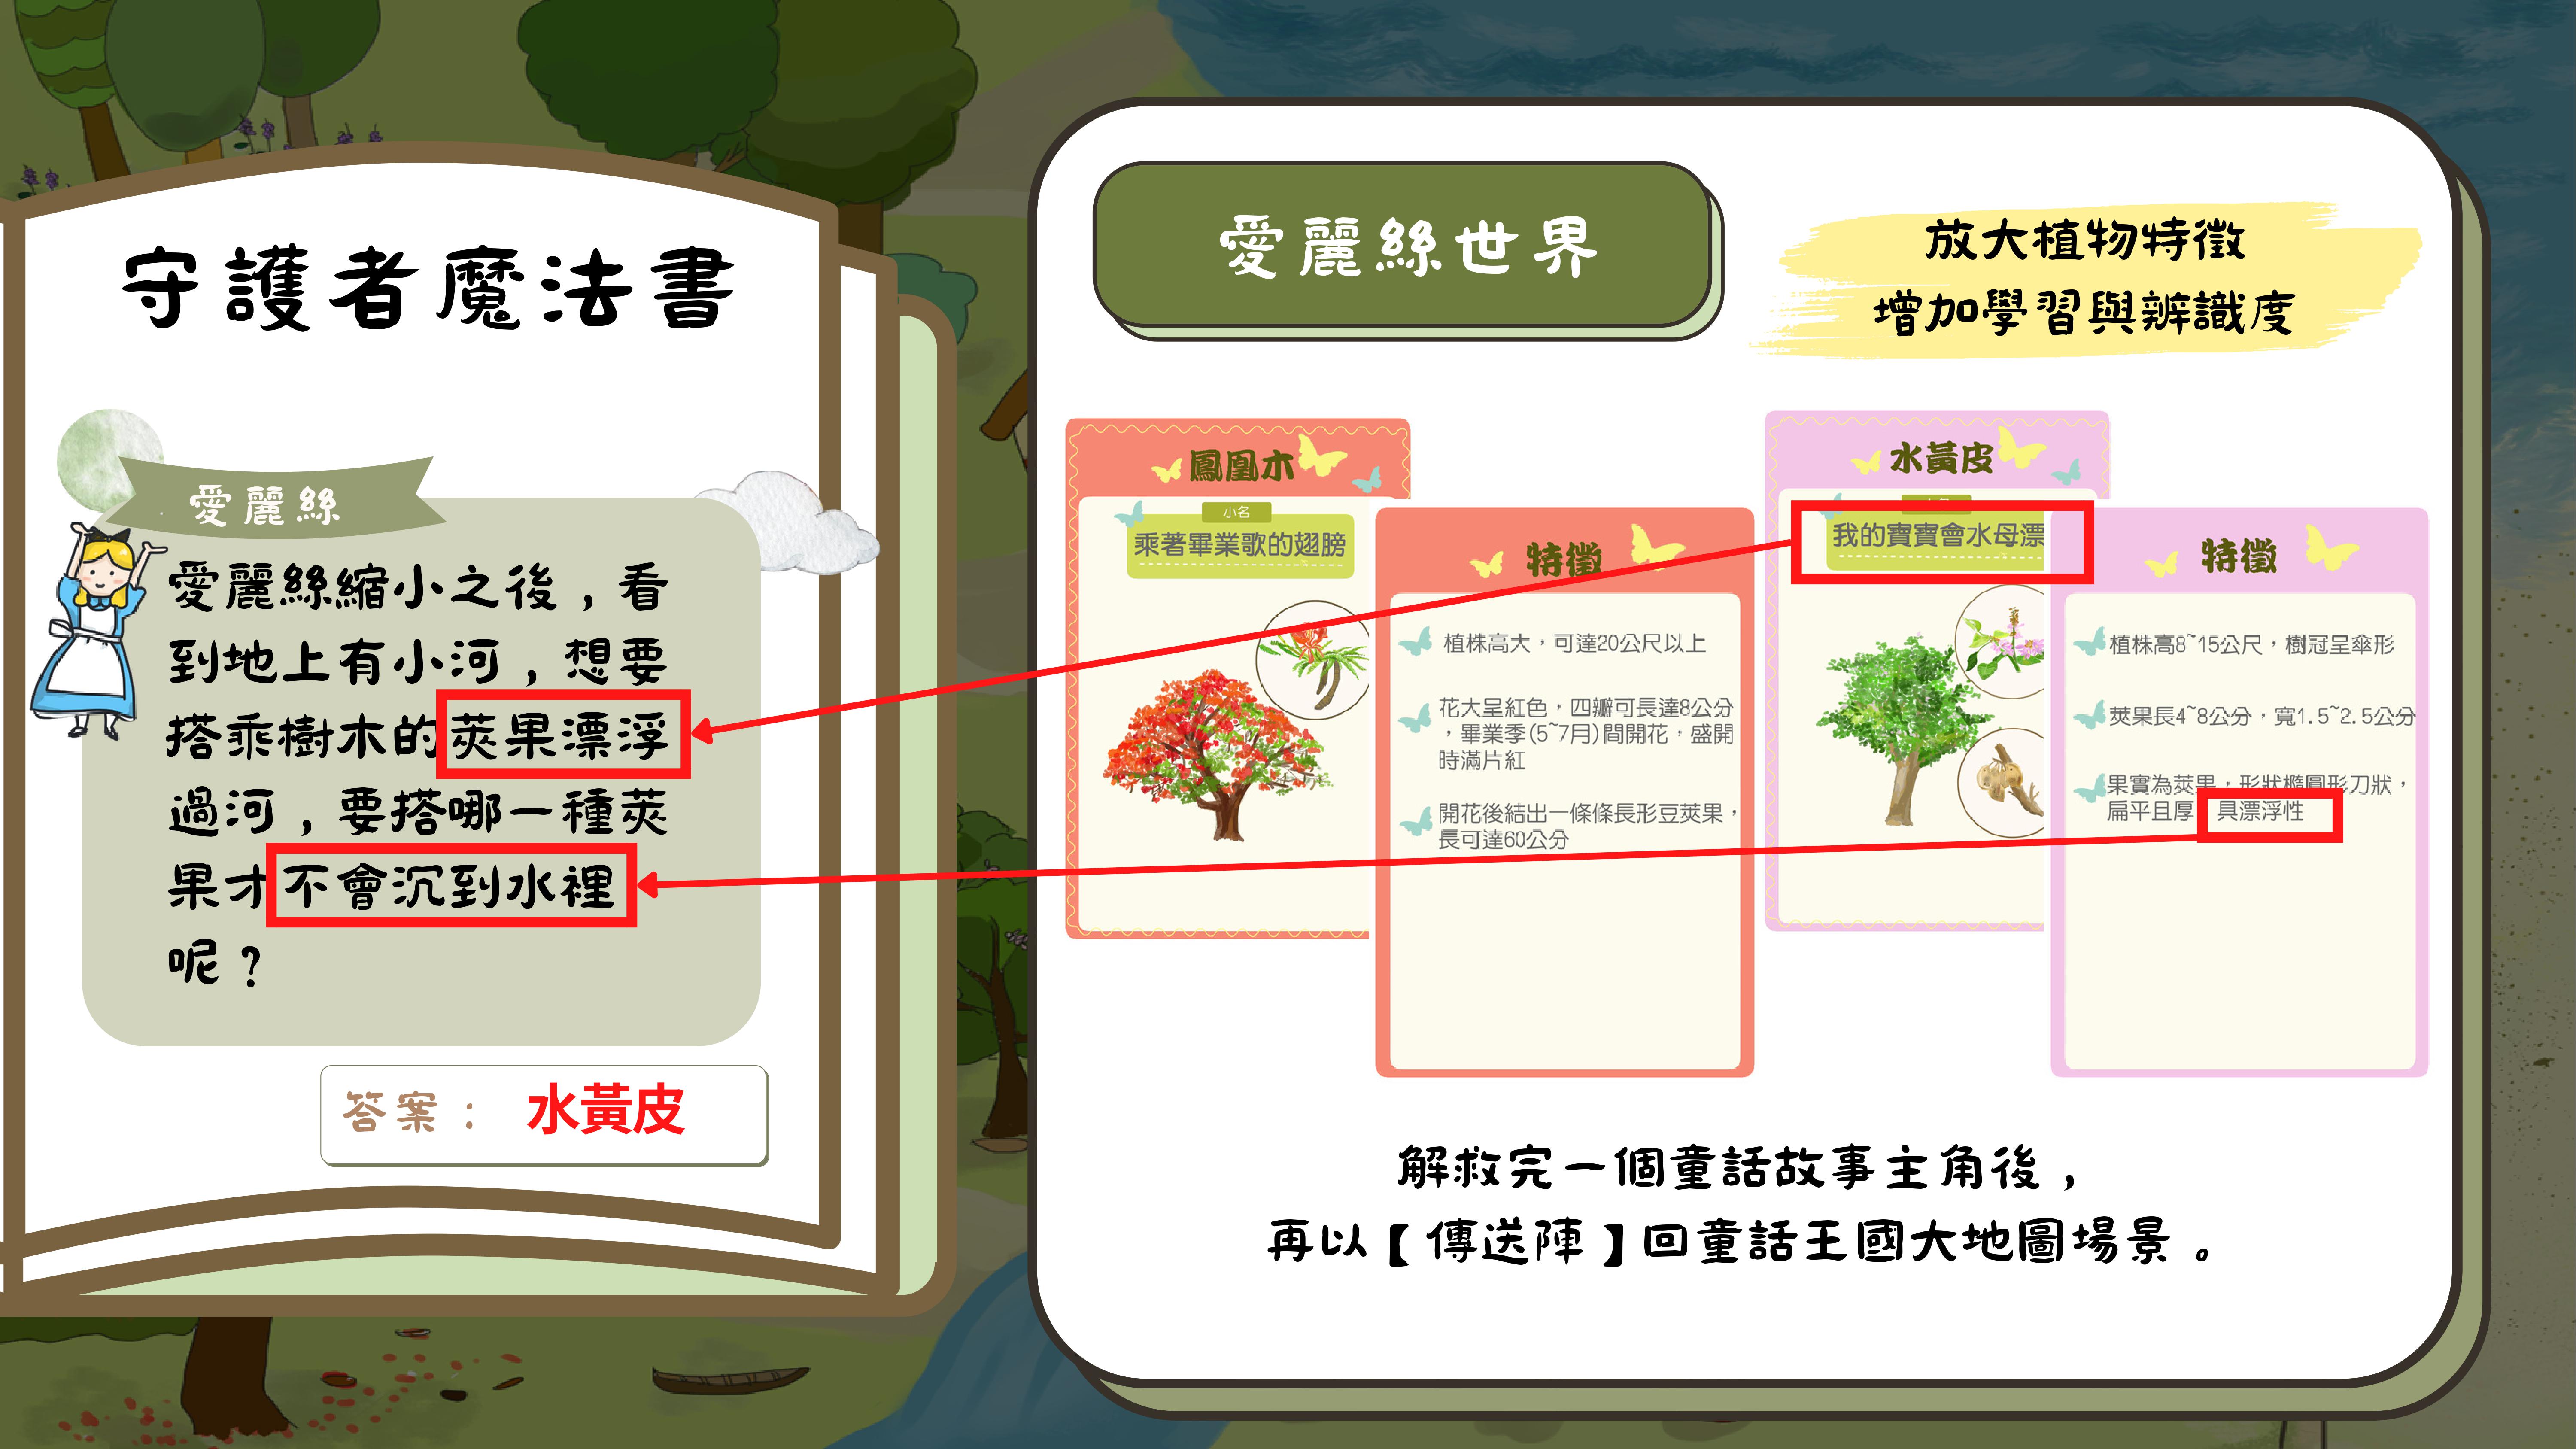
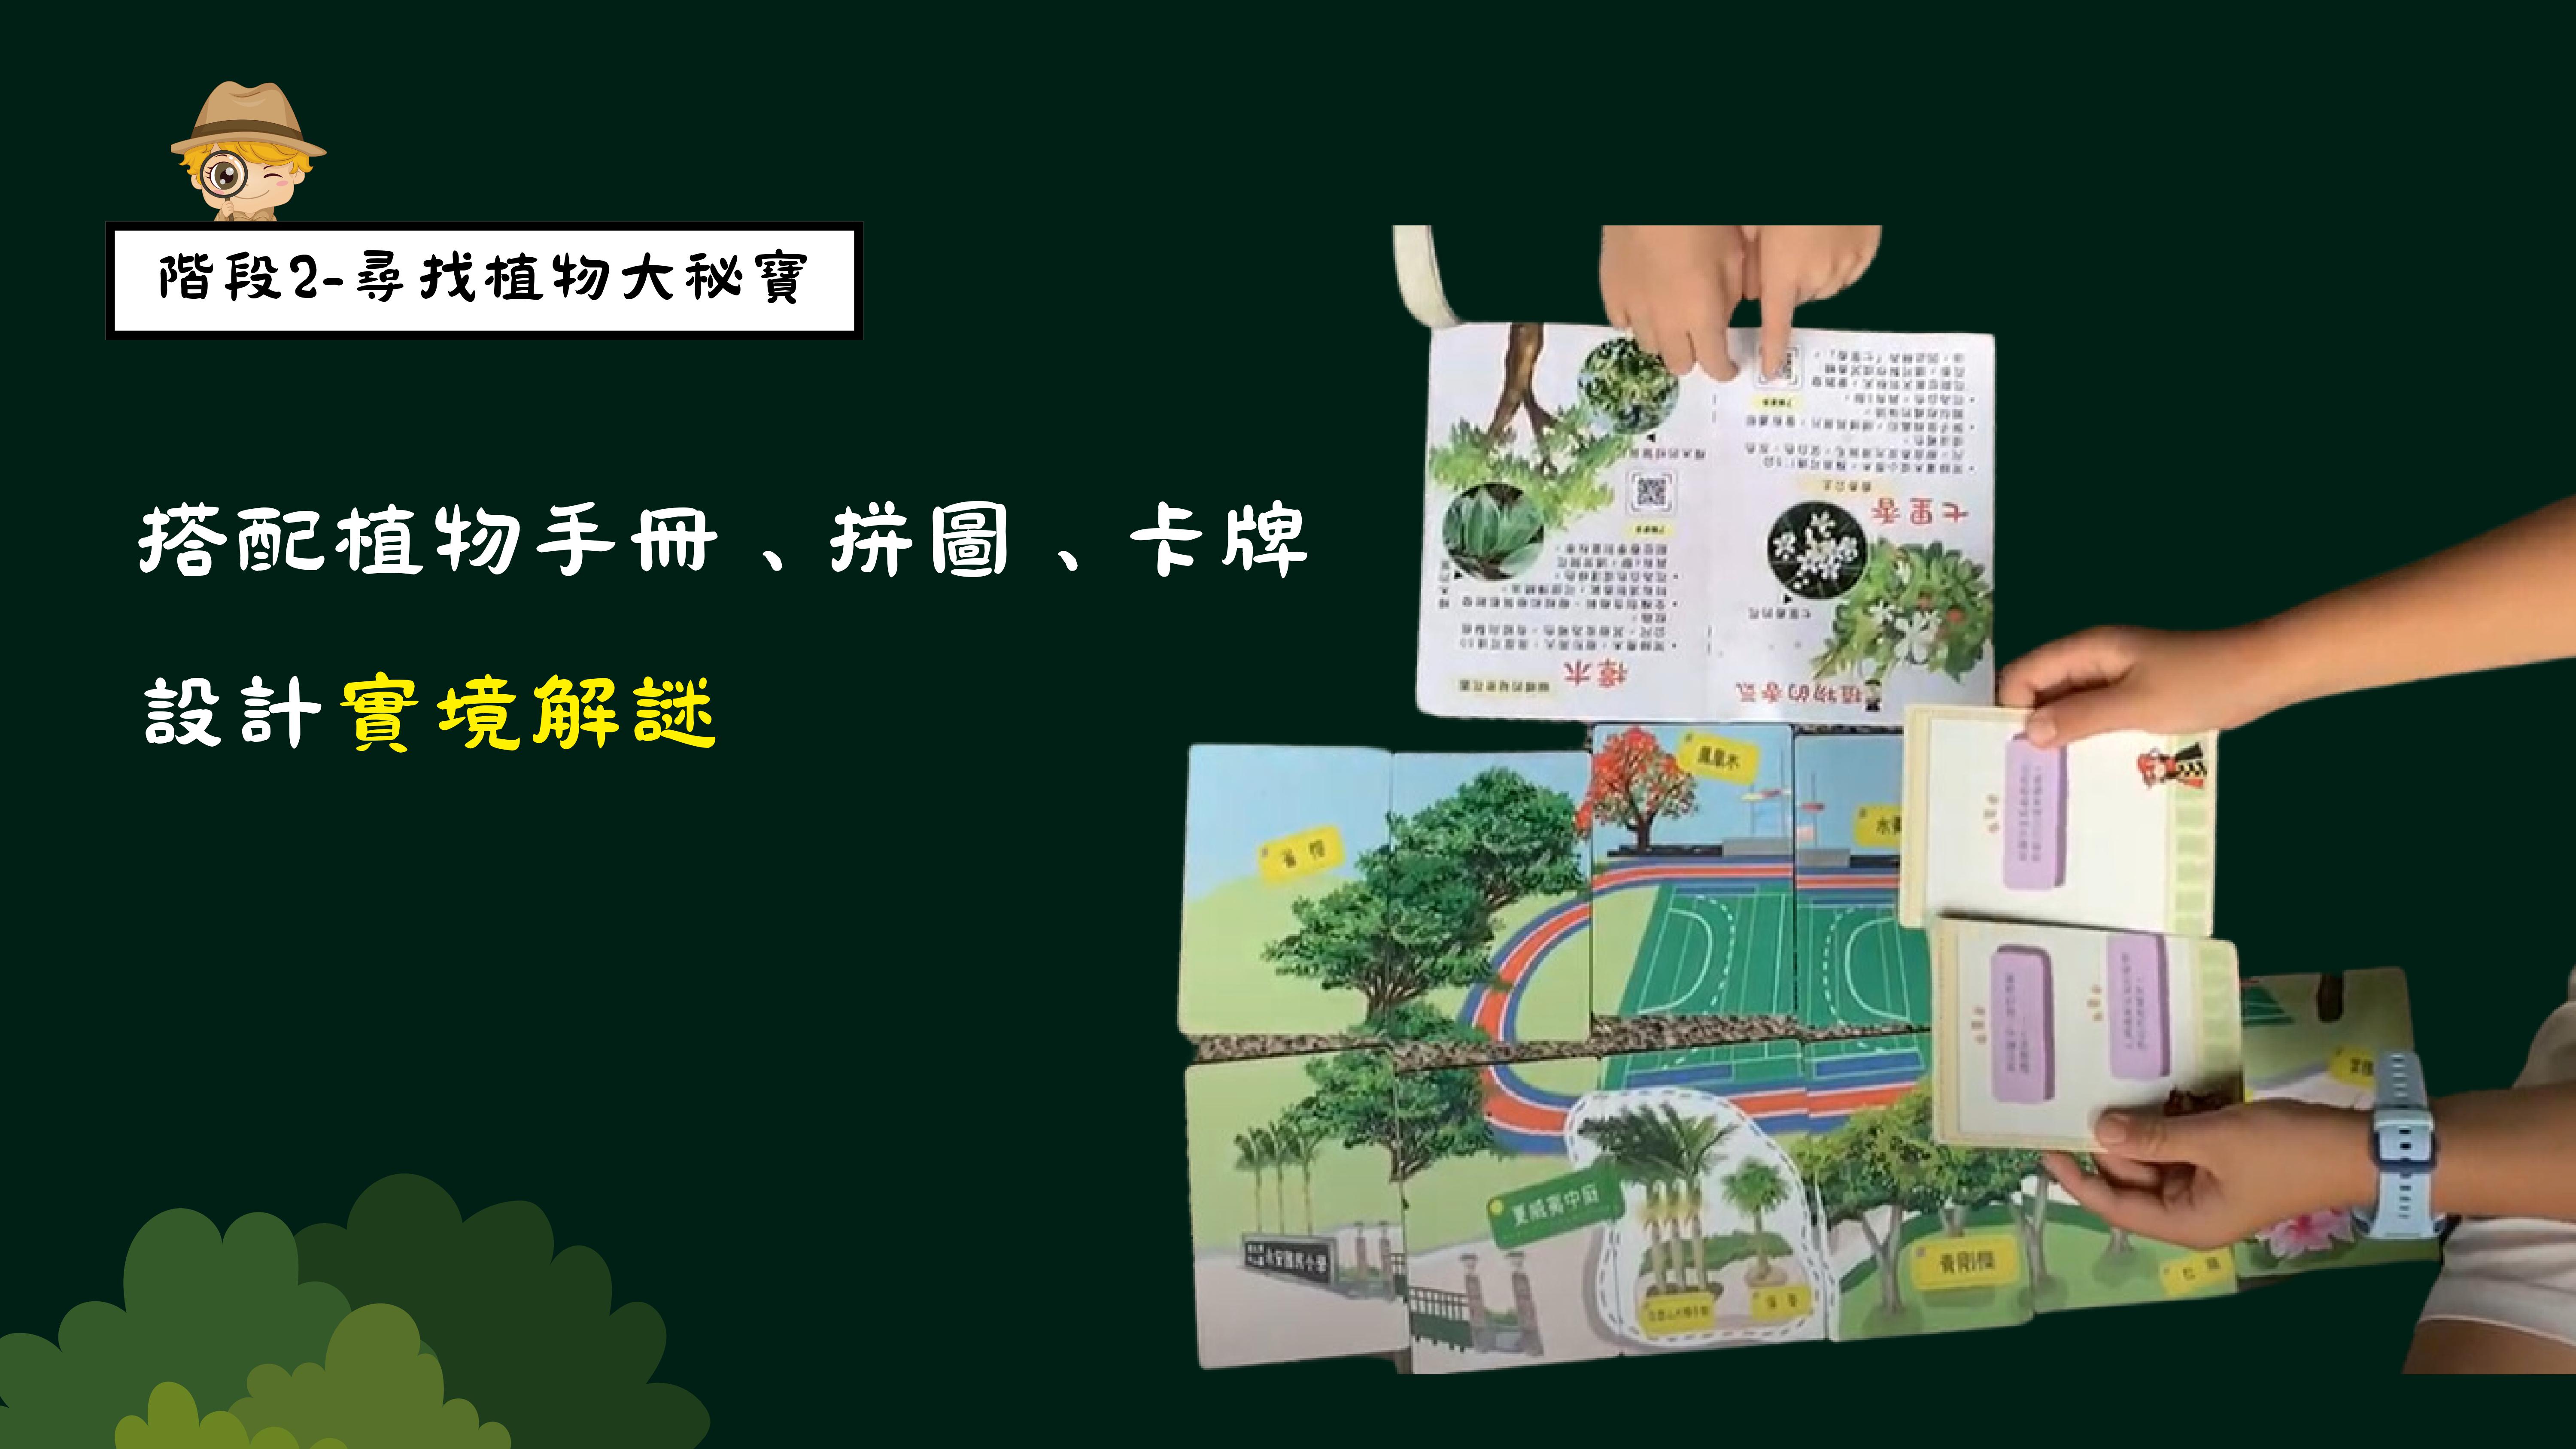
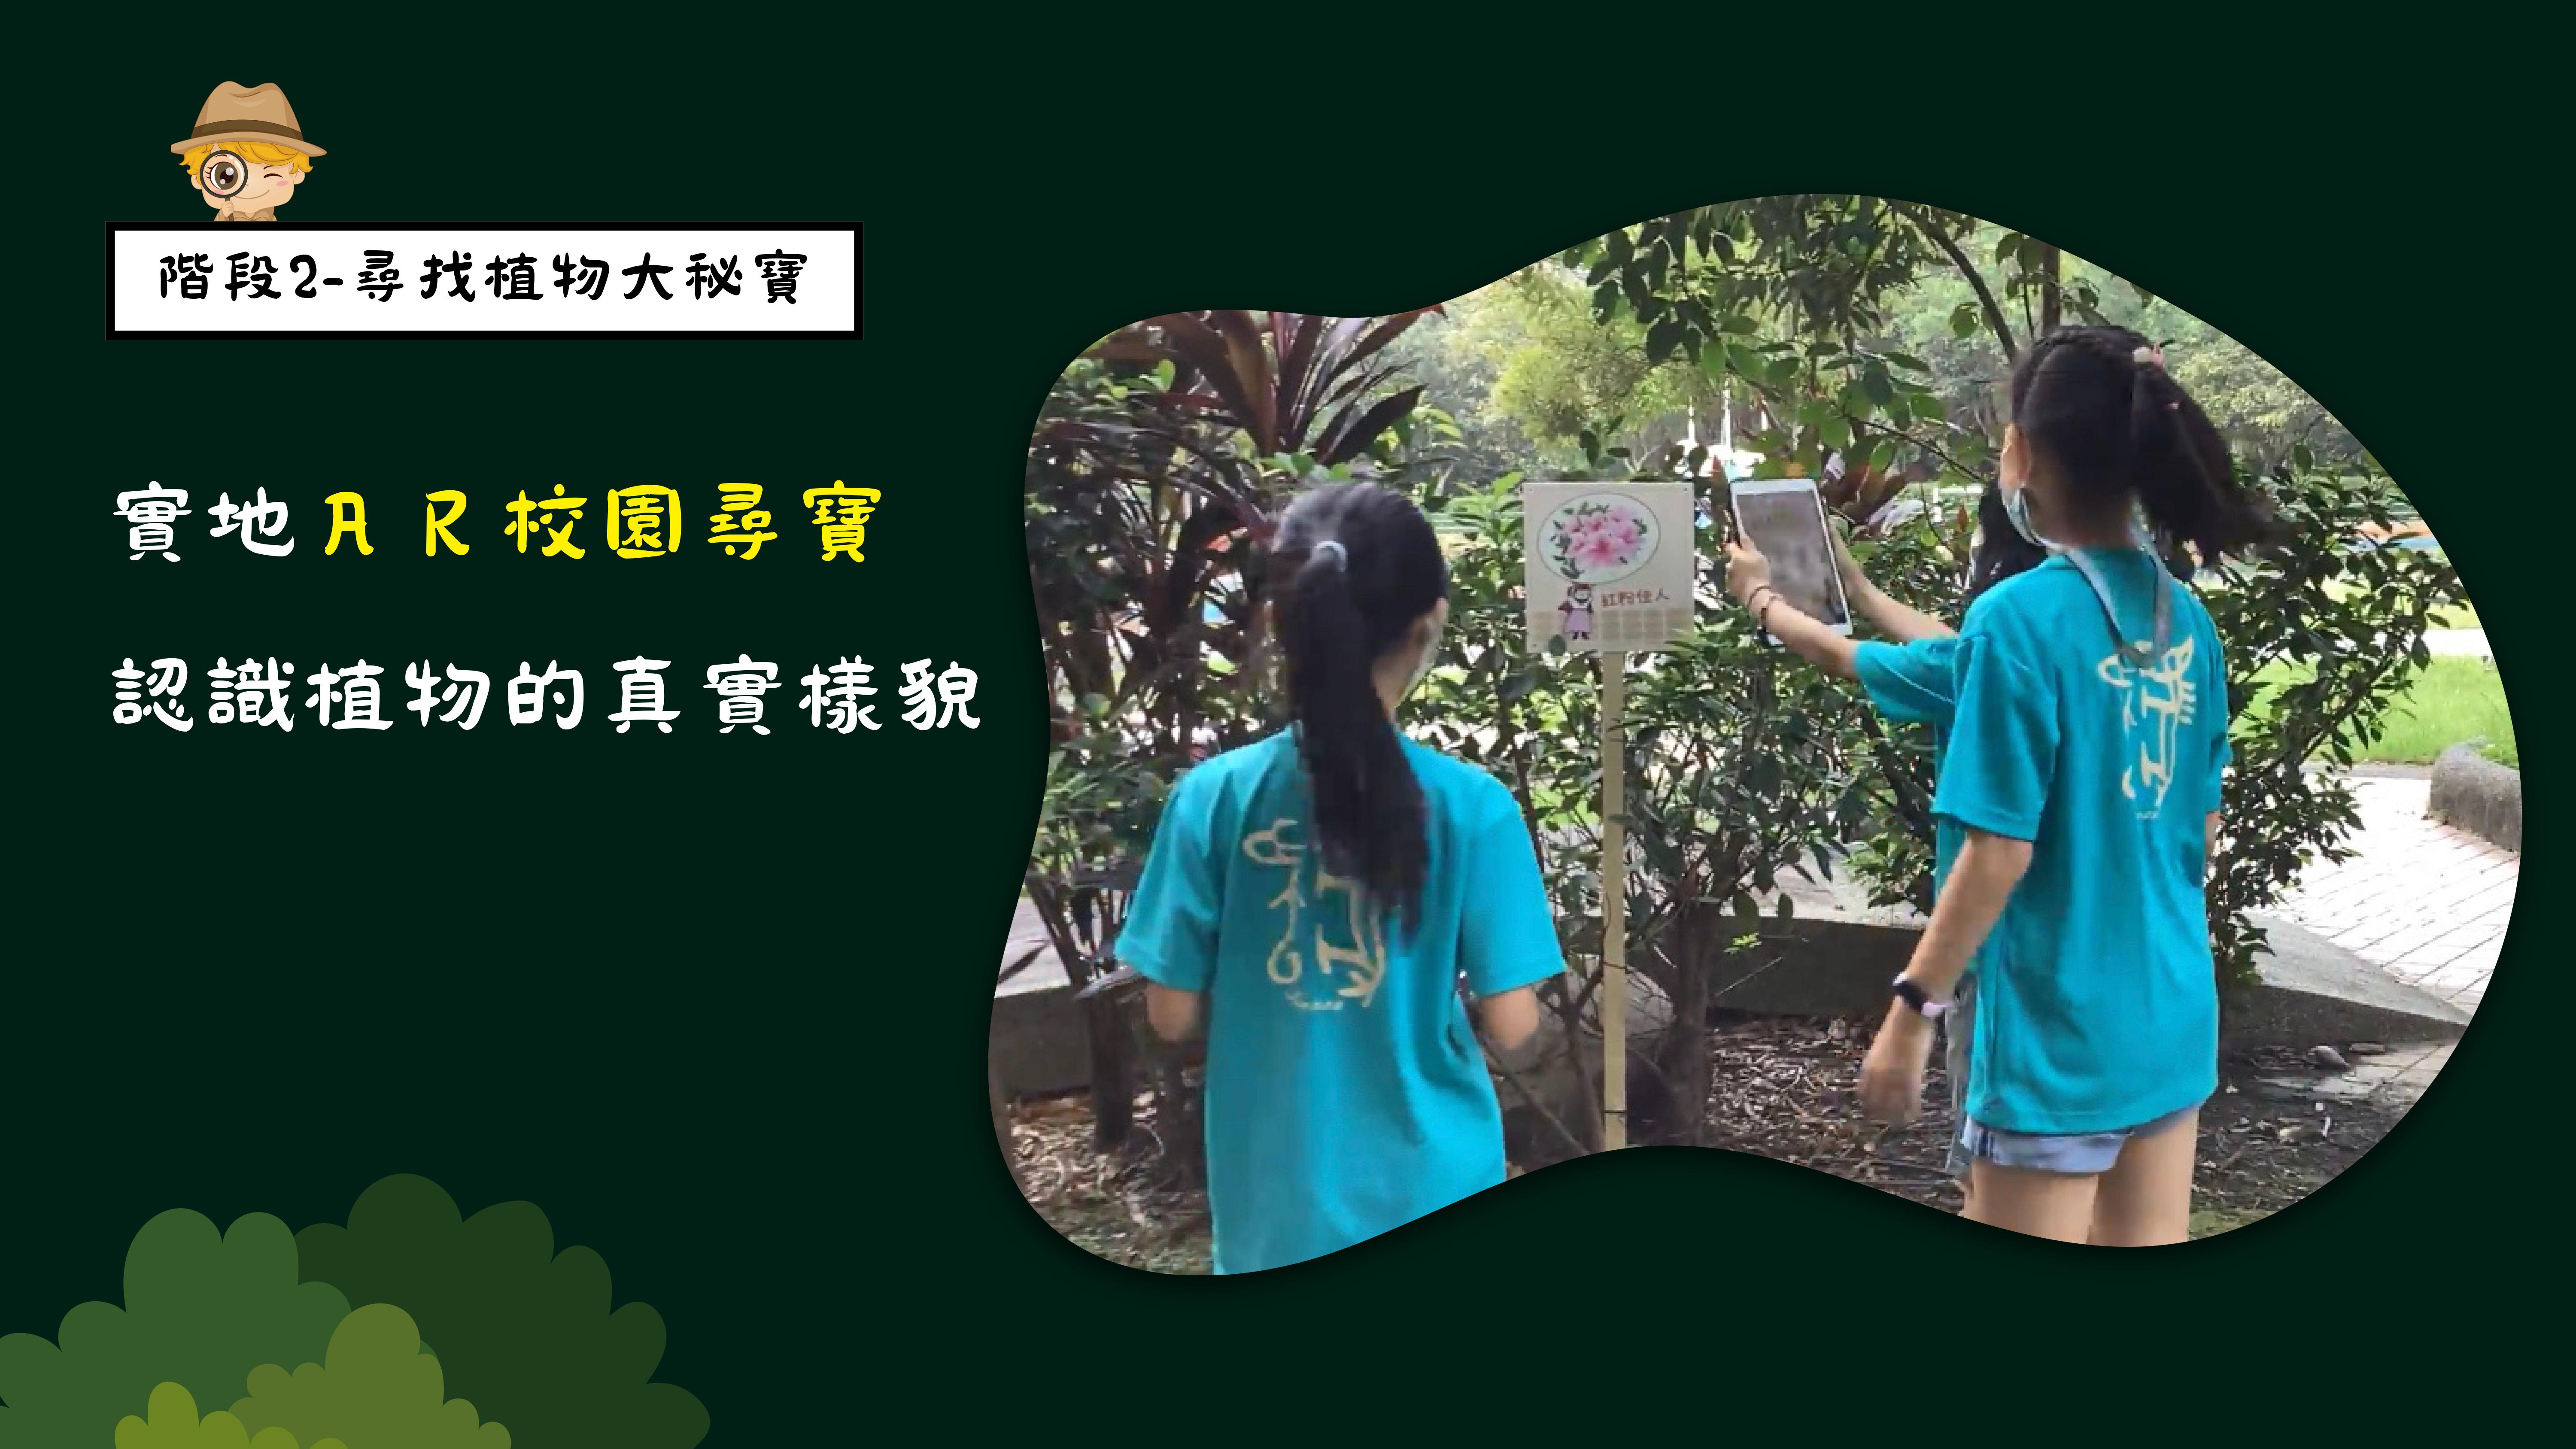
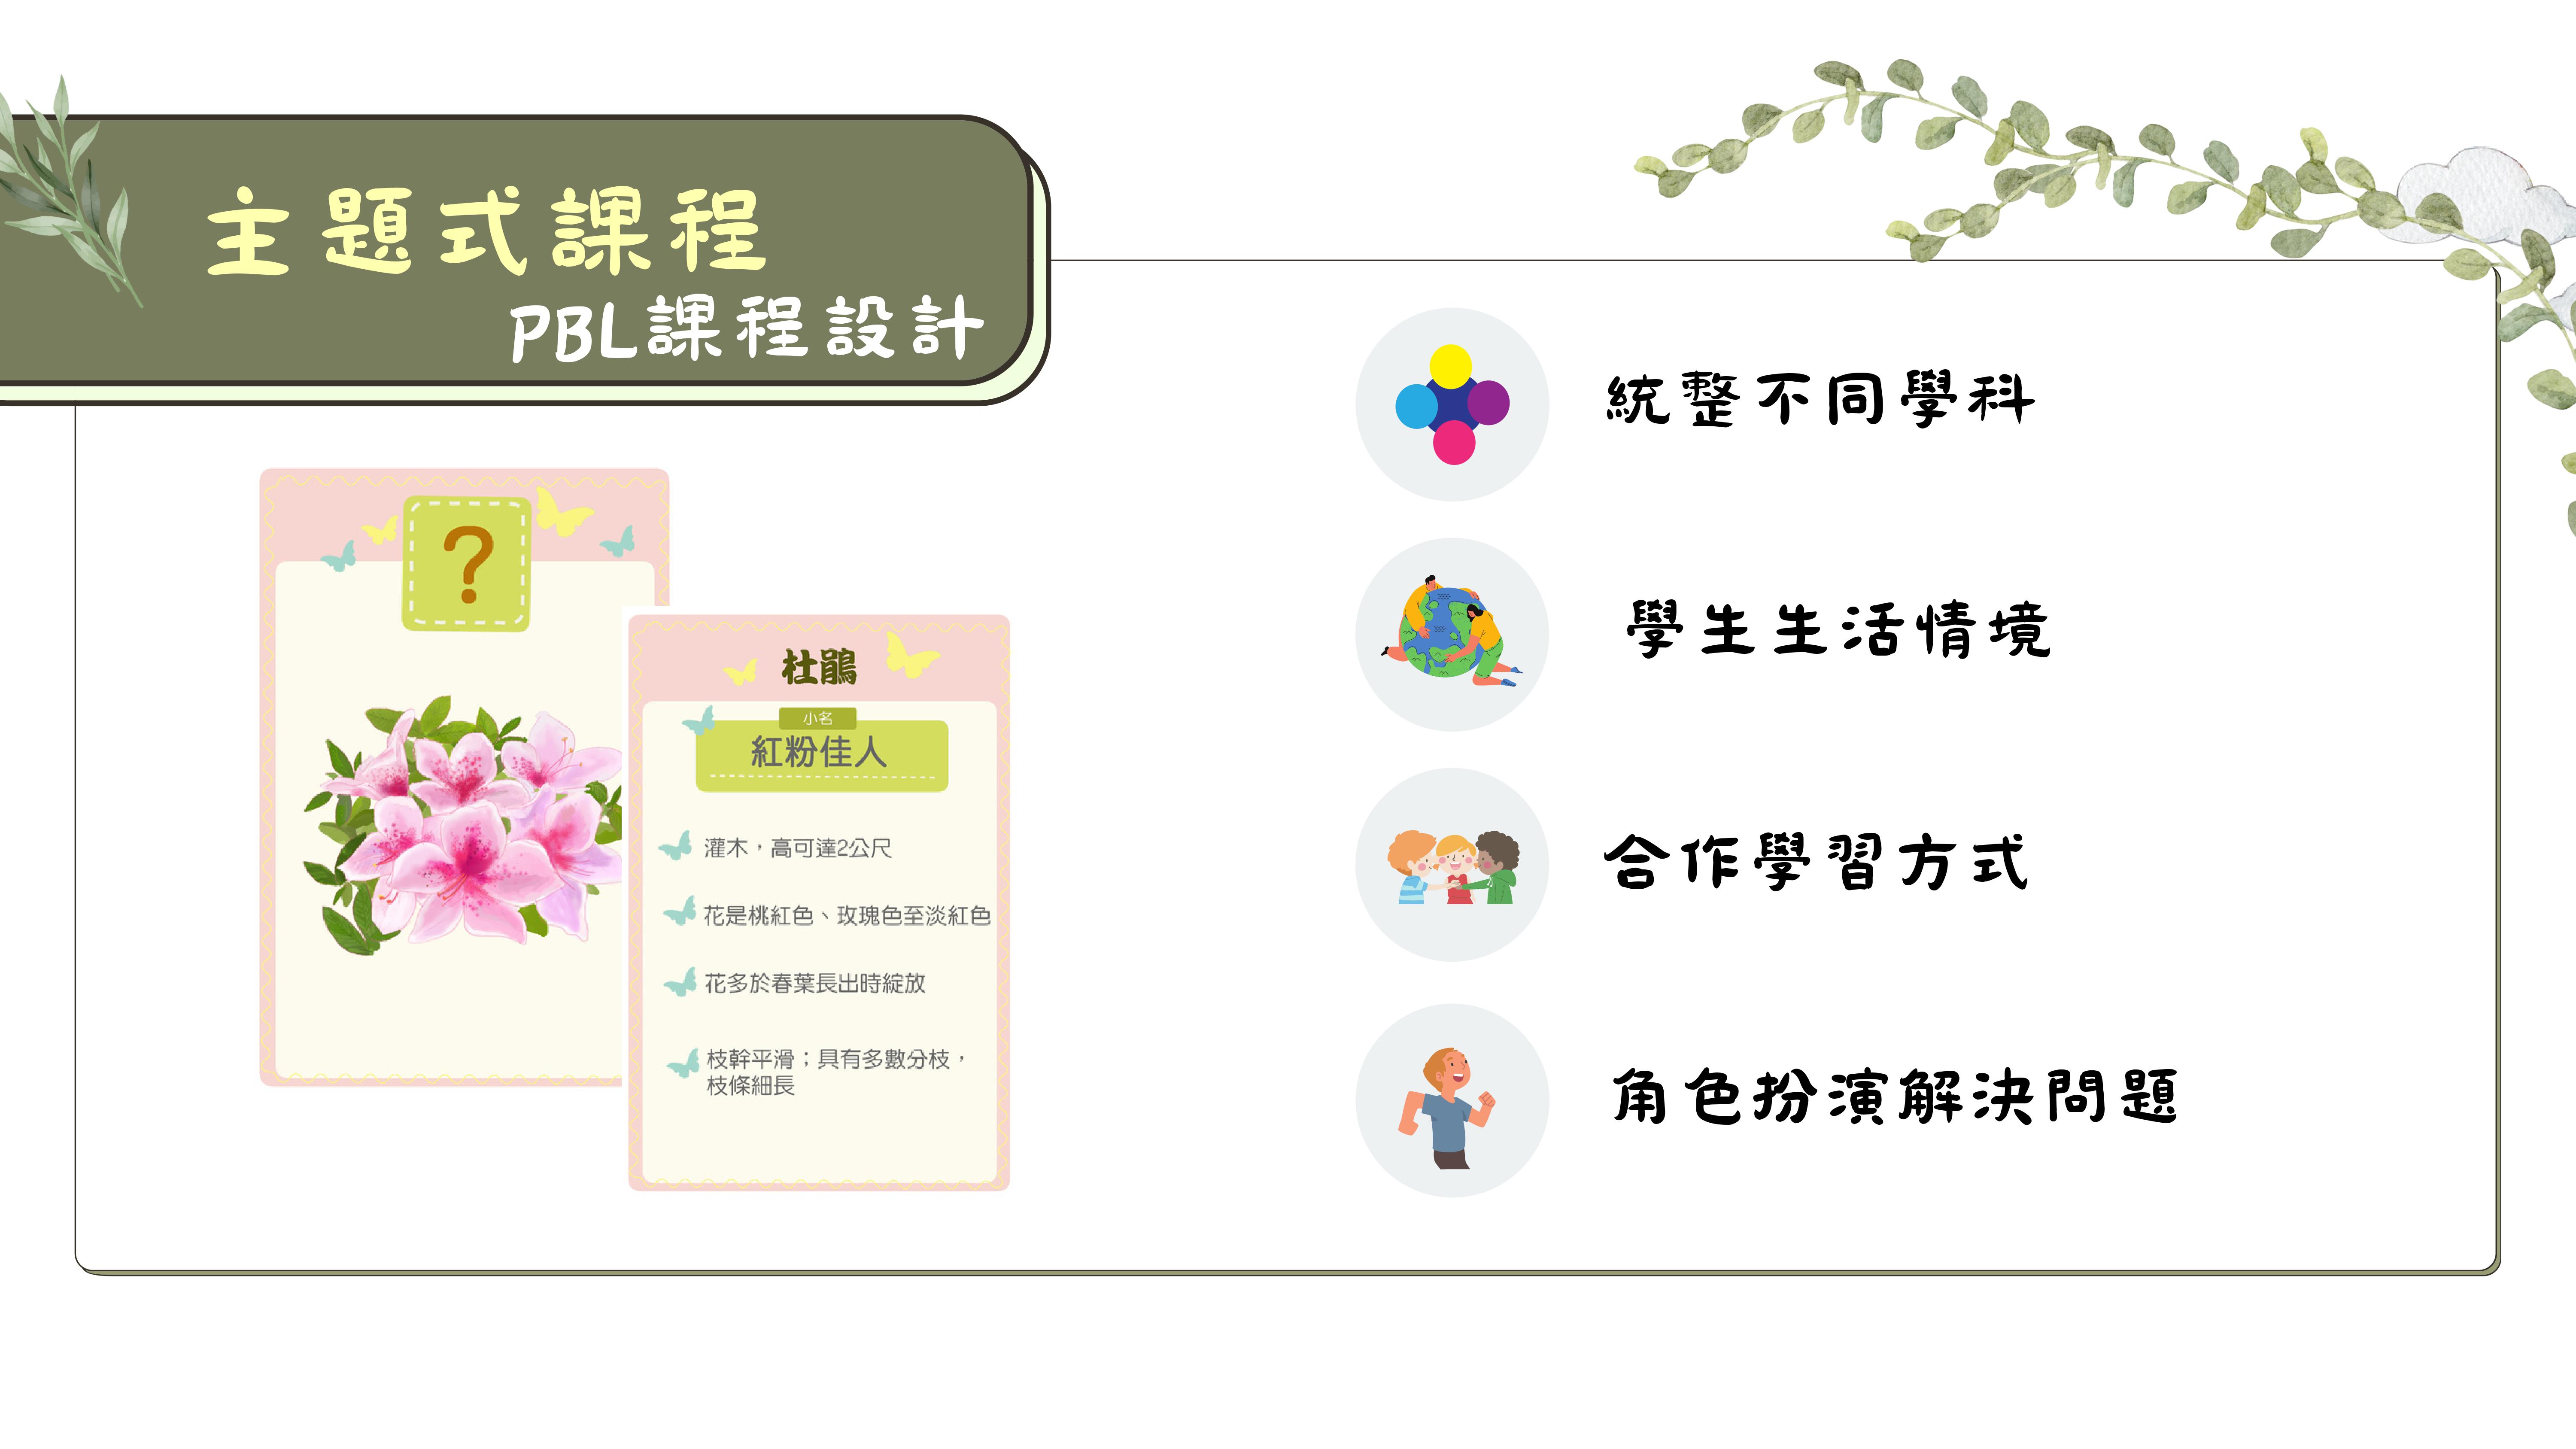
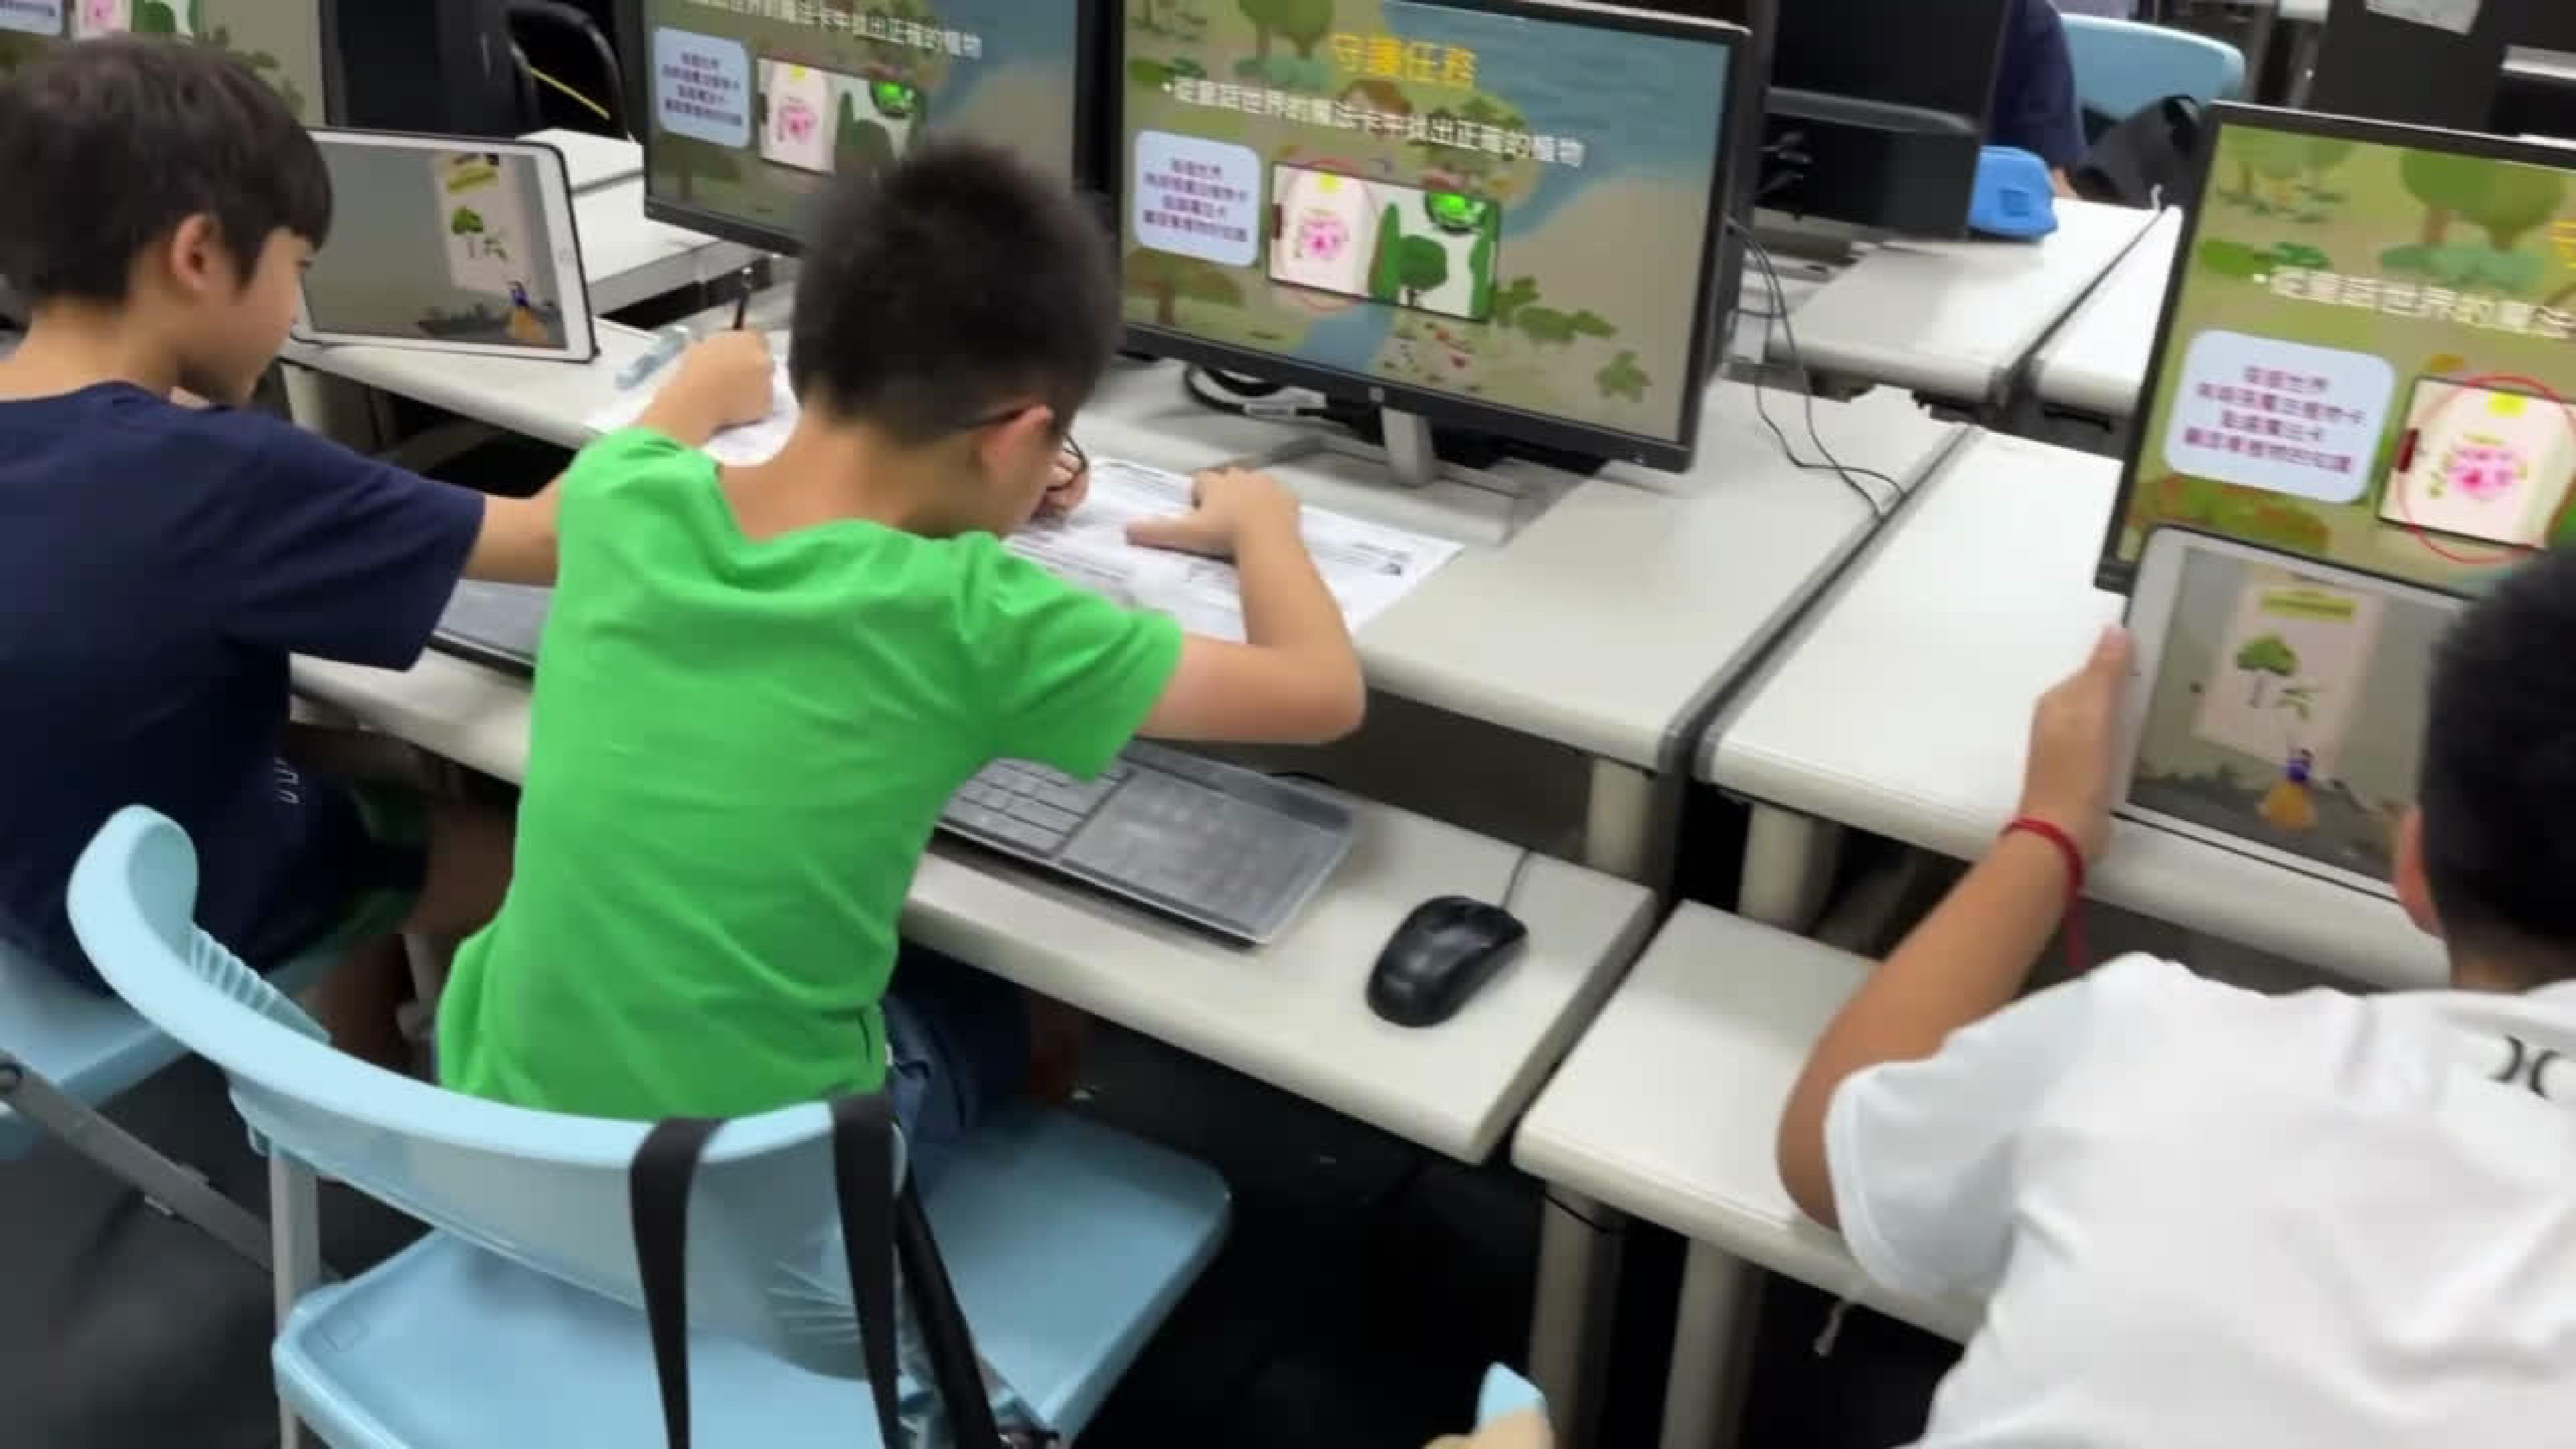
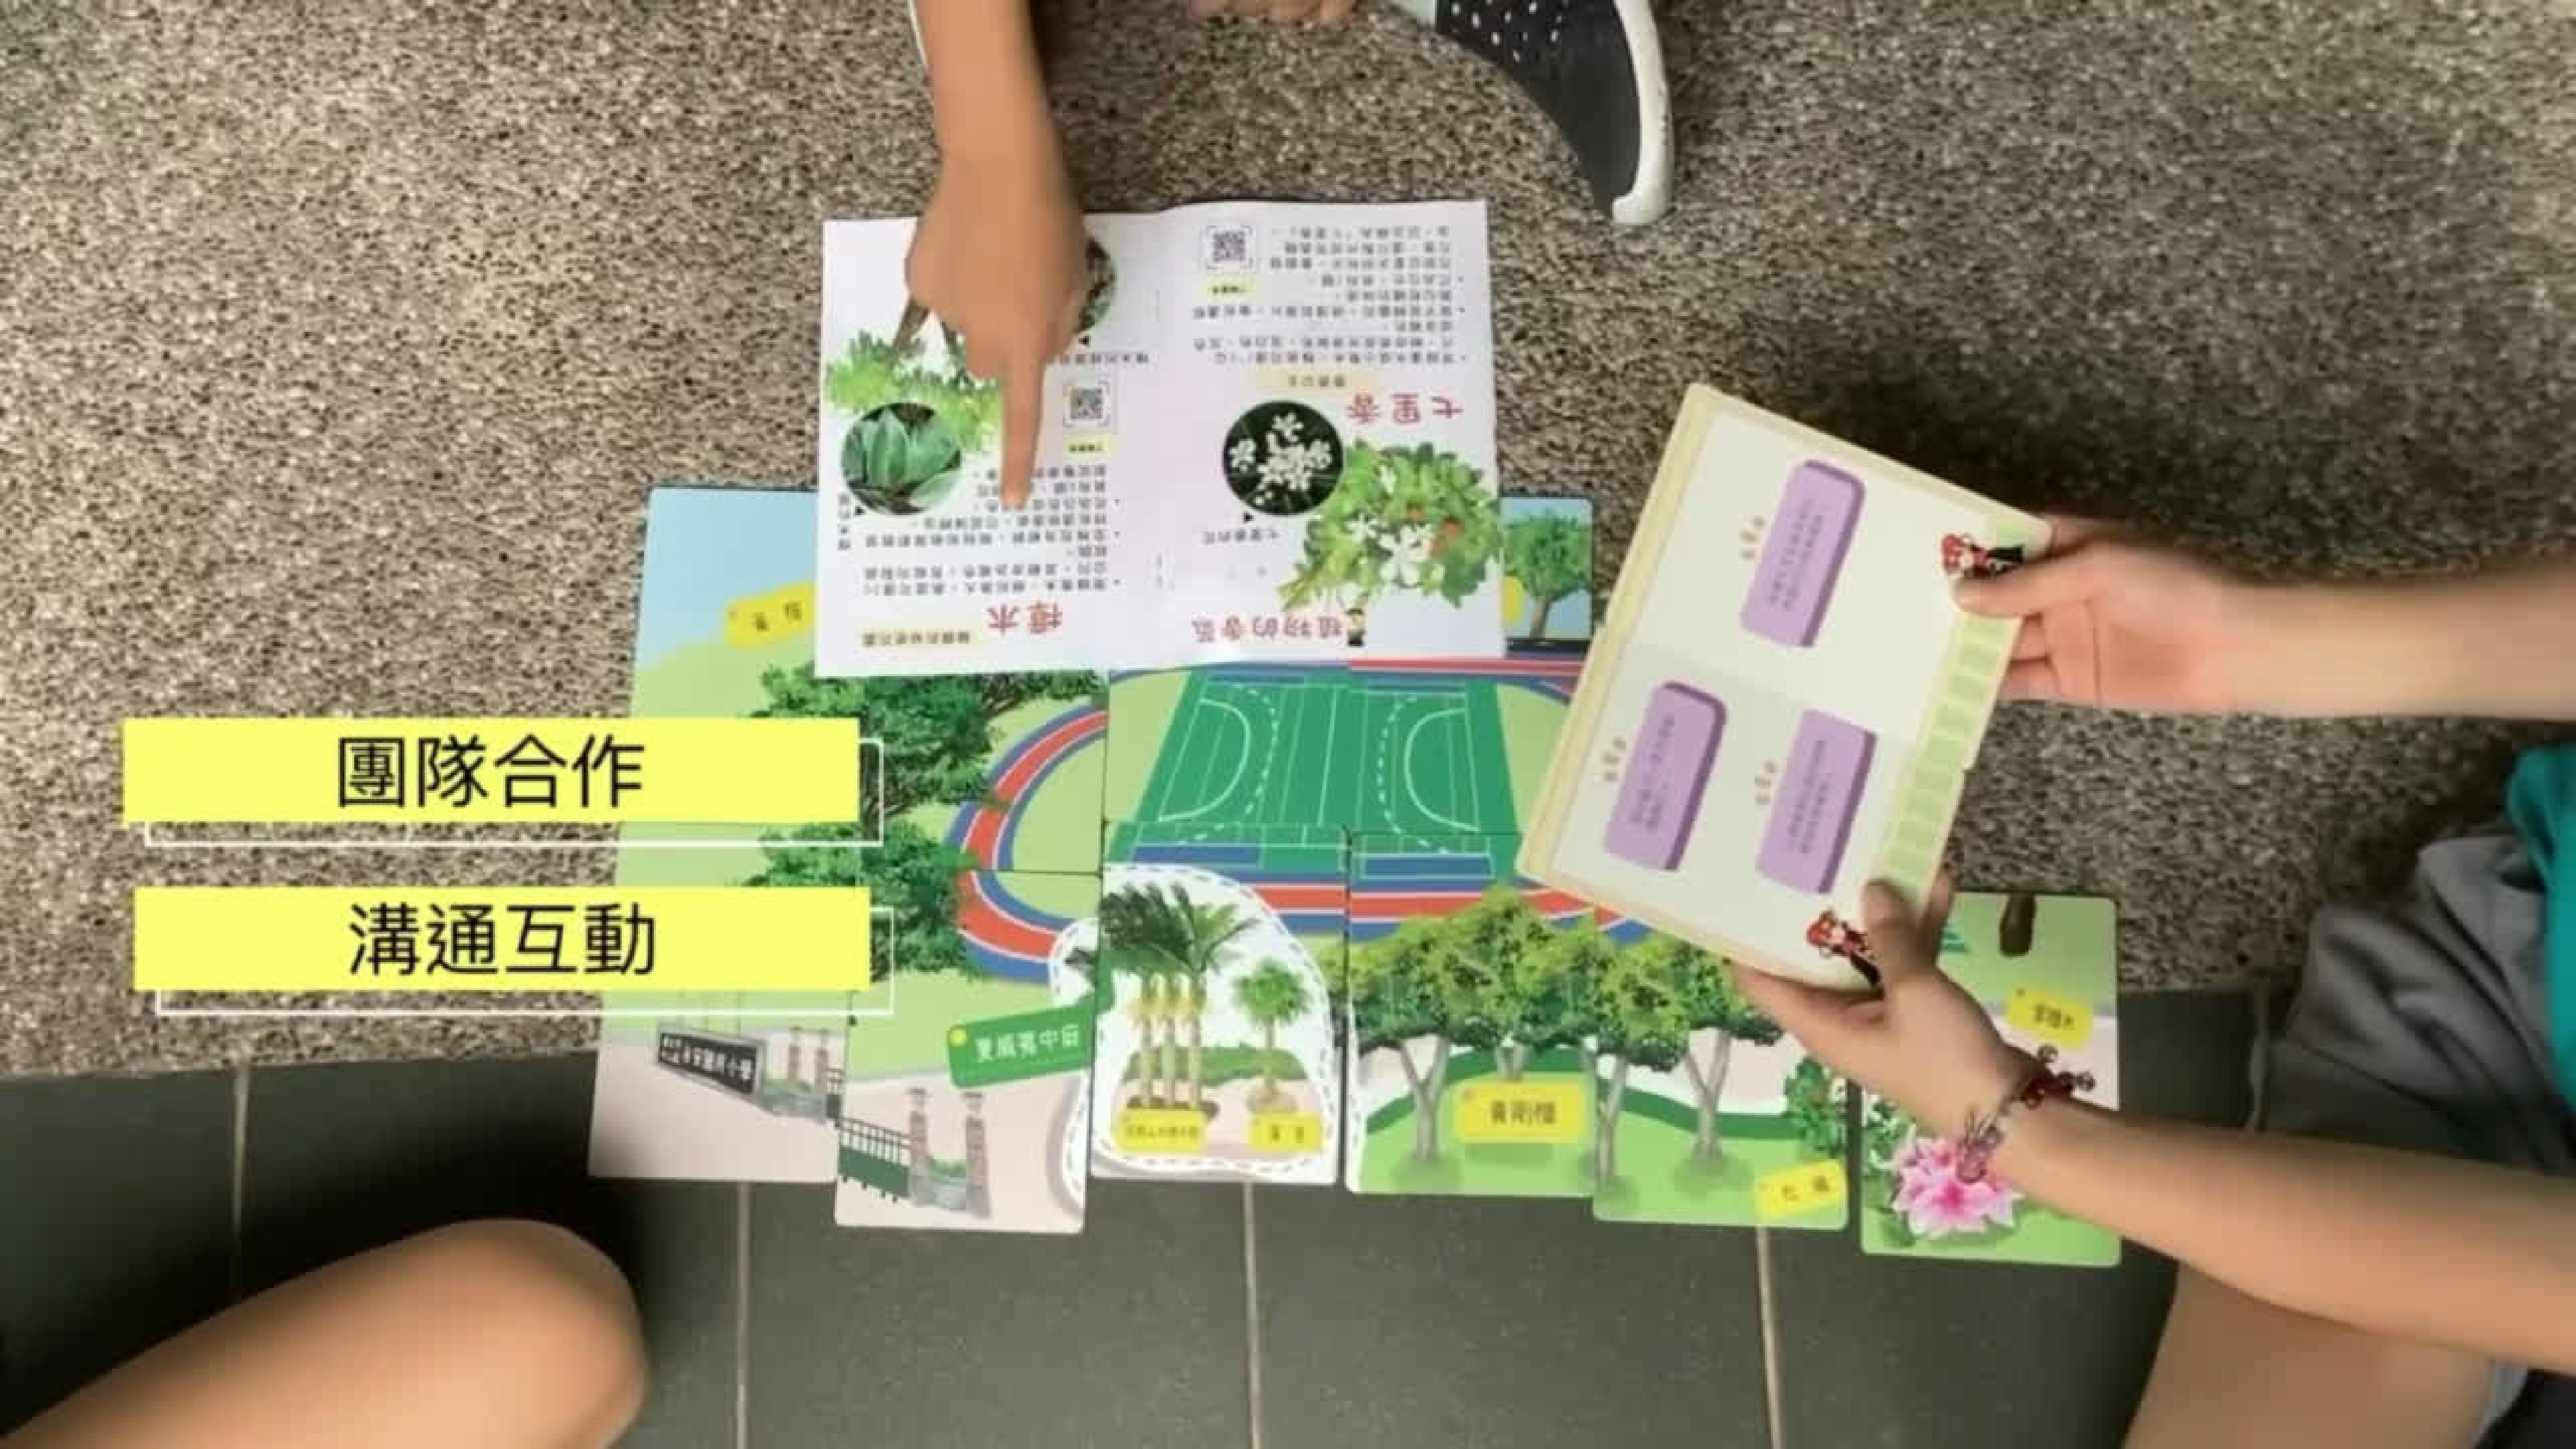
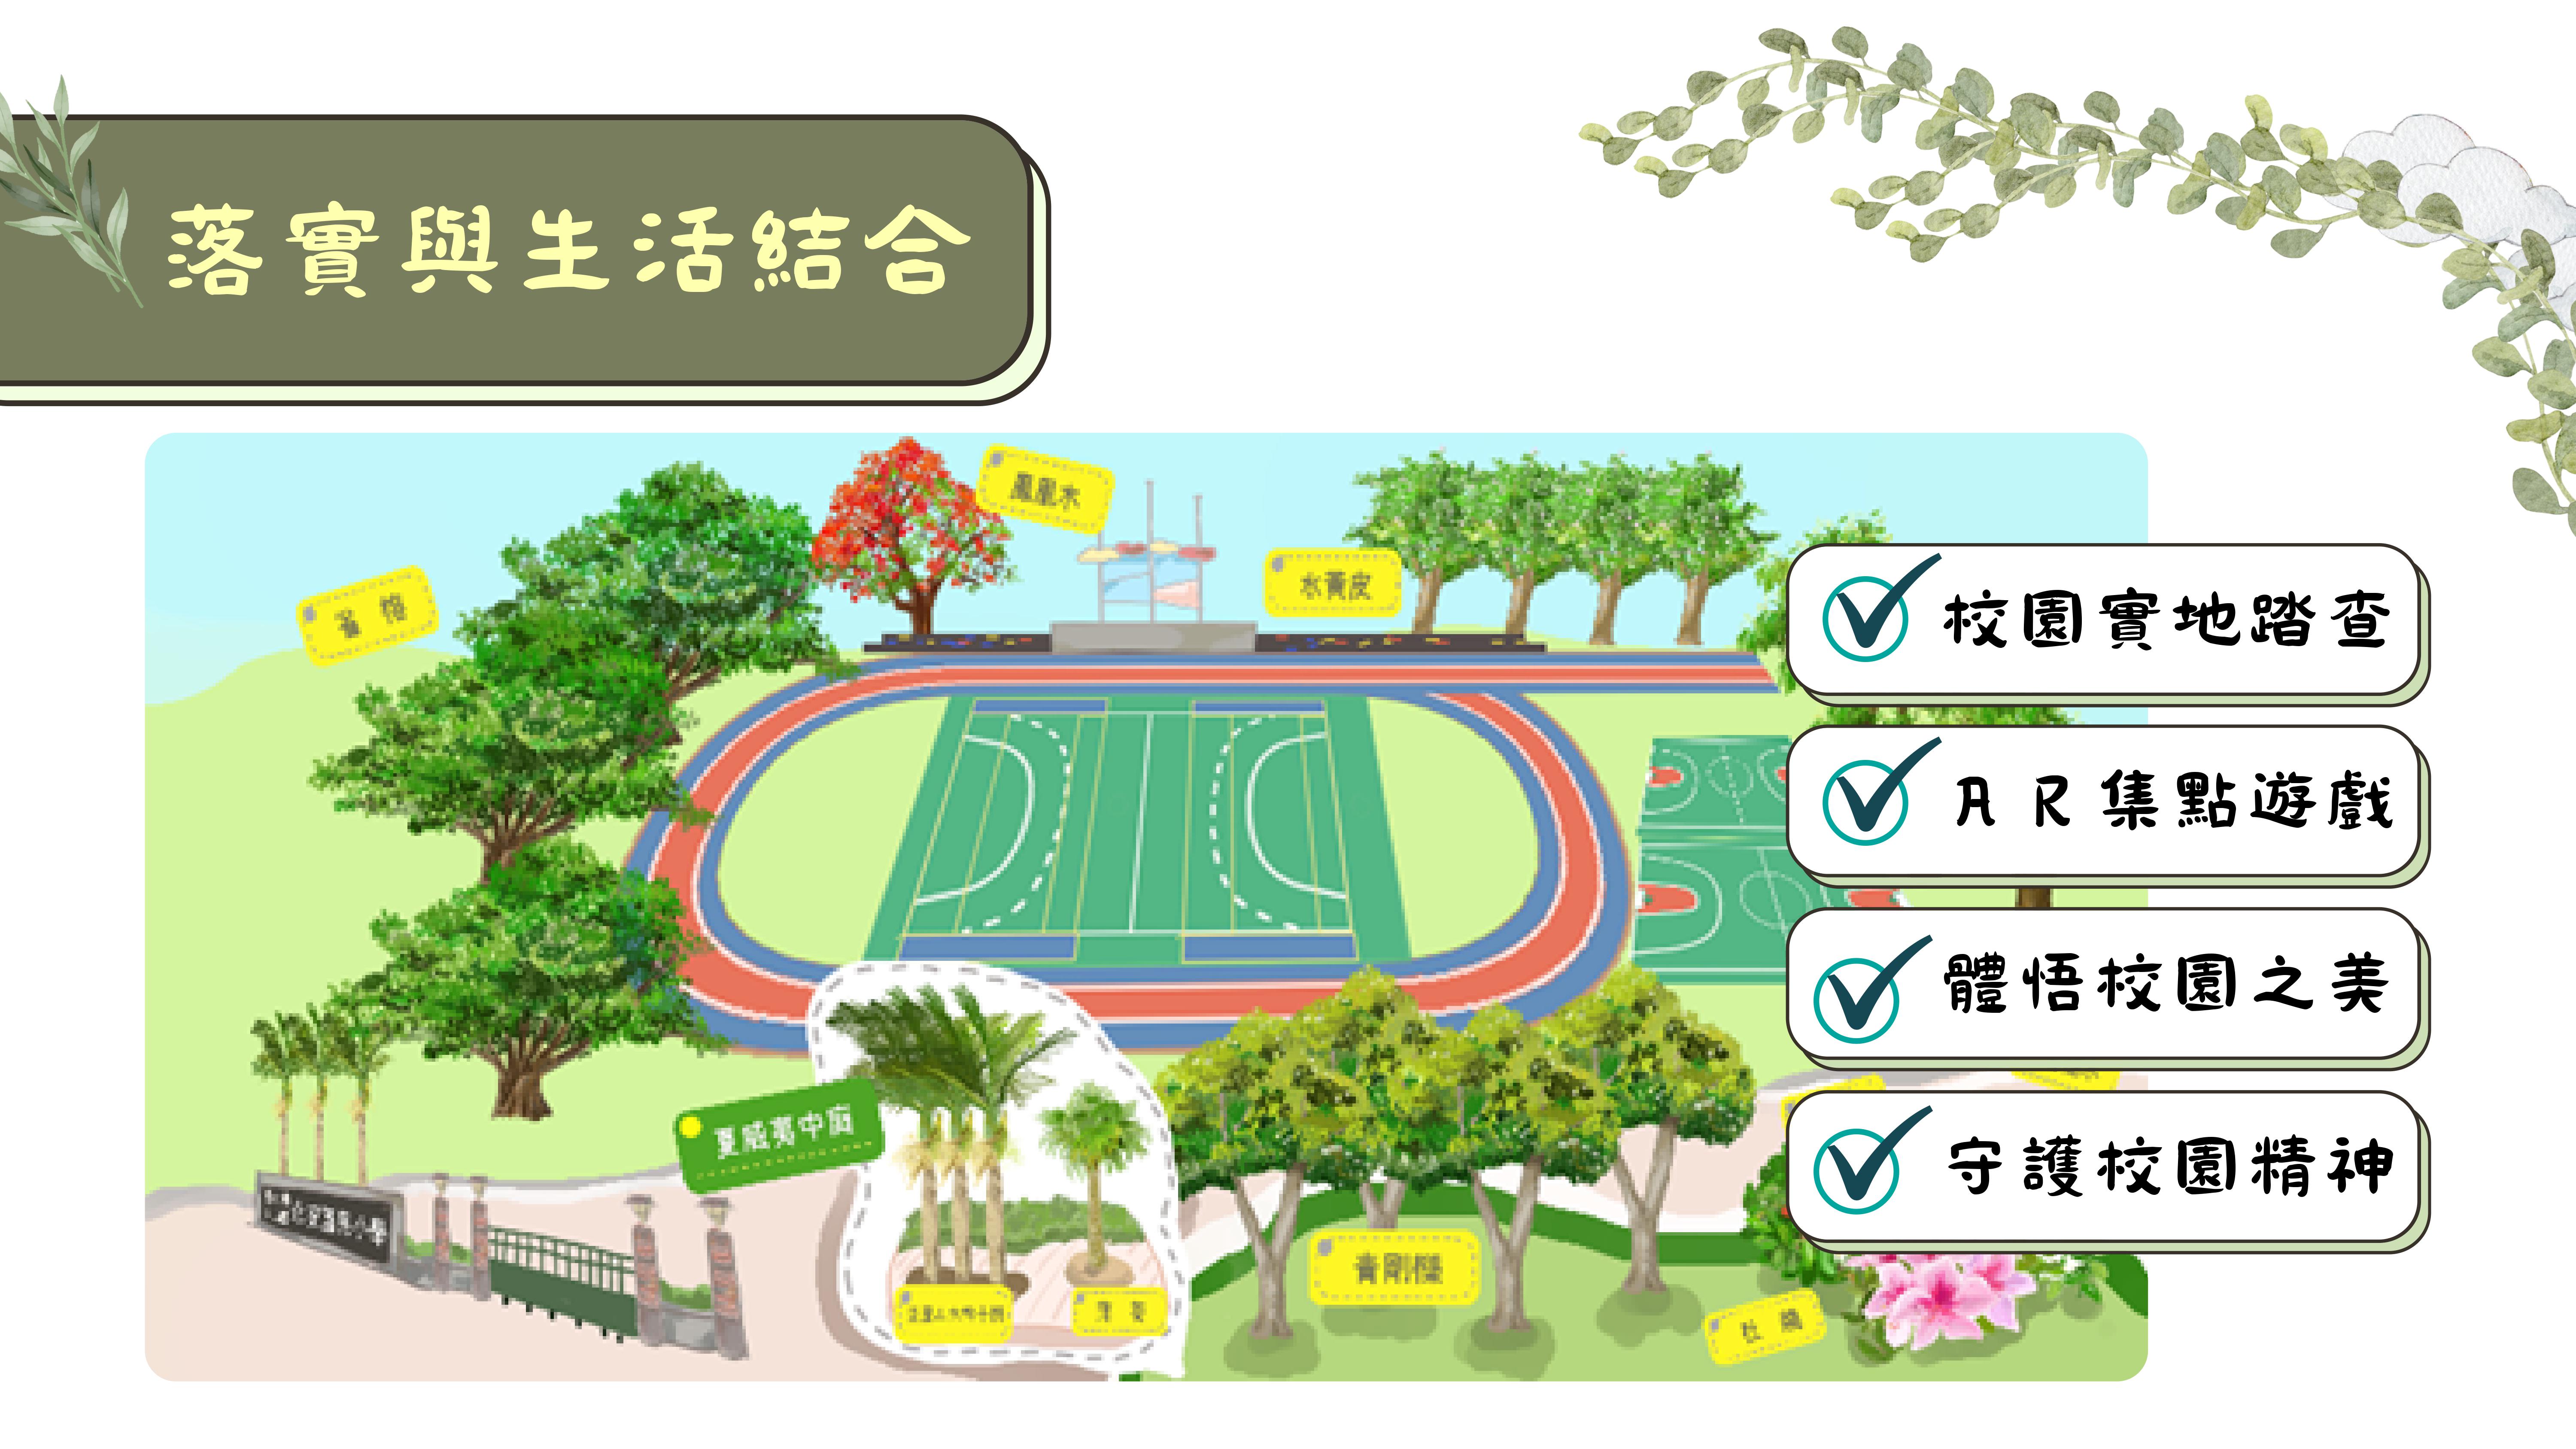
"Guardians of the Plant Kingdom" is an interdisciplinary teaching plan that combines the elementary school mid-grade natural sciences unit "Understanding Plants" with the comprehensive arts unit "Exploring the Joy of Aesthetics," divided into two phases. The first phase uses a fairy tale to spark interest, where students play the role of brave guardians of a fairy tale kingdom, learning about plants in various MR (Mixed Reality) fairy tale scenes and helping fairy tale characters solve problems. The second phase integrates reality-based puzzles with plant handbooks, puzzles, and cards, where after solving the puzzles, students search the campus for corresponding plants. They also use AR point-collection cards to learn about plants and appreciate the beauty of campus flora, effectively combining learning with daily life.
▍Course Teaching Features
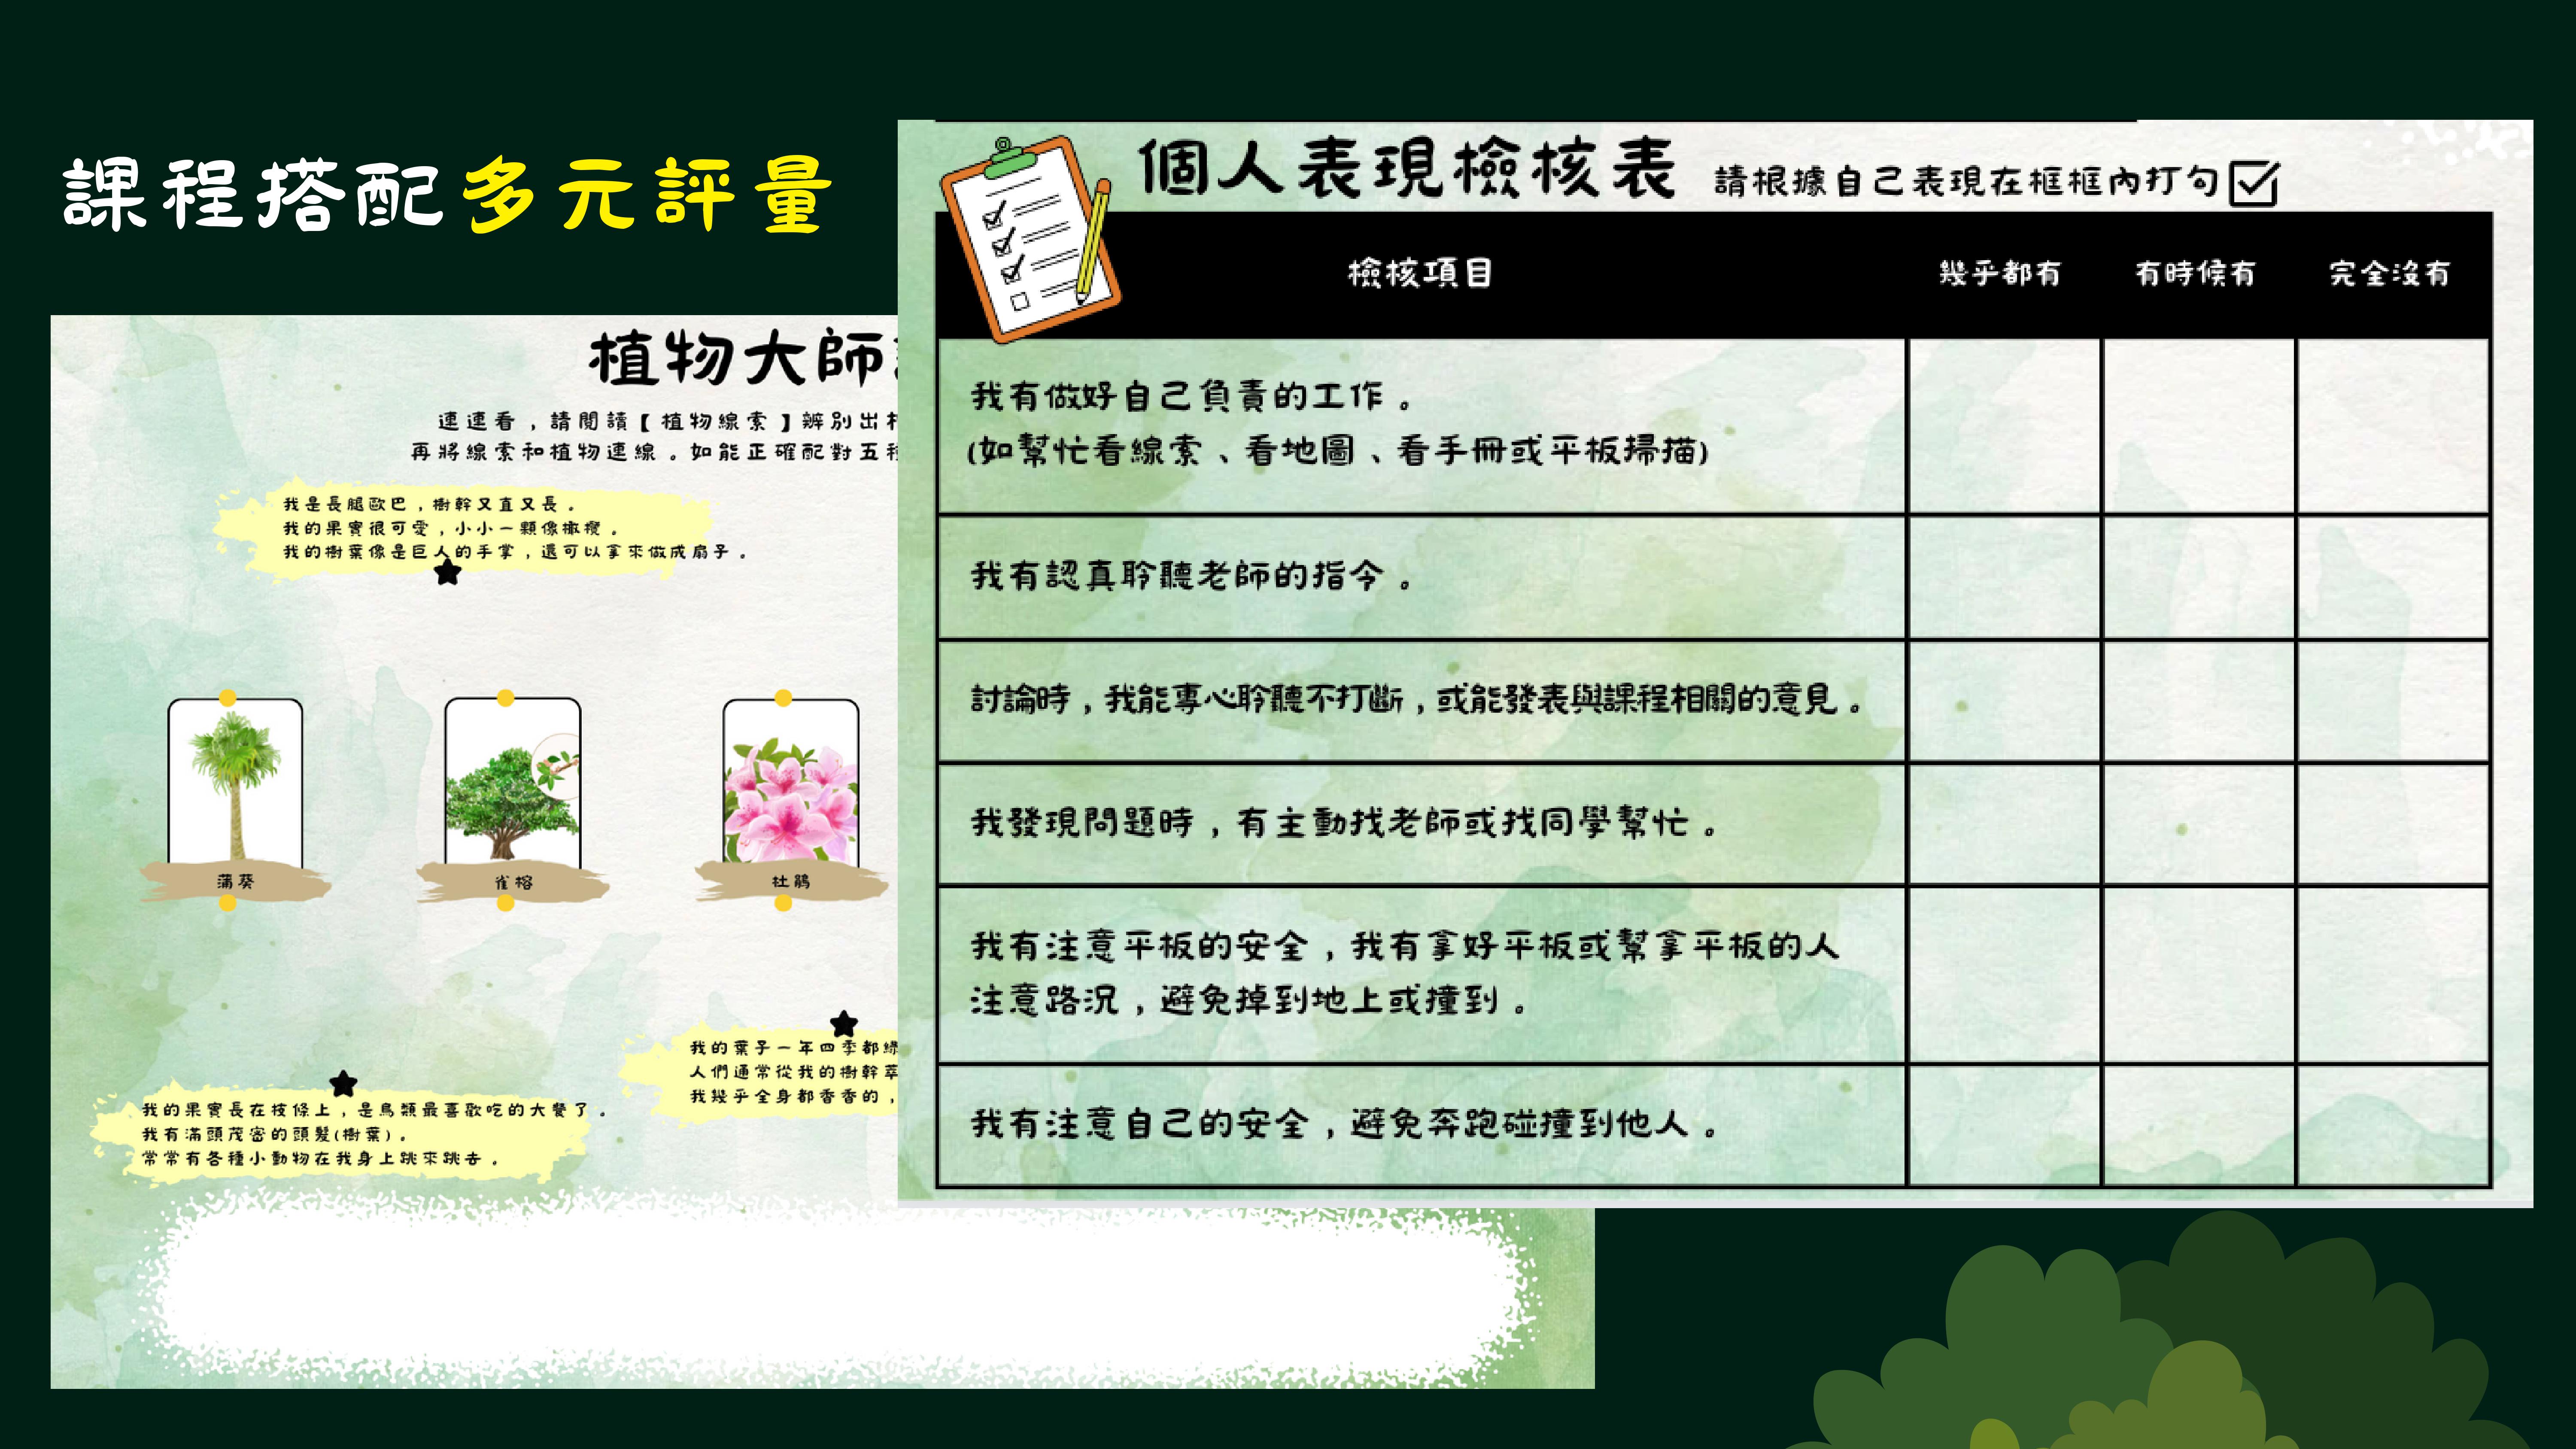
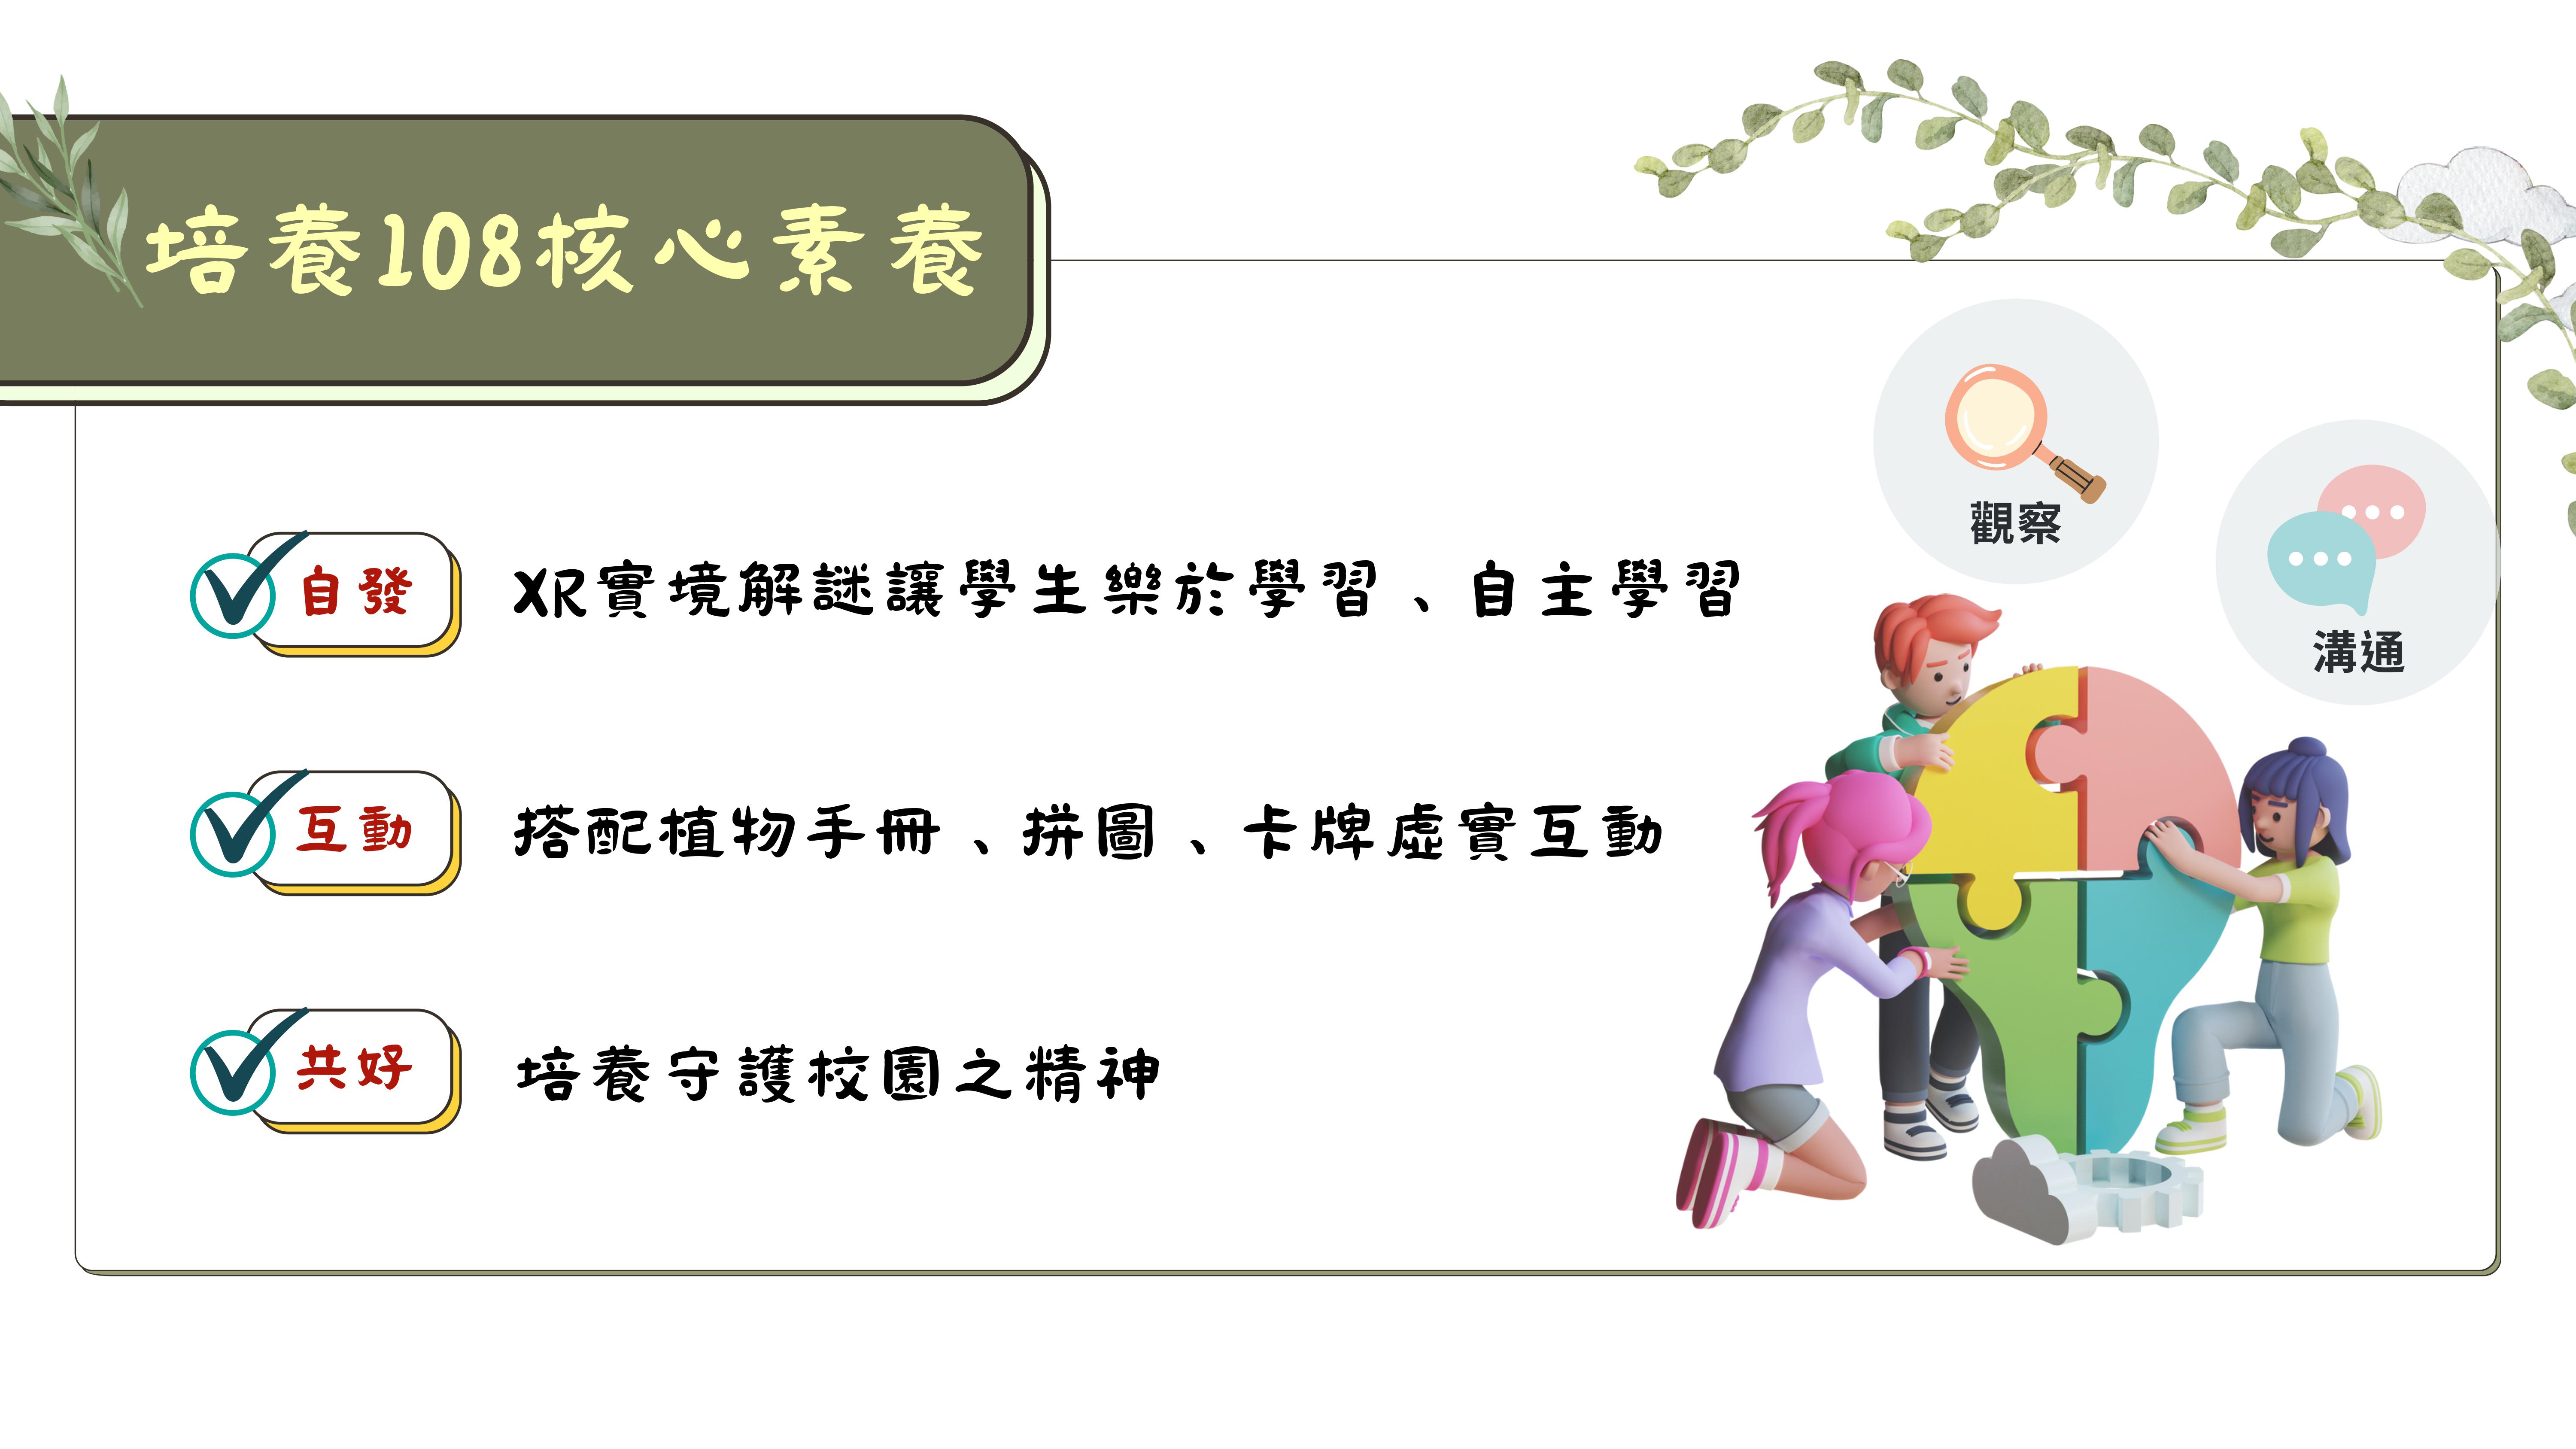
1.Interdisciplinary Curriculum: In line with the spirit of the 108 Curriculum Guidelines, this course integrates natural sciences and comprehensive arts. In addition to learning about plants, students also practice teamwork and explore the beauty of campus plants.
2.PBL (Project-Based Learning) Course Design: Students take on roles within a context, solving puzzles to advance the storyline, which enhances their motivation to explore and learn.
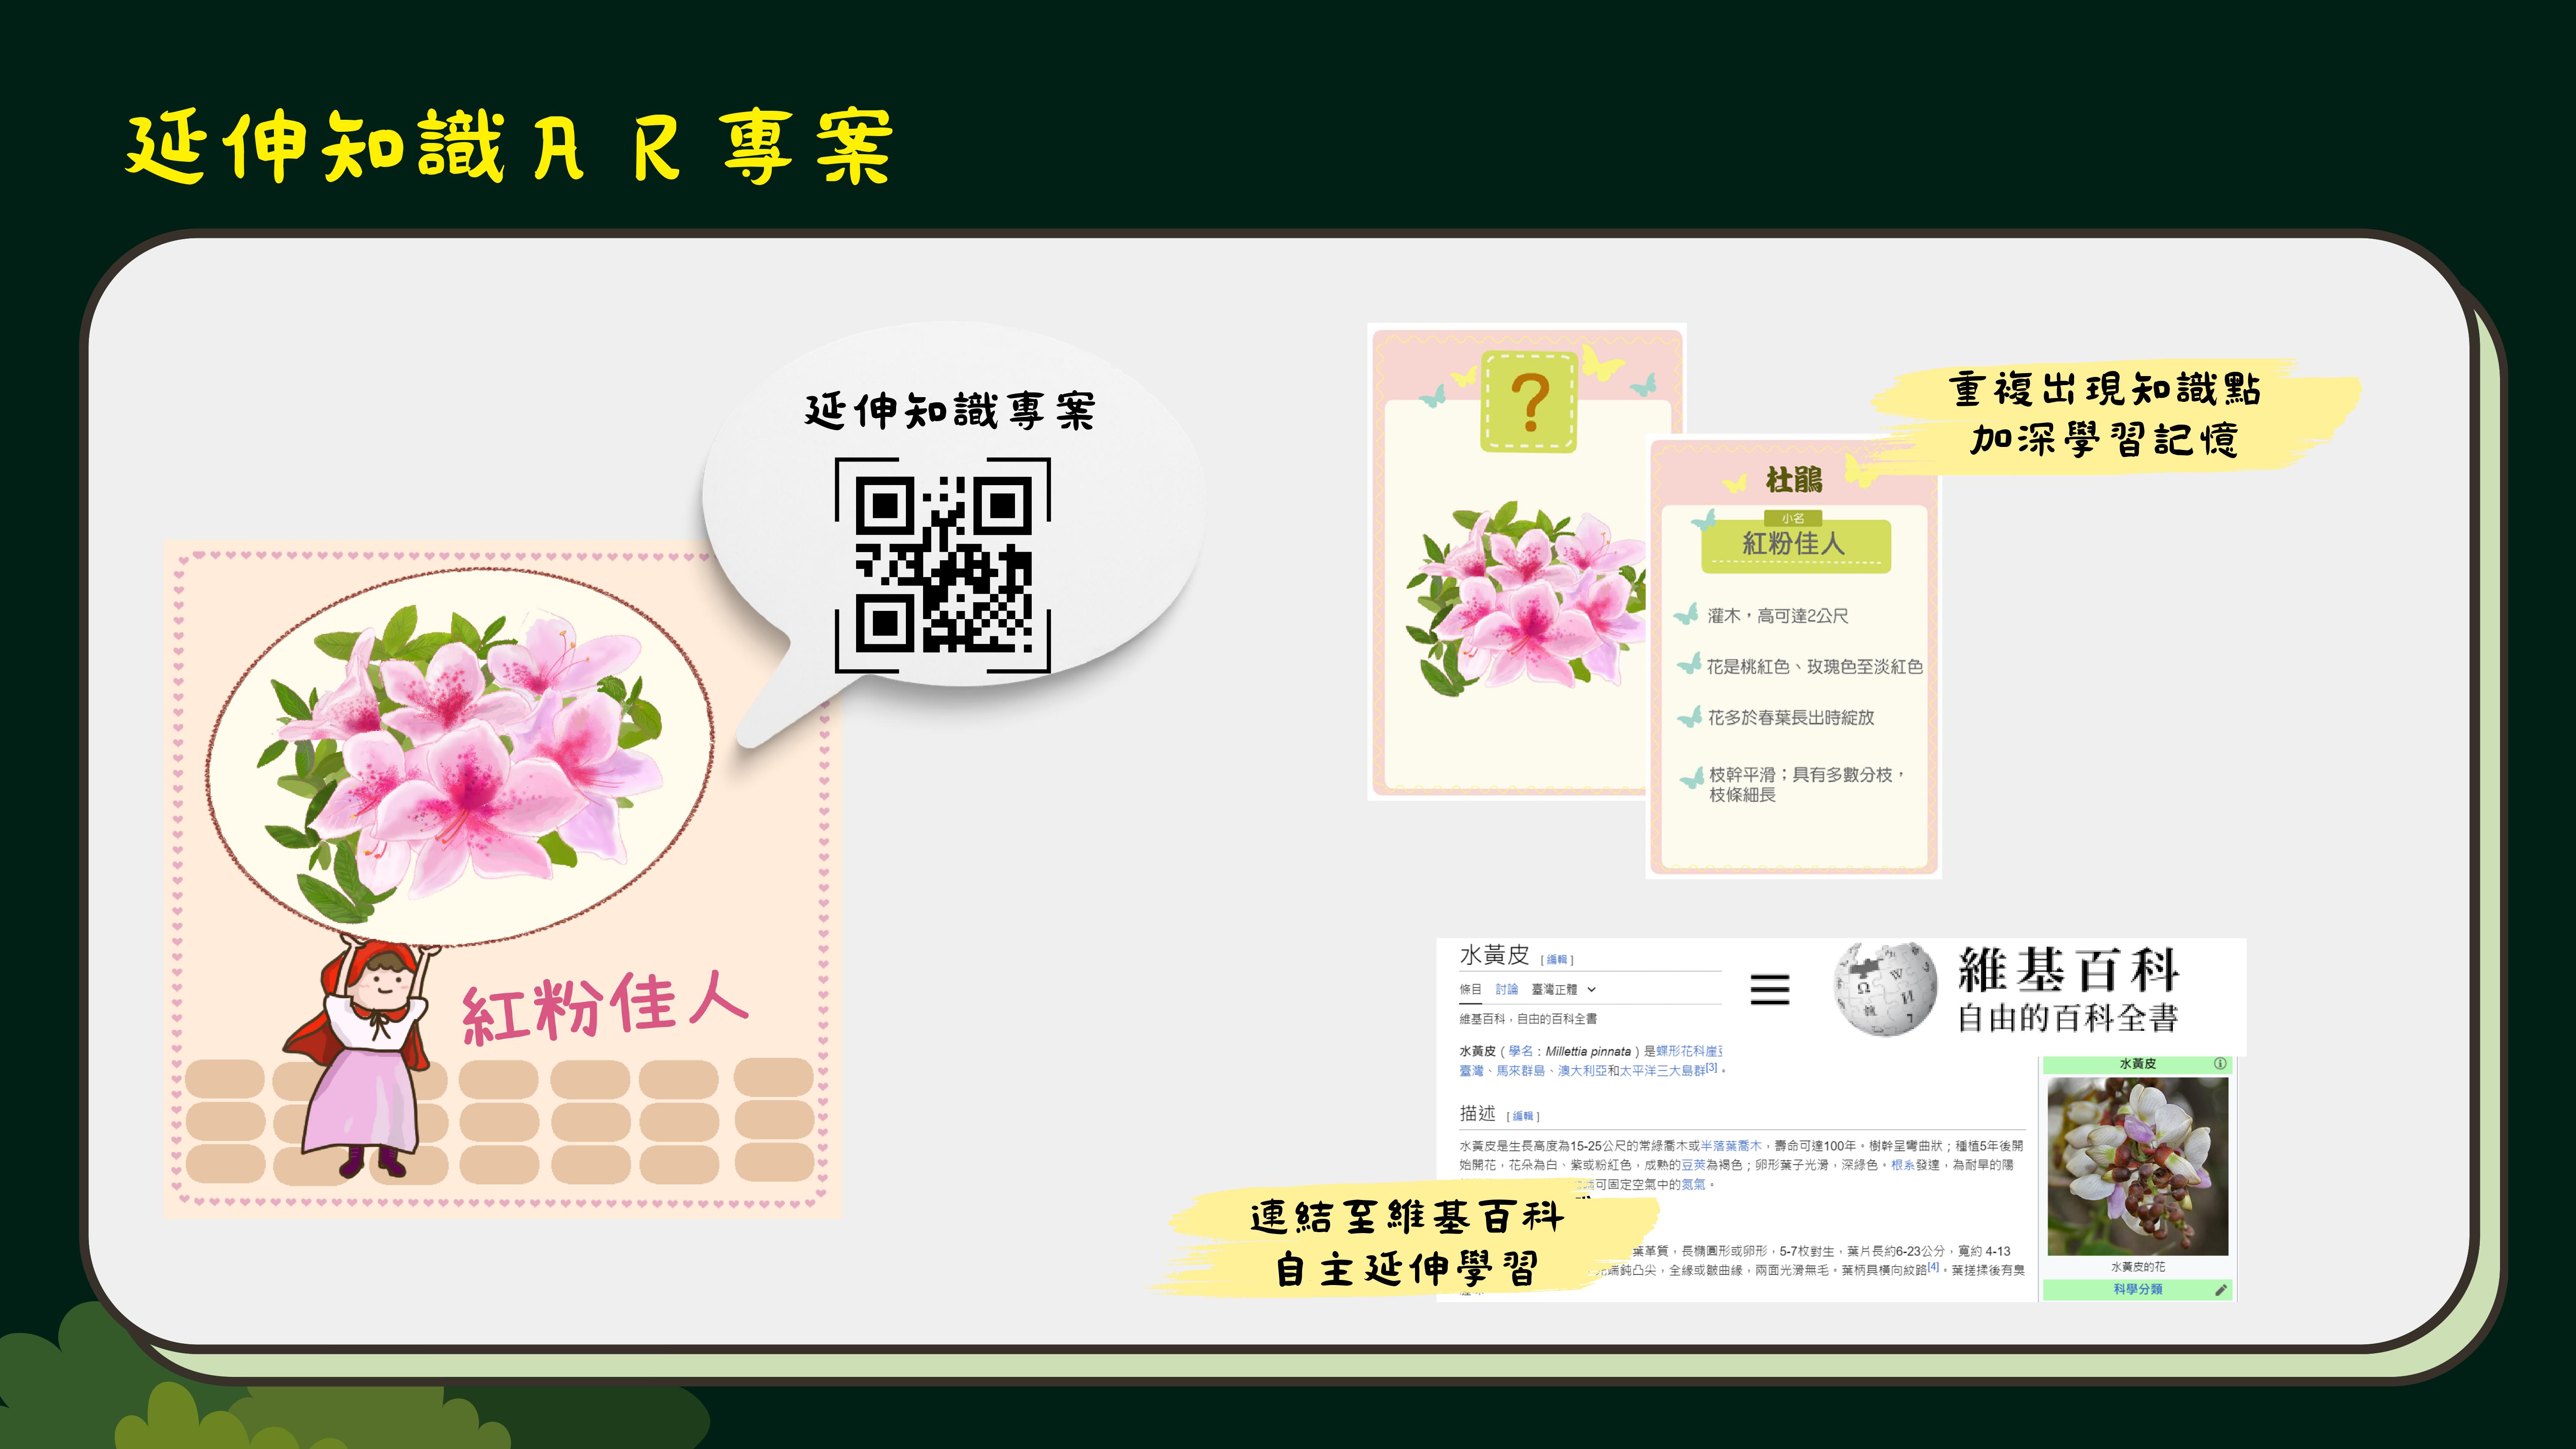
3.Technology Integration: Depending on the learning scenario, appropriate XR projects and technological media are integrated, such as incorporating MR (Mixed Reality) into the fairy tale kingdom, using recognition cards and point-collection cards to explore the beauty of the campus, and attaching AR explanations and extended learning links to campus plants.
▍Project introduction


MAKAR Viewer Hardware Requirements
| GooglePlay(Android) |
|
Android:Supports version 12.0 and above, compatible with iPhone 6s and newer models. |
MAKAR Editor Hardware Requirements
| Recommended Requirements |
|
【Mac】 Supports MacBook Air 2017 or later, Monterey 12.4 or above.
【Windows】 OS: win 7 CPU: intel core i5-6300 GPU: 2GB VRAM MEMORY: 4GB Ram |
| High Efficiency Specifications |
|
【Mac】 MacBook Air M2 or later, Sonoma 14.3 or above.
【Windows】 OS: win 11 CPU: intel core i5-10500 GPU: 4GB VRAM MEMORY: 8GB Ram |
Download and Install MAKAR Editor
Download and Install MAKAR Editor
1. Visit the Download Section of MAKAR Official and choose the appropriate installation file based on your computer system. MAKAR Editor is available in three versions: Windows 32-bit, Windows 64-bit, and iOS.
   |
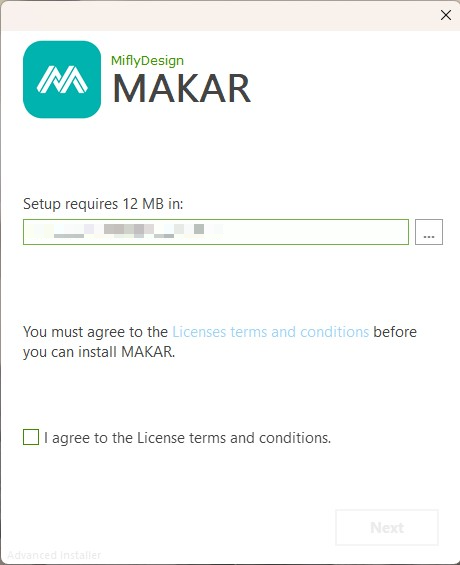 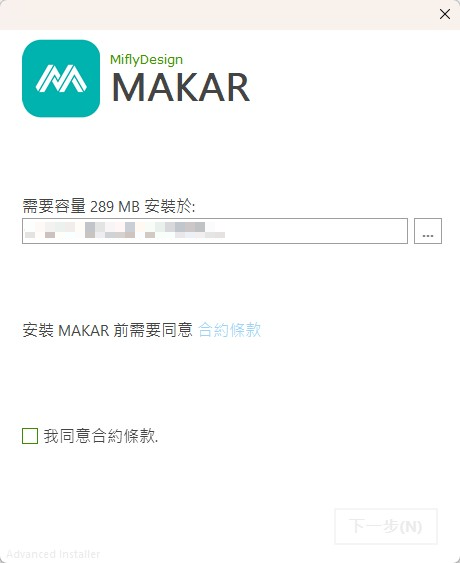  |
| 1. After opening the installation file, MAKAR installation screen will appear. | 2. Select the installation destination and check "I agree to the License terms and conditions." then click "Next". |
   |
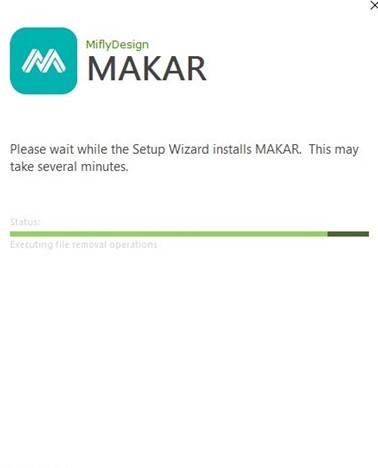 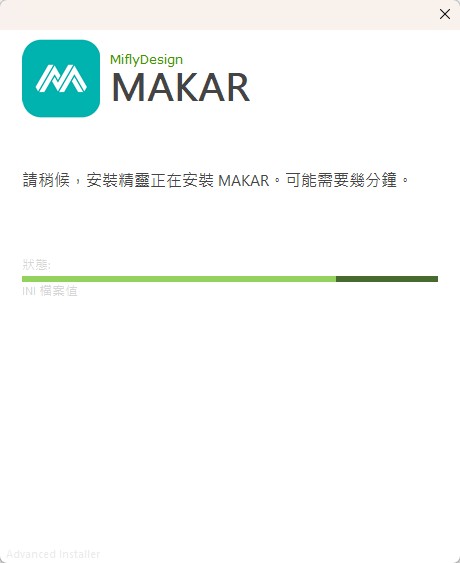  |
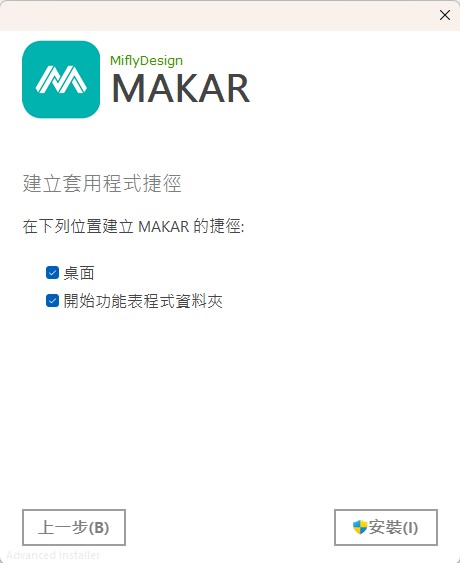
| 3. Check the shortcuts you want, then click "Install". | 4. MAKAR is installing. |
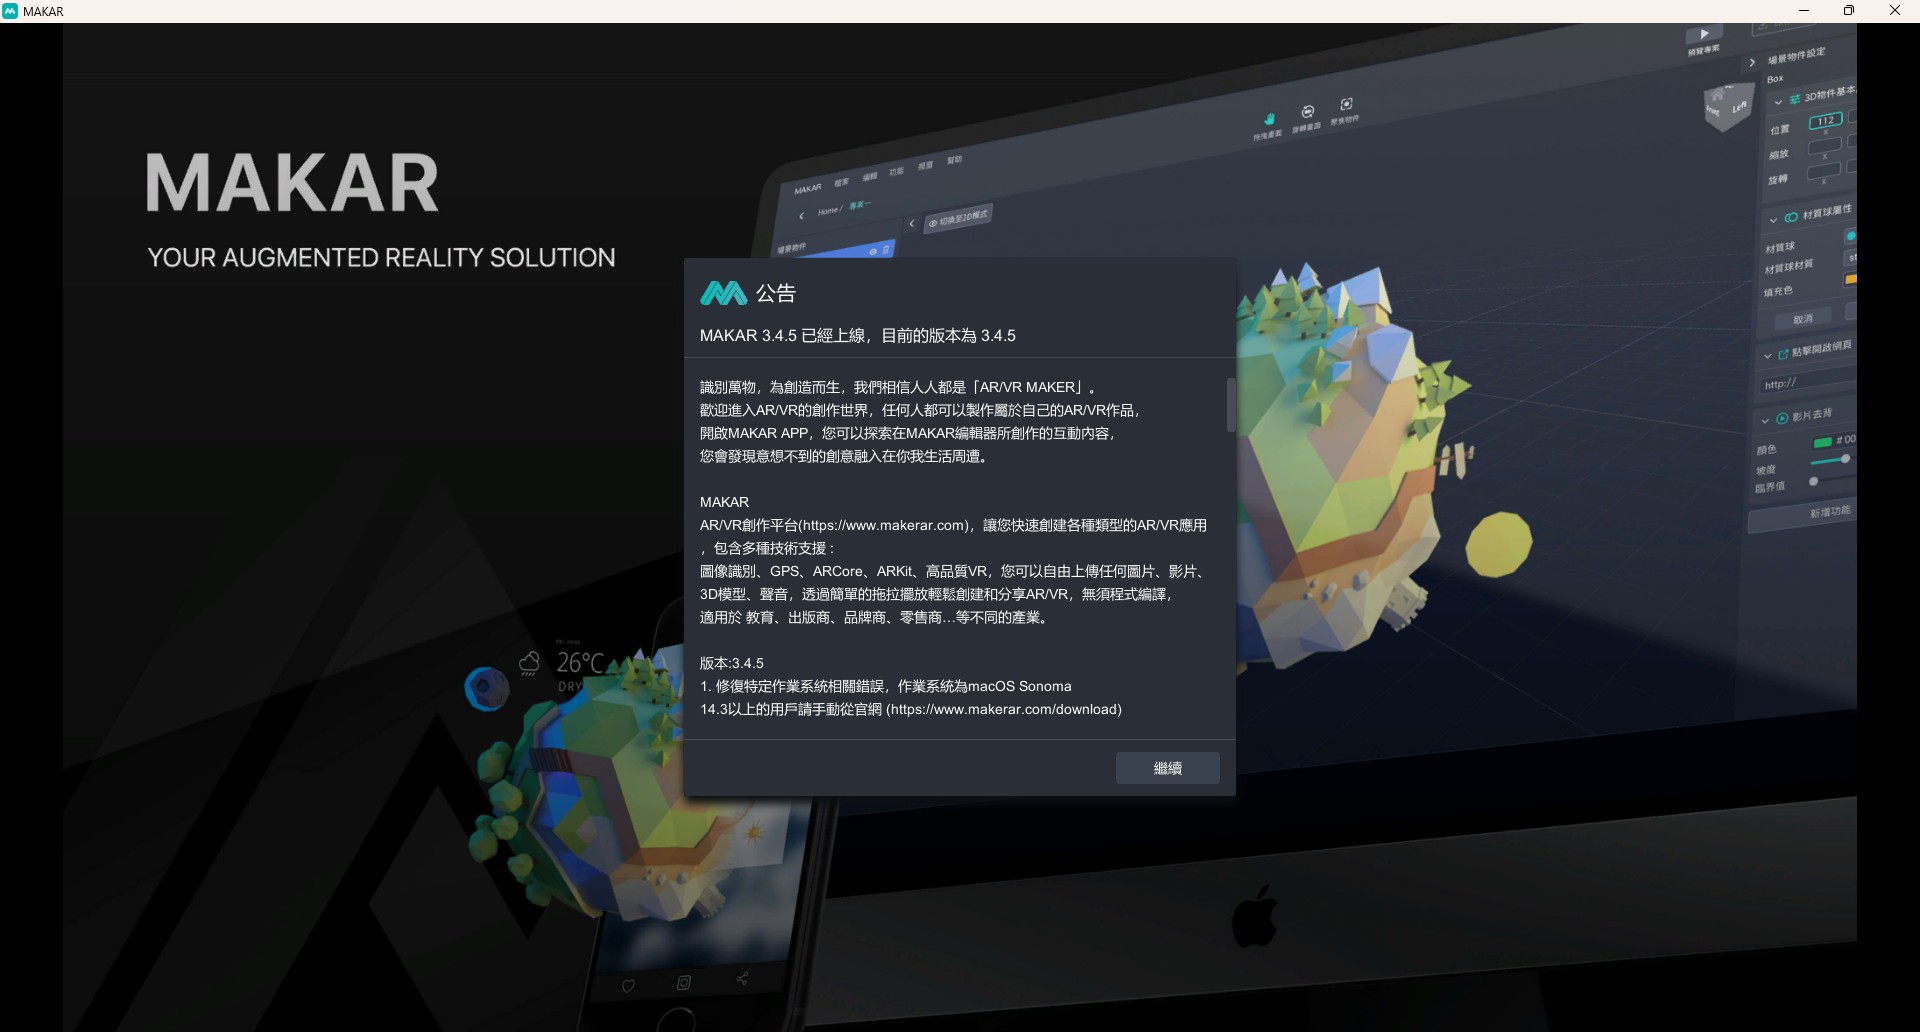
2. After the installation is complete, MAKAR Editor will automatically open. If it does not open automatically, you can click the icon on the desktop to open MAKAR Editor.


Create Your MAKAR ID on the Website
Create Your MAKAR ID on the Website
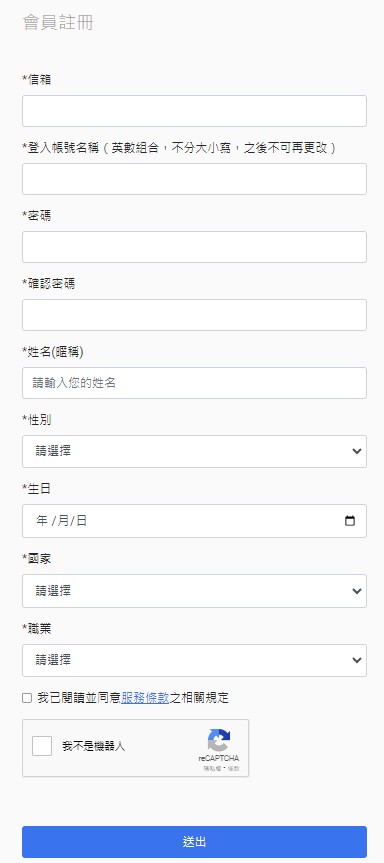
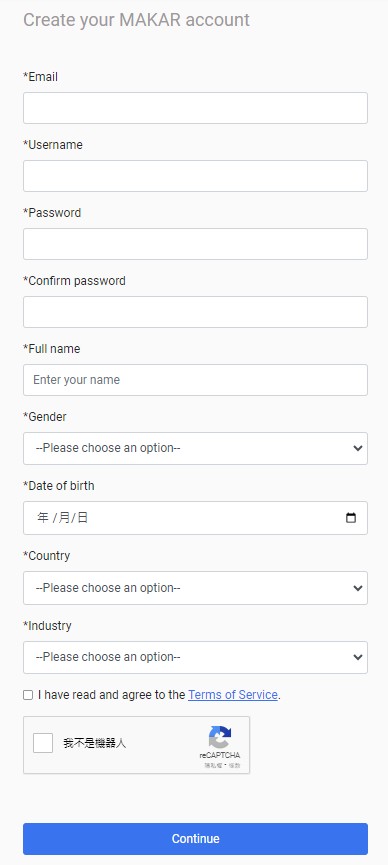
1. Begin your registration by visiting "Sign Up" section on the MAKAR official website. Enter the member registration page, fill in your personal information, and check "I have read and agree to the Terms of Service." and "I am not a robot", then click "Continue".

2. A verification email will be sent to the email address you provided. Please check your inbox and click the verification link.
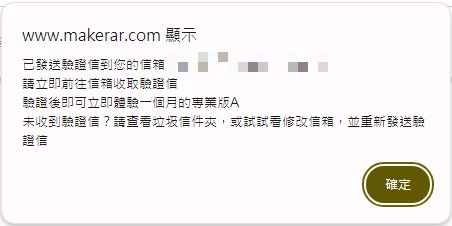

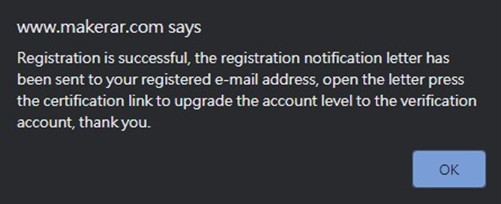
3. Once verified, your registration is successful. You can enjoy a one-month free trial of STANDARD plan.

Related Posts:
Use Third-Party Accounts to create MAKAR ID
Use Third-Party Accounts to Create MAKAR ID
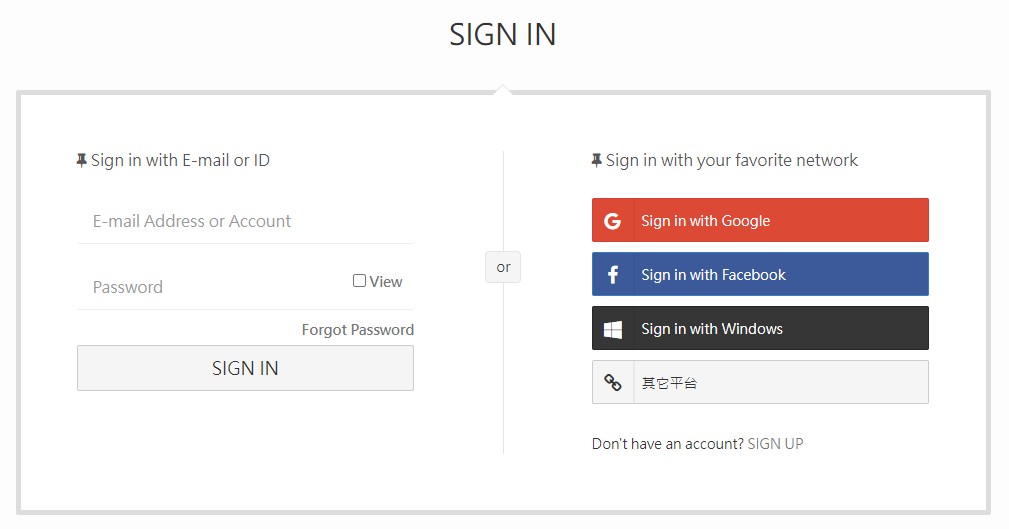
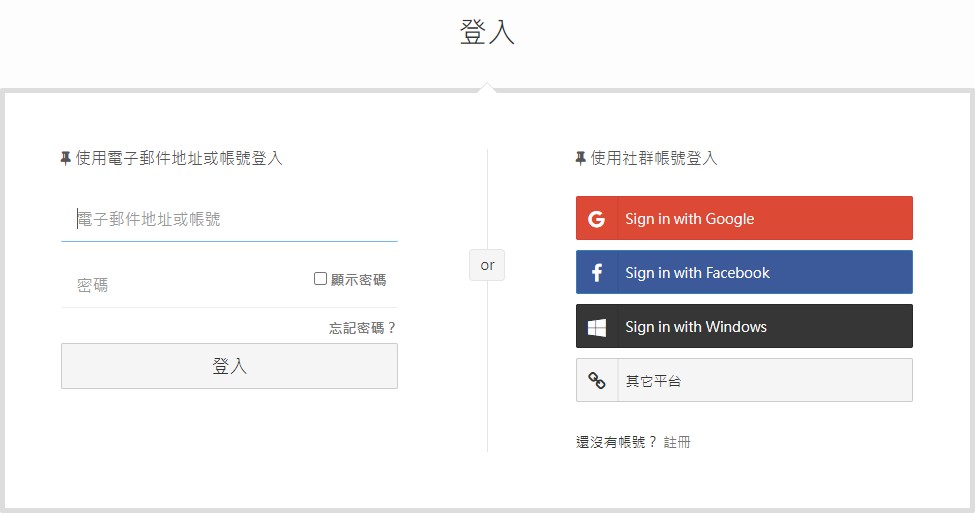
MAKAR offers third-party login options, allowing you to quickly finish signing up by logging in at the same time. You can log in using third-party accounts either from MAKAR Login on the official website or the login screen within the MAKAR Editor.
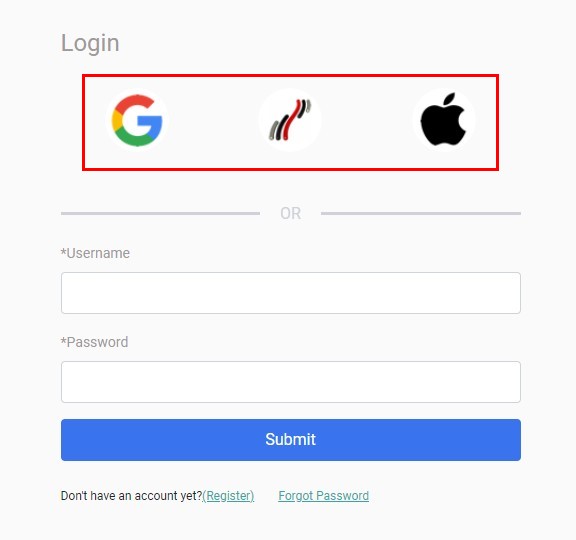 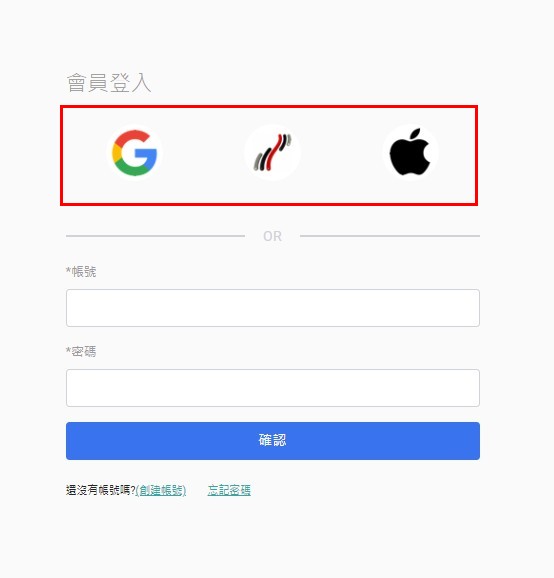  |
 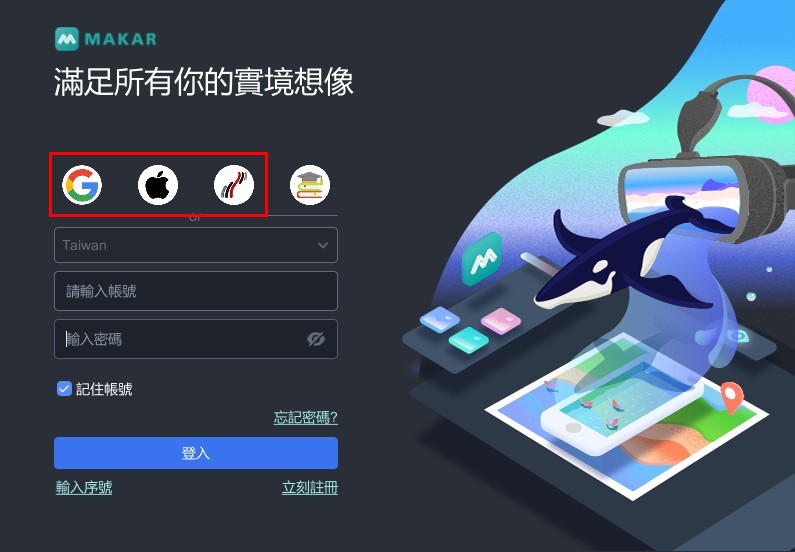  |
| ▲ on the official website | ▲ on MAKAR Editor |
Three Third-Party Login Processes
MAKAR provides three third-party login options: Google, 1Campus, and Apple. Below, we illustrate the login process for each of these options within the MAKAR Editor interface.
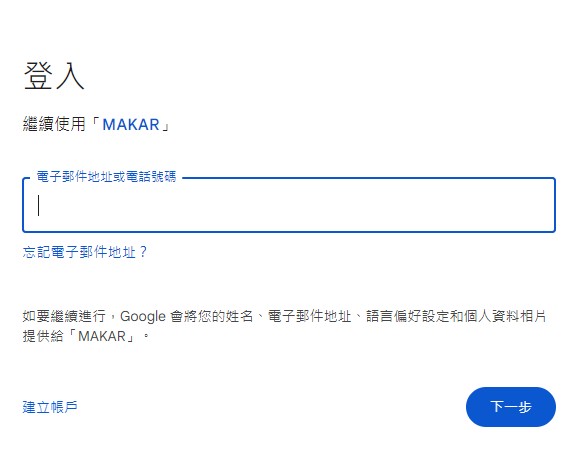
1. Log in with Google Account
   |
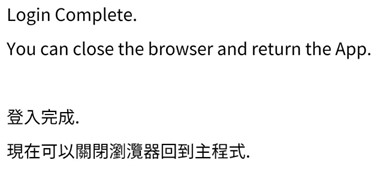   |
| 1. Click Google icon to access the login screen and enter your login information. | 2. A "Login Completed" window will appear. |
   |
| 3. You'll be directed to the editor interface, indicating successful registration. |
2. Log in with 1Campus Account
   |
   |
| 1. Click 1Campus icon to access the login screen and enter your login information. | 2. A "Login Completed" window will appear. |
 |
| 3. You'll be directed to the editor interface, indicating successful registration. |
3. Log in with Apple Account
 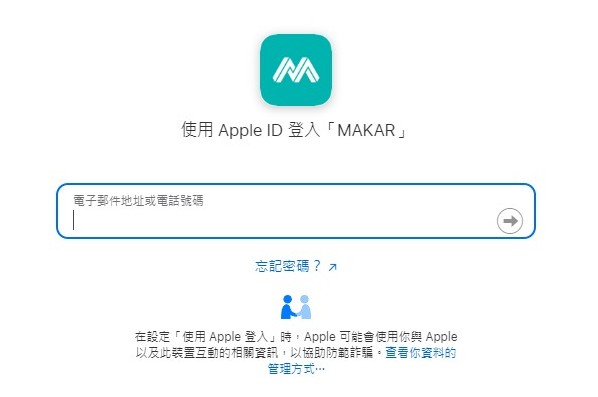  |
 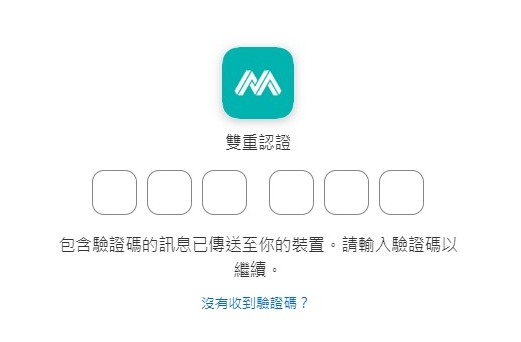  |
| 1. Click Apple icon to access the login screen and enter your login information. | 2. Logging in with Apple requires "Two-Factor Authentication." Please verify and input the authentication code on your Apple device.
*If Two-Factor Authentication has been previously enabled, this page will not appear. |
   |
 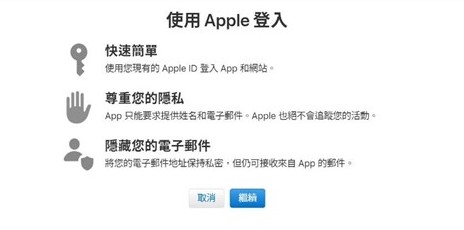  |
| 3. A "Trust This Browser?" prompt will appear. Click "Trust." | 4. "Sign in with Apple" will appear. Click "Continue." |
   |
   |
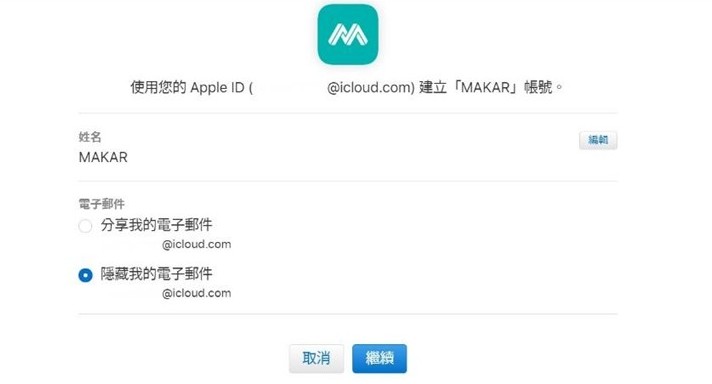
| 5. Verify that your Apple ID details are correct, and optionally modify your name and email sharing settings. Then click "Continue." | 6. A "Login Completed" window will appear. |
  |
| 7. You'll be directed to the editor interface, indicating successful registration. |
Related Posts:
Log in with MAKAR ID
Log in with MAKAR ID
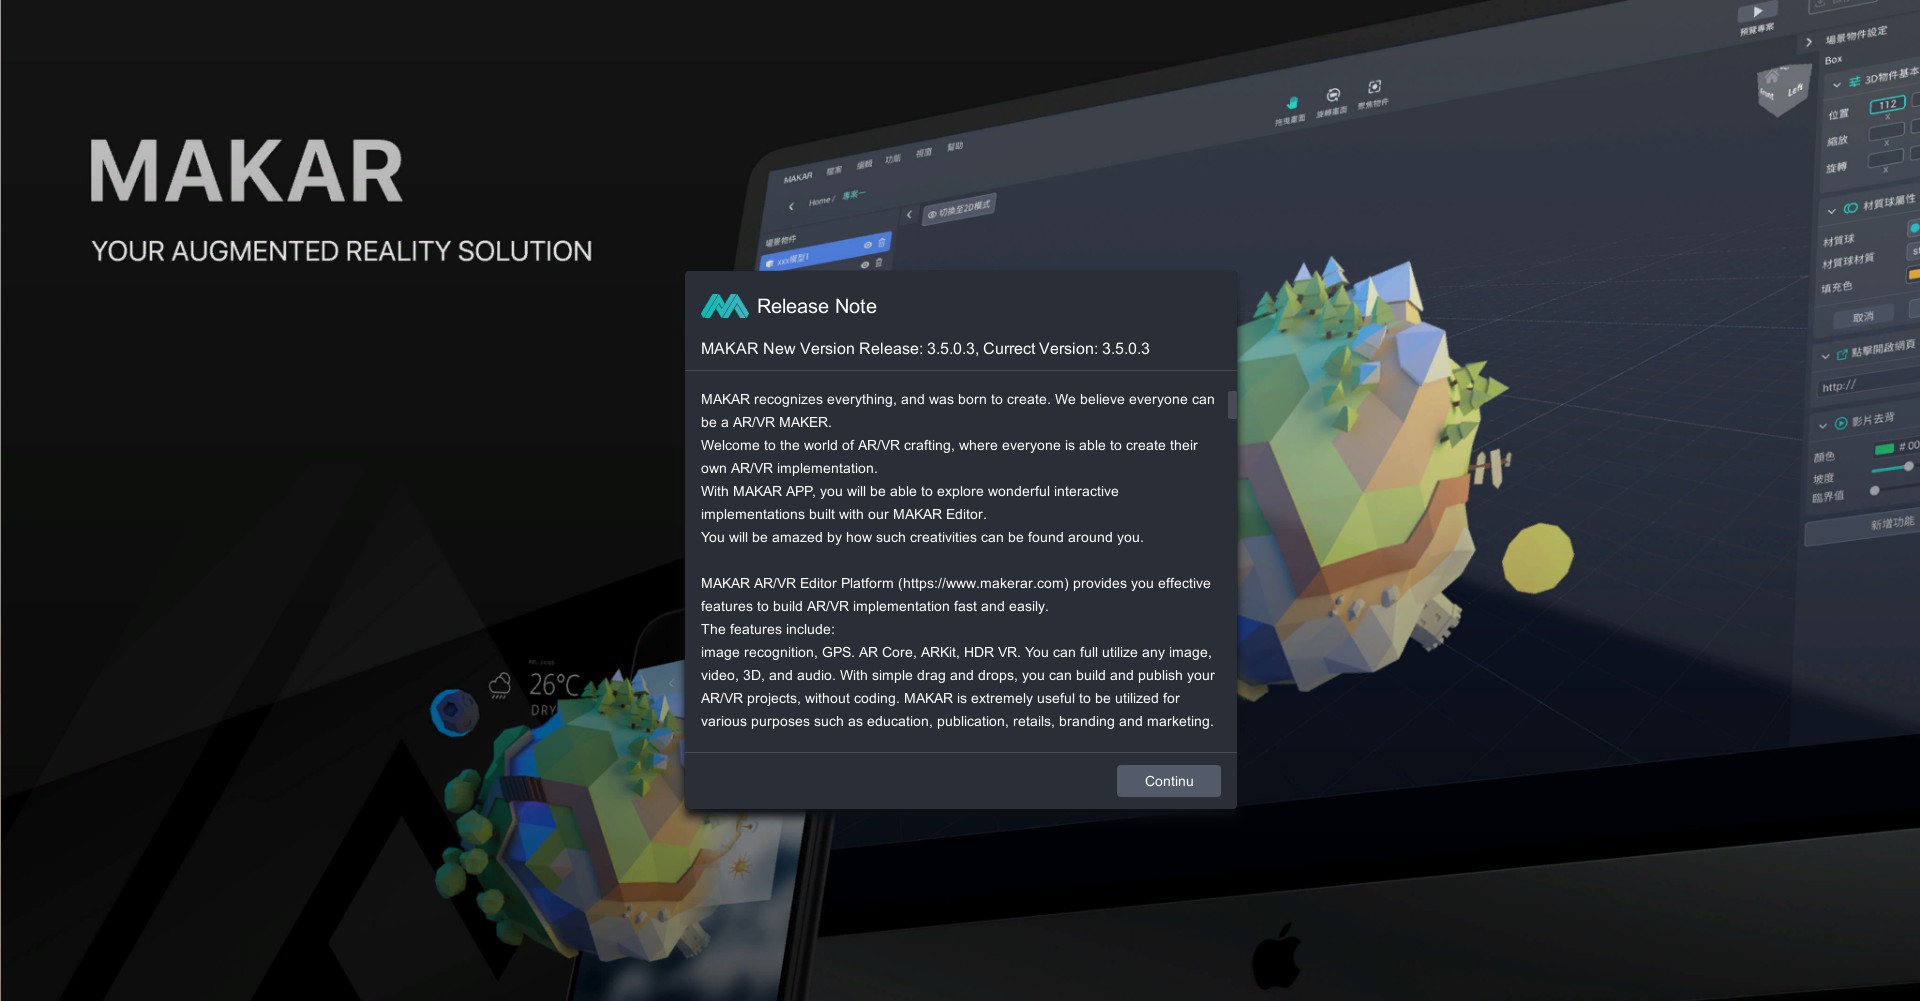
1. Open MAKAR Editor, a notification window will appear where you can confirm the current version. Click 'Continue' to proceed.

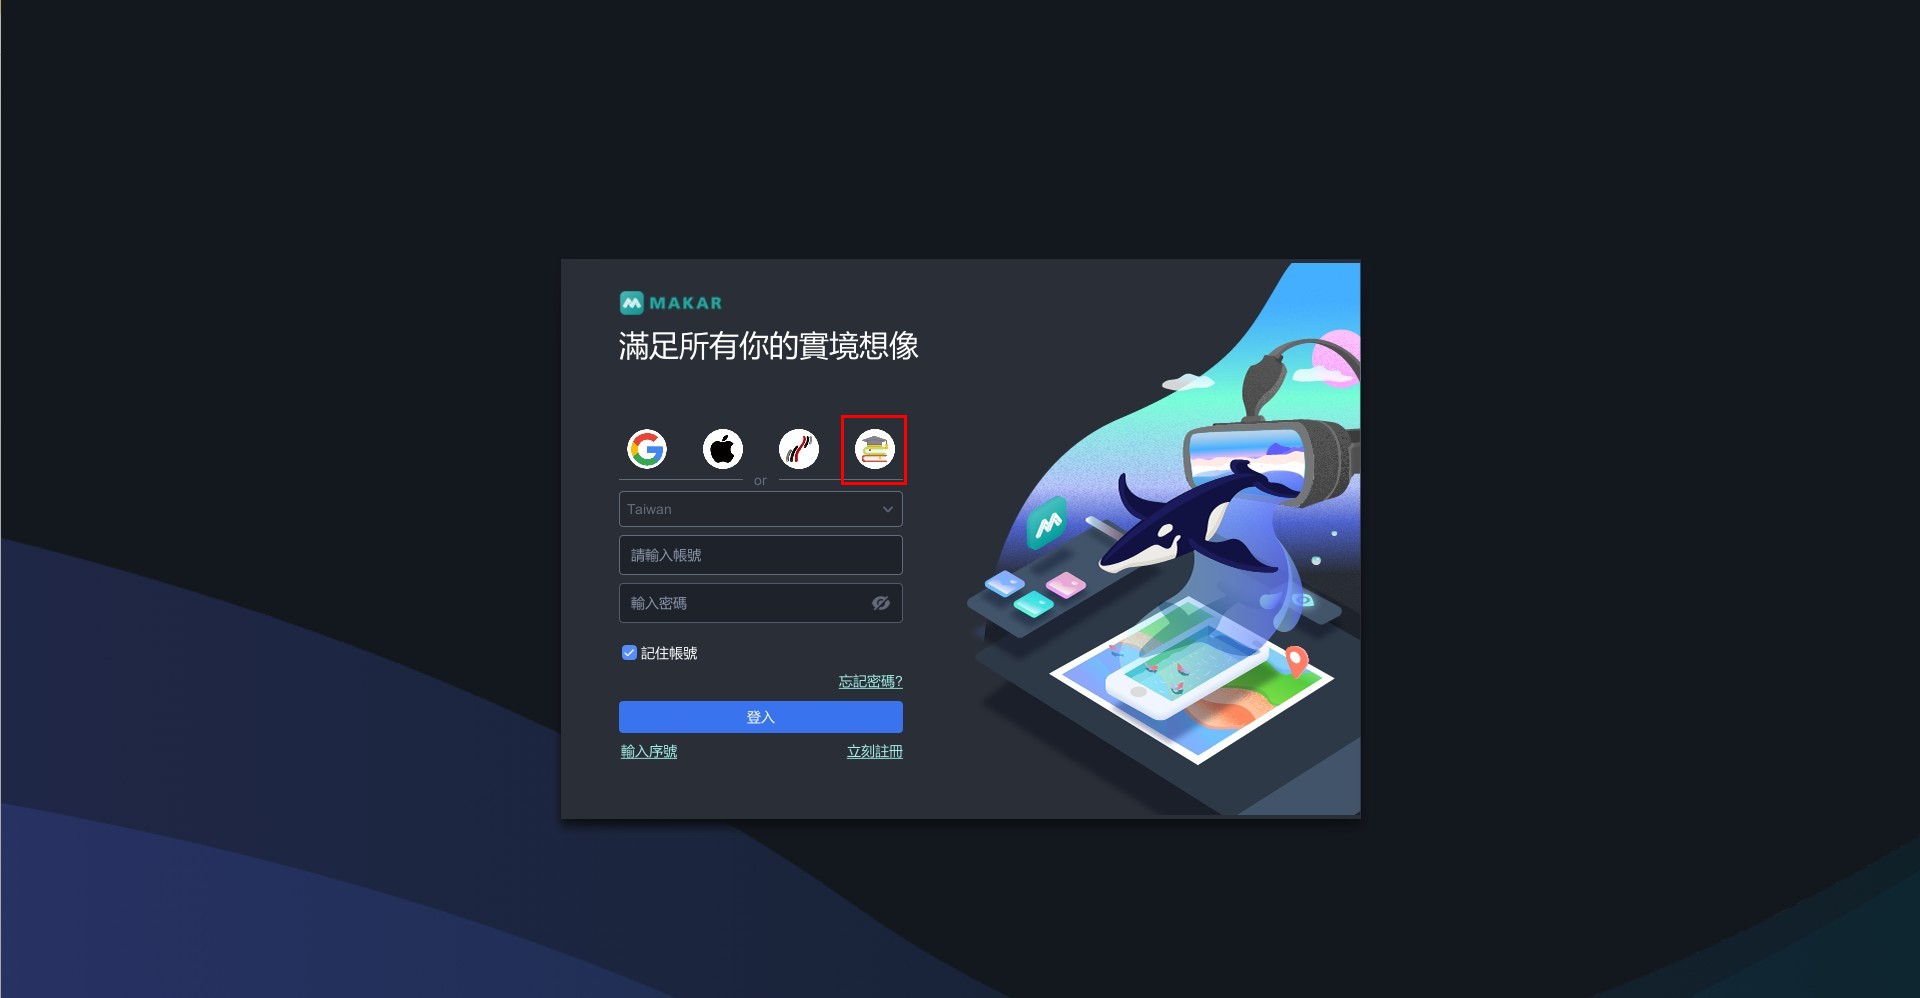
2. You will then be directed to the login screen. You can sign in using your registered MAKAR account from the official website, or opt for third-party login options. Once entered, click "Login".


※ Third-party login allows for immediate access upon registration. For the third-party login process, please refer to the tutorial on Use Third-Party Accounts to Create MAKAR ID.

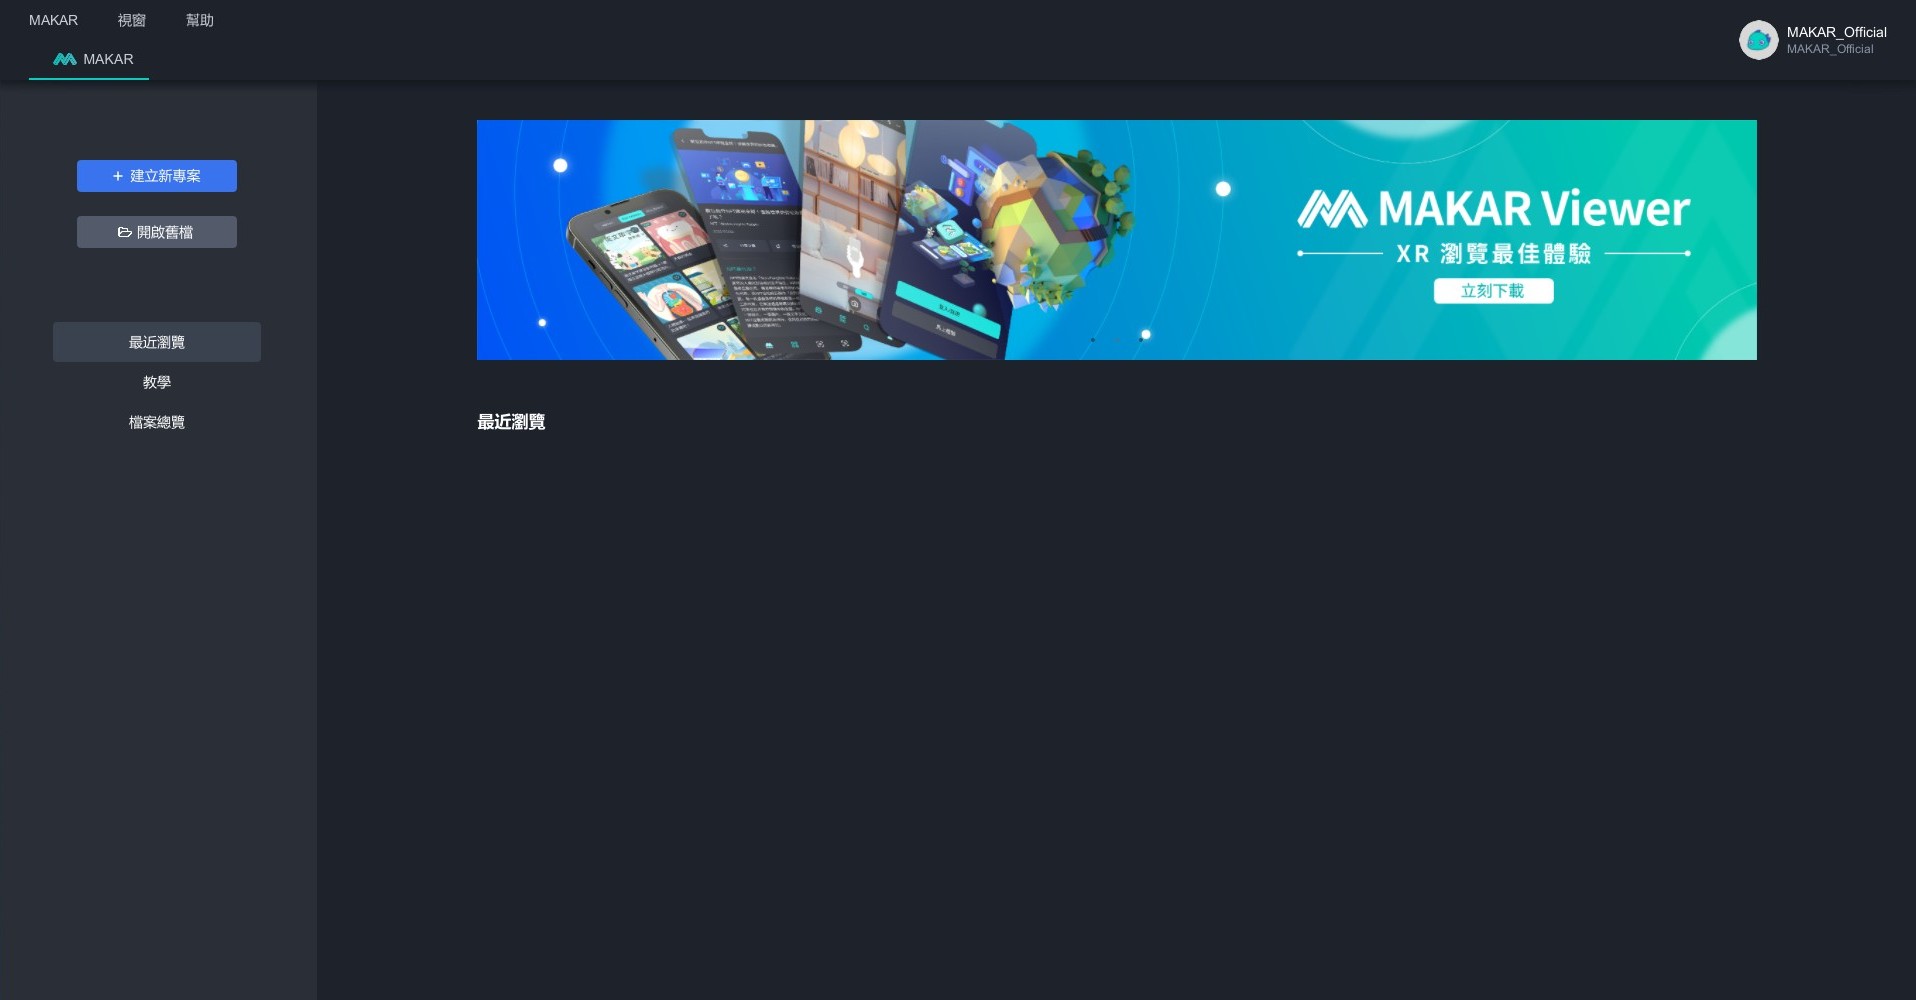
3. Upon successful login, you'll be directed to the MAKAR Editor homepage, ready to start your creative journey!


Related Posts:
Log in with MAKAR EDU
Log in to MAKAR EDU
1. Click the icon on the far right to switch to the MAKAR EDU login screen.


2. Please fill in the school information to log in to MAKAR EDU successfully.


【Input Field Explanation】
A | School ID: School code (Unified Business Number)
B | ID or Email: Account provided in the authorization letter
C | Password: As specified in the authorization letter or set by the school
Related Posts:

Bind Your MAKAR Editor Serial Key
Bind Your MAKAR Editor Serial Key
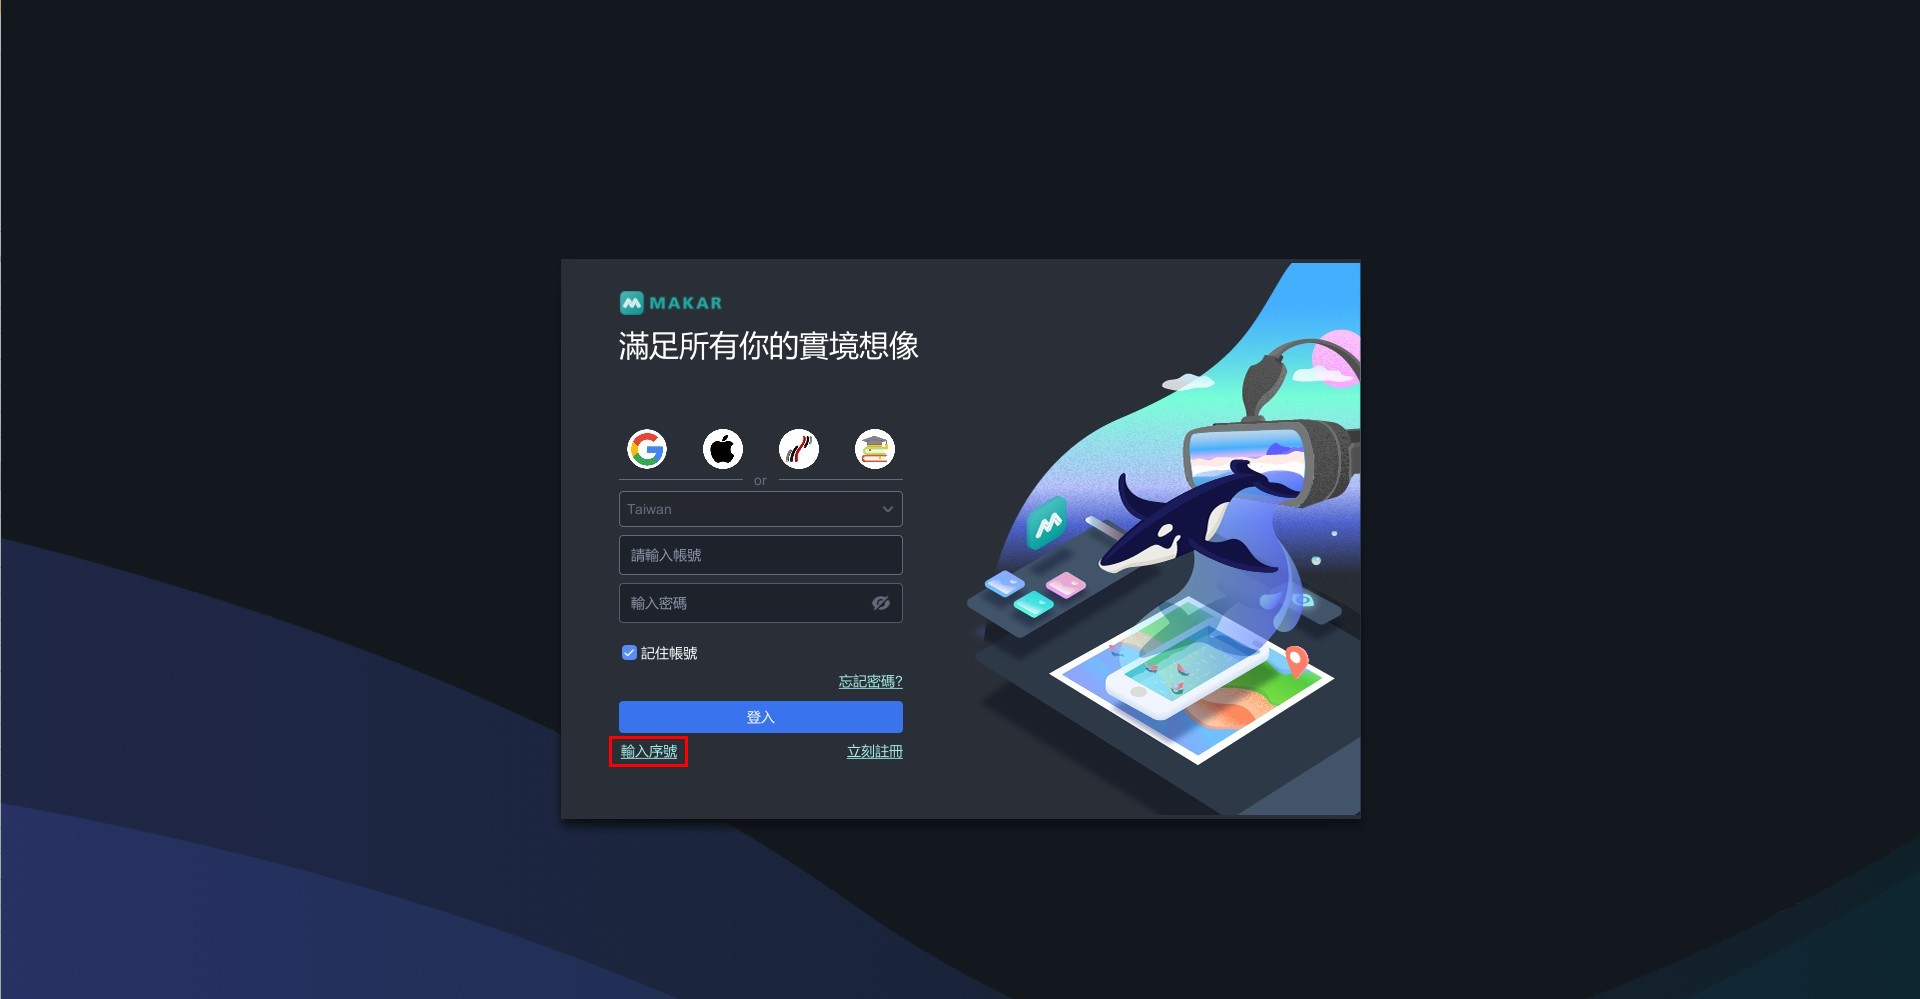
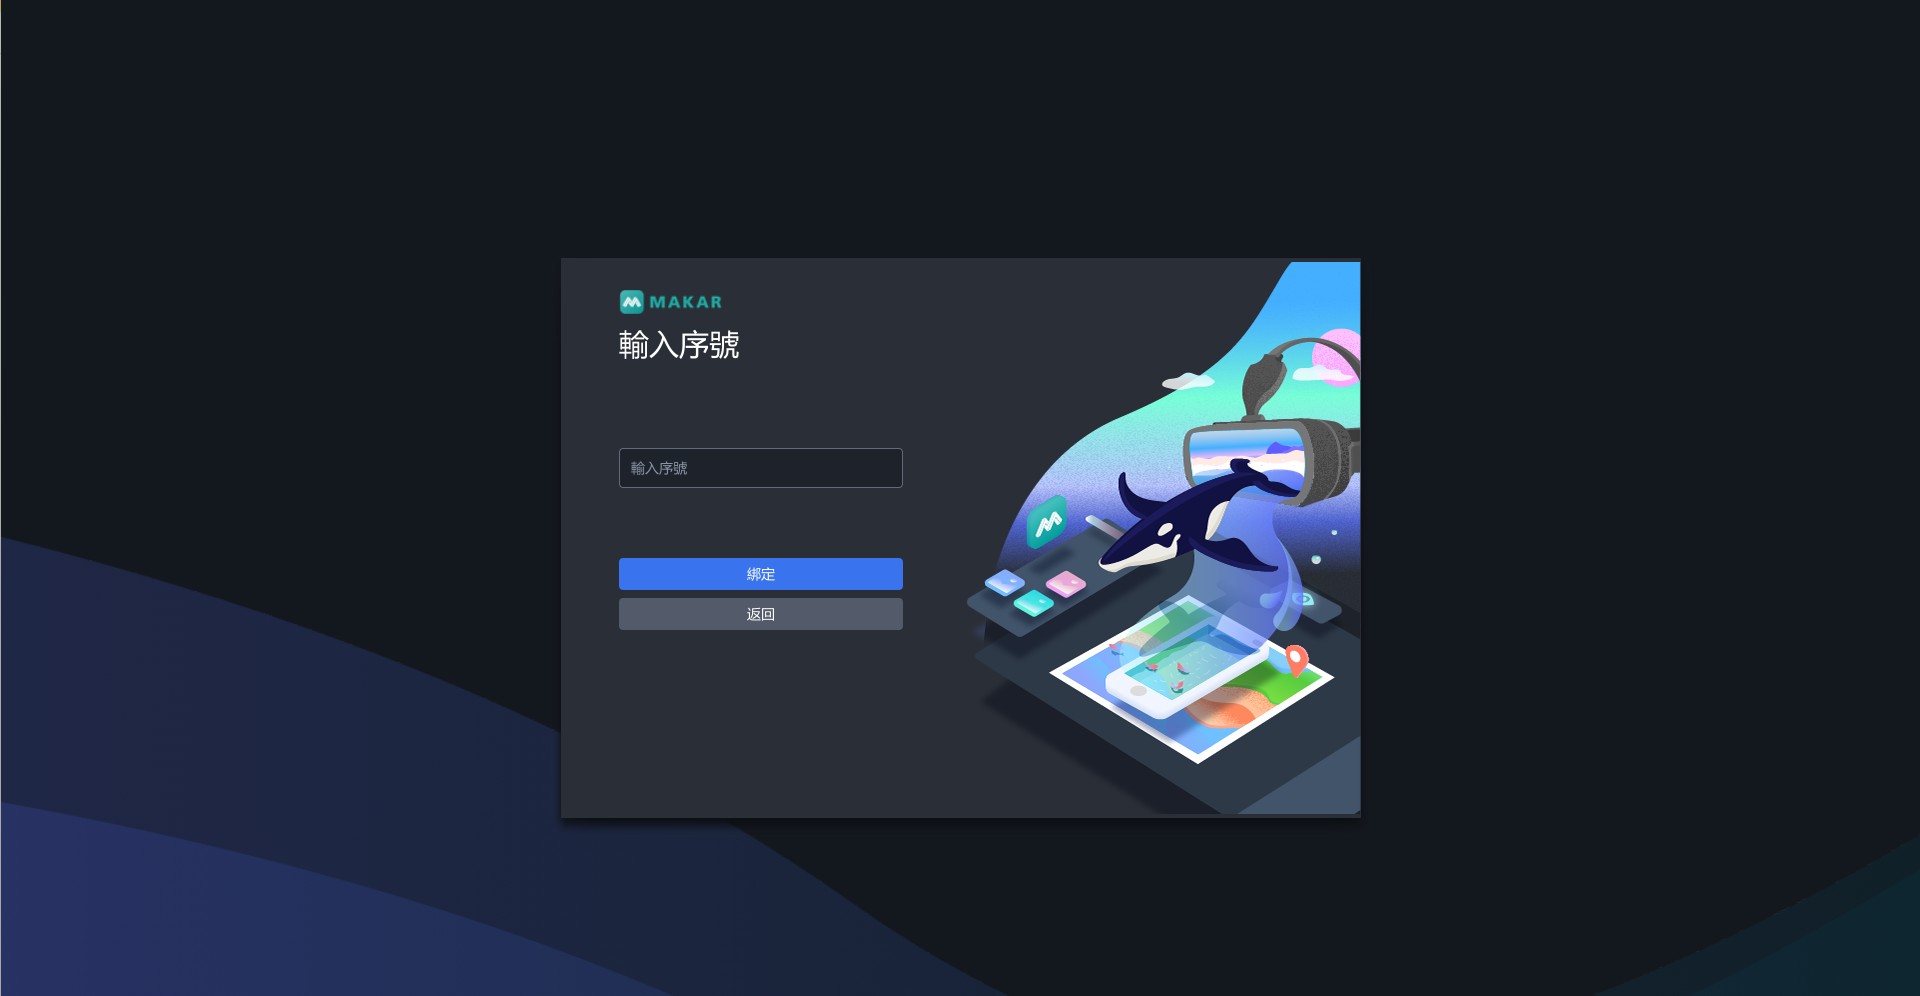
1. Open MAKAR Editor and go to the login page. Click "Enter Your Serial Key" at the bottom left corner.


2. Enter your serial key in the designated field on the serial key page. After inputting the serial key, click "Bind".


3. When the field is locked, it indicates successful binding. Click "Back" to start using MAKAR according to your plan.


Related Posts:
Release Your Bound MAKAR Editor Serial Key
Release Your Bound MAKAR Editor Serial Key
1. Open the MAKAR Editor and go to the login page. Click "Enter Serial Key" at the bottom left corner.


2. On the Serial Key page, the serial key field is locked. Click "Release Unbind".


3. A "Unbind" window will appear. Enter the original locked serial key and click "Confirm" to display a window indicating successful release.
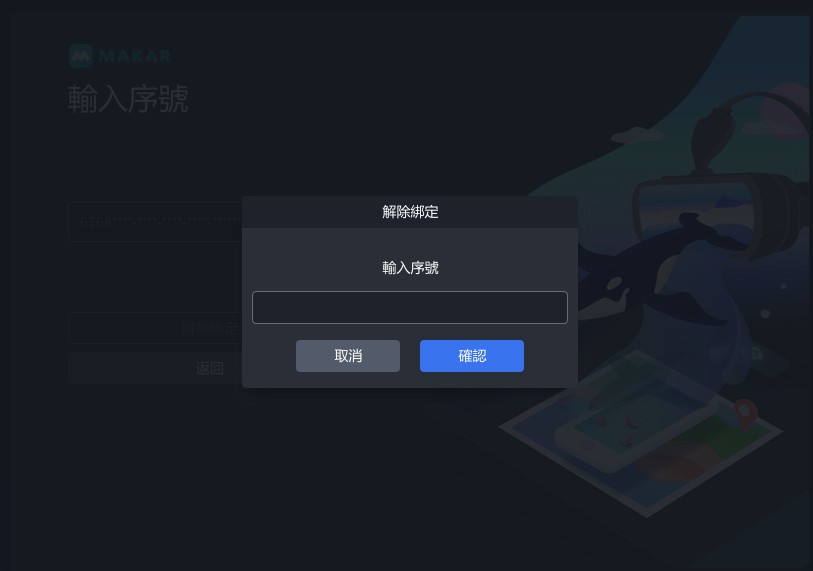 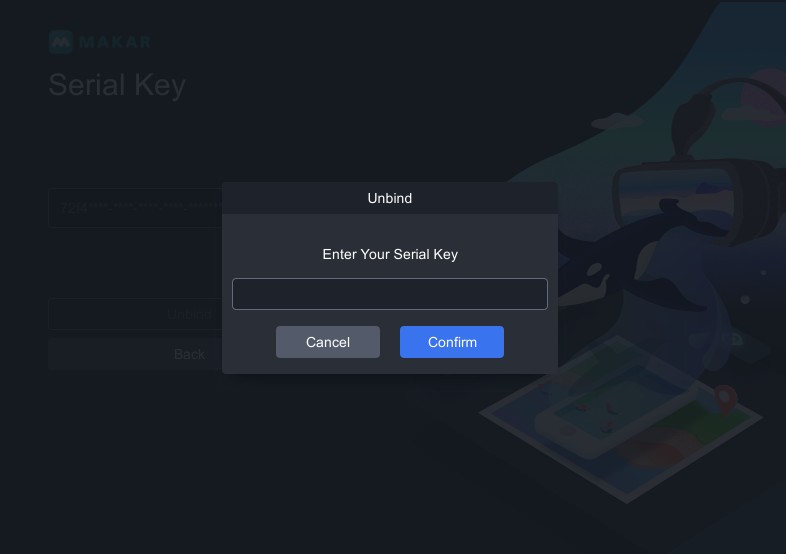  |
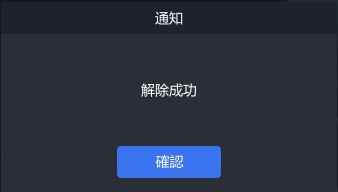 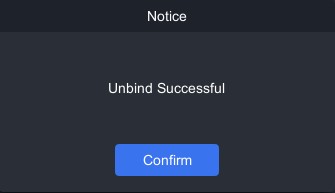  |
| ▲ Input Locked Serial Key | ▲ Release Successful |
4. Return to the serial key page. An empty serial key field indicates successful release of binding.


Related Posts:
Change Language Settings
Change Language Settings
MAKAR Editor provides four languages for users to choose from, including Chinese, English, Japanese, and Korean. Below are the steps to change the language:
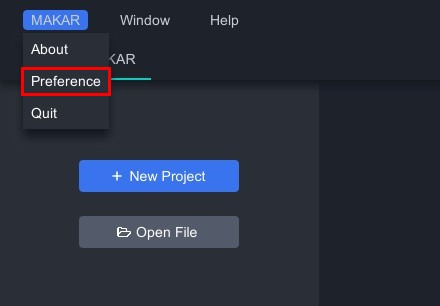
1. Enter MAKAR Editor and click "MAKAR" → "Preferences".

2. In the preferences window, click "General" and select your desired language from the "Language Settings" dropdown menu. Click "Confirm" to successfully change the language.

Related Posts:
Adjust Editing Preferences
Adjust Editing Preferences
When using MAKAR Editor, you can customize settings according to your preferences to better suit your workflow. The following explains how to adjust and change the "Object Generate Position" and "Object Controller" settings:
1. Enter MAKAR Editor and click "MAKAR" → "Preferences".
2. In the Preferences window, click "User", where you'll find options for "Object Generate Positiont" and "Object Controller". Simply select your preferred settings from the dropdown menu.
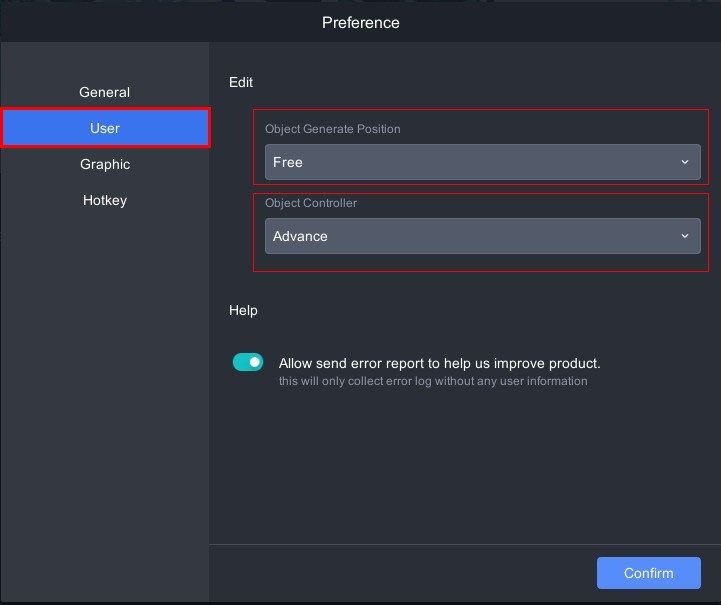
Object Generate Position
Choose between "Free" and "Center", determining the default position of objects when generated.
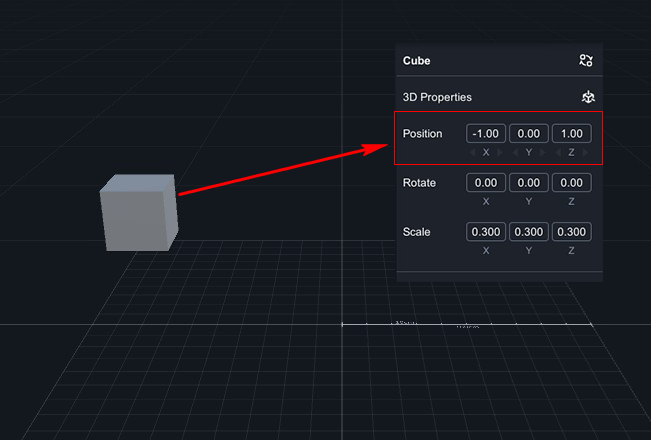 |
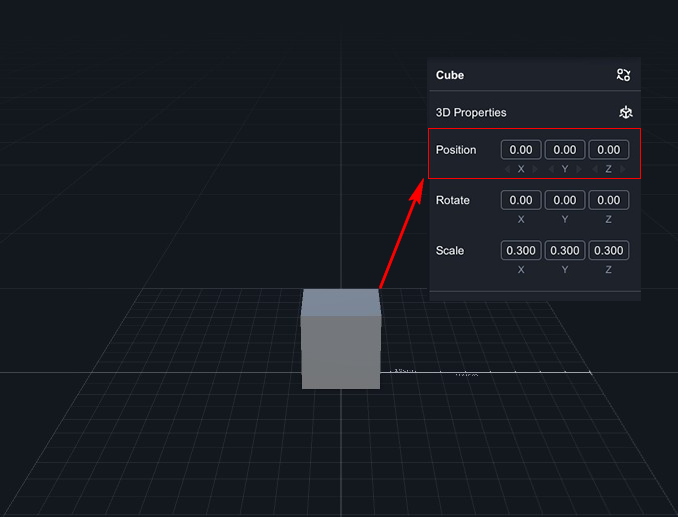 |
| Free:When dragging objects into the editing area, they will be placed in depth and direction according to the user's drag position on the plane. | Center:When dragging objects into the editing area, they will be unconditionally placed at the world origin X: 0, Y: 0, Z: 0. |
Object Controller
Choose between "Basic" and "Advance" to adjust the axis when controlling object movement.
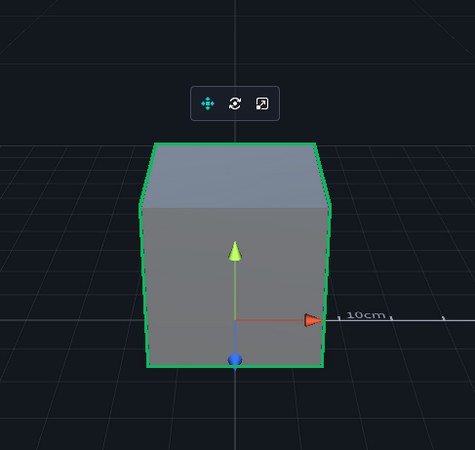 |
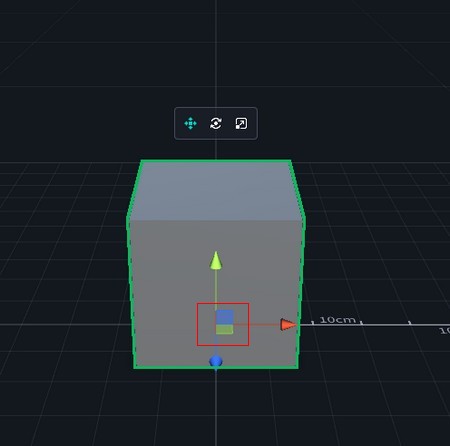 |
| Basic:When moving objects in the editing area, adjustments are made along a single axis. | Advance:When moving objects in the editing area, adjustments are made along all three axes. |
Related Posts:
Adjust Window and Graphics Settings
Adjust Window and Graphics Settings
MAKAR Editor allows you to adjust the image quality, resolution, and window settings, giving you the flexibility to switch according to your preferences. The following instructions and descriptions will guide you through the process.
1. Enter MAKAR Editor and click "MAKAR" → "Preferences".

2. In the preference window, click "Graphic". You will find options for "Quality", "Resolution", and "Window". Simply select your preferred settings from the dropdown menu.

| Quality | Adjust to high, medium, or low quality based on your needs. Higher quality displays maximize detail and showcase changes in object shadows through lighting, while lower quality settings conserve energy by omitting some object shadows and details. |
| Resolution | Choose from various resolutions including 1920 X 1080, 1600 X 900, 1536 X 864, and 1280 X 720. |
| Window | Select between "Windows" and "Full Screen" modes based on your preferences. |
Related Posts:
Change Keyboard Shortcut Settings
Change Keyboard Shortcut Settings
1. Enter MAKAR Editor and click "MAKAR" → "Preferences".

2. In the preference window that appears, click "Hotkey" to set shortcuts for various functions.

MAKAR Editor Default Hotkeys
| Function | Keys |
| Selection Mode | Q |
| Position Mode | W |
| Orbit | E |
| Scale Mode | R |
| Delete Object | Backspace |
| Back to Initial position | H |
| Focus Object | F |
| Coordinate Switch | Z |
| Undo | Ctrl/Cmd+Z |
| Redo | Ctrl/Cmd+Y |
| Save File | Ctrl/Cmd+S |
| Copy Object | Ctrl/Cmd+C |
| Paste Object | Ctrl/Cmd+V |
| Copy and Paste | Ctrl/Cmd+D |
| Select All | Ctrl/Cmd+A |
| Mutiple Select | Ctrl/Cmd+LB |
| Cancel Mutliple Select | Alt/Option+LB |
| Area Selection | Shift+LB |
| Left Click Select | LB |
| Select item within selection area | LB |
| Zoom Camera | Scroll |
| Orbit | RB |
| Truck and Pedestal | Space+LB/MB |
| Zoom in one step | + |
| Zoom out one step | - |
Related Posts:
Reset Your MAKAR Account
Reset Your MAKAR Account
If you wish to change the MAKAR account you initially registered with, you can reset your MAKAR account following the steps below. Please note that the account can only be changed once, so please consider carefully.
1. Click the account section in the upper right corner, then select "Personal".

2. In the personal information window that appears, you can reset your MAKAR account under "Account". The account can only be changed once. Before changing, the account area will be blank, and you can enter the new account here.


Remove Your MAKAR Account
Remove Your MAKAR Account
If you wish to delete your registered MAKAR account, you can follow the steps below
In MAKAR Editor
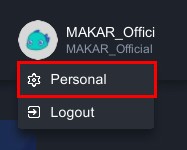
1. Click the account section at the top right corner, then select "Personal".

2. In the profile window that pops up, click "Remove Account".

3. In the delete account window that appears, click "Confirm".

4. Enter your password and click "Confirm" to delete. Deleting will remove all content.

In MAKAR Viewer
You can also remove your MAKAR account on the MAKAR Viewer. Simply click "Account Settings" → "Delete Account".
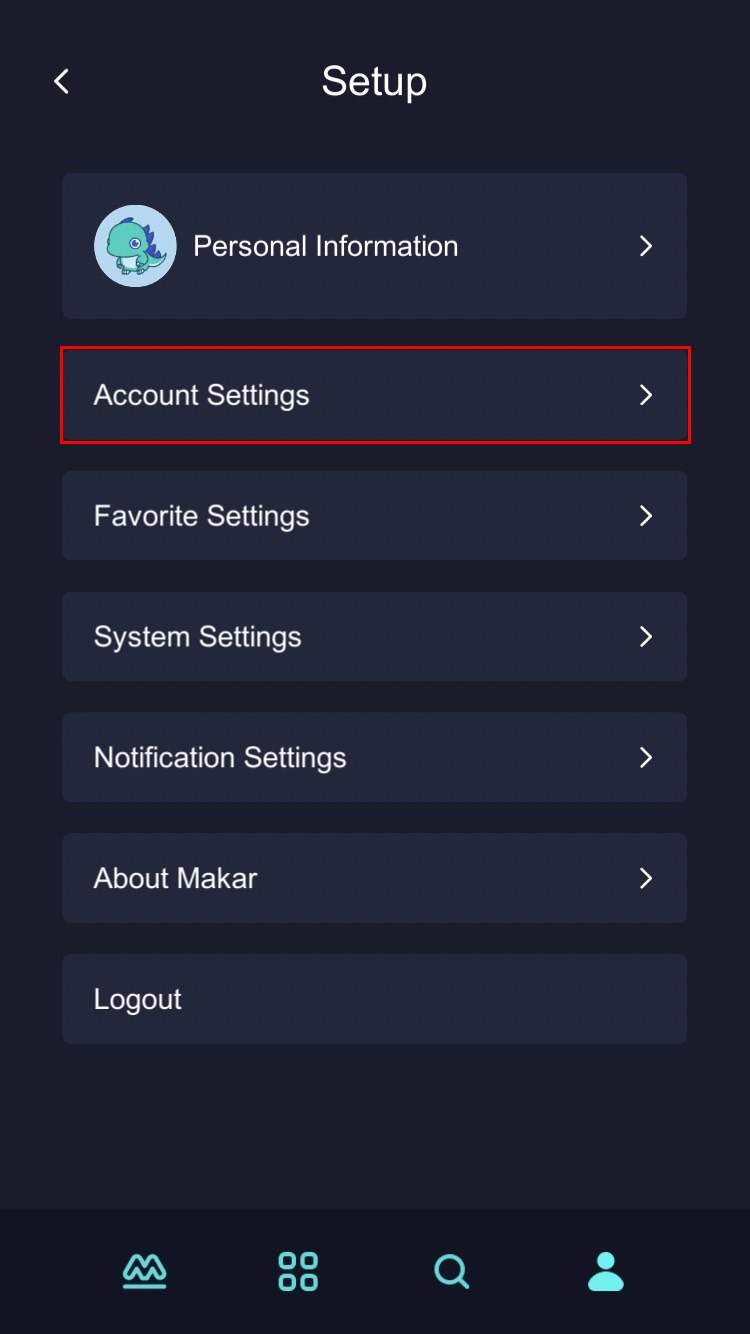 |
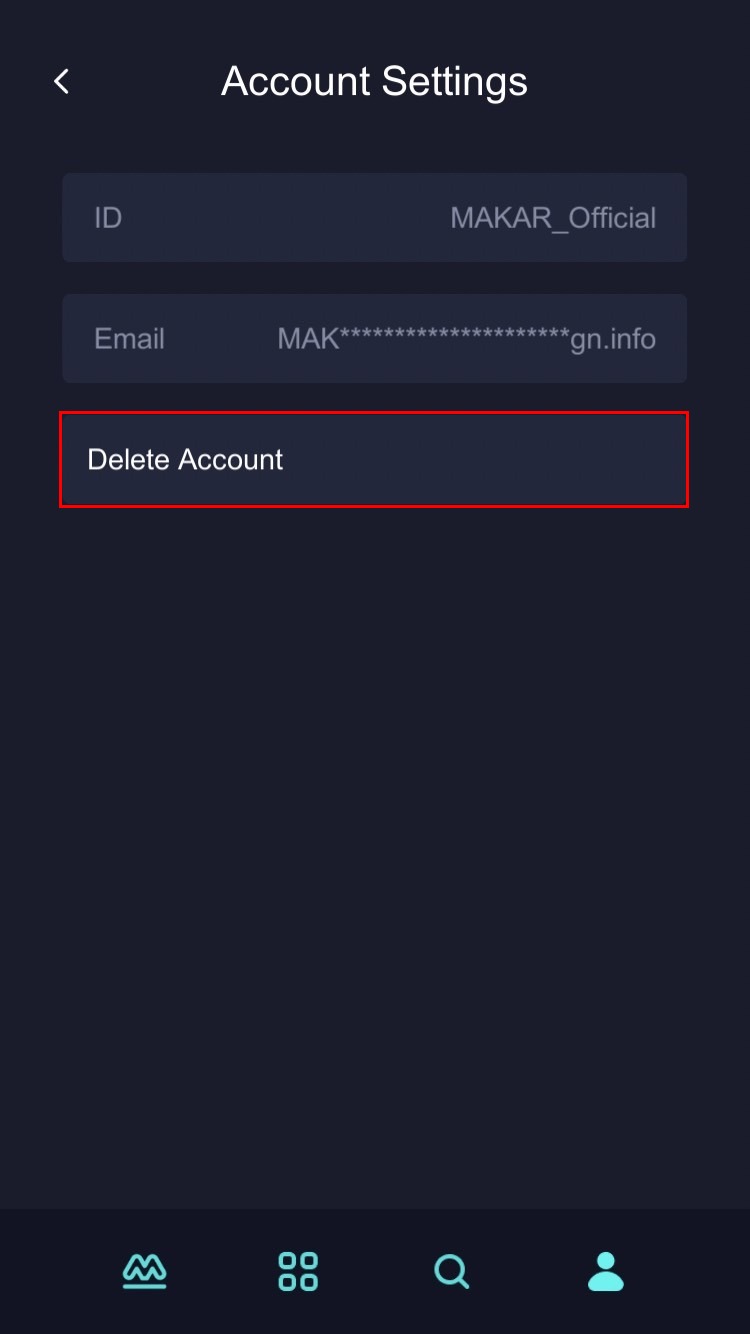 |
| ▲ Account Settings | ▲ Delete Account |
Update Personal Information for Your MAKAR Account
Update Personal Information for Your MAKAR Account
You can adjust the nickname, career, and location of your account according to the following steps.
1. Click the account section in the upper right corner, then click "Personal".

2. In the personal window that pops up, you can see the items for nickname, career, and location. For information about resetting and removing your MAKAR account, please refer to the tutorials on Reset Your MAKAR Account and Remove Your MAKAR Account.

Related Posts:
Check the Status of Your Plan
Check the Status of Your Plan
.MAKAR Editor currently offers four plans: free, standard, advanced, and studio. You can always check your account's plan status while using the editor, including current plan, data usage, published project counts, storage usage, and target images usage. Below is how to view your plan status.
1. Click the account section in the upper right corner, then select "Personal".

2. In the personal information window, click "Data Usage" to see your current plan, project storage quantity, published project counts, storage usage, and target images usage. You can also see your current capacity status based on the bar graph.

Related Posts:
Share Your MAKAR Personal Page
Share Your MAKAR Personal Page
The sharing function of the MAKAR personal page includes QR code and Domain settings. Below are instructions on how to share your MAKAR personal page.
1. Click the account section in the upper right corner, then select "Personal".
2. In the personal information window, click "Share Settings". You can download the QR code or set up your domain to share your MAKAR personal page.
※ For information on sharing projects using a domain name, please refer to the tutorial on "Share Your Project".

Related Posts:
View Project Data Report
View Project Data Report
If you wish to access the project data report for your MAKAR account, you can do so either by MAKAR login or by navigating through the MAKAR Editor. The following steps will guide you through accessing it via the MAKAR Editor.
1. Click the account section in the upper right corner, then select "Personal".

2. In the profile window that appears, click "Data Analysis."

3. A MAKAR member login page will appear. Enter your account credentials and click "Submit".
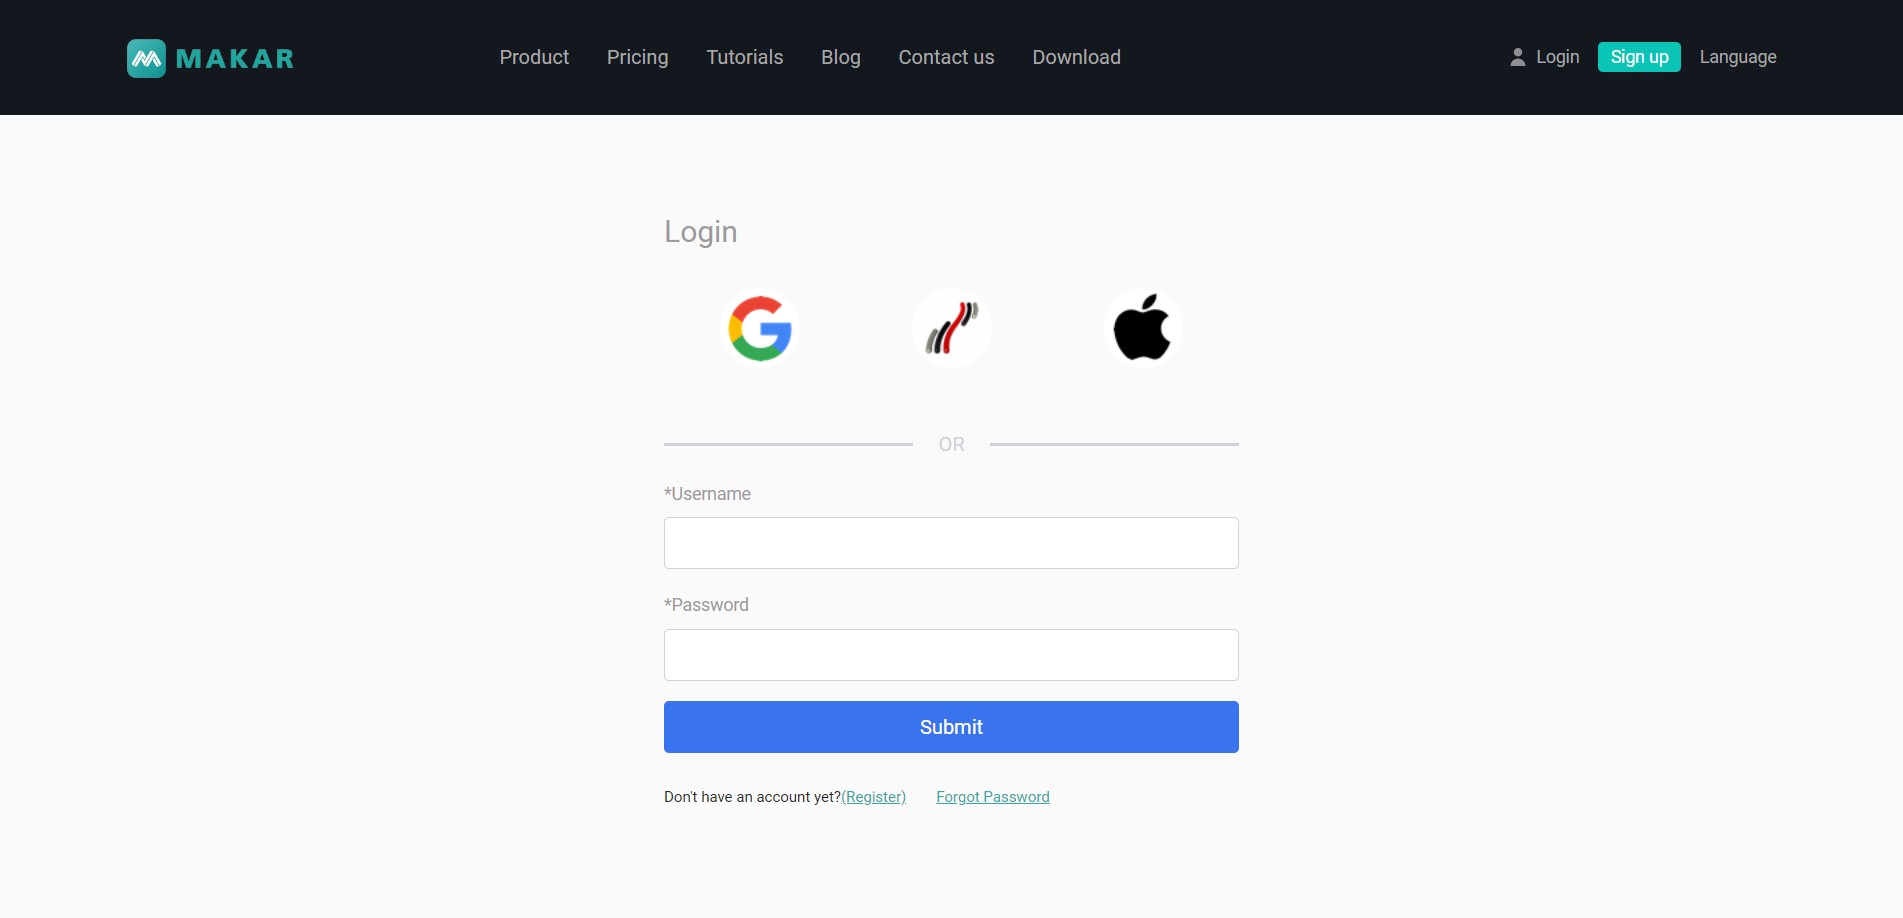
4. Once logged into the member area, click "Data Analysis" on the left sidebar.

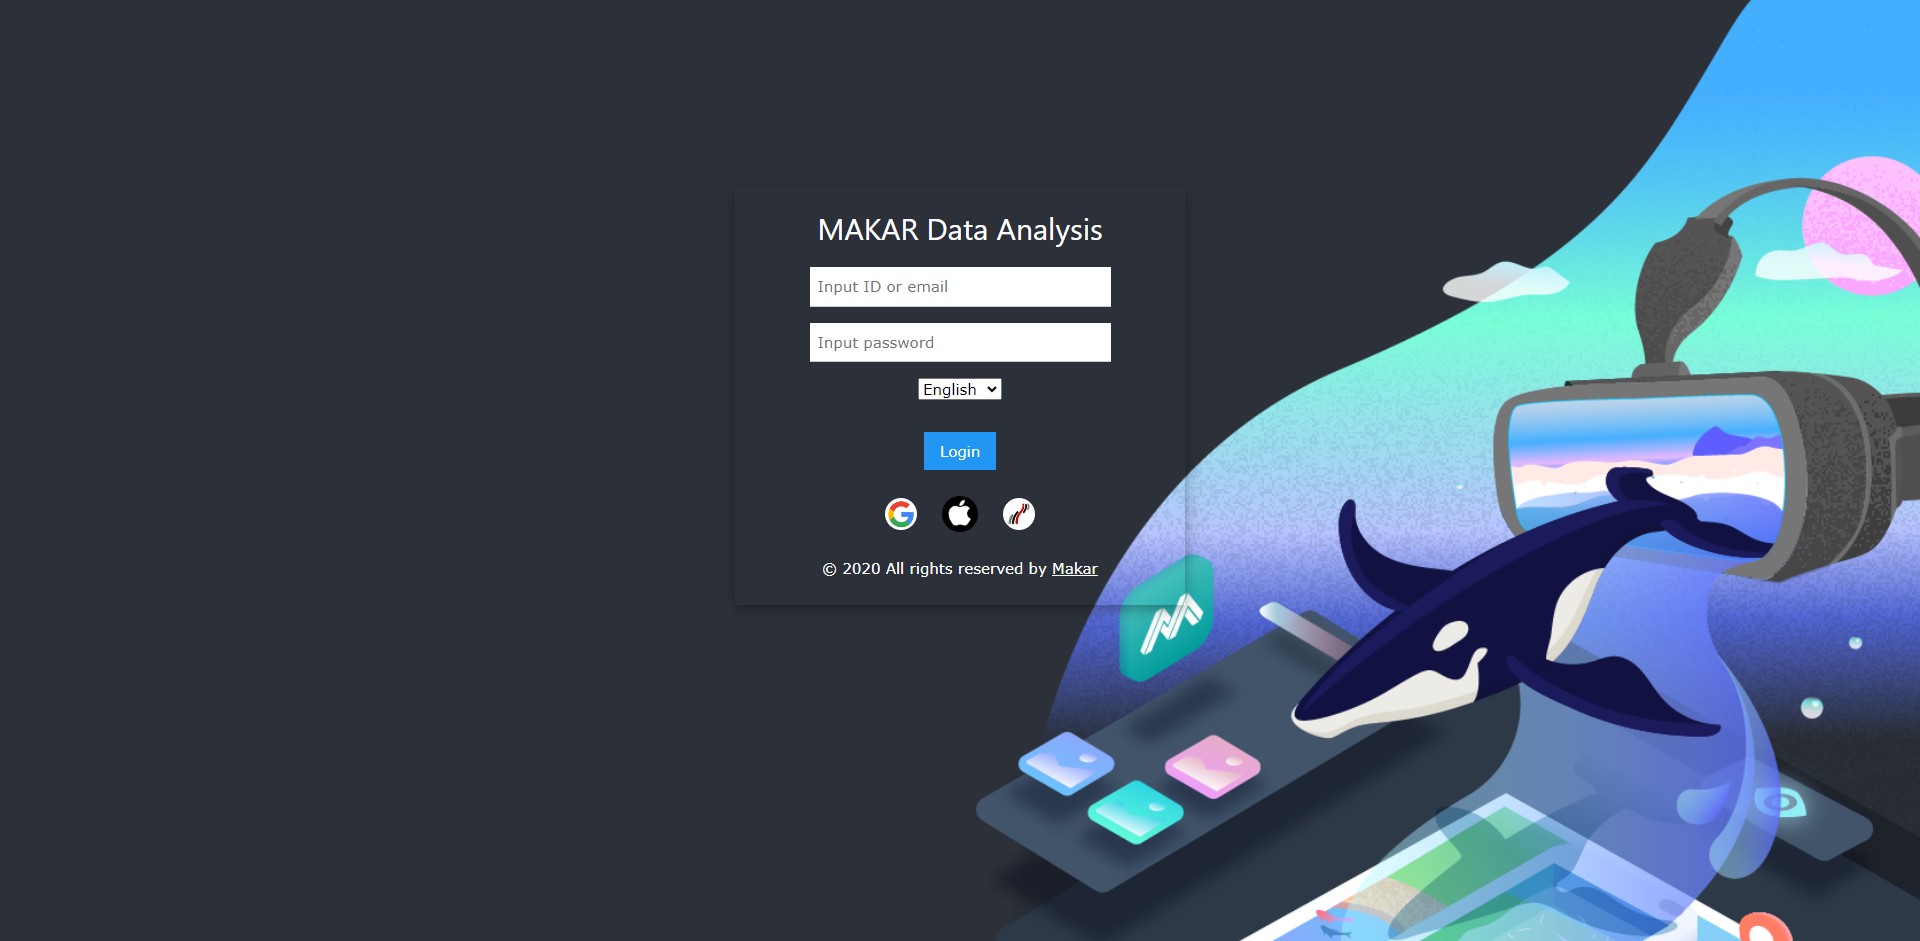
5. Another login page for MAKAR data analysis will appear. Enter your account credentials again and click "Login."
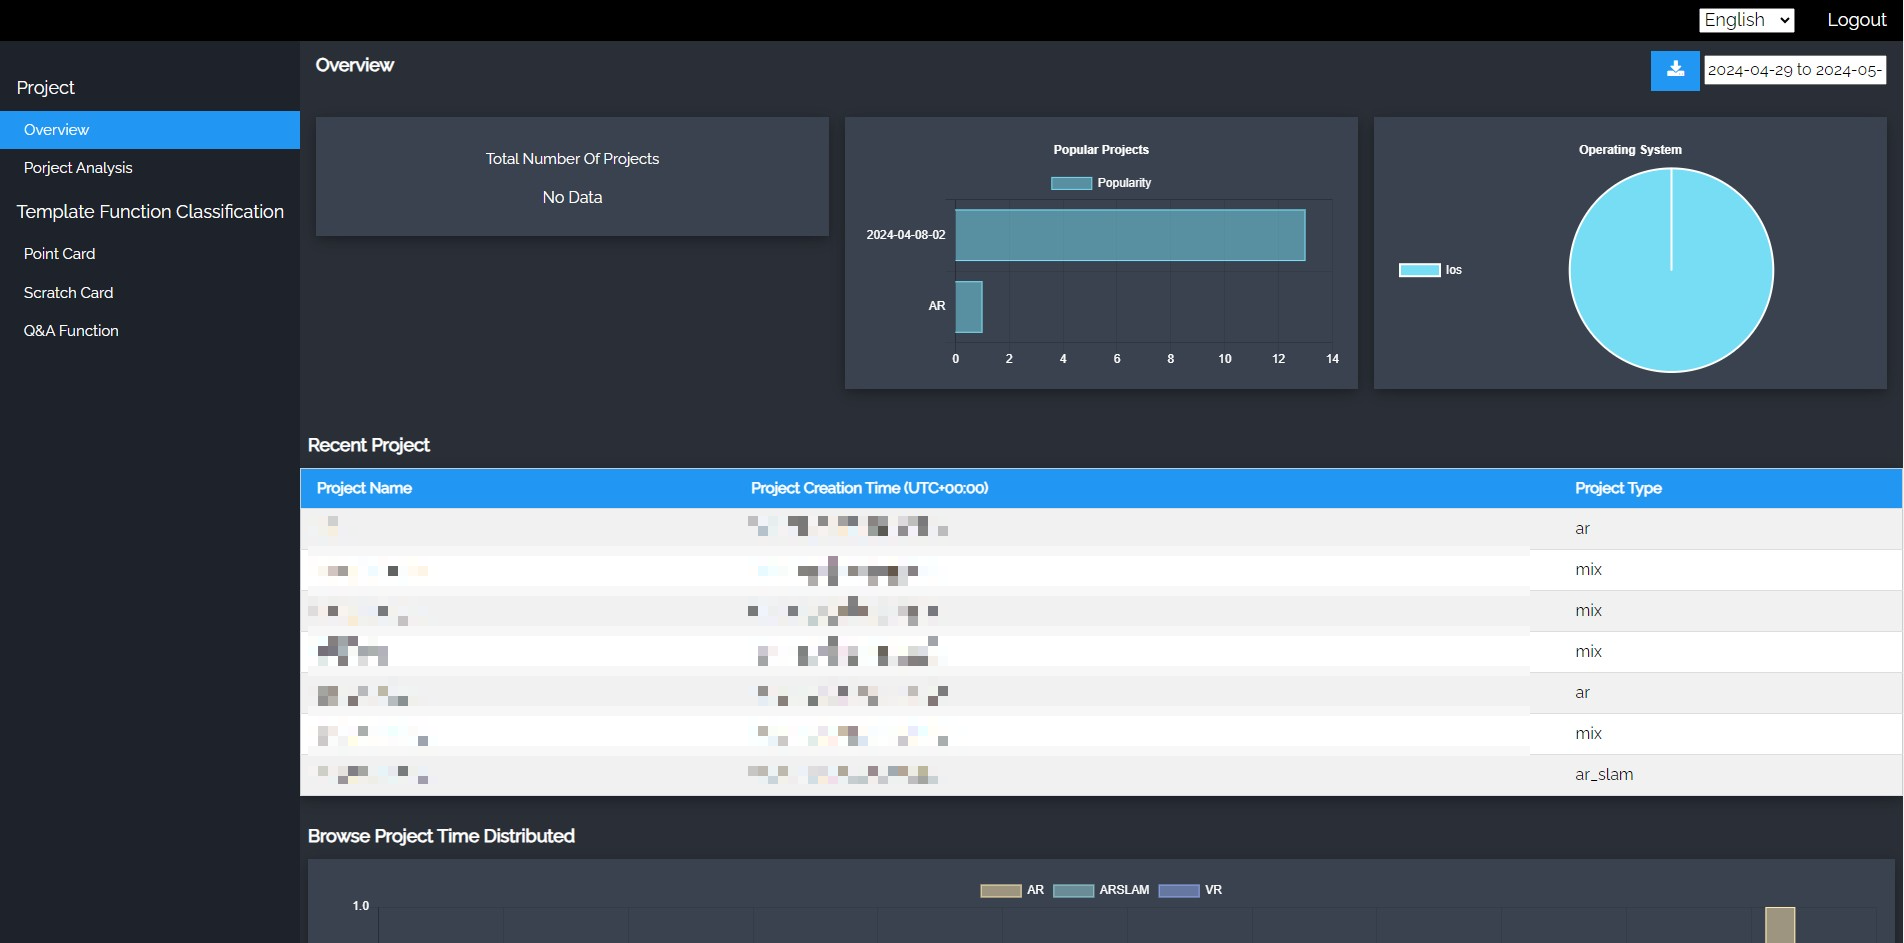
6. You will then enter the data analysis repository, where you can view the analytics for each project.
Related Posts:
Change Your MAKAR Password
Change Your MAKAR Password
If you wish to change your MAKAR account, proceed to log into your account through the MAKAR member login path.
1. After logging in, enter the member area and click "Change Password".

2. Enter your old password and new password, then you can successfully make the modification.

Augmented Reality (Image)
Augmented Reality (Image)
What is Augmented Reality (Image)?
Augmented Reality (Image) is an AR experience that quickly presents 3D digital content by scanning real-world images through mobile devices. The underlying technology behind it is Image Target, which is a common AR recognition technique. By using MAKAR Editor, users can create Augmented Reality (Image) projects, freely adjust the images and trigger digital content such as 3D models, images, or videos. Finally, users can scan their created projects with mobile devices to achieve immersive experiences in creating the metaverse.
How to create an Augmented Reality (Image) project?
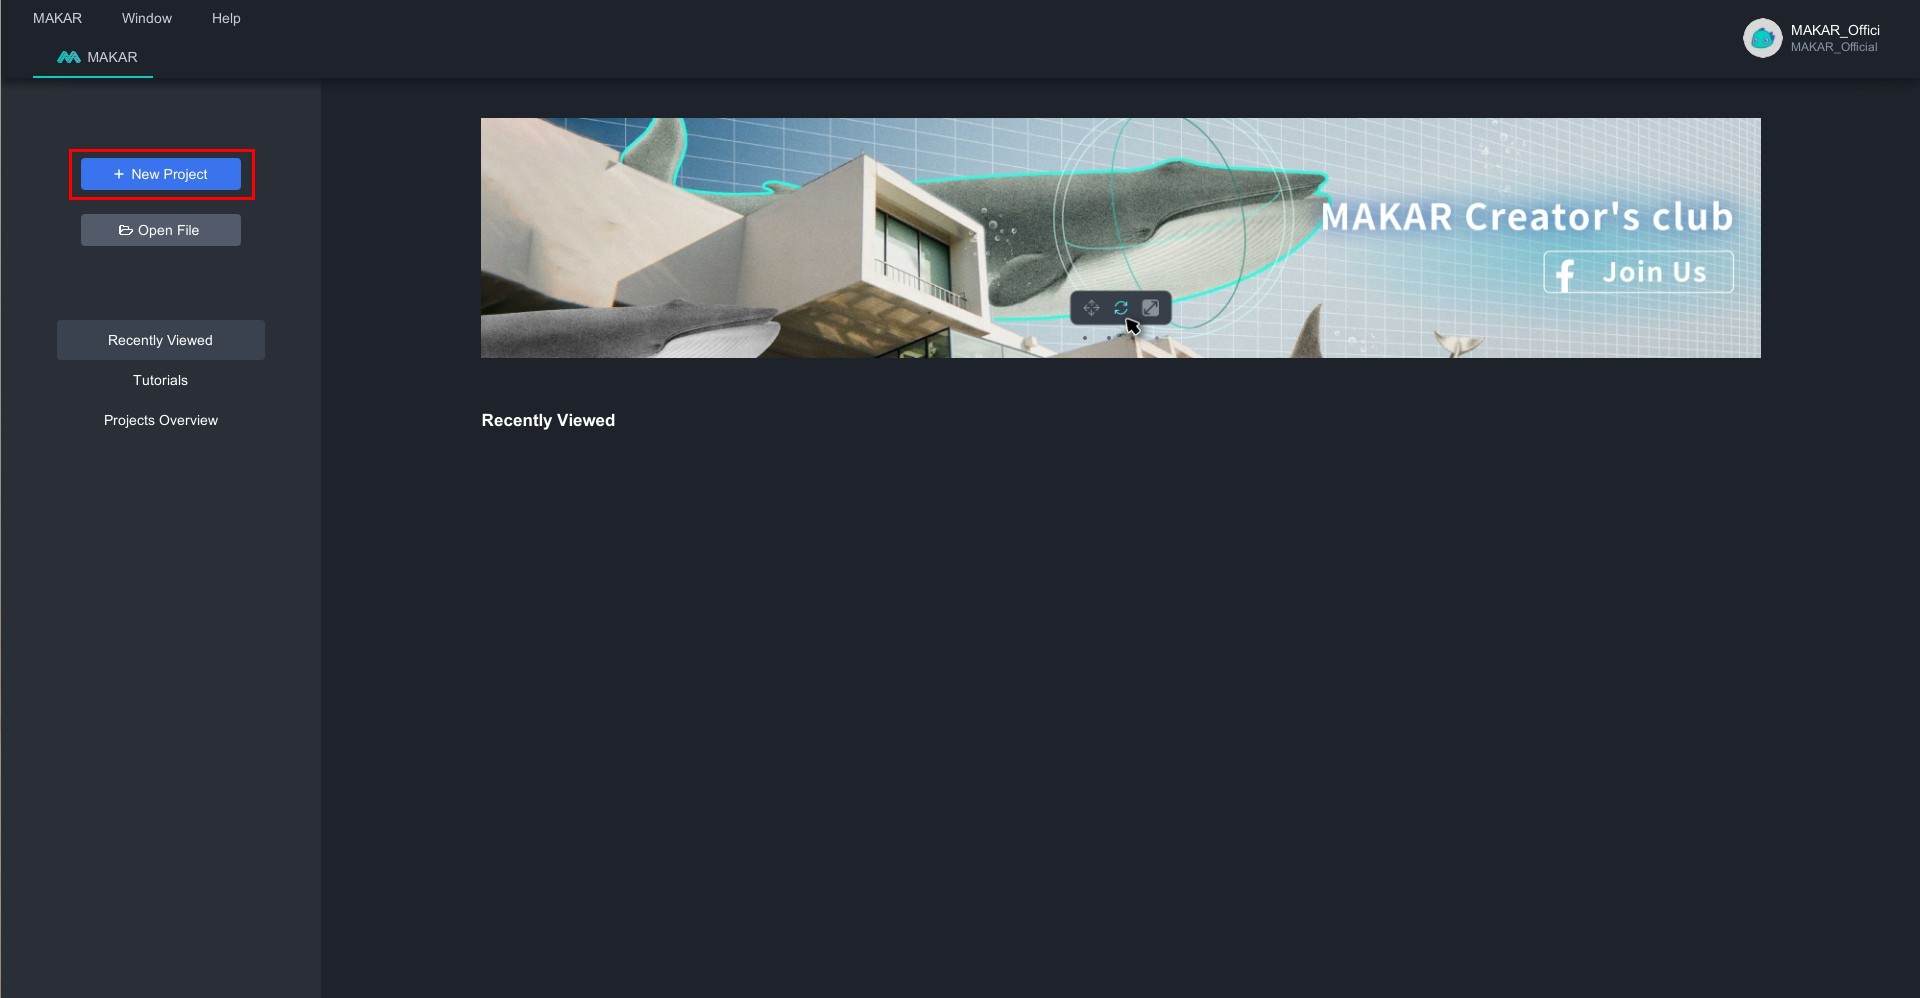
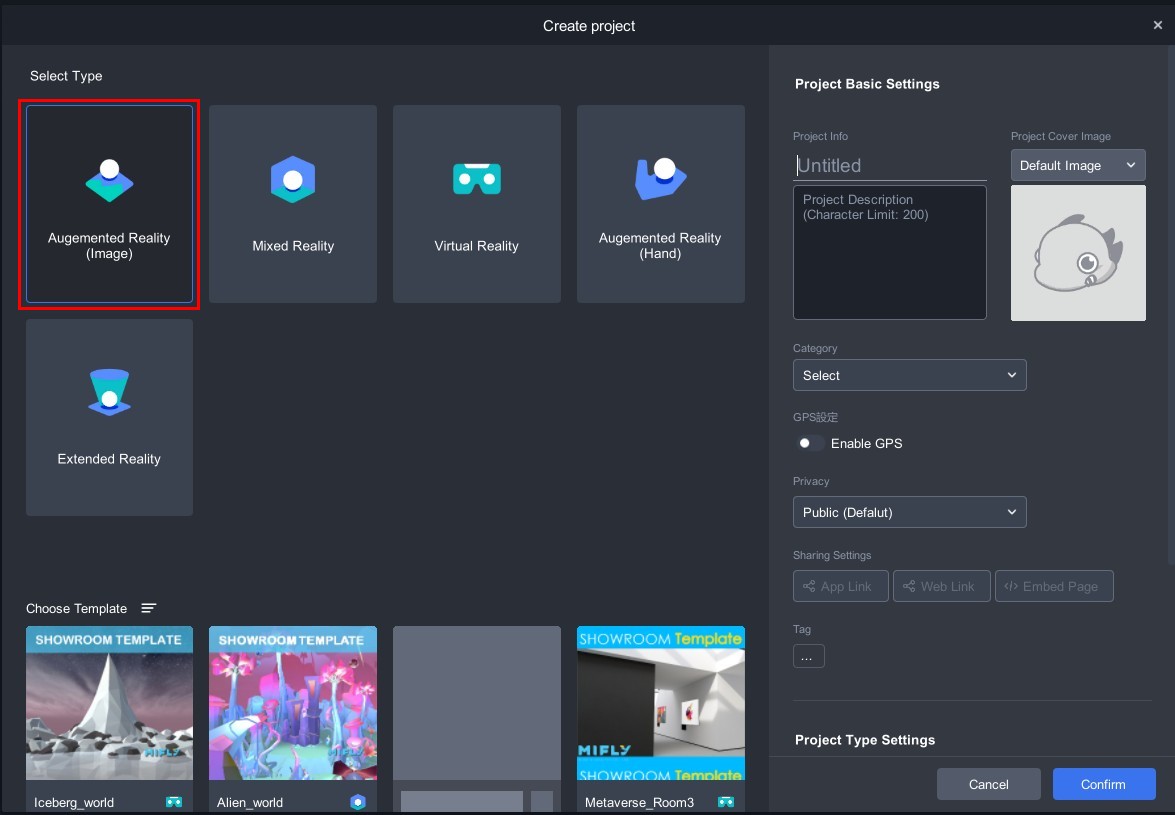
1. Click "New Project" on the left side of the MAKAR Editor.


2. In the pop-up project creation column, select "Augmented Reality (Image)" as the type. The right sidebar, please refer to the basic settings in "Complete Basic Project Settings".
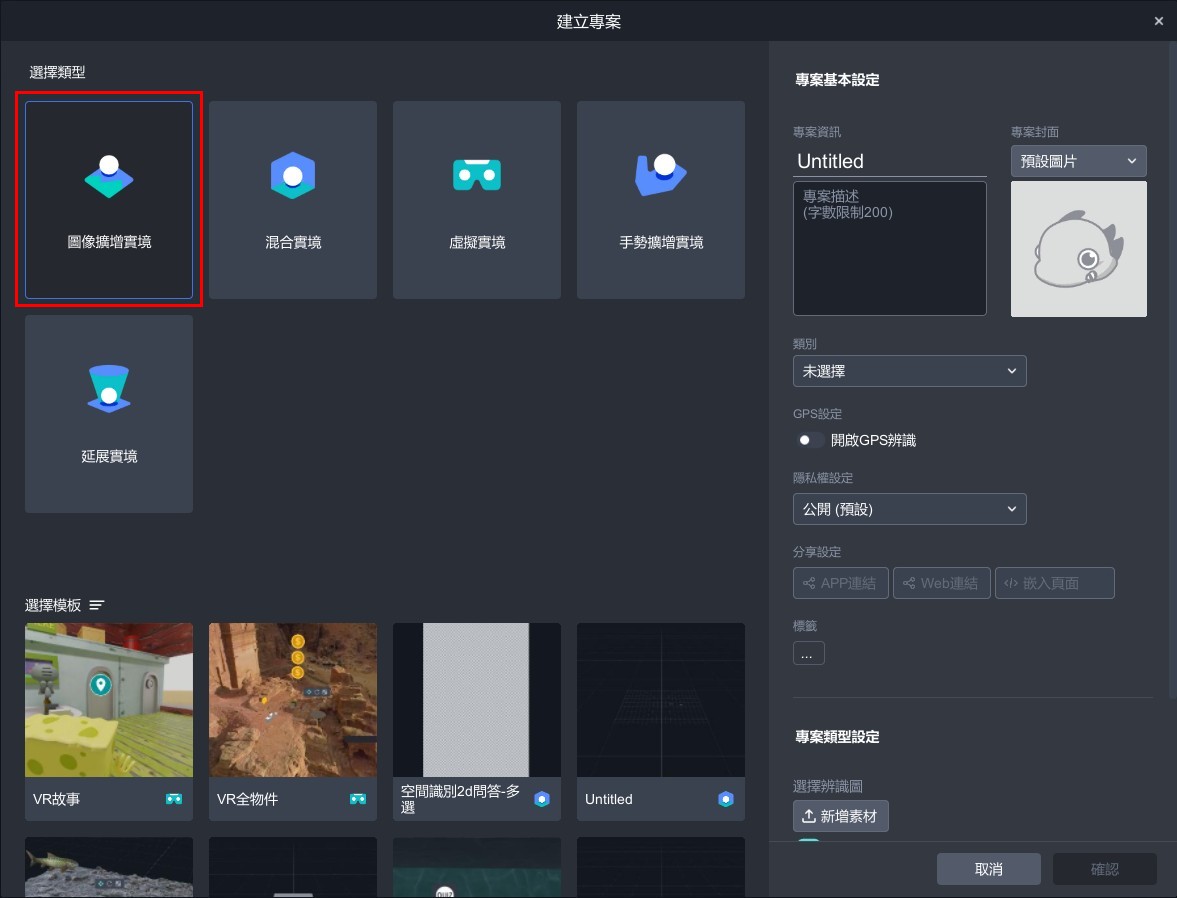
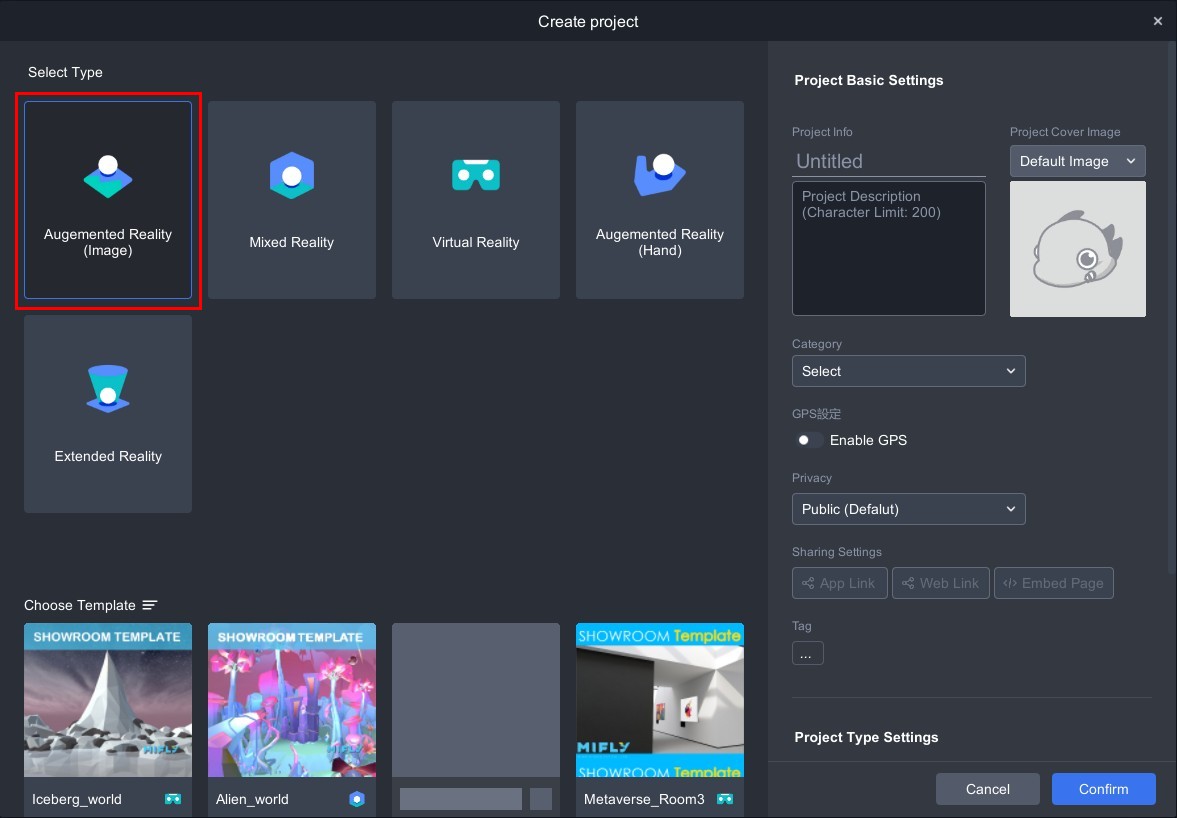
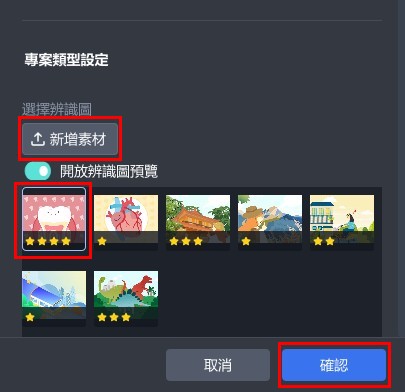
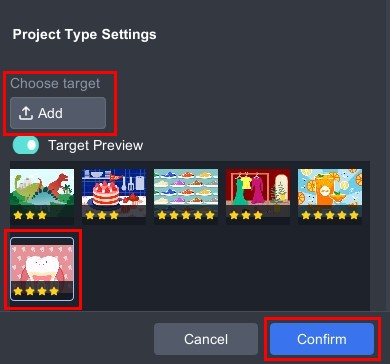
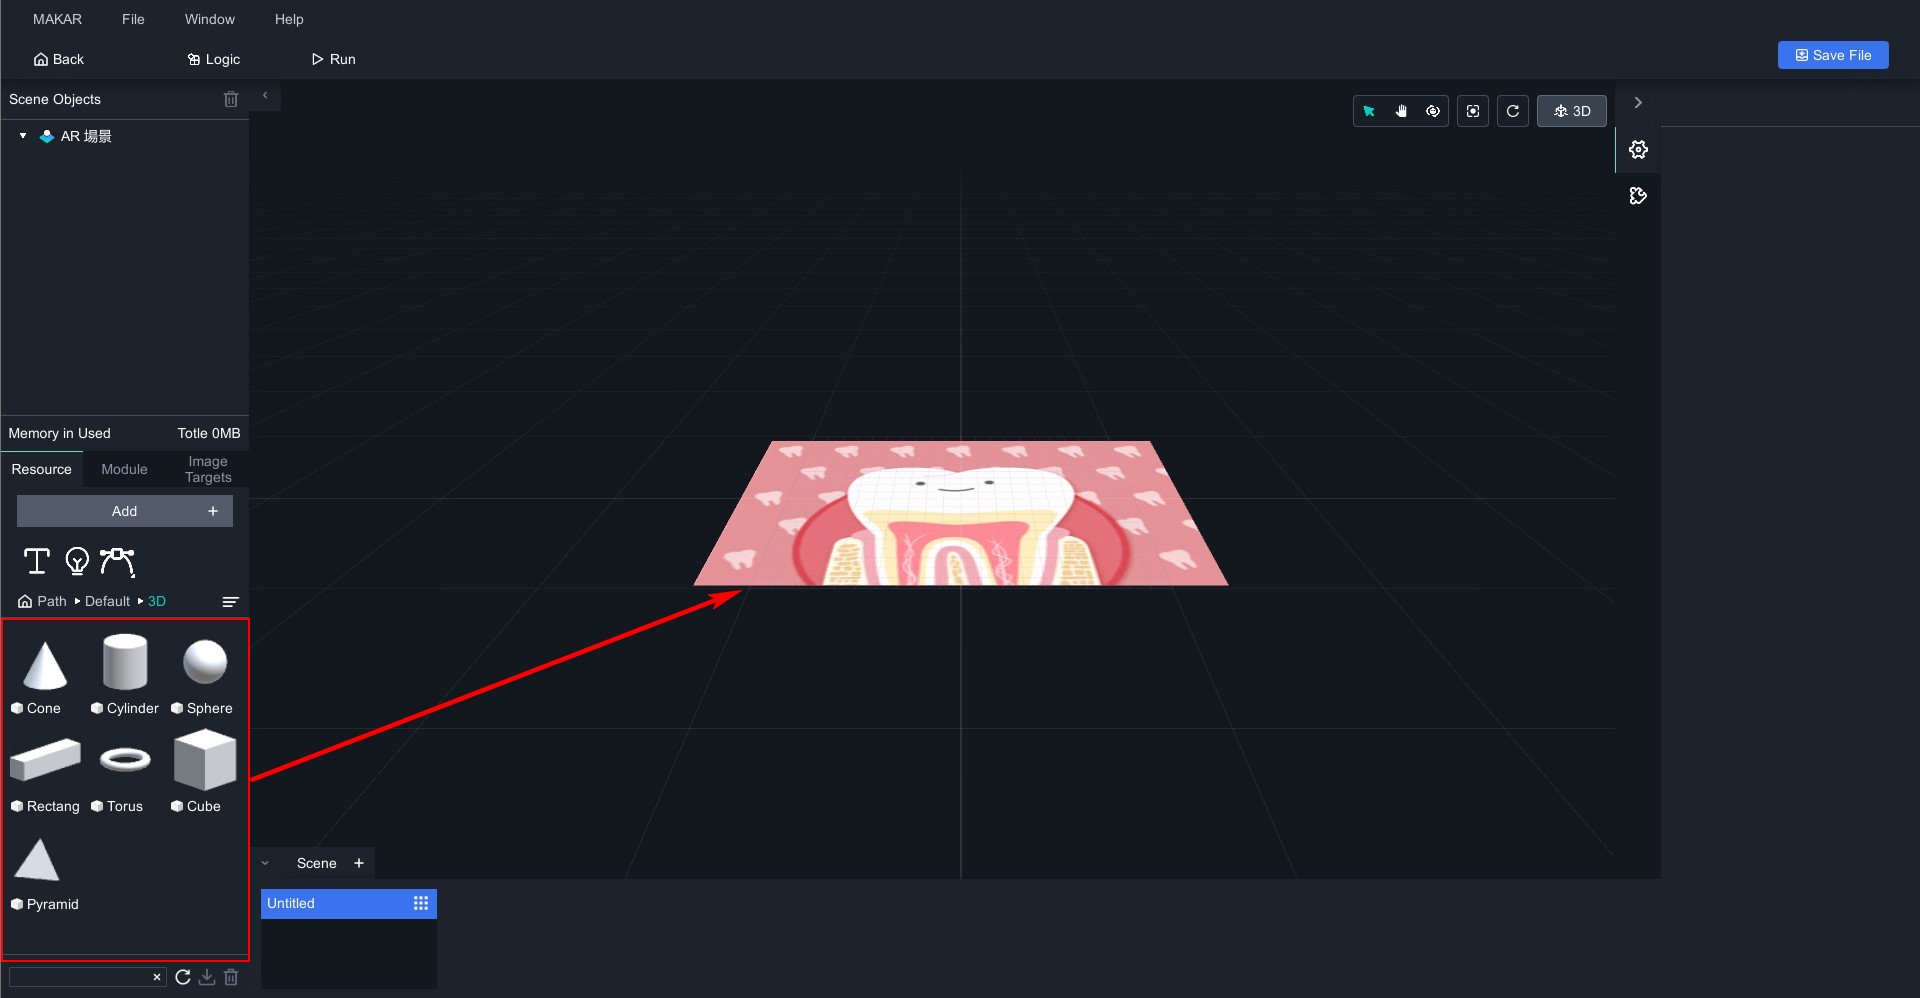
3. In the right side project type settings column, click "Add" to upload a JPG image to add your image target. All uploaded image targets will be previewed here in the future. After selecting an image, click "Confirm."
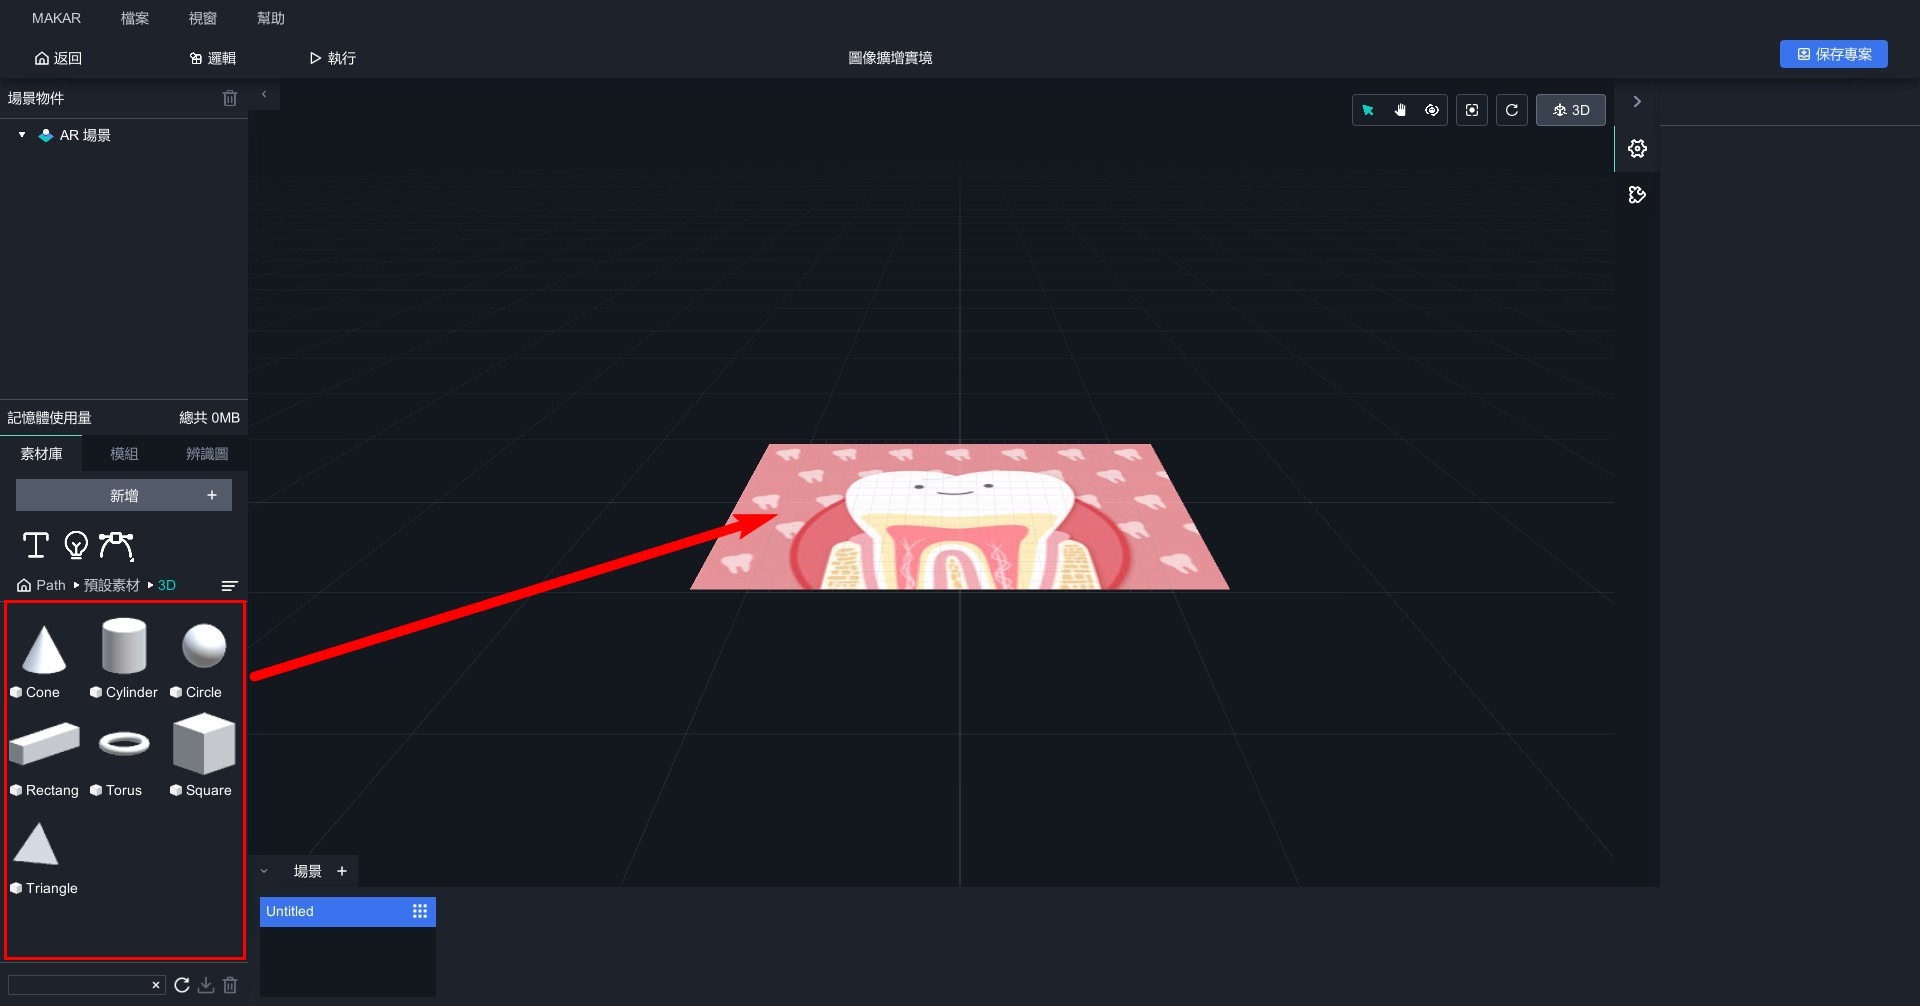
4. Successfully enter the Augmented Reality (Image) project, drag objects to the scene above the image target, and adjust the appearance of the image target you envision.
Related Posts:
Augmented Reality (Hand)
Augmented Reality (Hand)
What is Augmented Reality (Hand)?
How to Create Augmented Reality (Hand)?
1. Click "New Project" on the left side of MAKAR Editor.

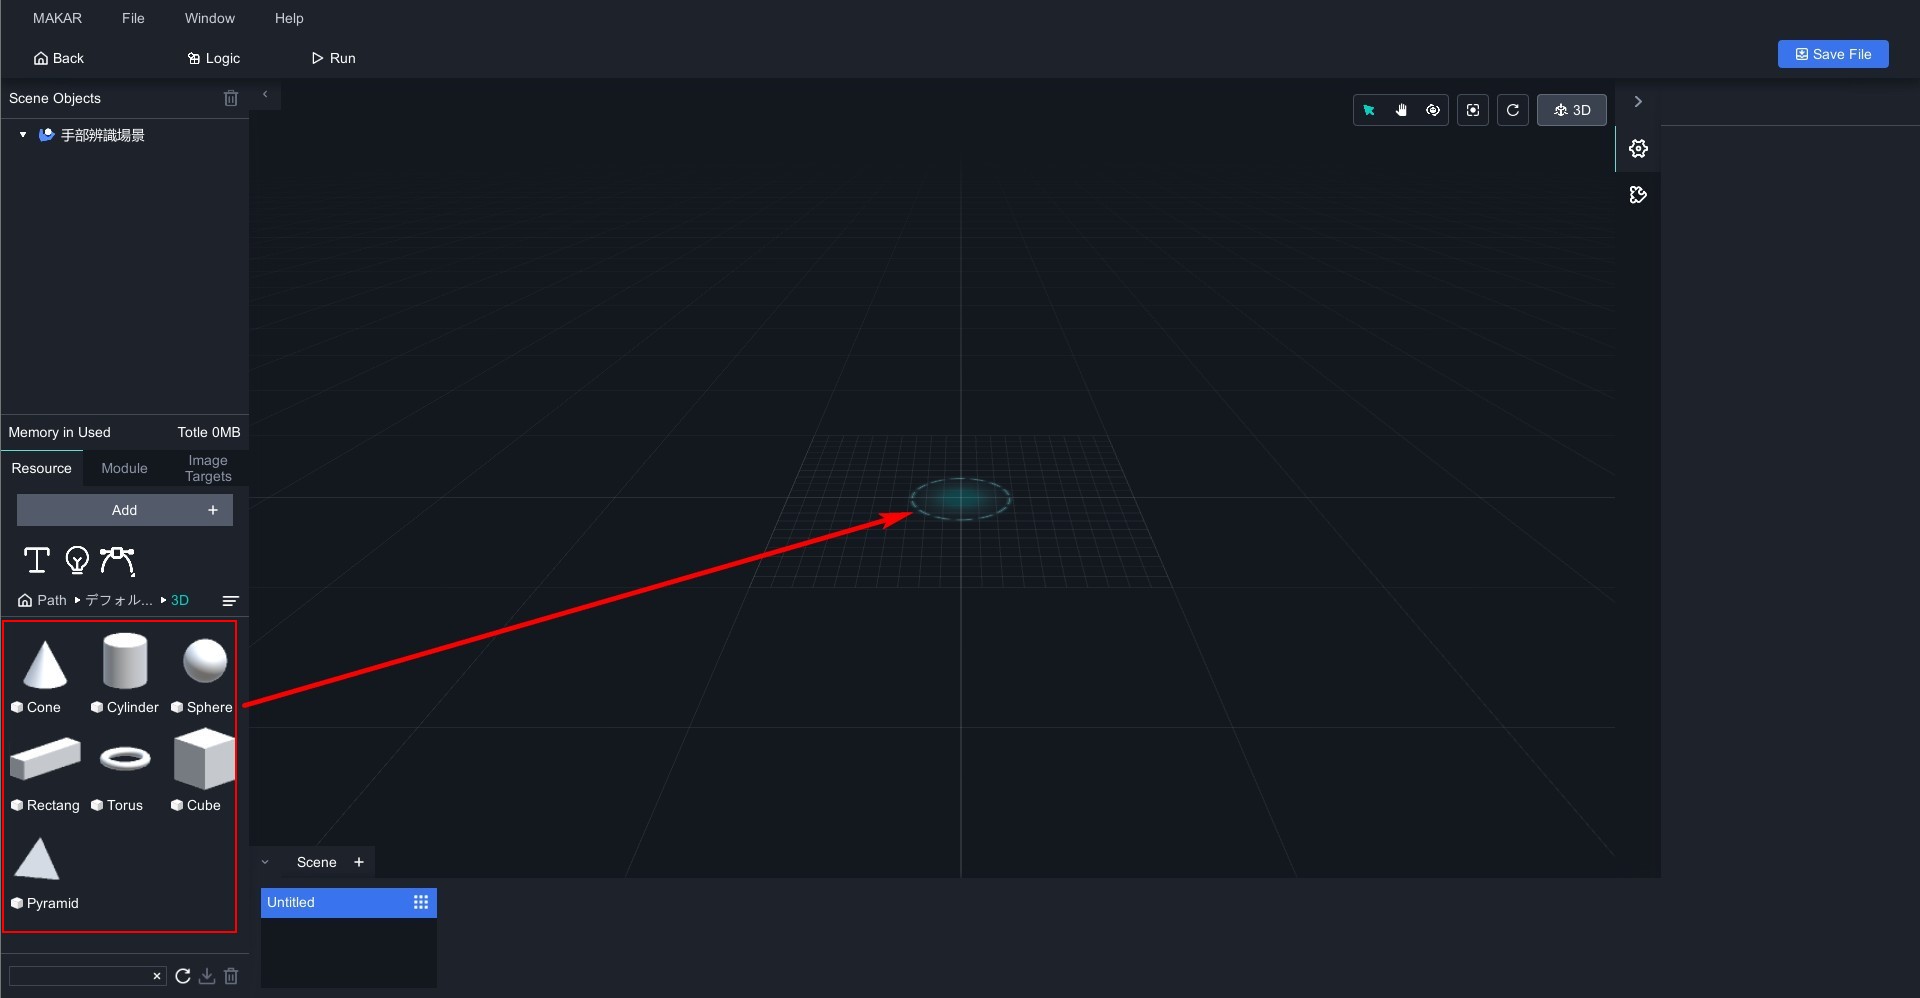
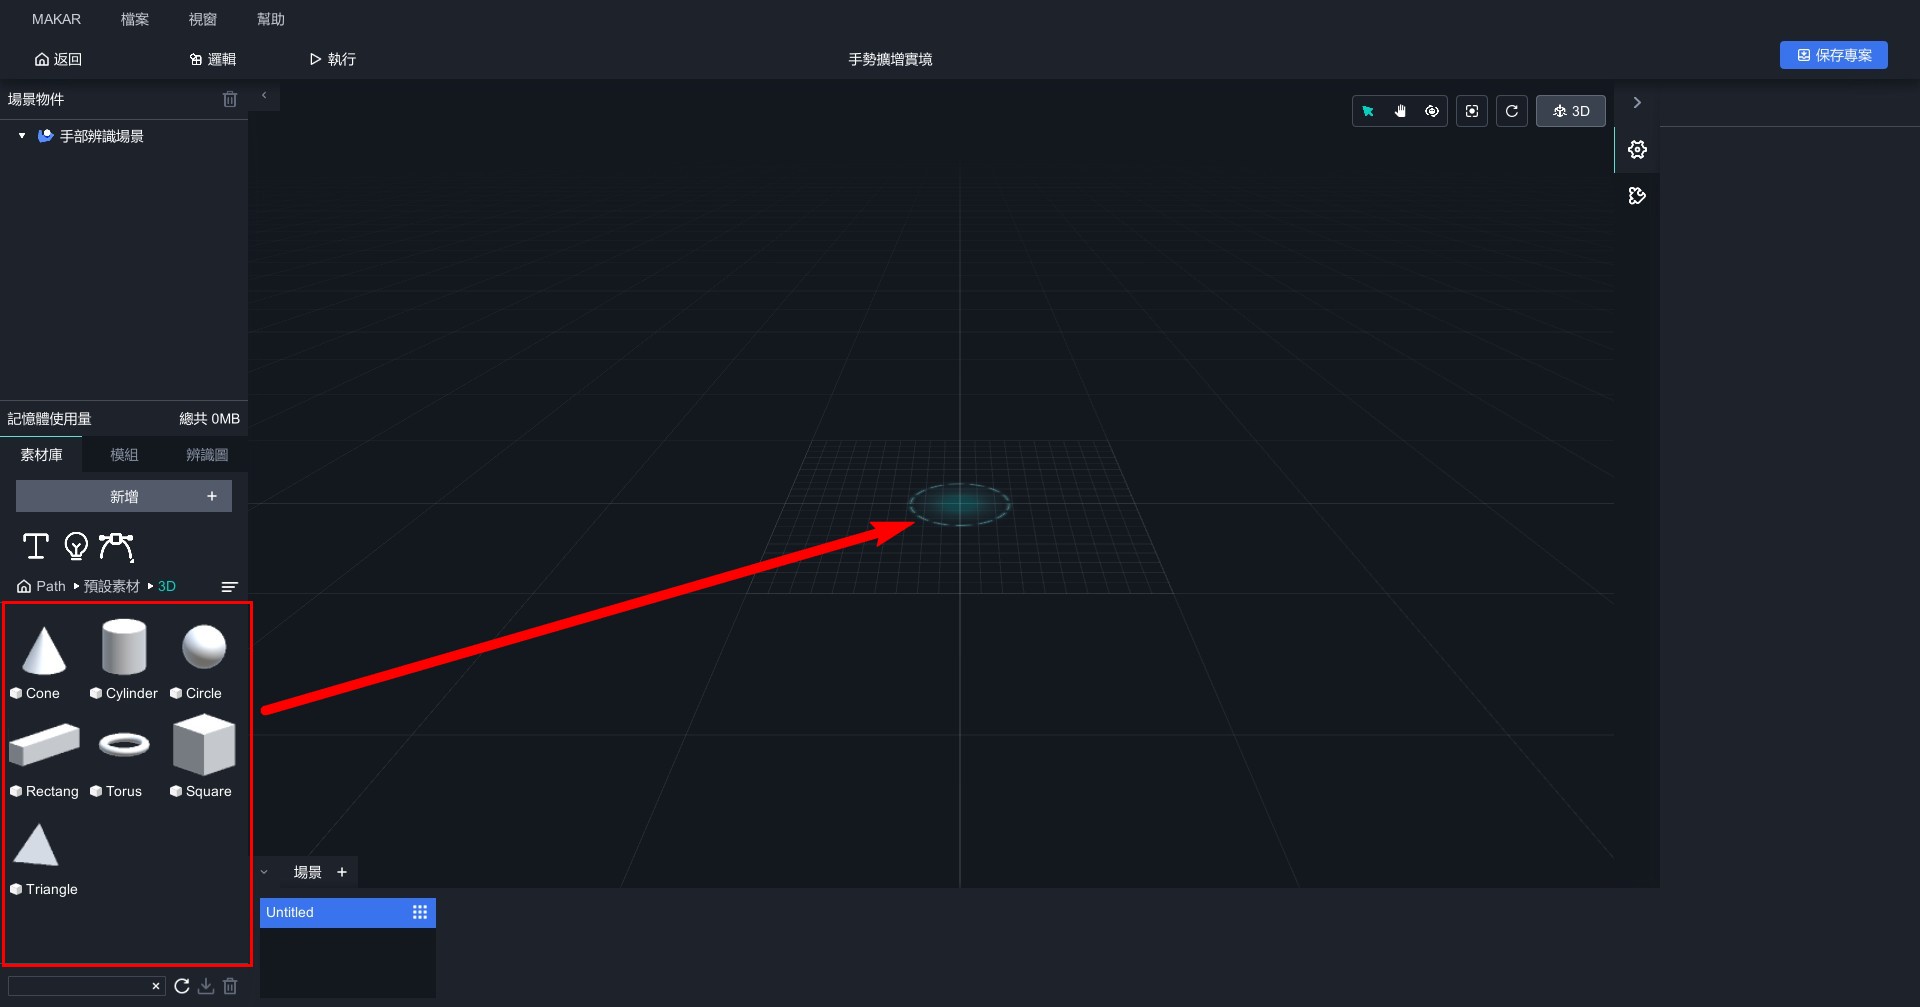
2. In the pop-up project creation window, select "Augmented Reality (Hand)" as the project type. Refer to the settings in the "Complete Basic Project Settings" section for configuration options on the right side. Finally, click "Confirm."


3. Once successfully entered the Augmented Reality (Hand) project, the green dot represents the center of the hand. Drag objects into the scene and adjust them to your desired appearance for hand gesture recognition presentation.
Related Posts:
Share Your Project
Share Your Project
When you finish creating a project in MAKAR Editor, there are several ways to share your project. Below are the types of sharing and the paths to do so.
Select the project you want to share, click "![]() " → "Settings" or "Share Project" to open the sharing window.
" → "Settings" or "Share Project" to open the sharing window.


| 1. Project QR Code | QR codes are available in three sizes: X1, X2, and X3. Download the project QR code according to your size requirements. ※ Open the project using the app. |
| 2. App Link | Click to copy the link to open the project. ※ Open the project using the app. |
| 3. Web Link | Click to copy the link to open the project on the web. |
| 4. Embed Page | Click to get the embedded code for web embedding, and adjust the size according to your requirements. |
WebXR Embedding Instructions

| 1. Size | Adjust the size of your Web XR project. |
| 2. Domain | Change to your own service domain. ※ For standard, advanced, studio users only. |
| 3. Code | Provide the project code for embedding, which can be copied. |
To change the domain:Go to the MAKAR Editor homepage, click on the user account in the top right corner → "Personal", then click "Share Settings" on the left side, and change the domain in the "Domain Setting" field according to your preference. Please refer to the tutorial on "Share Your MAKAR Personal Page".
Related Posts:
Add Your Resources
Add Your Resources
Add objects to your resource
Click "Add" on the left-side resource library to upload images, videos, 3D models, audios, and panorama images.

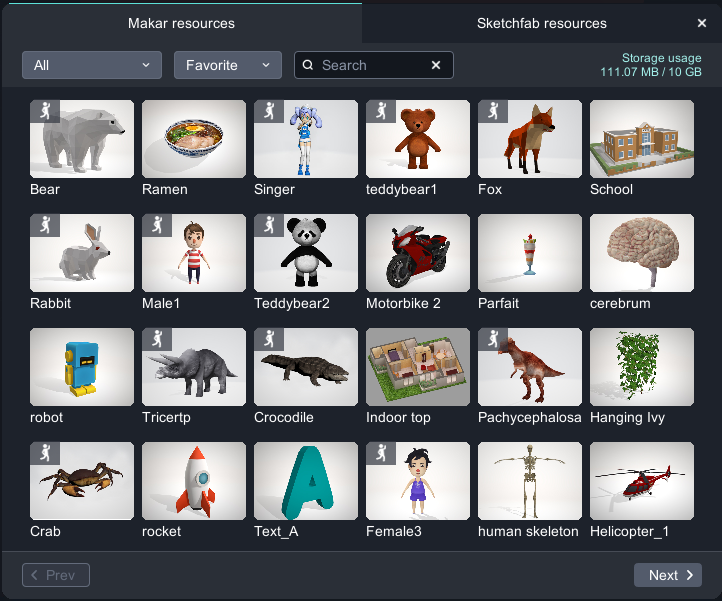
Download 3D objects from the online resources
Click "Online Resources" in the left-side resources, providing access to the MAKAR resources and Sketchfab resources. Click "![]() " to view assets, and click "
" to view assets, and click "![]() " to download models.
" to download models.
 |
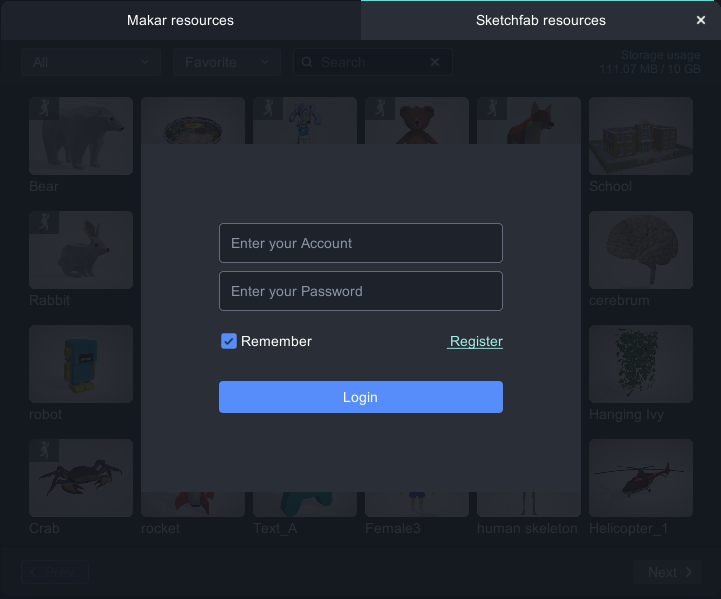 |
| 1. In the MAKAR resources, click " |
2. To access the Sketchfab resources, you need to register an account and log in. Click "Register" to register. |
If you have uploaded your own models or downloaded models from the resources, you can drag and drop them directly from the resources into your scene, and then you can start creating!

Related Posts:
Manage Your Resources
Manage Your Resources
The MAKAR Editor's resource library can accommodate various types of assets such as 3D models, images, and media. You can use basic functions to manage the Resources, including moving assets, adding folders, deleting assets, exporting assets, and searching for assets. The following will explain the basic functions for managing MAKAR resource library.
|
Contents
|
Move objects in the resource library

- Select the object and press the left mouse button to drag it, then arrange the object according to your needs.
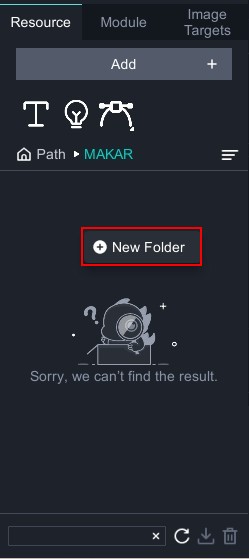 |
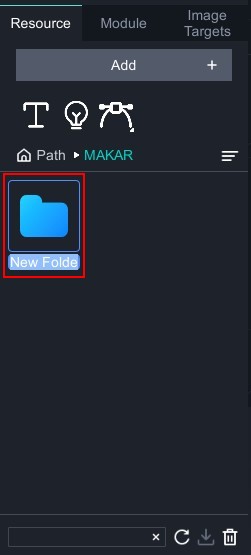 |
| ▲ Right-click to create a new folder | ▲ Double-click the folder to rename |
- Right-click in the resource library to bring up "
 " and drag object to folders for organization as needed.
 - Double-click the folder name to rename the folder.
Delete objects

- In the resource library, select the object and click "
 " below to delete this object.
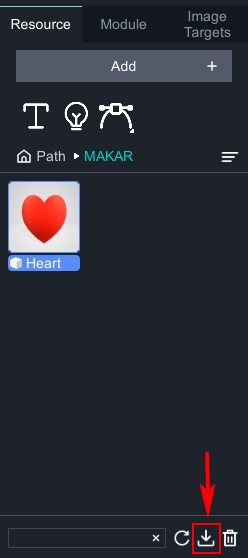
Export your objects (Download objects)
In your resource library, you can download and export assets to your computer.
There are two paths to export object:
 |
 |
| ▲ Download from the resource library | ▲ Download from my resources |
- In the resource library, select the object you wish to export, click "
 " at the bottom, choose the storage path on your computer, and the object export will be completed.
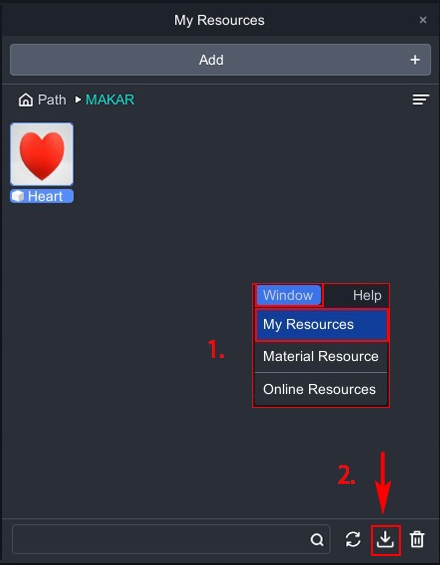
 - Click "Window" → "My Resources," a window of my resources will appear. Select the object you wish to export, click "
 " at the bottom, choose the storage path on your computer, and the object export will be completed.
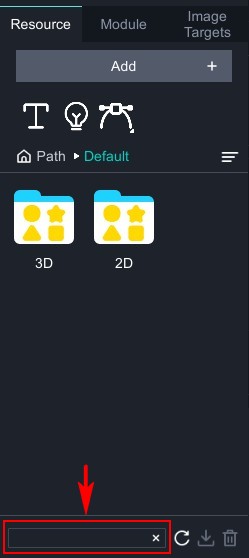
Search your resource library
There are two ways to search for object:
 |
 |
| ▲ Search from the resource library | ▲ Search from my resources |
- In the search box under the resource library, type the name of your object to find it.
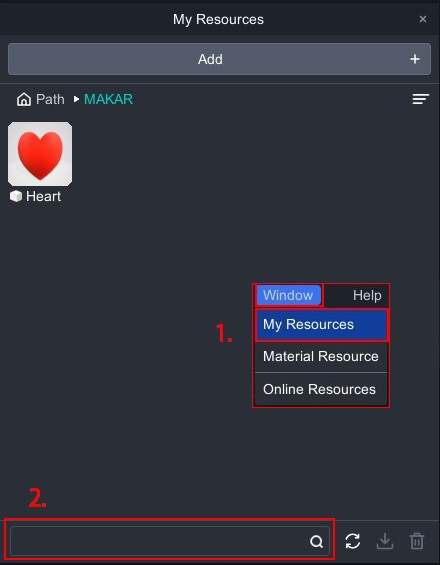
- Click "Window" → "My Resources", a my resources window will appear. In the search box at the bottom, type the name of your object to find it.
Related Posts:
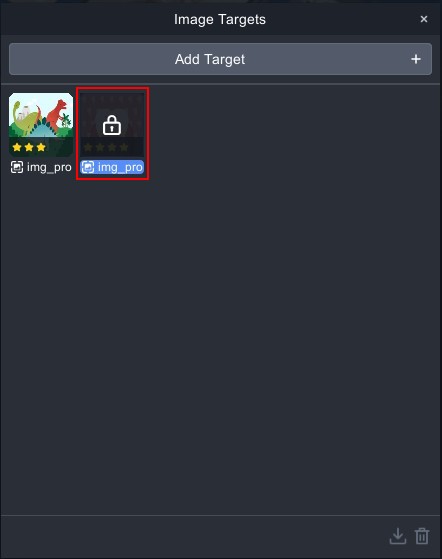
Manage Your Image Targets
Manage Your Image Targets
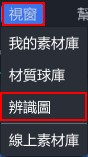
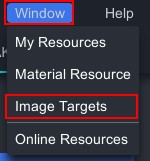
If you want to manage image targets, click "Window" → "Image Target" on the home page of the MAKAR Editor to open the Image Targets.
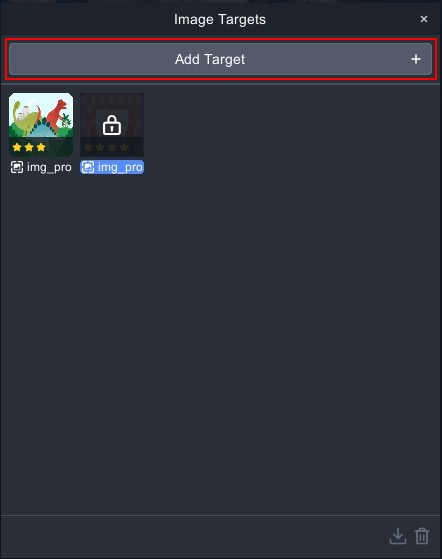
Add Image Target
Click「![]() 」to add an image target.
」to add an image target.

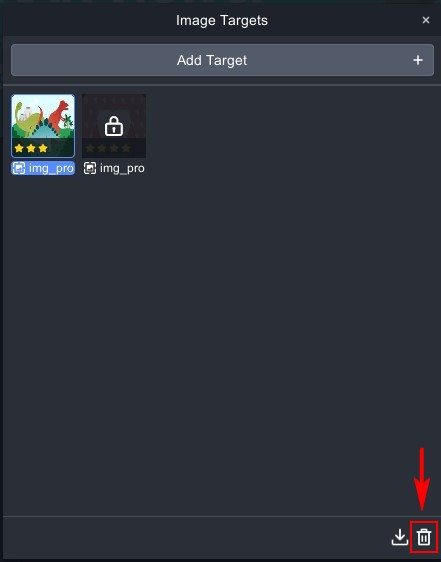
Delete Image Target
Select one of the image targets and click 「![]() 」 to delete the image target.
」 to delete the image target.
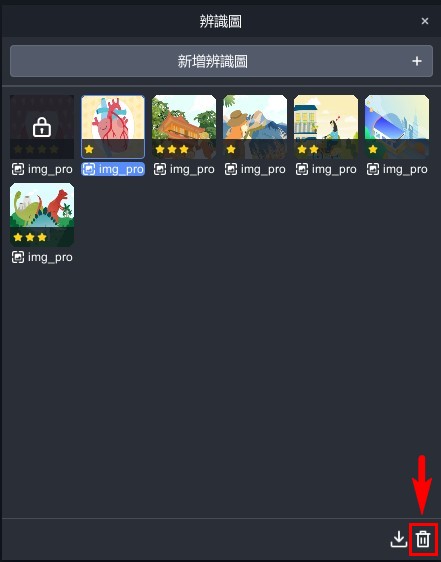
Download Image Target
Select one of the image targets and click 「![]() 」 to download the image target.
」 to download the image target.
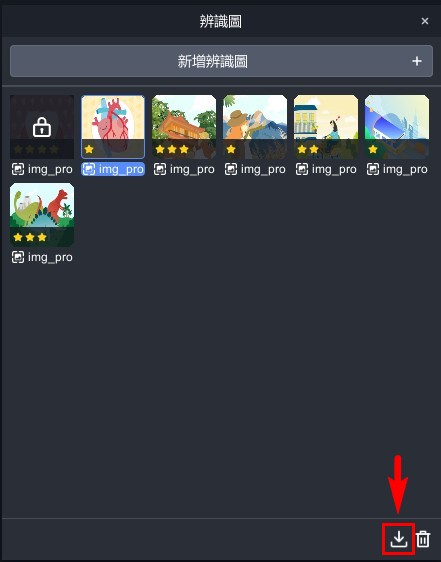
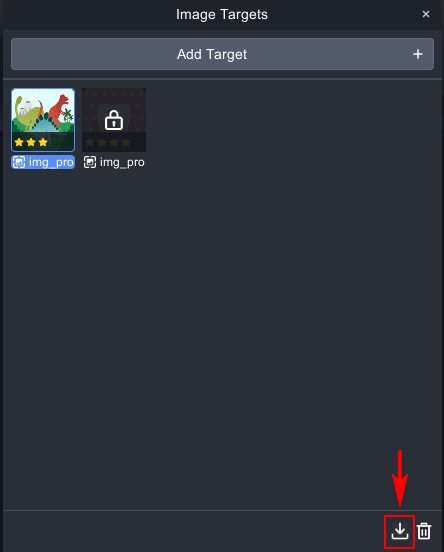
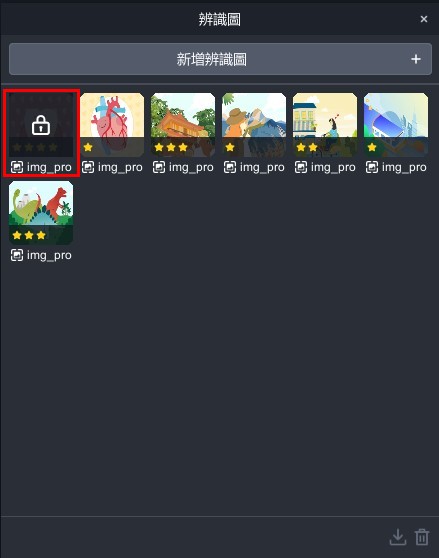
Image Target Locked
If the image target is locked, it means that a project is currently using this image target and it cannot be deleted. To delete the image target, please remove the project first and then proceed with the deletion.
Related Posts:
Basic Concepts of Image Targets
Basic Concepts of Image Targets
|
Contants
|
Is the Image Target a QR code?
Recognition images are not QR codes. The full name of QR code is "Quick Response Code," which is a type of two-dimensional barcode invented by the Japanese company DENSO WAVE in 1994 (for more information, refer to Wikipedia). The evolution of QR codes has become a significant change in recent years, gradually integrating into daily life. Nowadays, most users know that when they see a QR code, they need to "open the QR scanner" and scan it to get the relevant information. In recent years, major smartphone brands, including APPLE and GOOGLE, have started to add QR code scanning functions to their built-in cameras, which has enhanced the convenience for users in recognizing new technologies.
What is the concept of an Image Target? How does it work?
Regarding the identification image, it is necessary to mention a type of AR technology called "Image Target". Typically, we upload the identification image to the AR recognition system, and the system automatically determines whether the image recognition function can be achieved. If the image, like the one on the left, lacks complex elements and consists only of simple shapes such as circles and squares, then the recognition capability may be deemed "unable to recognize". If the image, like the one on the right, contains more complex design elements and content, then after the identification image undergoes processing by the image recognition system, it will provide a recognition rating of 1-5 stars. The number of stars assigned to the identification image affects the recognition speed and the stability of image tracking. Once the identification image is successfully processed, the characteristic points of the identification image can be observed in the image below. Compared to the image on the left, the image on the right has relatively higher recognition point density and recognition rating.

Image Target design techniques
For the concept of AR image target, you can start with the concept of image grayscale. If the color is lighter (lower saturation and brightness), it will also affect the recognition rate.
Of course, there are several techniques in designing image targets:
| Image Target Design Techniques |
|
Why did the Image Target upload fail?
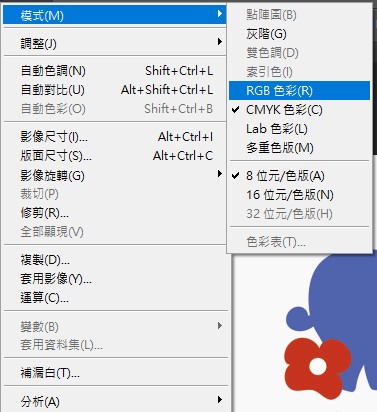
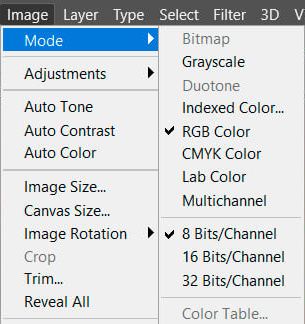
Most of the printed DMs are usually set in CMYK for color, with DPI around 150-300. To become an Image Target recognized by MAKAR, it needs to be adjusted to RGB and saved as a JPG format.
You can open Photoshop to confirm if the image is in RGB.
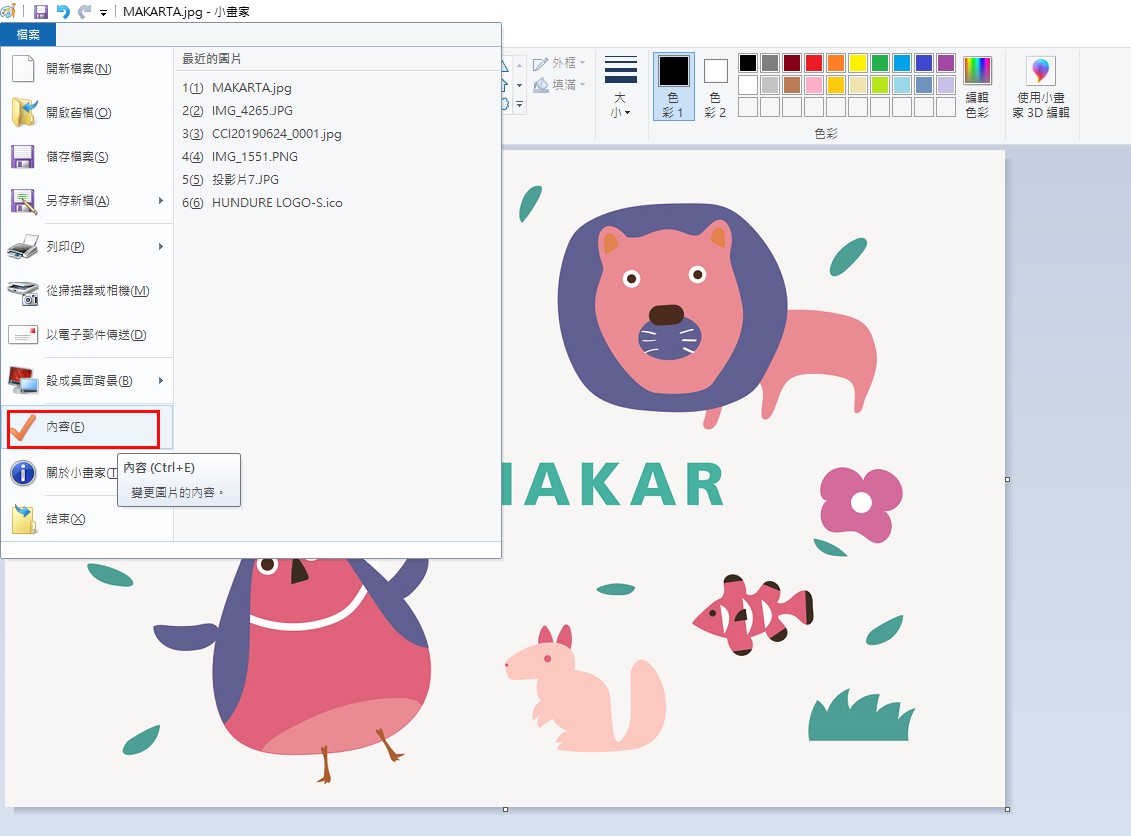
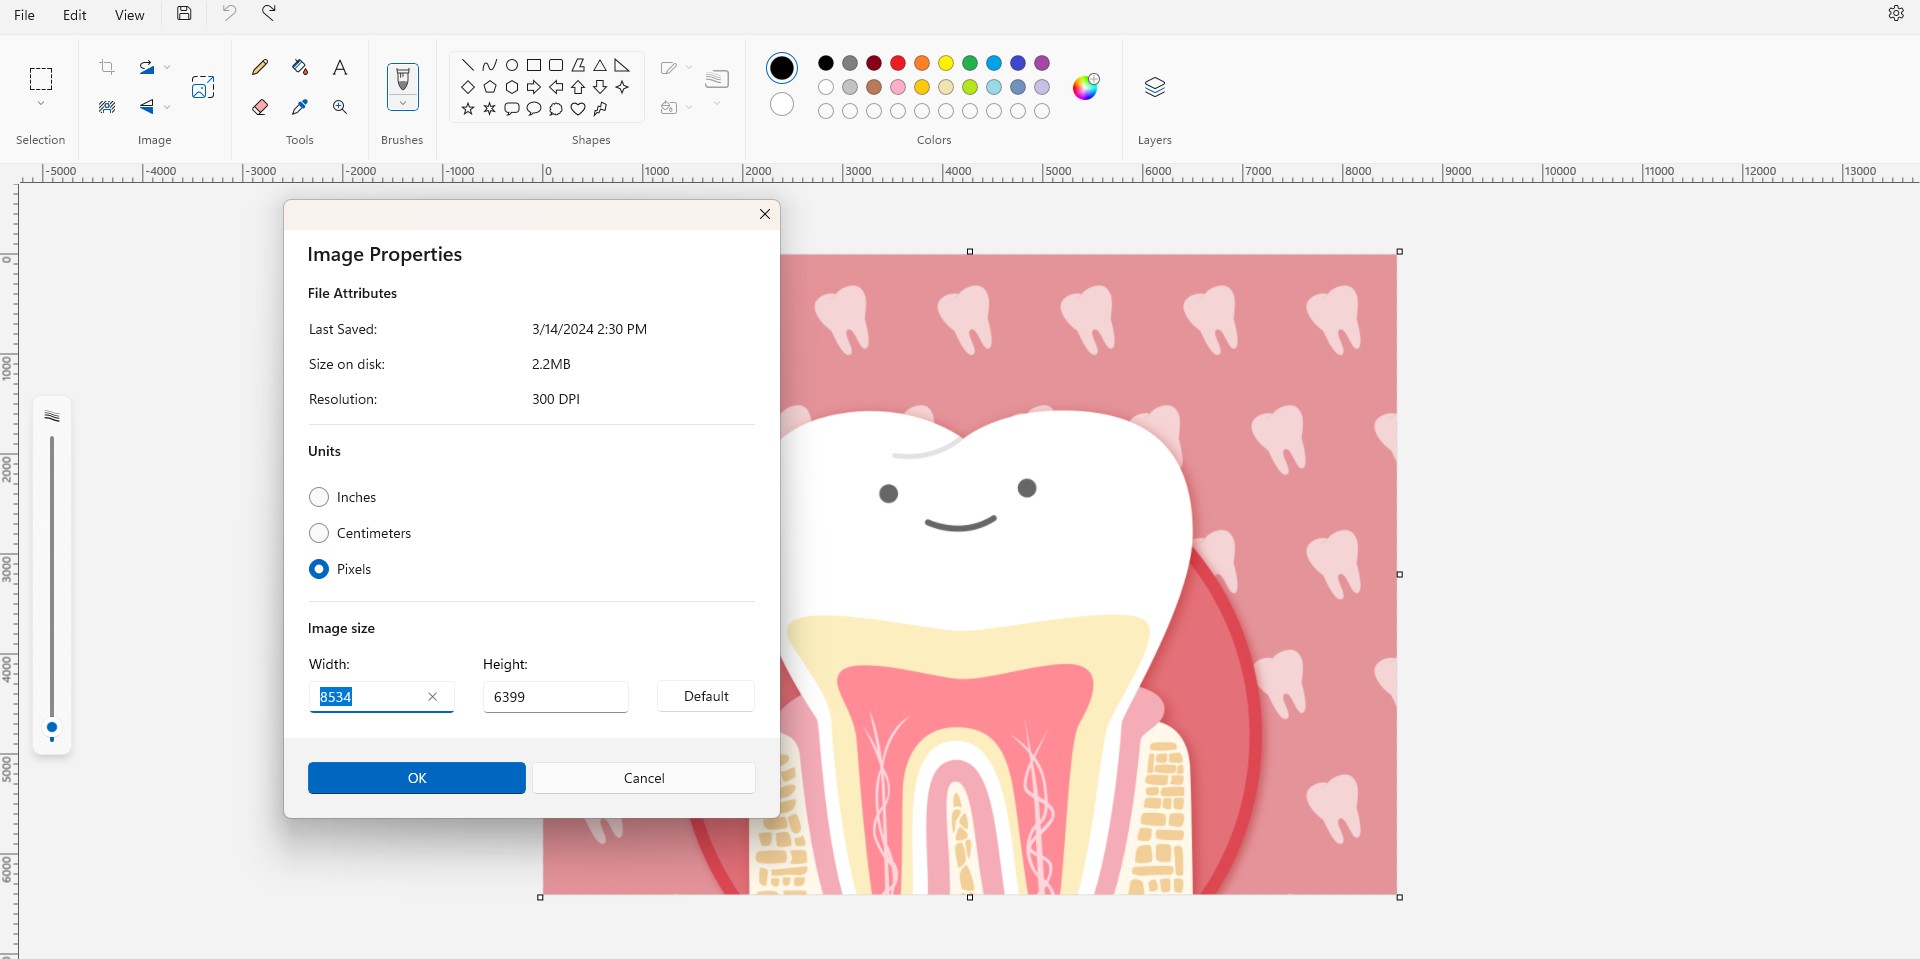
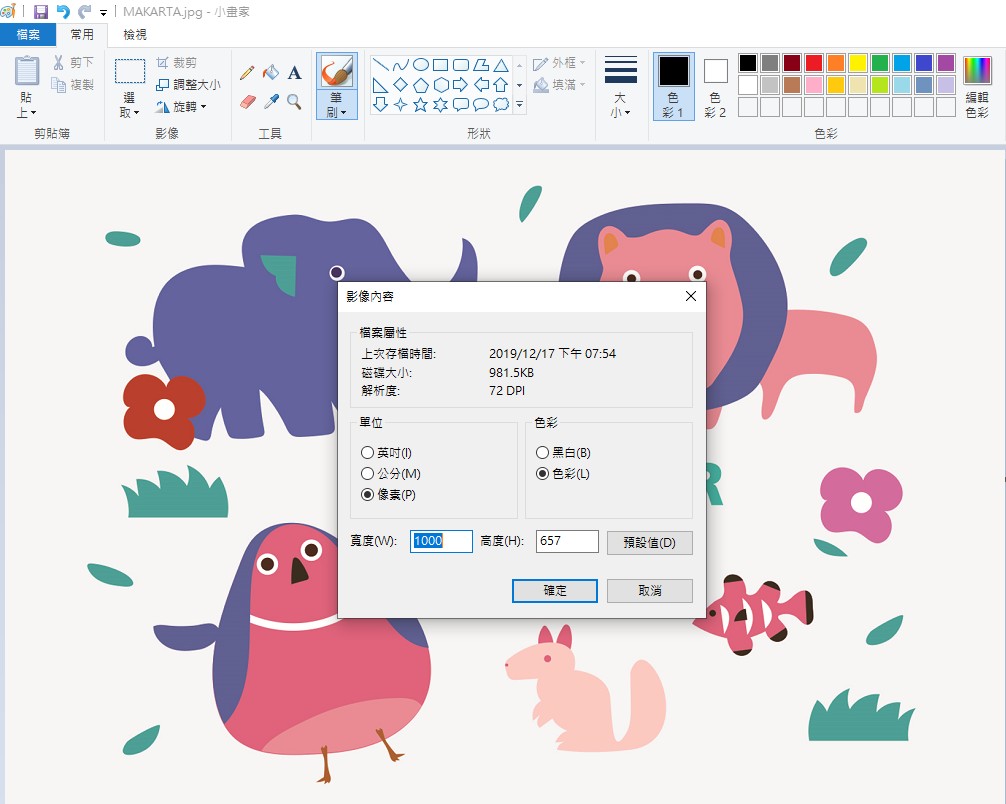
If you need to adjust the image format, you can choose the simplest Microsoft Paint to do so.
1. Open Microsoft Paint, then select "Resize."
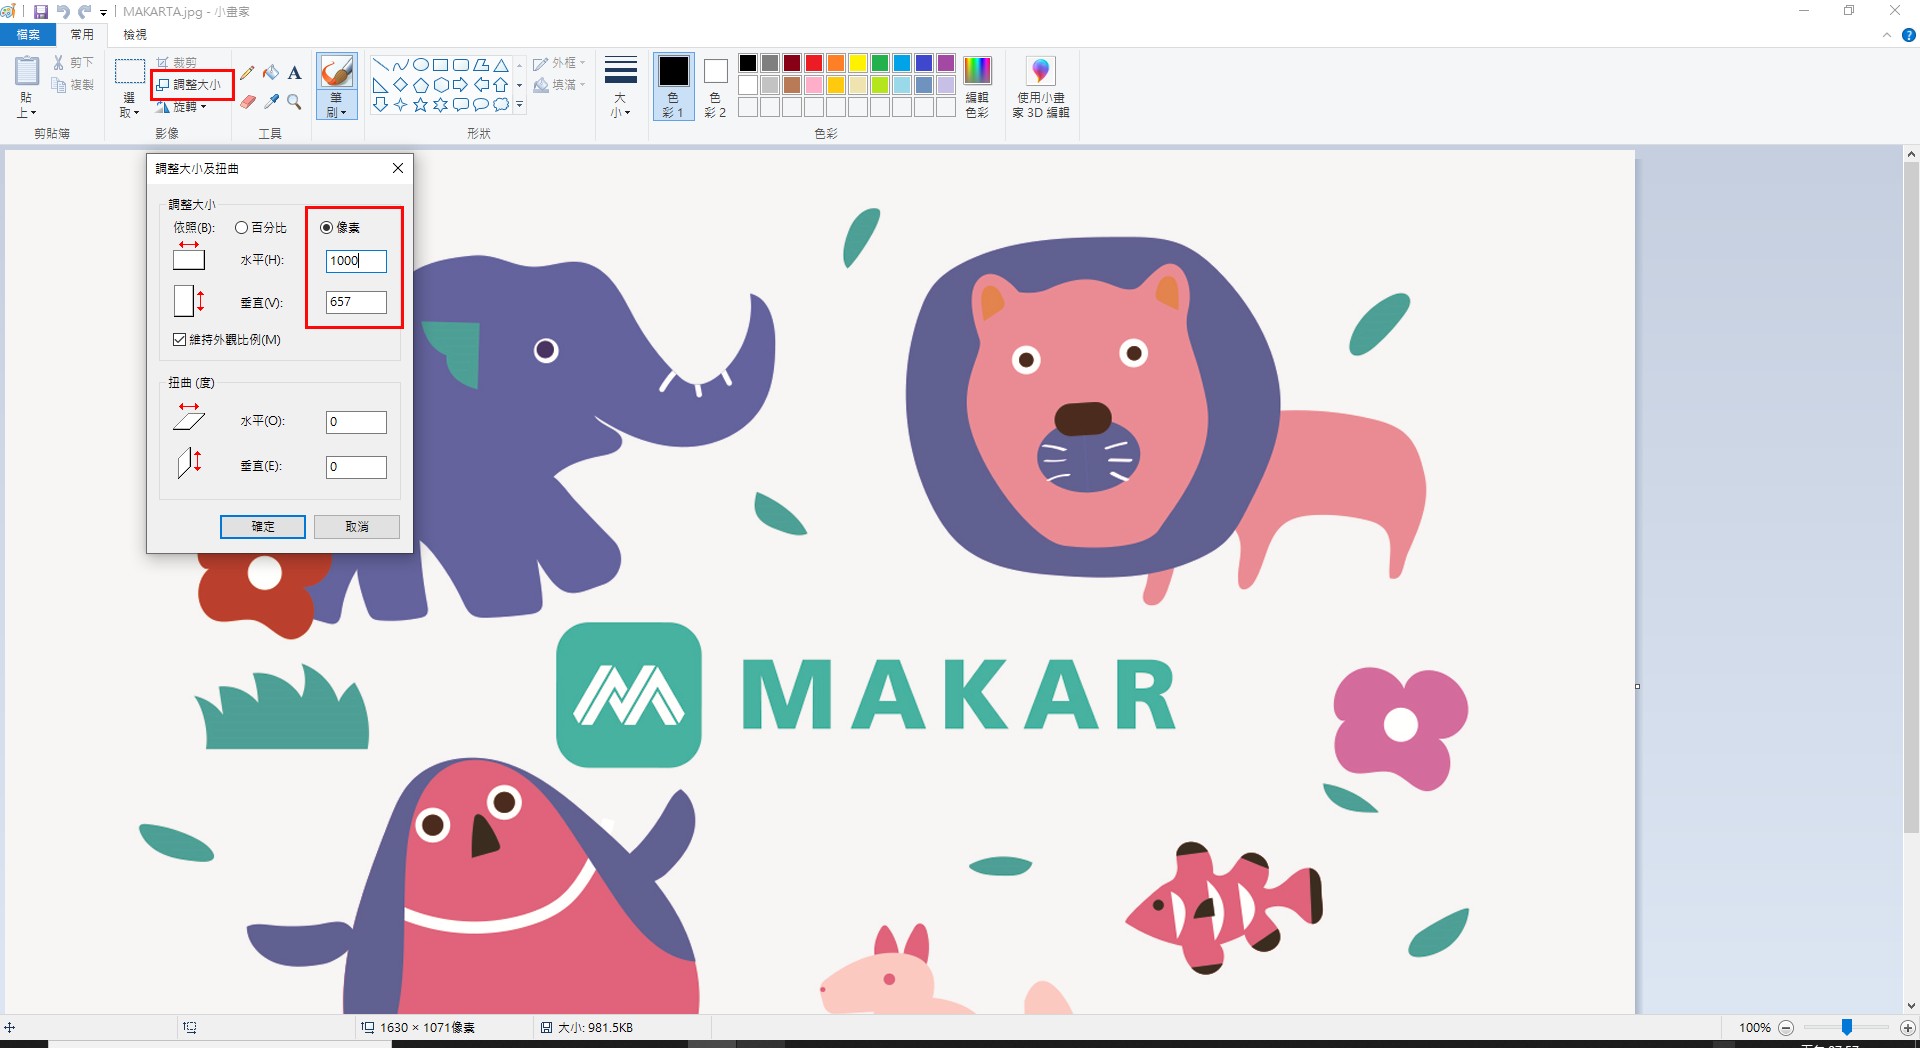
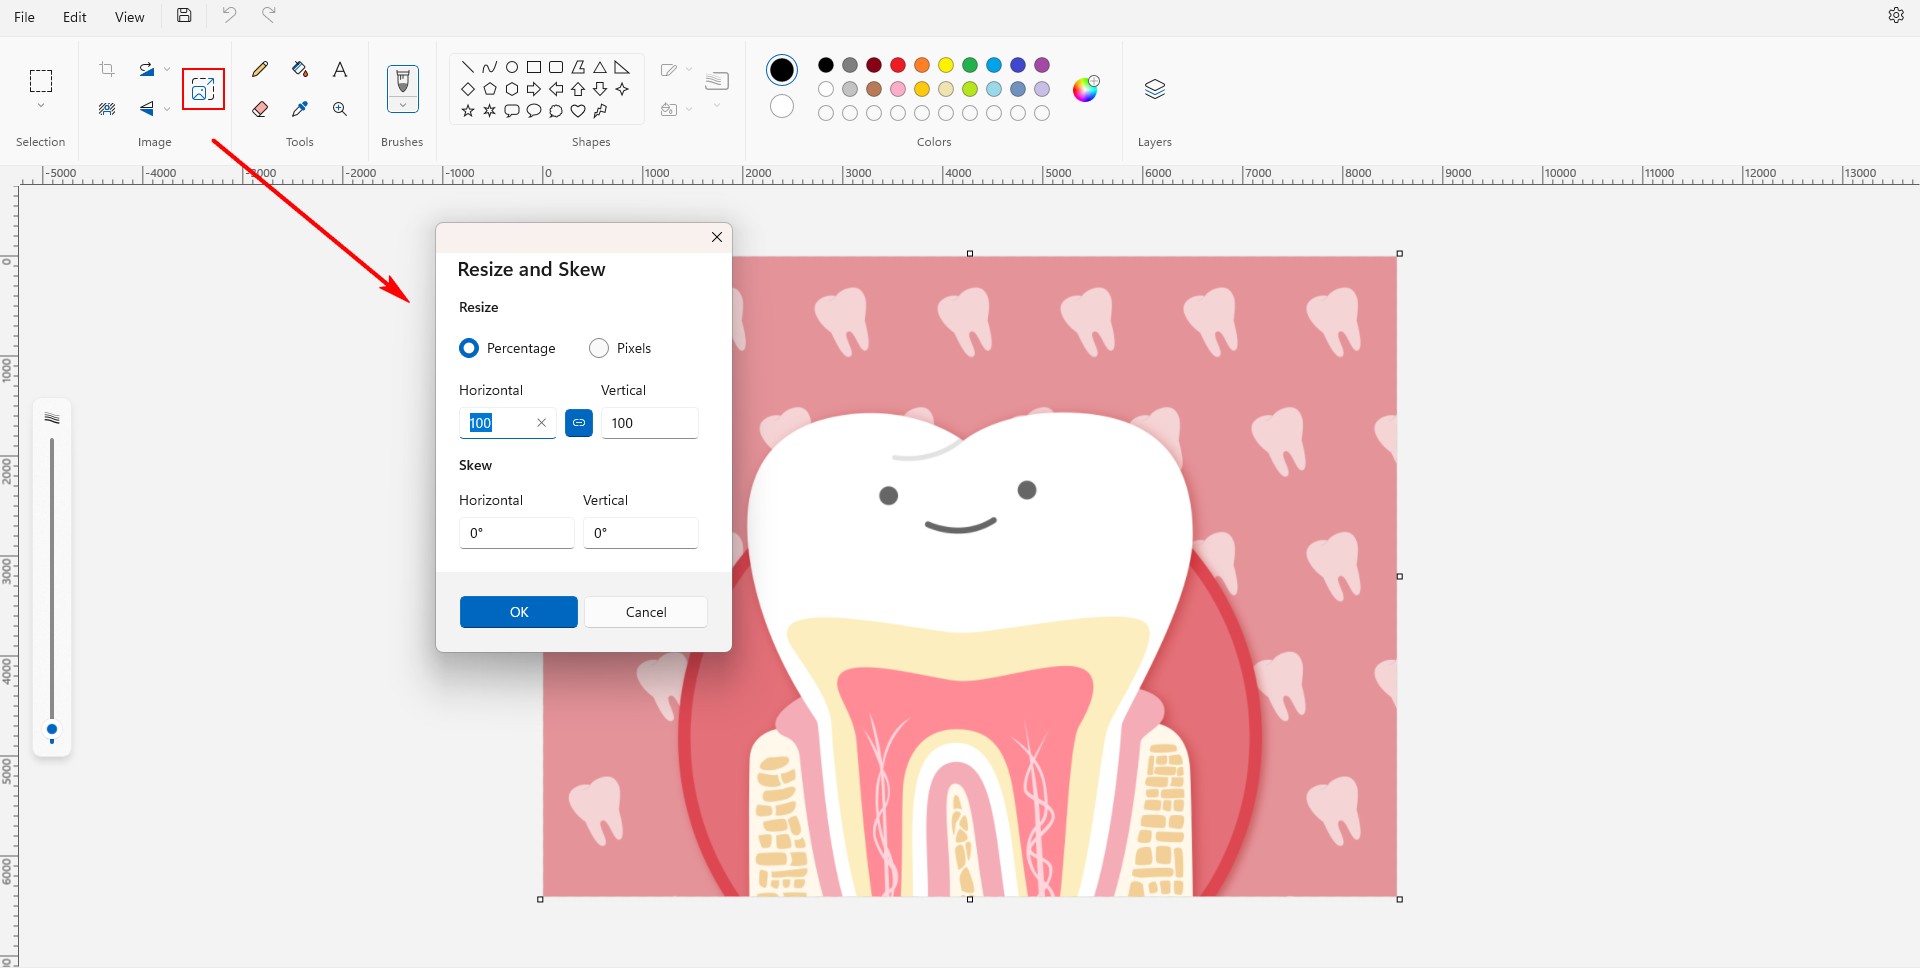
2. Choose the "Content" and check if the format is correct.

Common Resources Issues
Common Resources Issues
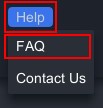
If you encounter common issues with assets while using MAKAR Editor, you can click on "Help → FAQ" to open the FAQ window, which will explain possible resources issues and solutions.

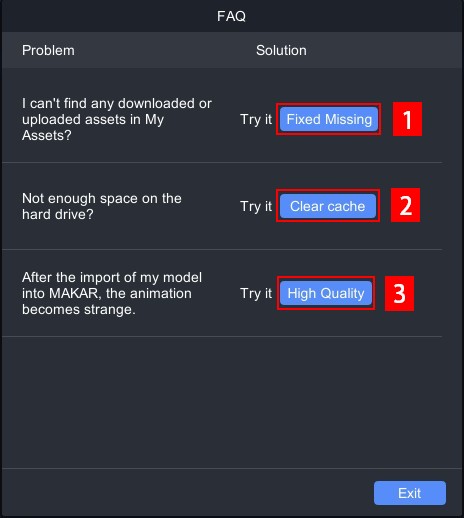
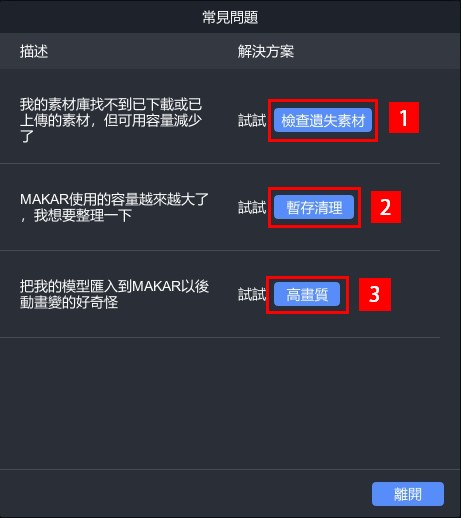
| 1. Check Missing Assets | If you cannot find downloaded or uploaded assets in your Resources but notice a decrease in available storage space, click on "Fix Missing" to locate the missing assets. |
| 2. Cache Cleanup | If your MAKAR storage capacity is increasing and you want to clear unnecessary cache space, click on "Clear Cache" to free up your storage. |
| 3. High Quality | If your model's animations become strange or choppy after import, click on "High Quality" to improve performance and ensure smooth operation of the model. (High Quality mode requires higher computer performance) |
Object Control Tool
Object Control Tool
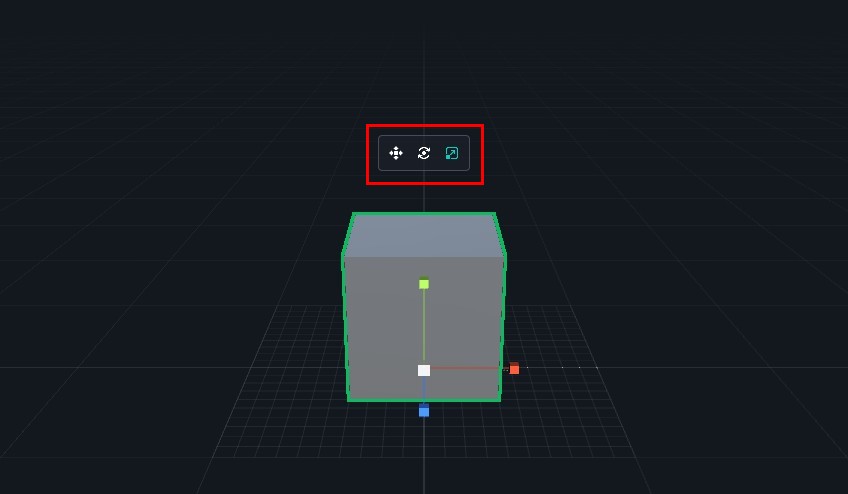
When dragging different objects into the scene, you can "select" an object by clicking on it with the left mouse button. Once you click an object, a control toolbar will appear, offering three functions: move, orbit, and scale. The following describes the functions of the object control tools.

| move |
Adjust the object's position by selecting the corresponding directional arrow based on the movement requirement. |
| orbit |
Adjust the object's rotation by selecting the corresponding color based on the rotation requirement. |
|
scale |
Adjust the object's scale by selecting the corresponding color based on the scaling requirement. For proportional scaling, it is recommended to use the "white cube" at the center of the object. Using a single-axis color will result in non-proportional scaling. |
Use QWER hotkeys
Since object control tools are frequently used, it is recommended to use the default hotkeys to quickly switch between functions. If you wish to change the hotkeys, please refer to the tutorial on "Change Keyboard Shortcut Settings".
| Q | Selection Mode |
| W | Position Mode |
| E | Orbit |
| R | Scale Mode |
Related Posts:
Mouse-Controlled Screen Navigation
Mouse-Controlled Screen Navigation
When using MAKAR Editor, you can control the screen display using the left, middle, and right mouse buttons.
 |
 |
| ▲ Left Press | ▲ Middle Press |
 |
 |
| ▲ Middle Scroll | ▲ Right Press |
| Left Press | Select objects, drag objects, and manipulate their rotation, movement, and scaling. |
| Middle Press | Pan the screen view. |
| Middle Scroll | Zoom in or out of the screen view. |
| Right Press | Rotate the screen view. |
Related Posts:
Perspective Adjustment Tool
Perspective Adjustment Tool
When using MAKAR Editor, there is a toolbar at the top right corner of the scene. You can use this toolbar to adjust the screen view.

| Tool | Shortcut | Description |
| Select |
Q | Select objects. |
| Truck and Pedestal |
Space+LB/MB | Pan the entire screen. |
| Orbit |
RB | Rotate the entire screen by pressing the right mouse button. |
| Focus |
F | Click an object and then click focus to immediately focus the screen on the selected object. |
| Camera View |
(VR Project) Switch between camera views. | |
| Back to initial position
|
H | Return the screen to the default view. |
 |
 |
| ▲ Select |
▲ Truck and Pedestal |
 |
 |
| ▲ Orbit |
▲ Focus |
 |
 |
| ▲ Camera View |
▲ Back to initial position |
Related Posts:
Text Object
Text Object
Using the default features provided by MAKAR Editor, including text, light, curve, and default materials, can enhance your project. The following explains the usage and functions of the text object.
Default Object Toolbar

Add Text
1. In the toolbar on the left side of the resource library, drag the "![]() " into the scene.
" into the scene.

2. A text panel will appear on the right side, where you can modify the text content, adjust colors, and more.

Text Function Description
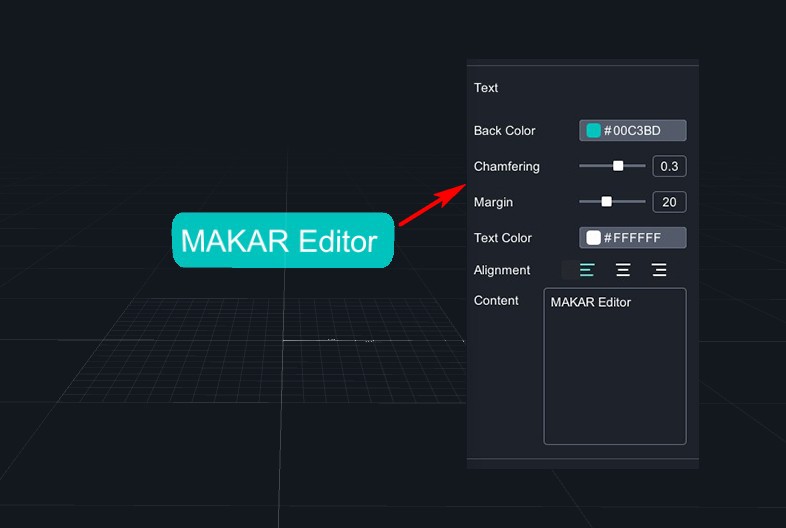
| Background Color | Add a background to the text and adjust the background color. |
| Chamfering | After adding a background to the text, you can adjust the background's chamfering. |
| Margin | After adding a background to the text, you can adjust the background's margin. |
| Text Color | Change the color of the text. |
| Alignment | Align the text to the left, center, or right. |
| Content | Change the content of the text. |
Related Posts:
- Light Object
- Curve Object
- Default Materials
Light Object
Light Object
Using the default features provided by MAKAR Editor, including text, light, curve, and default materials, can enhance your project. The following explains the usage and functions of the light object.
Default Object Toolbar

Add Light
1. In the toolbar on the left side of the resource library, drag the "![]() " into the scene.
" into the scene.

2. A light panel will appear on the right side, where you can modify the lighting mode, adjust colors, and more.
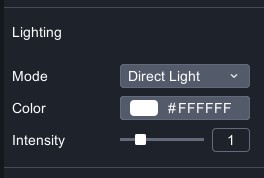
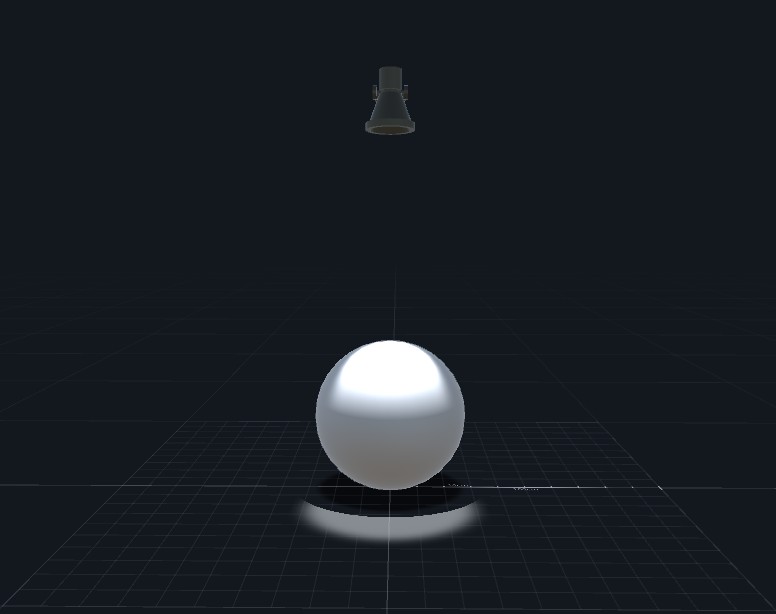
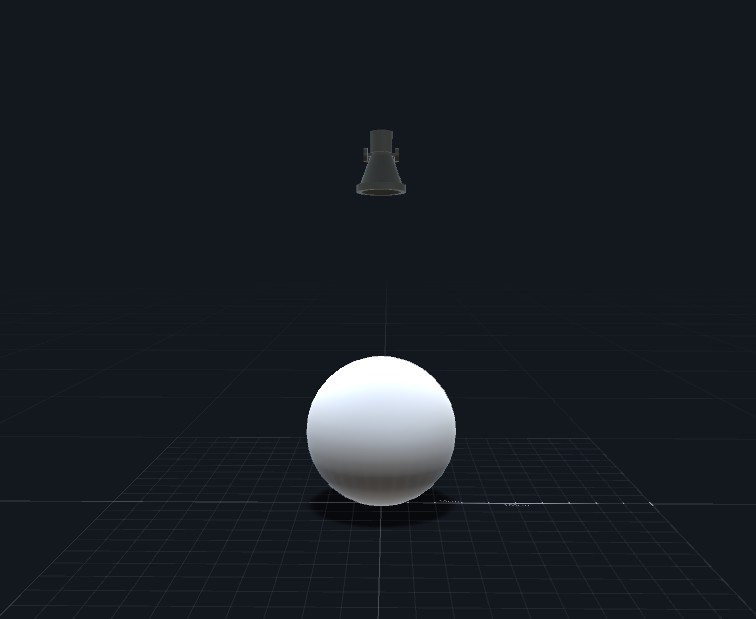
Light Modes Description
 |
 |
 |
| ▲ Spotlight | ▲ Direct Light | ▲ Point Light |
| Spotlight | Directional light with color, position, and direction, belonging to a conical illumination range. |
| Direct Light | Parallel light from an infinite distance with only color and direction, without a specific position, belonging to a parallel, straight light mode. |
| Point Light | Light with color and position but no single direction, emitting from a central sphere, belonging to a 360-degree emission light mode. |
Light Functions Description
Example: Using a Spotlight to Illuminate a Circle
 |
 |
 |
| ▲ Color | ▲ Intensity | ▲ Range |
 |
 |
| ▲ Angle | ▲ Shadow and Intensity |
| Color | Adjust the color of the light. |
| Intensity | Adjust the intensity of the light. |
| Range | Adjust the range of the light from near to far. |
| Angle | Adjust the angle of the light from narrow to wide. |
| Shadow and Intensity | Shadows cast by the light on objects. You can choose to enable or disable shadows and adjust their intensity. |
Related Posts:
Curve Object
Curve Object
With the curve object in MAKAR Editor, you can create motion paths for objects, adjust curves, easily control object movement along the path, and adjust speed, start mode, and more, enhancing the possibilities for animation creation. The following explains the usage and functions of the curve object.
Default Object Toolbar

Add Curve
1. In the toolbar on the left side of the resource library, drag the "![]() " into the scene.
" into the scene.
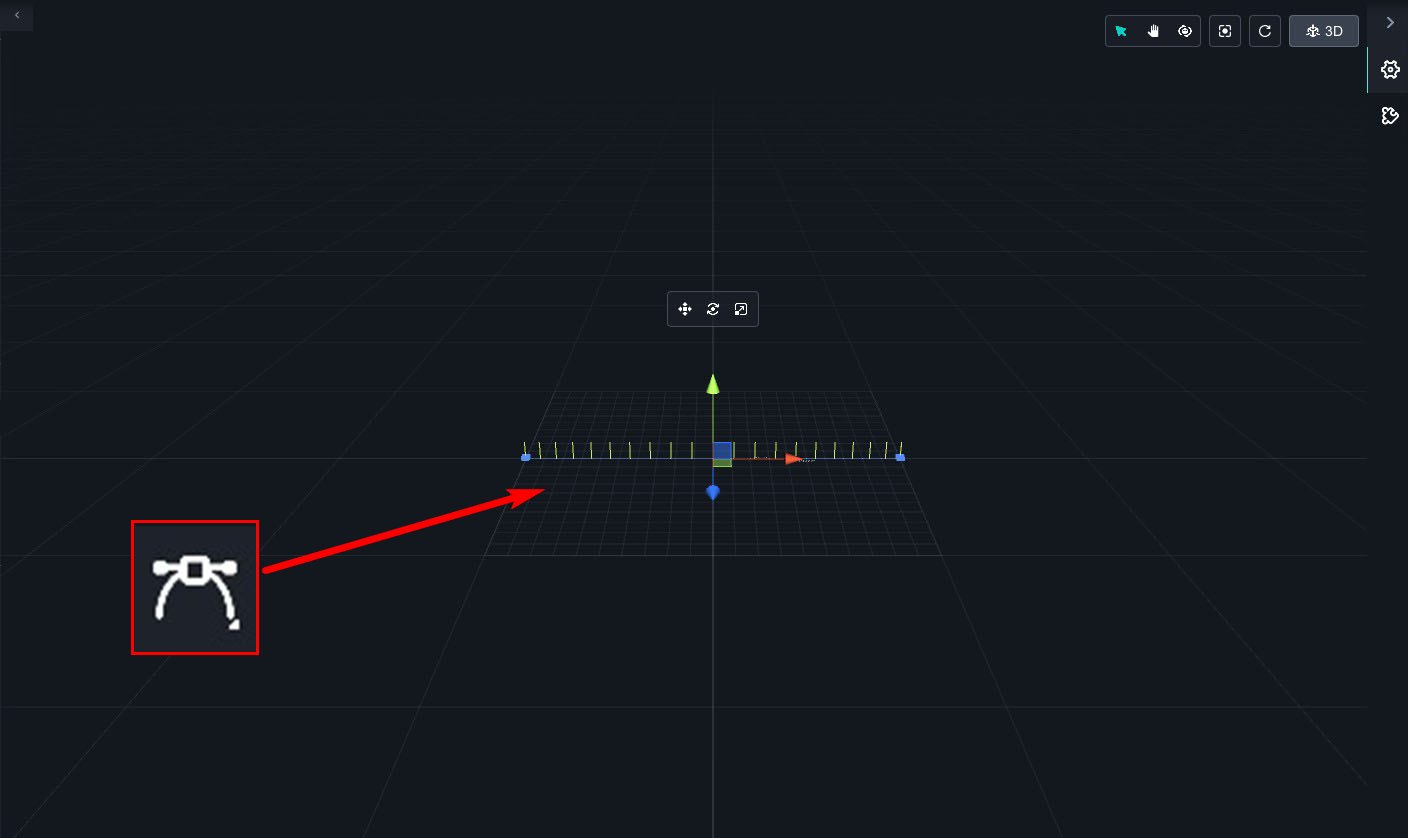
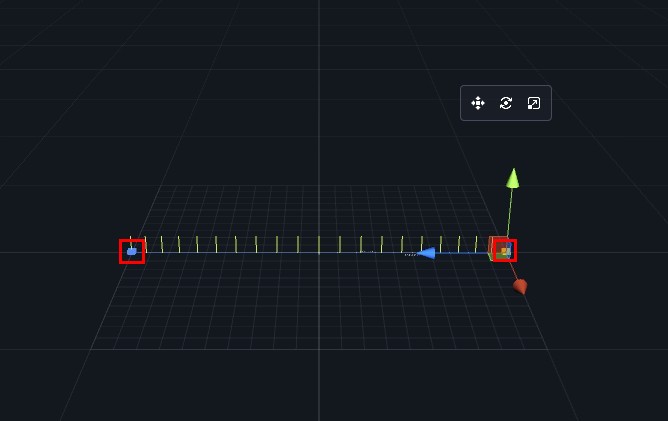
2. If the segment intervals disappear, you can click the small square at the head or tail to make them reappear.
Add, Delete, Select
In the curve object on the right side, there are three toggle functions: add, delete, and select.
| Add small squares to the segments. | |
| |
Delete small squares from the segments. |
| |
Select segments and small squares. |
Move, Rotate, Scale
Click the small square of the segment to perform the basic functions of moving, rotating, and scaling according to your needs.
Pan the segments.
|
|
Rotate the segments to create curved lines.
|
|
Adjust the density of intervals; the denser the intervals, the slower the object moves.
|
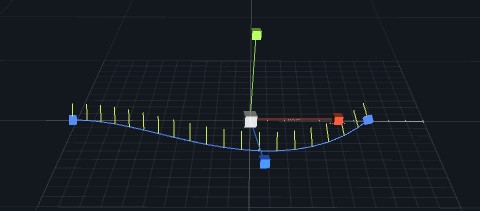
Object Tracking
1. Click "Curve" → "Select" to choose an object from the scene or the resource library.
※ In a VR scene, you can select the camera to follow, allowing the VR view to move along the segment.
2. The animation function will be displayed on the right side. Click play to view the object's movement path, and you can also return the object to the starting point.

3. Click "
 " to bring up the detailed settings window.
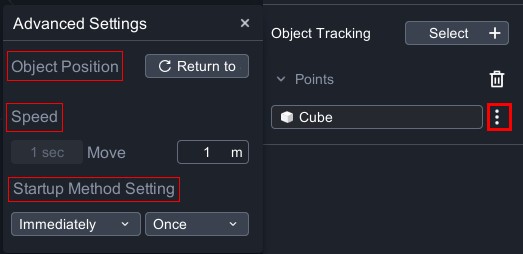
- Object Position:If the object has left the segment, click "Return to Start" to move the object to the start of the segment.
-
Speed:Change the movement speed using the distance moved per second.
-
Startup Method Setting:Immediately、Delay;Once、Loop.
All Control Points
Click "+" on the left or right side to add a small square to the head or tail.

End-to-End Connection
Enable loop to connect the start and end points of the segment, forming a closed loop track, allowing the object to continuously move along this loop path. The object will cyclically follow the segment.

 |
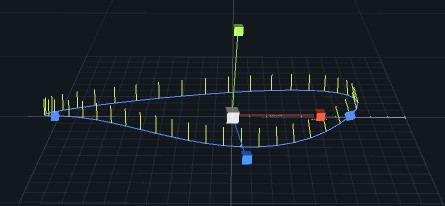 |
| ▲ Off | ▲ On |
Related Posts:
Default Materials
Default Materials
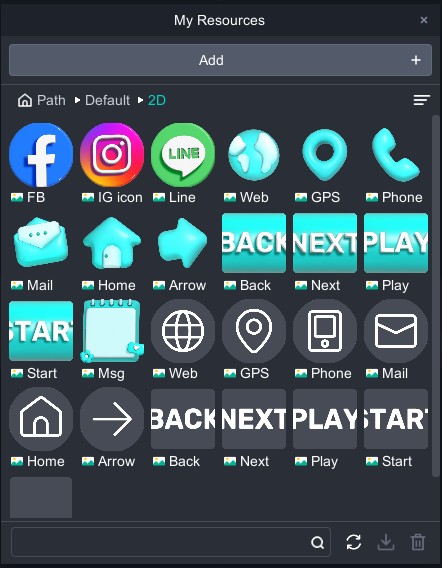
Using the default 3D and 2D materials provided by MAKAR Editor can enhance your project. After opening the editor, you can see the "Default Materials" folder directly in the resource library.
Default Materials
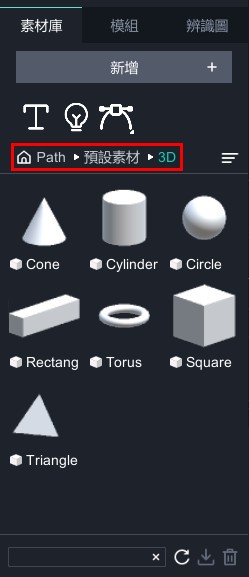 |
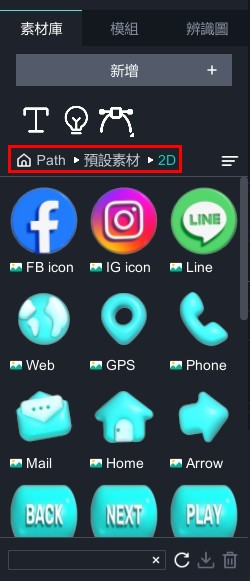 |
| ▲ 2D Material | ▲ 3D Material |
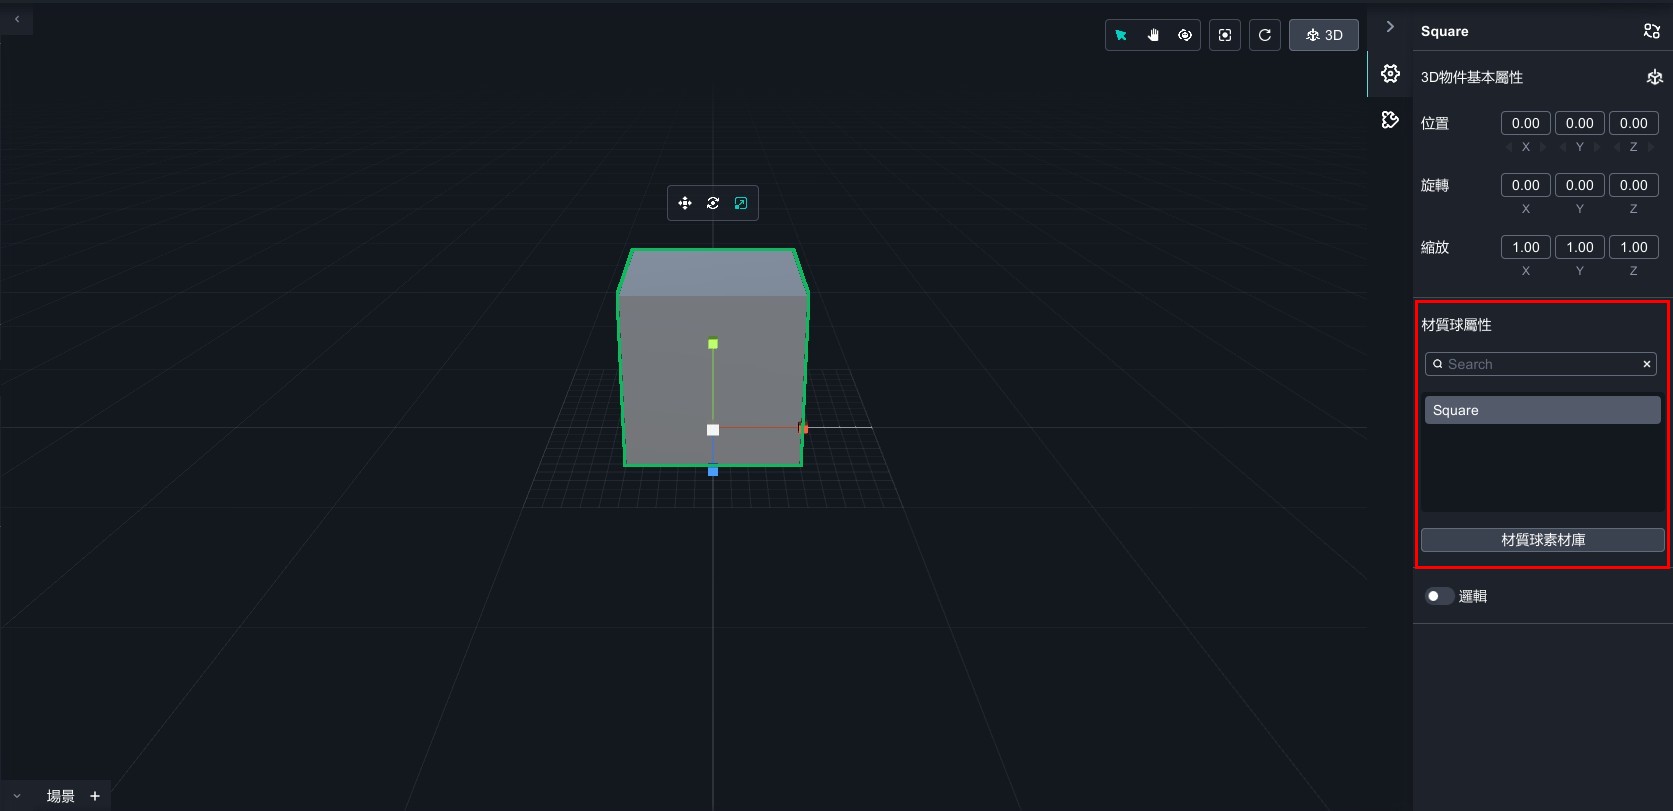
Add Default Materials
1. In the resource library on the left side, drag a shape object into the scene (using a 3D object as an example).
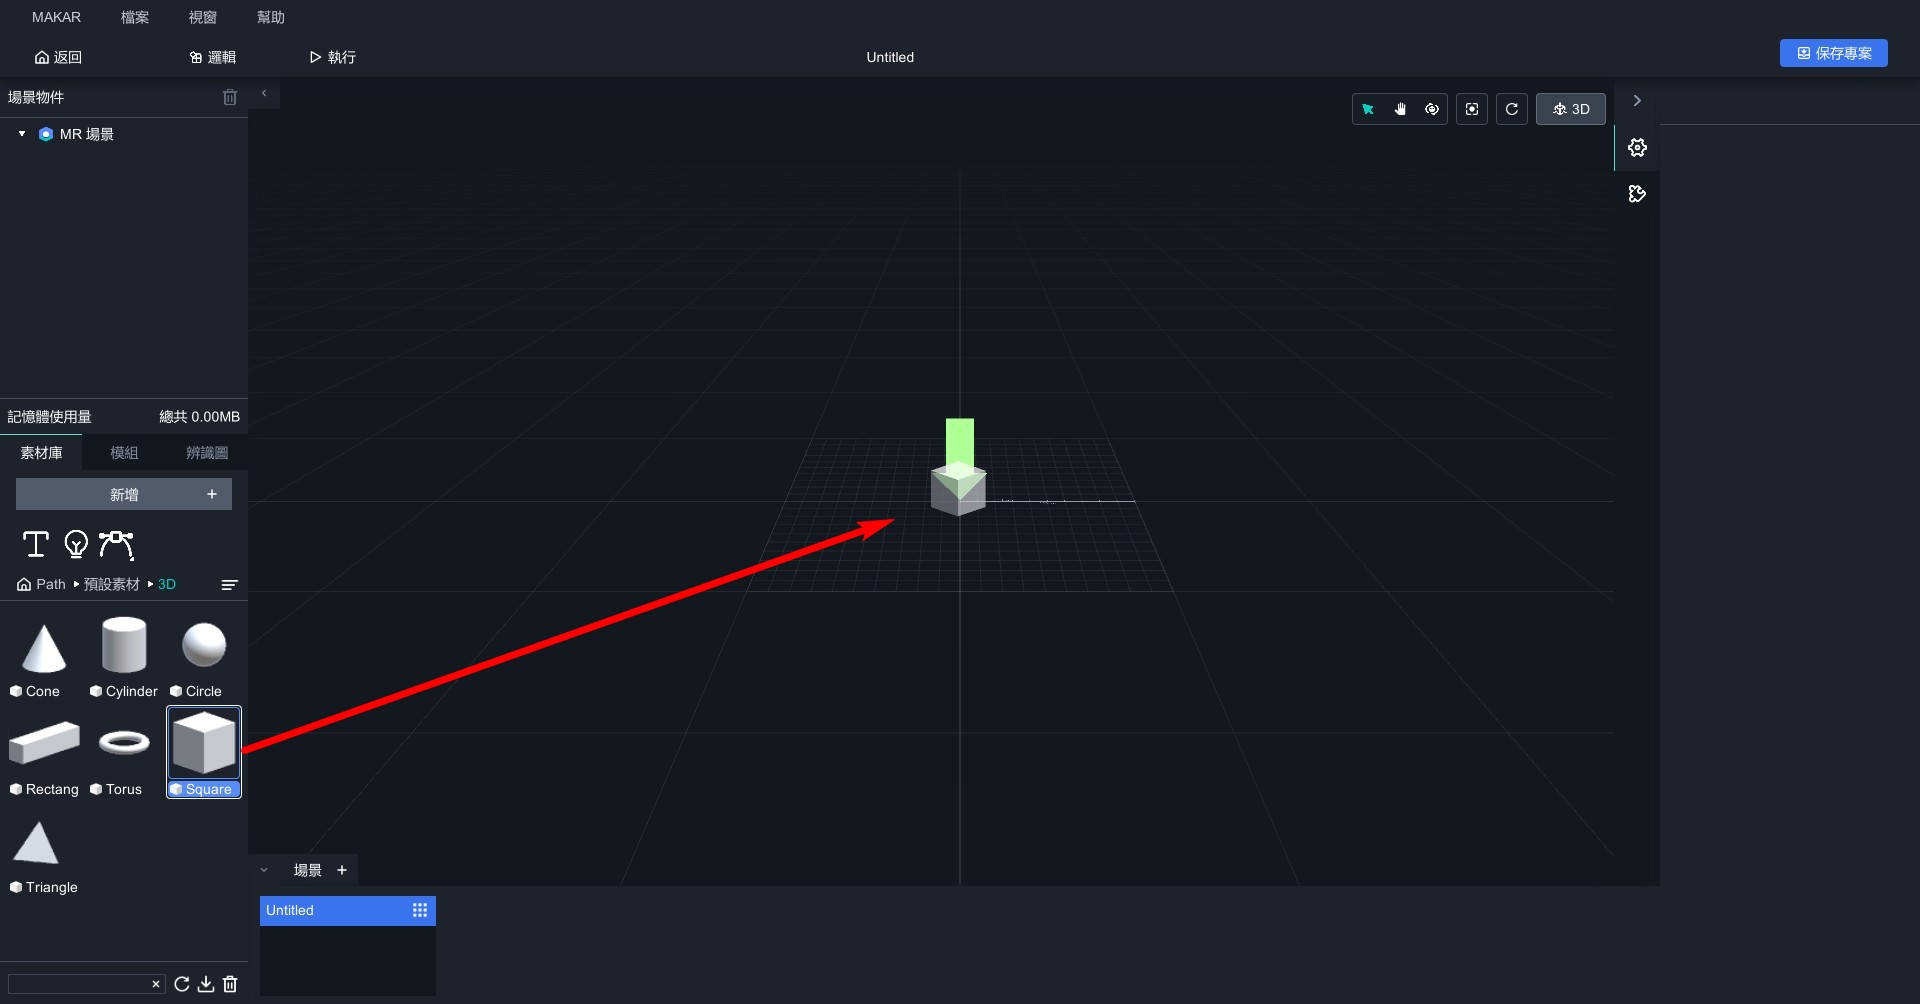
2. Since the object is a 3D object, a material panel will appear on the right side where you can adjust the material properties of the object. For the process of adjusting material properties, please refer to the tutorial on Adjust and Add Materials.
Related Posts:
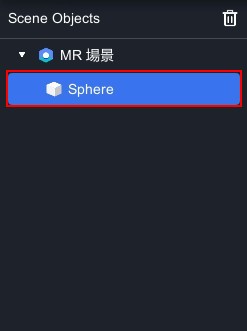
Scene Object Management
Scene Object Management
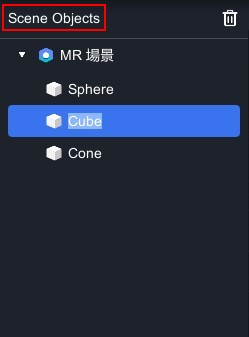
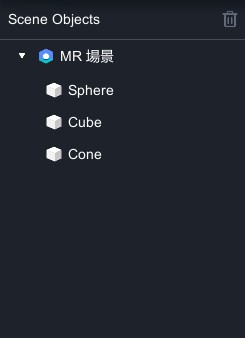
In MAKAR Editor editing interface, the left side features a column for scene objects. Any object dragged into the scene will appear in this column. Different types of objects display different thumbnails. You can adjust the sorting by dragging objects and double-click on objects to change their names, making it easier for you to manage scene objects.
|
Contents
|
 |
 |
| ▲ Before Setting | ▲ After Setting |
-
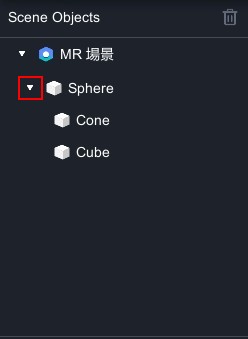
Scene objects can be set up with parent-child. Dragging other objects to "Circle" will group the entire object, where "Circle" becomes the parent object and "Square" becomes the child object.
-
At this point, the group will display "
 ", which you can click to expand or collapse the objects.
 -
To ungroup, drag the child object to an empty area.
- Performing "Ctrl/Command + C → Ctrl/Command + V" on the parent object will copy the entire parent-child object; performing "Ctrl/Command + C → Ctrl/Command + V" on the child object will copy the child object under the original parent object.
|
※ Regarding Parent-Child
|

-
When hovering over a scene object, a "
 " will appear on the right side. Clicking it will lock or unlock the object.
 -
When a scene object is locked, its current state is fixed and cannot be freely adjusted in scene editing or MAKAR Viewer. To freely adjust the object, unlock it.
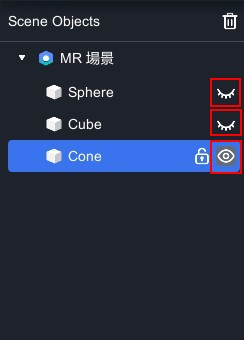
- When hovering over a scene object, a "
 " will appear on the right side. Clicking it will show or hide the object.
Delete Object
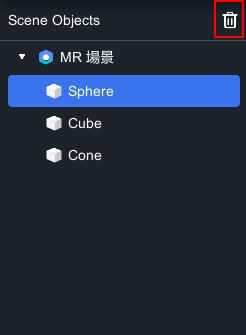
- To delete a scene object, click "
 " to delete the object.
About Group Trigger Structure
About Group Trigger Structure
The trigger objects in scene objects are related to the "Add Interactive Features" display function in MAKAR Editor. By selecting any object in the scene and setting the display function, it can become a trigger event. You can group two or more trigger objects to control each other's activation and deactivation. This article will detail the group trigger structure.
Firstly, if you need to use the display function in the "Adding Interactive Features" setting objects as trigger events, you can refer to the tutorial on adding interaction functions.
Once you set an object as a trigger event, you'll see the "Group" switch in the display window. Check it to activate the group function. Each trigger event can be set to trigger a group. Under the trigger group structure, you can set that only one object in the same group can be displayed, while the others will be deactivated. For example, after creating a general scene object, you can add trigger events for that scene object. Each trigger event can be set to a "Group," with a total of seven trigger groups available.
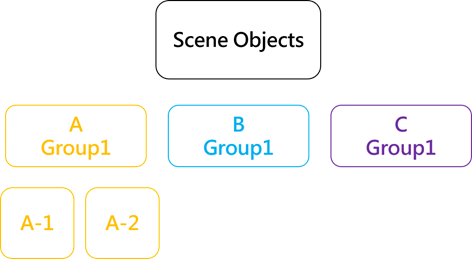 |
| ▲ Situation 1: When trigger events A, B, and C are all set in group 1, triggering A in MAKAR Viewer will deactivate B and C. |
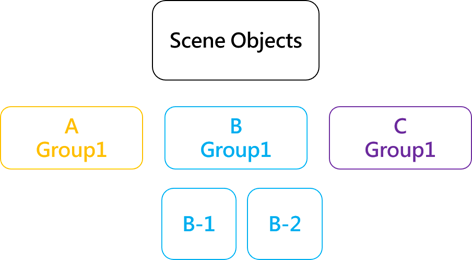 |
| ▲ Situation 2: When trigger events A, B, and C are all set in group 1, triggering B in MAKAR Viewer will deactivate A and C. |
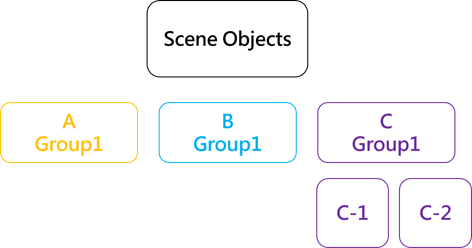 |
| ▲ Situation 3: When trigger events A, B, and C are all set in group 1, triggering C in MAKAR Viewer will deactivate A and B. |
For example, let's divide objects into A Group, B Group, and C Group. Suppose you want to display the text "Bingo!" when clicking on these three objects. Therefore, these trigger objects need to avoid repetitive display conditions. In this case, you can activate the group function for these three objects and set them to "Group One." Consequently, when you operate in MAKAR Viewer and trigger the function by clicking on an object, only one object in the same group will be displayed, and the others will be deactivated.
 |
 |
| ▲ All Three Objects Not Grouped | ▲ All Three Objects Set to "Group One" |
Edit in 2D Mode
Edit in 2D Mode
In MAKAR Editor, besides editing 3D features, you can also handle 2D objects in the editor. With just one click, you can switch from 3D mode to 2D mode, allowing you to operate seamlessly. The following explains how to switch to 2D mode and its basic functions.
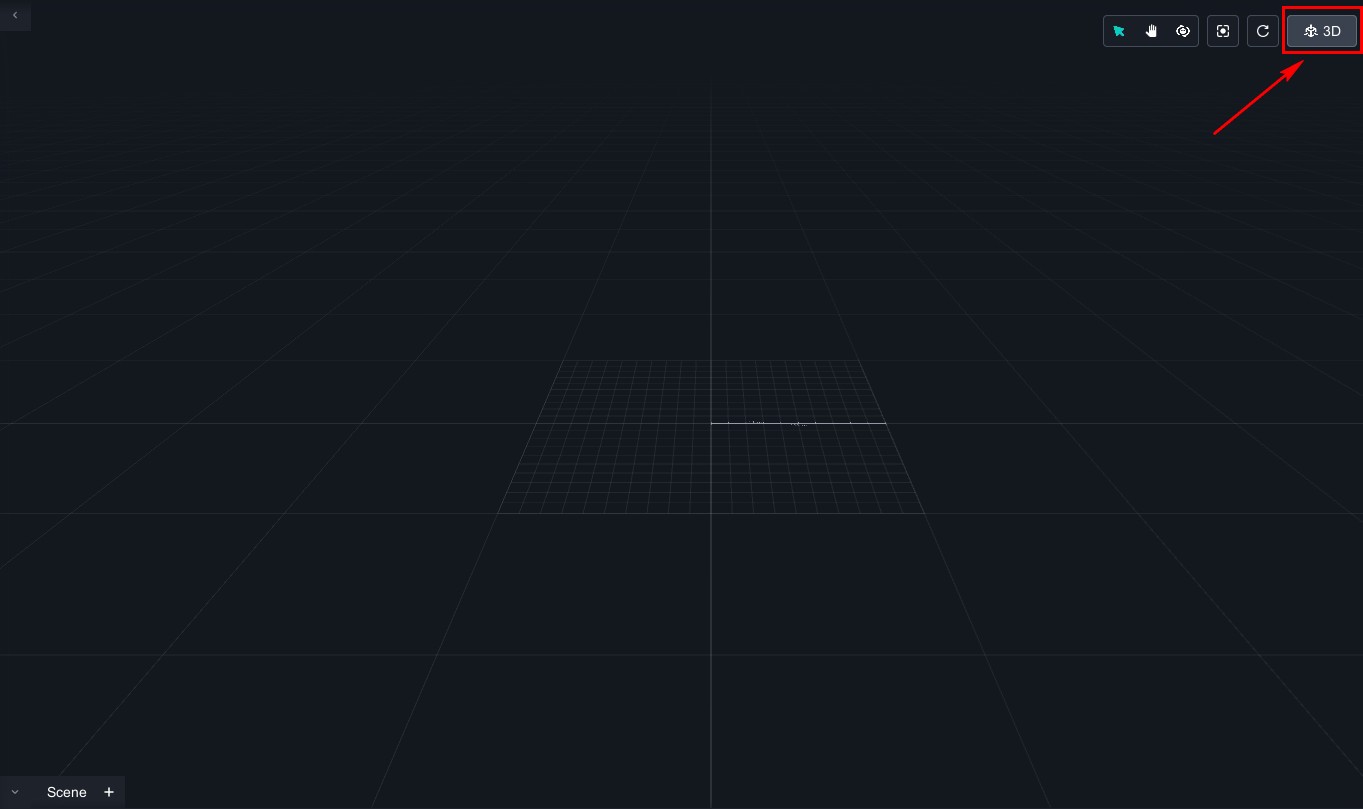
Switch to 2D Mode
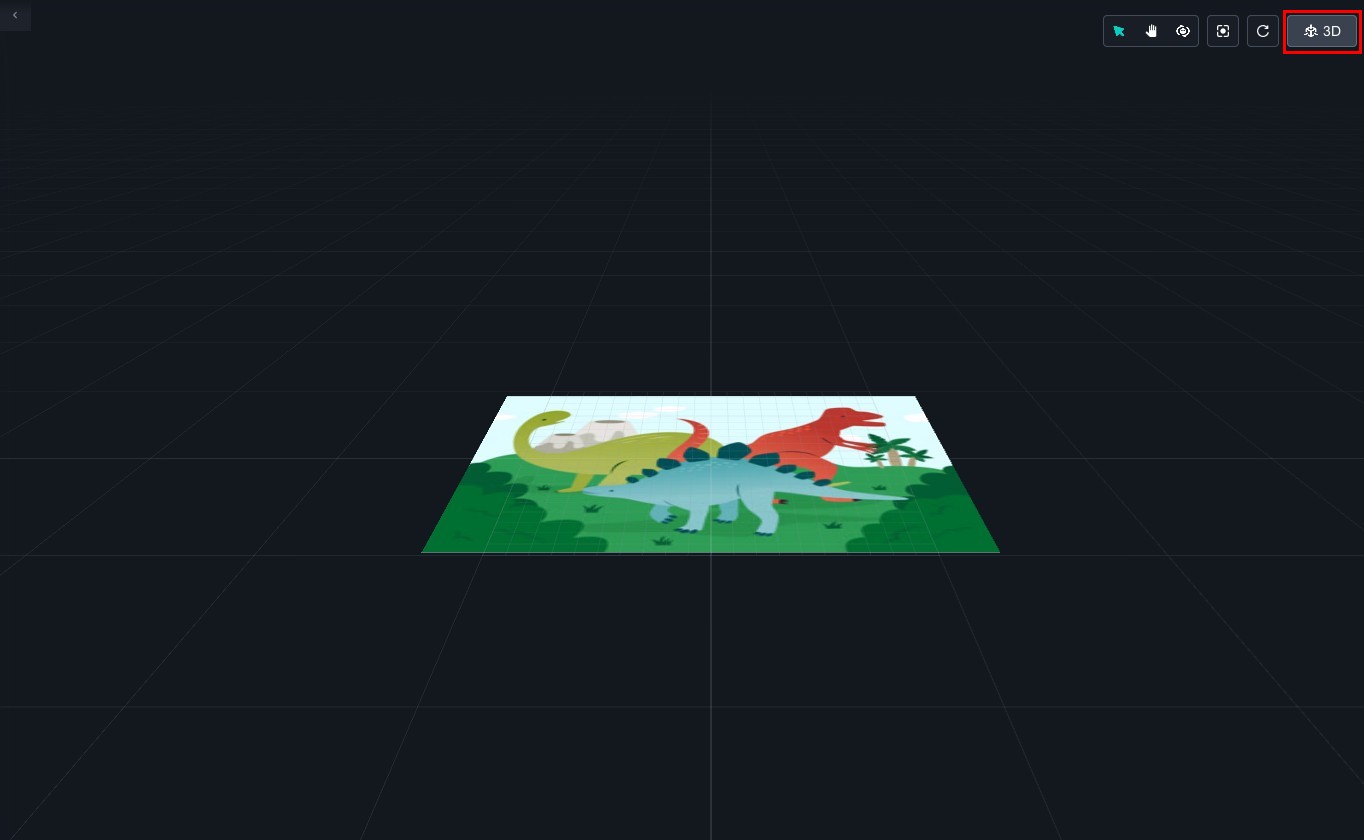
Click "![]() " in the upper right corner of the scene to switch from 3D mode to 2D mode.
" in the upper right corner of the scene to switch from 3D mode to 2D mode.
Handle Objects in 2D Mode
Drag 2D objects from the resource library to the scene in 2D mode to place them. You can scale and rotate the objects.

Adjust 2D Size
We offer a 2D size adjustment feature designed primarily to accommodate the size requirements of different user devices, ensuring optimal display across various devices. If the photo frame size does not match the device's requirements, it may result in display issues or layout problems. Therefore, we recommend adjusting the 2D size according to your device when using this feature.
1. Click "![]() " → "
" → "![]() " to bring up the layout size, where you can adjust the 2D interface size.
" to bring up the layout size, where you can adjust the 2D interface size.
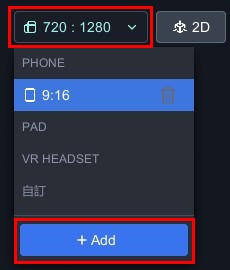
2. You can directly add sizes under "PHONE" or "PAD" categories, or add custom sizes under "Name".
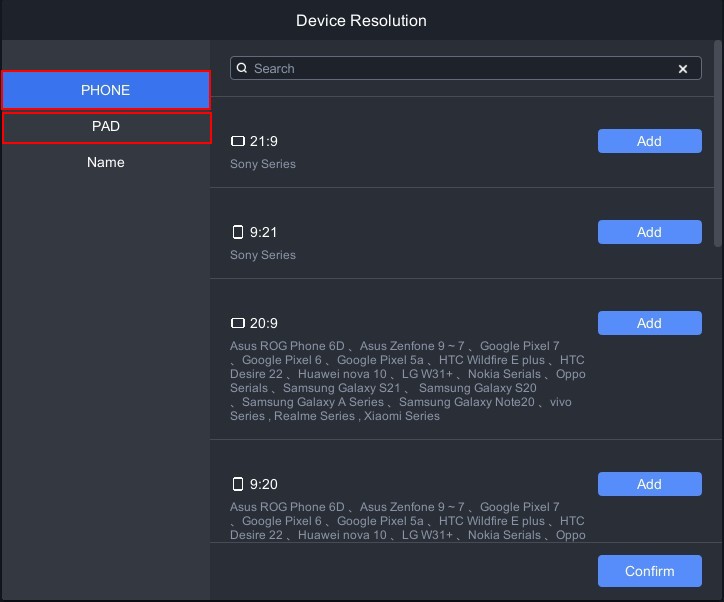 |
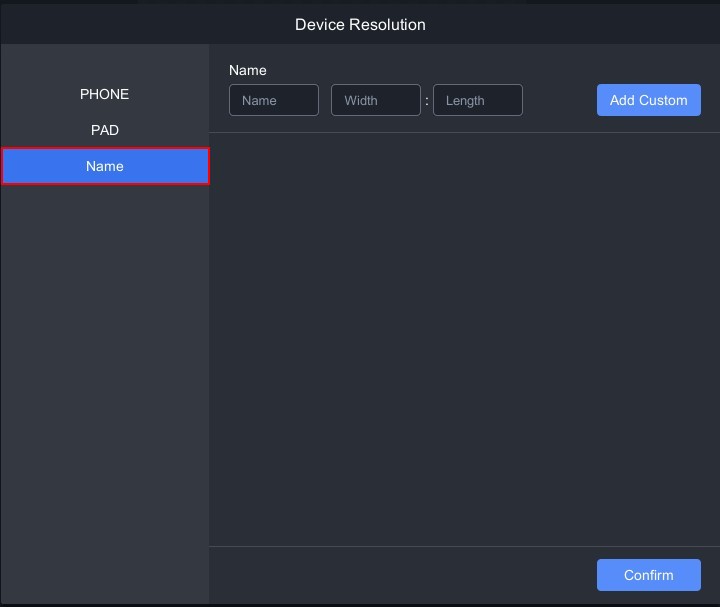 |
| ▲ PHONE & PAD Sizes | ▲ Custom Sizes |
Adjust Basic Attributes
Adjust Basic Attributes
In MAKAR Editor editing page, clicking on an object will bring up the adjustment panel on the right. You can adjust the basic properties of the object according to your needs. Different types of objects have different basic properties that can be adjusted. The following will introduce the basic properties and methods for adjusting objects.
|
Contents
|
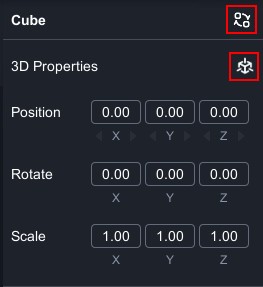
- After dragging an object into the scene, the right side displays the basic properties panel of the object.
-
The properties include position, rotation, and scale, which can be directly inputted according to your needs, or quickly changed by dragging the left mouse button on XYZ.
-
Click "
 " to quickly resets the position, rotation, and scale of the object to default.
 -
Click "
 " to quickly replace objects on the scene.
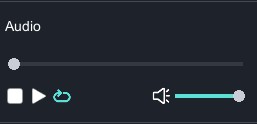
-
After dragging audio object into the scene, the audio panel will appear on the right.
-
You can play or pause the audio, adjust the volume, and enable loop playback.
Adjust 3D Animated Object
-
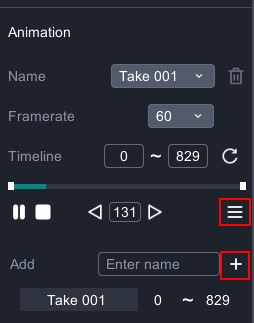
After dragging 3D object with animation into the scene, the animation panel will appear on the right.
-
Click "Name" to switch between different types of animations based on the model's built-in animations.
- Adjust the animation "framerate" according to your needs and view the "timeline" for each animation.
- Animation Splitting:Click "
 " to bring up the new animation window. Use the timeline to capture the required animation segments, enter a name, and finally click "
 " to successfully add the animation.。
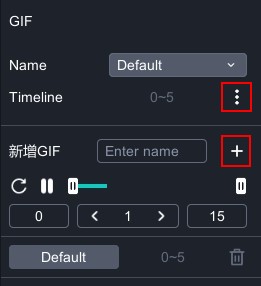
- After dragging GIF object into the scene, the animation panel will appear on the right.
- Animation Splitting:Click "" to bring up the new animation window. Use the timeline to capture the required GIF animation segments, enter a name, and finally click "" to successfully add the GIF animation.
Adjust 3D Material Properties
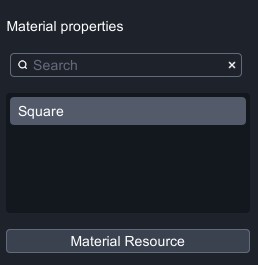
- After dragging 3D object into the scene, the material properties panel will appear on the right.
- Due to the diverse functions of material properties, we have separately opened a series of tutorials for 3D material properties. Please click the category on the left to manage the material library-related tutorials.
Adjust 2D Image
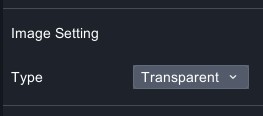
 |
 |
| ▲ Transparent | ▲ Opaque |
- After dragging 2D images into the scene, the image settings panel will appear on the right.
- Transparent: Indicates that the image itself is transparent.;Opaque: Indicates that the image itself is opaque.
 |
 |
| ▲ Both images are transparent: When overlapping, it is difficult to determine the front and back difference. | ▲ Button image adjusted to opaque: This makes the image appear in the front. |
-
Taking two transparent PNG images as an example, when these two images with transparency overlap, since both are transparent, the system cannot determine the front and back effects. Therefore, if you want two images with transparency to show a clear front and back relationship, you can set the one behind as "Opaque" to solve the problem of overlapping disappearance.
Logic
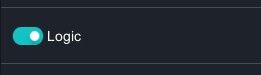

- After dragging any object into the scene, the "Logic" switch will appear on the right and can be clicked to set the object as a logical object.
- Click "Logic" in the upper left corner to start arranging the programming for objects to trigger. Click "Run" to preview the presentation.
- As the use of logic is complex, we have separately opened detailed logic tutorials. Please click the category on the left to view the relevant tutorials on logic building blocks.
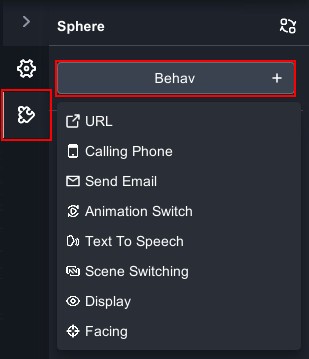
Add Interactive Features
Add Interactive Features
MAKAR Editor provides professional accounts with quick creation of object interaction features, enriching your project design. Select the object you wish to trigger in the scene, click the "![]() "→ "
"→ "![]() " on the right side and start adding the desired trigger functions. The following sections introduce various interactive features.
" on the right side and start adding the desired trigger functions. The following sections introduce various interactive features.
 |
 |
|
Contents
|
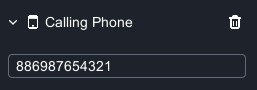
- Click the object to trigger the function of making a call on the device.
- Enter the phone number to be dialed.
Open Webpage
Click "![]() " to display the detailed functions on the left.
" to display the detailed functions on the left.
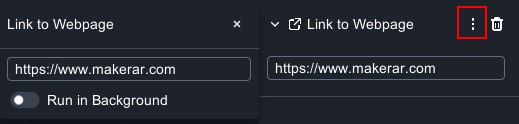
- Click the object to trigger the function of opening a webpage in the browser.
- Enter the URL to navigate to.
Send Email
Click "
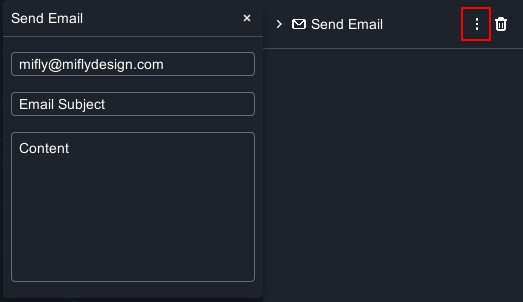
- Click the object to trigger the function of sending an email.
- Set the recipient, subject, and content. The email will be sent from the user's bound email account.
Switch Animation
Click "![]() " to display the detailed functions on the left.
" to display the detailed functions on the left.
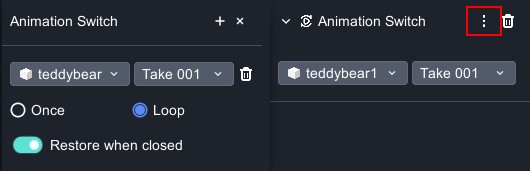
- Click the object to trigger the function of switching the object's animation.
- This function requires the animation to be segmented beforehand. For animation segmentation tutorials, refer to the section on Adjust Basic Attributes.
- About Animation Switch:
| Model Name | The model in the scene whose animation you want to switch. |
| Animation Name | The animation to switch to when the object is triggered. |
| Loop | The animation will loop continuously upon triggering. |
| Once | The animation will play only once upon triggering. |
| Restore when closed | The animation will play once and then revert to the original animation. |
Text To Speech
Click "
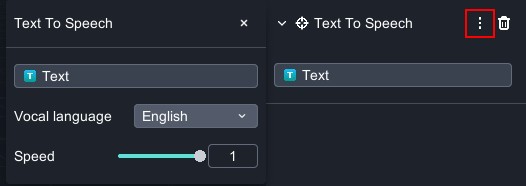
- Click the text object to trigger the function of reading aloud the text.
- The text settings support Mandarin, English, Japanese, and Korean, and you can also adjust the playback speed.
- The read-aloud function is only available on mobile devices.
Switch Scene
Click "
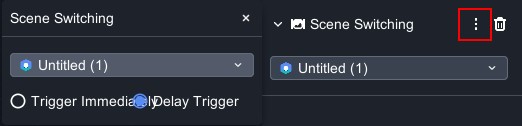
- Click the object in a VR project to trigger the function of scene jumping.
- At least two scenes need to be established.
- About Scene Switching:
| Scene | Choose the scene to jump to. |
| Trigger Immediately | The scene jump event is triggered immediately upon clicking. |
| Delay Trigger | The scene jump event is triggered after a 1-second delay upon clicking. |
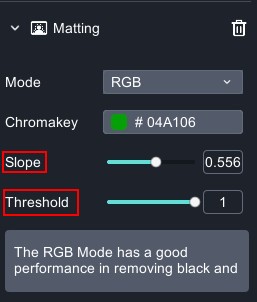
Matting
- Remove the background of image materials (jpg, png, gif) and video materials (mp4, YouTube link).
- For background removal steps, refer to the tutorial below (example with video material).
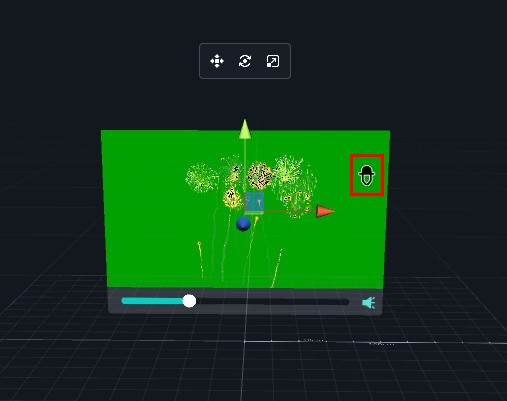 |
 |
| 1. Move the mouse to the video, and a " |
|
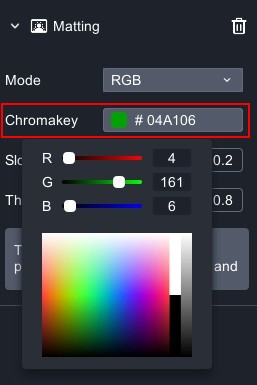 |
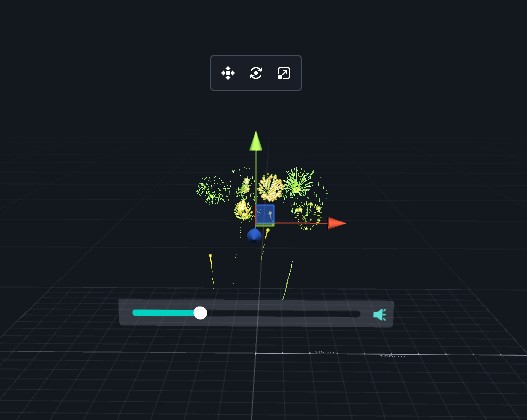 |
| 2. Alternatively, click "Chromakey" to select the color to remove through RGB. | |
 |
 |
| 3. Finally, adjust the slope and threshold values as needed to refine the background removal effect. | |
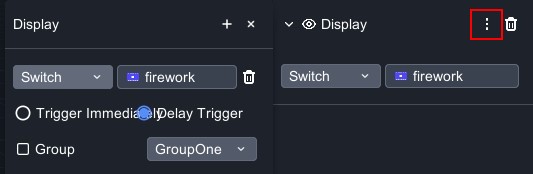
Display
Click "
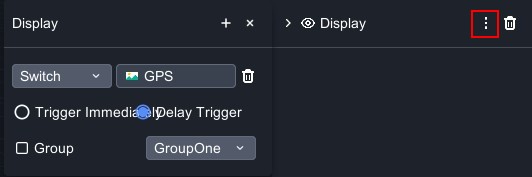
|
| Image Display:Click the object to trigger the function of displaying an image. |

|
| Model Display:Click the object to trigger the function of displaying a model. |
|
| Video Display:Click the object to trigger the function of displaying a video. |
|
| Text Display:Click the object to trigger the function of displaying text. |
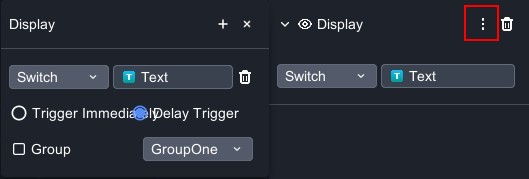
- About Display:
| Switch | Toggle the display or hide function. |
| On | Display the object. |
| Off | Hide the object. |
| Trigger Immediately | The display is triggered immediately upon clicking. |
| Delay Trigger | The display is triggered after a 1-second delay upon clicking. |
| Group | Set objects that should not appear simultaneously to the same group. |
※ For group triggers, refer to Group Trigger Structure Explanation tutorial.
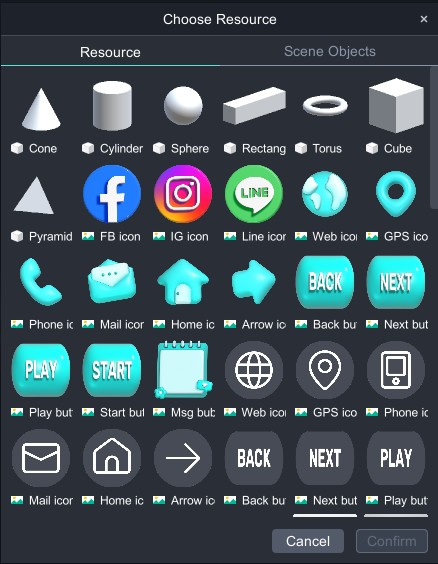
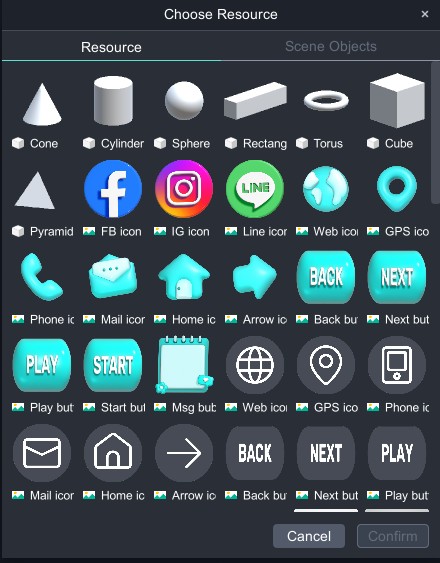
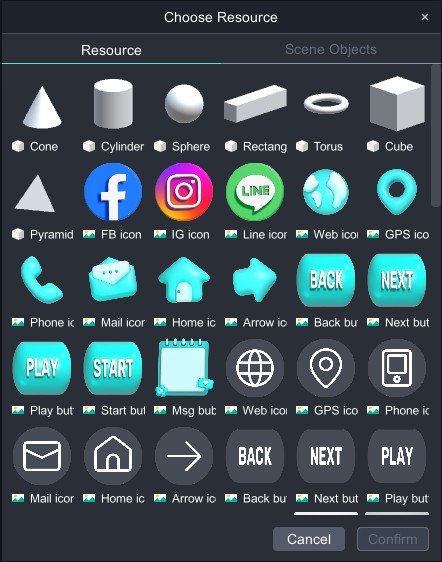
- Select Resource:When selecting to display other objects, a "Choose Resource" window will appear. You can choose objects in the scene or materials in the resource library.
Differences:
(1) Resource|Selecting from the resource library requires having many identical materials in the scene.
(2) Scene Object|Selecting from scene objects requires only one material in the scene. It is recommended to import from scene objects.
Facing
Click "
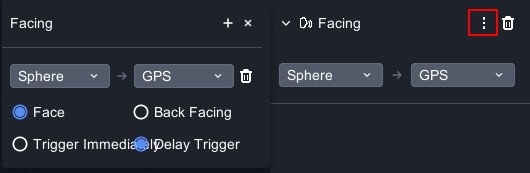
- Click the object to trigger the function of changing the object's gaze.
- The determination of whether an object is facing forward or backward is related to the object's origin. For example, if the origin of a human model is at the back of the body, then setting it to face forward will result in a backward-facing view. Therefore, please adjust the gaze function according to the object's specific situation.
- About Facing:
| Object A → Object B | Make object A face or turn its back to object B. |
| Face | Face the object. |
| Back Facing | Turn its back to the object. |
| Trigger Immediately | Trigger the face event immediately upon clicking. |
| Delay Trigger | Trigger the face event 1 second after clicking. |
Related Posts:
Specify Time
Specify Time
Specify Time function automatically triggers corresponding events at specific time intervals. These events include switching animations, displaying, text-to-speech, or facing. The time interval can be set with a minimum unit of one hour. You can configure specific events to automatically start at predetermined times according to the activity requirements or storyline, enhancing user interaction and creating a more immersive virtual world.
1. In the scene objects on the left, click the currently established scene.

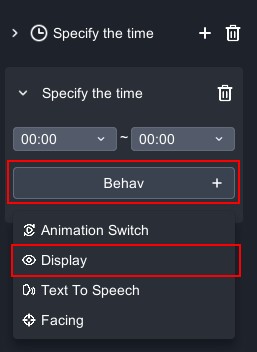
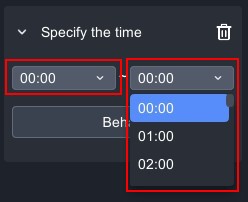
2. Click "![]() "→ "Behav" → "Specify the time".
"→ "Behav" → "Specify the time".

3. Click "+" to bring up the time setting window.

4. Click "Behav" to choose from four functions: "Animation Switch, Display, Text To Speech, Facing" The example below uses "Display" Select the object in the scene.
 |
 |
5. Set the time interval, with a minimum unit of one hour, or specify the exact time.
Related Posts:
Gyroscope
Gyroscope
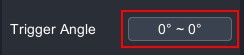
The gyroscope is a technology that detects the rotation of a mobile device. Its primary function is to trigger corresponding events when the device rotates to a specific angle. These trigger events include switching animations, displaying, text-to-speech, or facing. The trigger angle range can be set from 0° to 359° to meet different application scenarios. By rotating the mobile device through different viewpoints, it feels like being in the first-person perspective of a game character, making the virtual experience more immersive.
1. In the scene objects on the left, click the currently established scene.

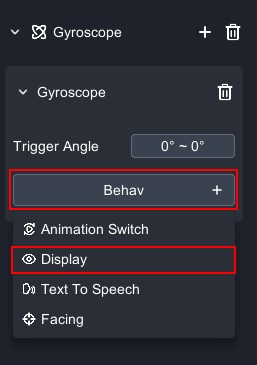
2. Click "![]() " → "Behav" → "Gyroscope".
" → "Behav" → "Gyroscope".

3. Click "+" to bring up the gyroscope settings window.

4. Click "Behav" to choose from four functions: "Animation Switch, Display, Text To Speech, Facing" The example below uses "Display" Select the object in the scene.
 |
 |
5. Set the trigger angle (0°–359°).
Adjust and Add Materials
Adjust and Add Materials
MAKAR Editor provides the functionality to adjust material properties for 3D objects. You can refine details such as smoothness, color, and shadows according to the material properties inherent to the object. Additionally, you can upload your own textures or use the default materials provided, making your 3D objects more vivid and rich. Below is an explanation of how to adjust and add material properties and their various parameters.
Adjust Material Properties
1. When you click a 3D object, the material properties panel appears on the right, showing all the materials applied to the object. By moving the cursor, you can identify which part of the object each material affects.

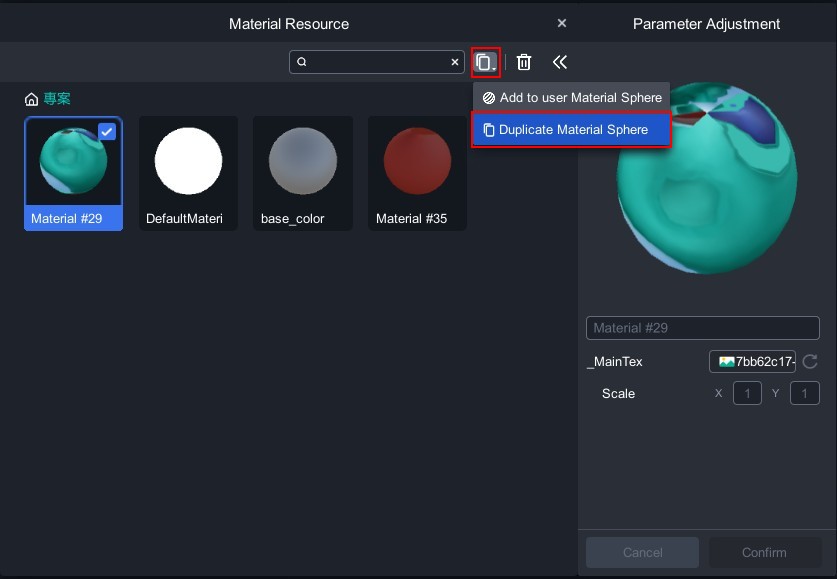
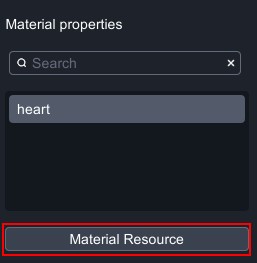
2. Click "Material Resource" to open the adjustment window.

3. In the scene, there are currently three 3D objects: Macaron, Square, and Heart. This section will display each 3D object's material properties. Move the cursor back and forth between the 3D objects in the scene and the material properties panel on the right to confirm the material positions.

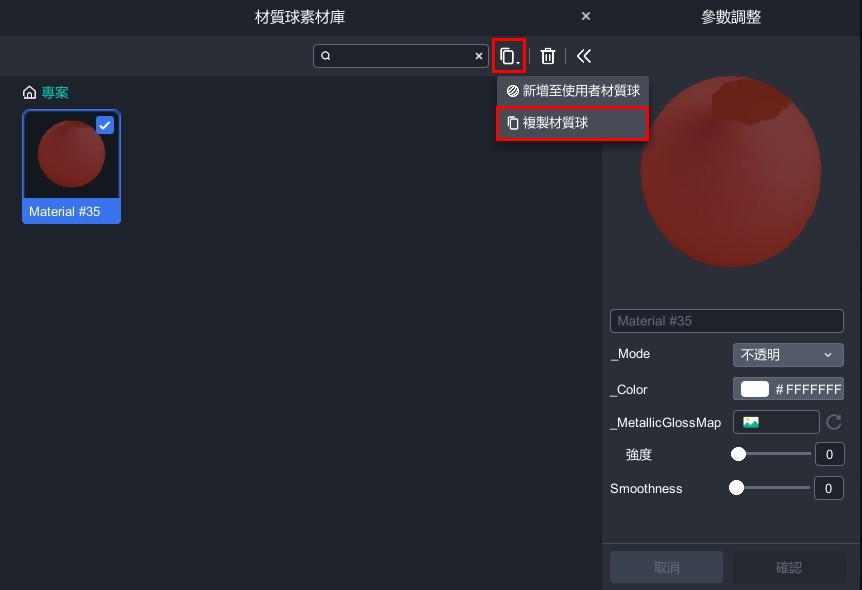
4. Since you cannot directly adjust the material properties of the object itself, you need to copy the material first. Select one of the materials and click "![]() " → "Duplicate Material Sphere" to successfully copy it. You can then adjust various parameters in this panel.。
" → "Duplicate Material Sphere" to successfully copy it. You can then adjust various parameters in this panel.。
 |
 |
Material Property Parameters
Add New Materials Properties
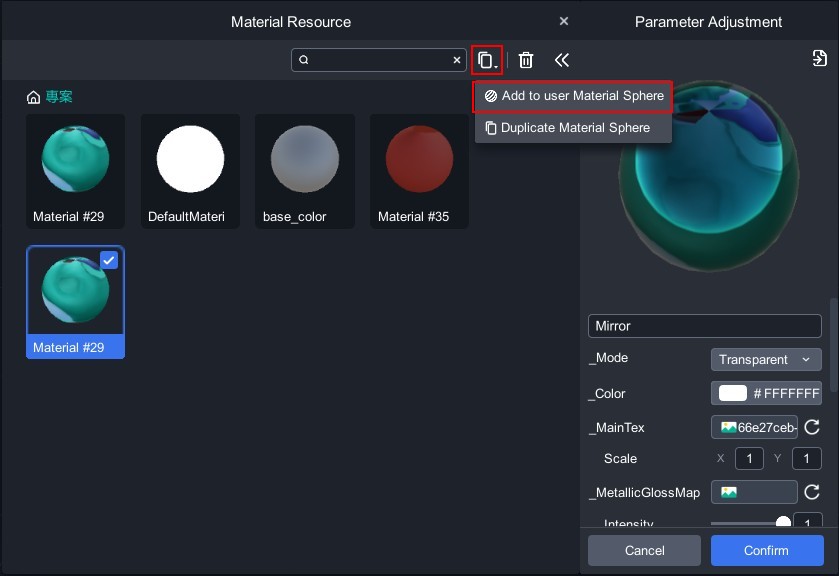
If you want to add the modified material to your own material library, click " ![]() " → "Add to User Materials Sphere" to add it. Later, when creating other objects or projects that require this material, you can directly import it from the user material library.
" → "Add to User Materials Sphere" to add it. Later, when creating other objects or projects that require this material, you can directly import it from the user material library.
For instructions on how to apply materials from the material resource directly to model objects, please refer to the tutorial on Apply and View Default Materials.
Related Posts:
Applying and Viewing Default Materials
Apply and View Default Materials
In the 3D material section, MAKAR Editor offers numerous preset materials, such as Iron, Bricks, and Cartoon, allowing you to easily apply various styles to your models. The adjusted materials can also be saved. Below is a guide on how to apply preset materials and how to view the preset materials.
Apply Default Materials
1. In your MAKAR project scene, select the 3D object and click "Material Resource" to open the adjustment window.

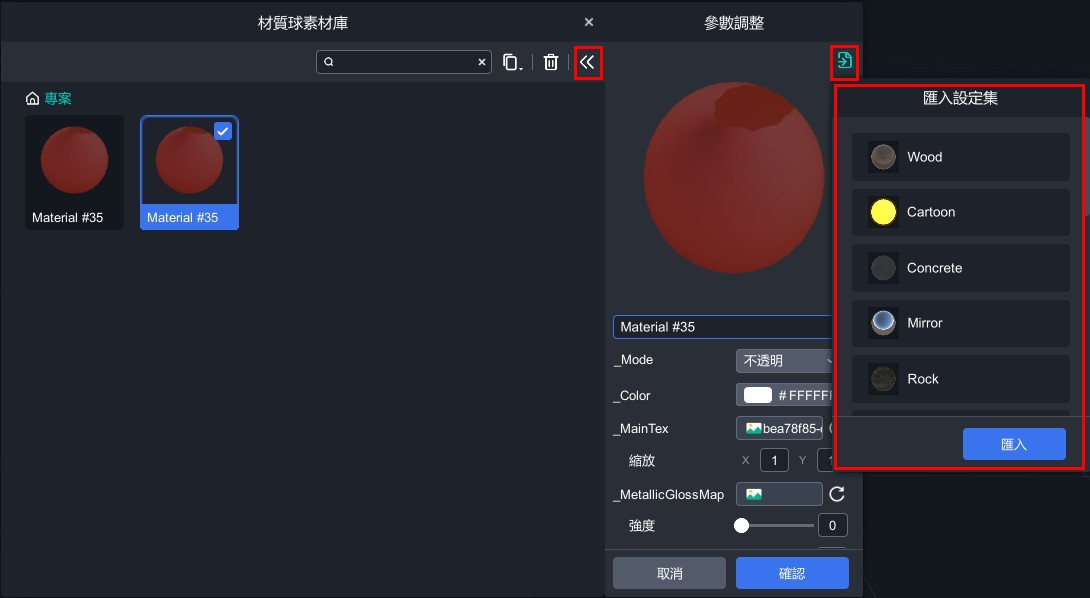
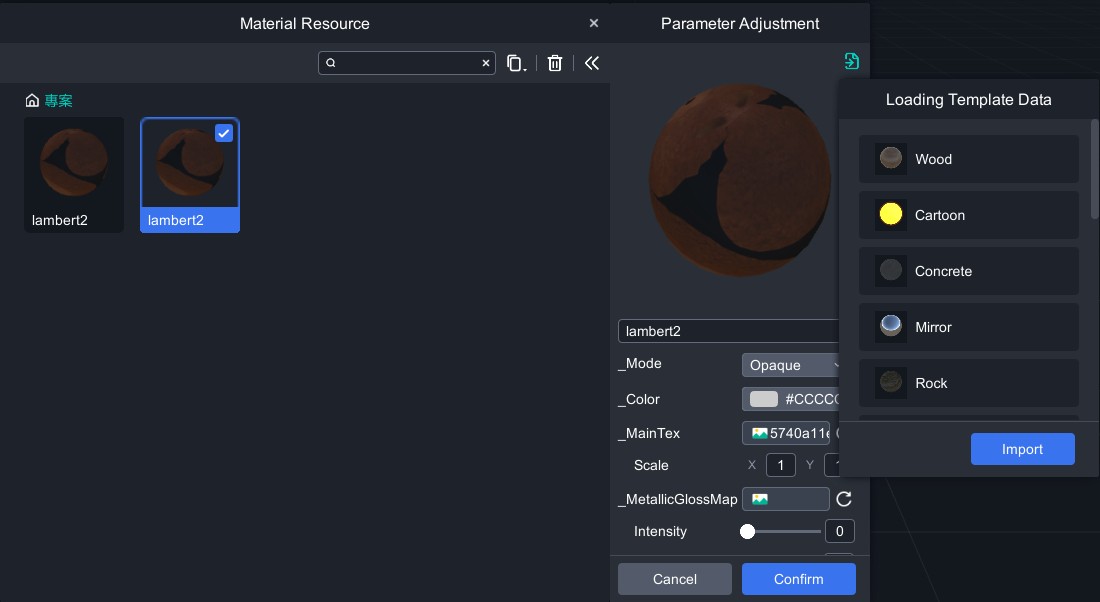
2. Click " ![]() " → "Duplicate Material Sphere" to copy the material. Then click "
" → "Duplicate Material Sphere" to copy the material. Then click "![]() →
→ ![]() " to display the import settings window. Here, you can choose from preset materials or previously added materials.
" to display the import settings window. Here, you can choose from preset materials or previously added materials.
 |
 |
View Materials
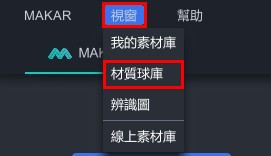
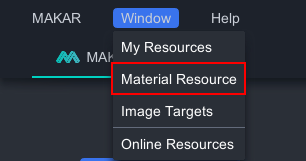
On MAKAR Editor homepage, click "Window" → "Material Resource" to open the user material library. This library contains various MAKAR default materials as well as any materials you have previously added.
You can directly adjust and add materials here or in your project. For detailed instructions, please refer to the tutorial on Adjust and Add Materials.
 |
 |
Related Posts:
Deleting Materials
Delete Materials
On MAKAR Editor Homepage
Click "Window" → "Material Resource" to open the user material resource on the homepage,click "![]() ",to delete materials. You can only delete materials that you have copied and added to a project. MAKAR default materials cannot be deleted.
",to delete materials. You can only delete materials that you have copied and added to a project. MAKAR default materials cannot be deleted.
 |
 |
In a MAKAR Project Scene
In your MAKAR project scene, select the 3D object and click "Material Resource" to open the adjustment window. Click "![]() " to delete materials. You can only delete materials that have been copied. The original materials that come with the 3D object cannot be deleted.
" to delete materials. You can only delete materials that have been copied. The original materials that come with the 3D object cannot be deleted.
When you add copied materials to the user material resource and then click "
 |
 |
Related Posts:
Introduction to Default Materials
Introduction to Default Materials
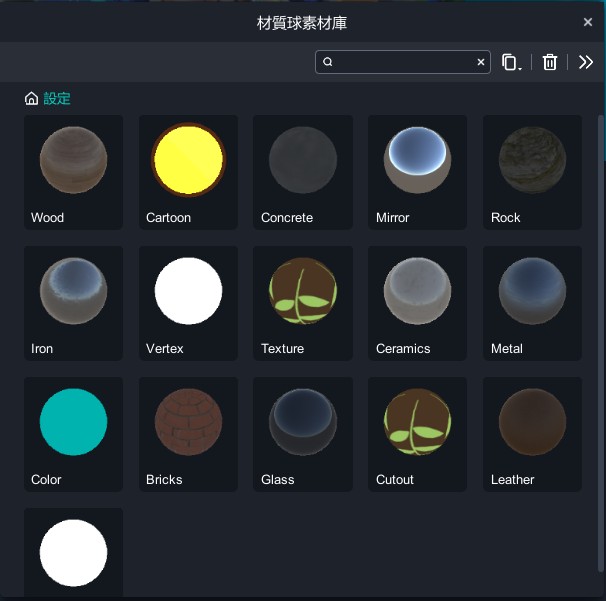
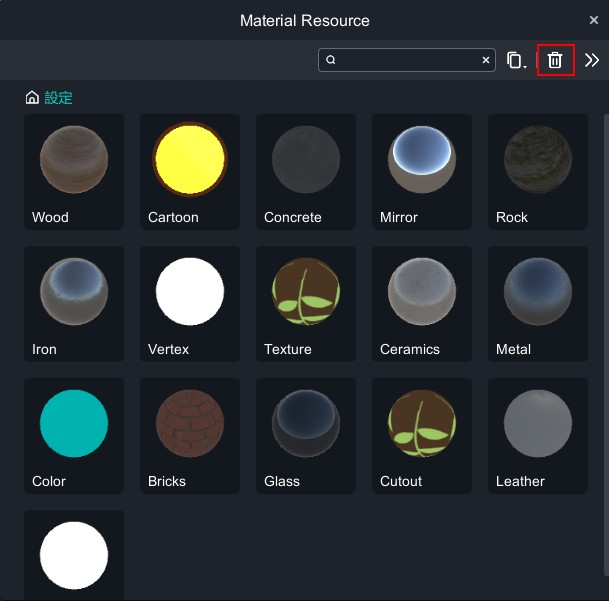
When adjusting the materials of 3D objects, you can select suitable materials from the MAKAR default material resource and fine-tune the details to achieve the desired look. Below are the various default materials offered by MAKAR.
| Default Materials |
|
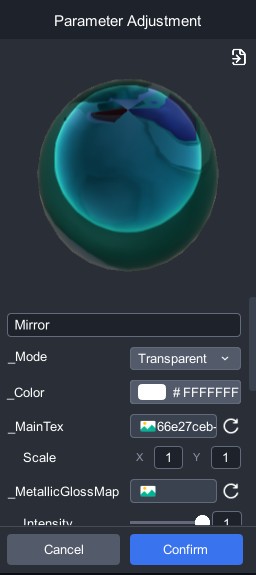
Wood、Cartoon、Concrete、Mirror、Rock、Iron、Vertex、Texture、Ceramics、Metal、Bricks、Glass、Cutout、Leather、Mask
|
Select and Adjust Materials
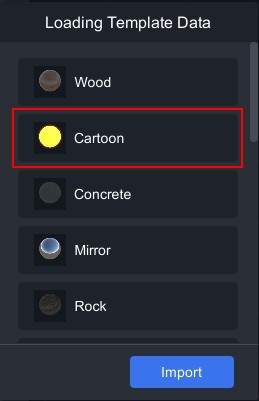
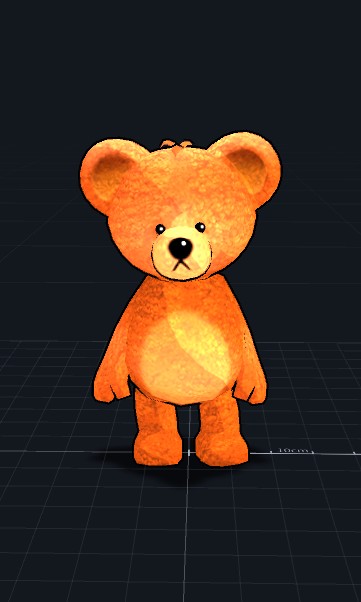
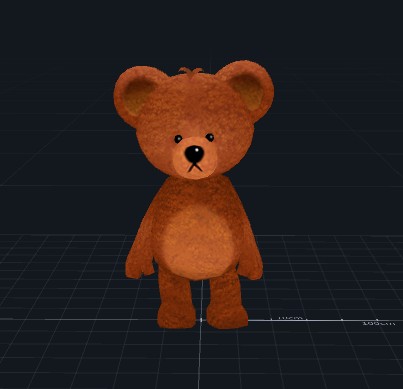
First, due to the variety of materials available in MAKAR, it is recommended to select the appropriate material for your object based on its appearance before applying and adjusting the default materials. The following example uses "teddybear 1" from MAKAR material resource to explain the selection and adjustment of materials.
1. Follow the steps to adjust materials by first copying the object's material and then opening the default materials. For detailed steps, please refer to the tutorial on Apply and View Default Materials.
2. Since the teddybear has a cute style, we choose the "Cartoon" material.
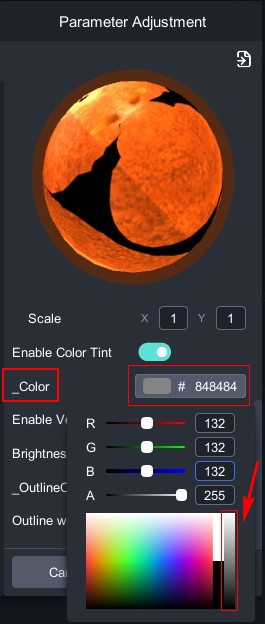
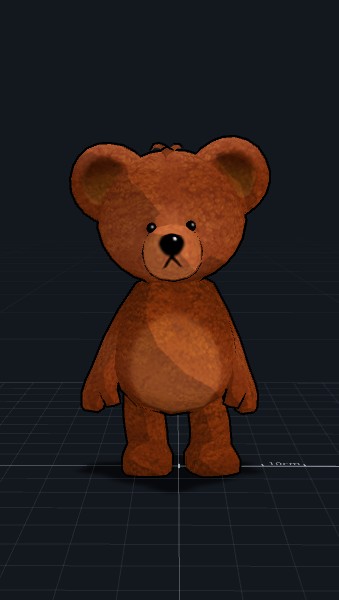
3. The default color of the cartoon material is yellow. Click "_Color" and adjust it to grayscale. Gray will let the object show its original color, with lighter gray being brighter.
 |
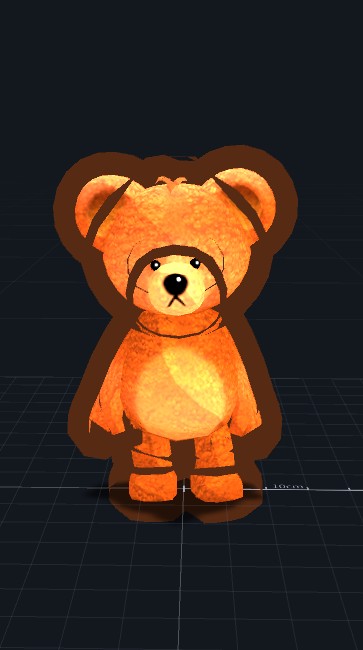 |
| Parameter Adjustment | Current Object Status |
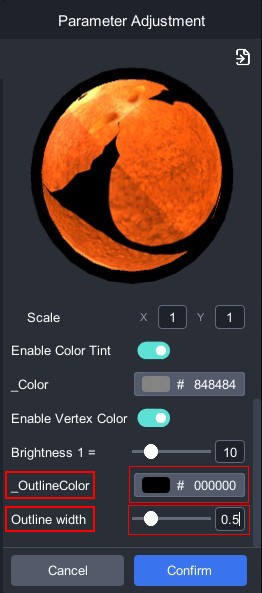
4. Adjust "_Outline Color" to black and "Outline Width" to 0.5 to define the object's outline.
 |
 |
| Parameter Adjustment | Current Object Status |
5. If the object appears too bright, adjust the "Brightness1" to achieve the desired cartoon look.
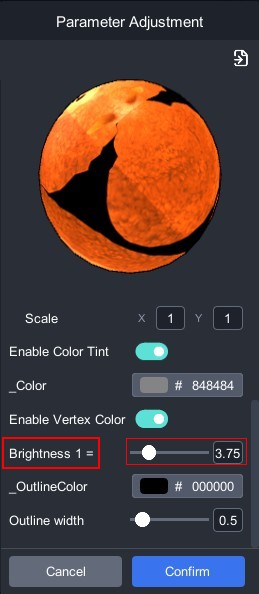 |
 |
| Parameter Adjustment | Current Object Status |
Therefore, the primary condition for selecting a material is to determine the needs of your object. For example, if your object is a wooden wall, apply and adjust the "Wood" material. If your object is a key, apply and adjust the "Metal" material. Using the appropriate default materials will bring out the best texture for your object.
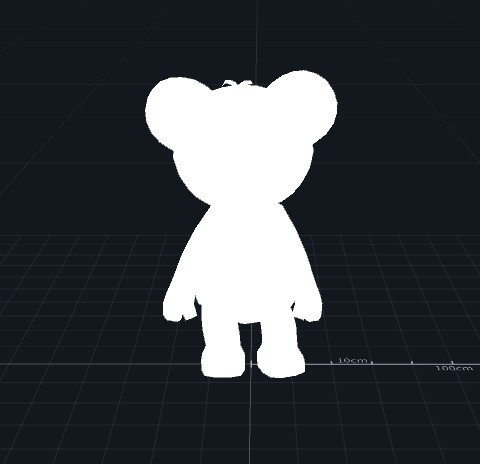
Special Materials
Some materials in the MAKAR default material resource have unique effects, which are explained below:
 |
|
| Vertex | This material shows the object without any texture, displaying vertex colors. |
 |
|
| Texture | This material does not react to lighting and gives the object a vivid, bright appearance. |
 |
|
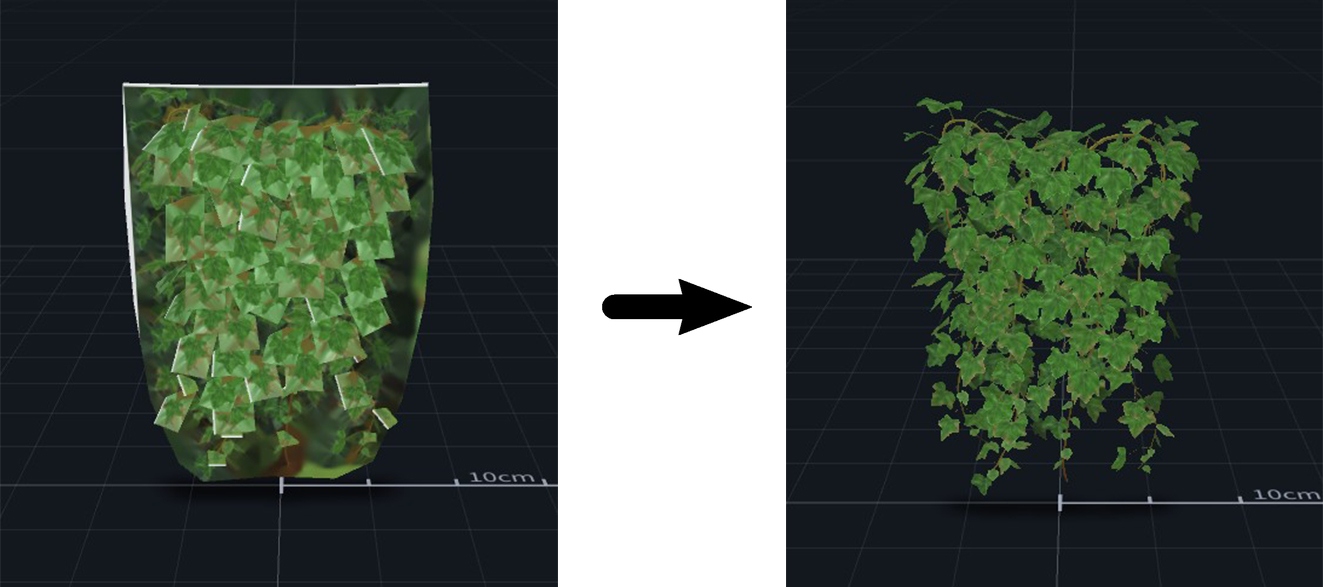
| Cutout |
Commonly used for plant models, this material makes the background transparent, clearly presenting the plant's appearance. |
 |
|
| Mask | This material hides the object and creates an effect of walking into a space. For practical applications of this feature, refer to MAKAR Mask Project. |
Create Point Card Module
MAKAR Editor offers an interactive point card module, allowing users to collect points by scanning AR target images with their mobile devices. This module is widely used in event marketing, such as offering rewards upon collecting enough points. Additionally, this module can be effectively used in the education sector, such as setting up point collection games for learning tasks to increase engagement and enhance the learning experience. The following instructions will explain how to create a point card module.
|
Contents
|
Play Point Card Process
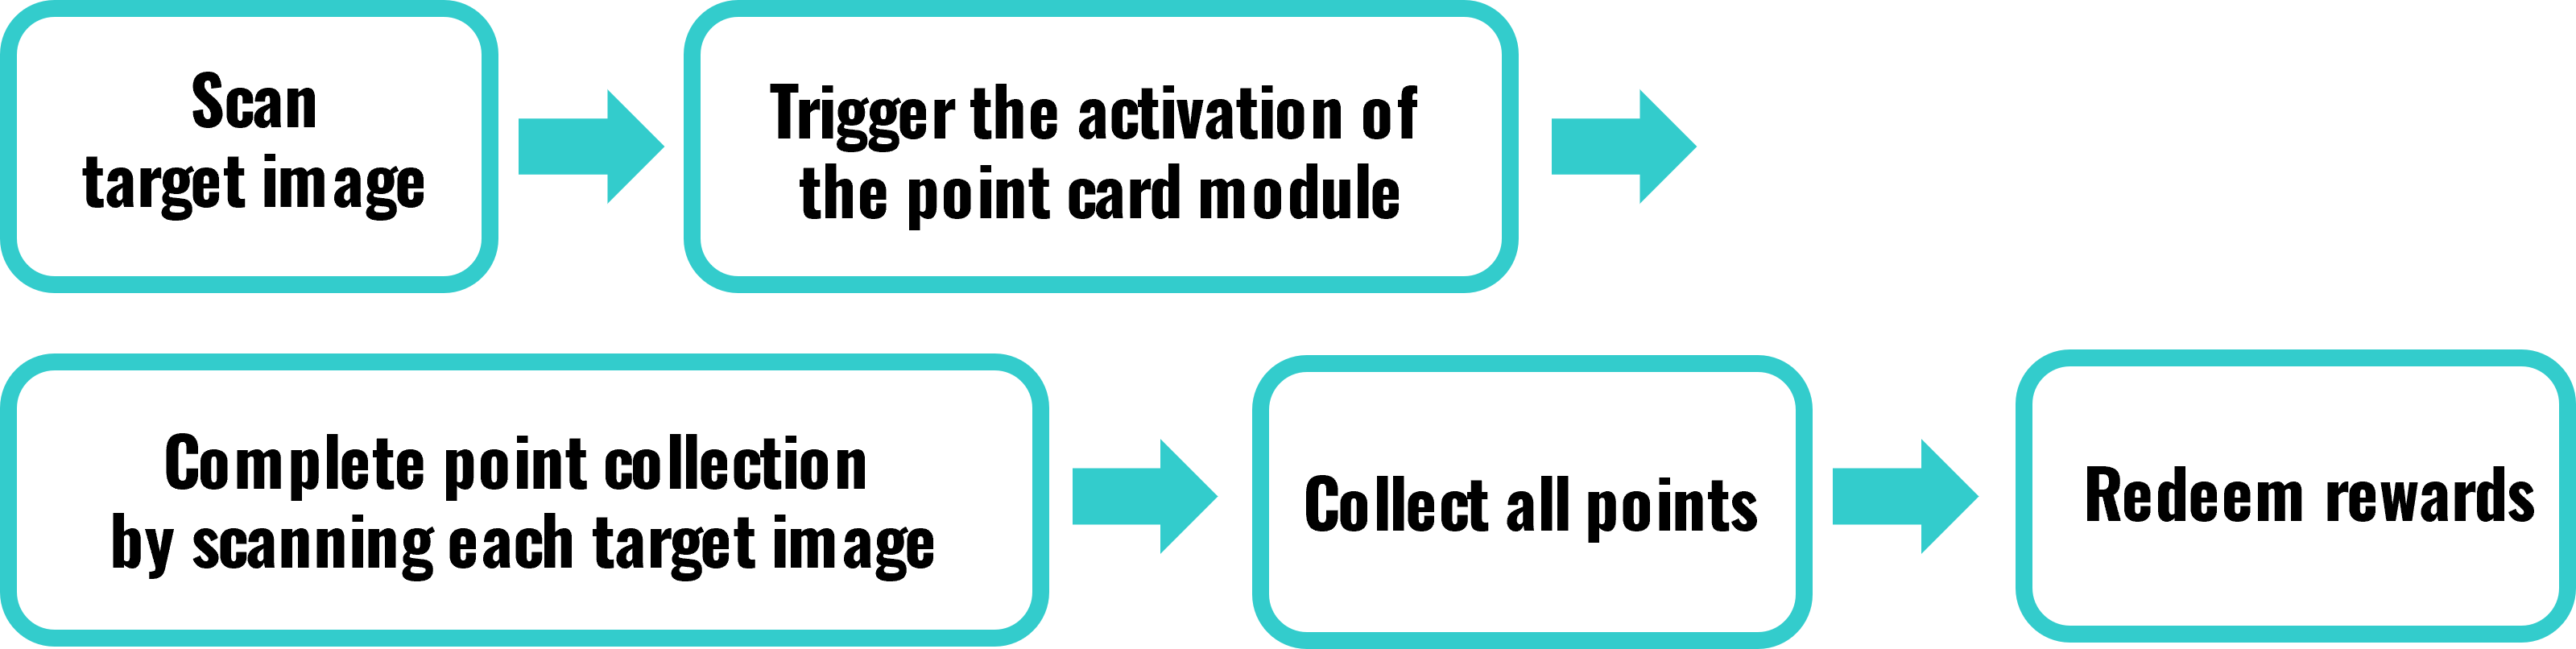
Create Point Card
1. The point card module belongs to 2D interactive experience and includes the function of scanning and recognizing images. Therefore, when creating the point card module, you must choose to add a project under "Augmented Reality(Image)".

2. Enter the augmented reality image project, click "
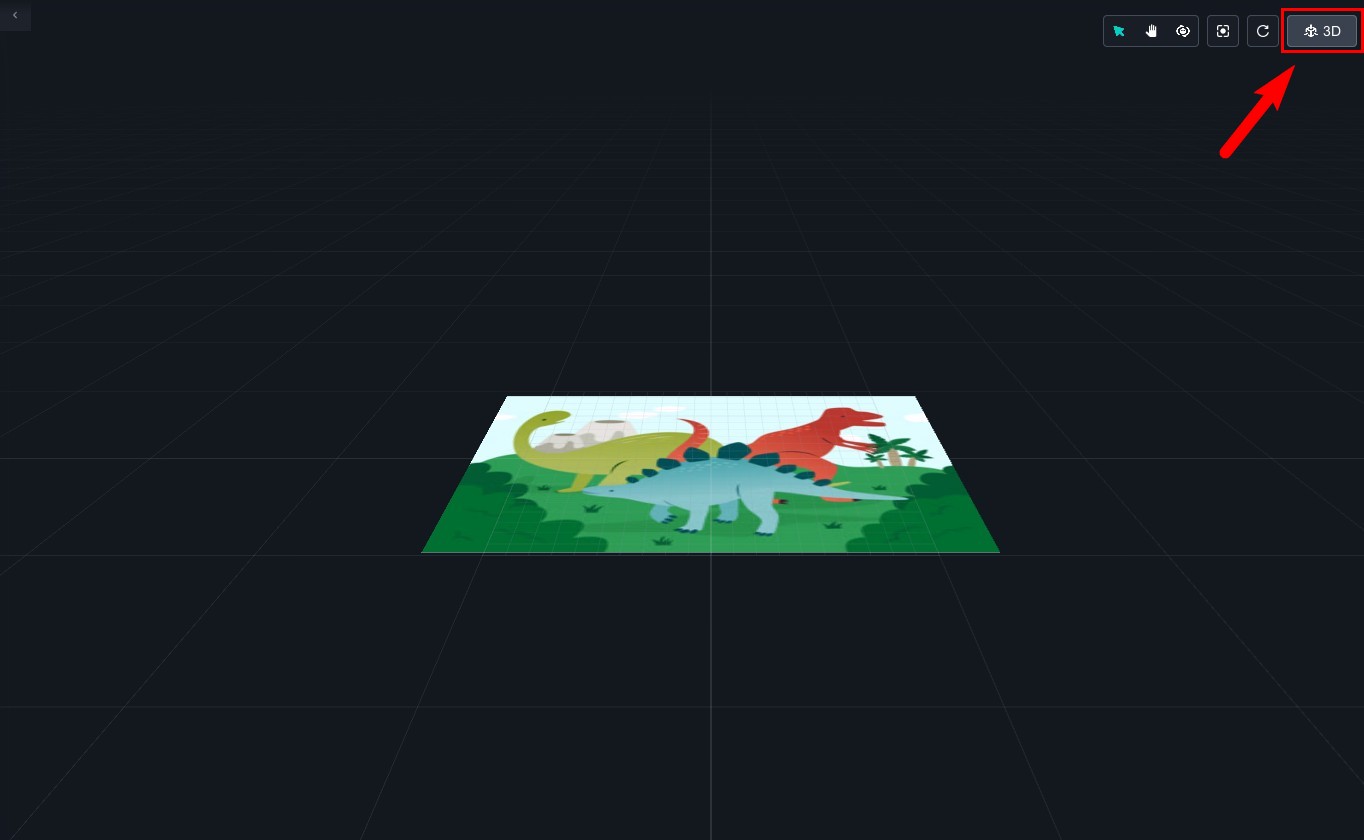 |
 |
| ▲ Before switch | ▲ After switch |
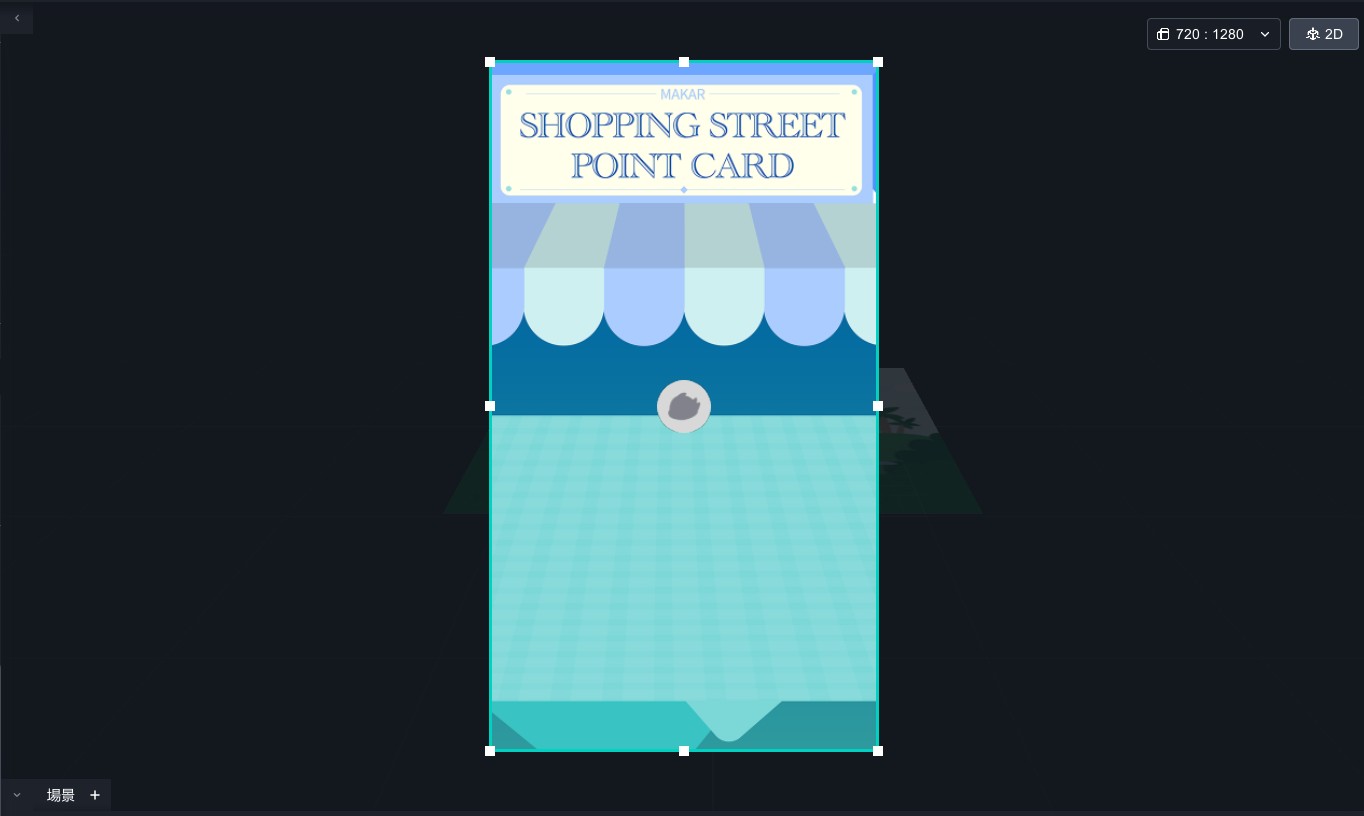
3. Click "Module" on the left side and drag "Point Card" into the scene.
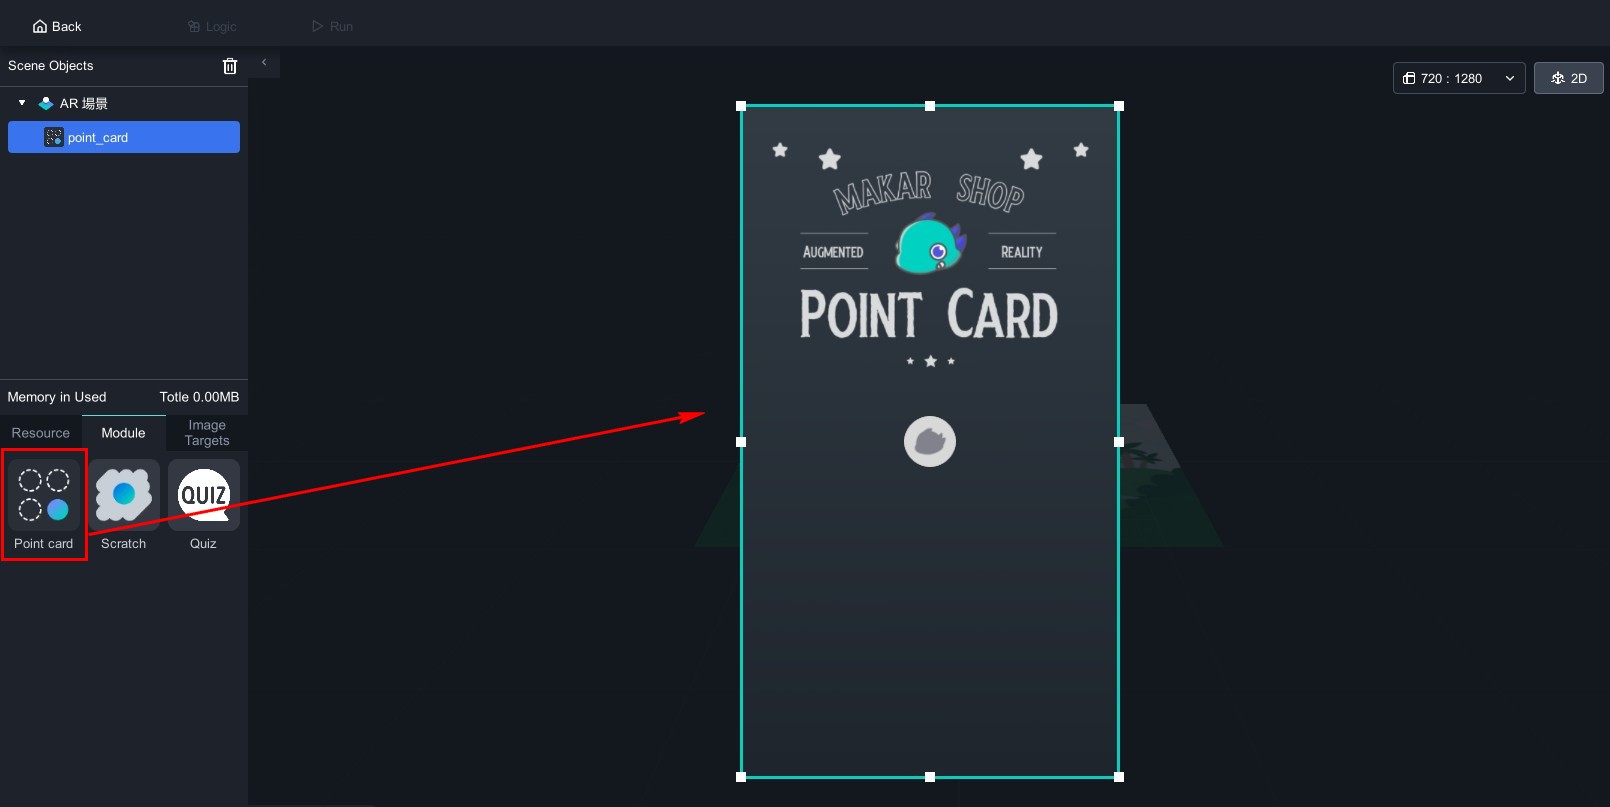
4. Click the module in the scene objects, and the point card function window will appear on the right.
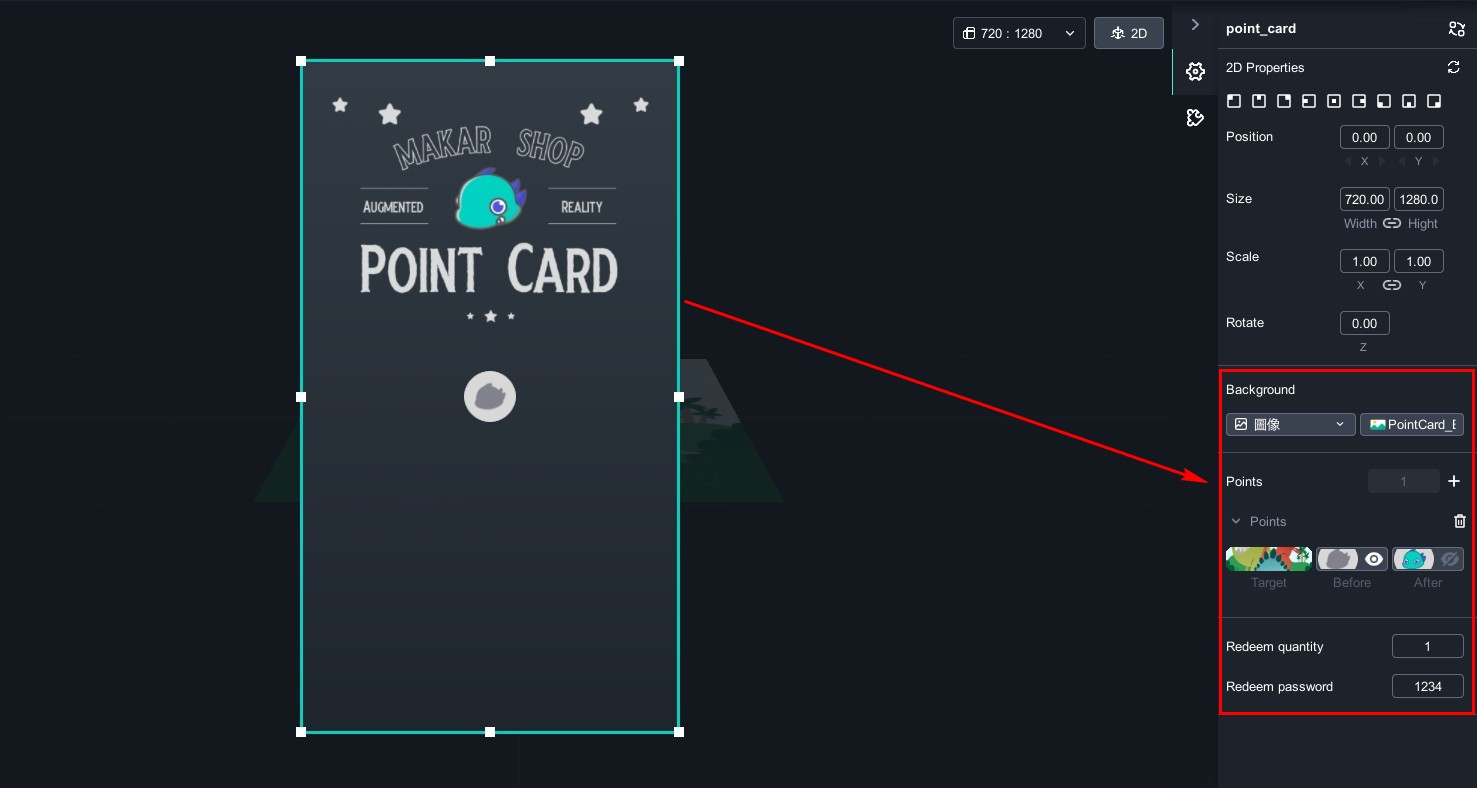
The point card module can be customized according to your needs, such as changing the background image of the point card, changing the backgrounds before and after redemption, and uploading materials to MAKAR for these changes. Due to the large number of images, it is recommended to create folders on your computer in advance and upload them to your resource library for better classification and organization. For the process of uploading images to the material library, please refer to the tutorial "Add Your Resources".
Next, we will explain how to change backgrounds, add points, and target images. For this tutorial, you can click "Point Card Module Materials" to download related materials.
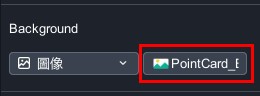
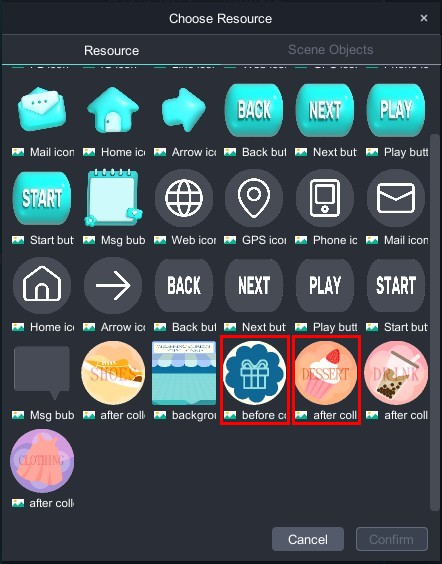
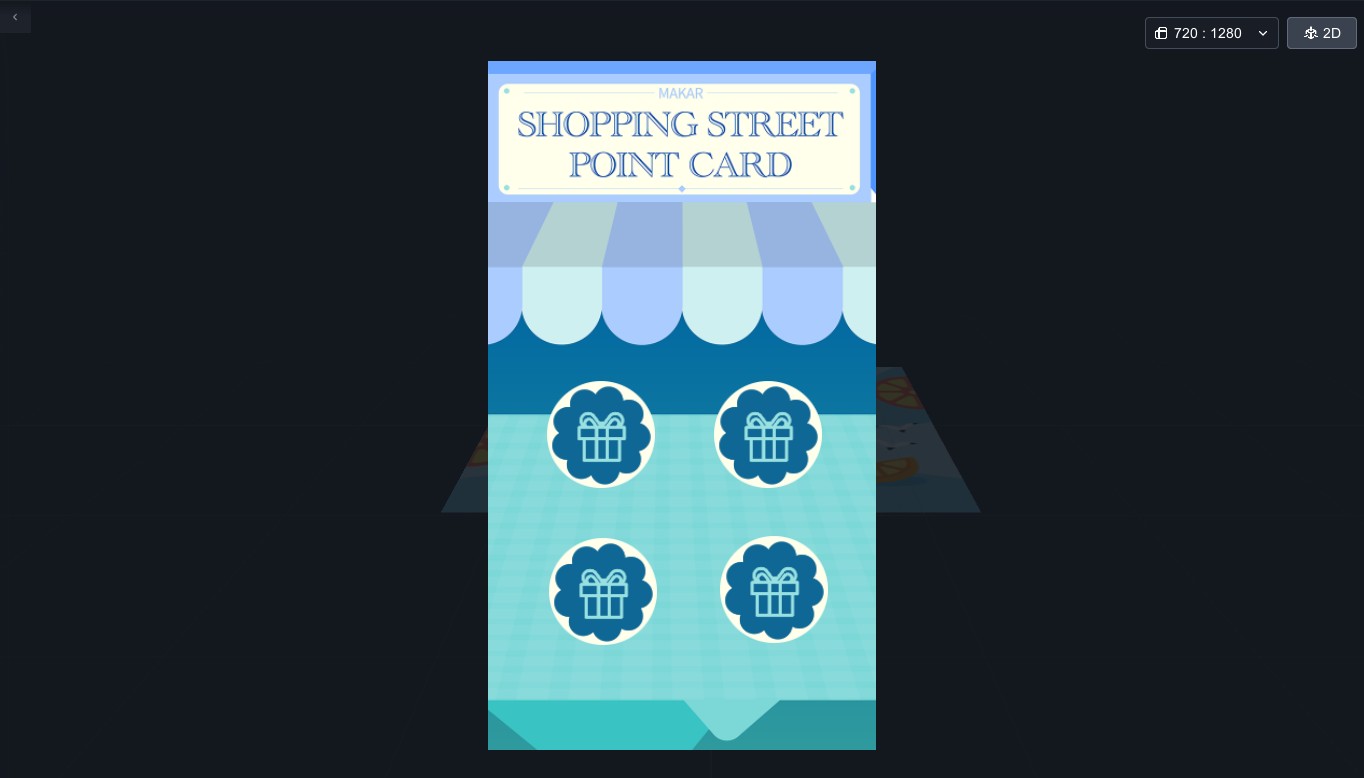
1. In the background section on the right, click the image option on the right, and a window will appear to select the material. Choose the background image you want to replace.
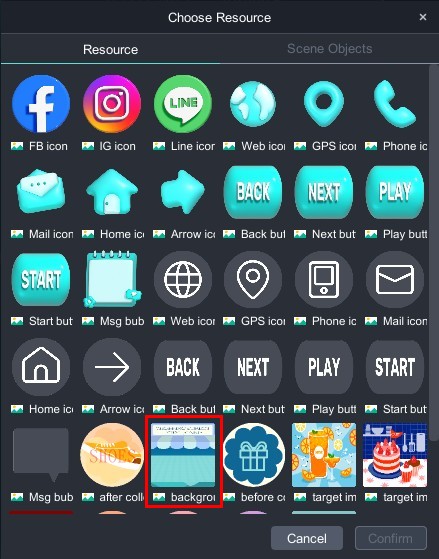
After changing the background:
Add Points / Add Target Images / Change Points Background
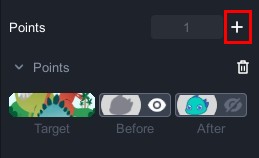
1. In the points section on the right, click the "+" to add points.
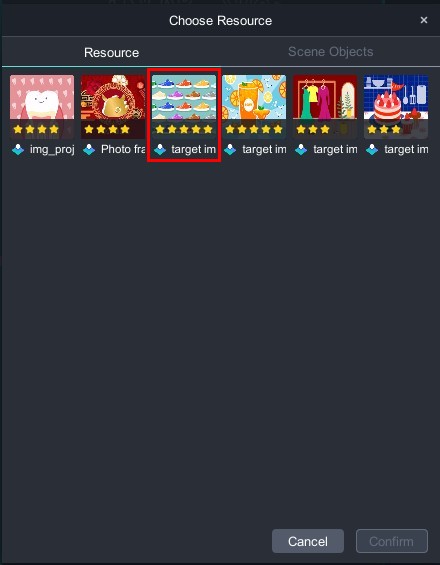
2. Click "Target", and a window will appear to select the material. Choose the target image for this point. If you need to upload a new target image, you can click "Image Target" → "Add Target" on the left to upload directly.
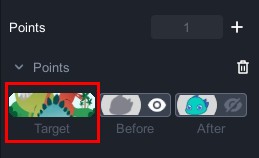
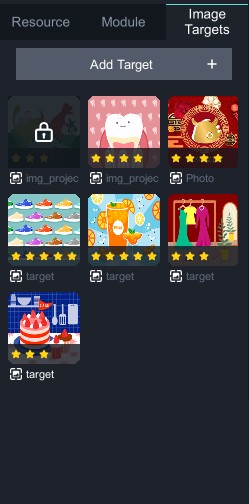
Four target images have been added:

3. Click "Before" and "After" respectively, and a window will appear to select the material. Choose the background you want to replace.
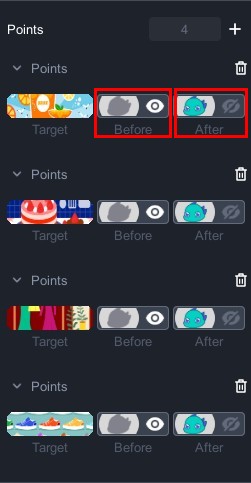
4. Add points according to your needs and use the mouse to drag and scale in the editing scene to easily arrange the layout.
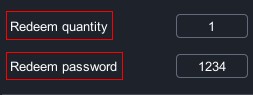
- Redeem quantity:Set the number of points needed to trigger the reward redemption function according to your needs, with a minimum of one point.
- Redeem password:Set a redemption password that triggers when the user collects enough points. If the number is deleted, there will be no password required.
1. Each account can only play the point card module once.
2. MAKAR Project Version of STANDARD/ADVANCED/STUDIO allow you to log in to the backend to view the project's redemption status.
3. If the user plays without logging in, they can play again after deleting and reinstalling MAKAR Viewer. If you have further feature requirements, we recommend contacting our specialists to discuss customized services.
Create Scratch Module
MAKAR Editor provides an interactive scratch module where users can scan a target image and use their finger to scratch open a picture. Scratching reveals the prize hidden underneath the image. This module is often used in marketing campaigns where scratched contents could include discount codes or other interactive content, providing users with an engaging experience. Below are the steps to create a scratch module.
|
Contents
|
Play Scratch Process
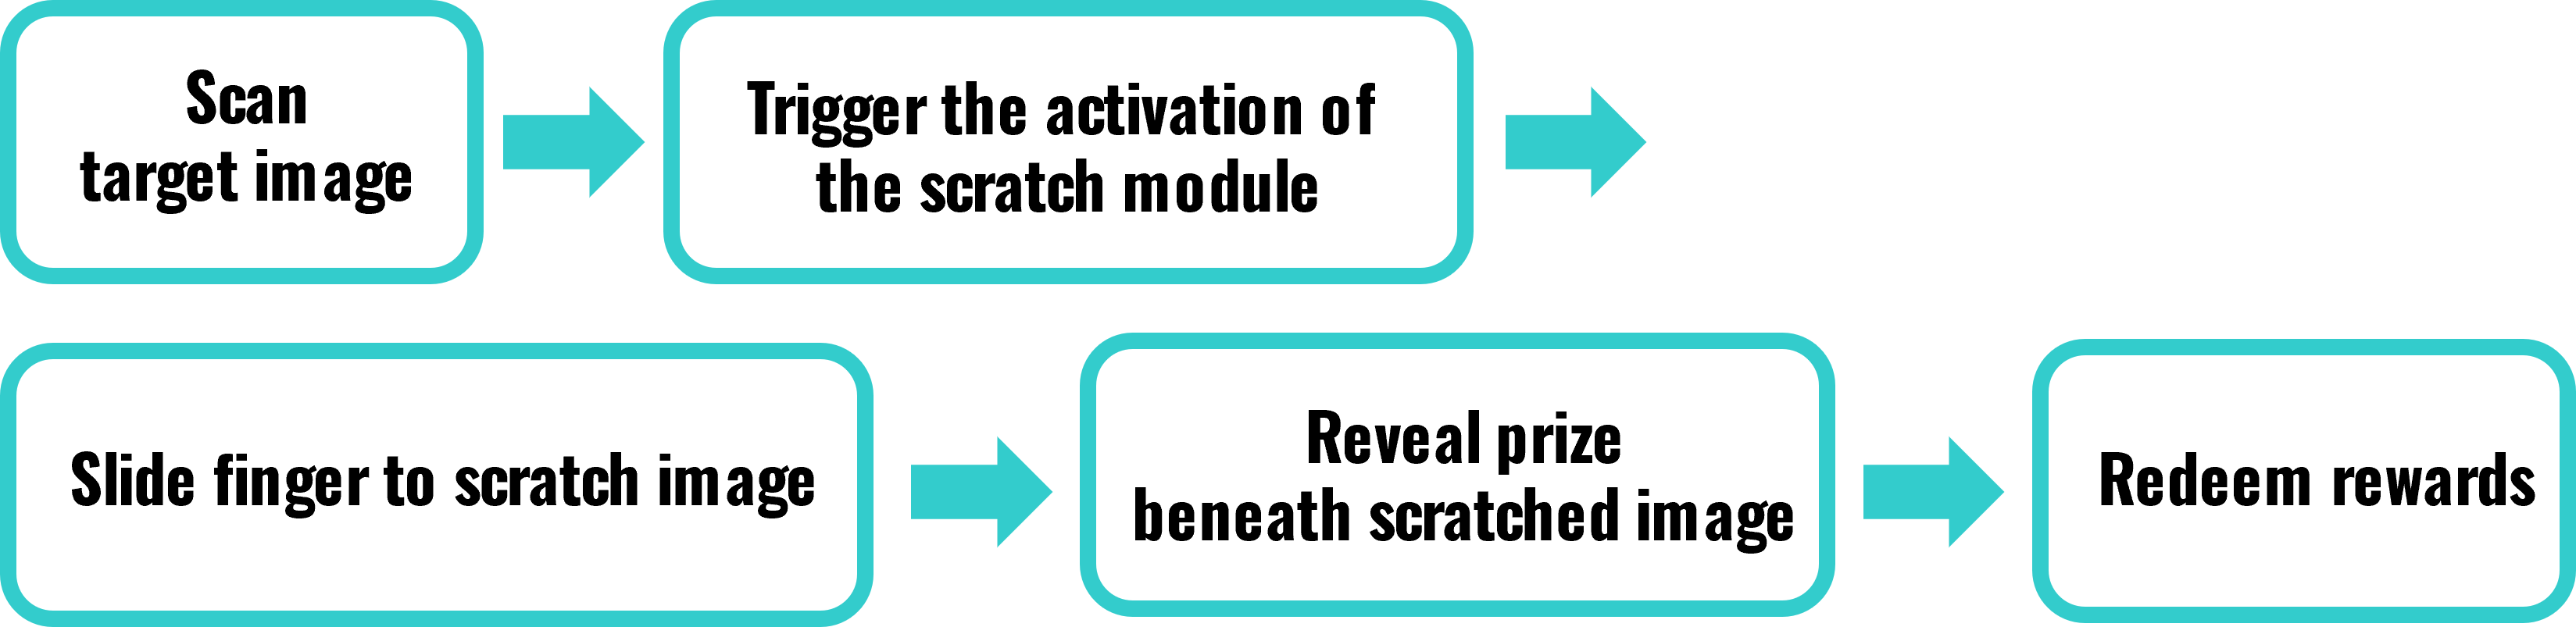
The scratch module is part of a 2D interactive experience, including the feature of scanning target images. Therefore, when creating the scratch module, choose to add a project under "Augmented Reality (Image)".
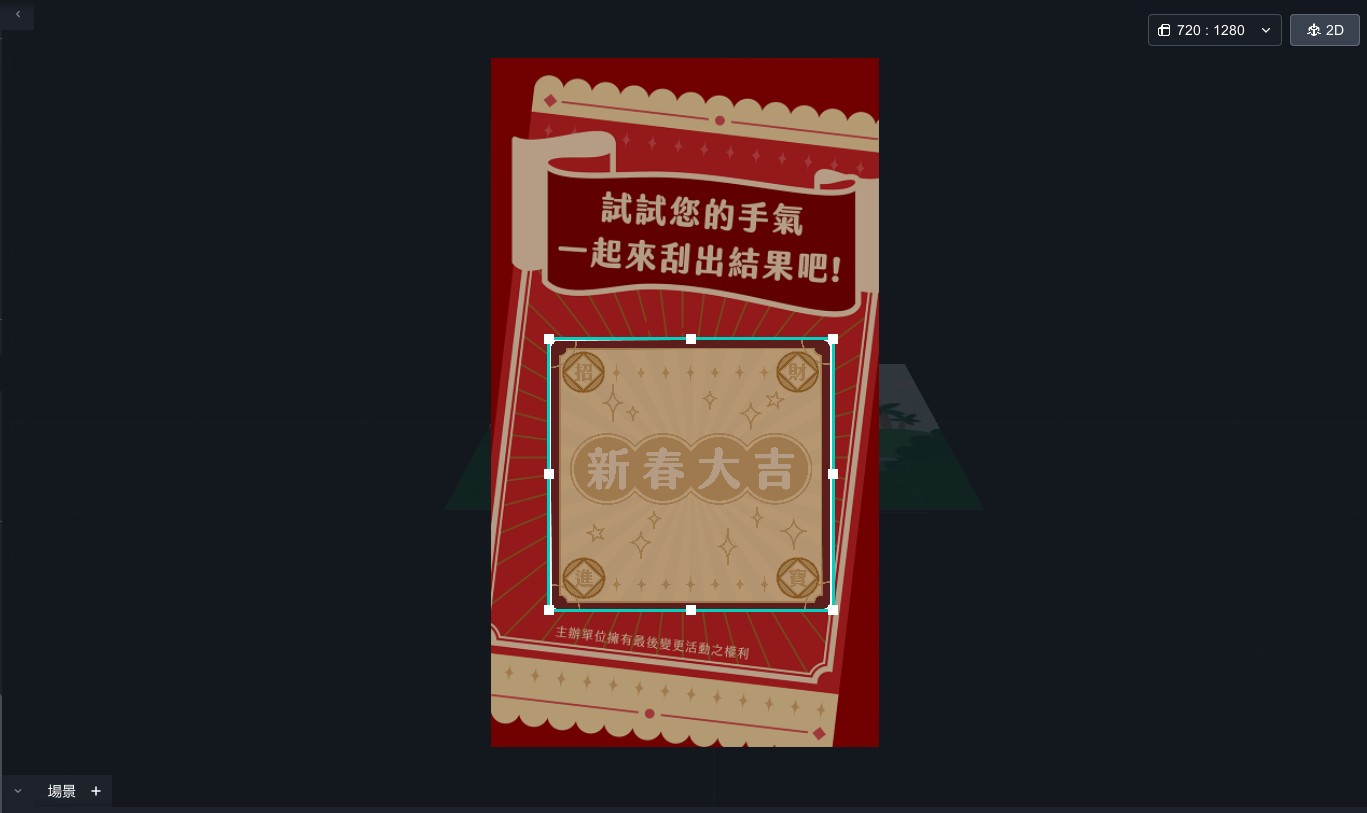
2. Enter the augmented reality image project, click "![]() " in the upper right corner of the scene to switch the scene to 2D mode.
" in the upper right corner of the scene to switch the scene to 2D mode.
 |
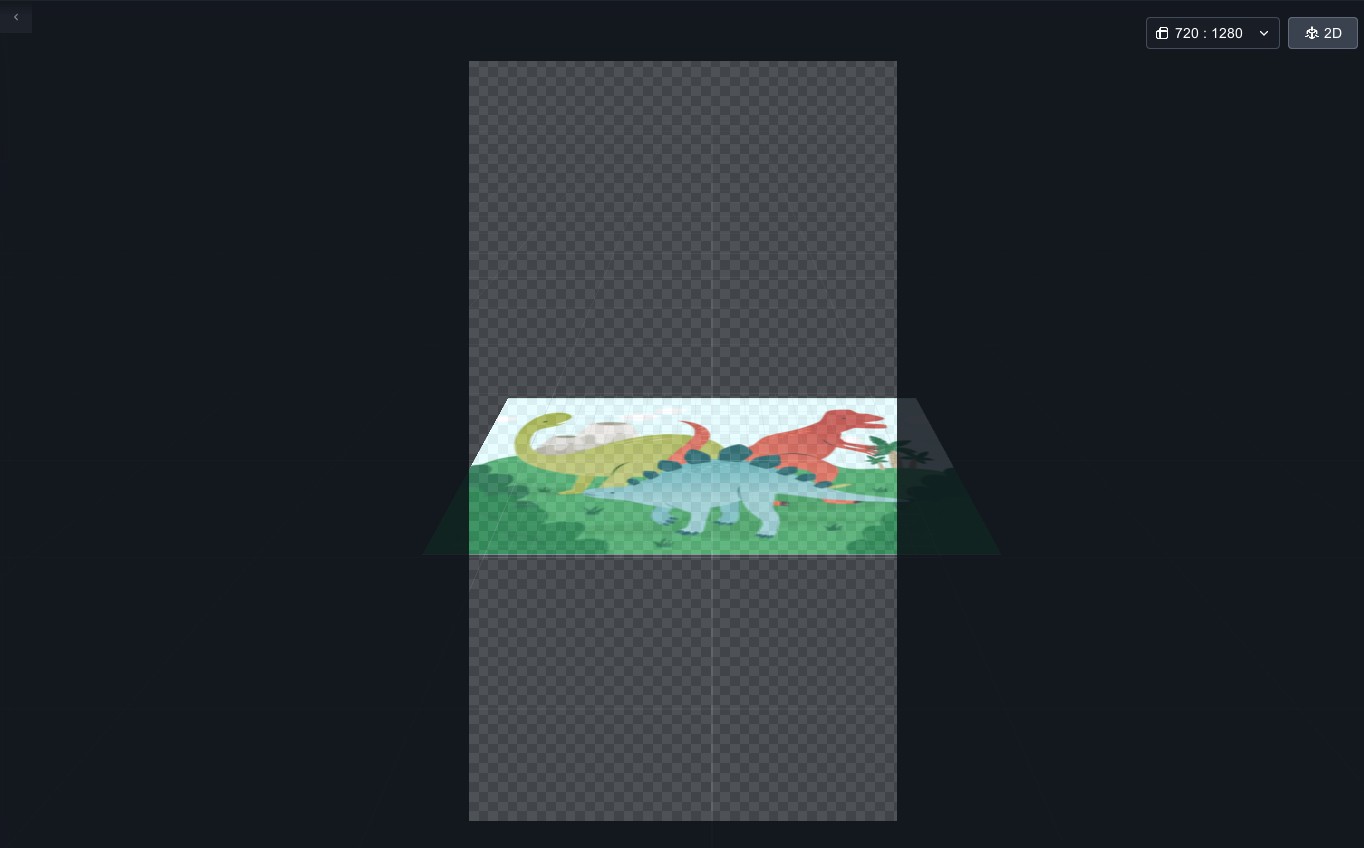 |
| ▲ Before switch | ▲ After switch |
3. Click "Module" on the left side and drag "Scratch" into the scene.
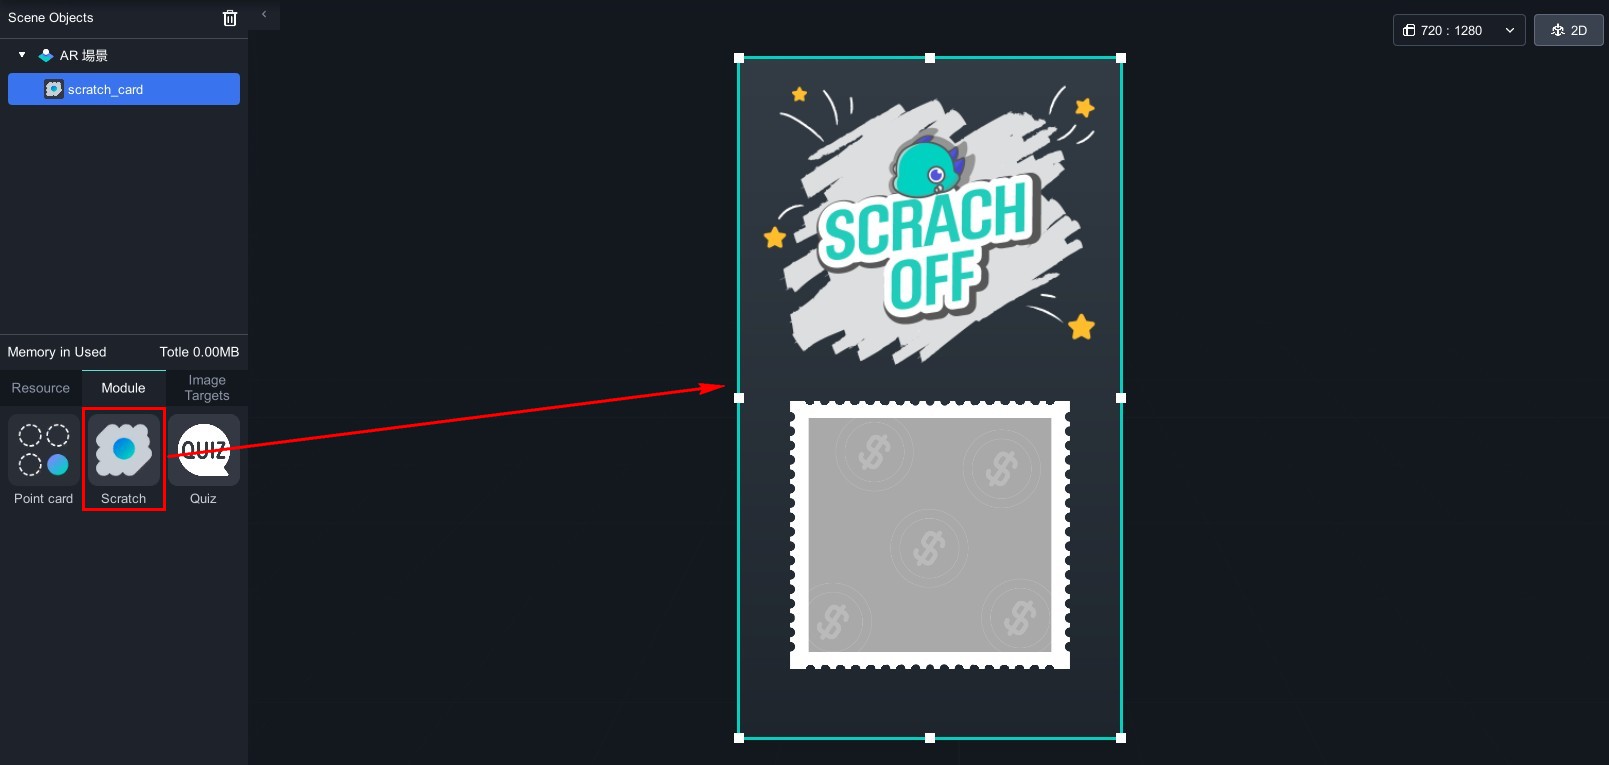
4. Click the module in the scene objects, and Scratch Module function window will appear on the right.
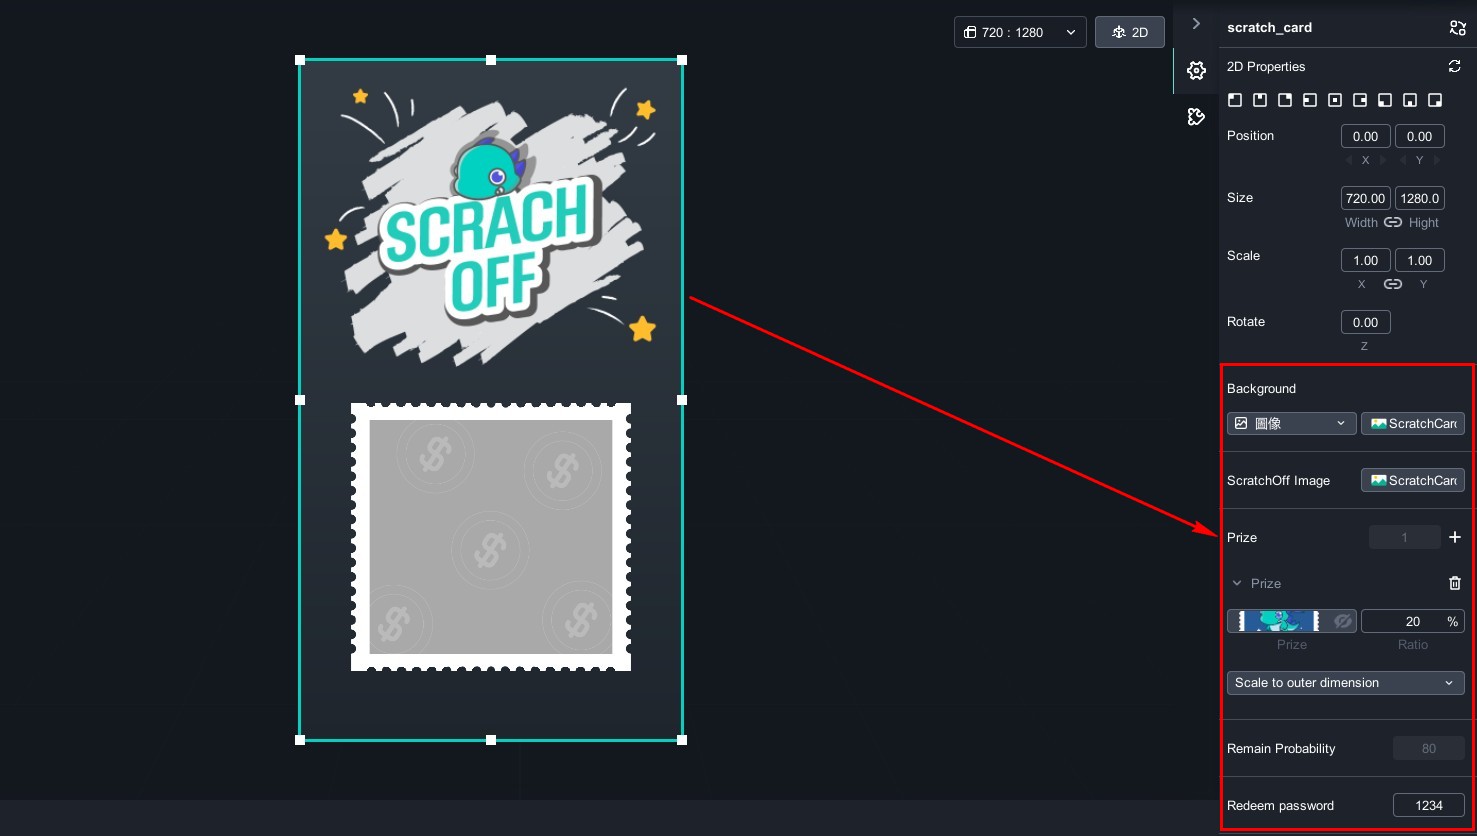
The Scratch Module can be customized according to your needs, such as changing the background image of the scratch module, the image to be scratched, and the prize image. You need to upload materials to MAKAR to make these changes. At the same time, you can adjust the winning probability of each prize. Due to the large number of images, we recommend creating folders on your computer in advance and uploading them to your resource library for better categorization and organization. For the process of uploading images to the material library, please refer to the tutorial "Add Your Resources".
Next, we will explain how to change backgrounds, add prizes, and adjust probabilities. You can click on "Scratch Module Materials" to download related instructional materials.
Change Scratch Module Backgrounds and Images
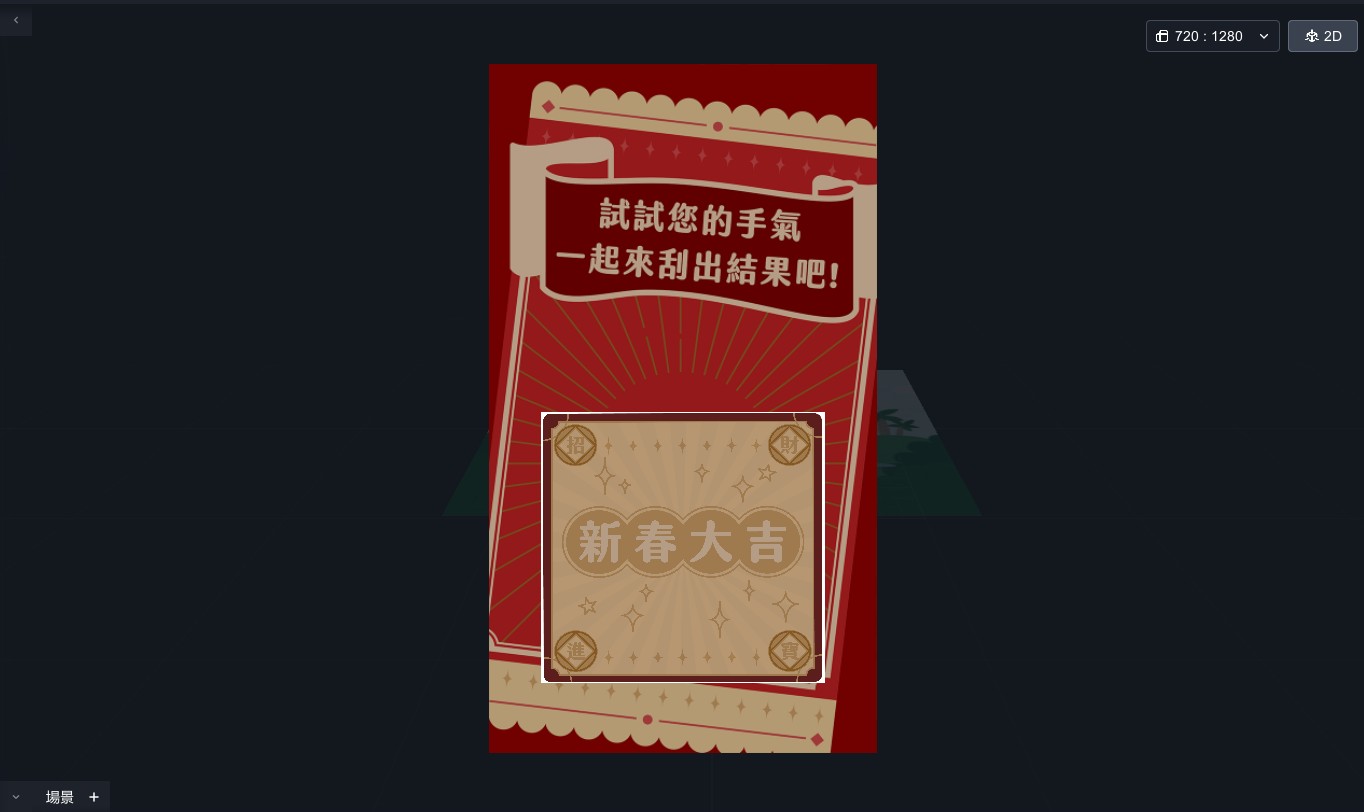
1. In the right-side "Background" column and the "ScratchOff Image" (before scratching) column, click the image option, and a window will appear to select the material. Choose the image you want to replace.
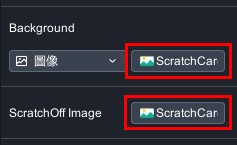
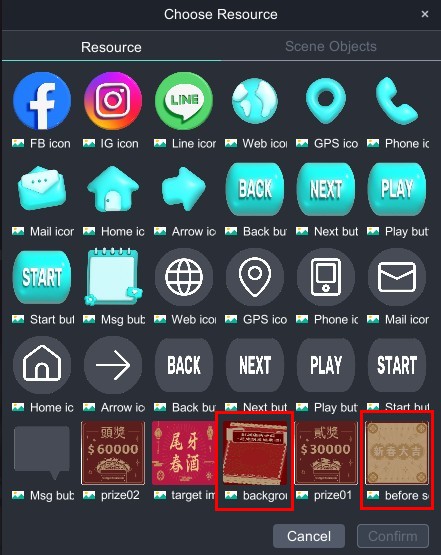
After changing the background and scratchoff image:
Add Prizes / Change Prize Images / Adjust Probabilities
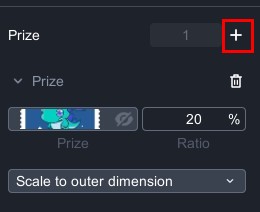
1. In the prize section on the right, click the "+" to add prizes.
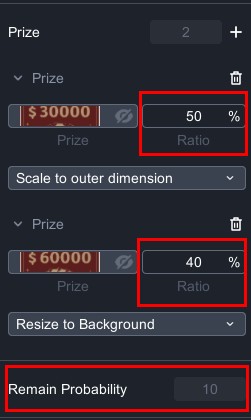
2. Click the prize image to bring up the material selection window and choose the result image of the prize. You can choose "Resize to Background" ,"Scale to outer dimension" ,"Scale to inner dimension" to adjust the image size.
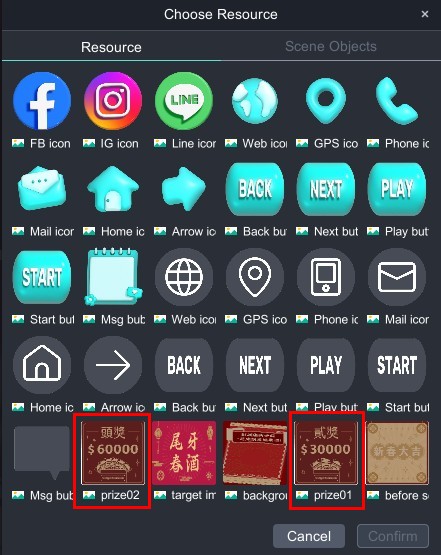
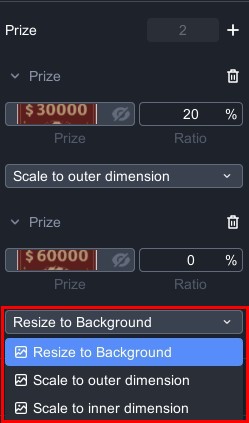
3. According to your needs, add prizes and set the winning probability for each prize. You can also see the ratio that remaining probability ratio below.
4. Use the mouse to drag and zoom in the editing scene to easily arrange the layout.
-
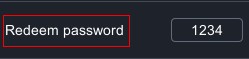
Redeem password:According to your needs, trigger the redemption password after the user scratches the prize. If you delete the numbers, it will be in password-free status.
1. Each account can only play the scratch module once.
2. MAKAR Version of STANDARD/ADVANCED/STUDIO allow you to log in to the backend to view the project's redemption status.
3. If the user plays without logging in, they can play again after deleting and reinstalling MAKAR Viewer. If you have further feature requirements, we recommend contacting our specialists to discuss customized services.
4. It is recommended that developers manage the number of prizes redeemed. Once the prizes are redeemed, they can directly access the project to delete and remove the winning image. For further additional feature requirements, it is recommended to contact our professionals to discuss customized services.
MAKAR Flash -One-hour 3D Material Specialization Class, the philosophy that must be grasped for XR creation
One-hour 3D Material Specialization Class, the philosophy that must be grasped for XR creation
No longer be limited to filming or hand-drawing to obtain materials! This month's MAKAR Flash course invites Teacher Li Yanqiu to share how to use generative AI to create materials within an hour, combined with the MAKAR XR Platform, to add endless possibilities to your XR creation. From AR to VR, delve into the techniques for creating materials. Besides, the teacher will also generously share about the logic functions in MAKAR. You absolutely shouldn't miss this if you want to catch the metaverse wave! Come and experience the amazing effects of AI-generated materials paired with XR creation!▌Course Outline
1、AR Material Production Techniques2、VR Material Production Techniques
3、Bonus: Basic Logic function in MAKAR and Material Integration with MAKAR
4、Q&A Session
▌Instructor Introduction
Teacher Yanqiu's teaching style combines aesthetic editing, lively creativity, and editing skills, making her a frequently invited lecturer for official seminars, schools of all levels, teacher training, corporate organizations, and government departments. She is also the author of the official Chinese CyberLink PowerDirector tutorial book and videos. Additionally, she is a full-time professor at the National Taiwan Normal University Extension School, teaching practical EXCEL courses, which are consistently full and highly acclaimed.▸CEO of Junyi Information Co., Ltd.
▸Founder of Teacher Yanqiu's Teaching Team
▸Over 20 years of experience in information software teaching
MAKAR Flash-How to integrate AR/VR into teaching with 5G? Quickly build your exclusive XR teaching materials!

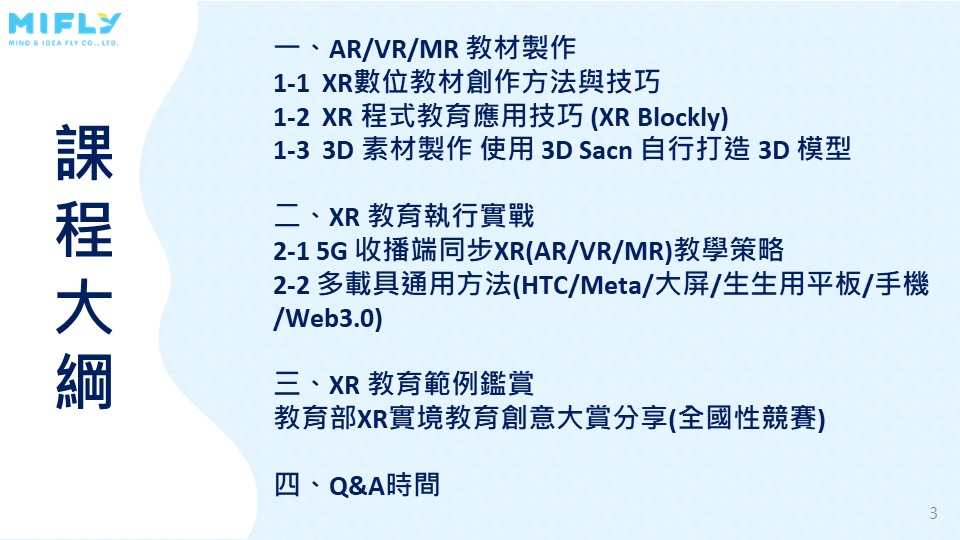
How to integrate AR/VR into teaching with 5G? Quickly build your exclusive XR teaching materials!
How to integrate AR/VR into teaching with 5G? Quickly build your exclusive XR teaching materials! Welcome to the new era of 5GVR education! This month's MAKAR Flash course covers everything from AR/MR/VR teaching material development to 3D material production, and to actual teaching application, solving all your problems in the Ministry of Education's digital content enhancement plan and the 5GVR teaching integration M1,M2 plan. This course provides suitable solutions for any type of device used in schools, ensuring the best teaching outcomes. Teachers and students executing related projects and the broadcasting partners from schools definitely should not miss this! Join the forefront of XR educational applications and achieve new heights in teaching!▌ Course Outline
【AR/VR/MR Teaching Material Production】1-1、XR Digital Teaching Material Creation Methods and Techniques
1-2、XR Programming Education Application Techniques (XR Blockly)
1-3、3D Material Production Using 3D Scan to create your own 3D models
【XR Education Execution in Practice】
2-1、5G Broadcasting End Synchronized XR(AR/VR/MR) Teaching Strategies
2-2、Universal Methods for Multiple Devices (HTC / Meta / TVScreen / Tablets / Phones / Web3.0)
【XR Education Example Appreciation】
3、XR EDU Reality Creativity Competition Sharing (National)
4、Q&A Session
▌Course Date
January 25, 2024 (Thursday)▌ Course Time
20:00-21:30 (1.5 hours)▌ Course Instructor
Lina TsaiMAKAR Flash-Creating Your Own 3D Material Library with Your Phone? MAKAR 3D Scan New Application Analysis!
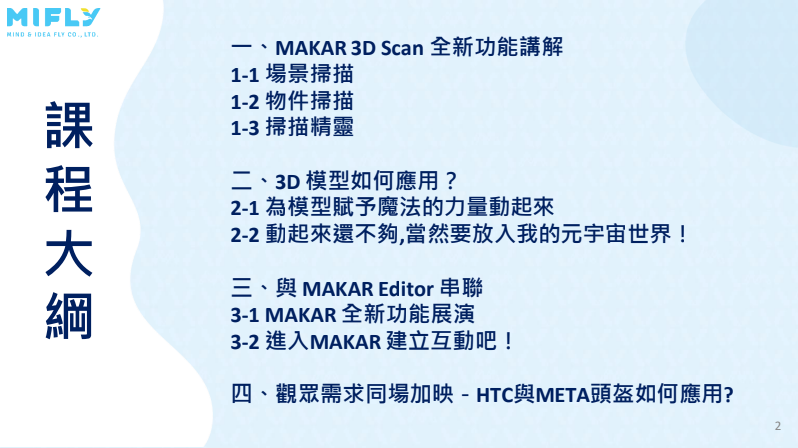
Creating Your Own 3D Material Library with Your Phone? MAKAR 3D Scan New Application Analysis!
Lina Tsai will guide you through exploring the diverse applications of MAKAR 3D Scan and teach you how to swiftly import scanned 3D model assets into the MAKAR Editor software to create engaging XR projects. With just a smartphone or tablet, you can easily build your own 3D asset library, bidding farewell to the frustration of limited resources! The course will demonstrate how to create scene models through spatial scanning and scan objects using the new feature of the latest 3D Scan, enhancing your scanning experience and effortlessly creating personalized 3D models!
▌Course Outline
Section 1: Introduction to New Features of MAKAR 3D Scan1-1 Scene scanning
1-2 Object scanning
1-3 the new feature of the latest 3D Scan
Section 2: Application of 3D Models
2-1 Adding magical motion to models
2-2 Placing them into my metaverse world!
Section 3: Integration with MAKAR Editor
3-1 Showcase of new MAKAR features
3-2 Engaging with MAKAR for interactive experiences!
Section 4: Q&A Session
▌Course Details:
Date: November 30, 2023 (Thursday)
Time: 20:00-21:00 (1 hour)
Instructor: Lina Tsai
▌Important Notes:
To enhance the efficiency of the flash course experience, please prepare two devices:Device1: For attending the online Meet session, you can use a computer or tablet.
Device2: For experiencing MAKAR 3D Scan, please have a smartphone or tablet (preferably a tablet).
Ensure you have downloaded the MAKAR App beforehand ➡ https://www.makerar.com/app#download
MAKAR Flash-How Can Beginners Quickly Recreate Unity AR/VR Projects?

Here comes the MAKAR Flash XR Free Lecture for September, bringing you abundant knowledge about Metaverse applications!
How Can Beginners Quickly Replicate Unity AR/VR Projects?
Generally, the AR/VR applications we see today are created using Unity, a game engine tool. However, for those without an IT development background, it’s challenging to create your own AR/VR applications with Unity without knowing programming languages like C#. The high learning curve deters many enthusiasts interested in XR applications.
But today, we are going to break down the Unity XR project creation process and replicate it using MAKAR Editor! We’ll start with understanding AR/VR logic and structure, walk you through the XR creation process, demonstrate the application of MAKAR's Blockly design, and guide you in creating and exporting a complete project! Even without writing a single line of code, you can create your own AR/VR content!
Are you ready? Join this exciting course that blends practice with creativity!
● Course Outline
1. Sharing and Recommendations of AR/VR Teaching Materials
2. Steps to Deconstruct AR/VR Teaching Materials
2-1. Understanding AR/VR Logic
2-2. Clarifying the Material Structure
2-3. Planning the Material Workflow
2-4. Creating and Exporting Materials
3. Practical Creation of AR/VR Teaching Materials
4. Q&A Session
● Course Date
Thursday, September 28, 2023
● Course Time
8:00 PM ~ 9:30 PM (1.5 hours)
● Course Instructor
Lina Tsai
AR Envelope for Beginner –New Year Rabbit
|
Abstract: Introduction: This project is a response to the Eastern New Year culture, applying AR technology to red envelopes, so that they not only have traditional cultural significance but also incorporate modern technology. |
1. Image target
The image target for this project was created using Midjourney, an AI tool that generates images from text. This tutorial also introduces other similar tools and prompts currently available, as well as recent examples of people using ChatGPT to generate more complete prompts, and then incorporating Midjourney to create even better images.
The image target gets a five-star recognition in MAKAR editor.


In order to add animated effects to the rabbit in the target, it was necessary to remove the rabbit from the original image. Here, we used an online and free AI tool called Magic Eraser to quickly erase unwanted objects or parts from the image. This tool automatically recognizes the background using AI and seamlessly fills in the removed parts, making it easy to remove unwanted objects from images.
This is a free AI tool that can animate 2D images. By uploading a character image with similar human-like limbs to the website and going through simple processing, the website will bind a skeleton to the character. To increase the liveliness and interactivity of the project, Midjourney was used to generate a rabbit for 2D interaction.
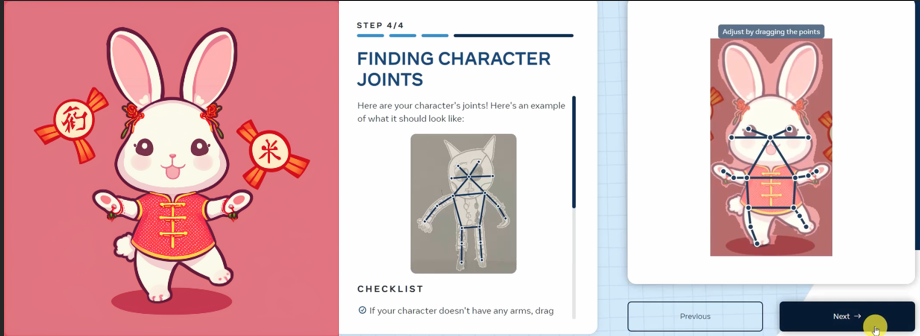
By choosing the appropriate action, you can download the video. The video will have a white background, and you can use the "remove background" function in the MAKAR editor to make the background transparent after importing it.
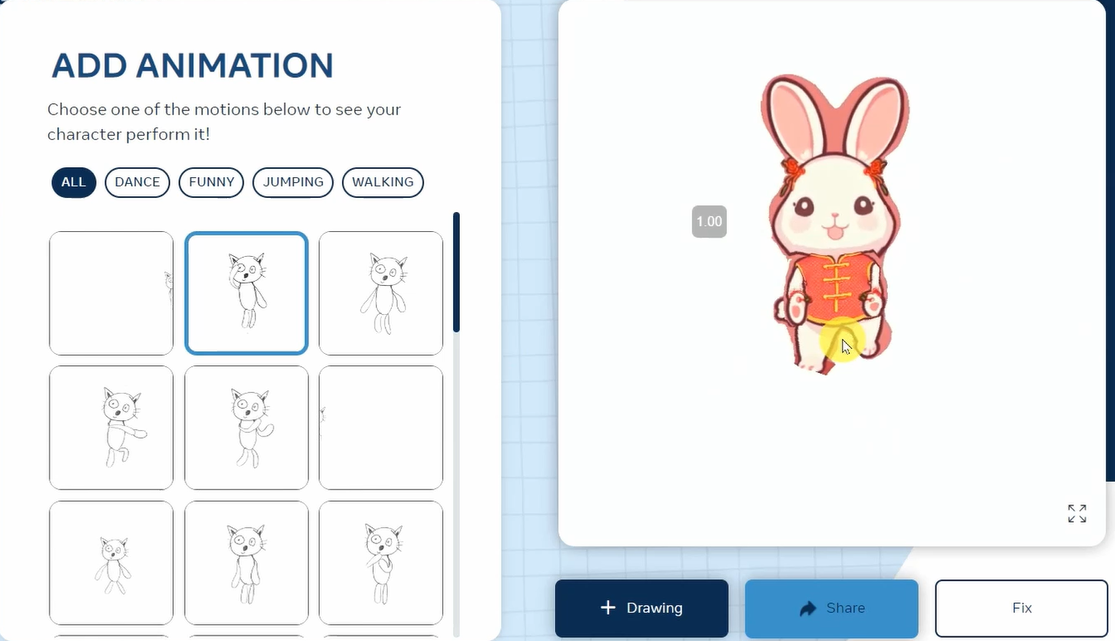
3. MAKAR Editor
New project 🡪 AR 🡪 AR Target
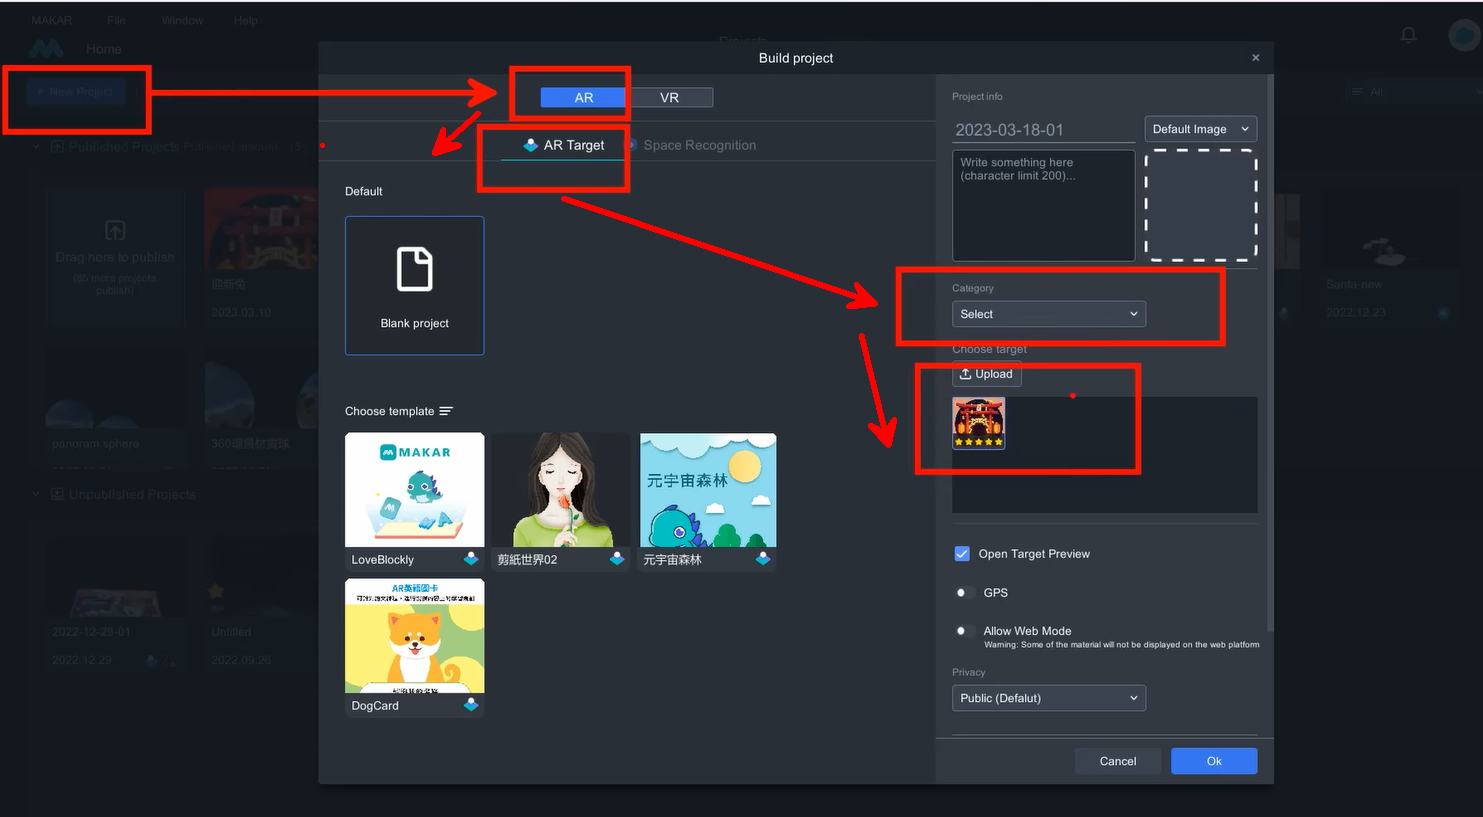
After creating the project, you can import materials, including images, videos, 3D models, and audio, to the resource vault.

Drag ta1_blank on top of the target to cover it.
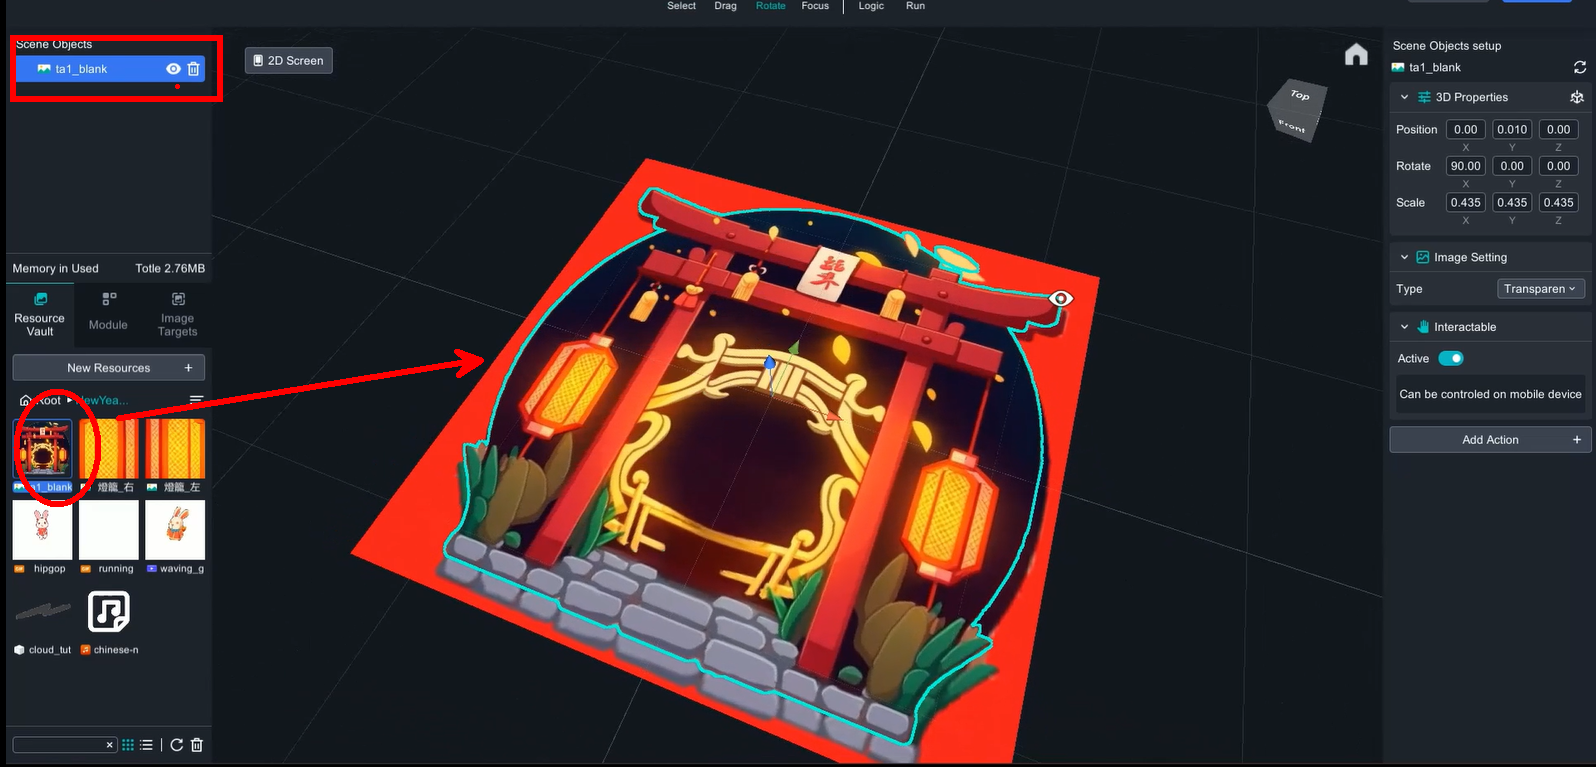
Drag waving_guesture video in the scene, and use matting to remove background.
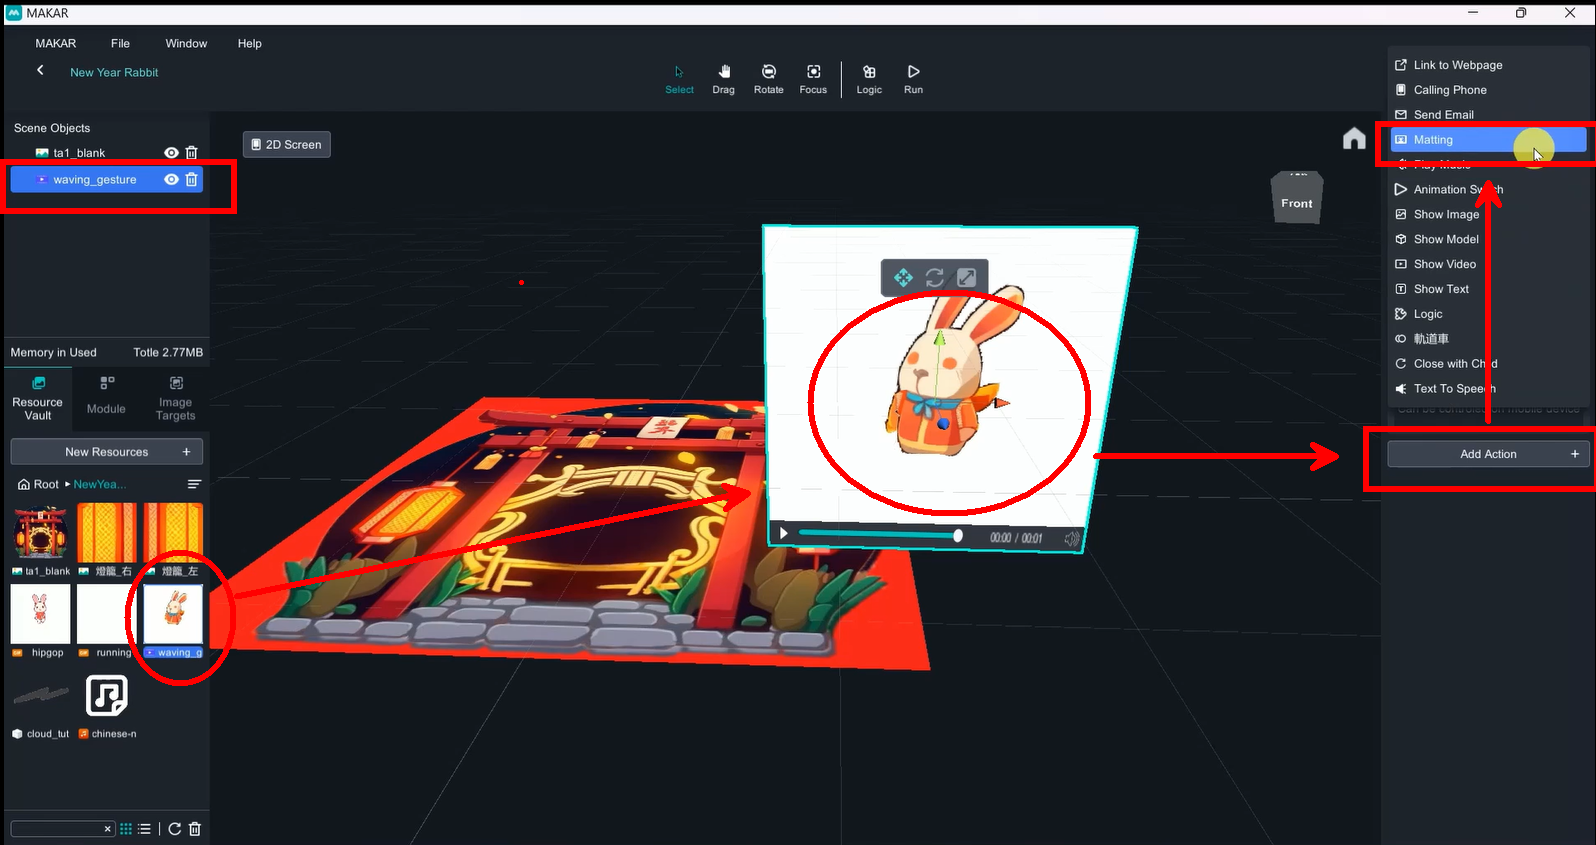
Matting value(Mode: RGB, Slope:1.00, threshold:0.43)
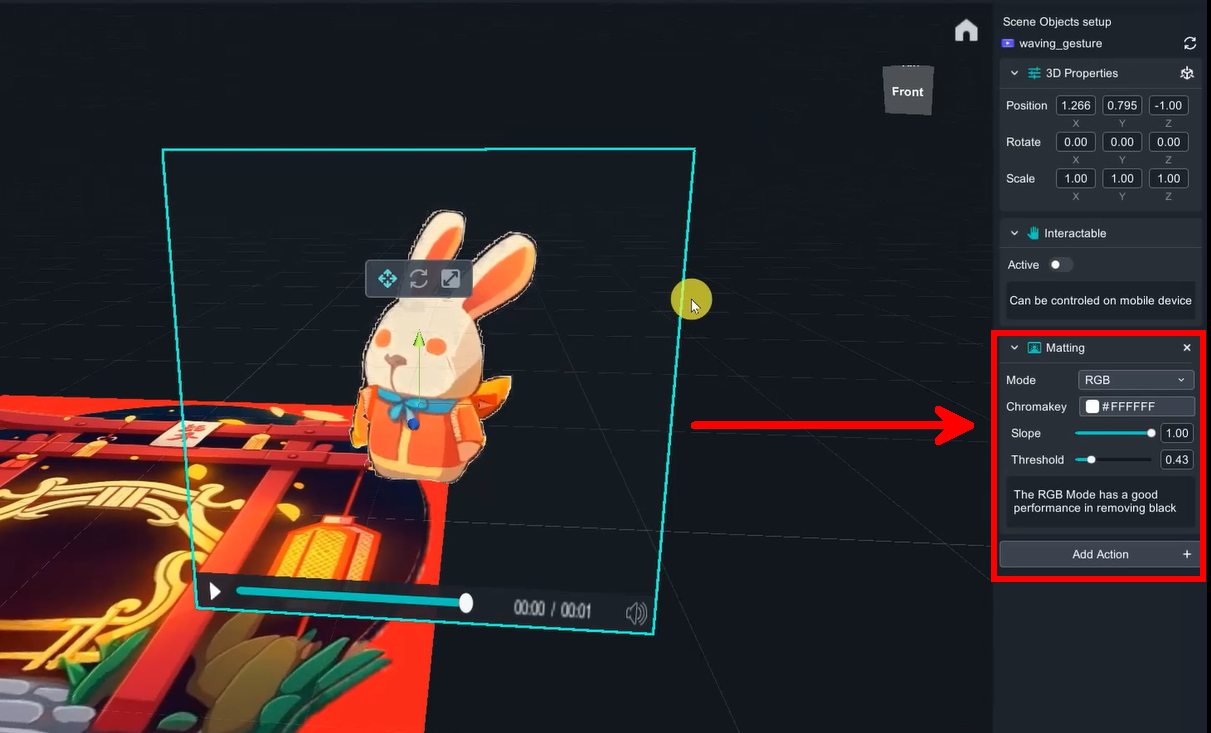
Rabbit (Hipgop) matting value(Mode: RGB, Slope:0.52, threshold:0.11)
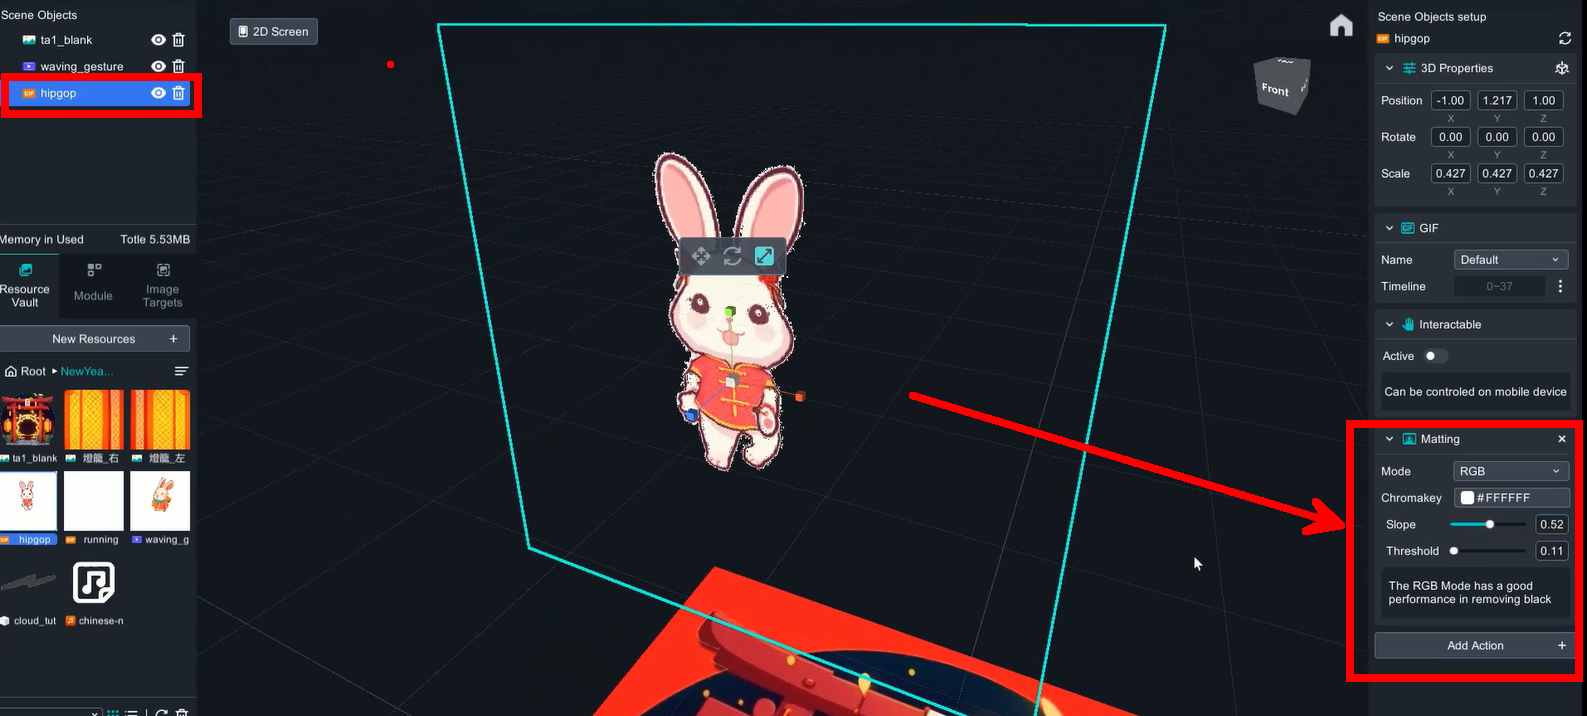
Rabbit(running jump) matting value(Mode: RGB, Slope:0.52, threshold:0.11)
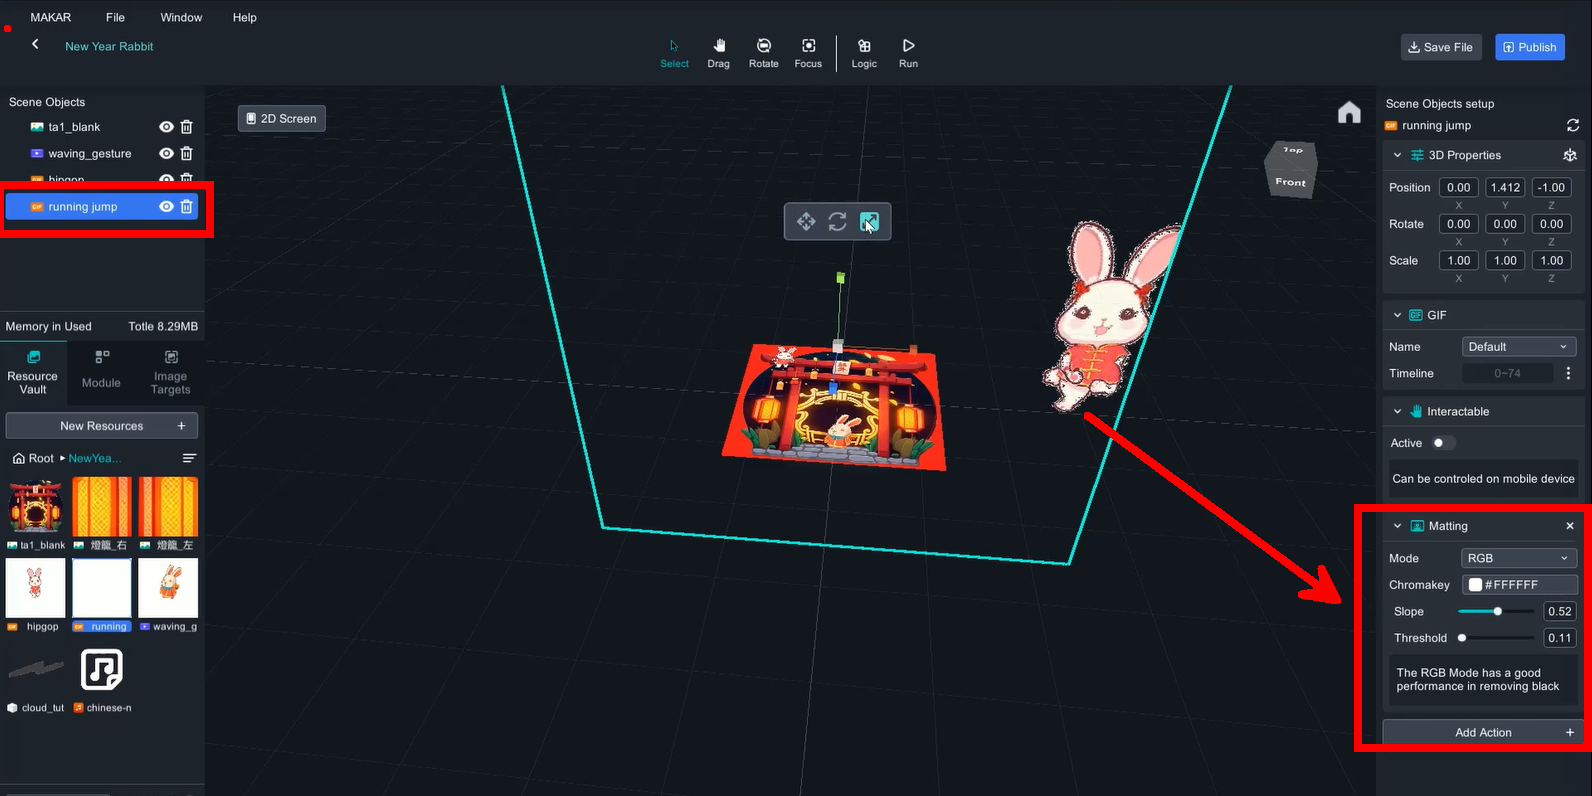
3D model (cloud): change material into Mask.
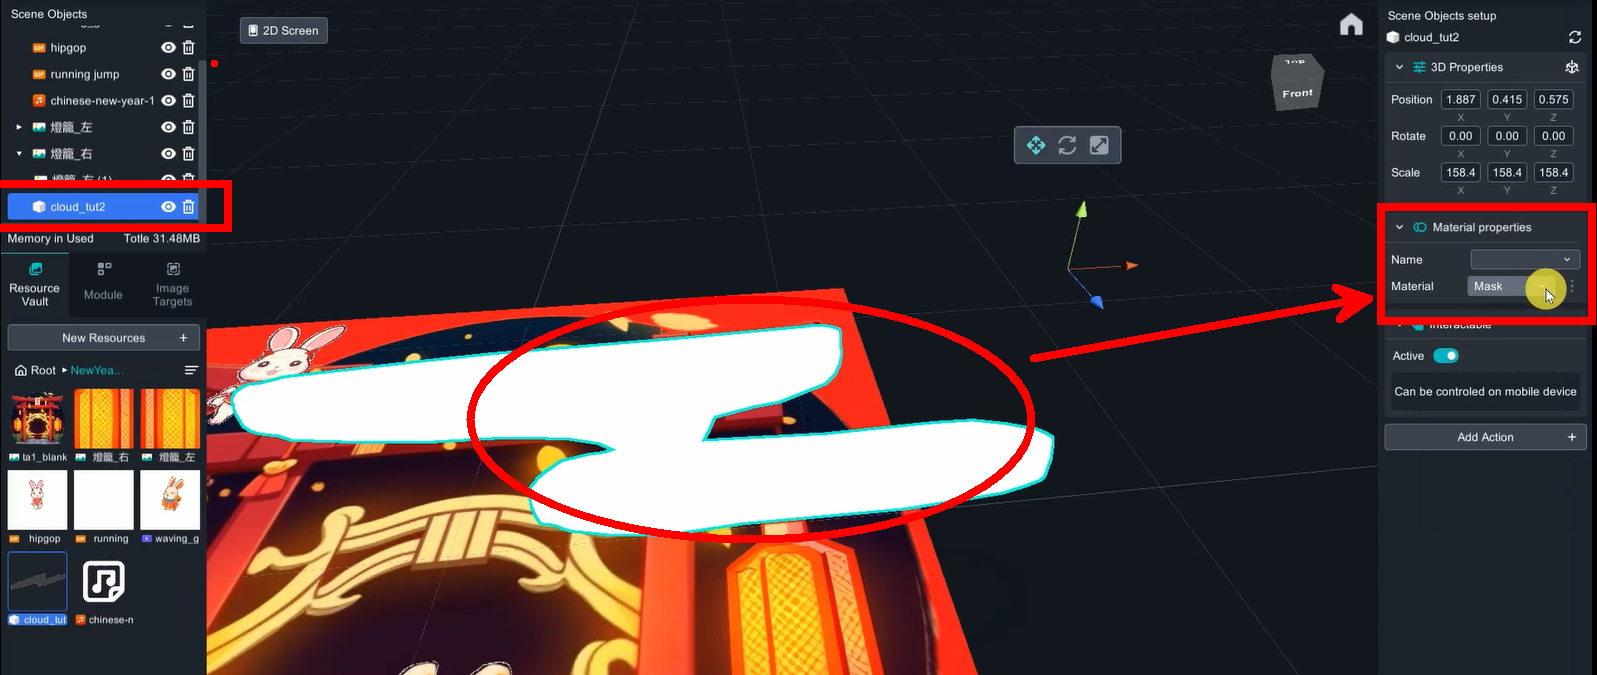
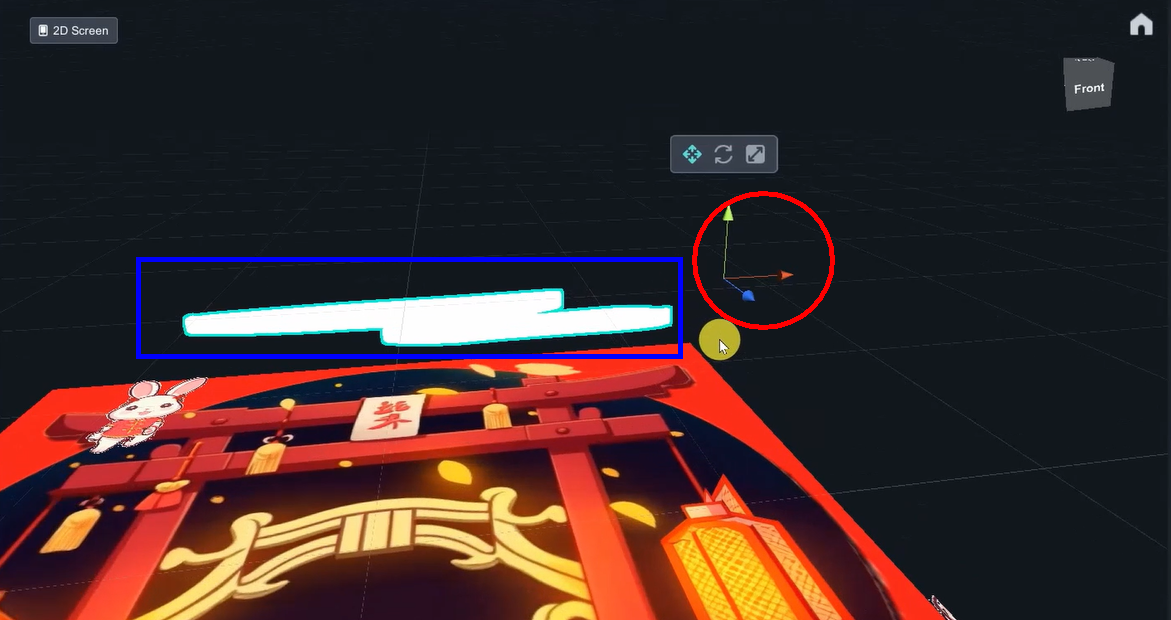
Due to a slight offset in the center point (the intersection point of the three axes) of this model, an additional transparent sphere was added to enclose the cloud for ease of control. Transparent sphere: Click the three dots on the right side of the material ball, change the mode to "Fade”, click on the color, decrease the A (alpha) value to 0.
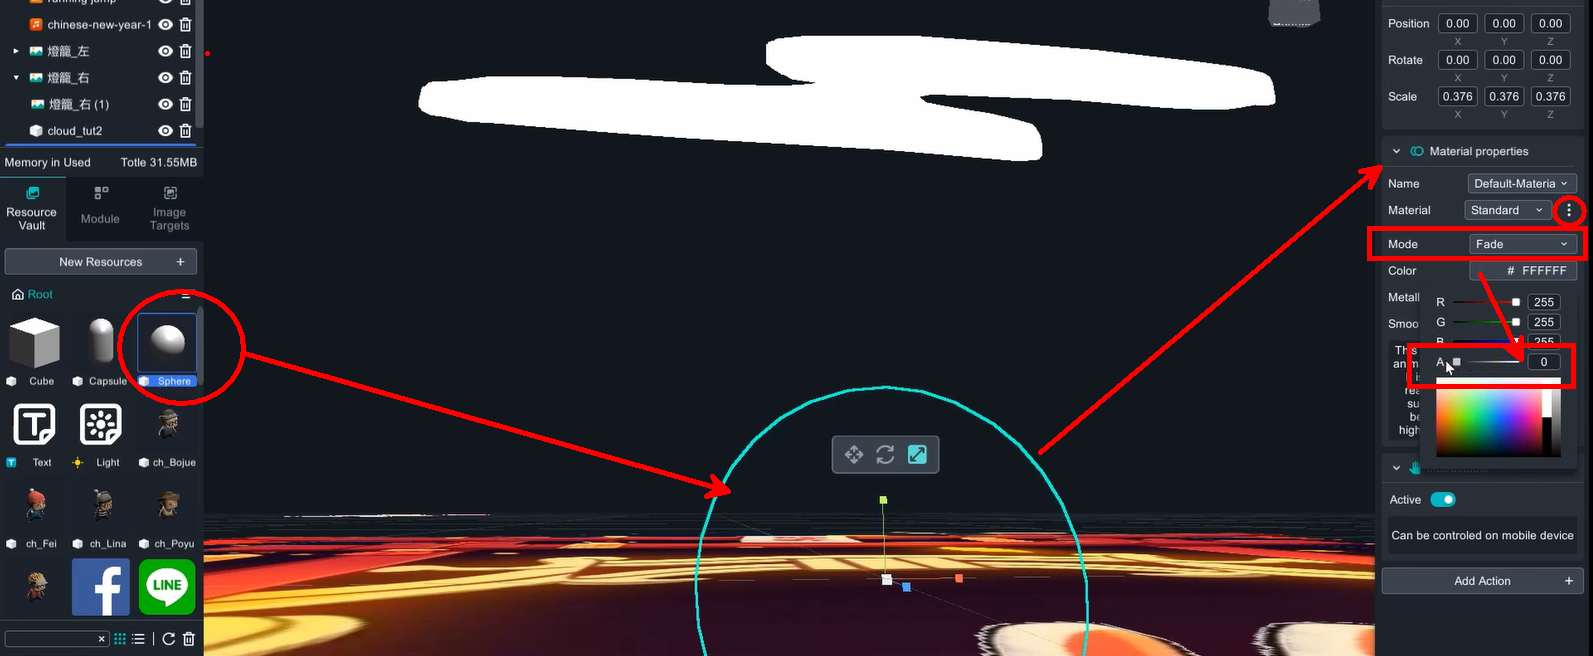
In scene objects, drag cloud_tut2 into sphere to group them together.
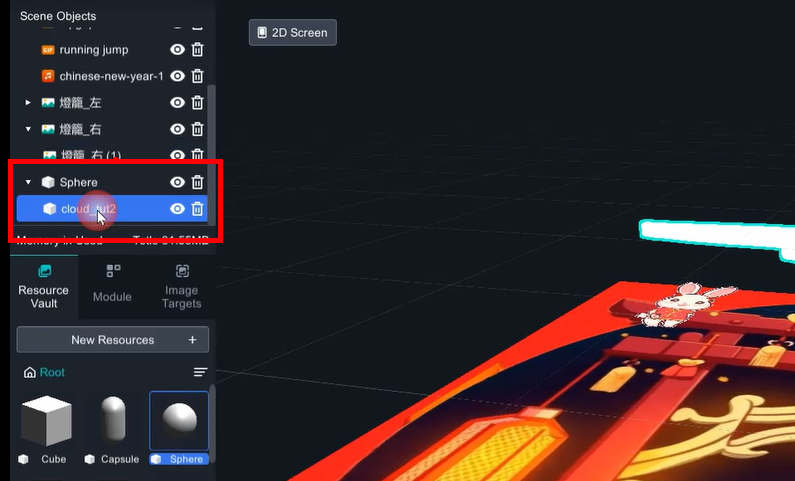
Two clouds will be created here, so you only need to duplicate the completed cloud and paste it. The pasted object will be separate, so it needs to be brought closer to the sphere again.
4. 2D image mimics 3D object
Drag the lantern image , cover perfectly on top of the lantern in target.
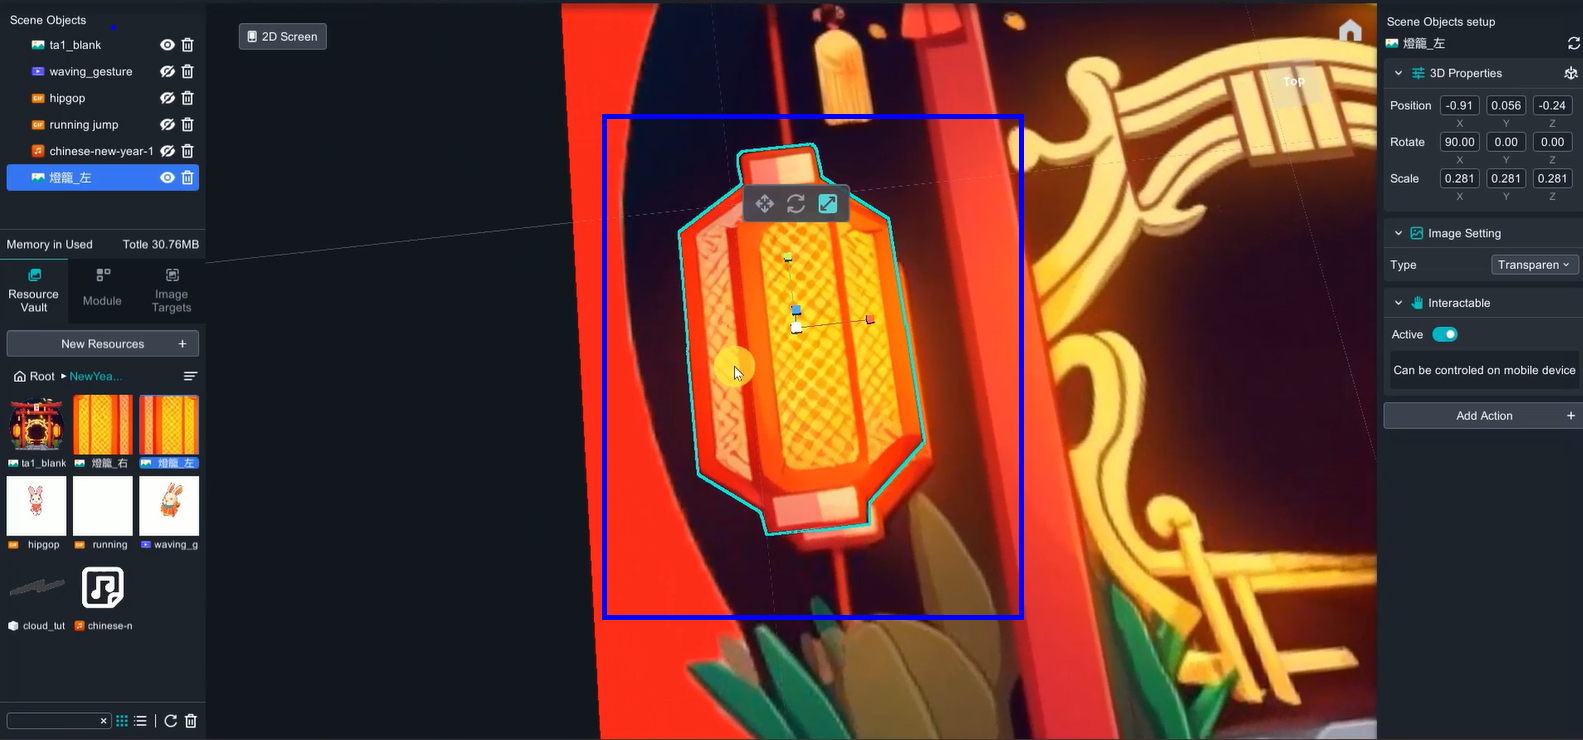
Duplicate another image, and rotate 90 degree, so that both images perpendicular to each other.
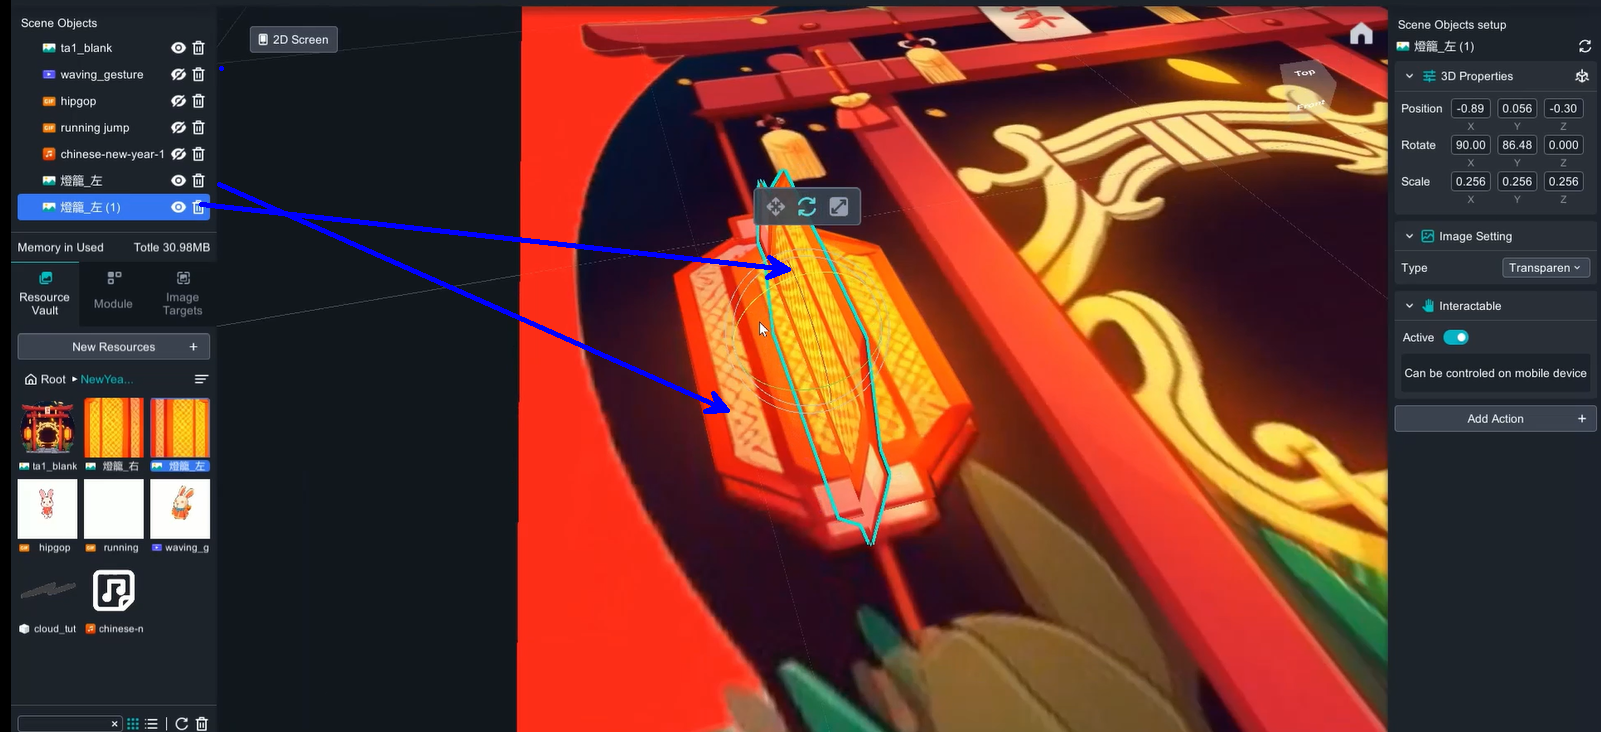
Drag the second image into the first one to group them.
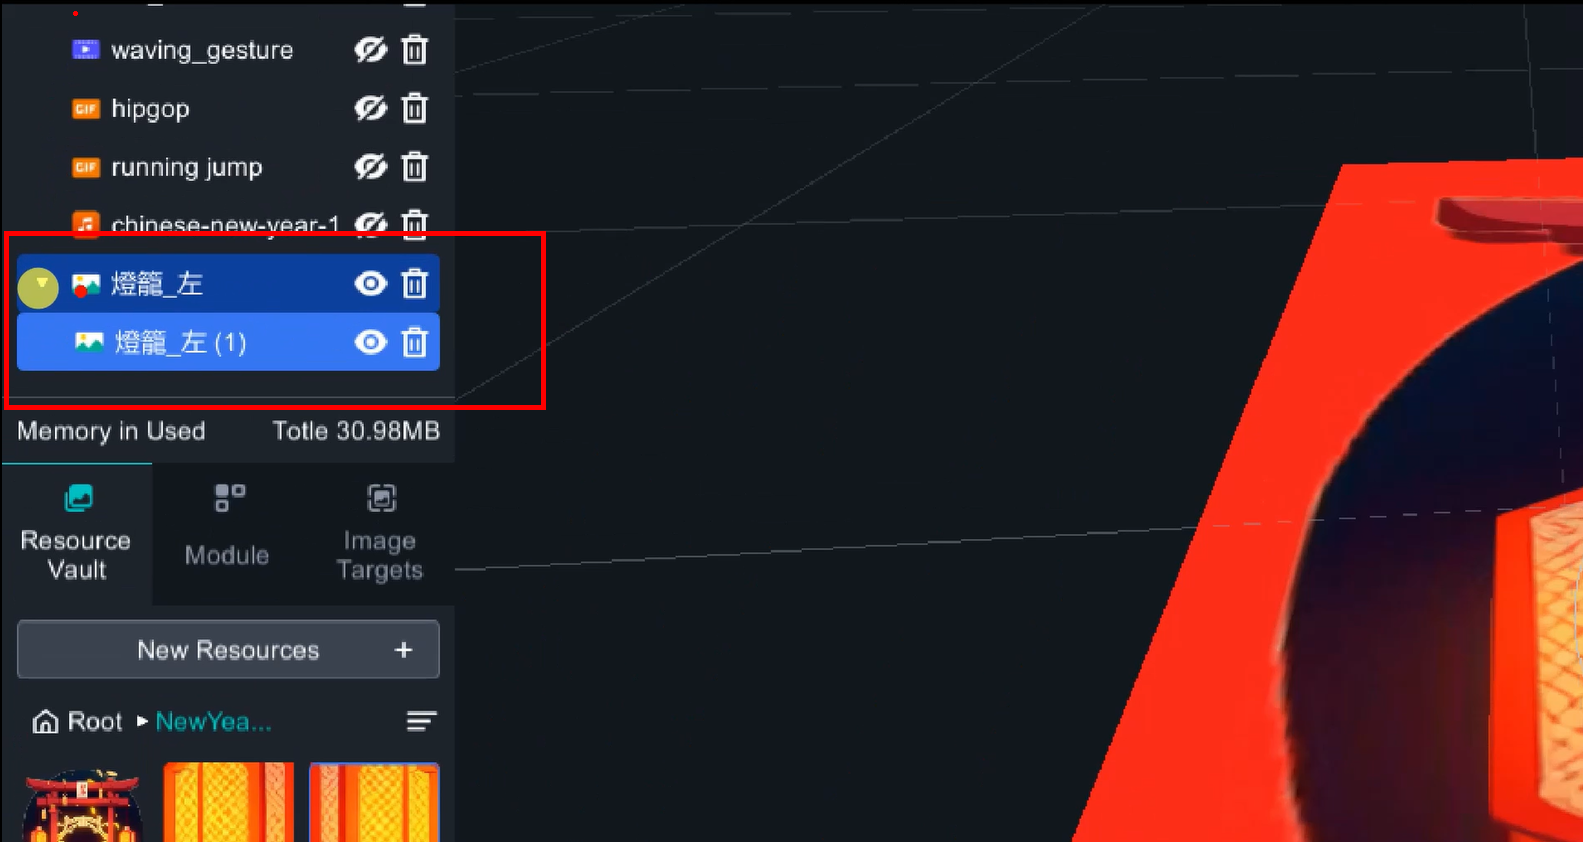
There are two lanterns in this project, and the method is the same.
5. De-active interactable function
Interactable feature allows users to move, rotate, and scale the augmented objects by hand when they appear on the screen. However, this feature has been disabled here to prevent accidentally moving the objects while viewing and losing the best experience.
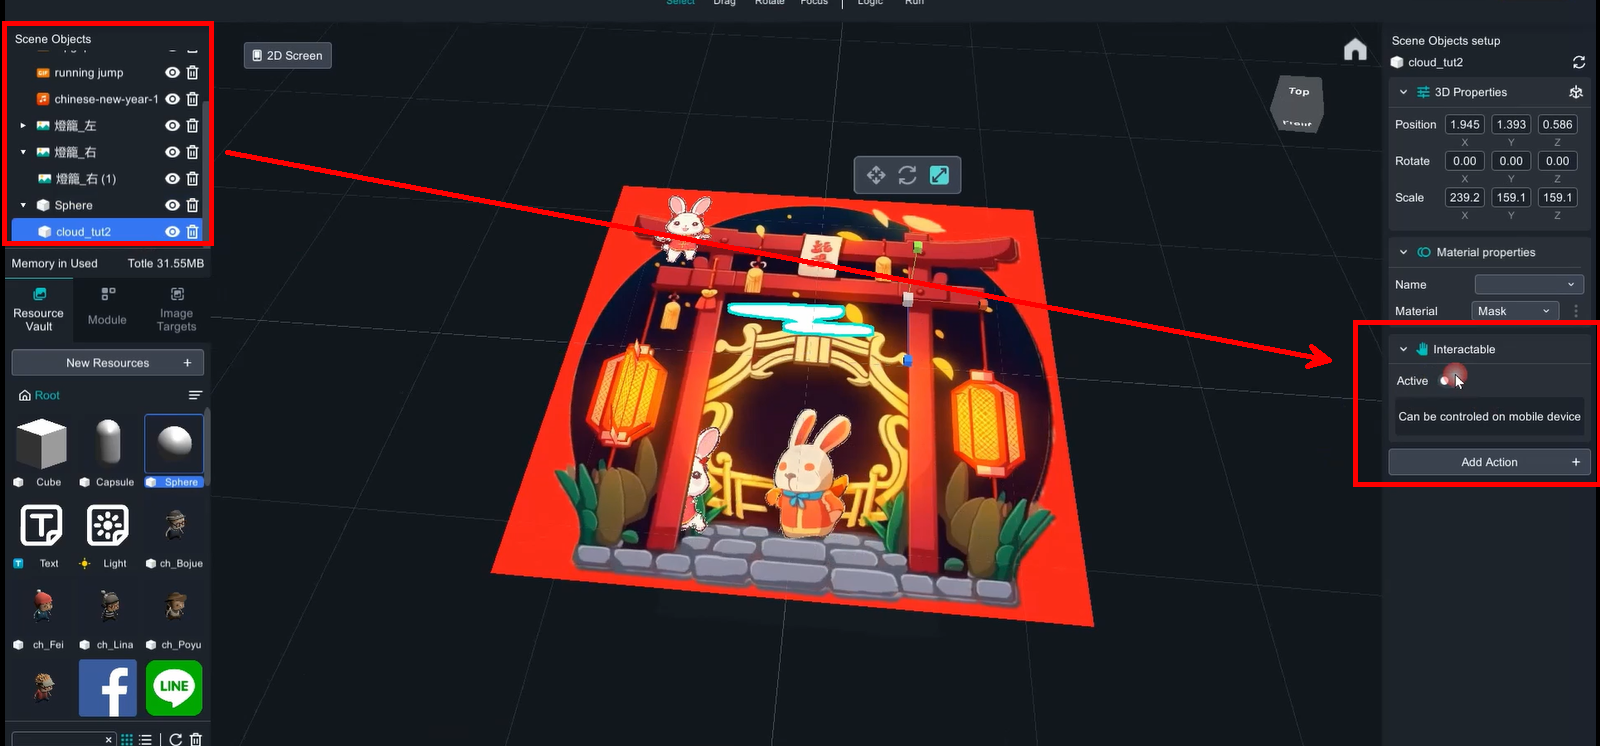
6. Logic function
Add logic function to all objects in the scene (Add Action -> Logic). For grouped objects (clouds, lanterns), only the outermost layer (with the white triangle) needs to be given a logic function, while the elements inside the group do not need it.
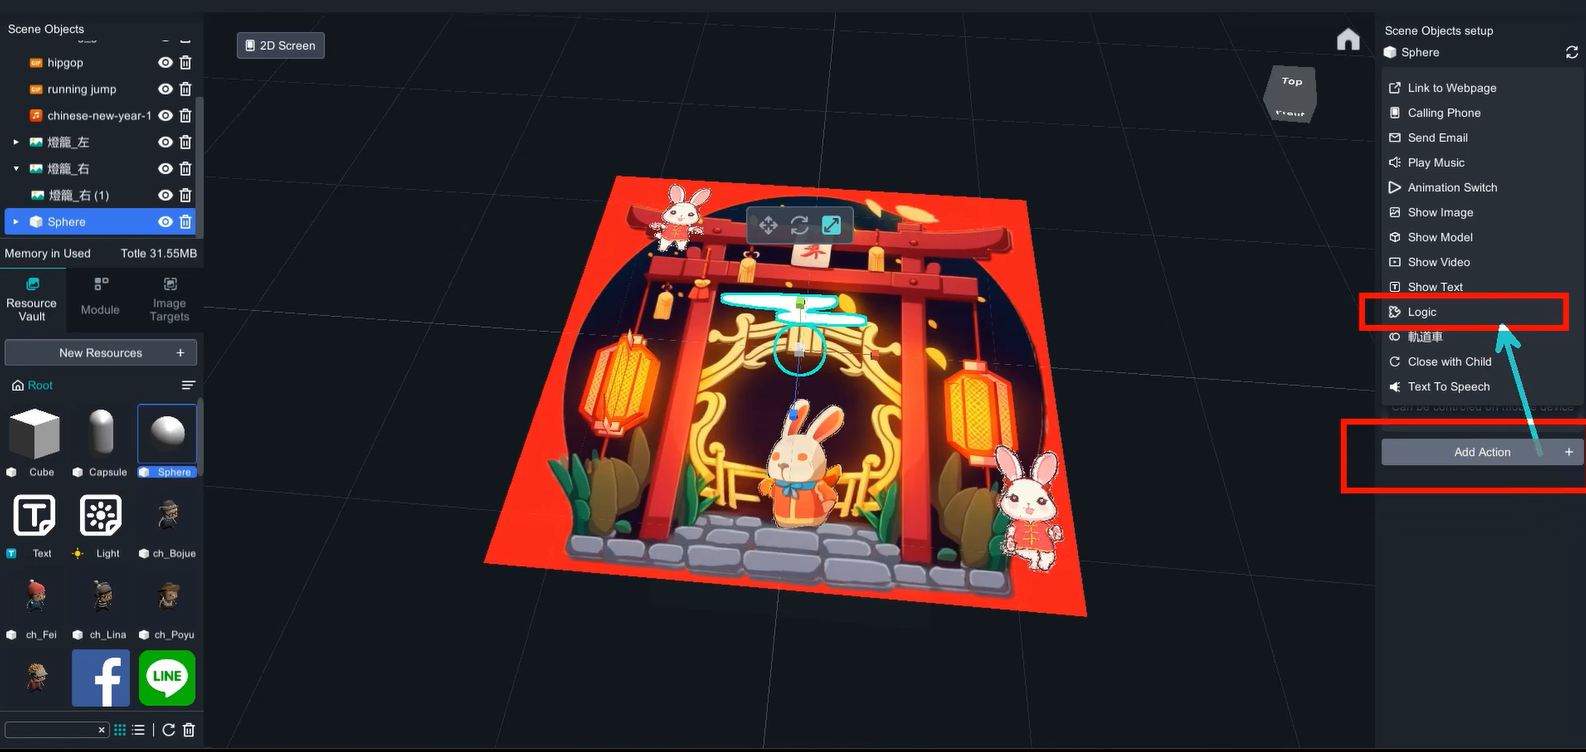
Click the Logic on top menu to open logic editor.
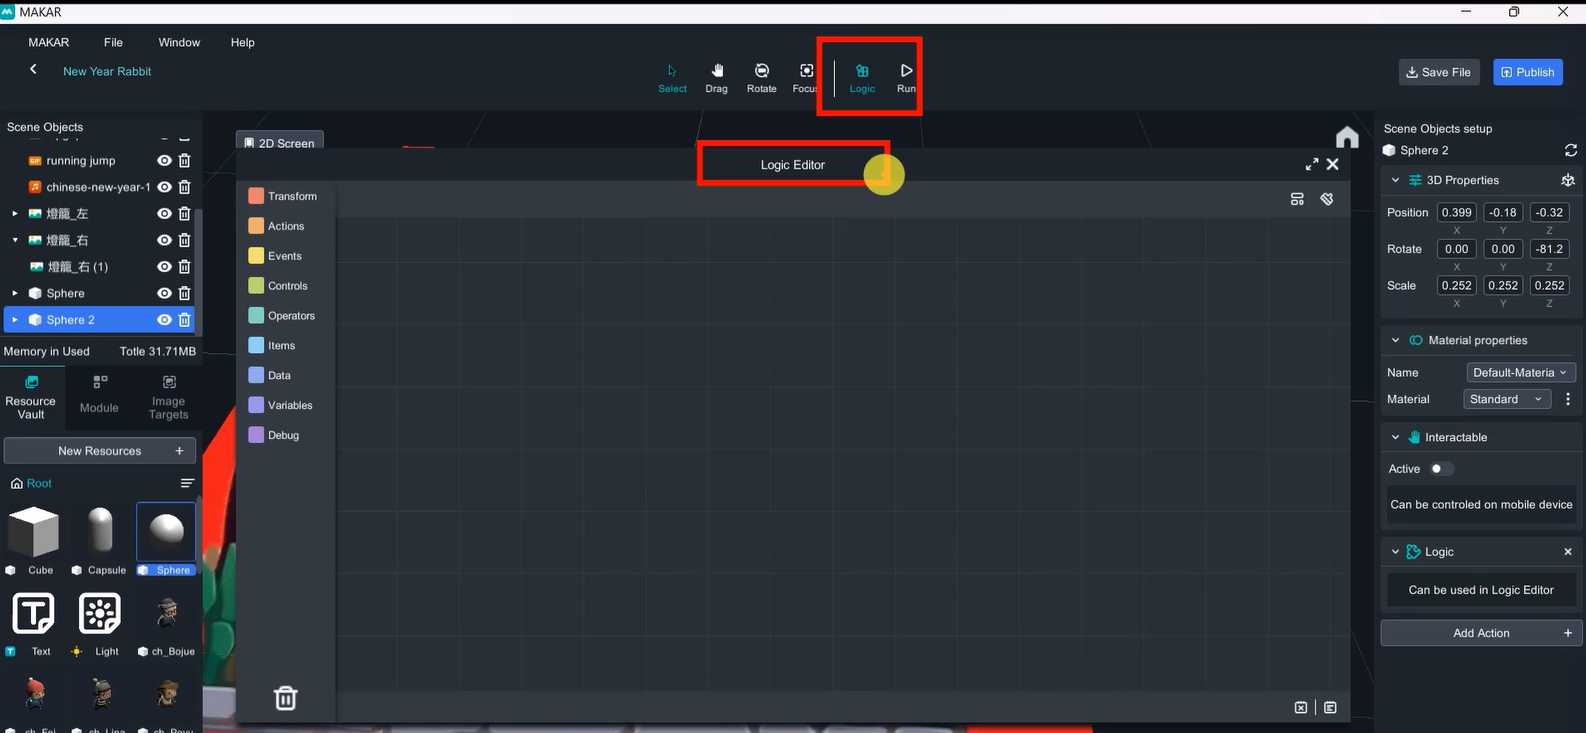
a. Cloud
Transform 🡪 Transitions 🡪 the sixth blockly
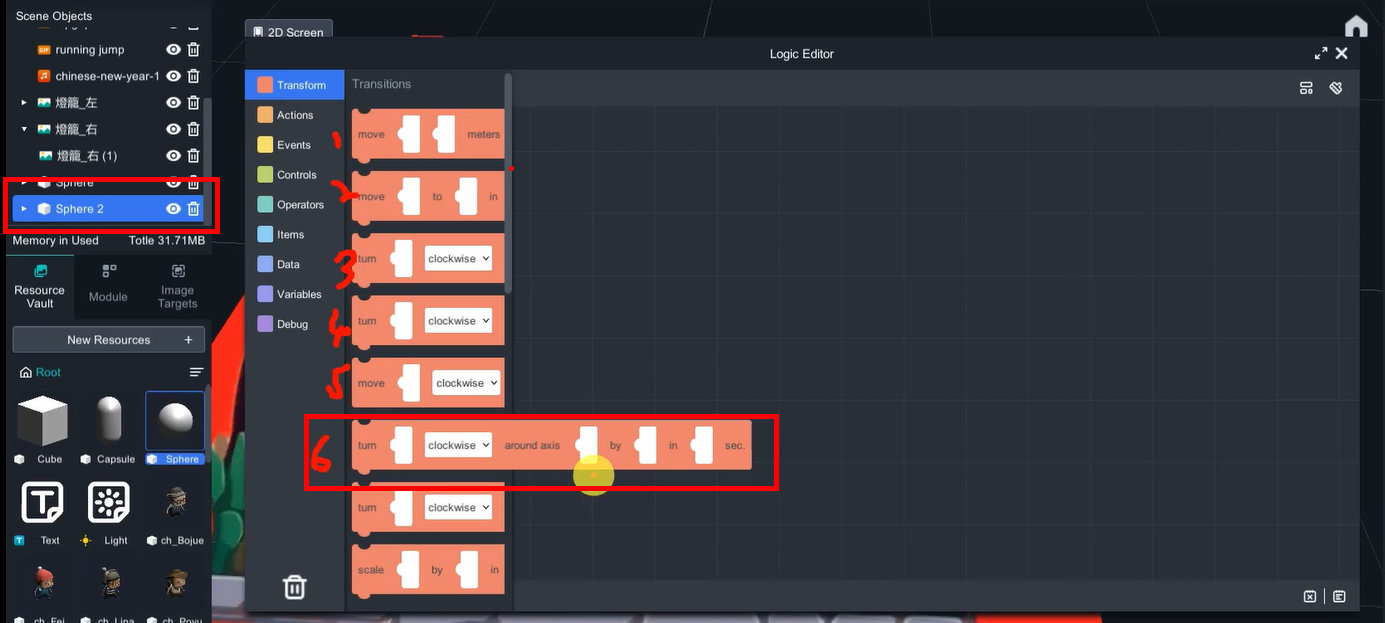
Transform item: sphere, rotate axis(0,0,2) by 360 degree.
Add a " Forever do" loop outside(Control🡪Loops🡪 first blockly)
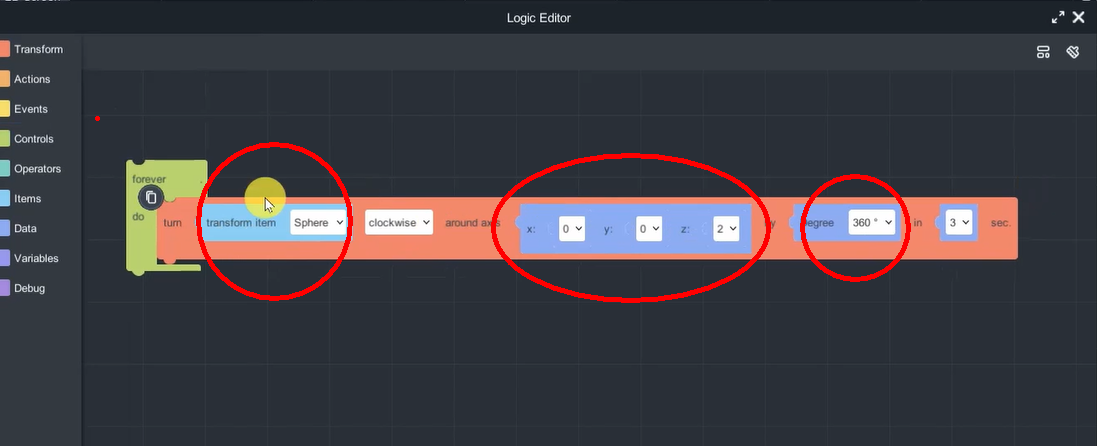
〈Little detail〉
To create the effect of clouds appearing and disappearing, the distance between the clouds and the sphere was increased, which in turn increased the rotation radius.
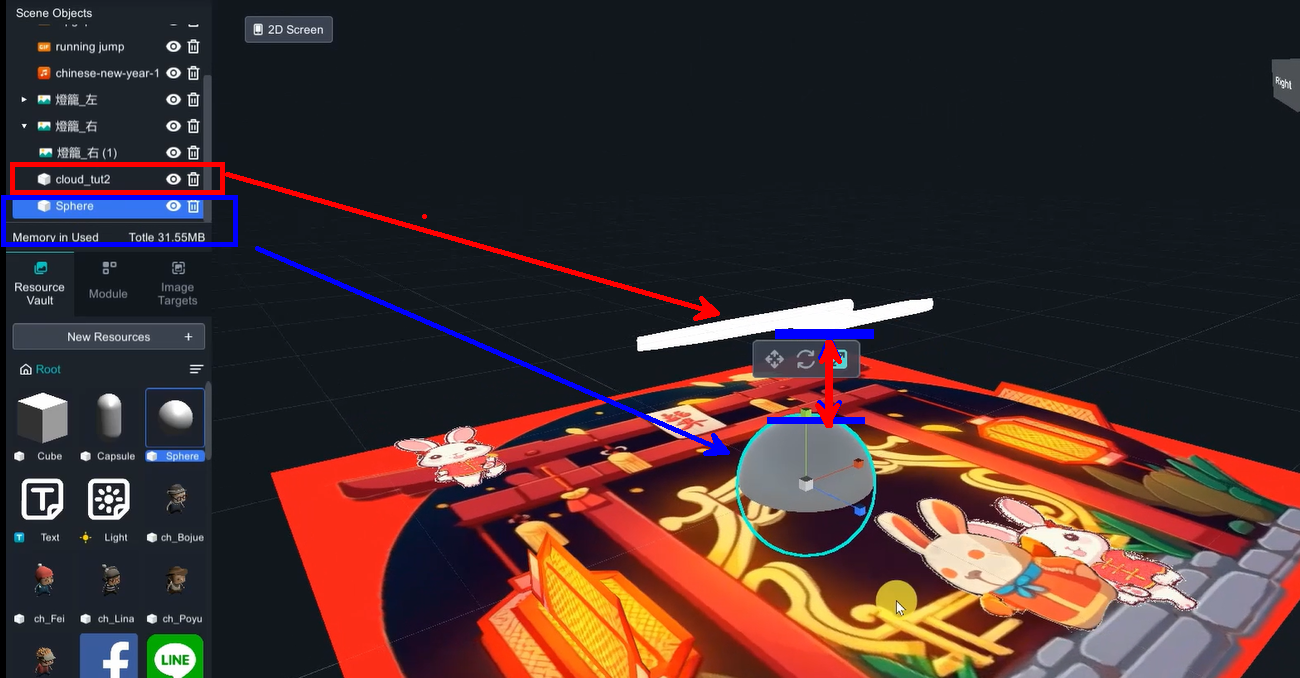
To create a sense of visual hierarchy between the two clouds appearing at different times, one of the clouds can be rotated 90 degrees.
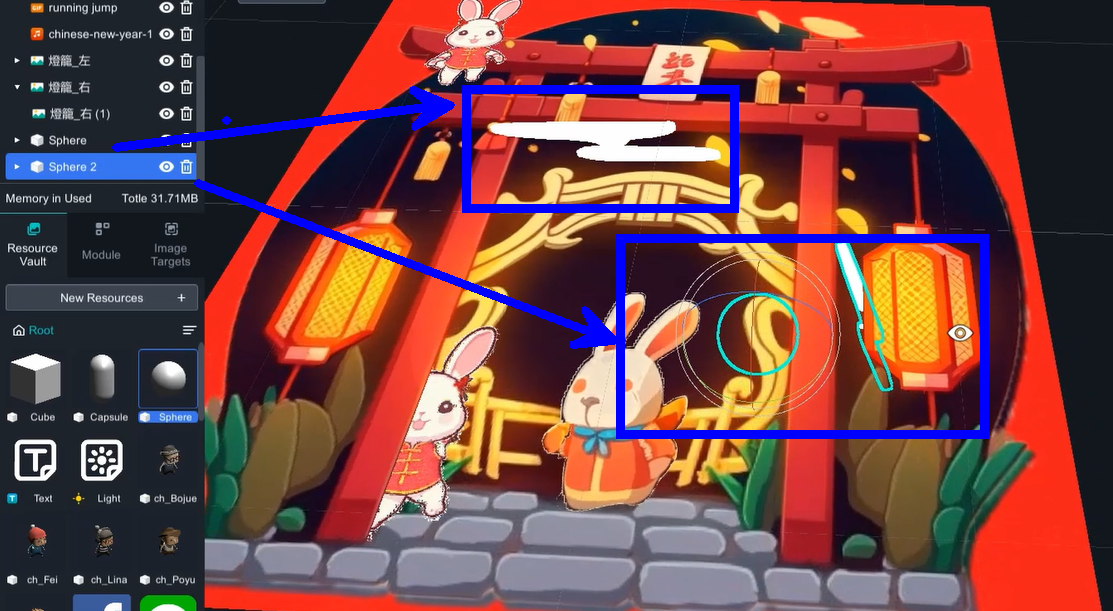
b. Lanterns:
Duplicate the blocklys from cloud, and change the transform item and rotate axis(0,1,0).
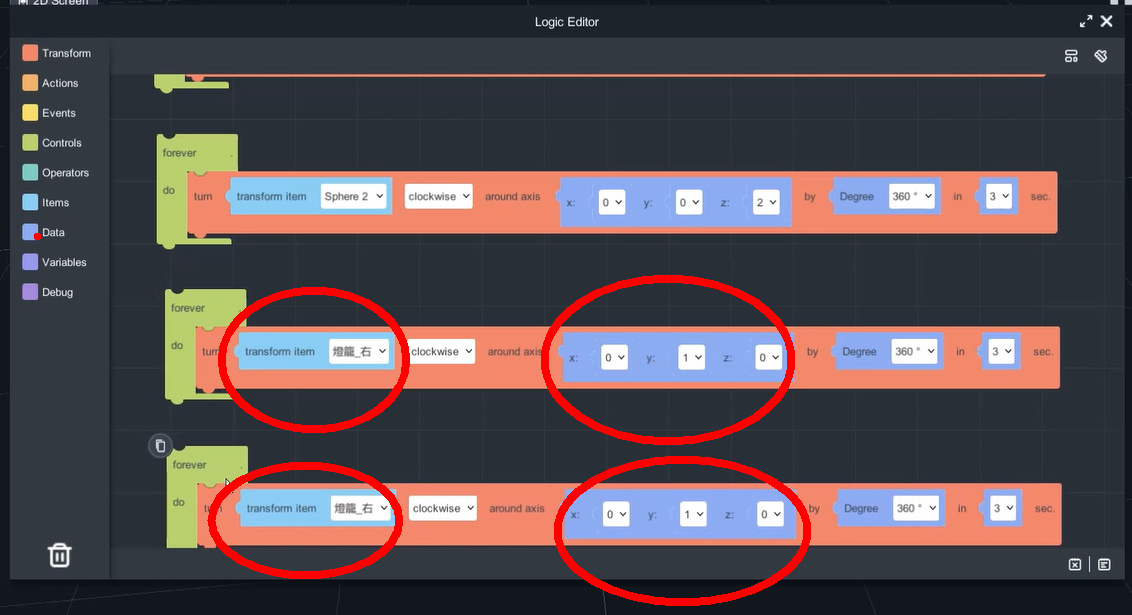
c. Audio:
Drag audio into scene and de-active interactable and add logic function.
Actions 🡪 Sound 🡪 first blockly
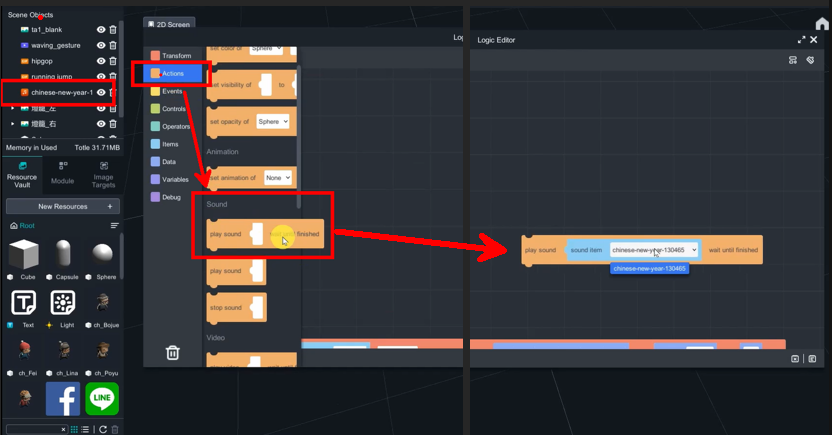
d. Video:
Waving_guesture video: Actions 🡪 Vidoe 🡪 first blockly

Finally, disable the visibilty of all the item in the scene objects, except audio material. And use the blockly to control all the item.
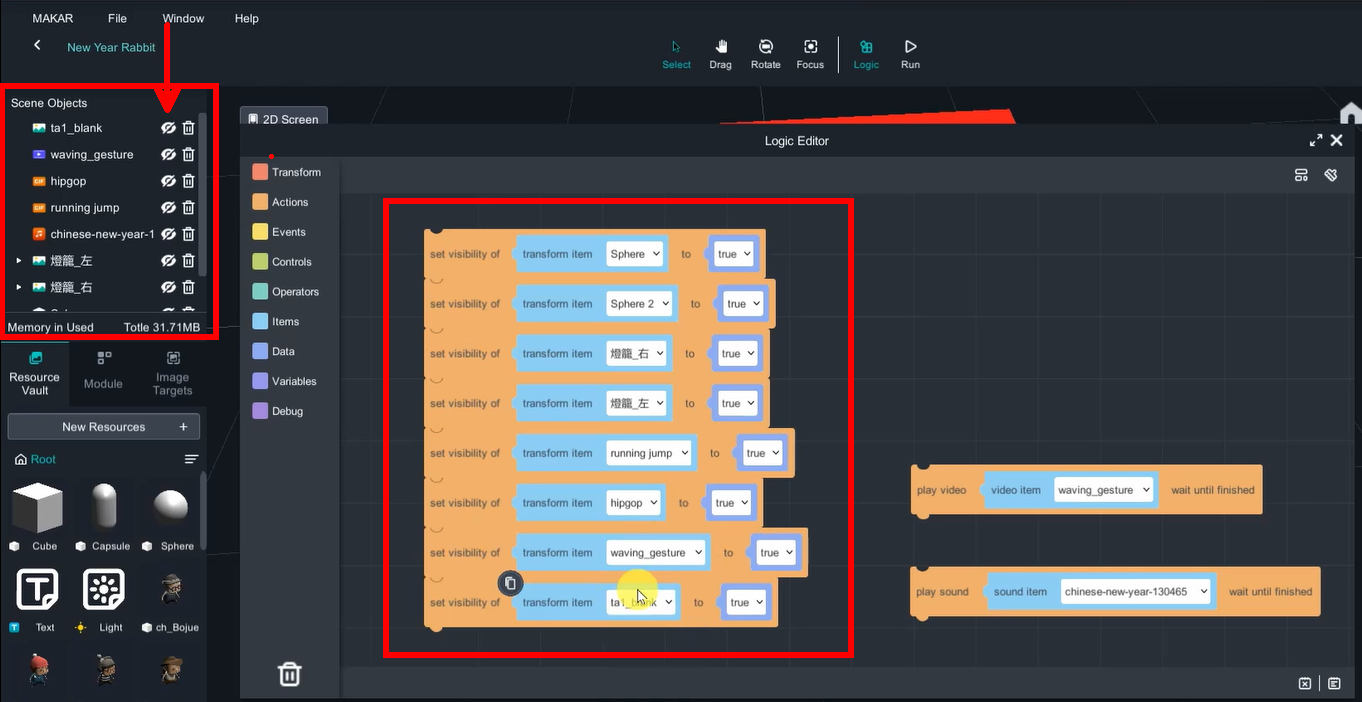
This method ensures that no augmented objects will appear on the screen when the mobile camera is not pointing at the target image.
The project is now complete and ready for publishing.
How to play
Click the application, type in the ID or scan the QR code to experience the AR/VR !
1. Install MAKAR application
2. Scan QRcodec or search ID: class06


3. Select「迎新兔」project,click「experience」to active and put the camera face forward the poster.


iPhone/iPad MAKAR 3D Scan User Guide
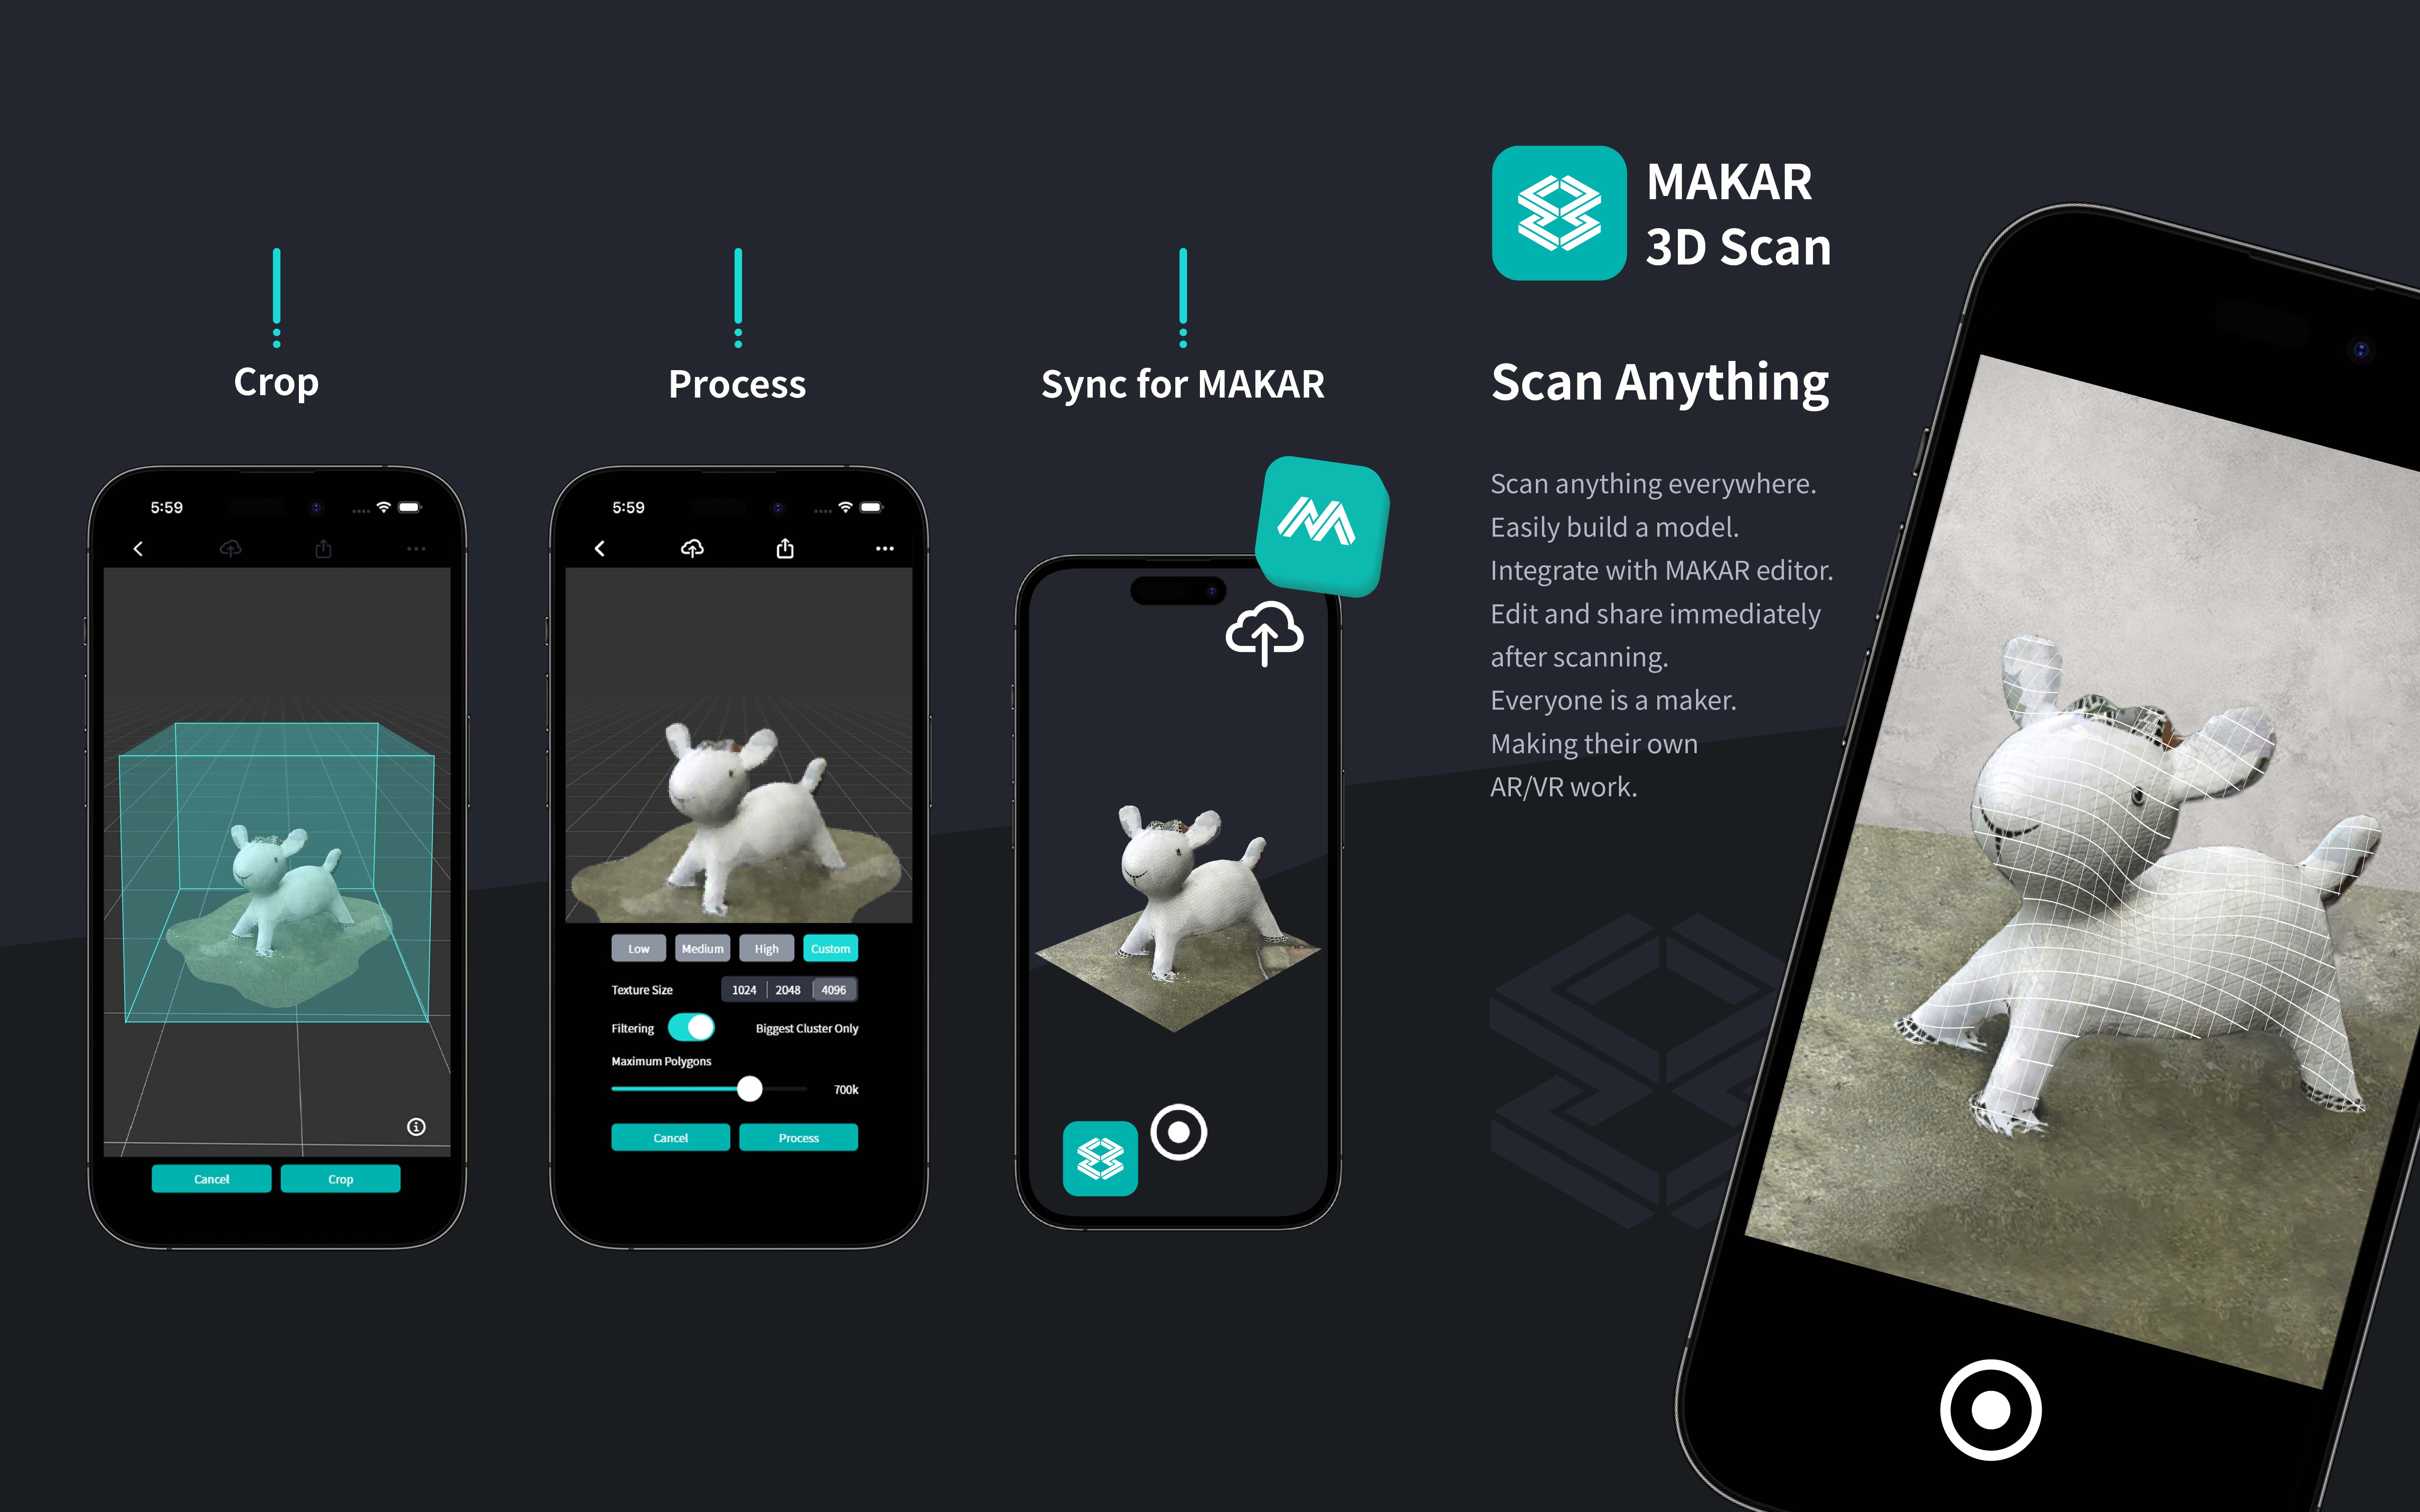
MAKAR introduces the iPhone/iPad version of the "MAKAR 3D Scan" app. Without any additional equipment, you can scan and create 3D models with just an iPhone or iPad, transforming your favorite spaces or objects into models quickly and easily, making it a powerful tool for XR creators. This guide will detail how to use the iPhone/iPad version of the MAKAR 3D Scan app.
Table of Contents |
|---|
iPhone/iPad MAKAR 3D Scan Features Introduction
No additional equipment is needed—creating 3D models is that simple! In the future of the metaverse, everyone should be able to quickly enter the XR world, and MAKAR 3D Scan is the gateway from reality to virtuality, and the most powerful 3D modeling tool for every XR creator.
Here are the detailed features of the MAKAR 3D Scan app for iPhone/iPad:
1.Scan Everything with Your Phone and Computer: Take photos around the object you want to turn into a 3D model, import the photos into MAKAR 3D Scan, and with just a phone and a computer, you can quickly scan and produce a 3D model.
2.Customizable Scan Precision: Worried that your scanned 3D model might be too large or not detailed enough? MAKAR 3D Scan offers options for model precision and background removal, allowing you to adjust the 3D model according to your needs.
3.Supports Various 3D Format Outputs: The 3D models created with MAKAR 3D Scan can be exported in USDZ, OBJ, GLB, and STL formats, making it easy to apply them across different platforms.
4.Direct Integration with MAKAR Editor Library: Log in to your MAKAR account, and the 3D models scanned with MAKAR 3D Scan will automatically be imported into your MAKAR Editor library, allowing you to quickly start editing in the metaverse XR without any additional steps.
5.Unlock the Chains of the XR Metaverse: Easily enter the infinite XR world. MAKAR 3D Scan builds a bridge between reality and virtuality for you!
Minimum Hardware Requirements and Download Instructions for iPhone/iPad MAKAR 3D Scan
【Software Name】: MAKAR 3D Scan for iPhone/iPad
【Language】: Traditional Chinese, English
【Minimum Requirements】: Space scanning requires a LiDAR camera; object scanning (Scan Wizard) requires LiDAR functionality and an A14 Bionic chip or later, running on iOS or iPadOS 17 or higher.
【Download Location】: iOS Download
iPhone/iPad MAKAR 3D Scan Tutorial
【Basic Features Introduction】
➤ Scan Settings
1. Click the menu icon in the upper left corner, then select "Settings".
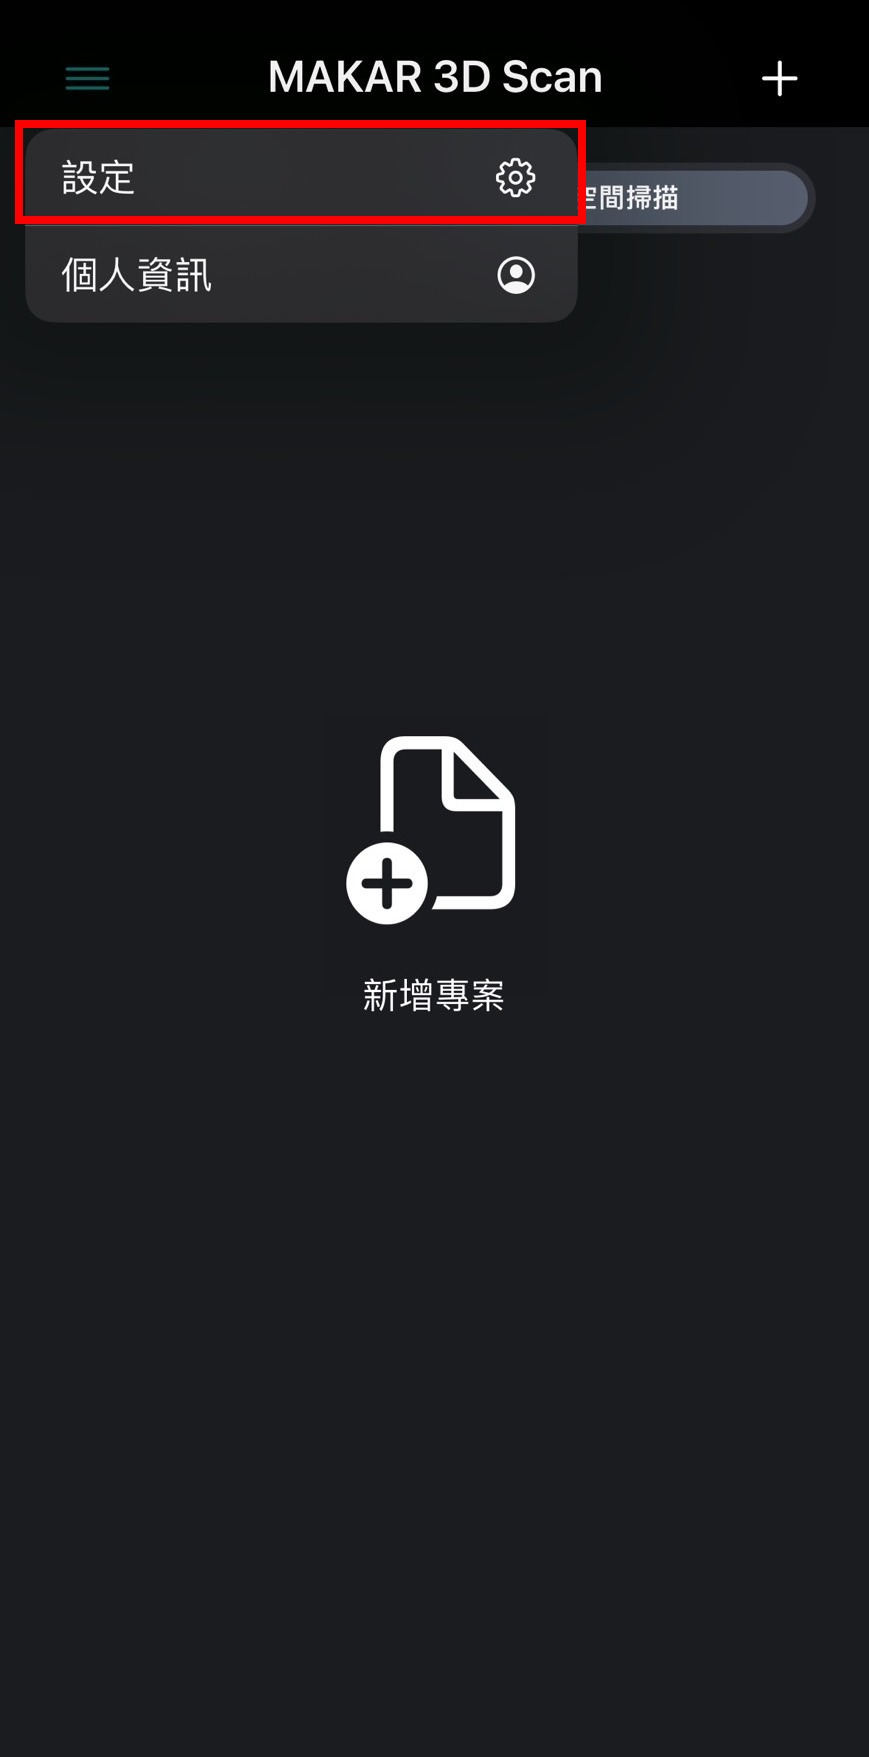
2. You can set the range and mesh simplification for space scans, and the photo quality for object scans.
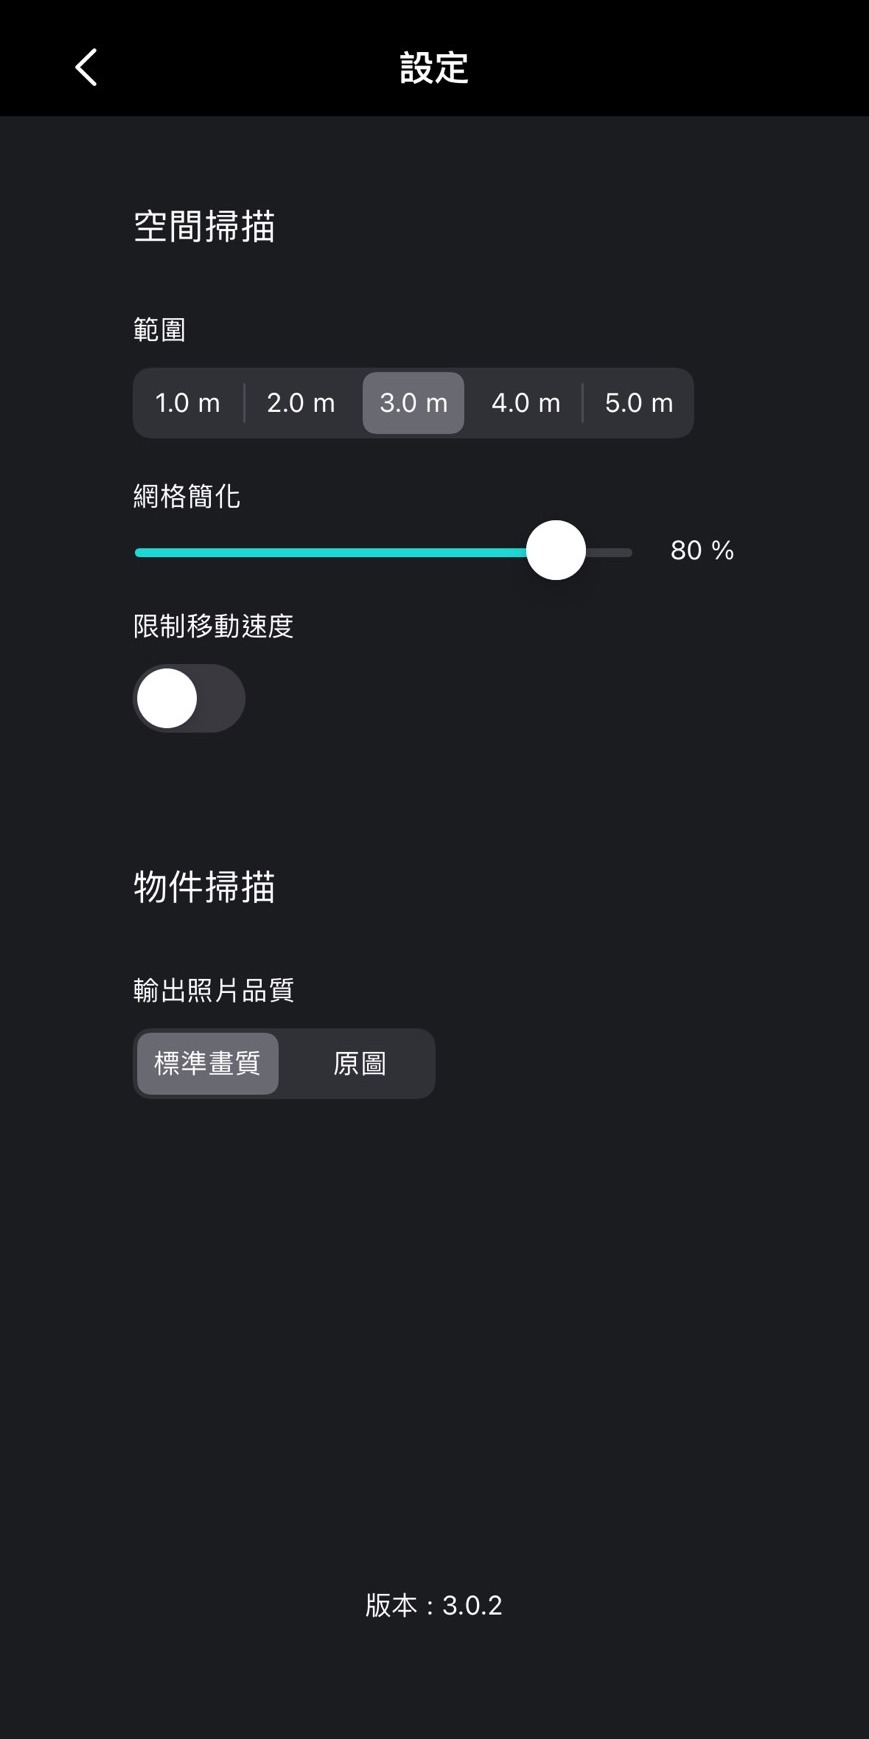
➤ Logging into MAKAR Account
1. Click the menu icon in the upper left corner, then select "Personal Information".
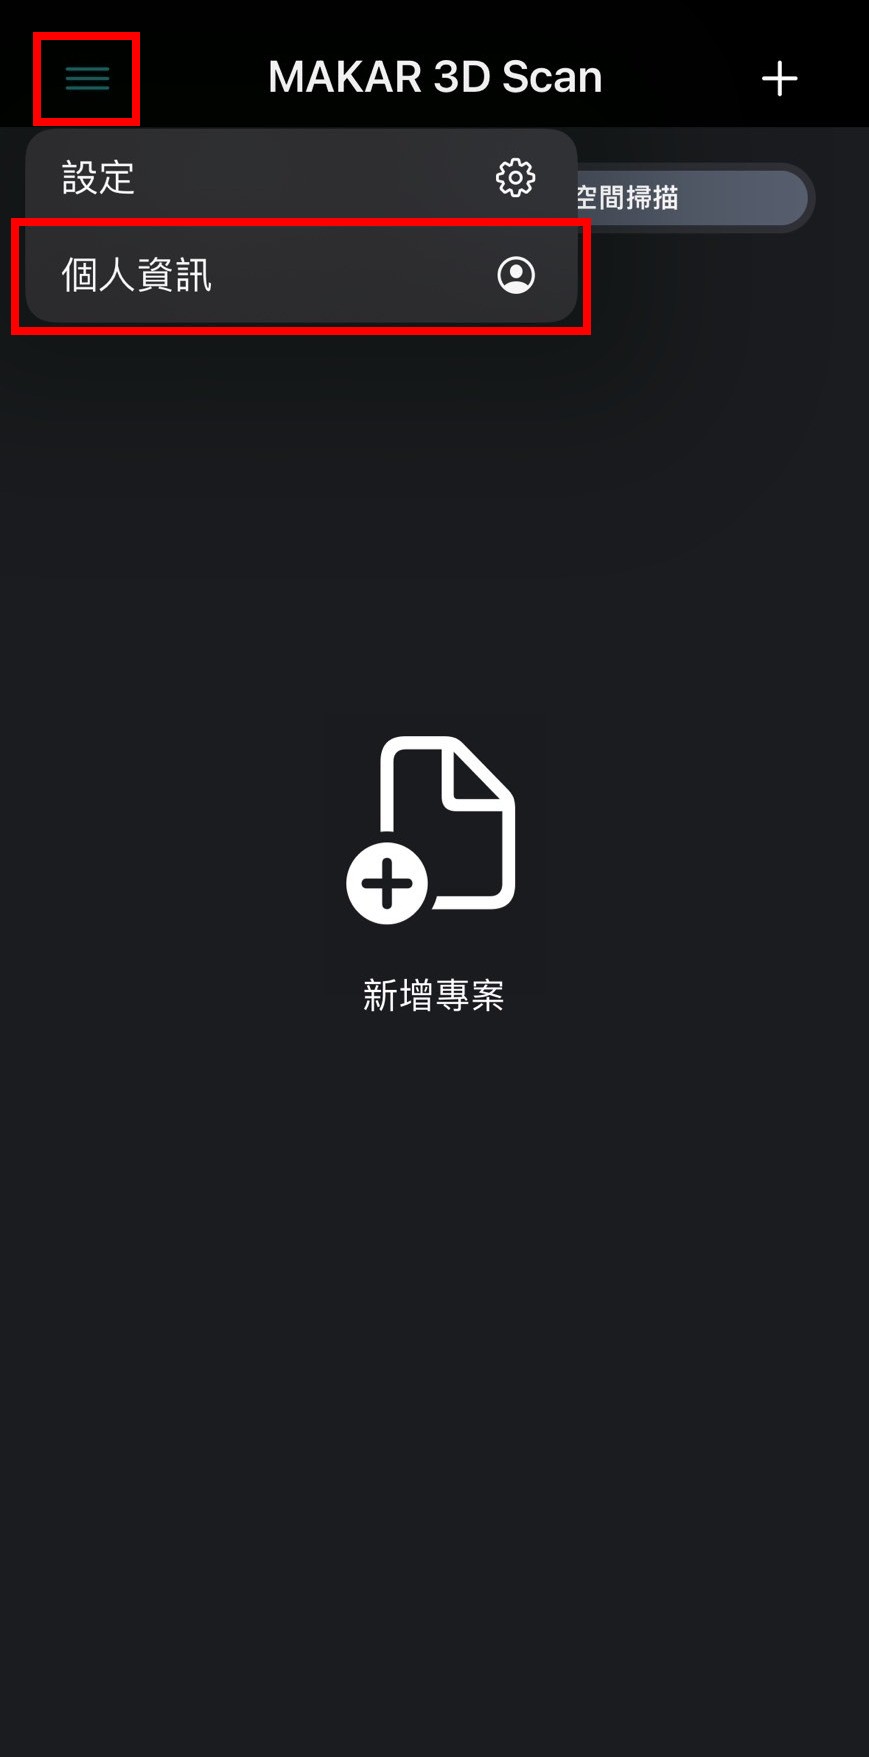
2. After logging into your MAKAR account, the created 3D objects can be directly uploaded to the MAKAR Editor.
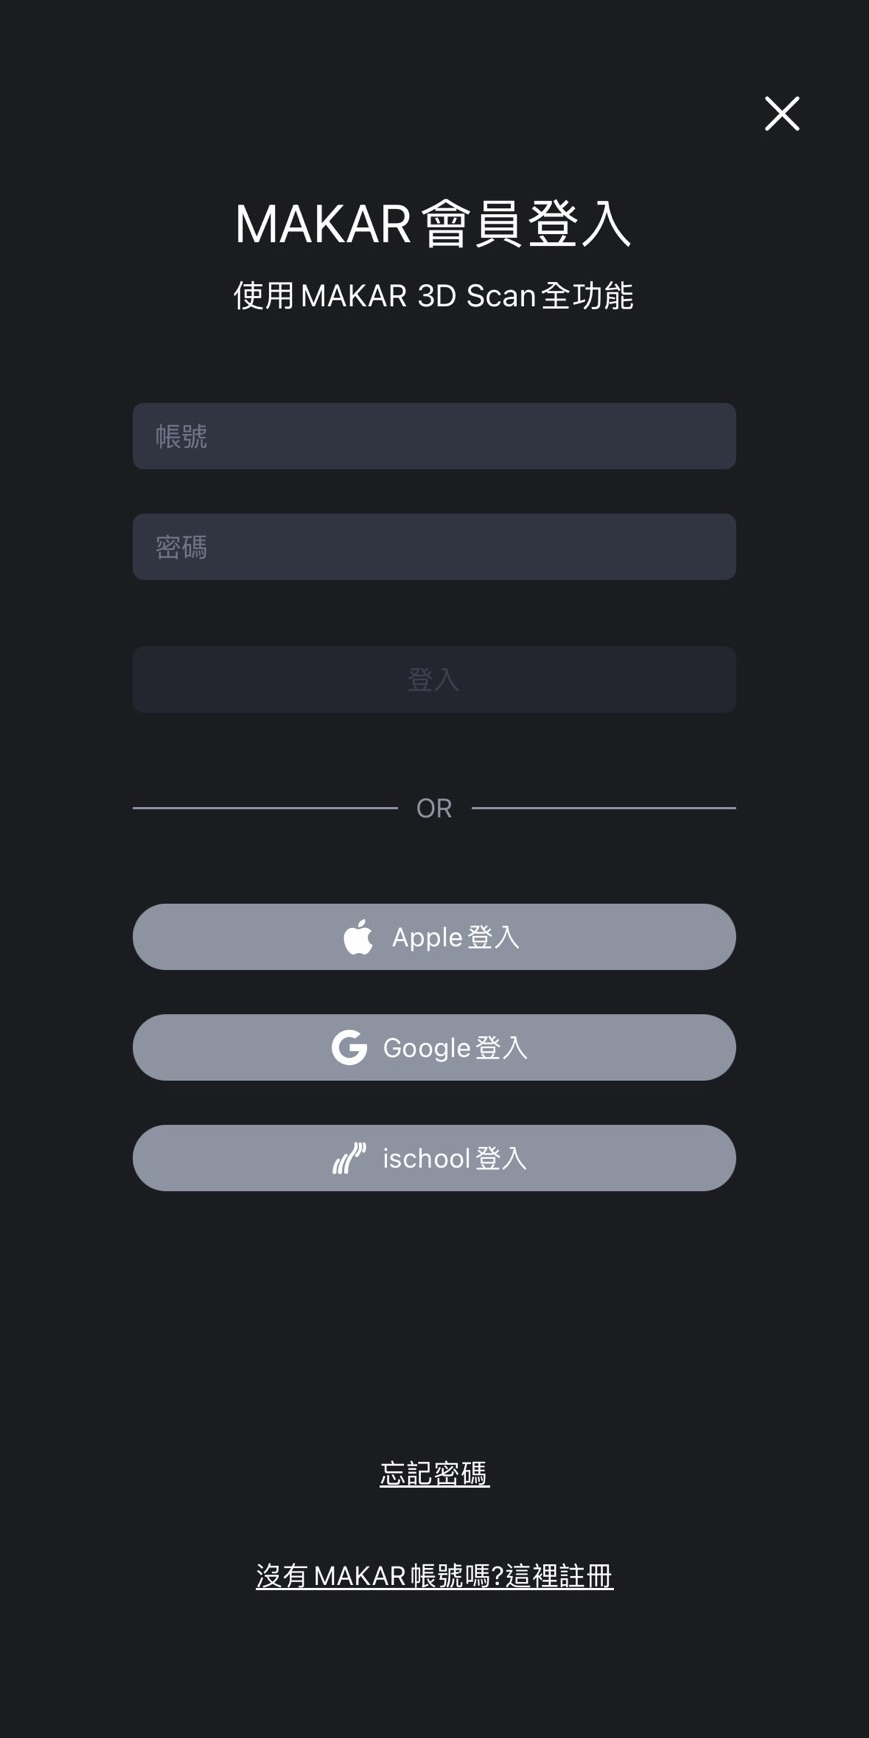
➤ Renaming Projects
1. After the 3D object is created, click the icon with three white dots.
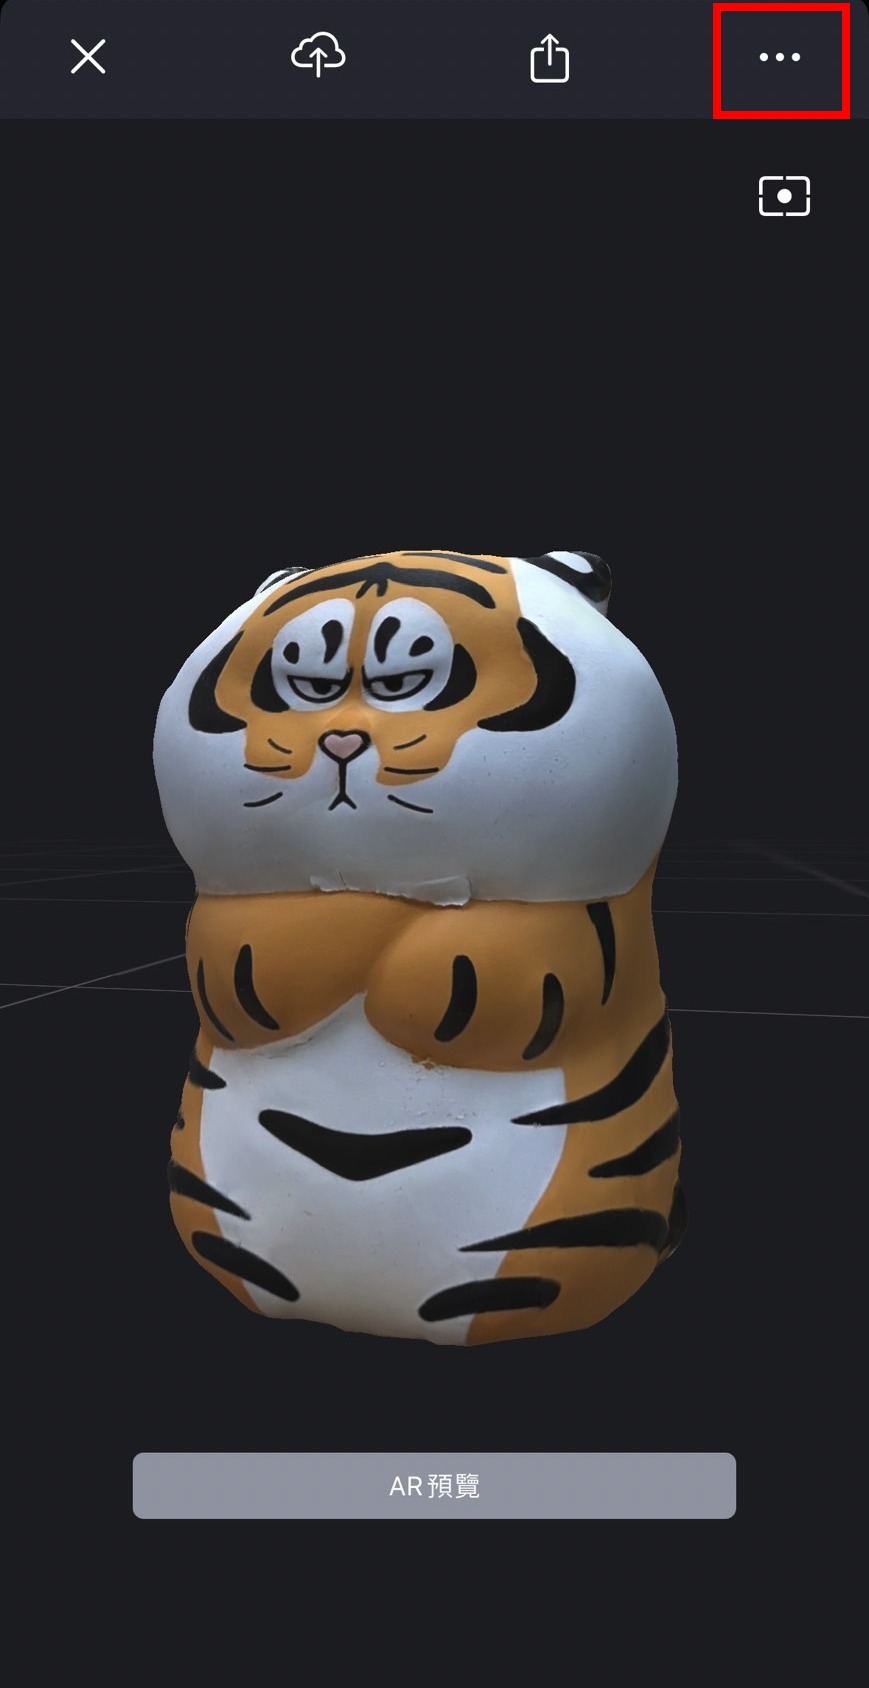
2. Click the project name to rename the project.
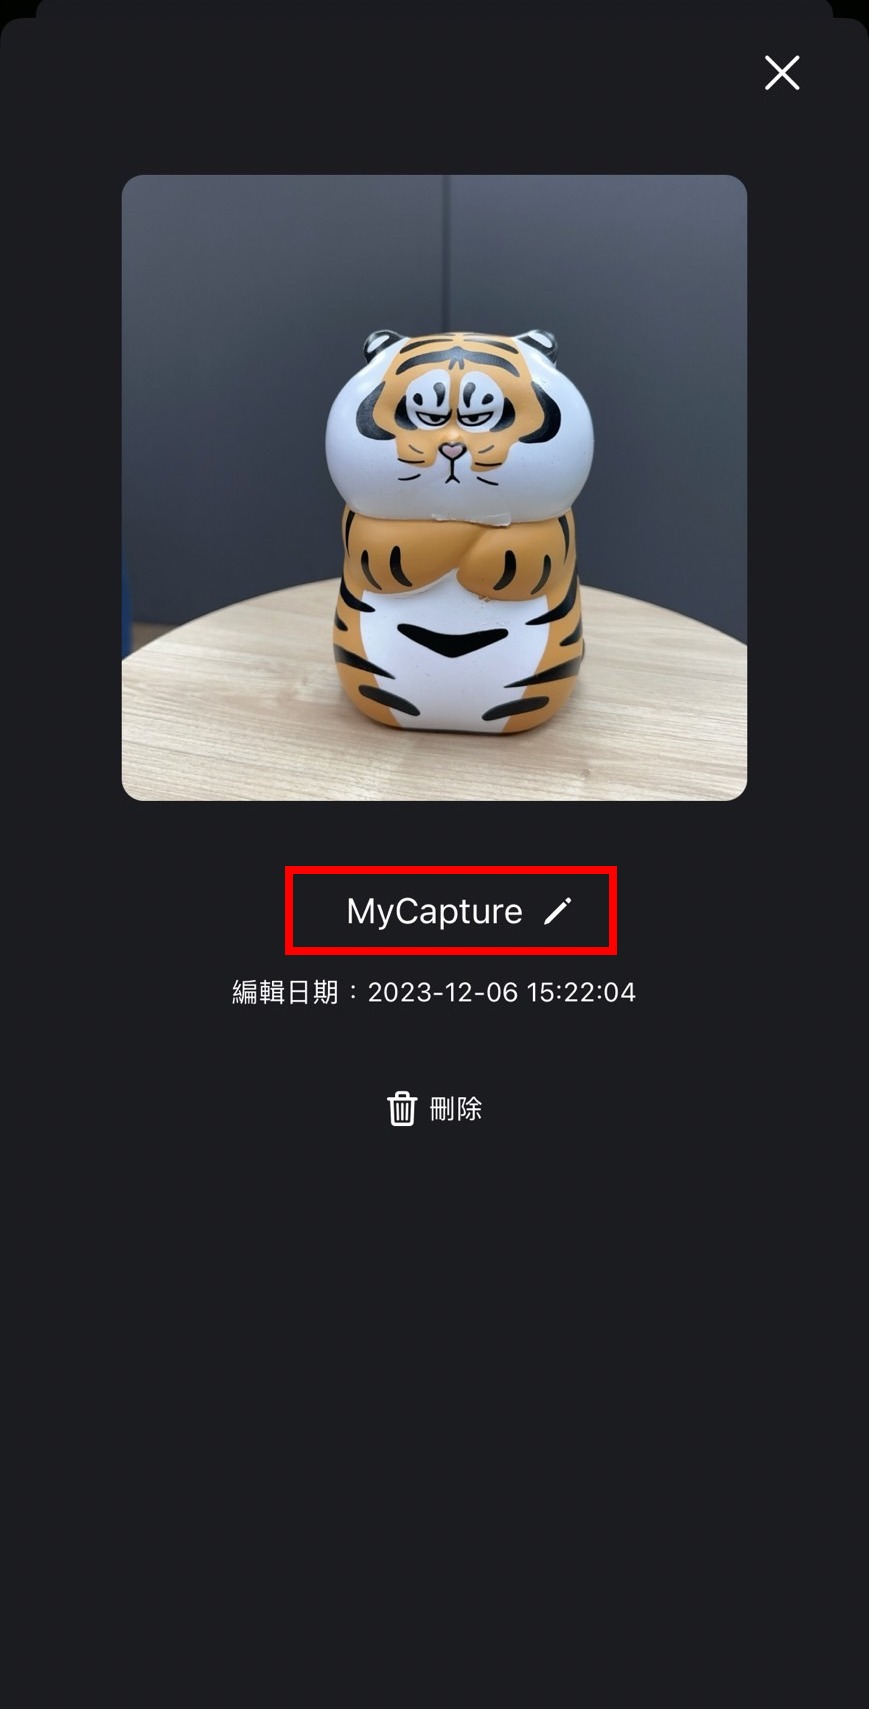
【Room Scan】
1. Open the MAKAR 3D Scan app on your iPhone or iPad, and tap the "+" icon in the upper right corner.
.jpg)
2. Select "Room Scan" on the right.
.jpg)
3. Enter the scanning space, align with the scene to be created, and press the red button to start scanning. Once the data is successfully captured, the scene will gradually be constructed with a grid while the red area disappears. It is recommended to move around and let the system capture the space until it is fully captured, then press the white button.
.jpg)
.jpg)
4. Then enter the "Post-Processing" step. The screen will display resolution options. You can choose low, medium, high, or custom for automatic post-processing by the system.
.jpg)
.jpg)
5. Next, click "Crop" to enter the cropping step.
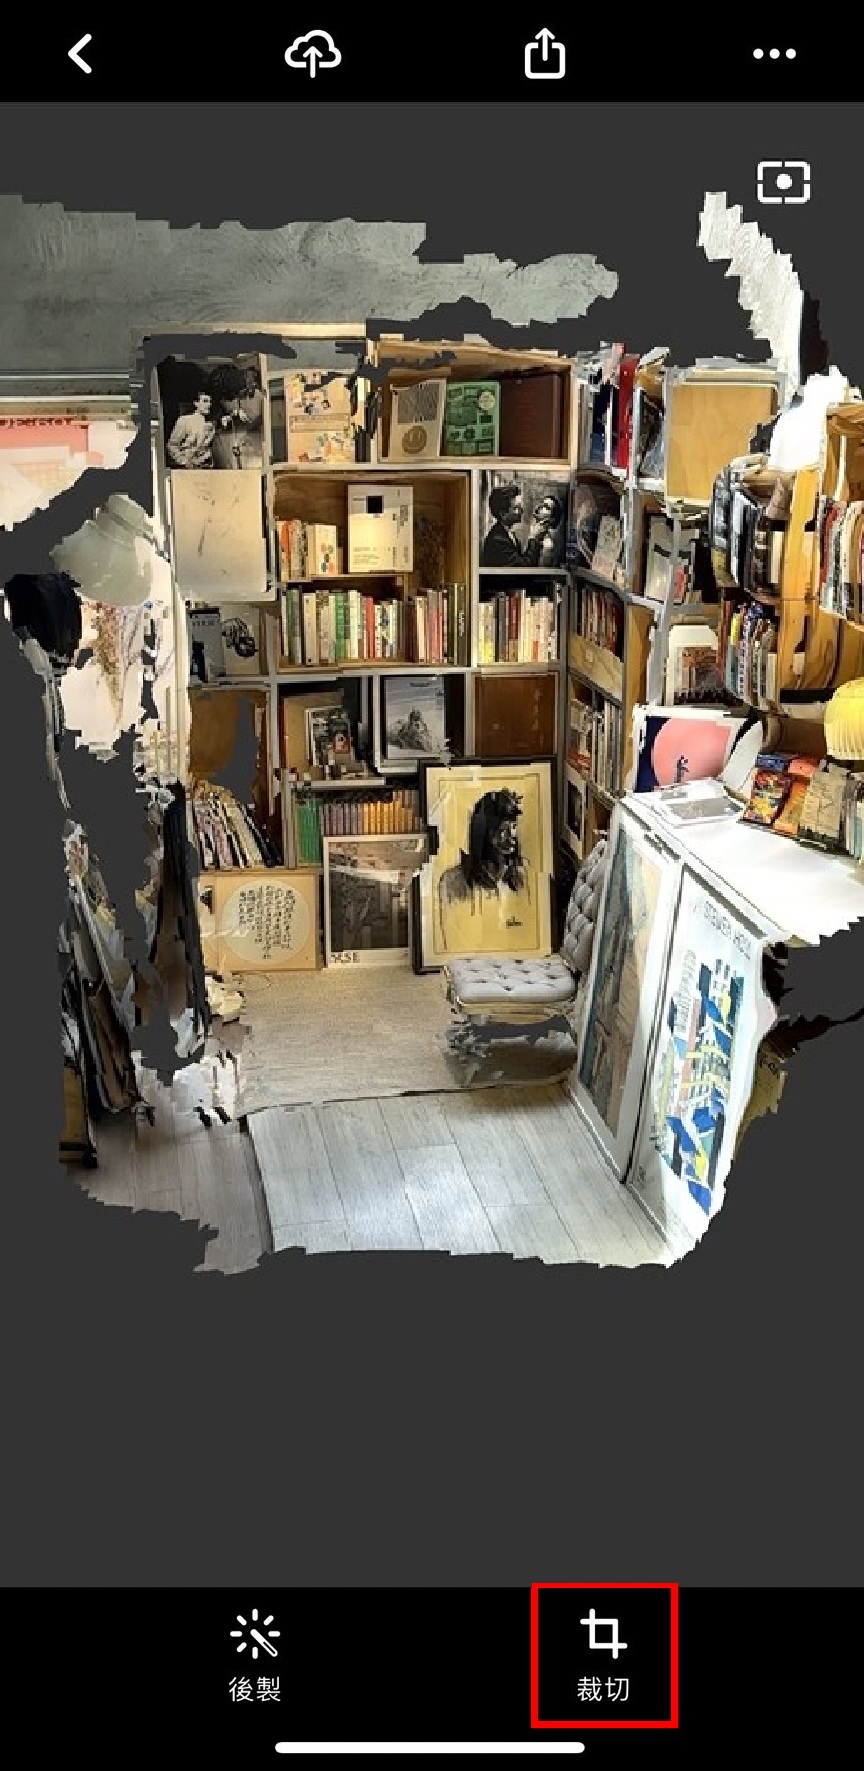
6. Follow the instructions to trim the scene to the appropriate size, then press "Crop" to complete. If you need to reprocess the resolution or recrop the scene, you can click "Post-Processing" and "Crop" to adjust.
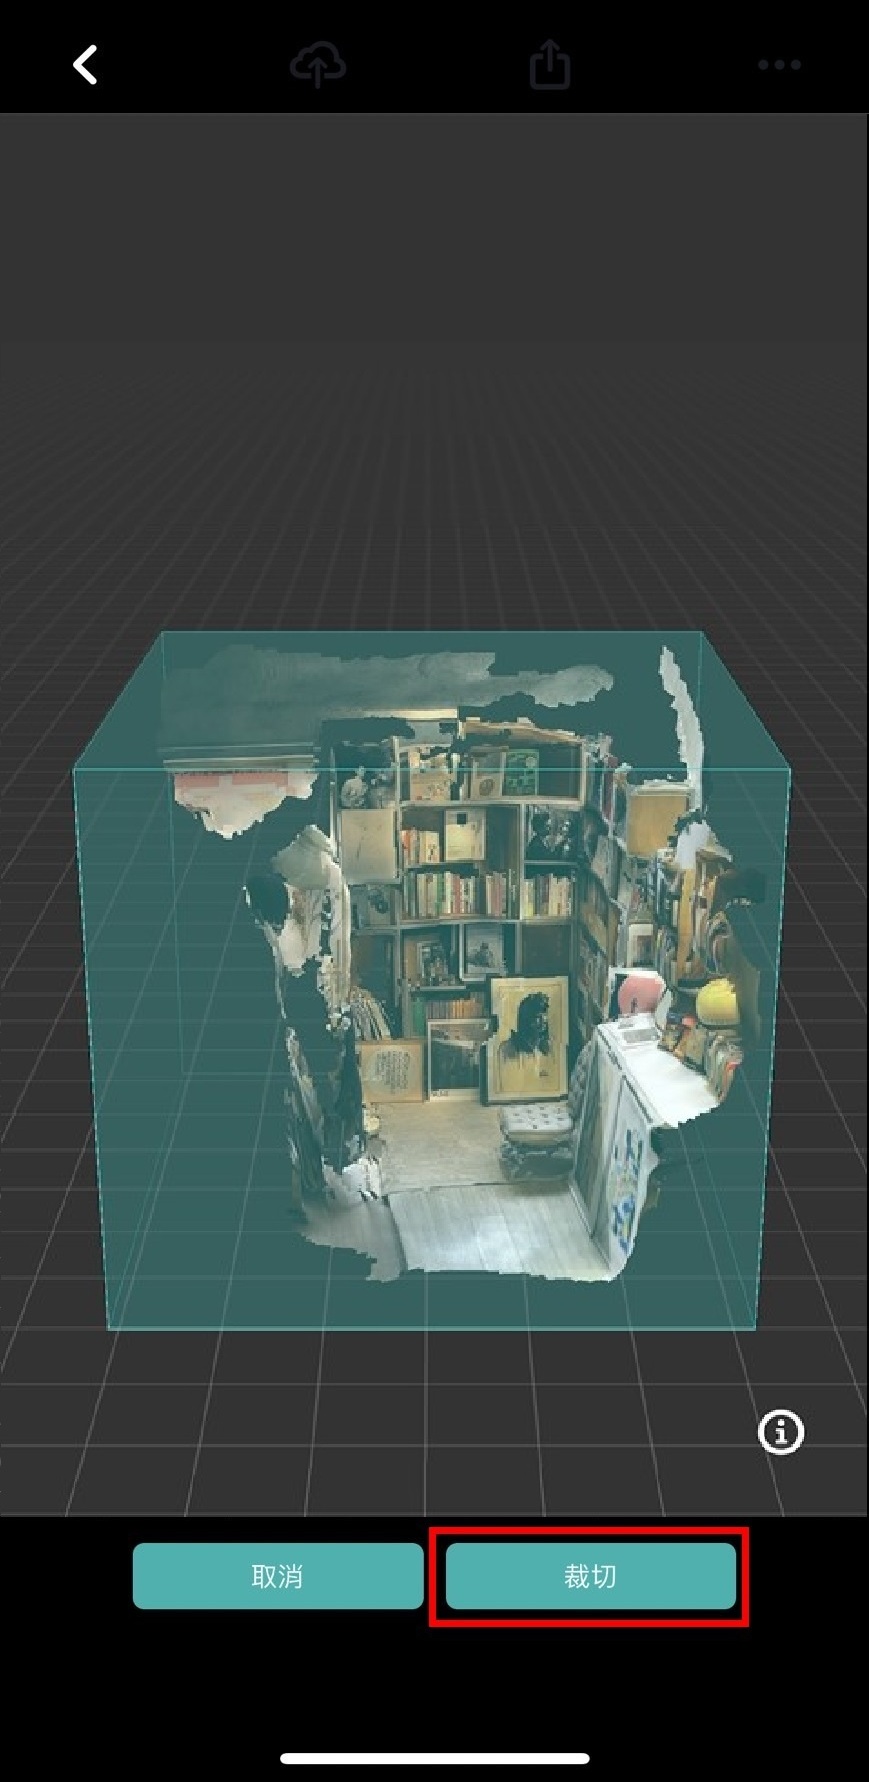
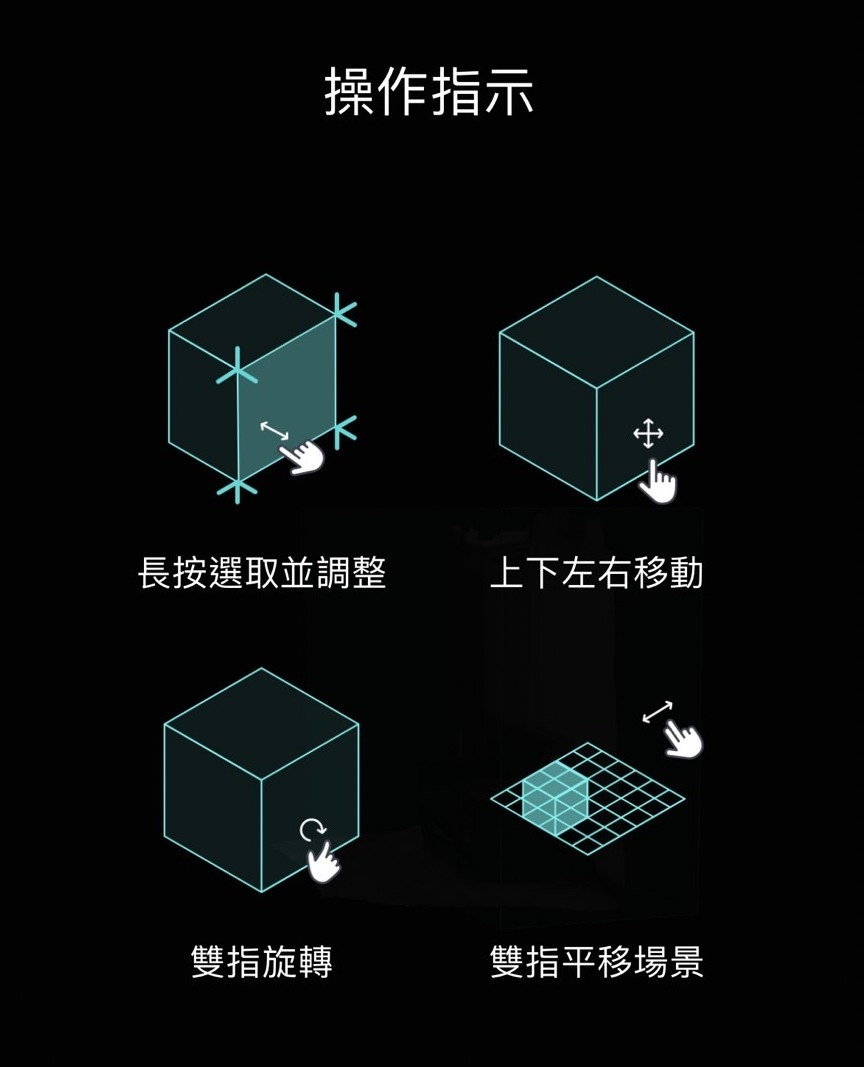
7. Once the scene is created, if reprocessing or recropping is needed, you can adjust it again.
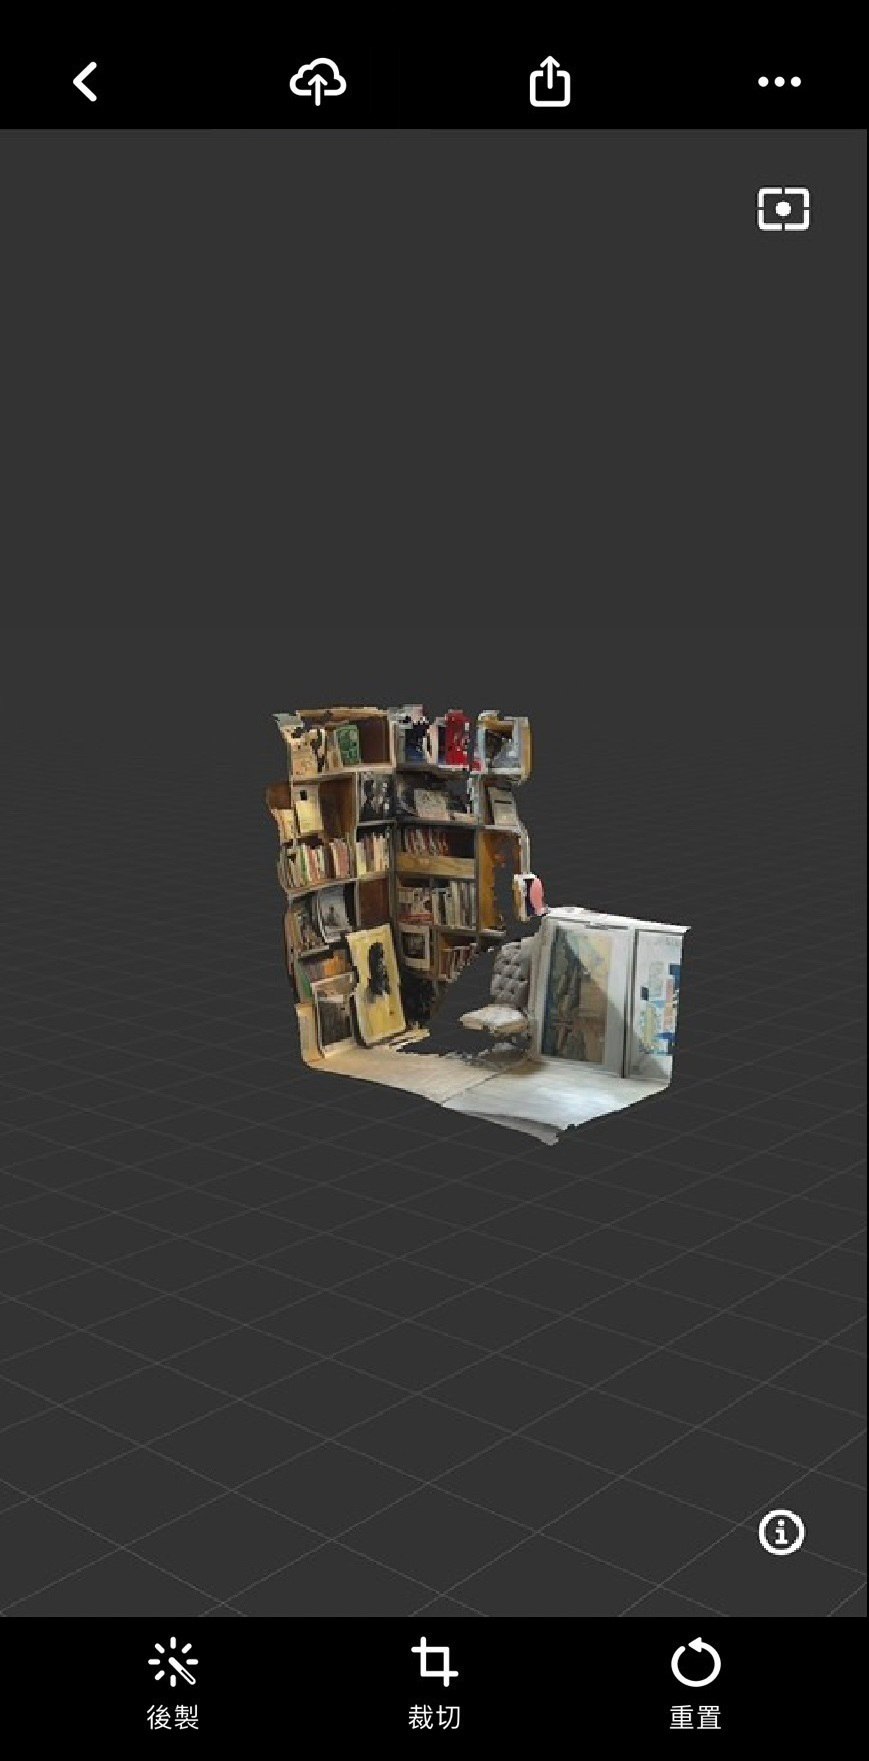
【Object Scan】
MAKAR 3D Scan's object scanning is divided into "Scan Assistant" and "Manual Capture" functions. Scan Assistant requires devices with LiDAR functionality and A14 Bionic chip or higher, and iOS or iPadOS 17 or higher; Manual Capture only requires a camera to create models. Manual Capture tutorials have also been introduced in the MAC version of MAKAR 3D Scan.
Using Scan Assistant provides more depth information, making the model almost identical to the real object. Manual Capture allows for simple photo scanning, which is more convenient. The following explains how to use both "Scan Assistant" and "Manual Capture".
➤ Scan Assistant
1. Open the MAKAR 3D Scan app on your iPhone or iPad, and tap the "+" icon in the upper right corner.
2. Select "Object Scan" on the left.
.jpg)
3. Select "Scan Assistant" on the left.
.jpg)
4. Approach the target and center it, then click lock.
.jpg)
5. A white frame appears around the object. You can adjust the lock size with your finger. Once confirmed, press "Start Scan".
.jpg)
6. Enter the scanning page. The white dot serves as the scanning center. Move around the object to scan and fill the scale track. The screen bottom synchronizes the scanning status, with white representing the filled scale. Once the scale is filled, proceed to the next step.
.jpg)
.jpg)
7. Aim to maintain distance and fill the scale while scanning the object, requiring at least 20 scans. If distance is too far or movement is too fast, small prompts will appear above the object to remind the user.
.jpg)
.jpg)
8. Once the scale is filled, the screen automatically enters the second scanning step. Click "Continue" to scan parallel to the object again.
.jpg)
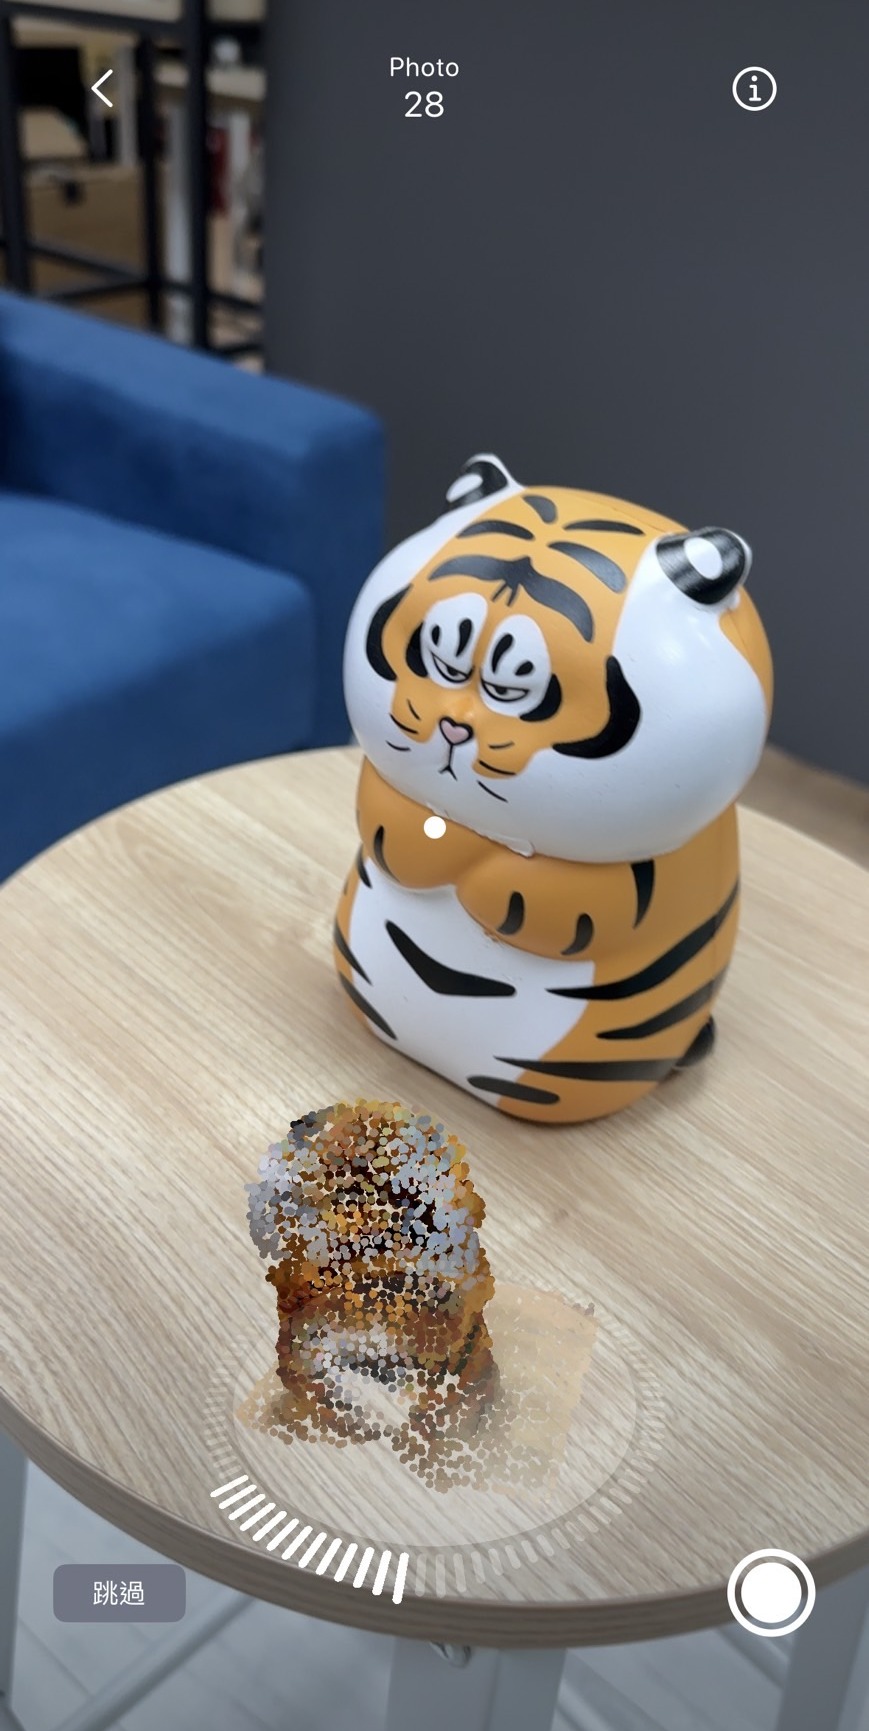
9. Once the scale is filled, the screen automatically enters the third scanning step. Click "Continue" to scan from above the object again.
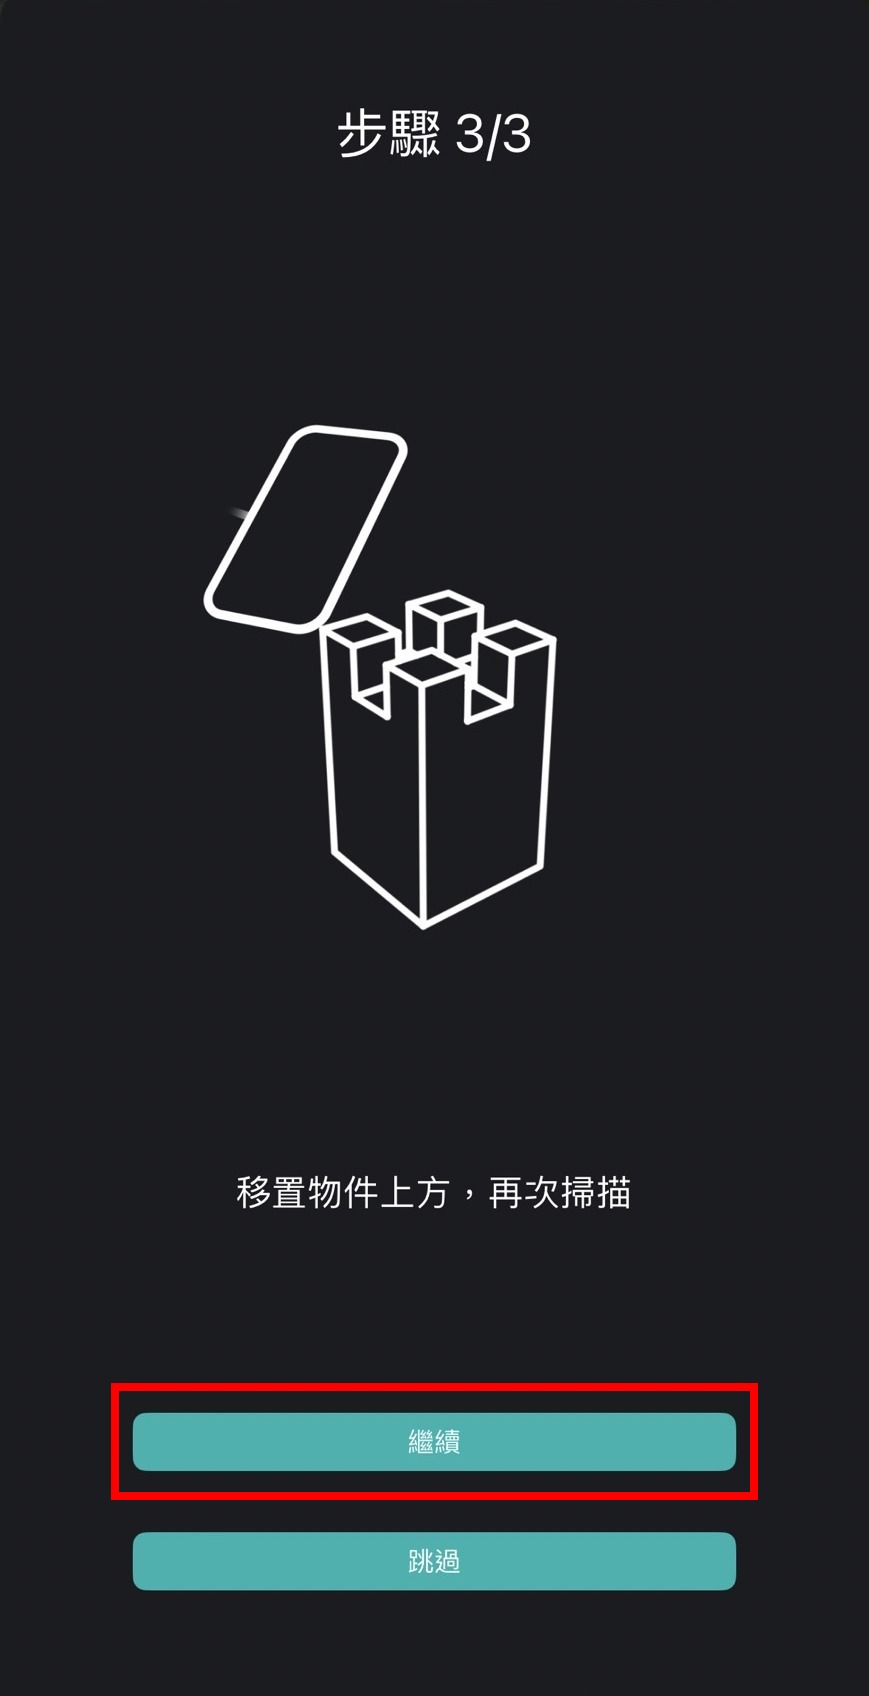
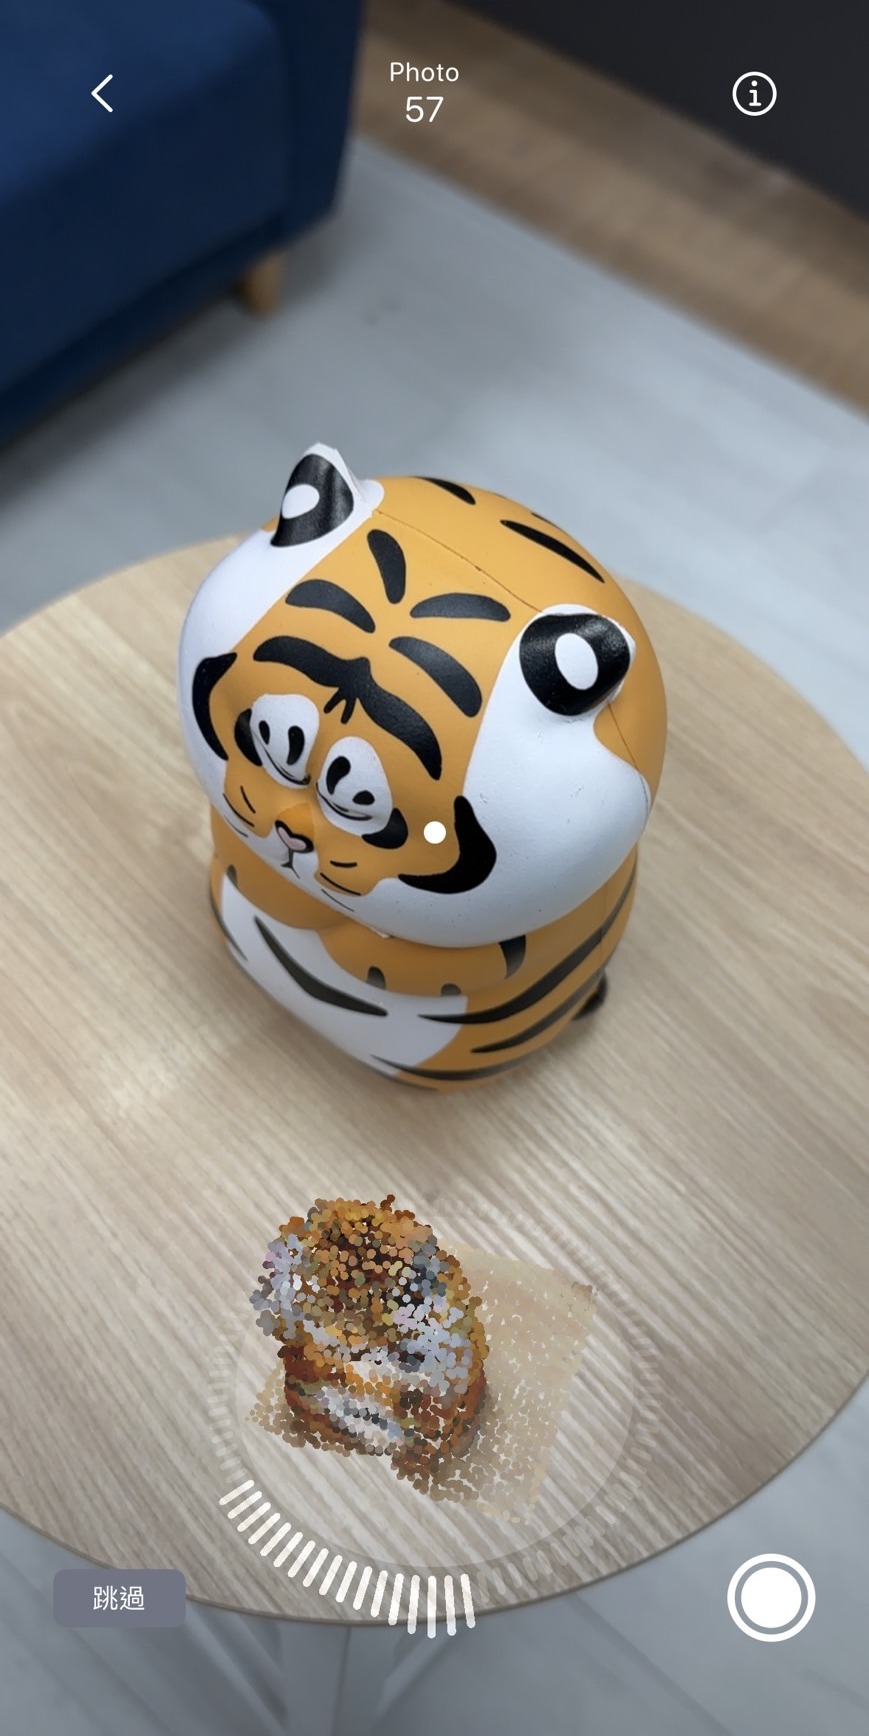
10. After completion, a preview of the object point cloud appears. Click "Finish".
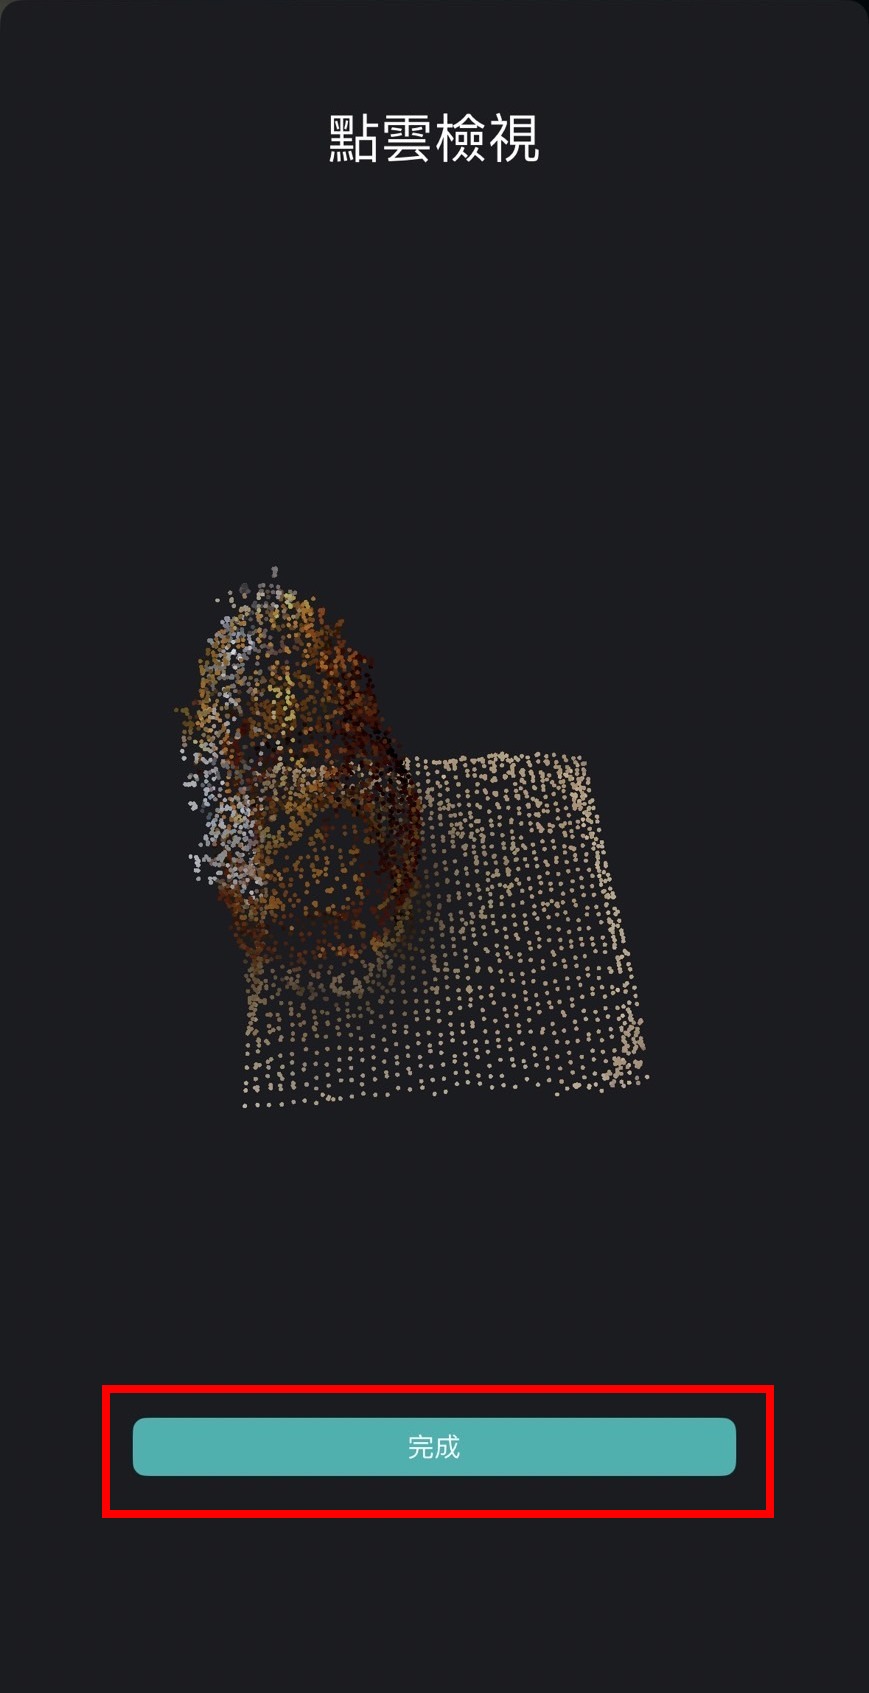
11. Click "iPhone Computing" to create the model.
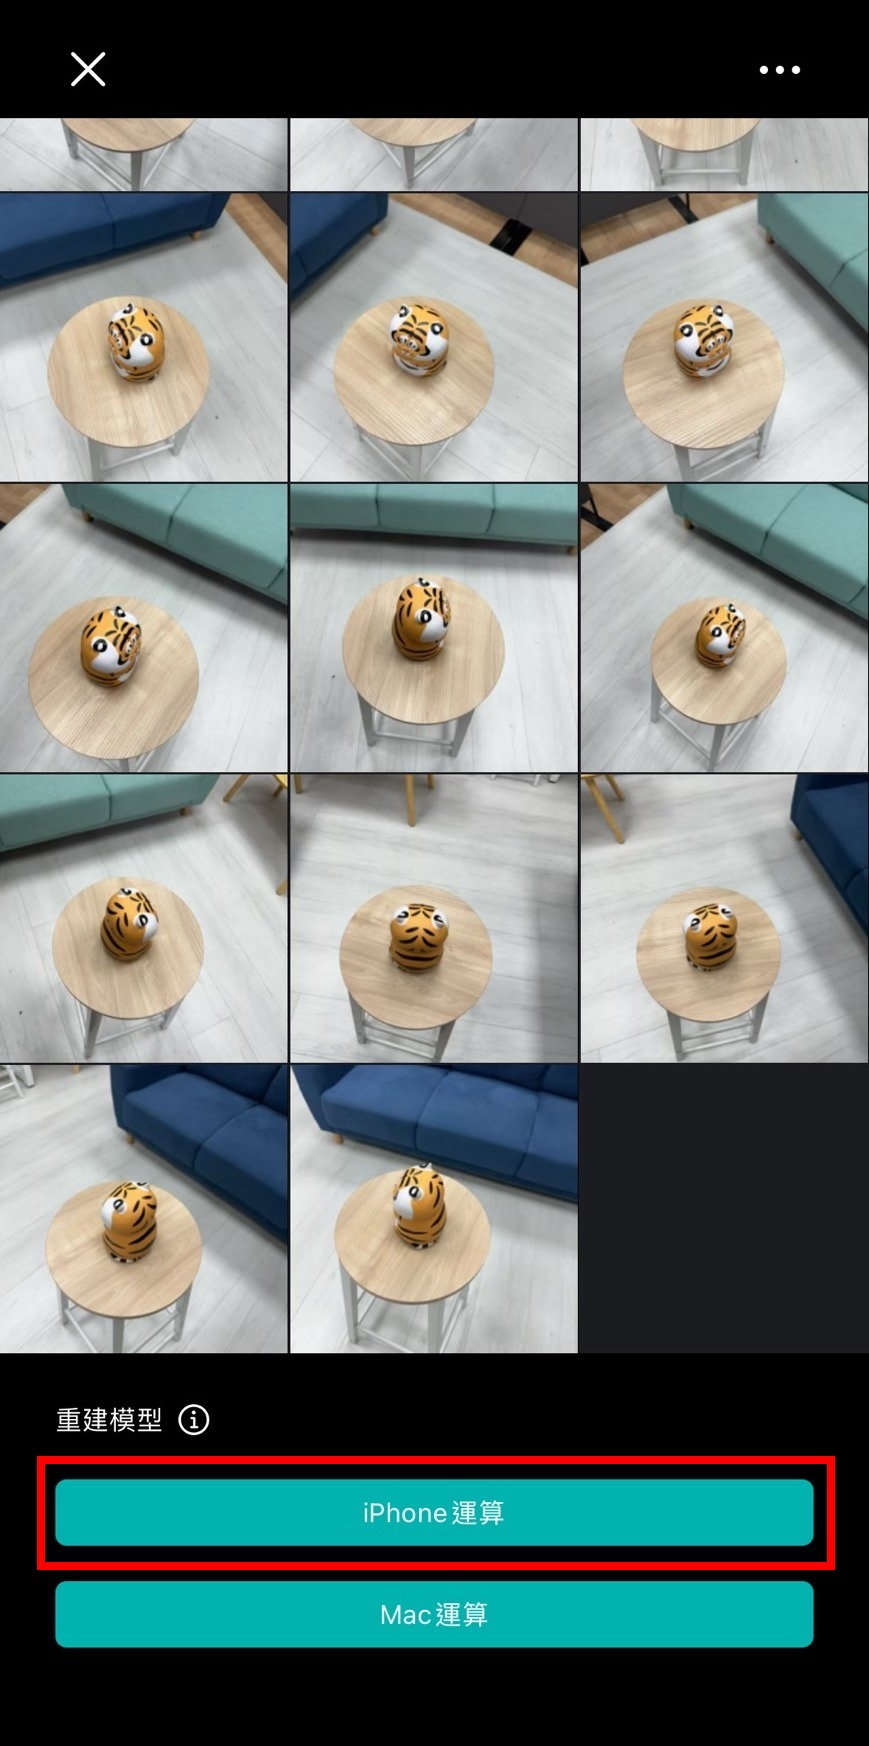
12. Once the object is created, click "AR Preview" to view the object in augmented reality on your phone.
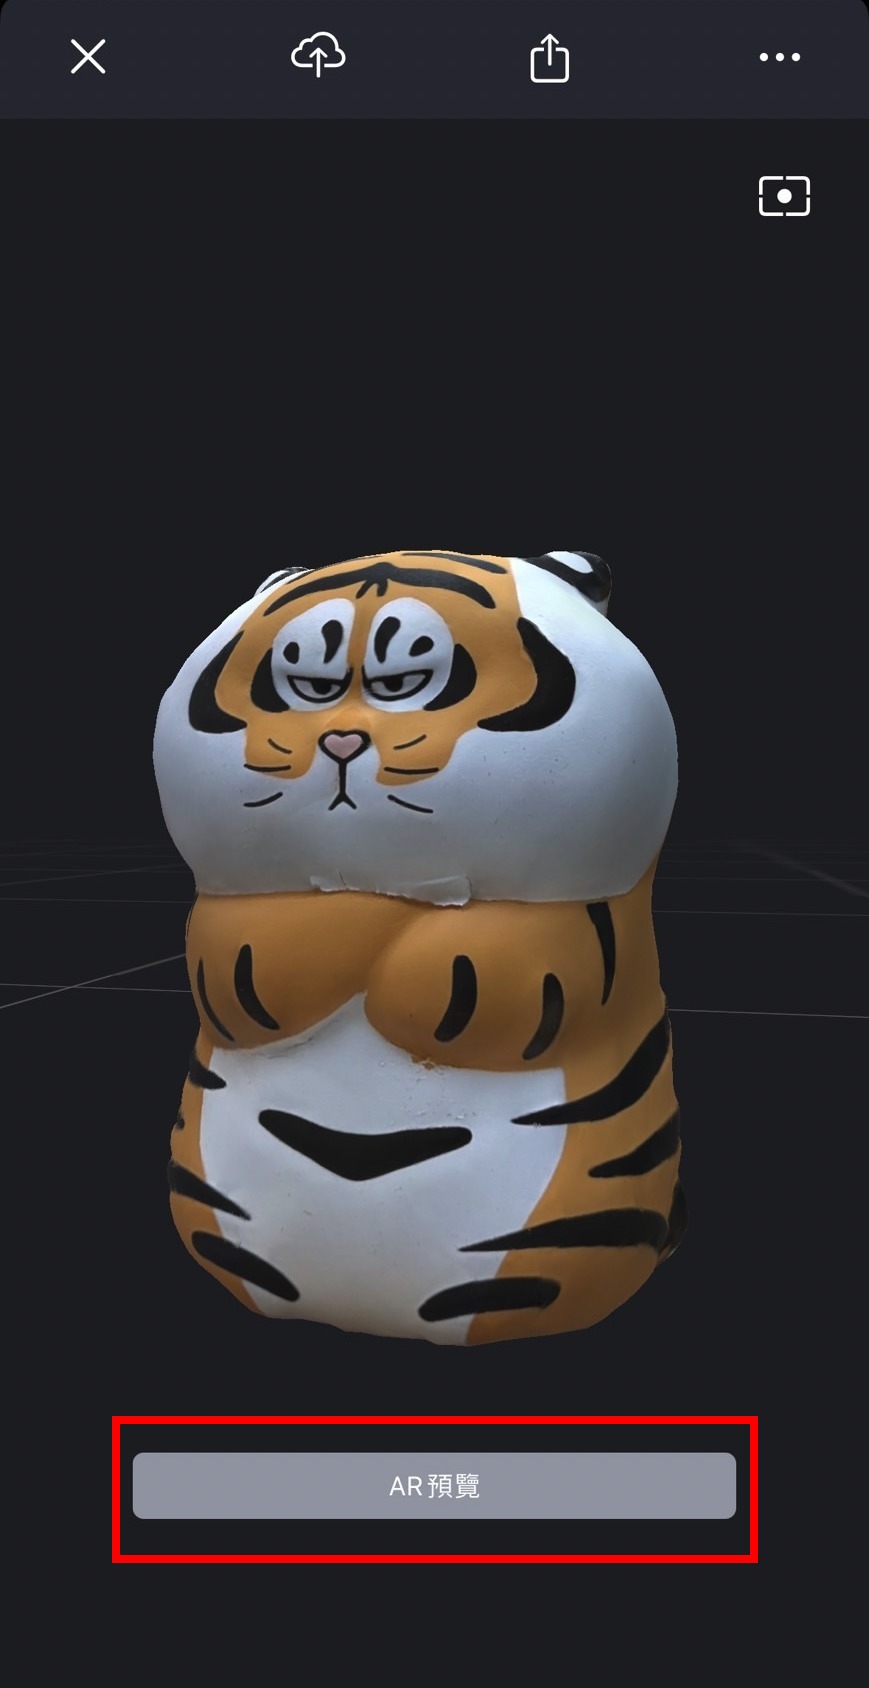

➤ Manual Cpature
1. Open the MAKAR 3D Scan app on your iPhone or iPad, and tap the "+" icon in the upper right corner.
.jpg)
2. Select "Object Scan" on the left.
.jpg)
3. Select "Manual Capture" on the right.
.jpg)
4. Aim for clear shots, filling the frame, and maintaining 70% overlap. Use the white button to take pictures around the object. It is recommended to take at least 20 shots each from the front, top, and bottom for the next step.
※ The more shots taken, the better the modeling details. Up to 200 shots can be taken.
.jpg)
.jpg)
5. Click "iPhone Computing" to create the model.
.jpg)
6. Once the object is created, click "AR Preview" to view the object in augmented reality on your phone.
.jpg)
.jpg)
【Uploading 3D Models to MAKAR Editor】
1.Click the red frame icon to directly upload the scanned object to the MAKAR Editor.
※ Requires logging into a MAKAR account.
.jpg)
.jpg)
2. After uploading to the MAKAR software, the model will appear in the asset library.
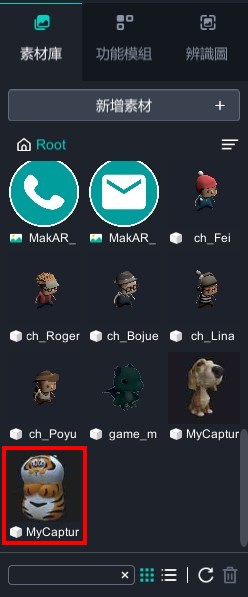
【Exporting 3D Model Files】
The iPhone/iPad version of MAKAR 3D Scan supports exporting the completed 3D models, facilitating XR project creation. To learn more about the differences and conversion methods of 3D file formats, refer to the guide on Understanding GLB, OBJ, STL, and Other Common 3D File Formats, with Blender Conversion Tutorial Included!
1. Click the red frame icon to support exporting 3D formats: USDZ, OBJ, GLB, STL.
※ Exporting models is exclusive to MAKAR professional account users.
.jpg)
.jpg)
2. If the account is not upgraded but wants to export 3D models, you can first upload the 3D model to the MAKAR Editor. Click "Window" → "My Resources", select the created 3D model, and finally click the red icon to download it to the computer.
※ This function only supports downloading in GLB format.
.jpg)
.jpg)
AR Envelope for Advancedr –Lucky Rabbit
|
Abstract: In this tutorial, I will explain how to create this AR envelope advanced version, and how to use Blockly to create interactive AR project. Introduction: There are increasingly more tools available for quickly and easily creating AR projects. As people become more familiar with this technology, they will want to try out more possibilities, whether in terms of interactivity or functionality. The MAKAR editor has added "logic functions" in recent years, using programming blocks which are easier for beginners to learn compared to traditional text-based programming. Beginners will not make errors due to input mistakes or missing specific symbols, which can cause programs to fail. This project builds upon the AR envelope and focuses more on achieving AR effects through logical programming. It will use effects such as "random sampling" and "model fade-in/fade-out". |
1. Image target
Creating image recognition is like New Year Rabbit tutorial and is done using Midjourney. Therefore, it will not be explained in detail here, and you can refer to the beginner's tutorial for more information.
2. Doodle3d
This is a web-based modeling tool. The left side displays a 2D canvas while the right side shows a 3D space. You can draw any shape or write any text on the canvas on the left and an equivalent 3D model will immediately be generated on the right. The models can be saved in STL and OBJ file formats. Therefore, I will use this tool to create my year's logo. By opening the website on a tablet, I can use a stylus to write in my unique handwriting font.

After the creation is complete, export it as an OBJ file format. Once the compressed file is unpacked, two files will be obtained: the MTL file and OBJ file. Simply opening the OBJ file may reveal a colorless model, so we need to use Blender to convert the model.

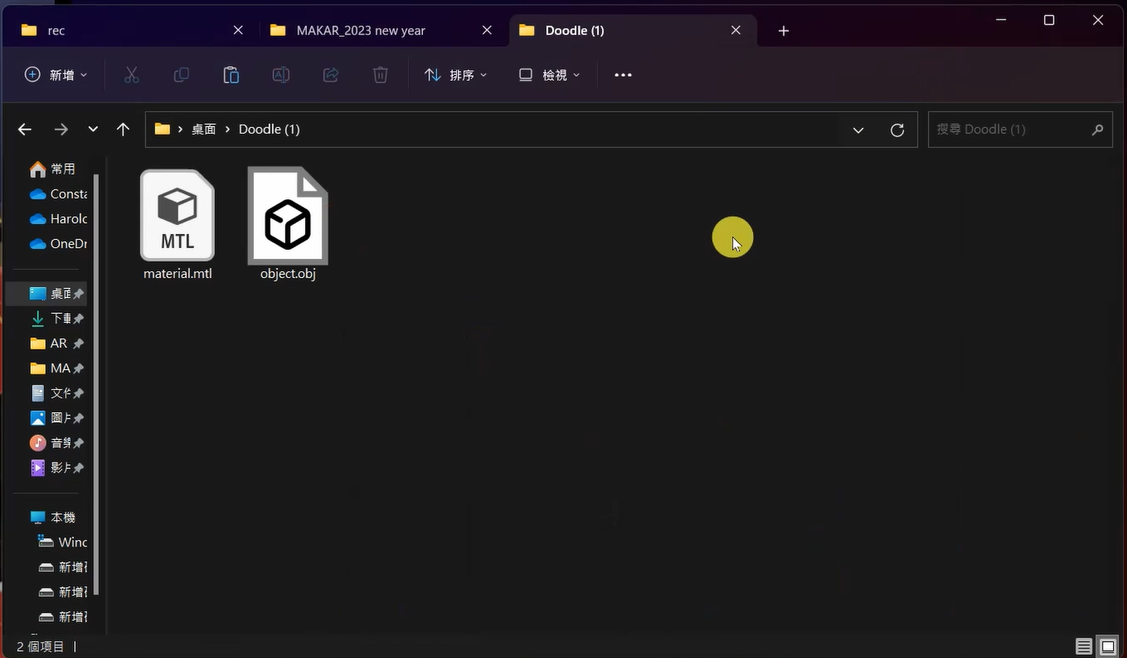
3. Blender
Blender is a free and open-source modeling software that supports multiple platforms. We are only using Blender to convert the OBJ file into a model file type supported by MAKAR, such as FBX or GLB.
To import the file, go to File 🡪 Import 🡪 Wavefront (OBJ).

Then just export it.
To export the file, go to File 🡪 Export 🡪 glTF 2.0 (GLB/GLTF).
There is no need to change any export settings.
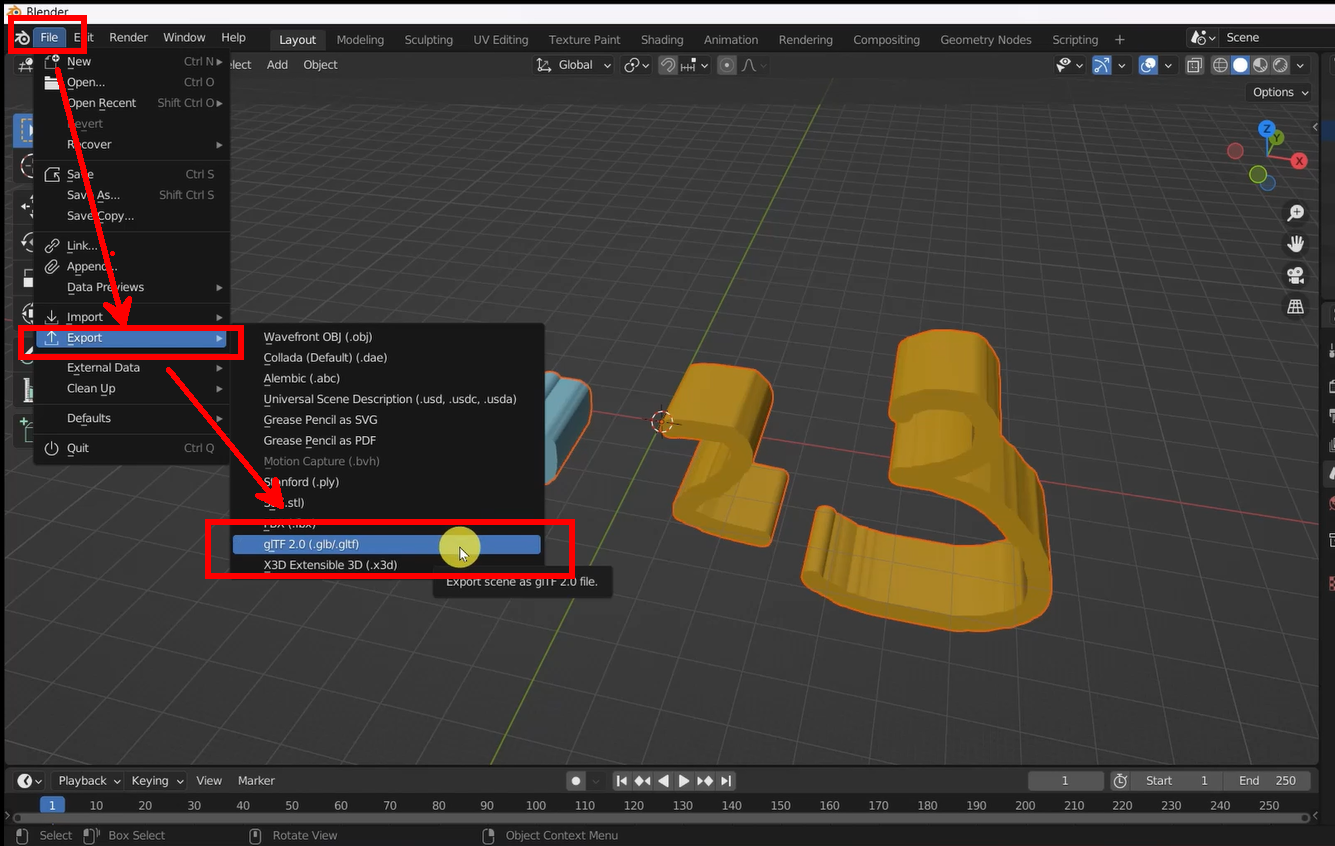
4. MAKAR Editor
New project 🡪 AR 🡪 AR Target
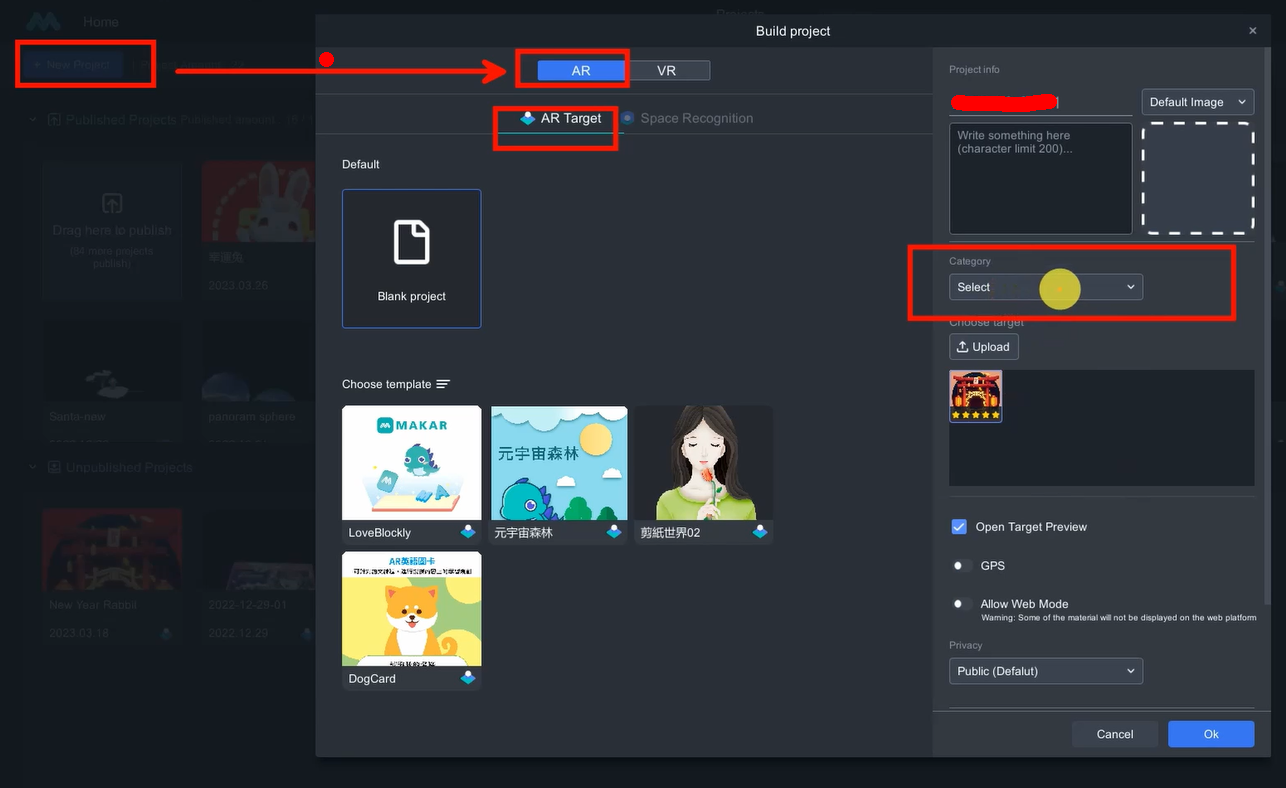
After creating the project, you can import materials, including 3D models, and audio, to the resource vault.
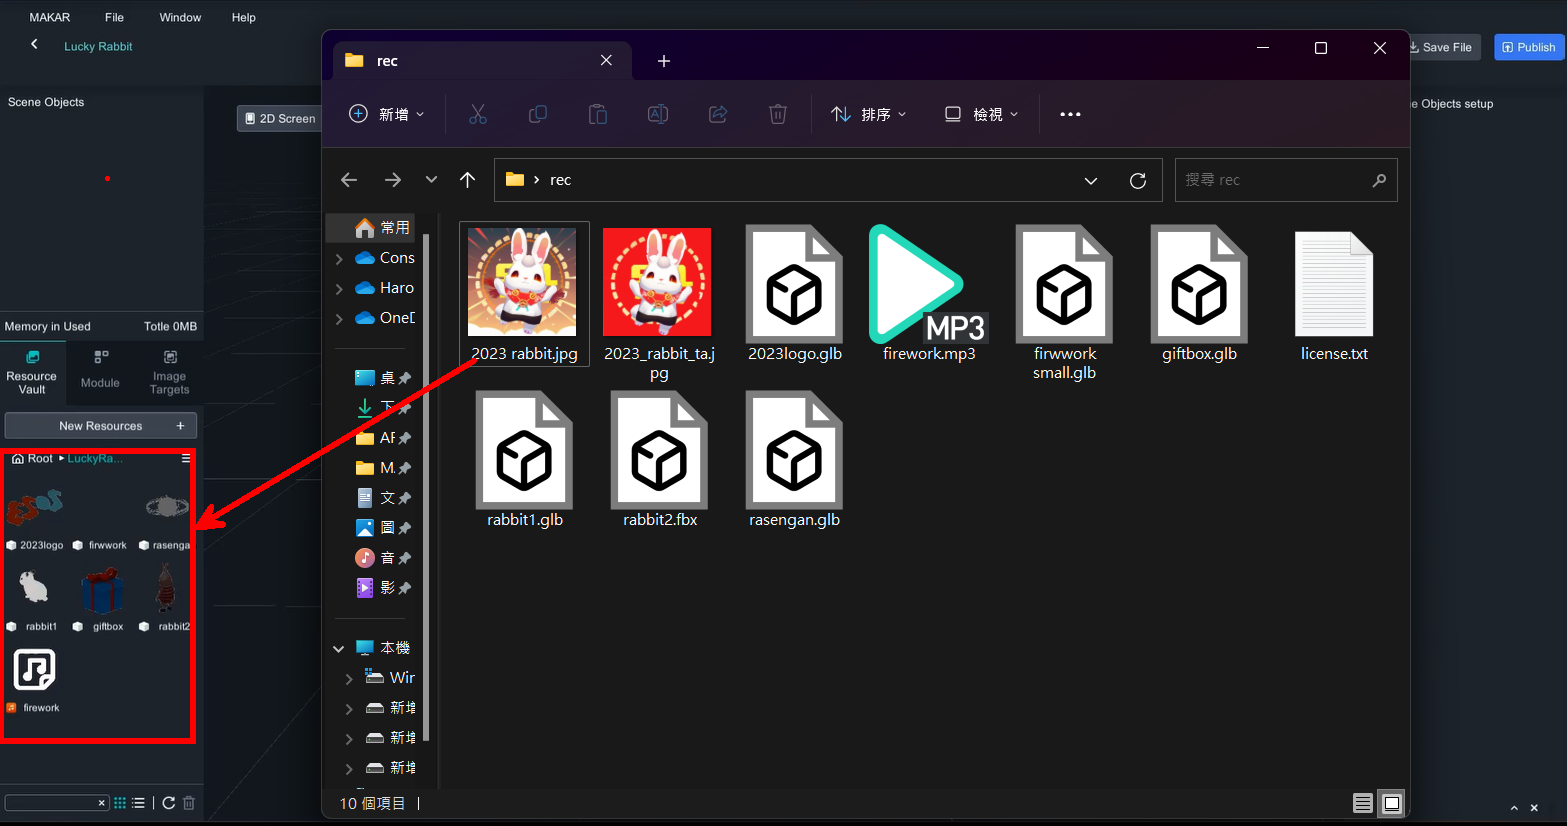
The third rabbit was created using the rabbit material available on MAKAR's online resources.
To add the material, go to New Resources🡪 Online Resources 🡪 MAKAR Resources, and search for "Rabbit". You may not find the rabbit if you typed “rabbit”.
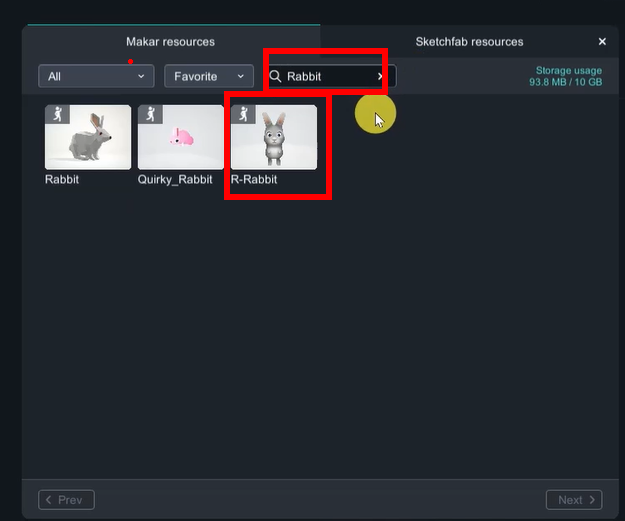
5. Animation segmentation
First, you need to separate the animation of the giftbox into two states: the static state (box) and the open state (open). Click the three dots in the bottom right corner of the animation feature for giftbox to create a new animation.
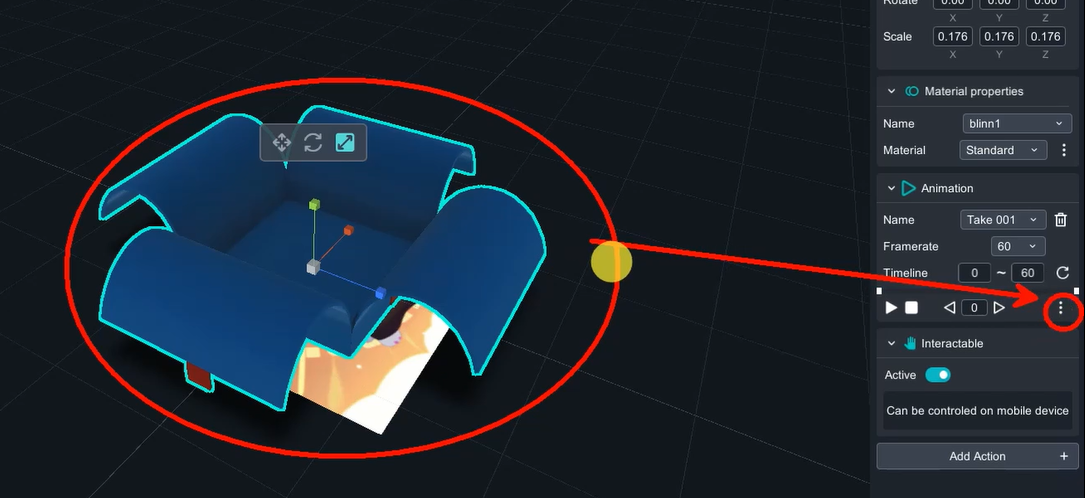
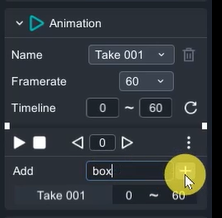
The timeline of box is 5 to 5; and timeline of open is 6 to 49.
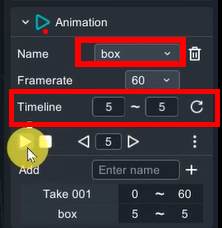
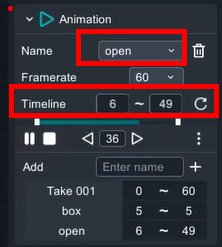
6. Color on model
The rasengan in the material can be used to decorate as a magic ball, but this model does not have any material (color) by default. Therefore, through MAKAR's built-in functions, the model can be colored.
Note: The use of material on the model has a time and place. This model can be identified by its different names on the right, which correspond to different parts (multiple model names), making it suitable for this method. If there is only one model name, this method may not be suitable.
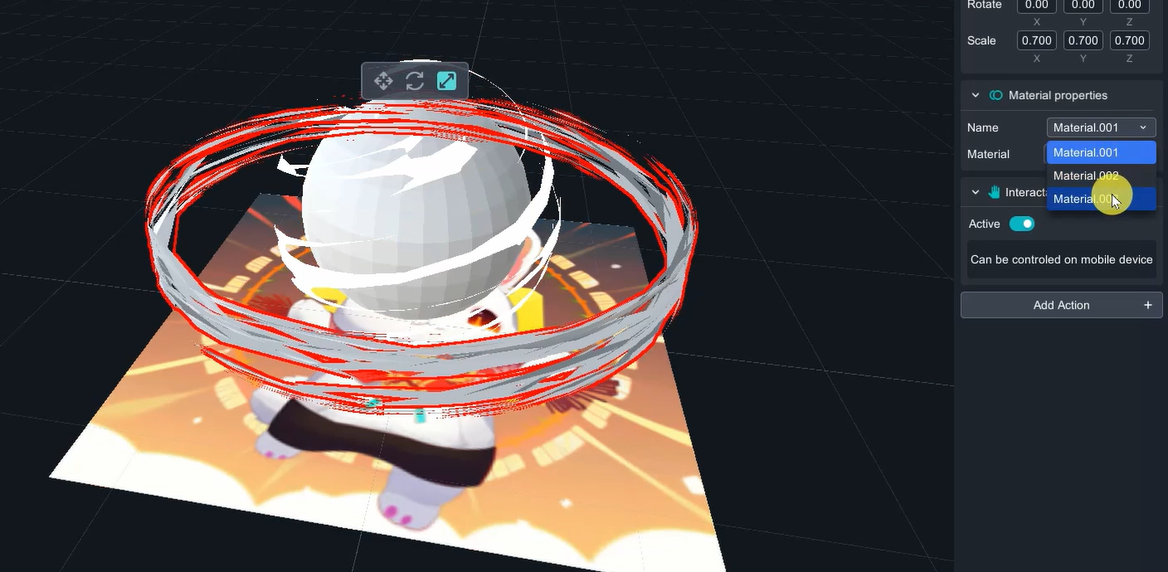
Change the material to " Color" and click on the three dots on the right to open the color options and choose the appropriate color.
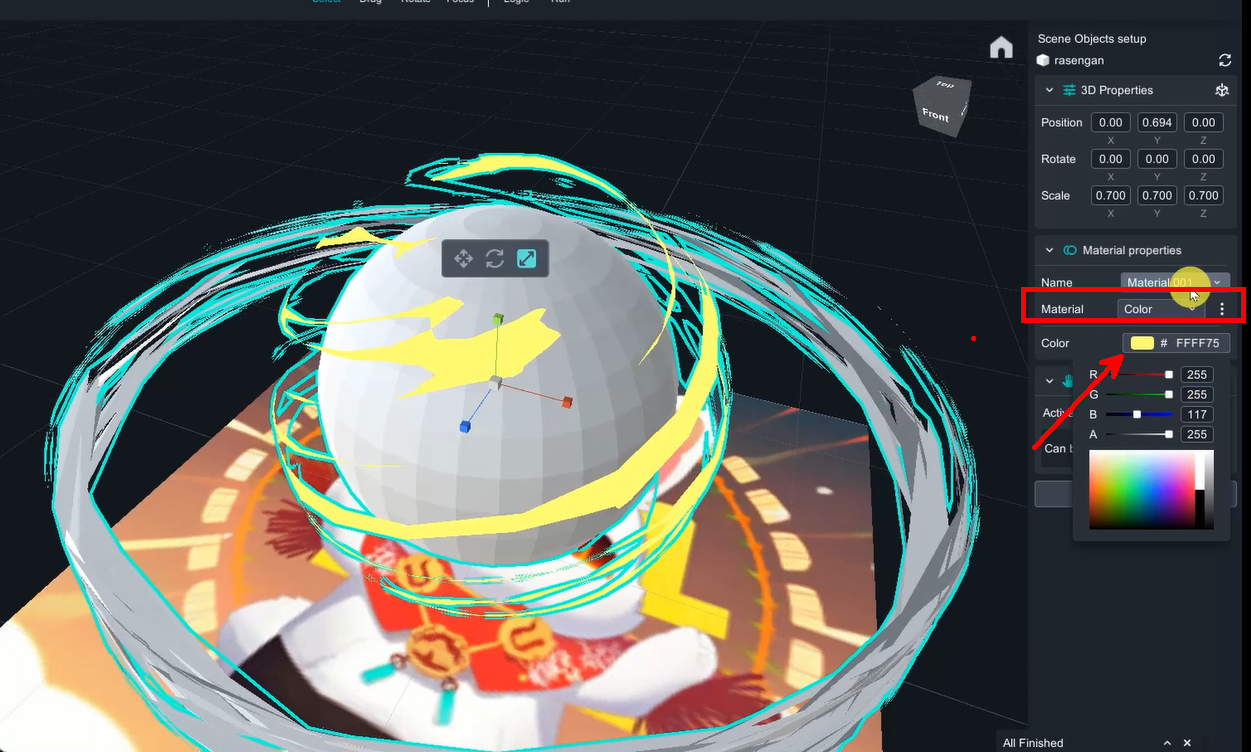
If you find the model too dark, you can add a light source to it. Since the material has been changed into color, you cannot use "mask(alpha)".
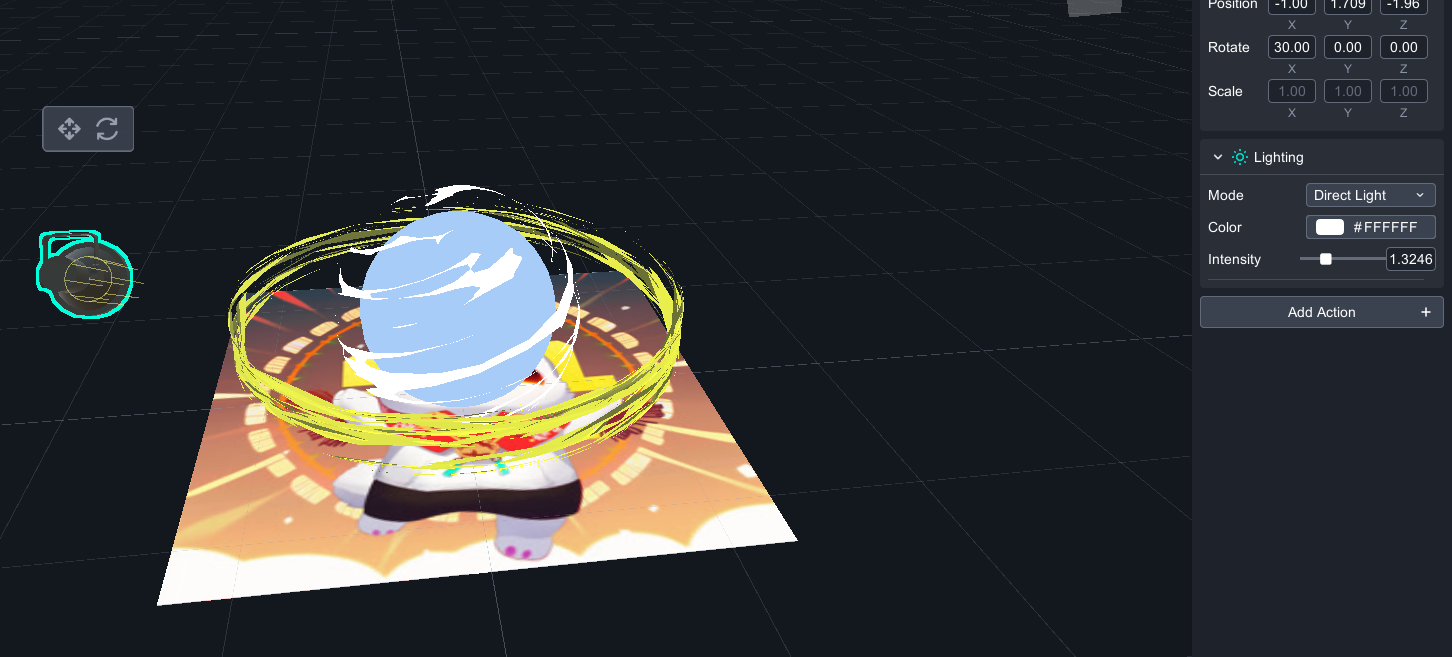
7. Rabbit group
We will be using three rabbits for this project. Place each rabbit in the center of the scene and adjust their sizes to be consistent.
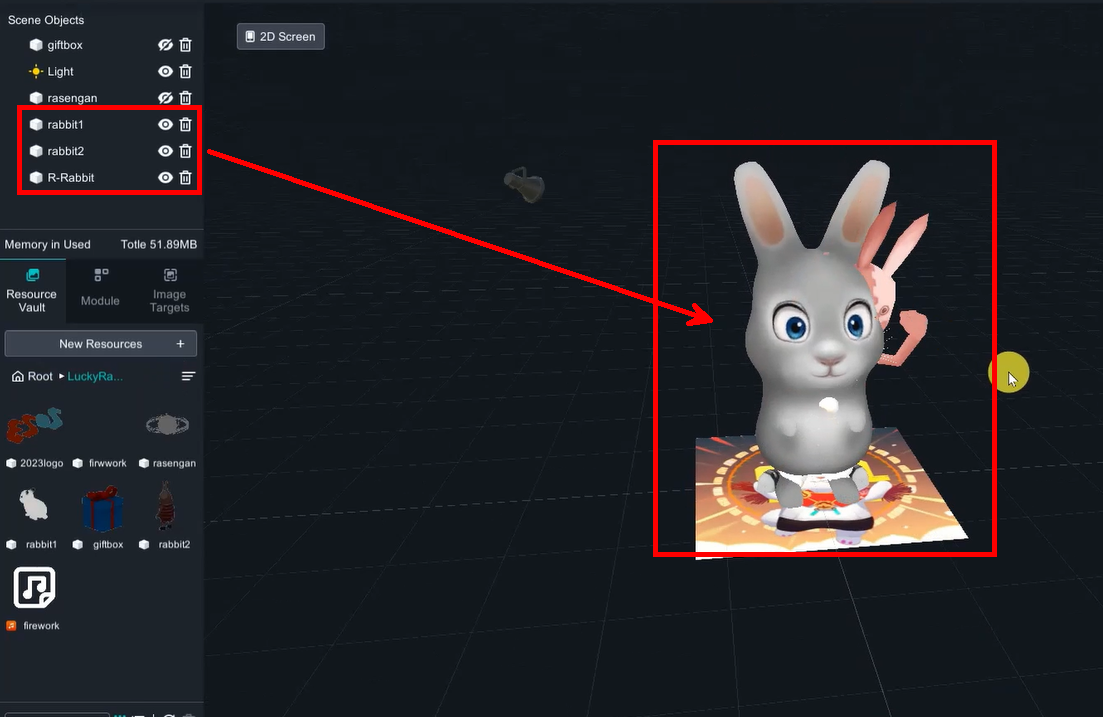
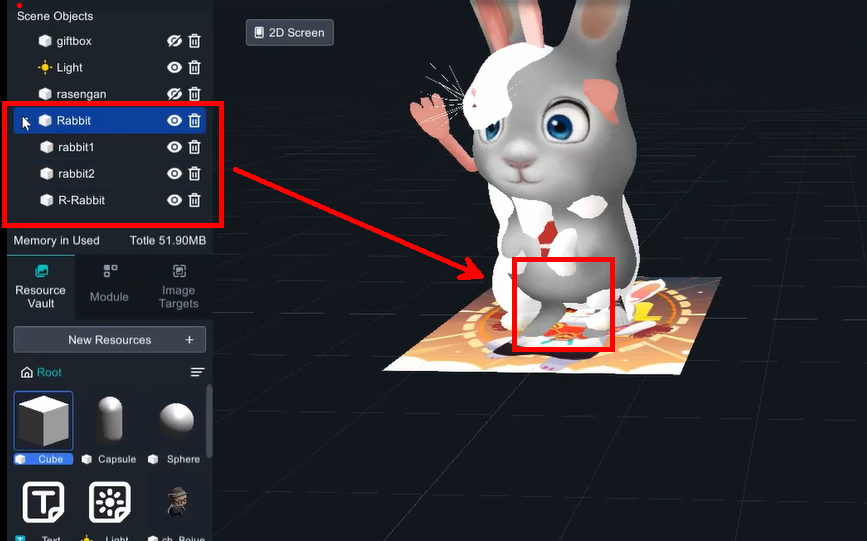
Transparent cube: Click the three dots on the right side of the material ball, change the mode to "Fade”, click on the color, decrease the A (alpha) value to 0.
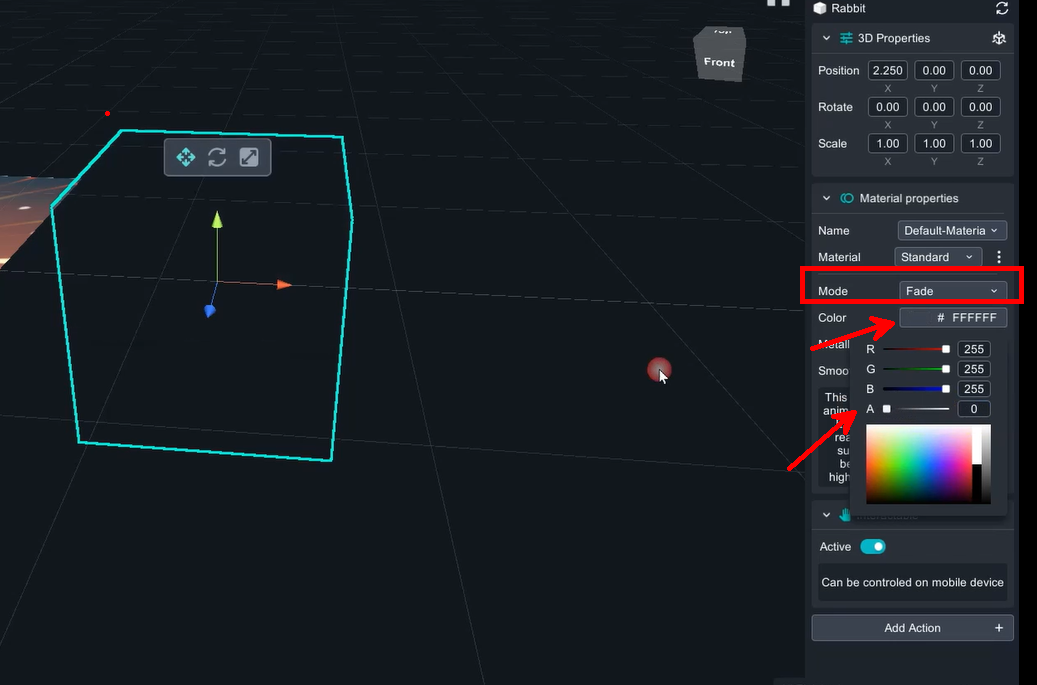
Then drag LOGO into same group as well.
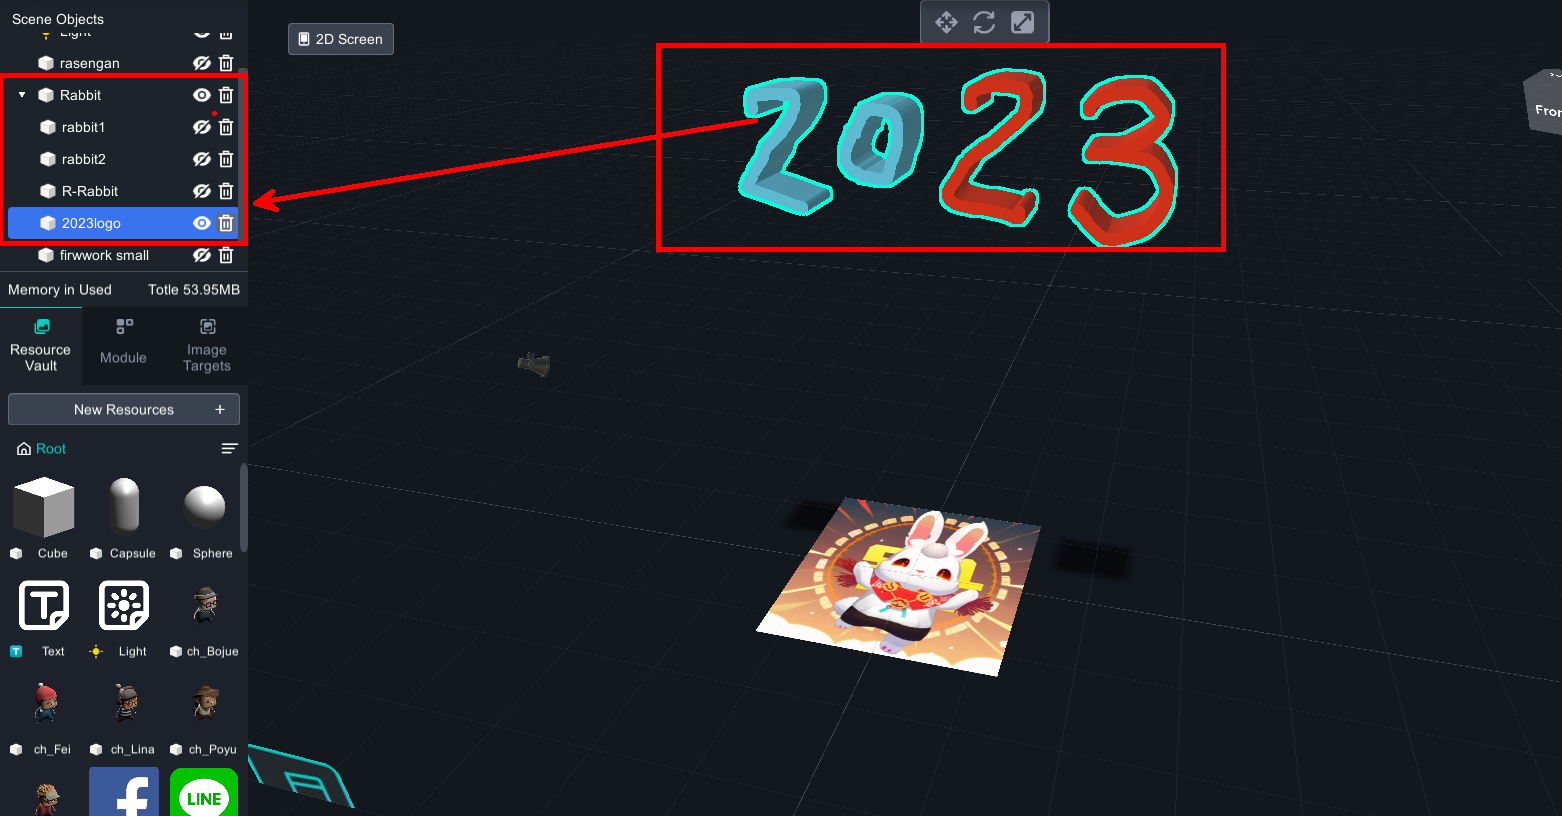
8. De-active interactable function & Add Logic Function
Interactable feature allows users to move, rotate, and scale the augmented objects by hand when they appear on the screen.
Add logic function to all objects in the scene (Add Action -> Logic).
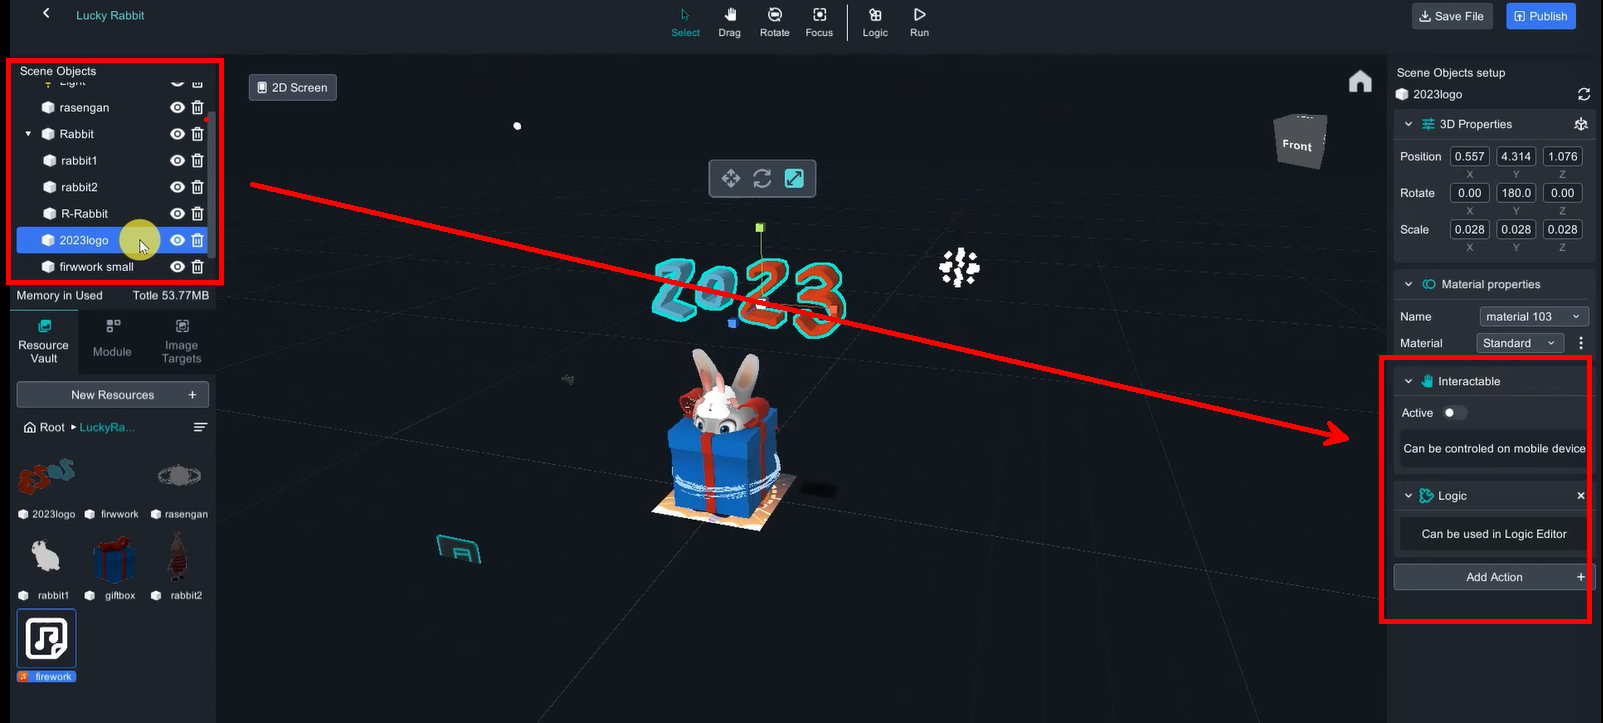
9. Logic function – giftbox jump
Object bouncing can be interpreted as moving up and down repeatedly. By continuously repeating these two actions, it appears as if the object is bouncing.
Blockly code: Transform 🡪Transitions 🡪Second block.
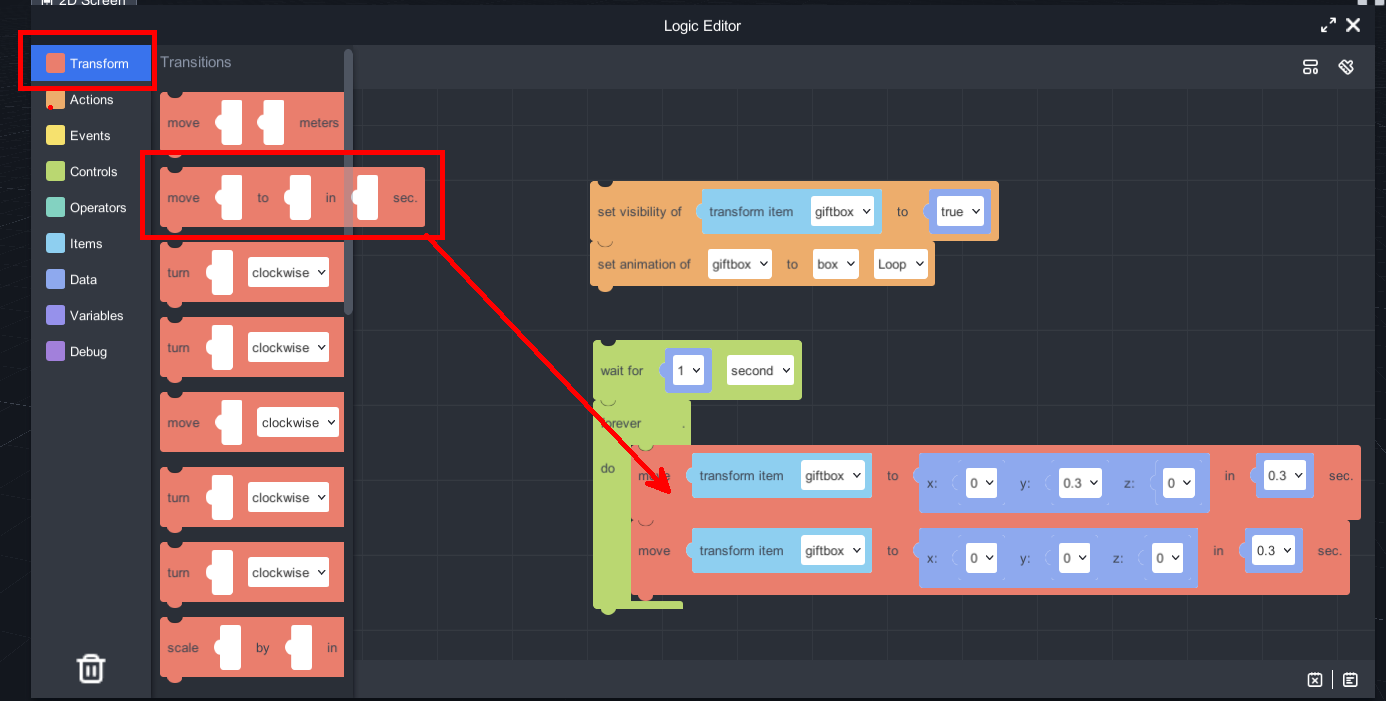
For repeating these two actions, it needs to add “forever do” blockly, and “visibility ” to control it appears only if the target image showed up.
(Forever do)Blockly code: Control🡪Loops🡪First block.
(visibility)Blockly code: Actions 🡪Material 🡪 Second block.
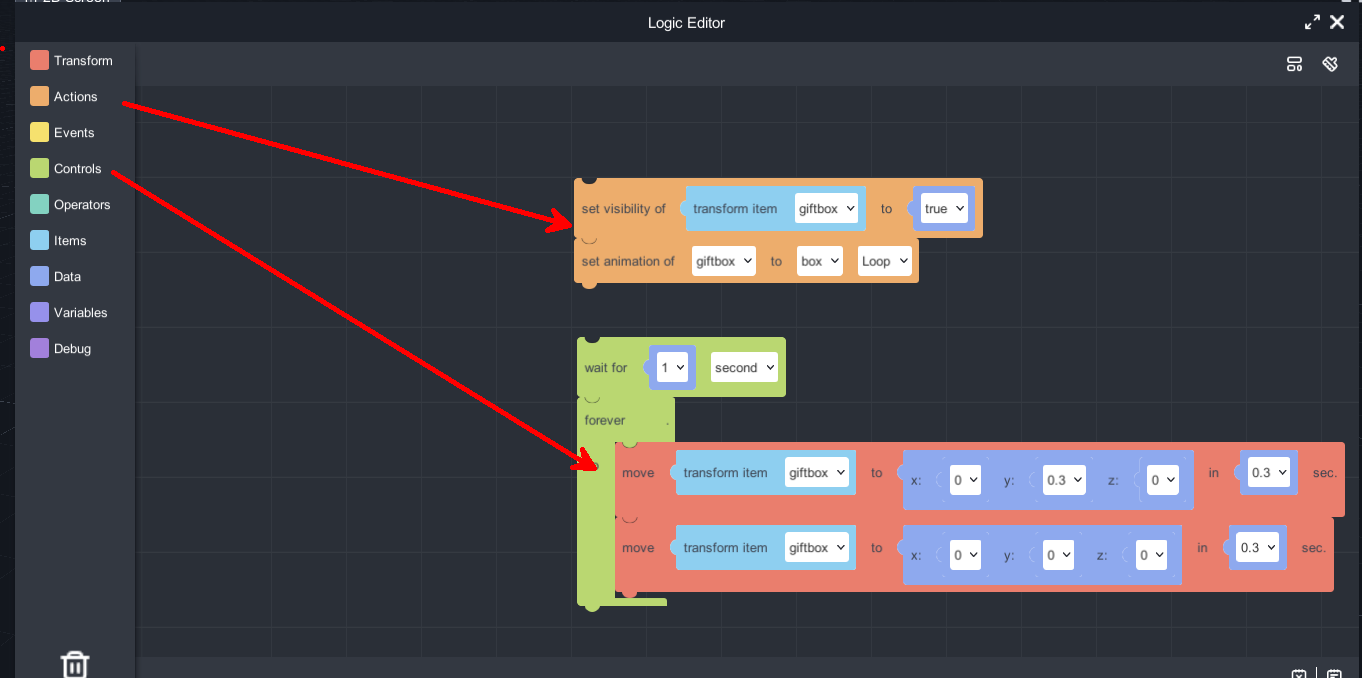
10. Logic function – Fade in/ Fade out
The fade-in/fade-out effect can be achieved by changing the transparency or quickly scaling the object. Here, we will use the quick scaling method.
First, we need to create a trigger event, which will be clicking on the giftbox. At this time, the giftbox animation will change from "box" to "open" (this only needs to be executed once).
Blockly code: Events -> Input -> First block.
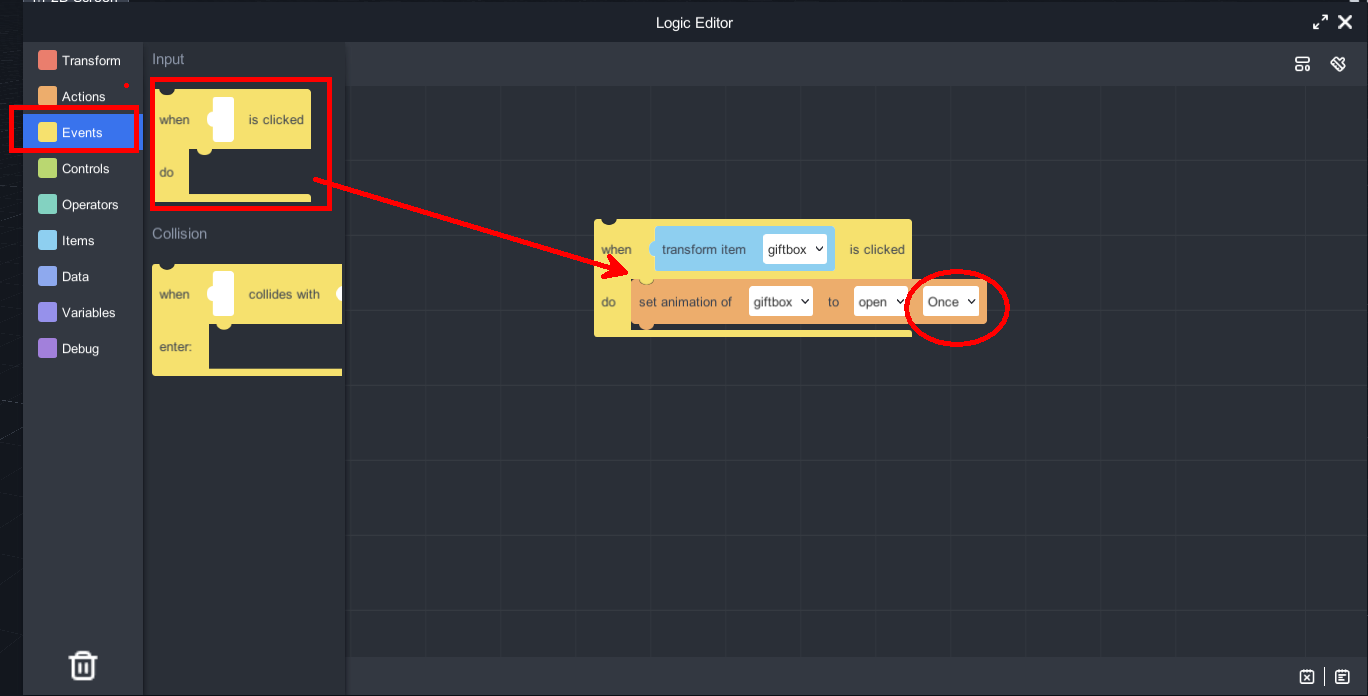
Next, three things happen simultaneously: the giftbox fades out, the magic ball appears and fades out, and the rabbits fade in. The logic program needs to achieve the fade-out effect (i.e., shrinking to no volume) and the fade-in effect (expanding from no volume to normal volume).
To control the volume scaling, we need to use "variables" here.
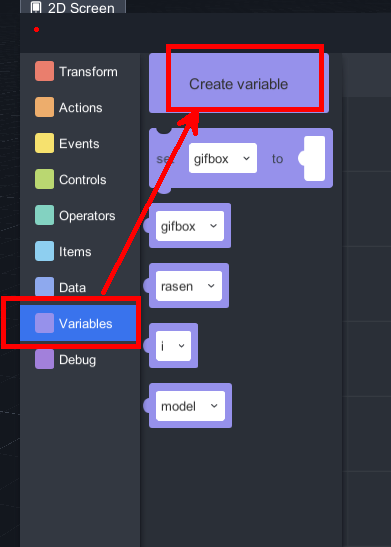
Giftbox fades out:
To achieve fade-out effect of giftbox, we need to set its value as "scale", and repeatedly execute the scaling down process for n times with a time interval of 0.01 seconds between each scaling operation. The scaling effect is achieved by using variable operations in the computer program's logic. Finally, we ensure that the volume is reduced to zero by forcing the giftbox's scale to be set to 0.
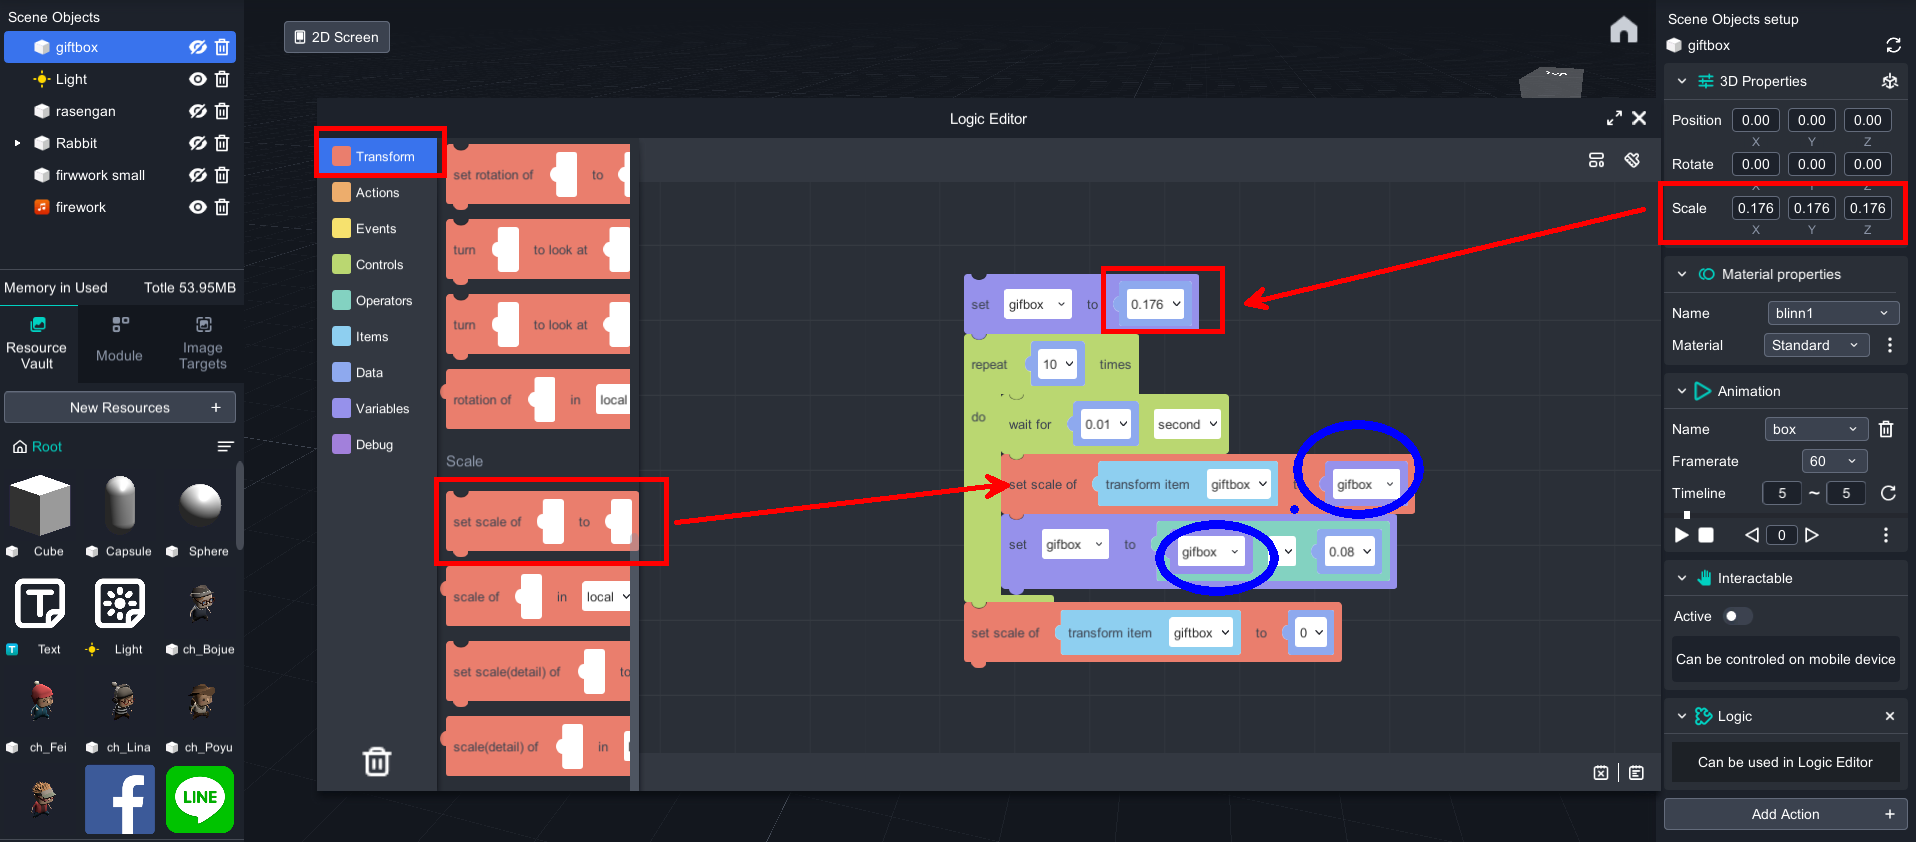
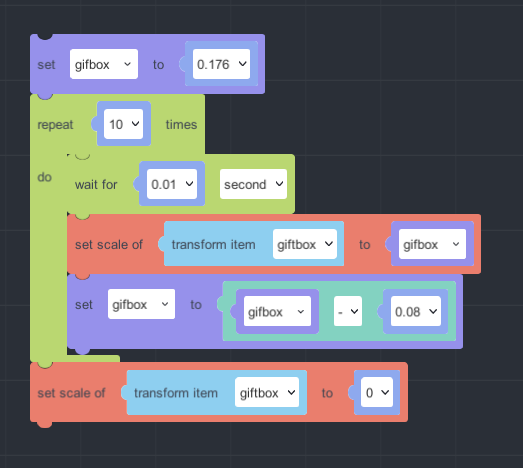
Values may vary depending on the size of your model, so it's important to test your program frequently to ensure it's working correctly.
Magic ball appears and fades out:
After appearing, keep the magic ball rotating and fade it out after 3 seconds. The fade-out module is the same as the giftbox, so it can be copied and used by changing the new variables and scale. In addition, rotation and fade-out are connected using parallel operations.
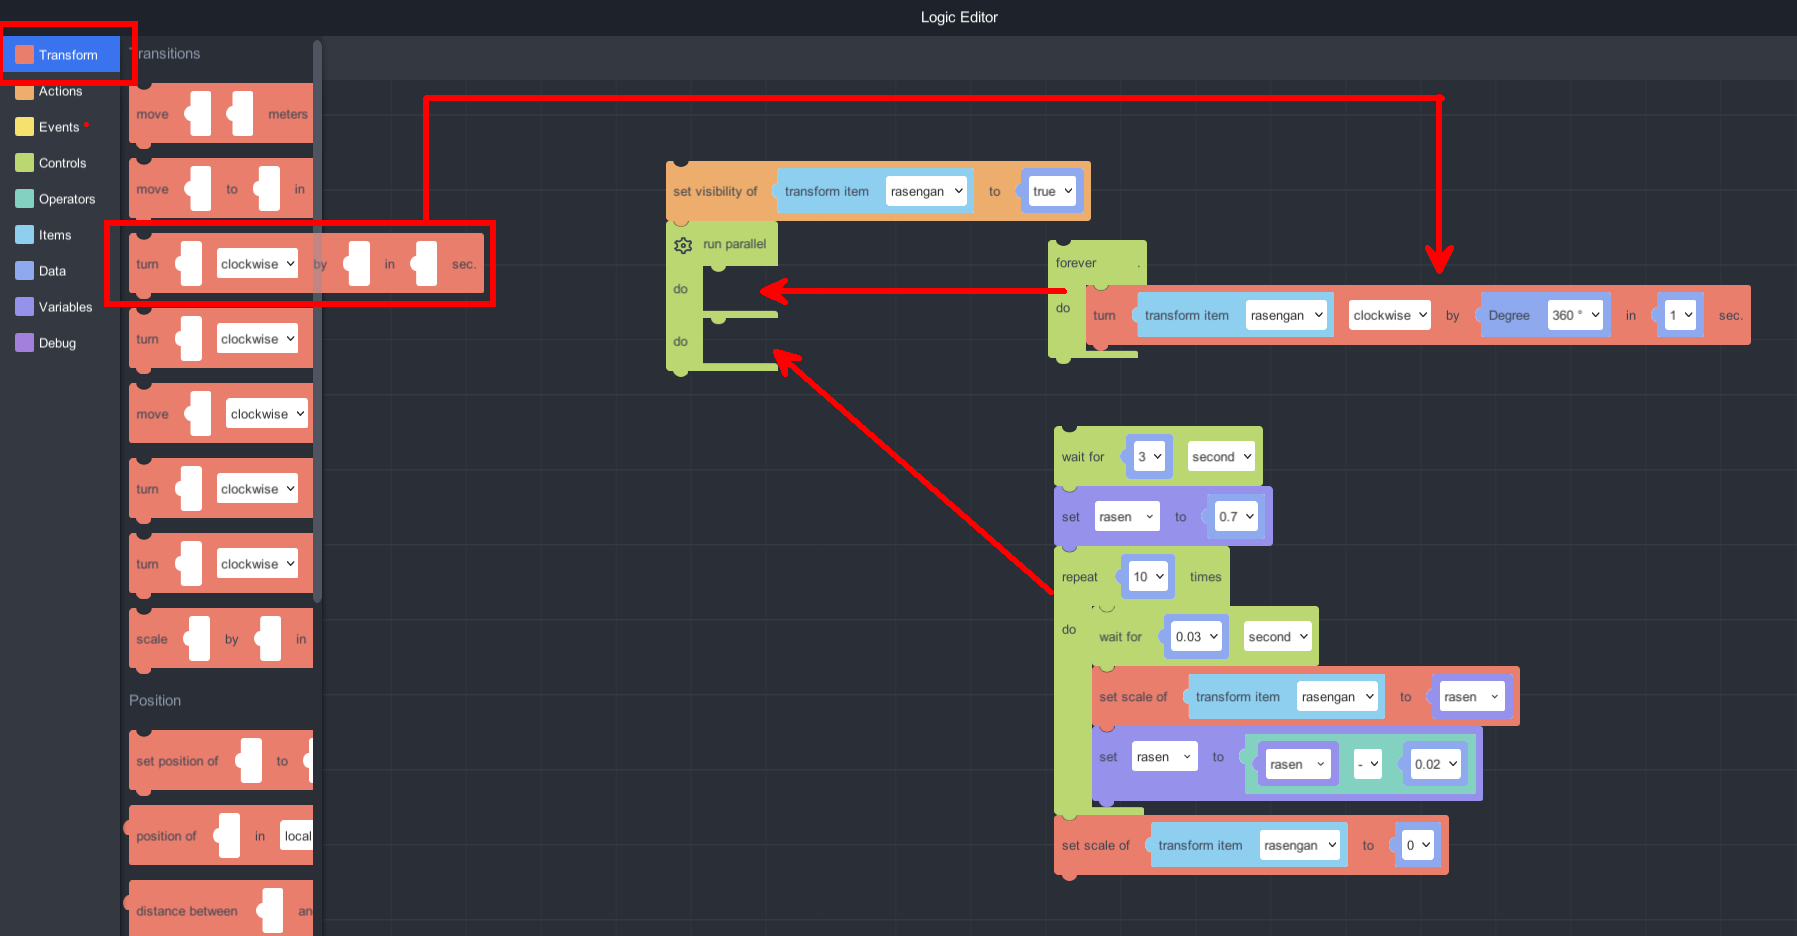
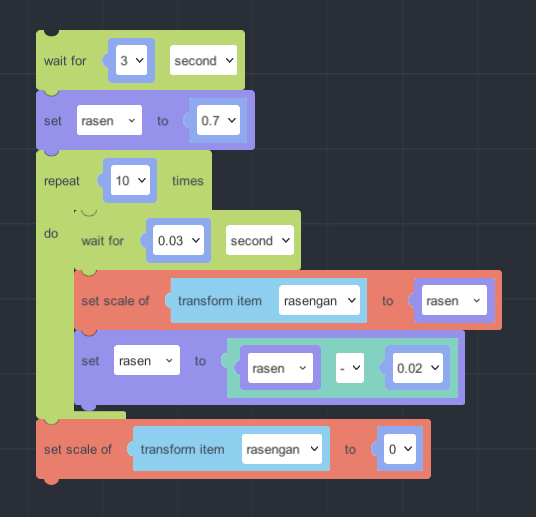
The Rabbits fade in:
The program for fade-in and fade-out effects is basically the same, except for the difference in arithmetic operations between subtraction and addition. The original scale ratio is set to 0, and then gradually increased to a scale ratio of 1.
Note: The initial pause of 3 seconds in this program is the same as the 3 seconds it takes for the magic ball to fade out, which can achieve the effect of the rabbit appearing when the magic disappears.
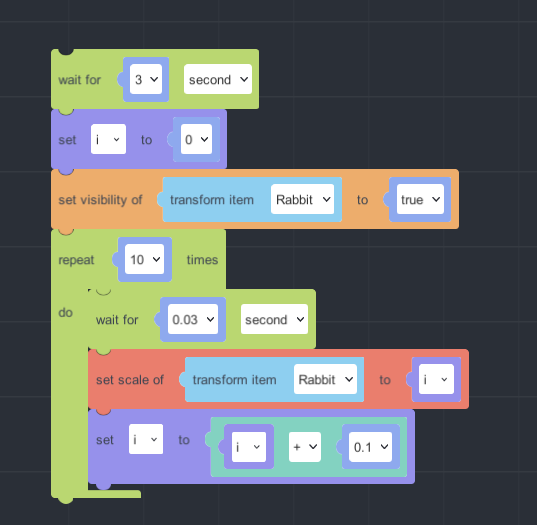
Add firework model and sound effect below it.
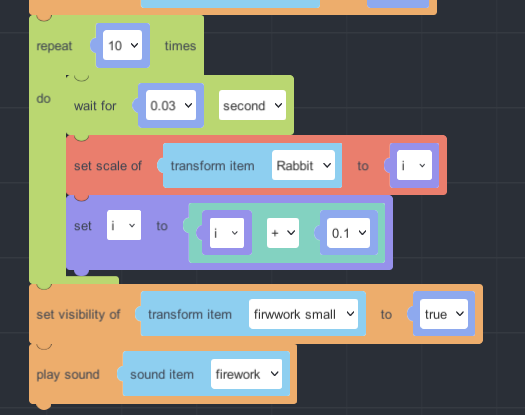
Parallel:
To synchronize the three actions of giftbox fade-out, magic ball appearance & fade-out, and, parallel programming can be used to link the three actions together. By default, parallel programming only has two tasks, but you can click on the gear icon in the upper-left corner to increase the number of tasks.
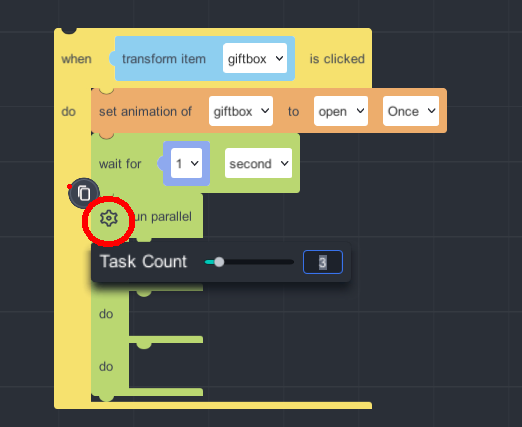

11. Logic function – Random sampling
A random sampling is a mathematical function that uses the operator "random integer between A and B", which is used in conjunction with visibility applications.
To create a random sampling, we need to create a new variable and set it to be a "random integer between A and B". The mathematical range of this variable is A≤variable
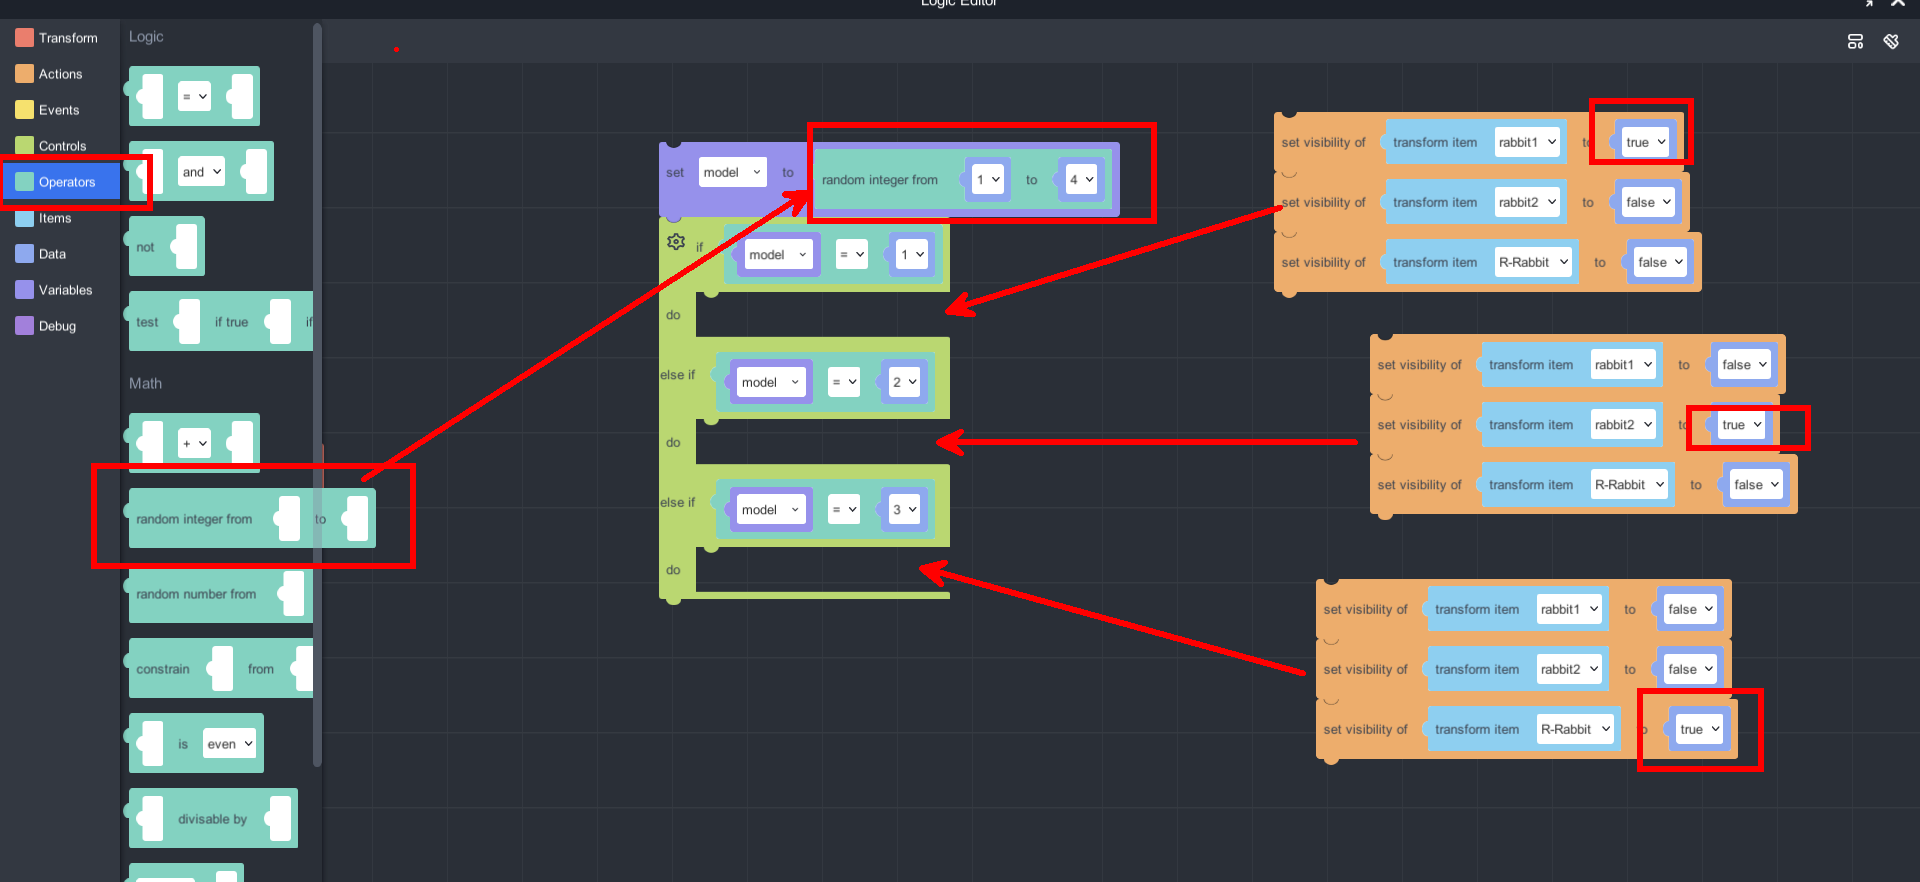
Full Blockly Code
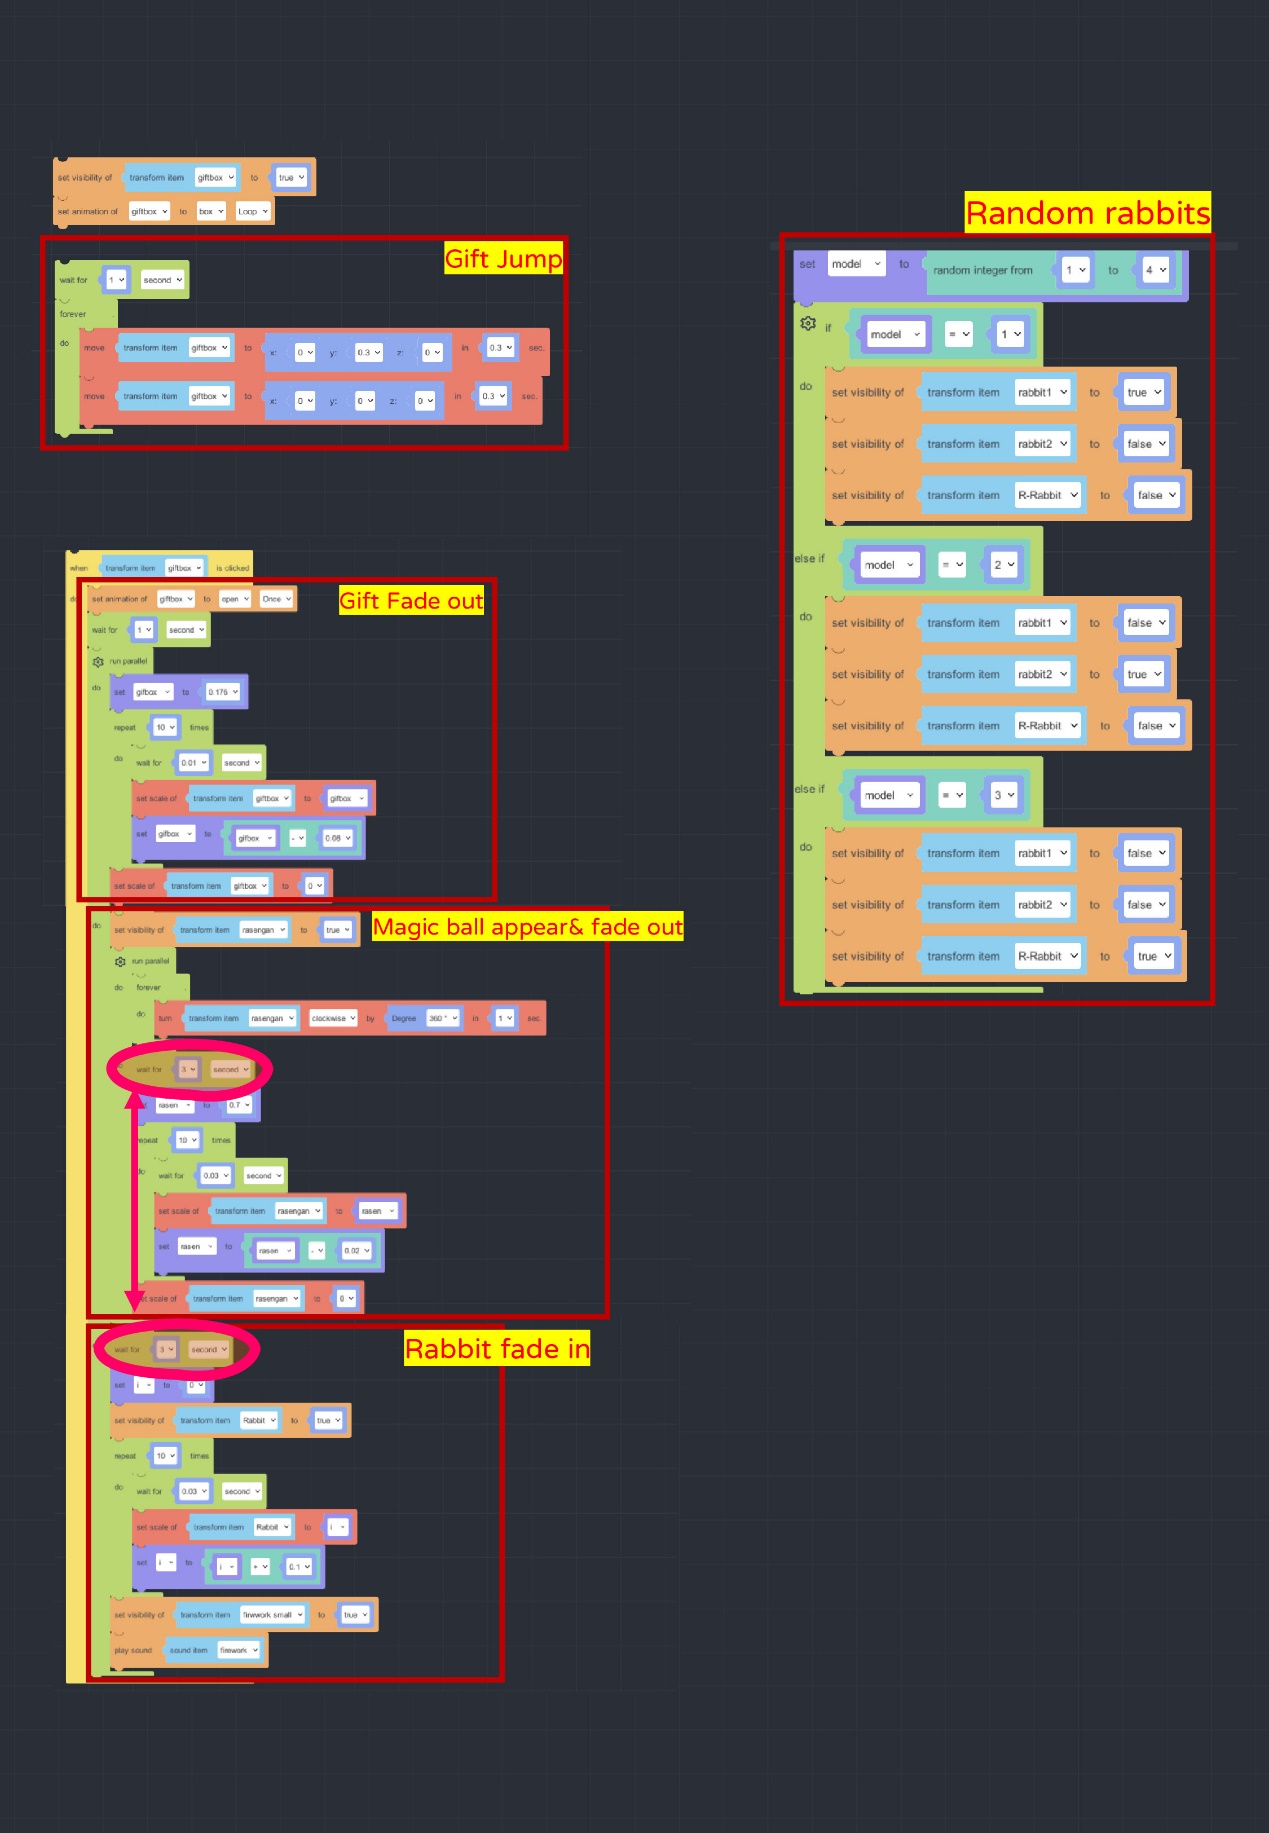
How to play
Click the application, type in the ID or scan the QR code to experience the AR/VR !
1. Install MAKAR application
2. Scan QRcodec or search ID: class06


3. Select「幸運兔」project,click「experience」to active and put the camera face forward the poster.
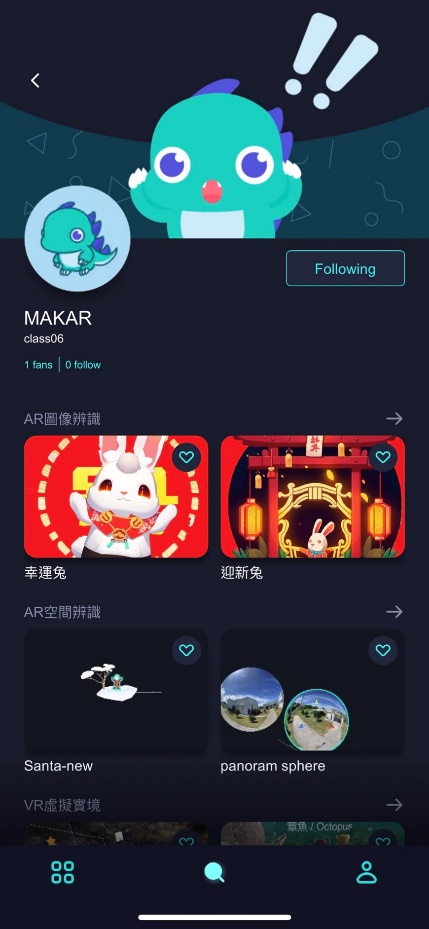
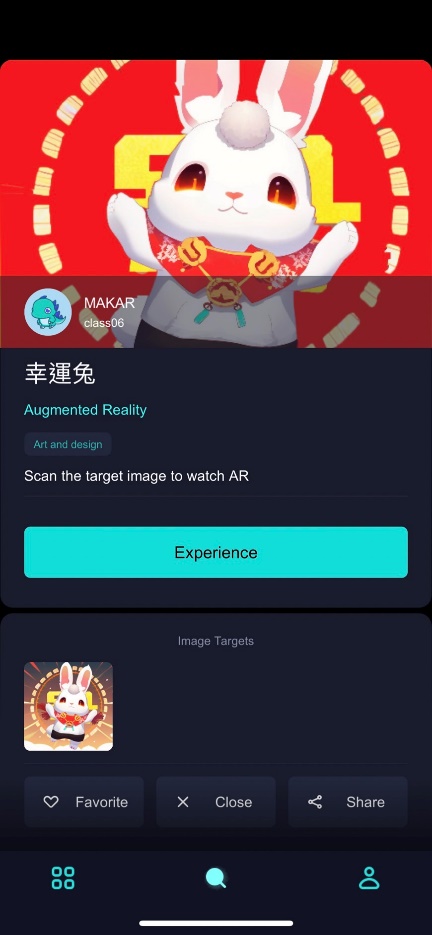
Understanding GLB, OBJ, STL, and Other Common 3D File Formats, with Blender Conversion Tutorial Included!
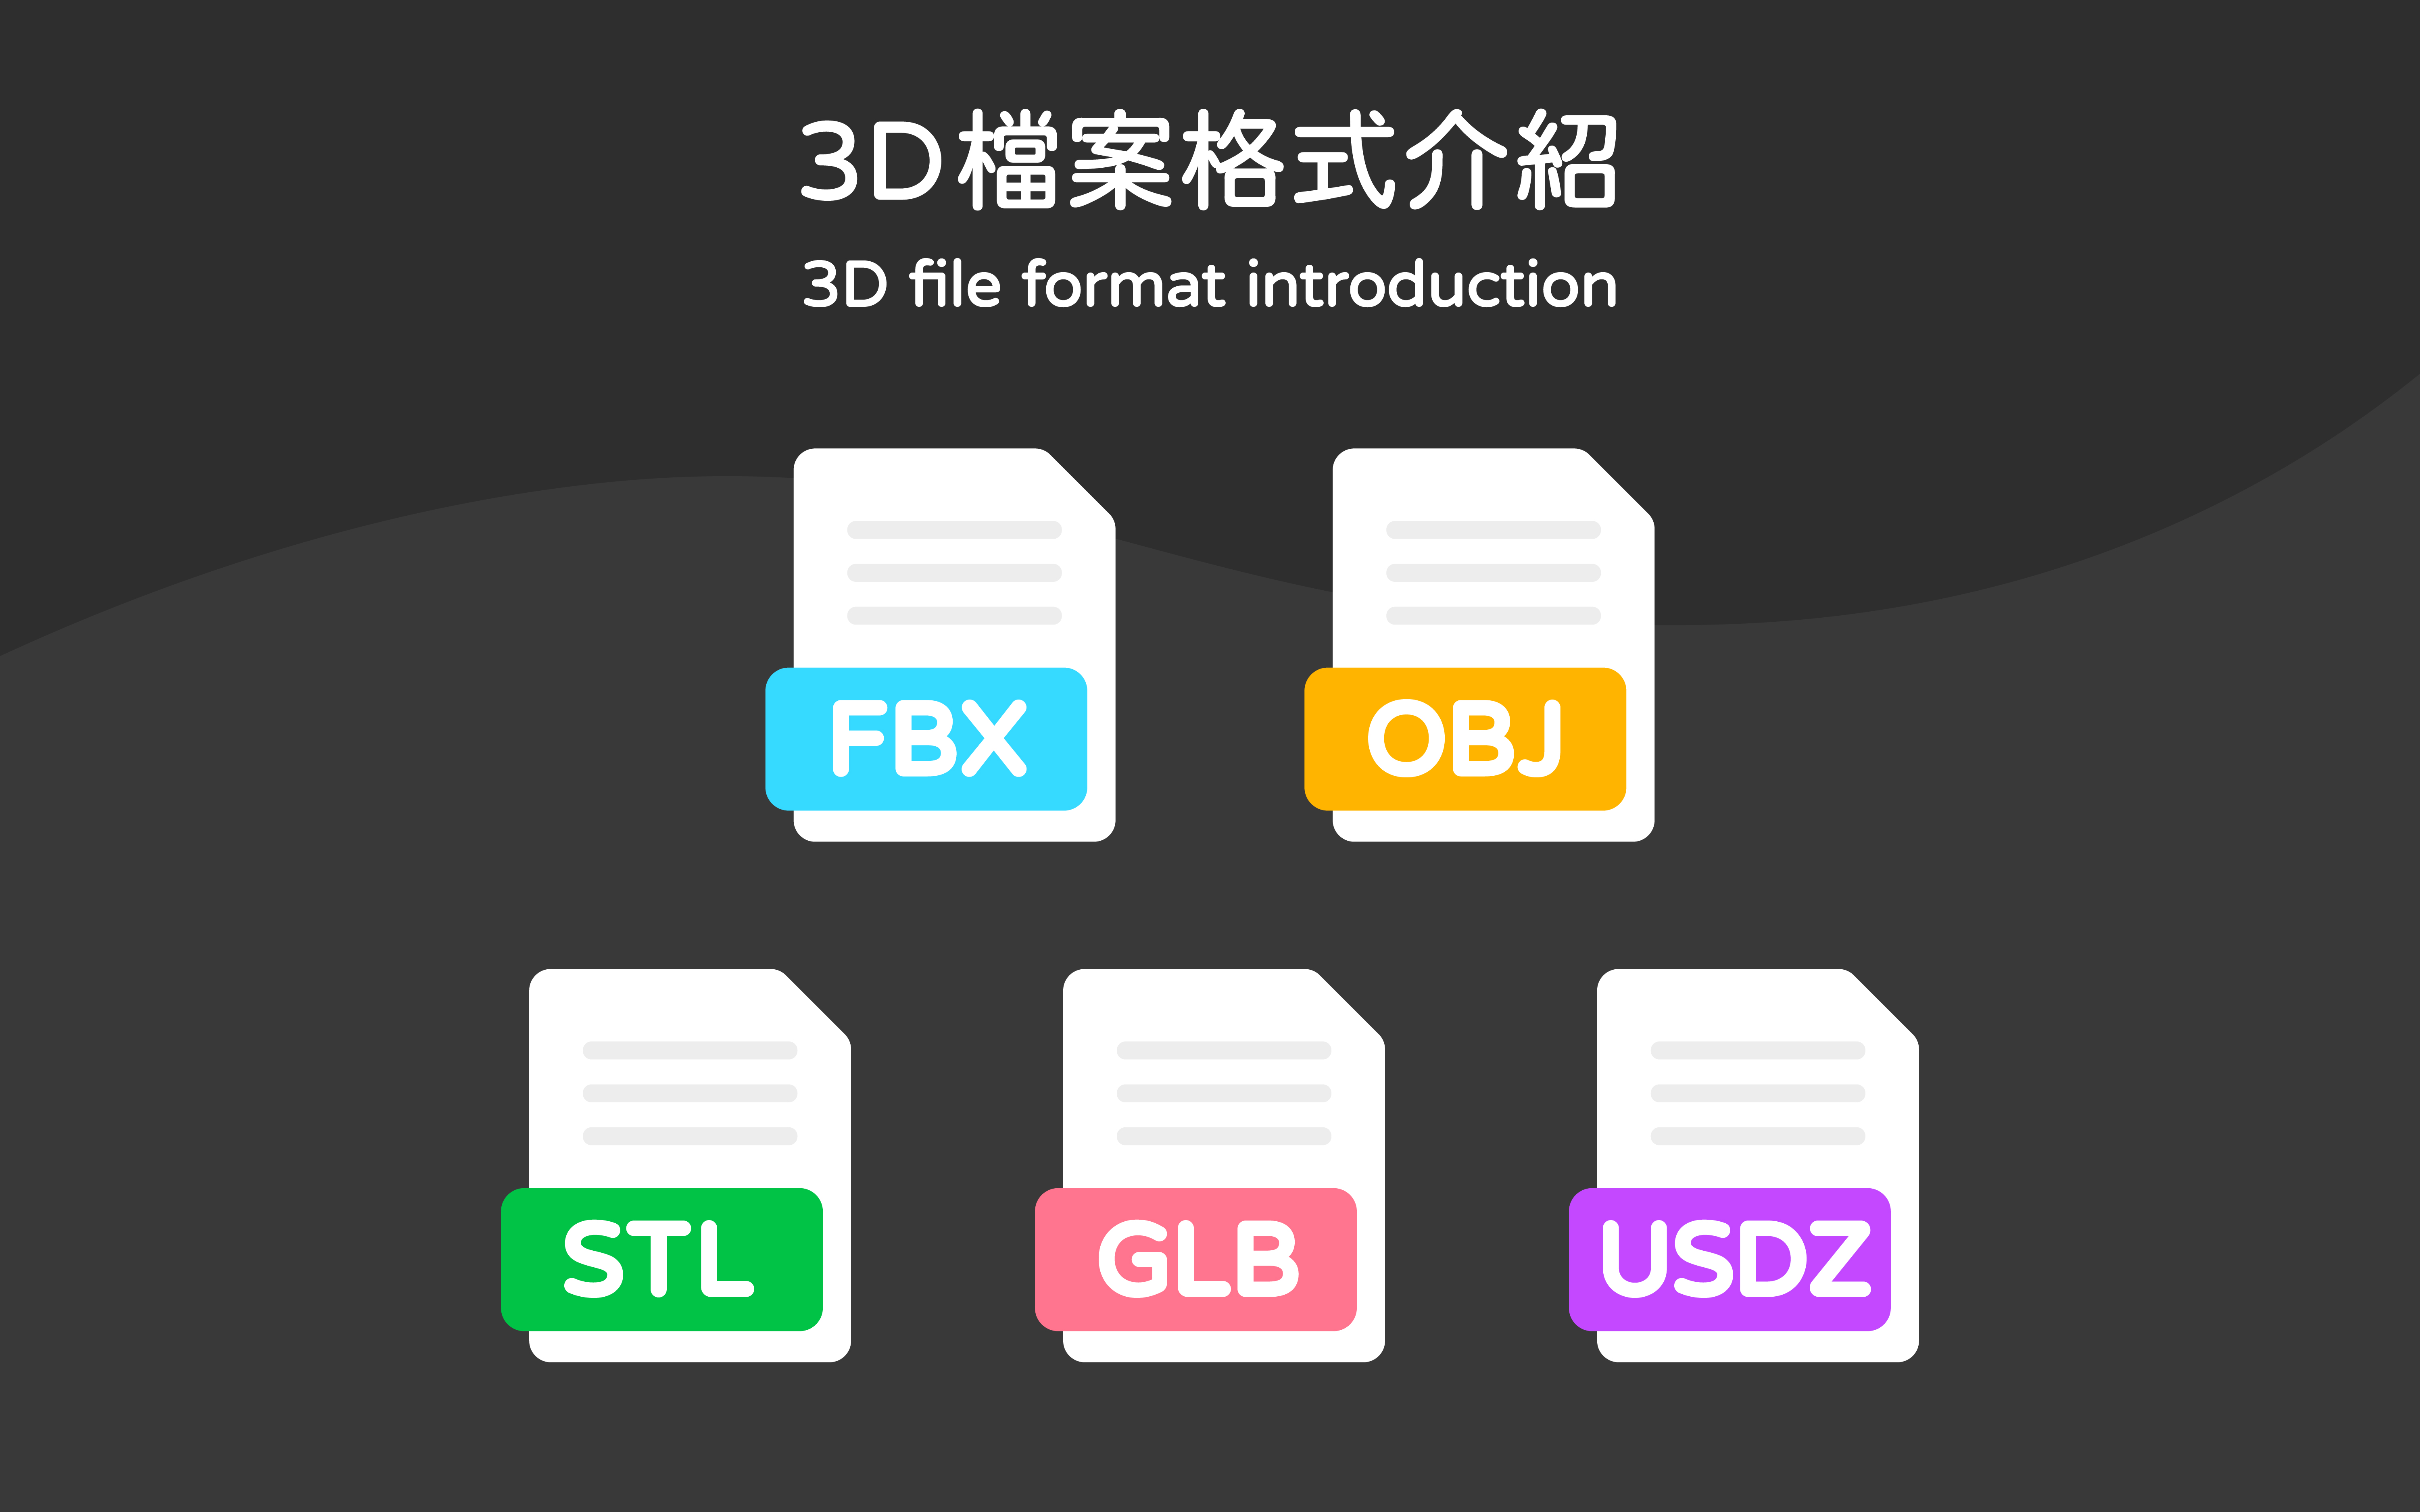
When working with 3D models, you may have encountered file formats like FBX, OBJ, GLB, etc. Each file format has its own usage and applicable scenarios. This tutorial will guide you through understanding common 3D formats, which formats MAKAR supports, and how to convert them into suitable formats to save time when handling models.
Content Overview |
|---|
Introduction to Various 3D File Formats
【 FBX、OBJ、STL、GLB、USDZ 】
FBX|A 3D file format released by AutoDesk.
The file supports 3D geometry, textures, skeletons, and also supports music and video elements.
If you need to export dynamic 3D models, it is recommended to use FBX.
OBJ|A 3D file format released by Wavefront Technology.
The file supports 3D geometry and texture data but does not support animation, music, or video elements.
Since it can record fewer types of data compared to FBX, the data volume is relatively smaller.
If you need to export static 3D models, it is recommended to use OBJ.
STL|A 3D file format released by 3D Systems.
Mainly used for 3D printing and computer-aided design (CAD), it does not support 3D texture data.
Typically, STL data is loaded into 3D printers for printing, assisting designers in producing prototype parts.
GLB|A 3D file format released by Khronos Group.
An optimized model format that can merge model materials, textures, and animation information into a single file.
It can easily display 3D content on the web and is sometimes referred to as the JPEG of 3D.
The file supports simple animations and is usually smaller in size.
USDZ|A 3D file format released by Pixar Animation Studios and Apple.
Specifically used for storing AR images, including playing music. iPhone and iPad can use AR Quick Look to browse USDZ, but it is limited to iOS products.
【3D File Format Comparison Table】
|
File Format |
Purpose |
Texture |
Animation |
Media |
File Size |
|---|---|---|---|---|---|
|
FBX |
3D Modeling |
External Texture |
Supports Animation |
Supports Music, Video |
Larger |
|
OBJ |
3D Modeling |
External Texture |
Static |
Not Supported |
Moderate |
|
STL |
3D Printing |
Not Supported |
Static |
Not Supported |
Smaller |
|
GLB |
Display 3D Models on the Web |
Texture included in one file |
Supports Animation |
Not Supported |
Smaller |
|
USDZ |
Display 3D Models on Apple Devices |
External Texture |
Supports Animation |
Not Supported |
Smaller |
3D File Formats Supported by MAKAR
【 Supported Types in MAKAR Editor 】
The MAKAR Editor now supports uploading both FBX and GLB 3D file formats. You can upload your own 3D models or download free objects from 3D asset websites like Sketchfab. Simply search for the desired object, select the downloadable option, and choose either FBX or GLB format to download.
※Although the MAKAR Editor's online asset library provides direct access to Sketchfab models for easy one-click downloads, these models often have their file sizes maximized by default, leading to larger project files. To make your files more lightweight, it’s recommended to download models from the Sketchfab website directly.

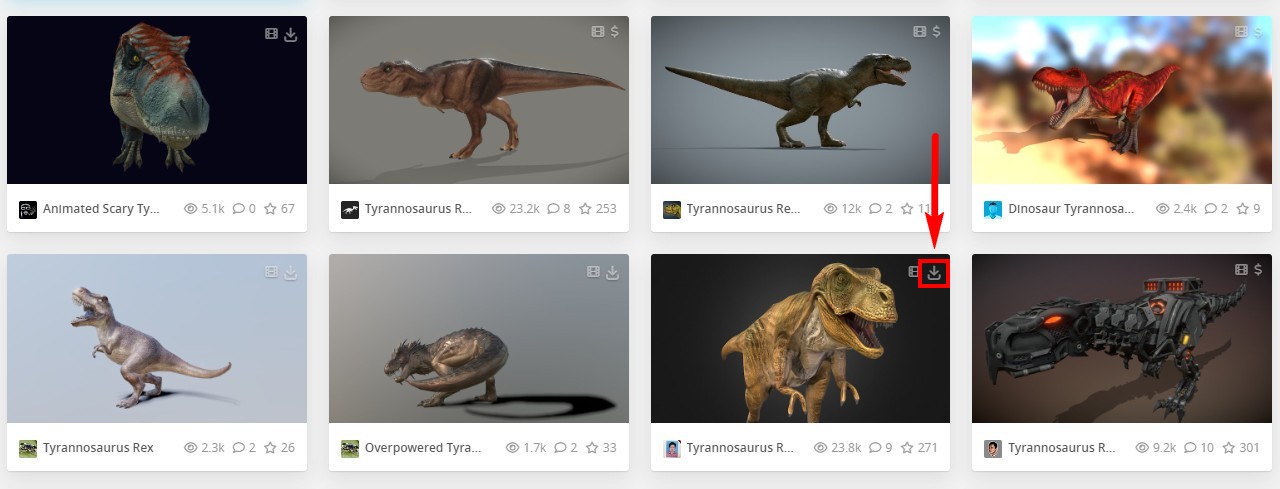
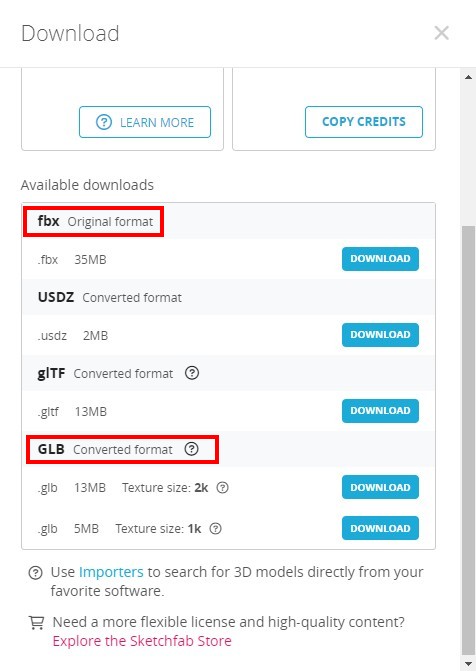
Open the MAKAR Editor, click "Add Asset" ➔ "3D Model" and upload the GLB or FBX file. Once uploaded, the model will appear in your asset library, ready to be dragged to the center for editing. It is recommended to upload GLB files for smaller size and faster processing.
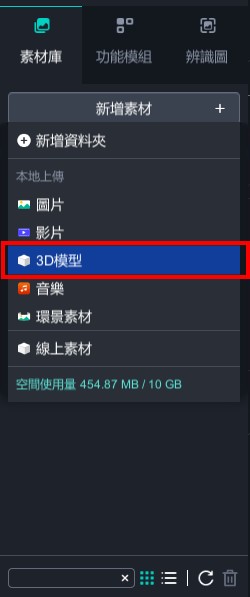

For any free models downloaded from external websites, please credit the author in the "Project Settings" description field.
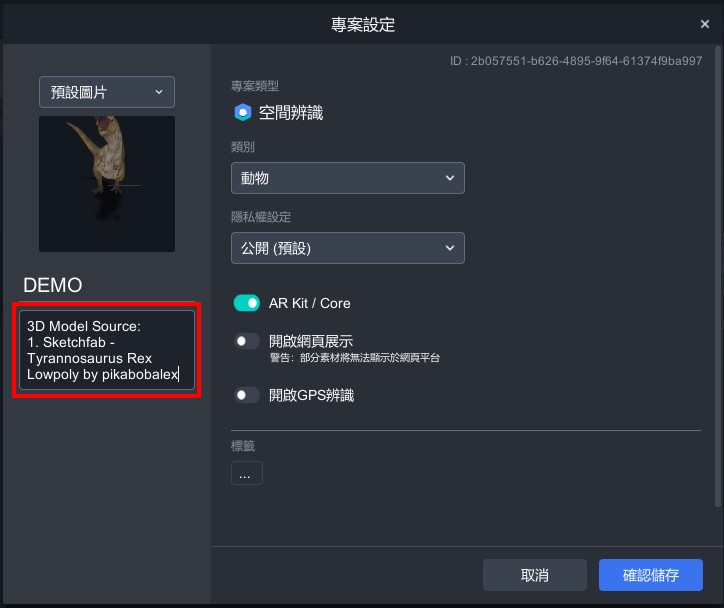
【 3D Model File Export in MAKAR 3D Scan 】
Whether using the iPhone/iPad version or the MAC version of MAKAR 3D Scan, upon completing a scan and model, MAKAR professional account users can export 3D files in USDZ, OBJ, GLB, and STL formats.
▼ iPhone/iPad MAKAR 3D Scan Export Location

▼ MAC MAKAR 3D Scan Export Location

Blender Conversion Tutorial
現今雖有許多線上 3D 轉檔的網站,方便了 XR 創作者使用,但線上轉檔往往有很多不確定性,造成模型毀損、動態失效等狀況時有所聞,若是想要洽當處理 3D 模型,使用 3D 軟體是最佳的選擇,而 Blender 是一個強大且免費的 3D 軟體,任何你在網路上得到的 3D 模型都可以用 Blender 檢查並轉檔,下列將以 Sketchfab 的 恐龍模型(created by pikabobalex) 為範例,敘述如何使用 Blender 軟體轉檔,讓 XR 創作更加輕鬆上手。
【 Converting GLB to FBX 】
▌ Check the File
1. Open Blender and select "General."
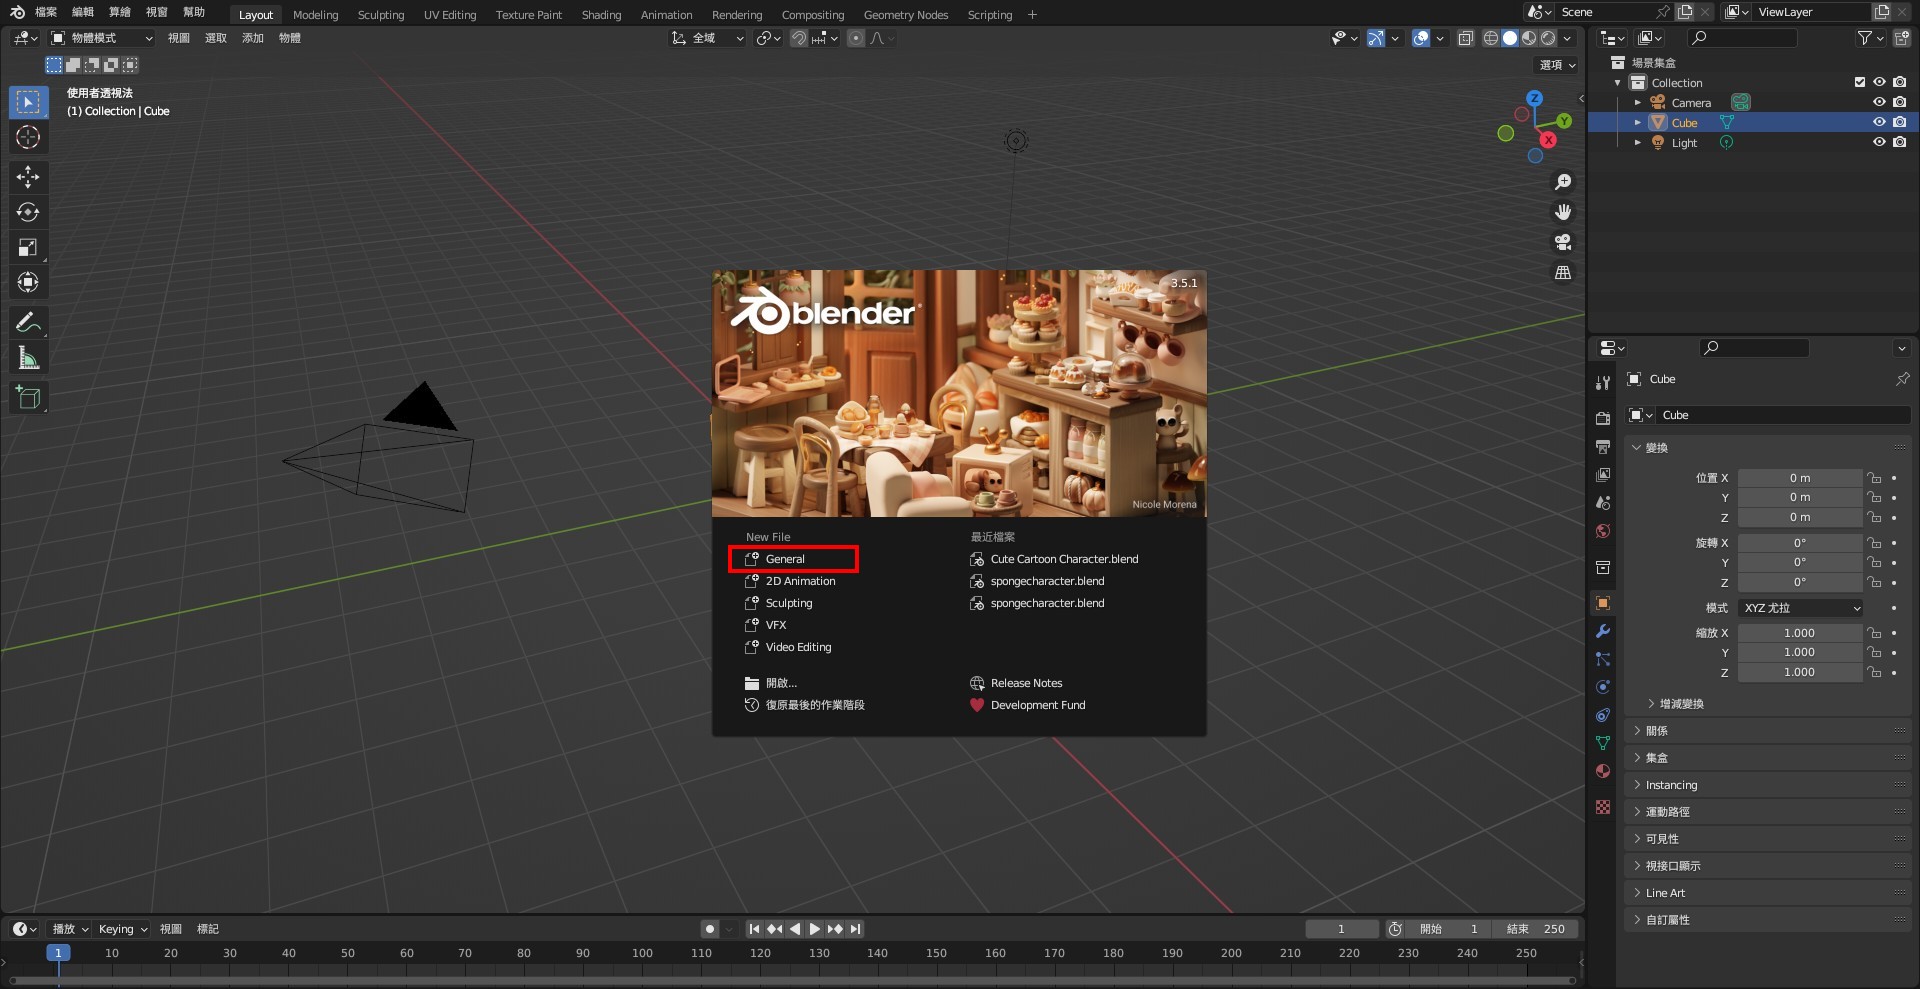
2. Delete the default cube by selecting it and pressing delete.

3. Select "File" ➔ "Import" ➔ "glTF 2.0" to import the 3D model you want to convert.
※ Model names must be in English; Chinese filenames cannot be imported.
.jpg)
4. Click "Viewport Shading" to check if textures are applied correctly and play the animation to ensure it's working.
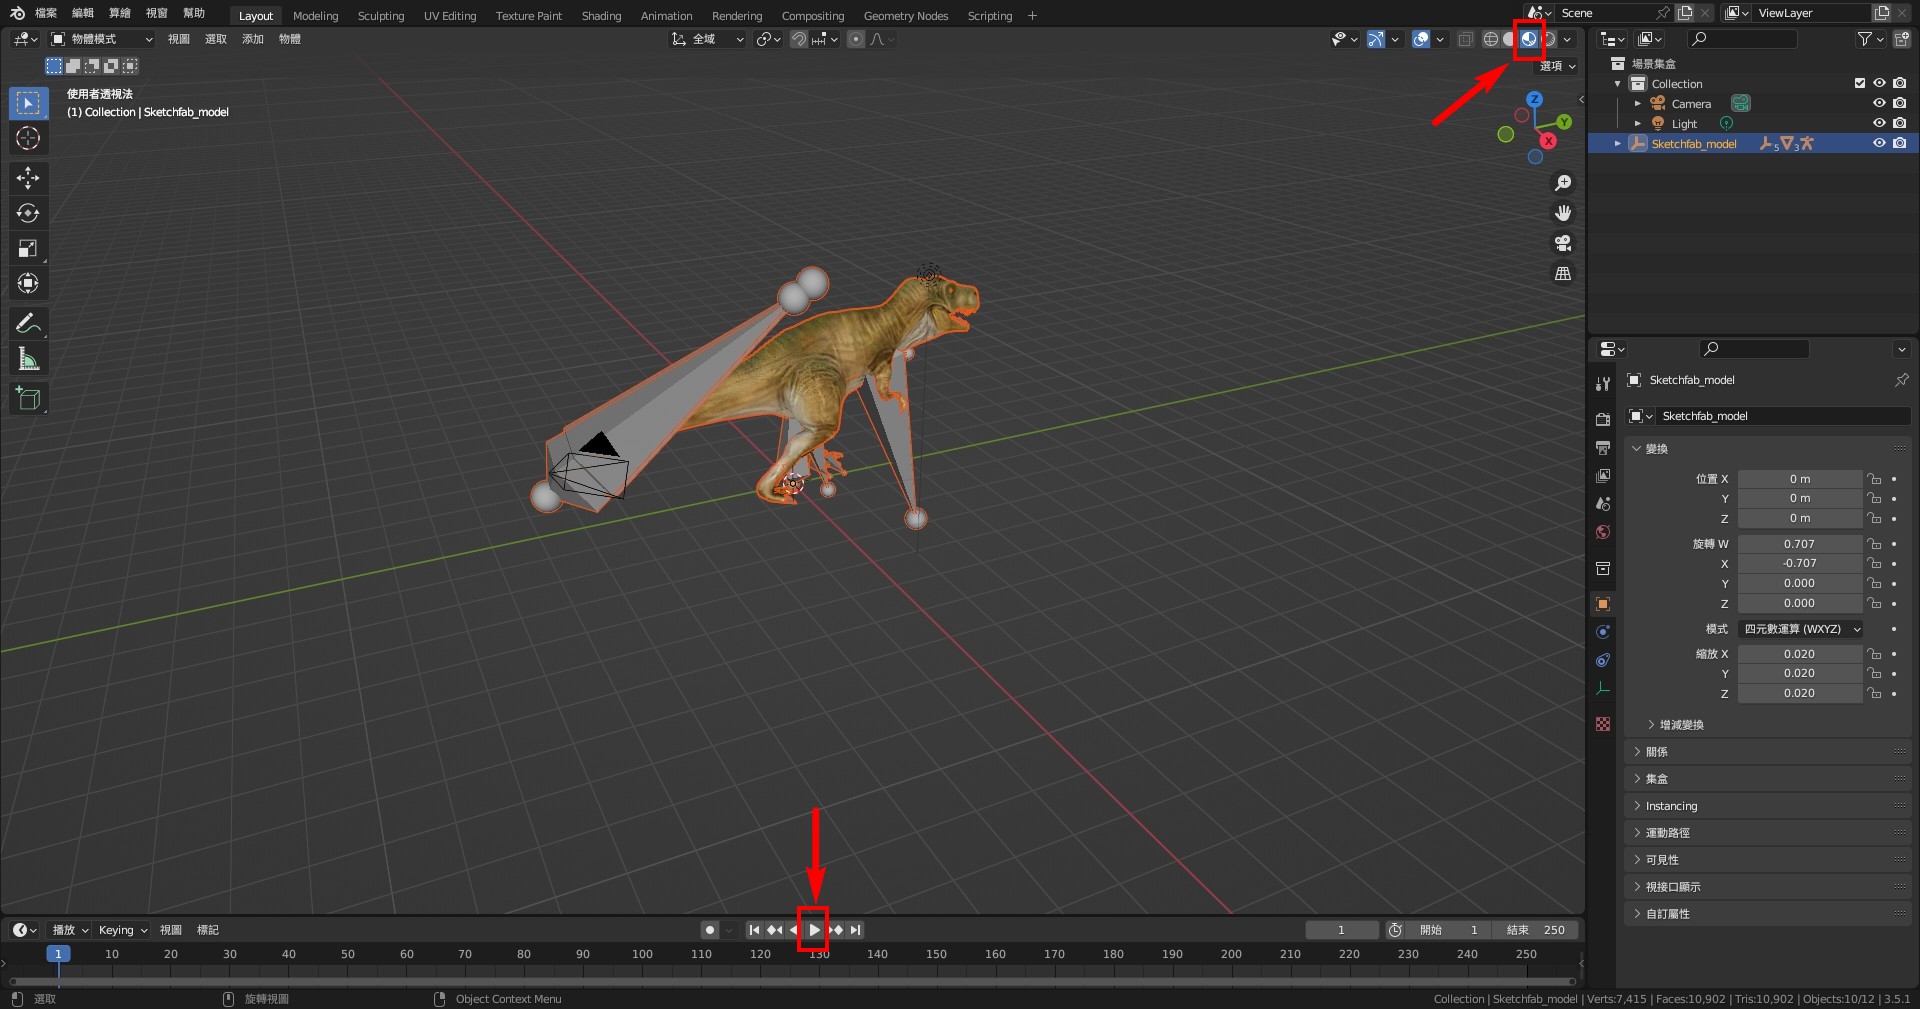
▌ Rearrange Nodes
Due to FBX handling fewer effects compared to GLB, converting directly may cause texture issues. Therefore, it's necessary to reduce the effect nodes before conversion.
1. Switch to the "Shading" workspace, select the model, and check the nodes connected.
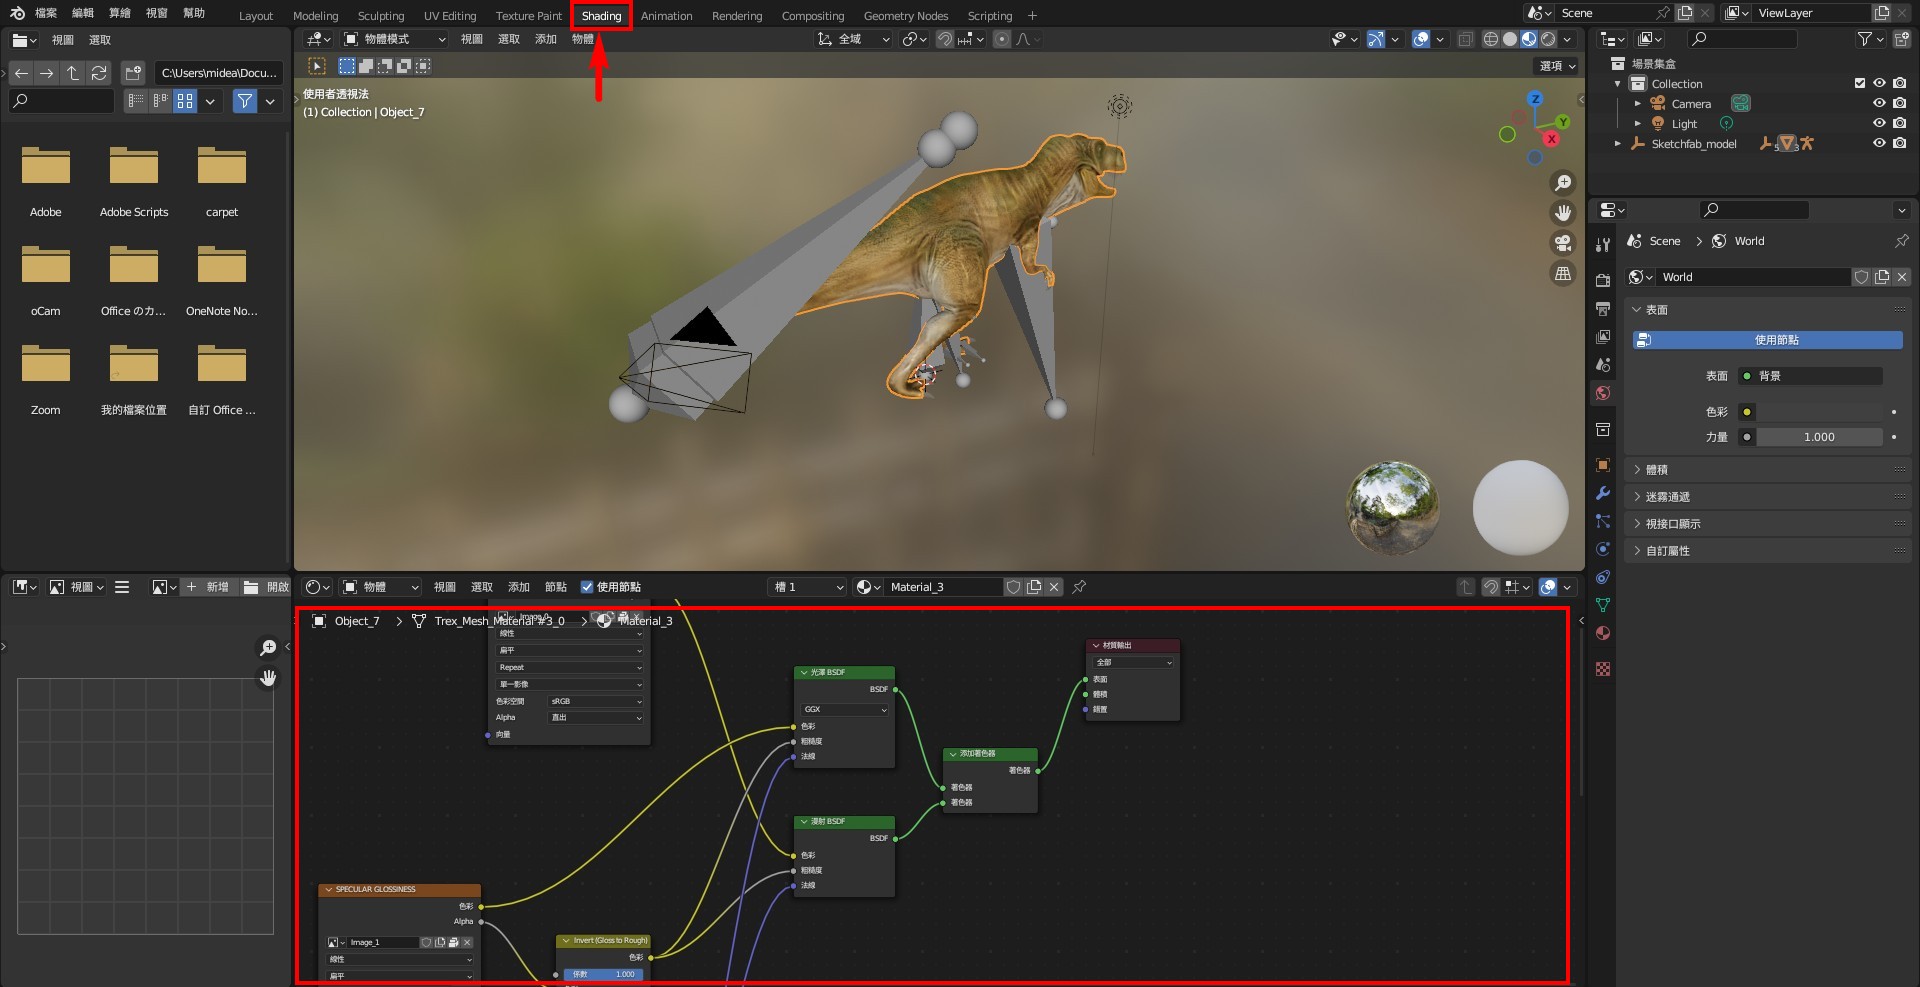
2. Retain the "Material Output" and "Image Texture" nodes, and delete the other effect nodes. If multiple "Image Texture" nodes are present, keep the main one and delete the others.
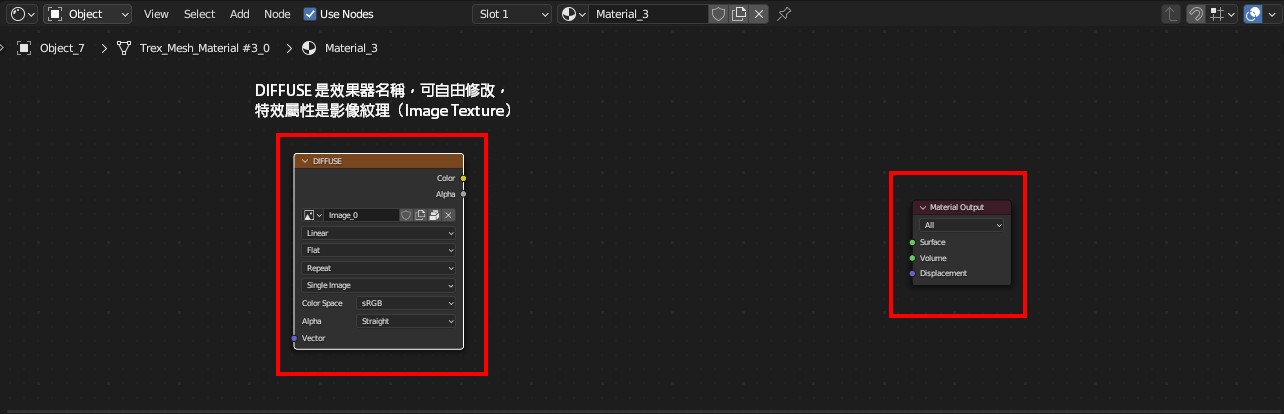
3. Right-click on the black area, select "Add/Add" ➔ "Shader/Shader" ➔ "Principled BSDF", and place it in the middle.
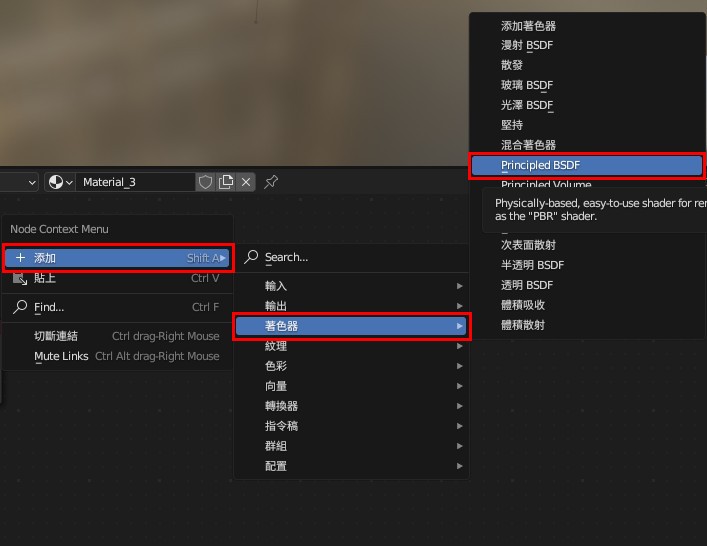
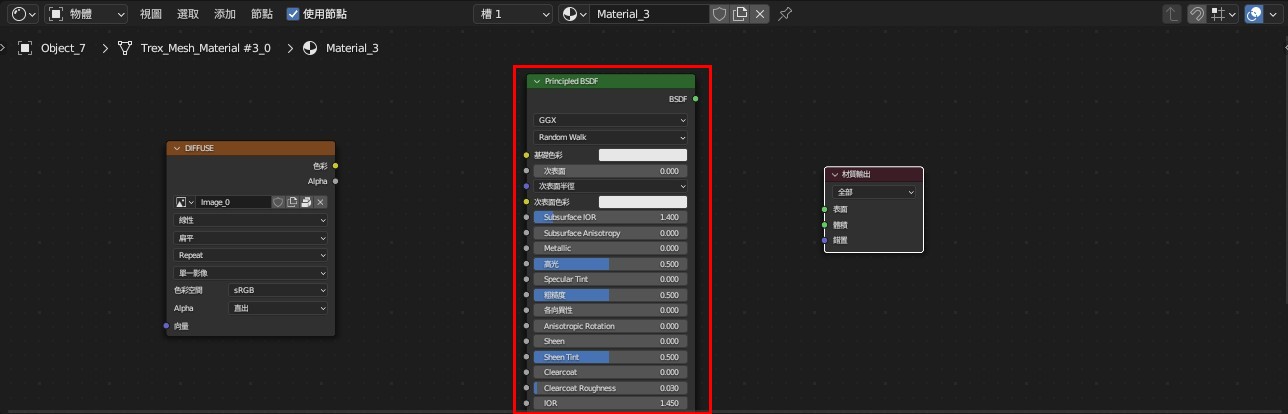
4. Connect "Image Texture/Image Texture" to "Base Color/Basic Color", and "BSDF" to "Surface/Surface" of "Material/Material Output".
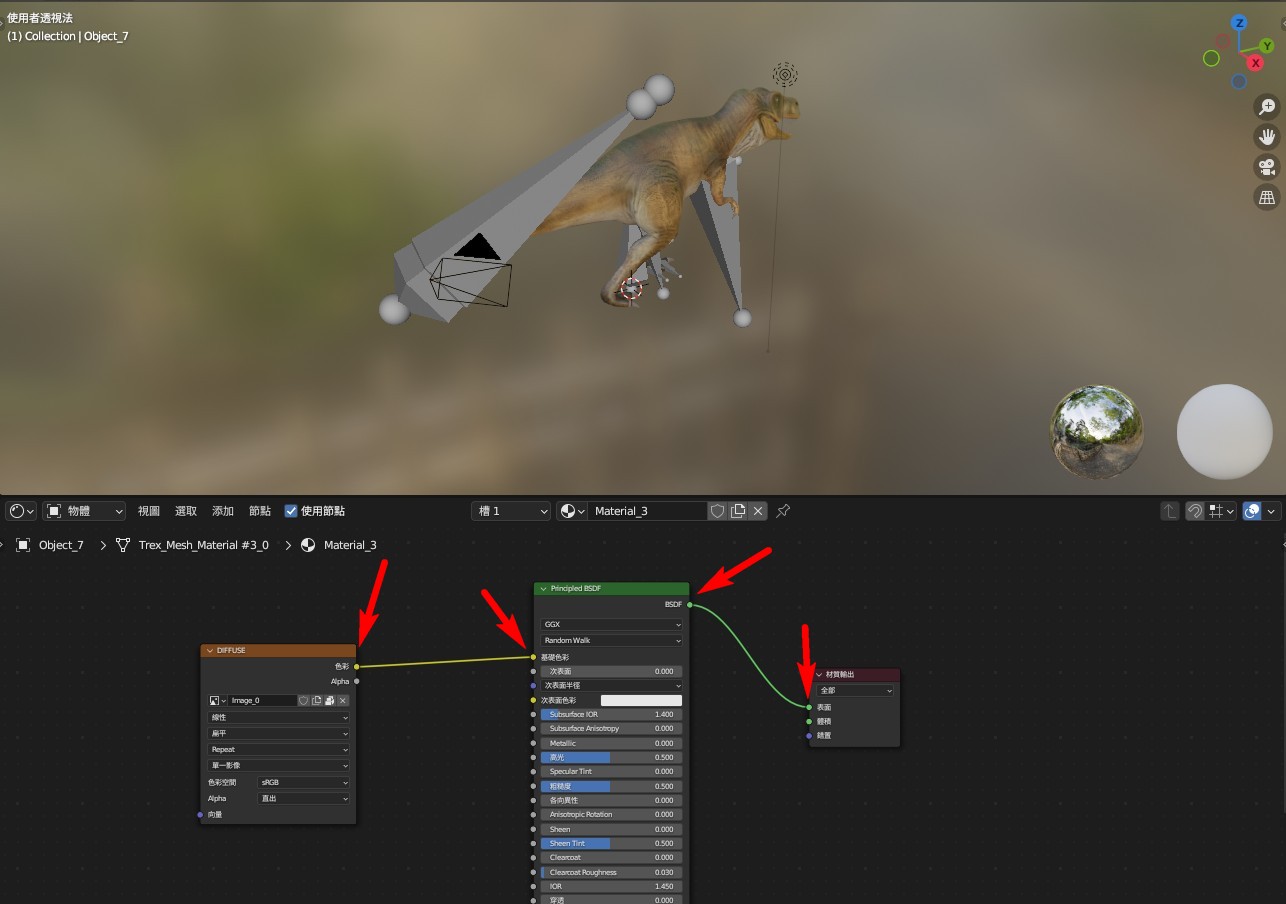
5. The block within the red frame contains various material balls in the model, which will switch to different sequences. Perform the above reordering action on each valid material ball.
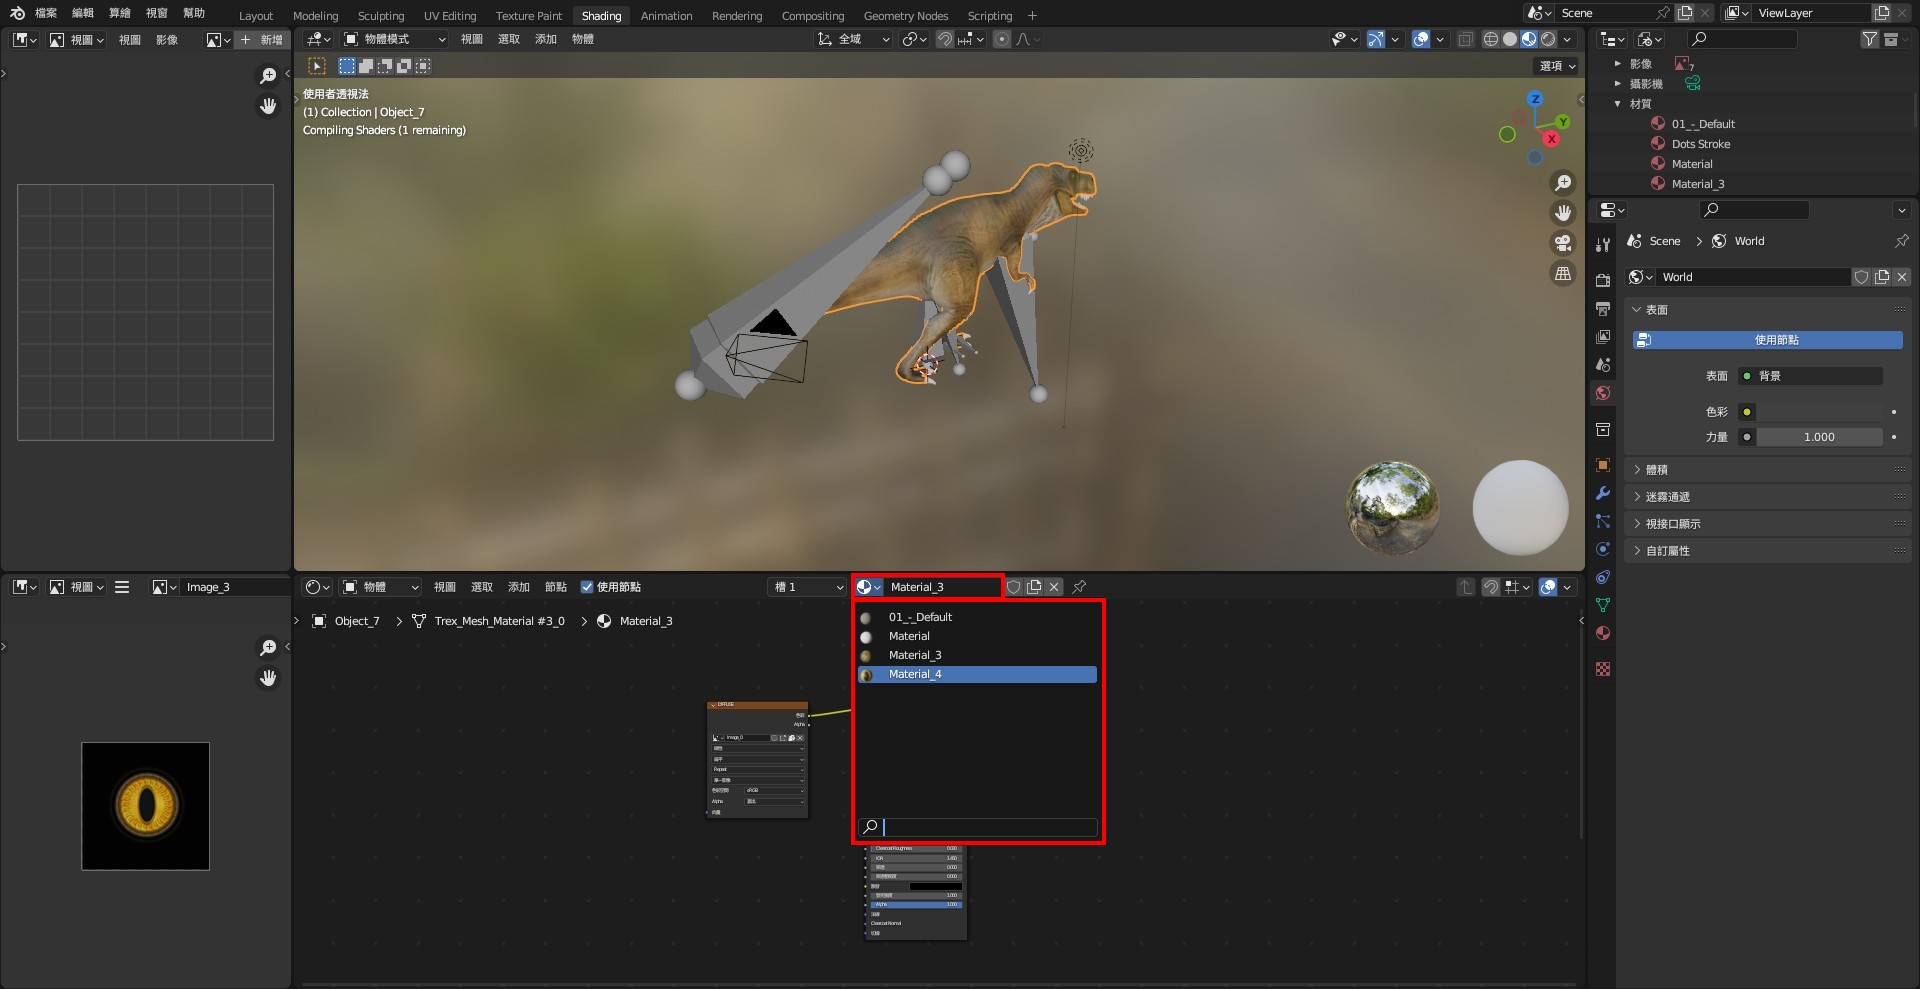
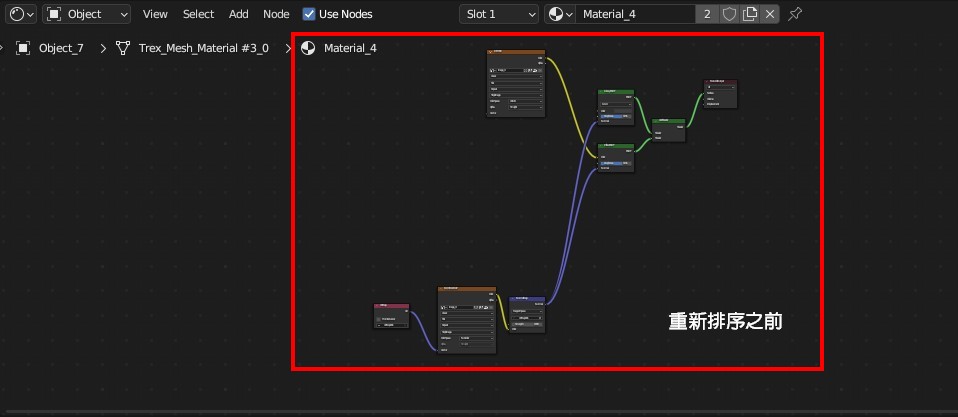
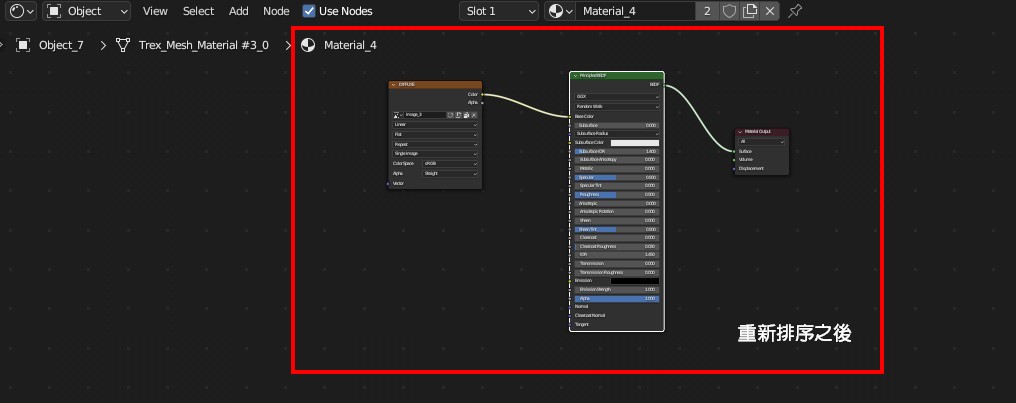
6. If the texture displayed by the material ball is unnecessary, it should be deleted for organization. Click the red frame icon in the upper right corner, then select "Blender File" ➔ "Materials" to find all the material balls in the model. Right-click to delete the unnecessary material balls.
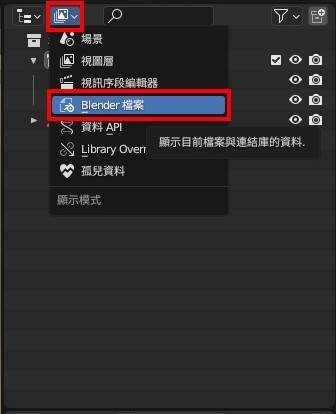

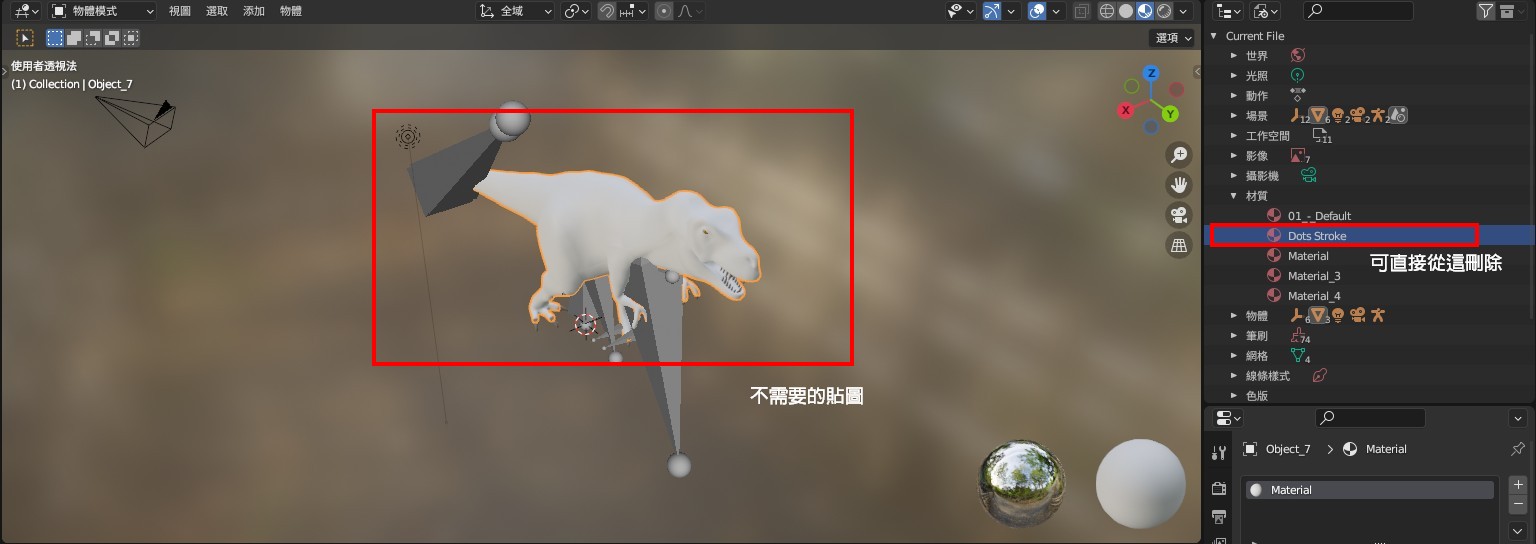
7. You can also rename the material balls here for better organization.
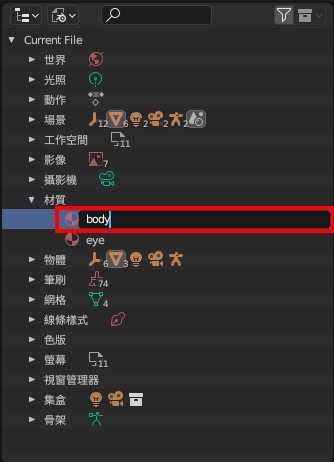
▌ Packing Texture Images
When downloading 3D models from external sources, there is a high possibility that textures might be missing. Therefore, it is recommended to "pack texture images" when handling 3D models to ensure that the models display the correct textures. Here’s how to pack the texture images for your models.
1. The area within the red box indicates the texture images. First, determine if the images are suitable for packing. In this example, you should save the images for the dinosaur's skin and eyes.
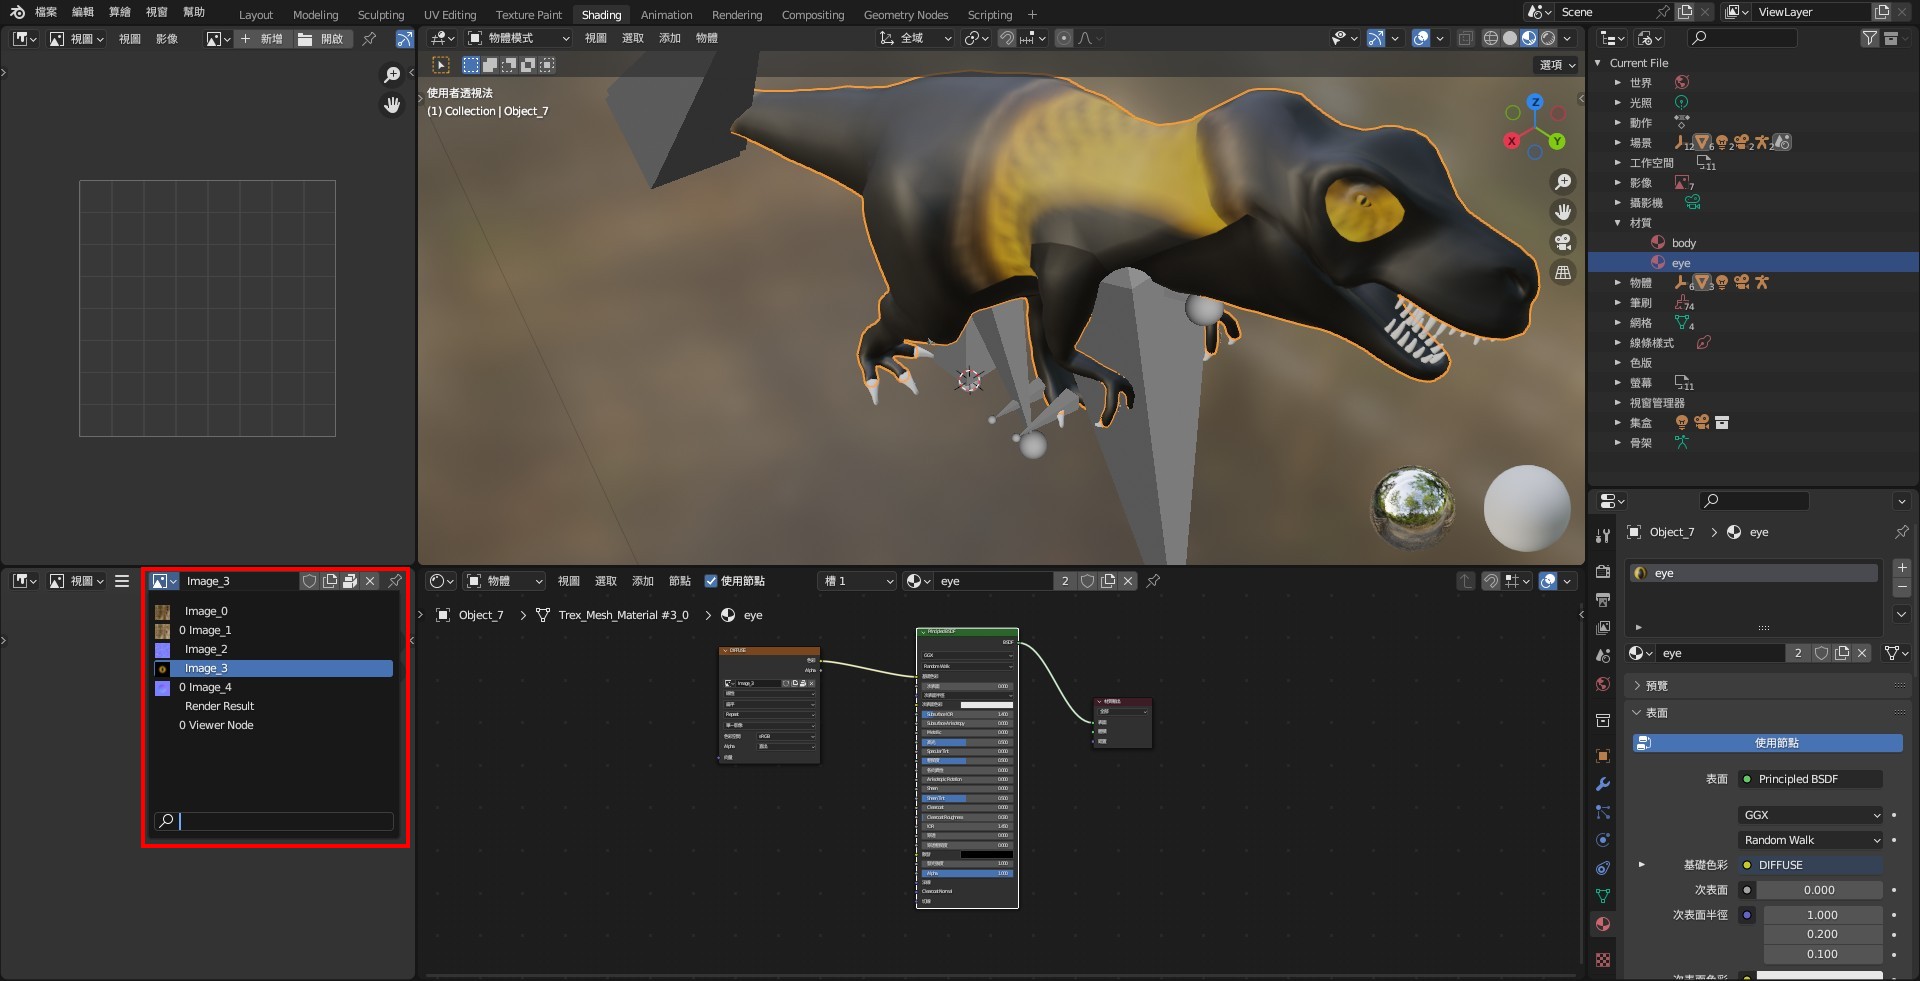
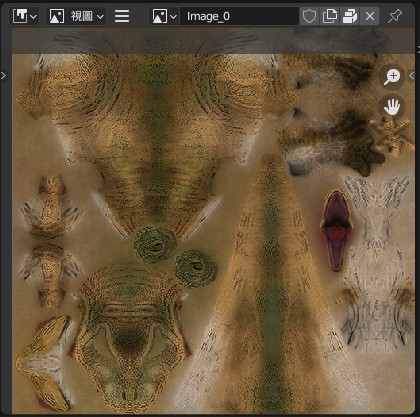
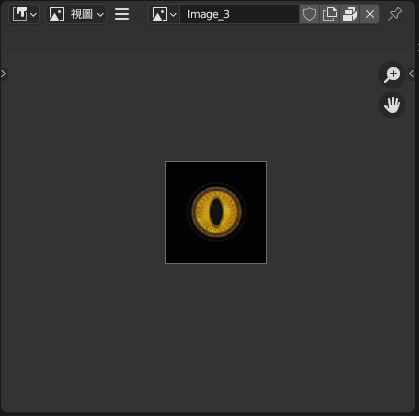
2. Click on the icon within the red box, then select "Image" ➔ "Save As".
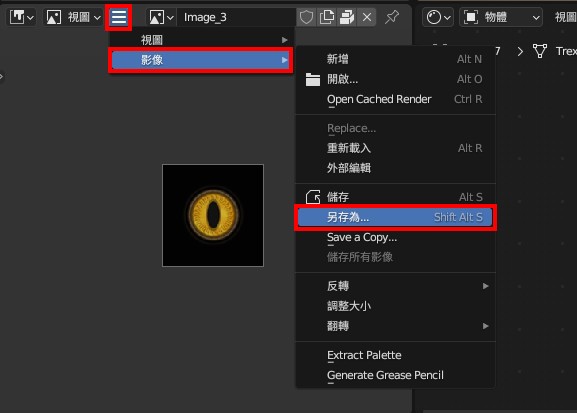
3. Choose the JPEG format, rename the images appropriately, and save them. Save each suitable image as described above.
※ Please use English filenames for naming.
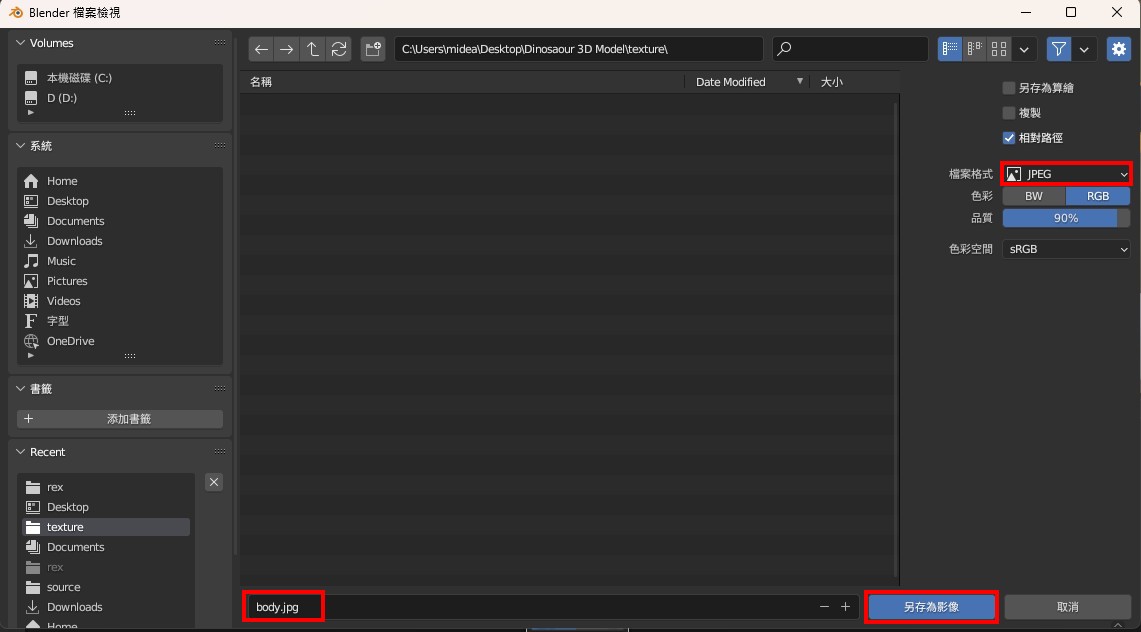
▌ Exporting FBX Files
1. Once the above steps are completed, you can export the file. Click "File" ➔ "Export" ➔ "FBX".
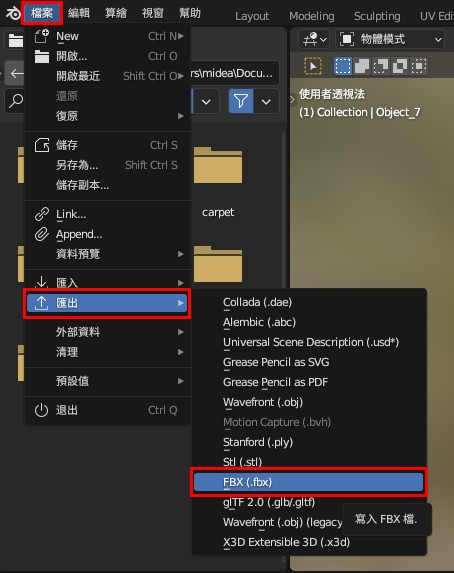
2. In the Path Mode, select "Copy" and open the adjacent box to ensure all data is properly packed.
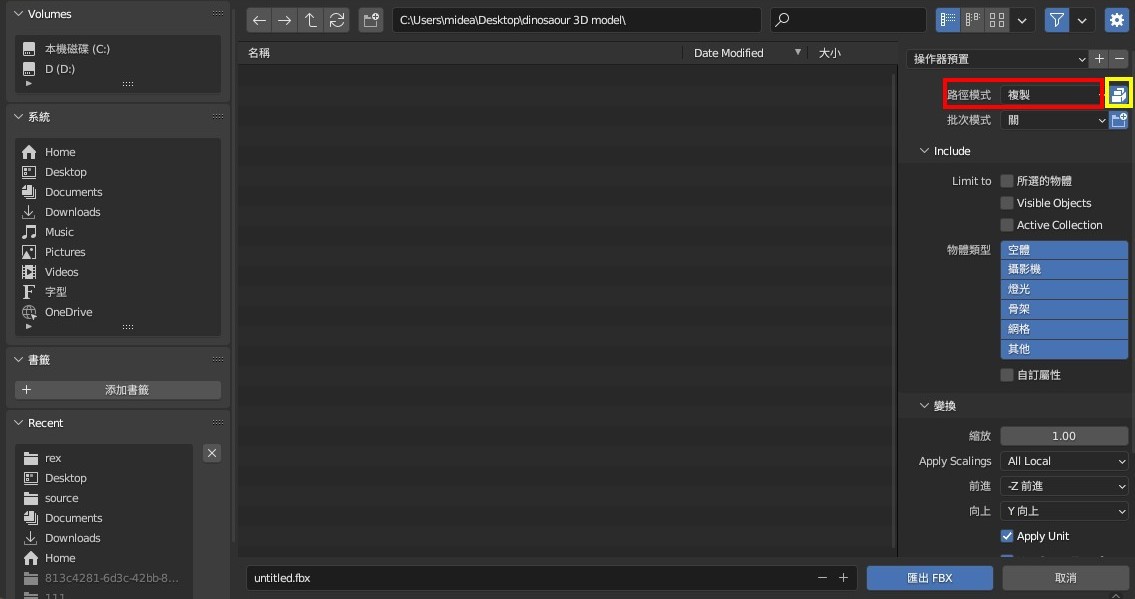
3. If the object has animations, expand the "Bake Animation" section, then uncheck "NLA Strips" and "All Actions".
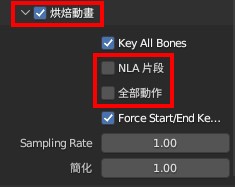
4. Save the file in the main folder (which contains the packed texture images), and finally, click "Export FBX".

5. Successfully convert GLB to FBX!
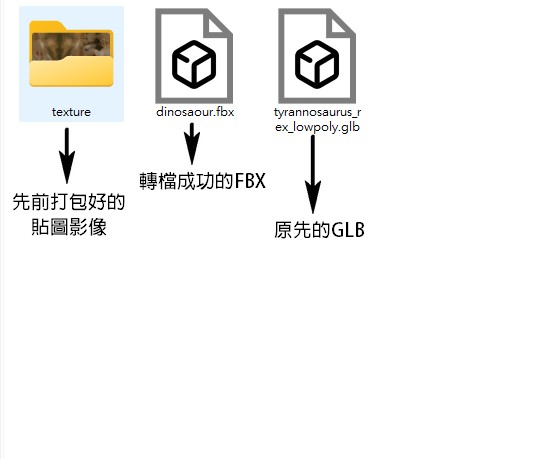
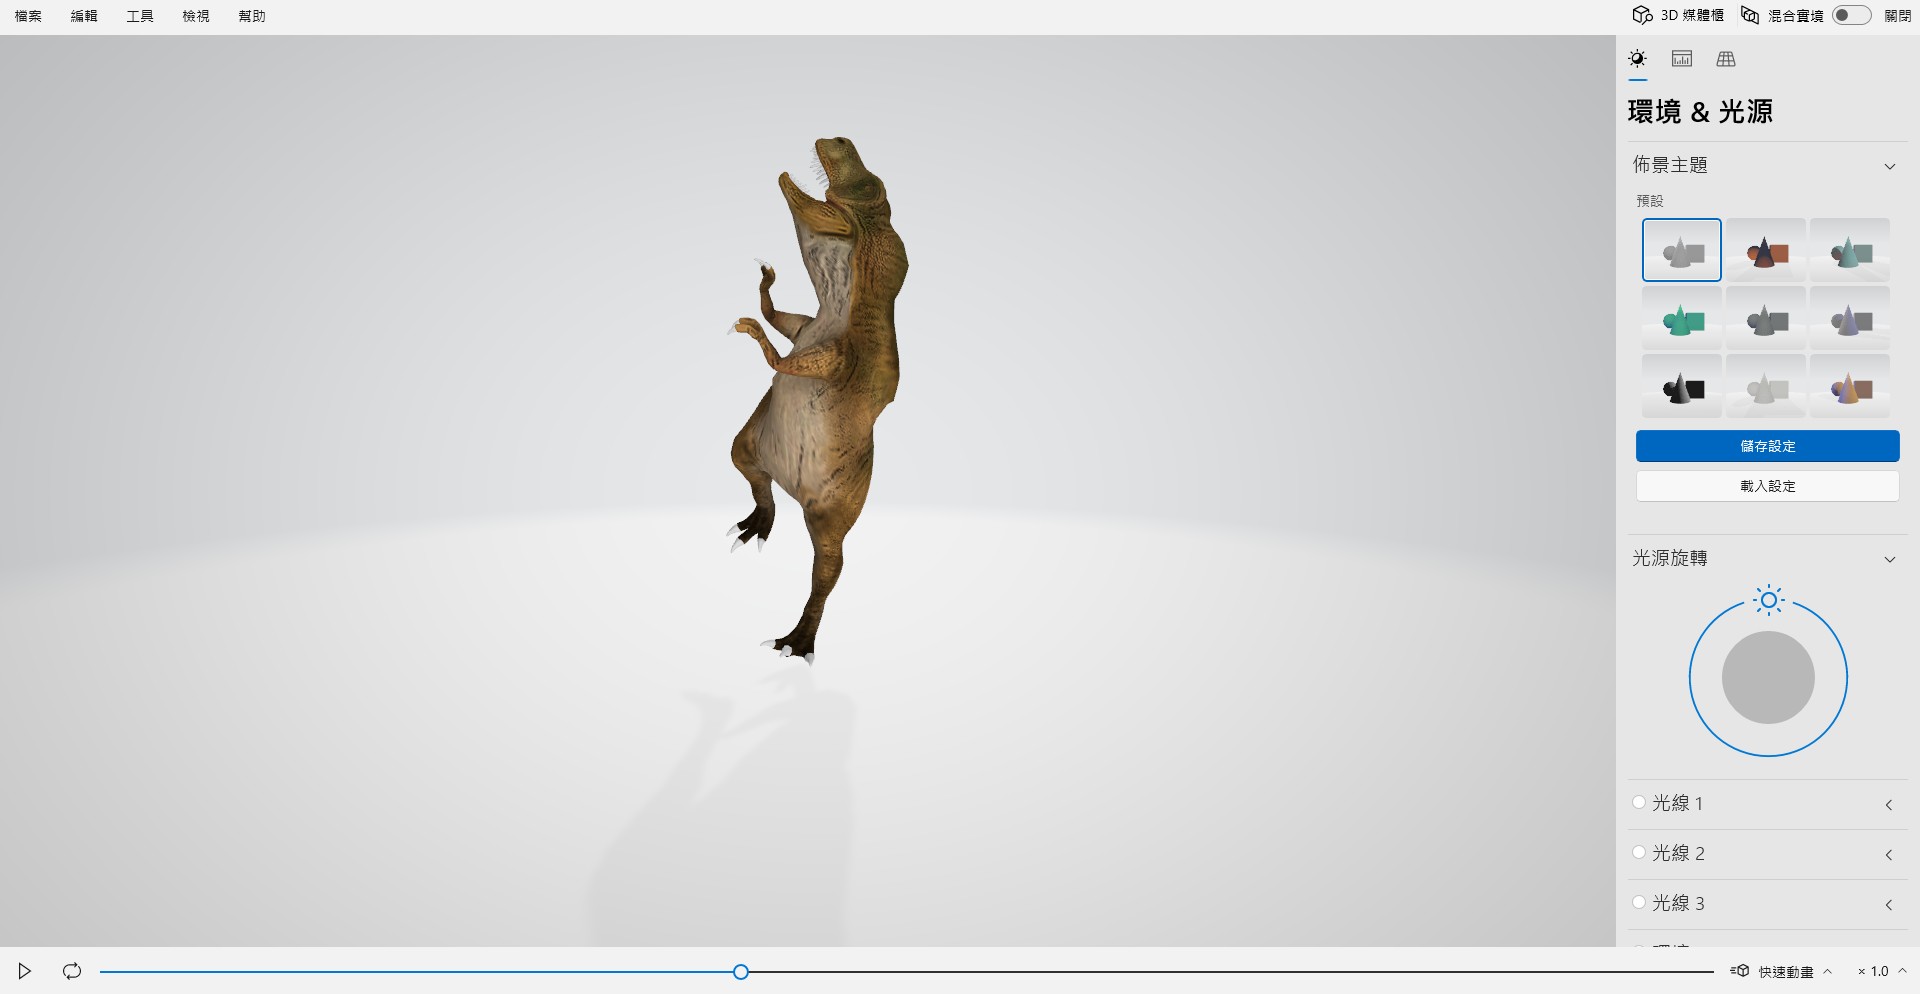
【 Converting FBX to GLB 】
1. Click on "Viewport Shading" to check if the texture is displayed correctly; if the texture is visible, it is working correctly. Click the play button below to check if the animation is functioning properly.

2. Click "File" → "Export" → "glTF2.0".
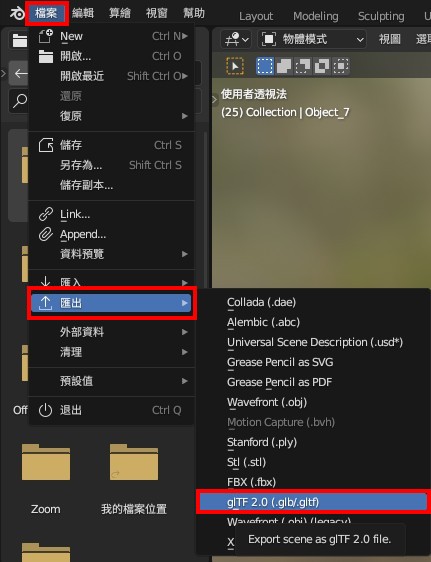
3. Successfully convert FBX to GLB!
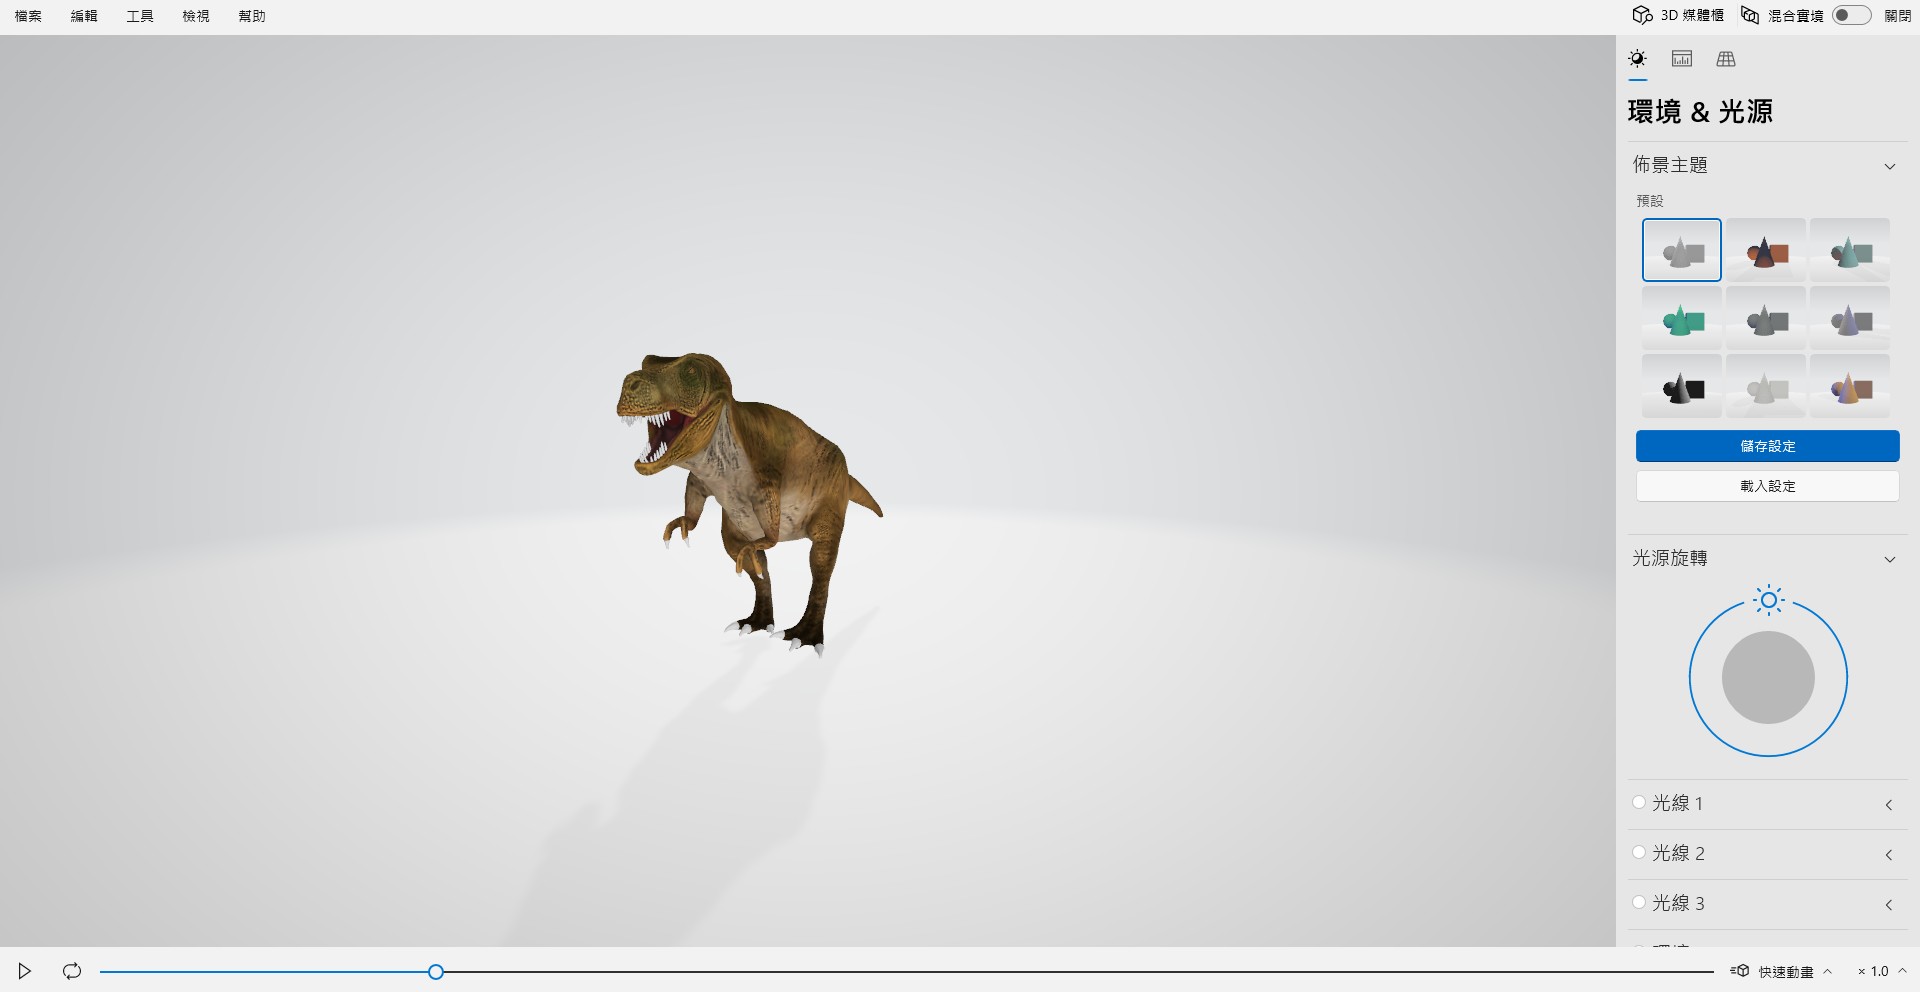
MAC Version MAKAR 3D Scan User Guide
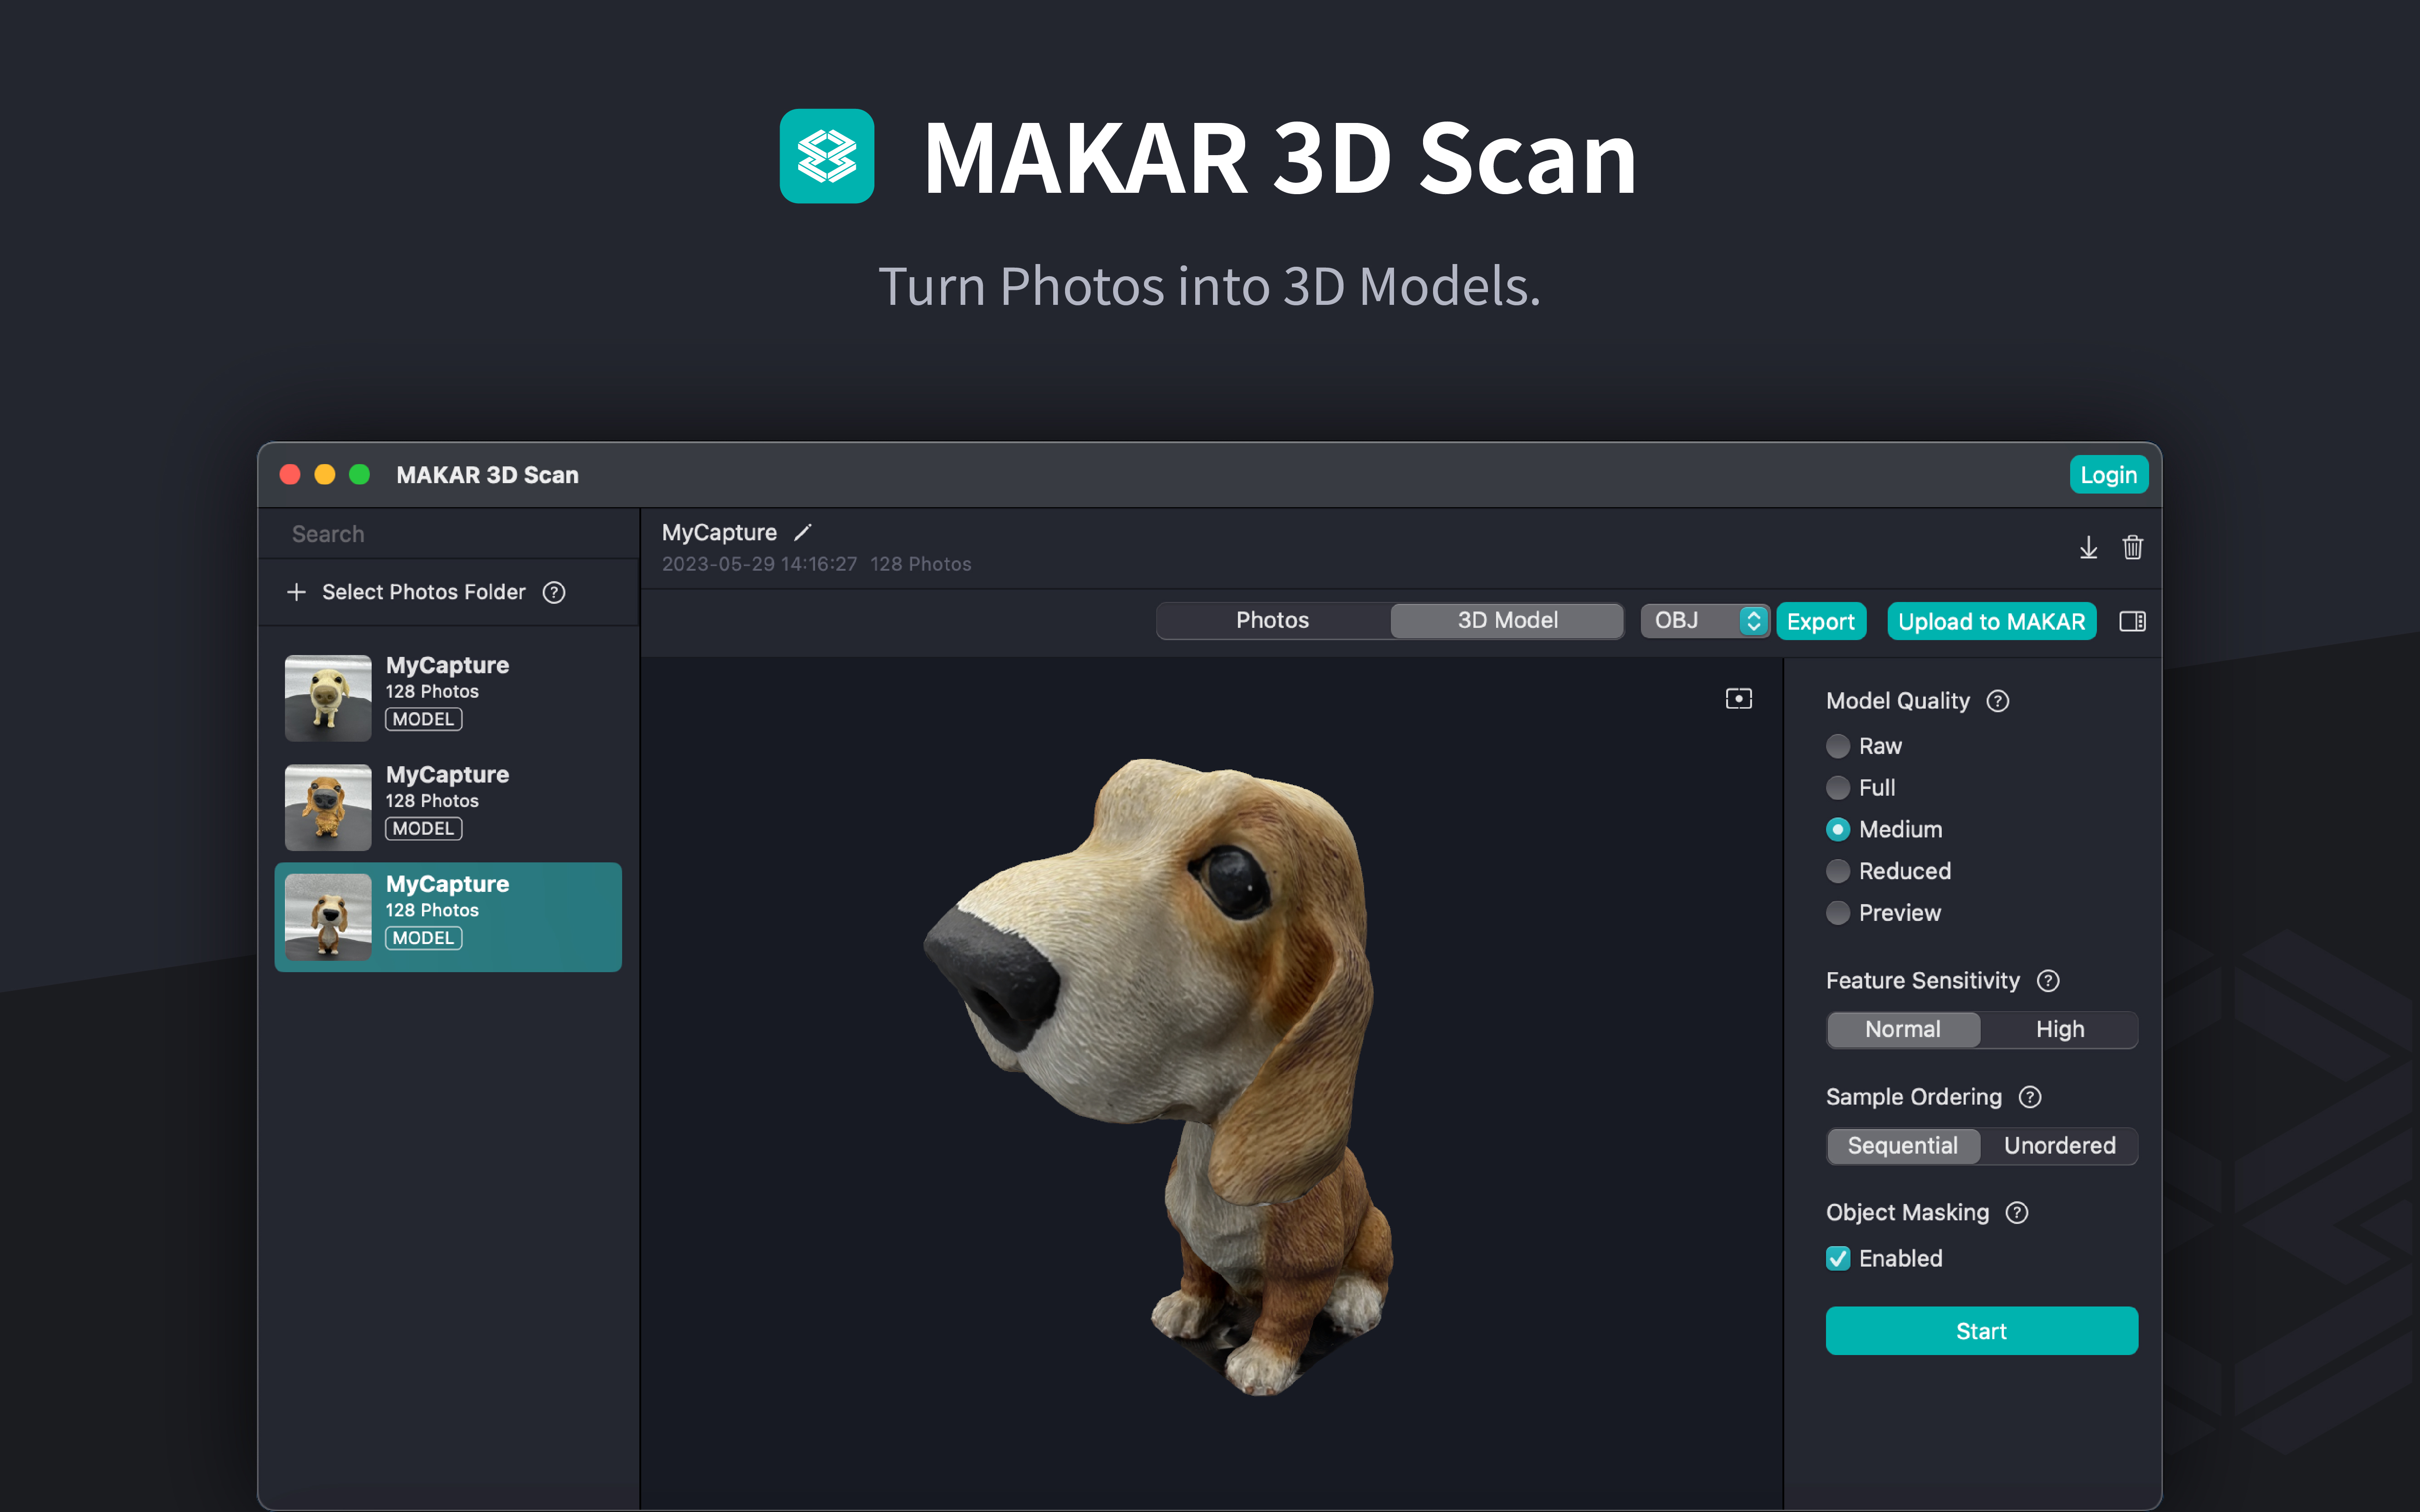
MAKAR has released the computer version of "MAKAR 3D Scan" software, making it easy to create 3D models using a MAC! Simply by photographing objects and importing the photos into the software, you can quickly generate 3D models. This guide will detail how to use the MAC version of MAKAR 3D Scan software.
Table of Contents |
|---|
Introduction to MAC Version MAKAR 3D Scan Features
-
Scan Everything with Phone and Computer: Simply take photos of the object you want to convert into a 3D model, rotate it 360 degrees, and import the photos into MAKAR 3D Scan. Through a simple process on both your phone and computer, you can quickly scan and generate a 3D model.
-
Customizable Scan Precision: Worried that your 3D model is too large or lacks detail? MAKAR 3D Scan offers customizable options for model precision and background removal, allowing you to scan and create 3D models according to your specific needs.
-
Supports Multiple 3D Format Exports: 3D models created with MAKAR 3D Scan can be exported in formats such as USDZ, OBJ, GLB, and STL, enabling seamless integration across various platforms.
-
Direct Integration with MAKAR Editor Resource: Log into your MAKAR account, and 3D models scanned with MAKAR 3D Scan will automatically be imported into your MAKAR Editor asset library, requiring no additional steps, and allowing you to quickly explore XR editing in the Metaverse.
-
Unlocking the Boundaries of XR Metaverse: Easily enter the infinite world of XR. MAKAR 3D Scan bridges the gap between reality and virtuality, unleashing your creativity in an immersive, expansive augmented reality world.
Minimum Hardware Requirements and Download for MAC Version MAKAR 3D Scan
【Software Name】: MAC Version MAKAR 3D Scan
【Software Language】: Traditional Chinese, English
【Minimum Requirements】: macOS Monterey or above, M1 chip, 16GB, 16GB RAM, 4GB VRAM
【Download Location】: Download from the MAC App Store
MAC Version MAKAR 3D Scan User Guide
【Taking Photos with iPhone/iPad and Importing into the Software】
-
Open the mobile version of MAKAR 3D Scan on your iPhone or iPad, and select "New Project" in the middle or the "+" in the top right corner.
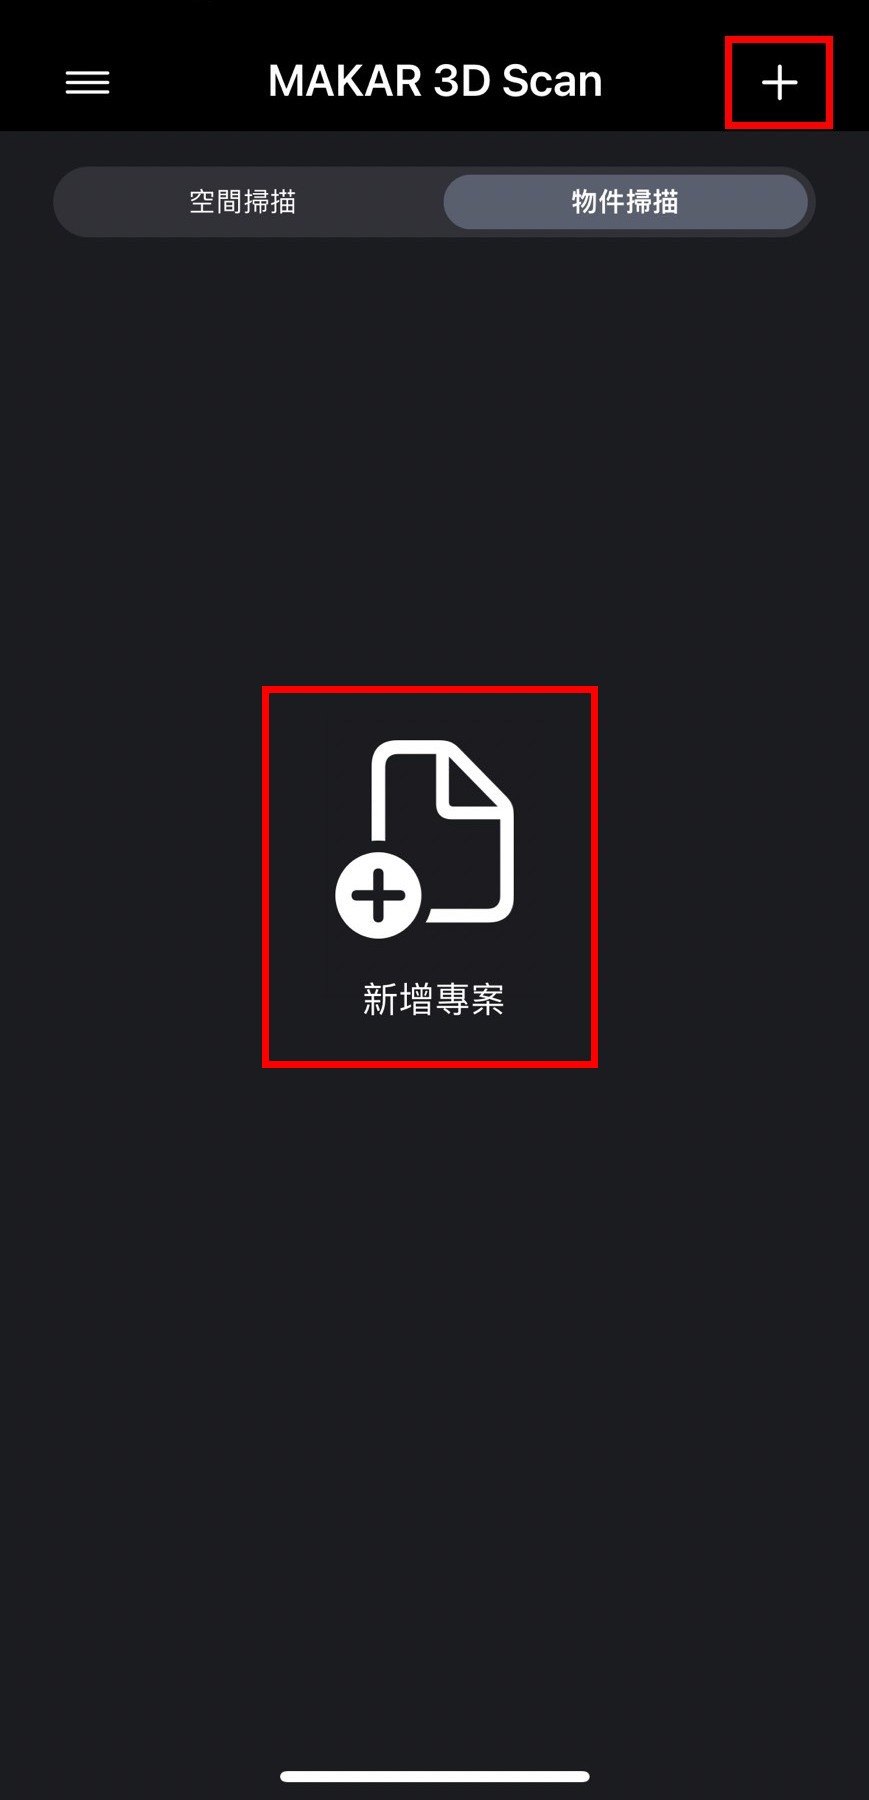
-
Select "Object Scan" on the right side.
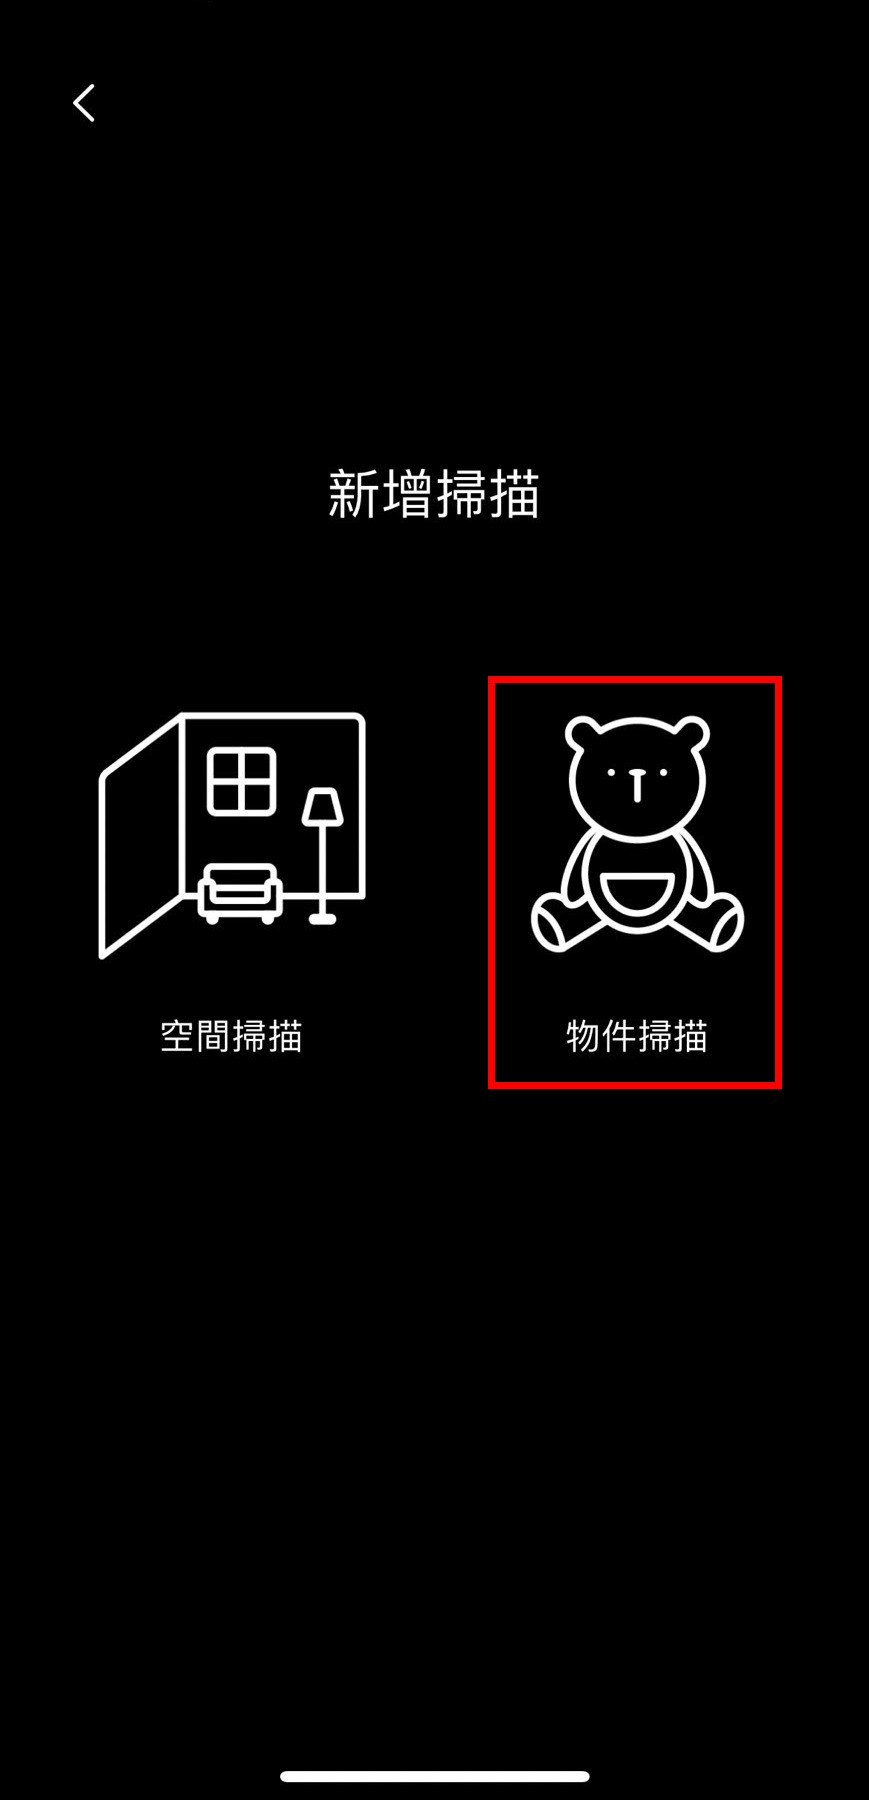
-
A notice will pop up with scanning tips, aiming for clear shots, maintaining 70% overlap, and filling the frame.
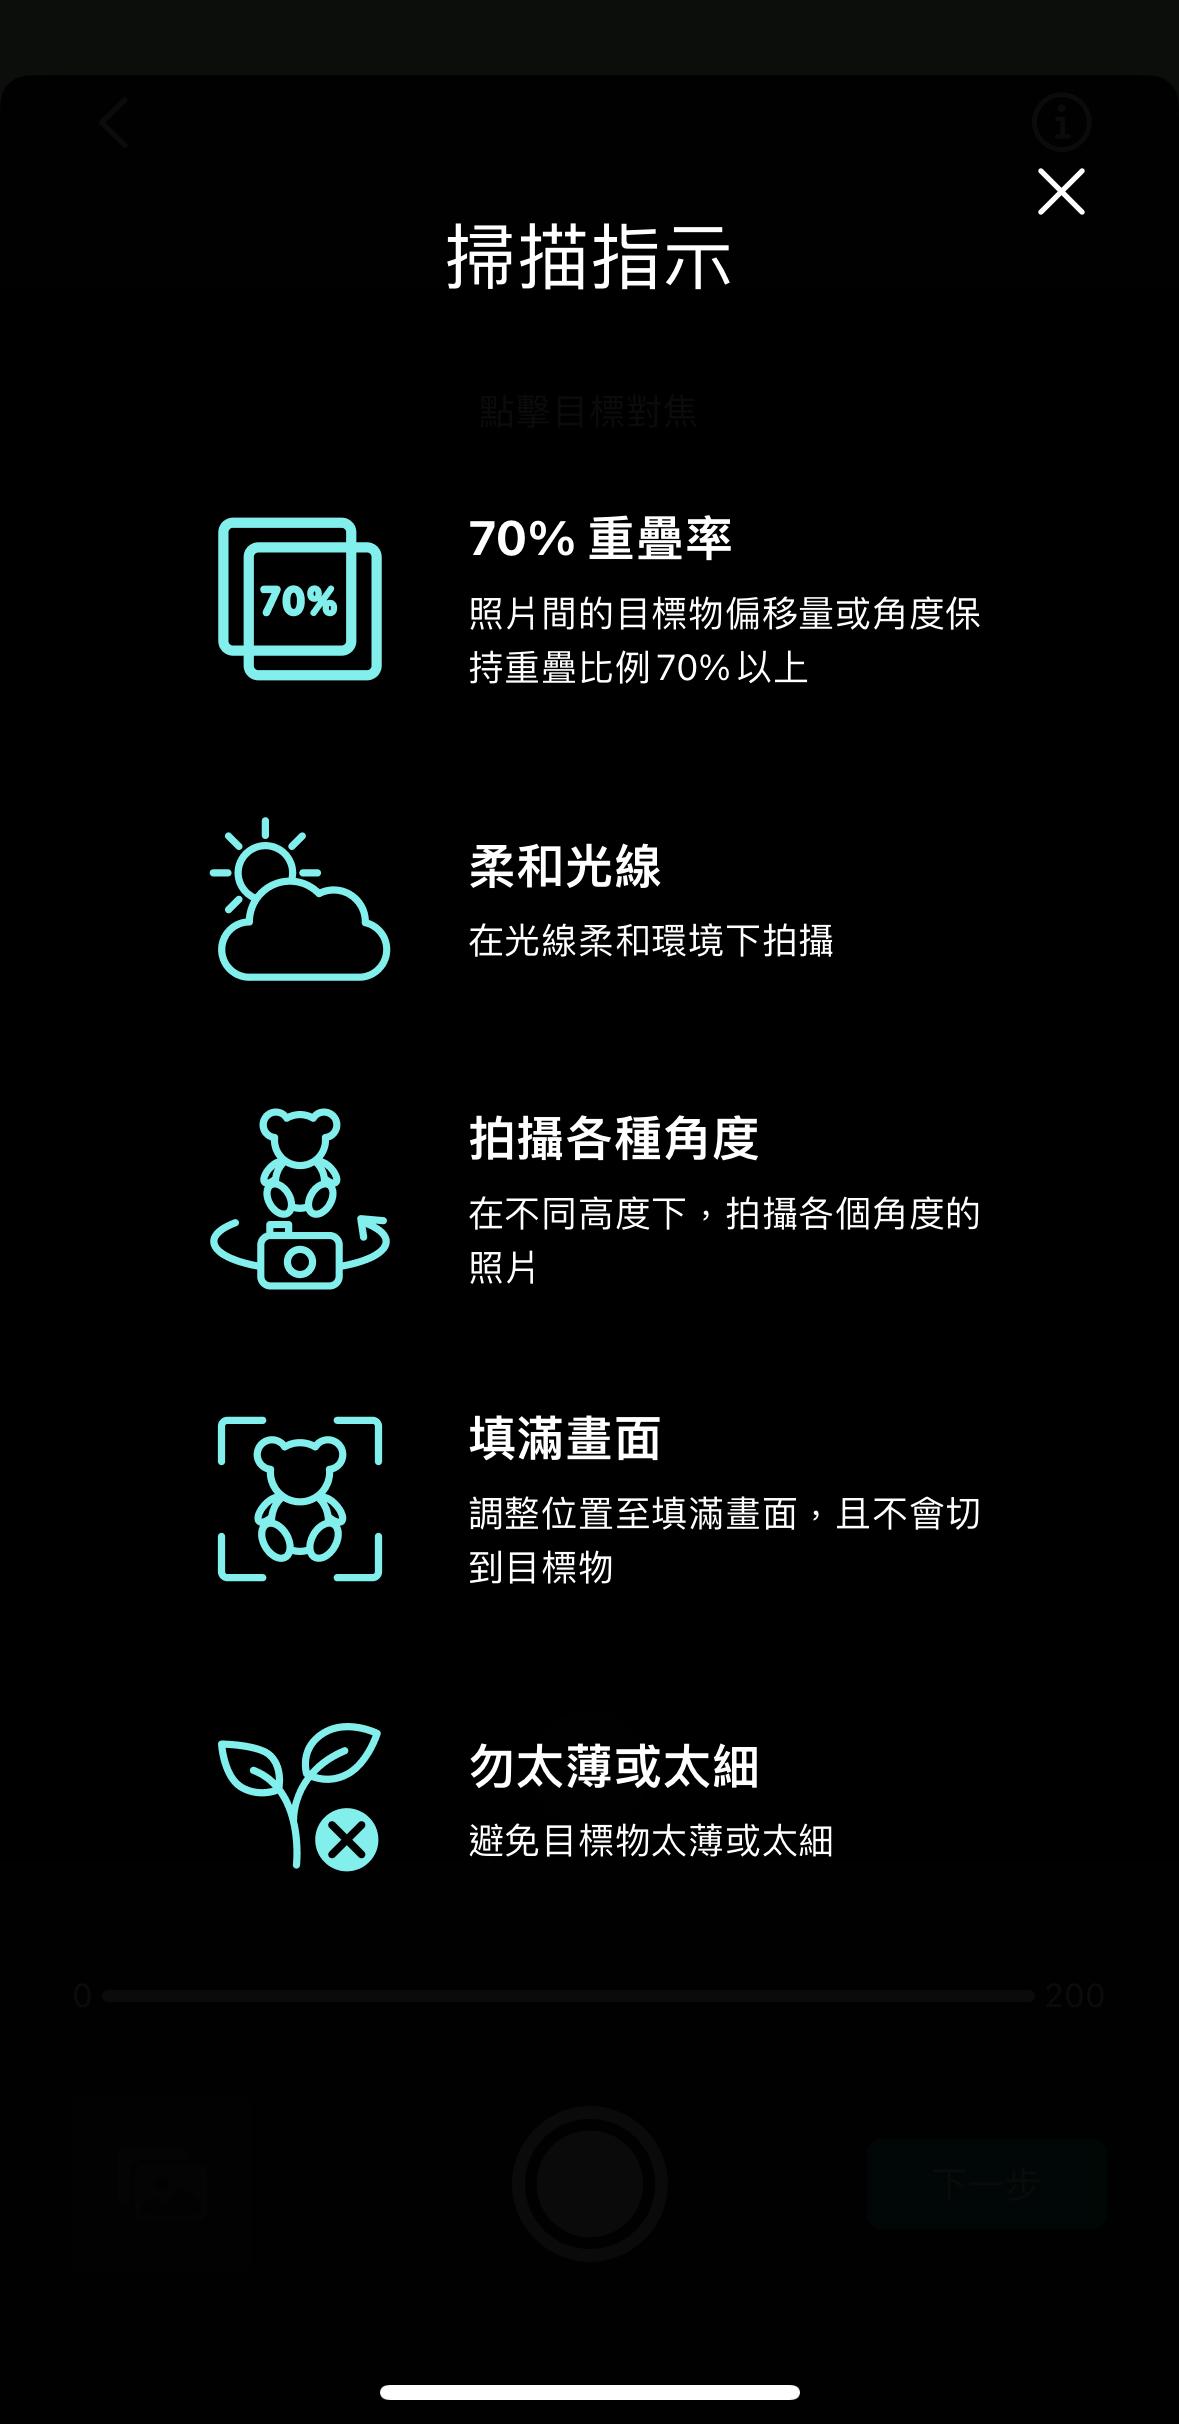
-
Enter the shooting page and start taking photos of the object.
Focus on the object by tapping on the screen, and zoom up to 3X. Capture the object from different heights, rotating 360 degrees, taking at least 40 photos to meet the conditions for the next step.
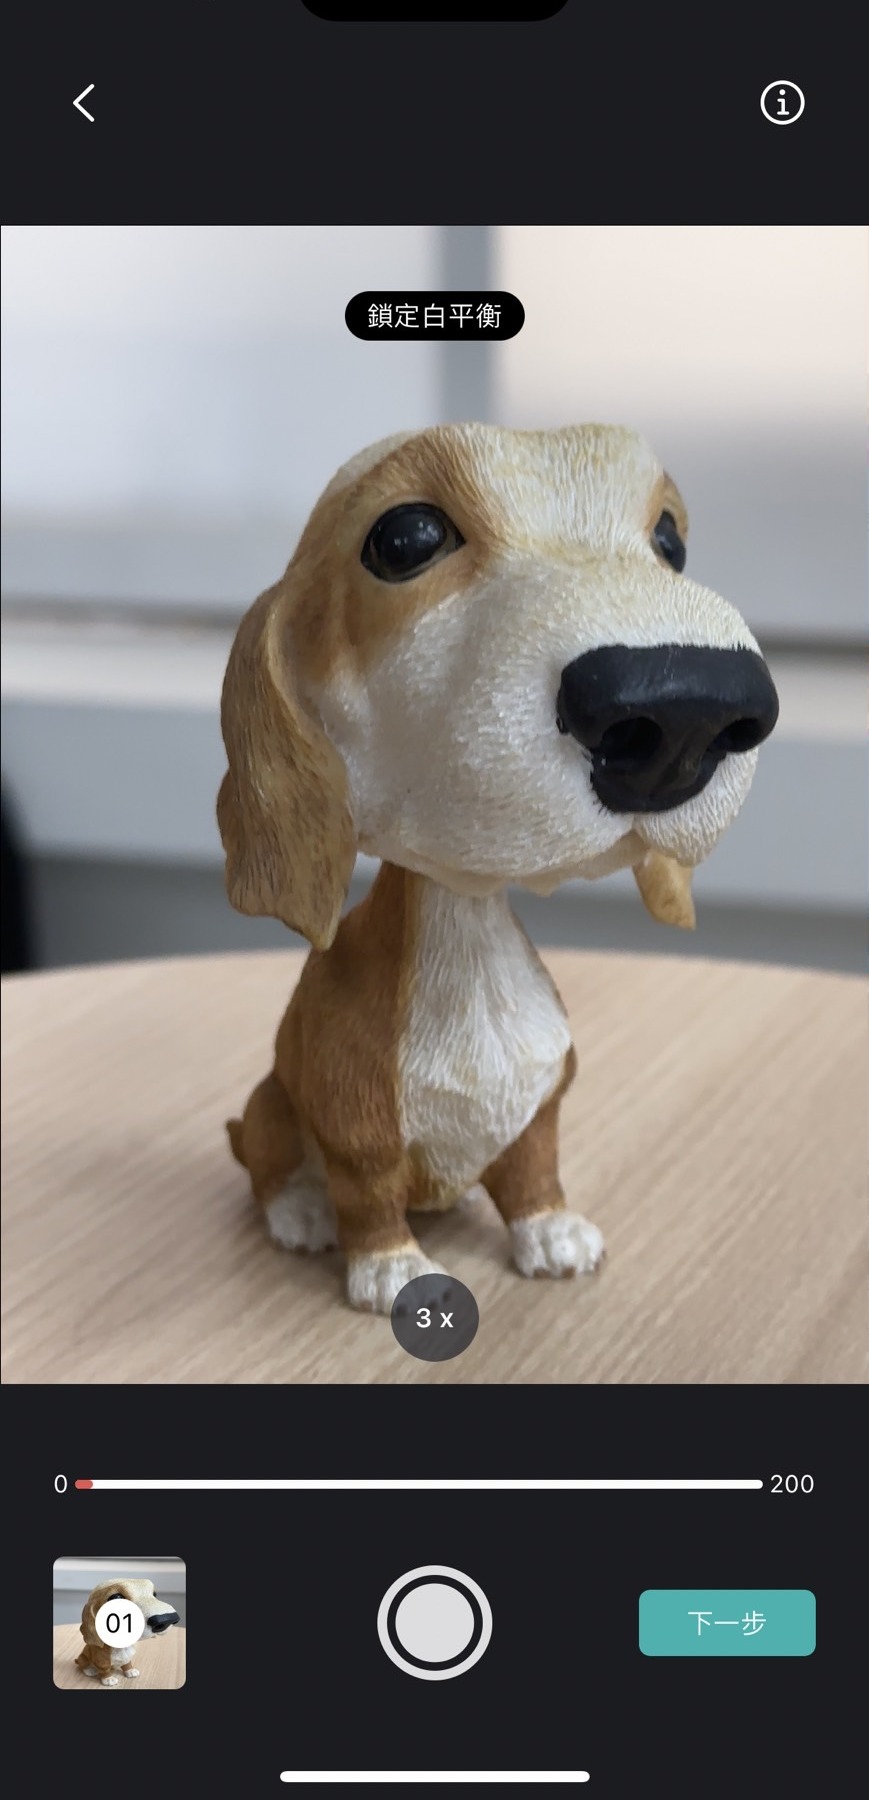
-
After taking the photos, select "Next" on the right side.
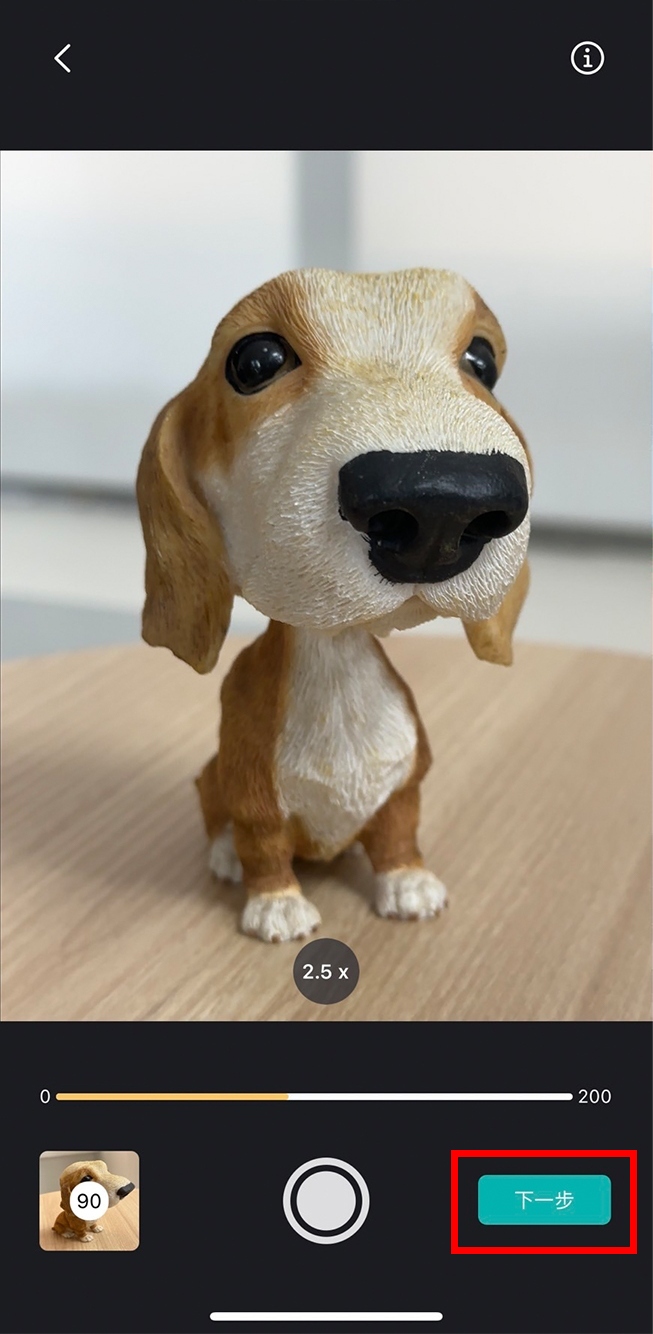
-
Then, open MAKAR 3D Scan on your MAC, and return to your iPhone/iPad to select "Wi-Fi Transfer" to start transferring files to the MAC version of MAKAR 3D Scan.

【Creating 3D Models Using the Software】
- Upload via "Wi-Fi Transfer," and you can see the transfer progress in the status bar below.
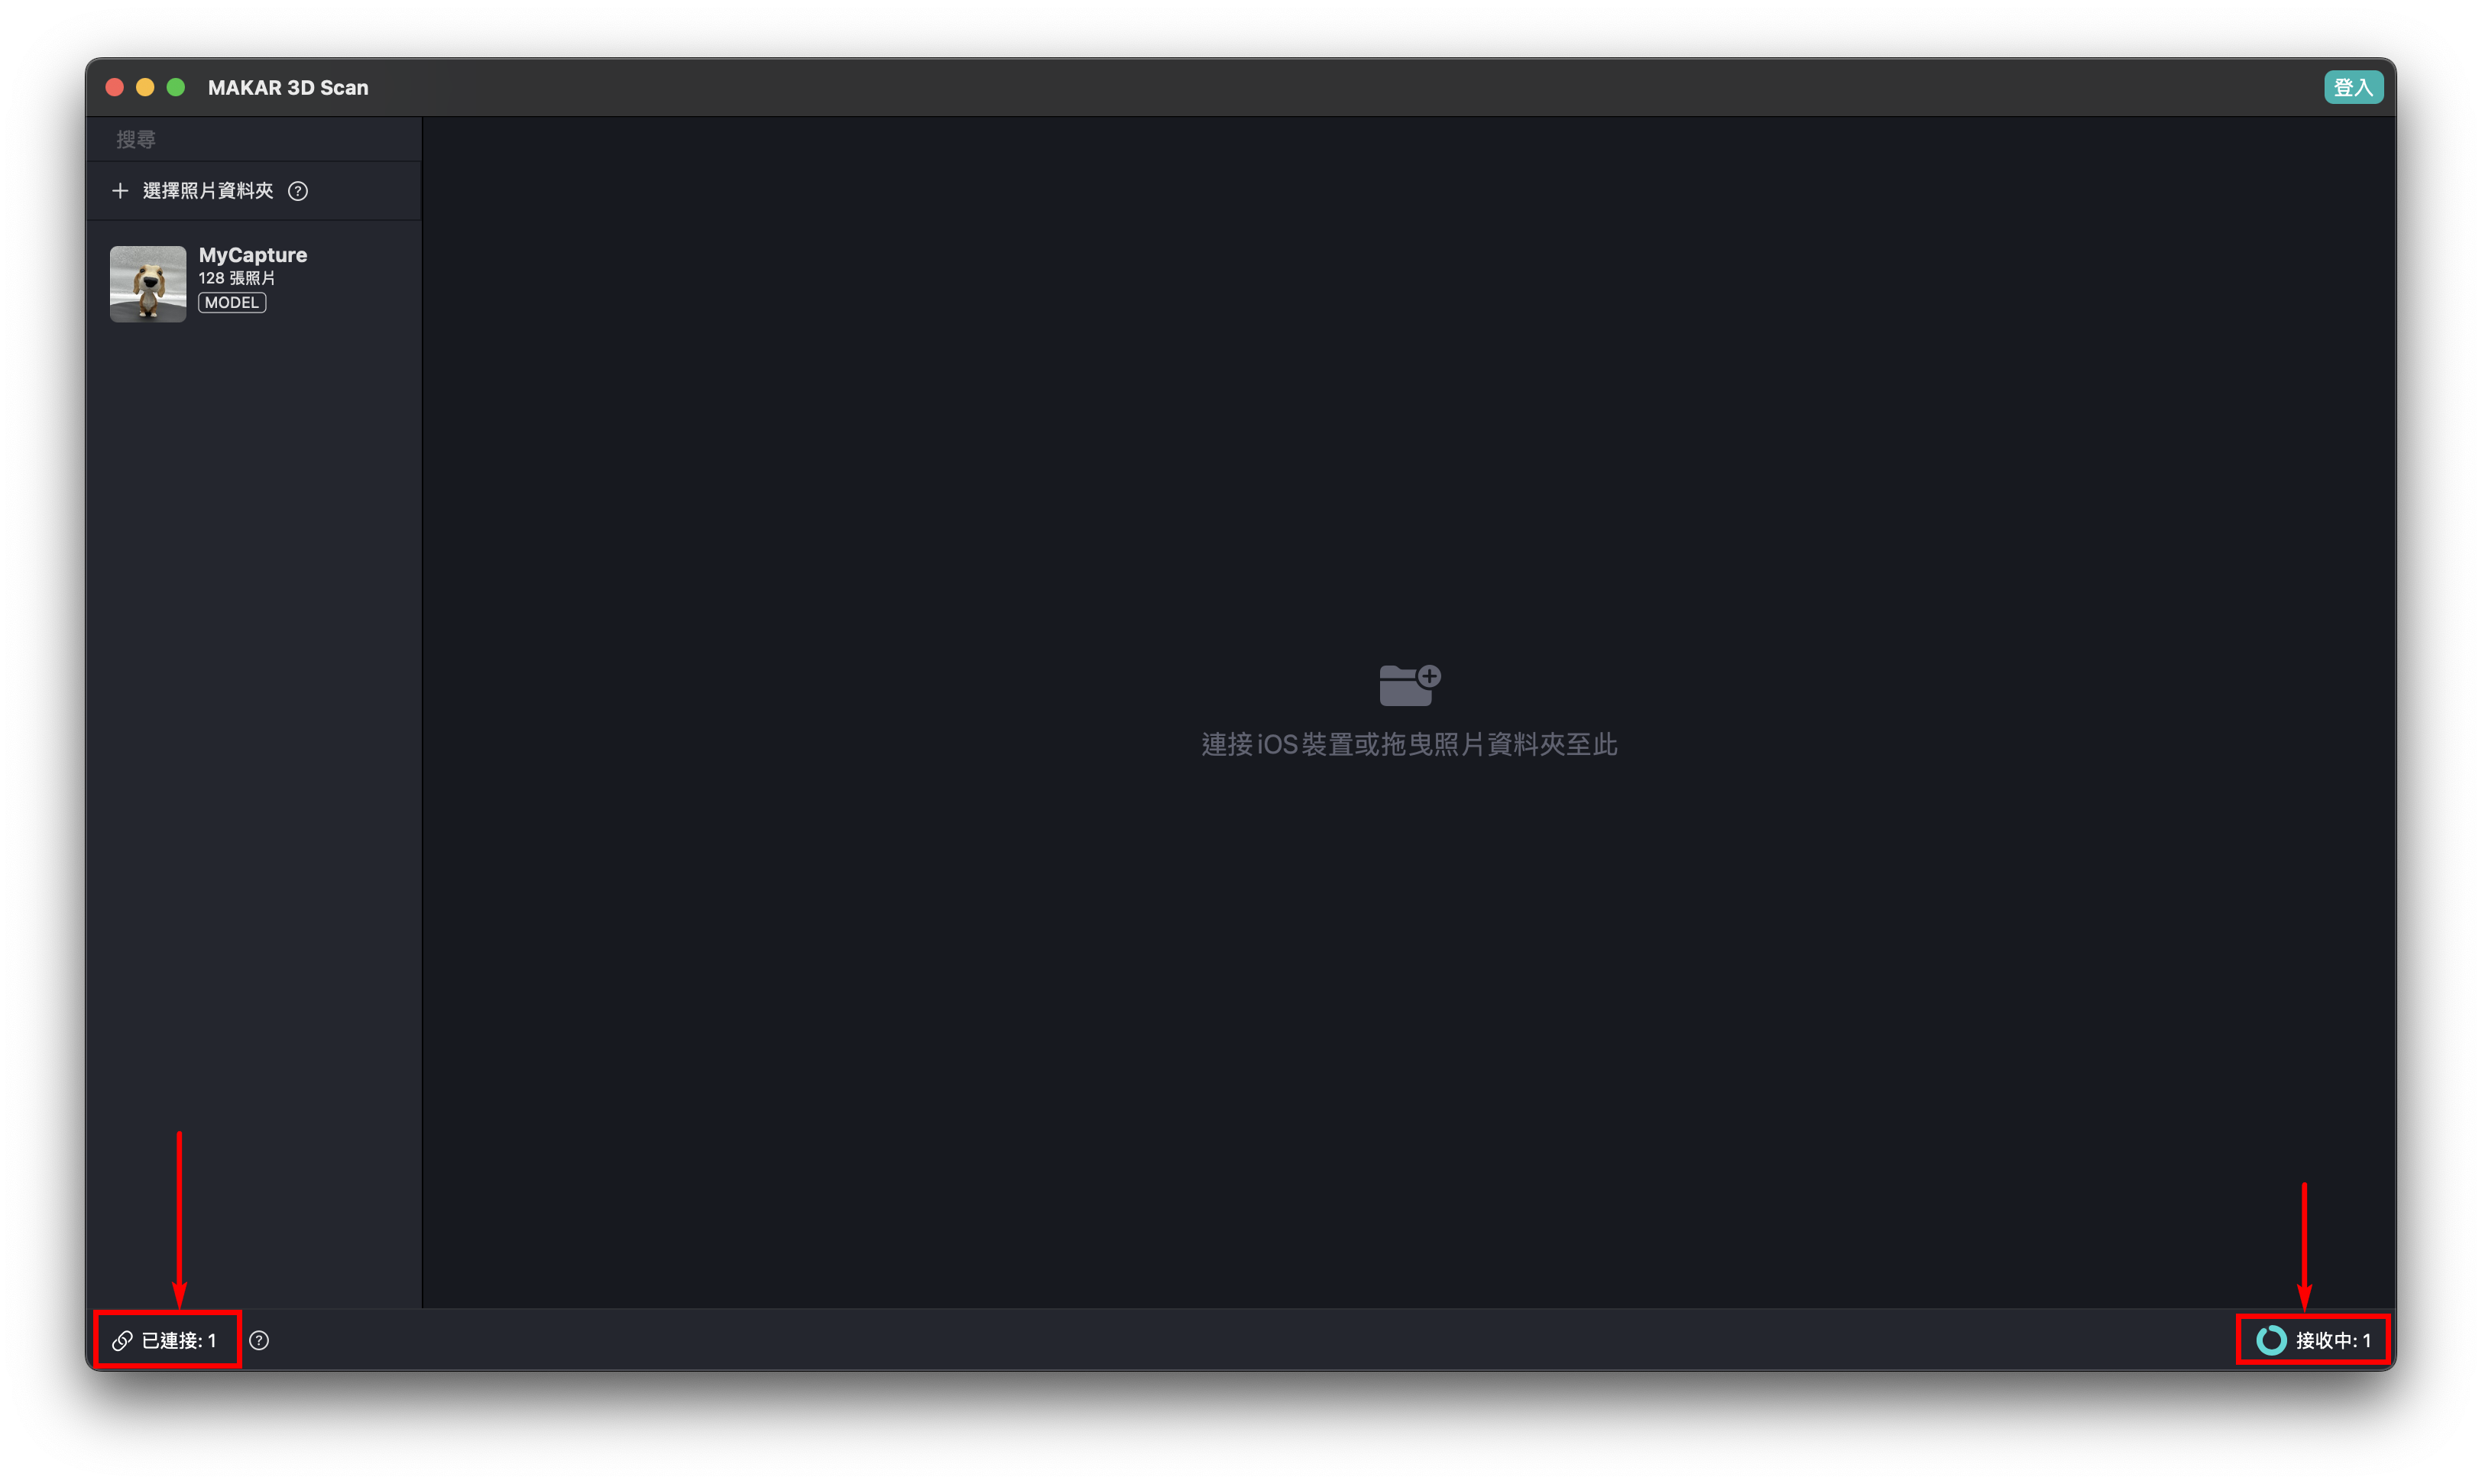
- After uploading, the automatic modeling process begins. You can check the progress from the main screen or the Dock.
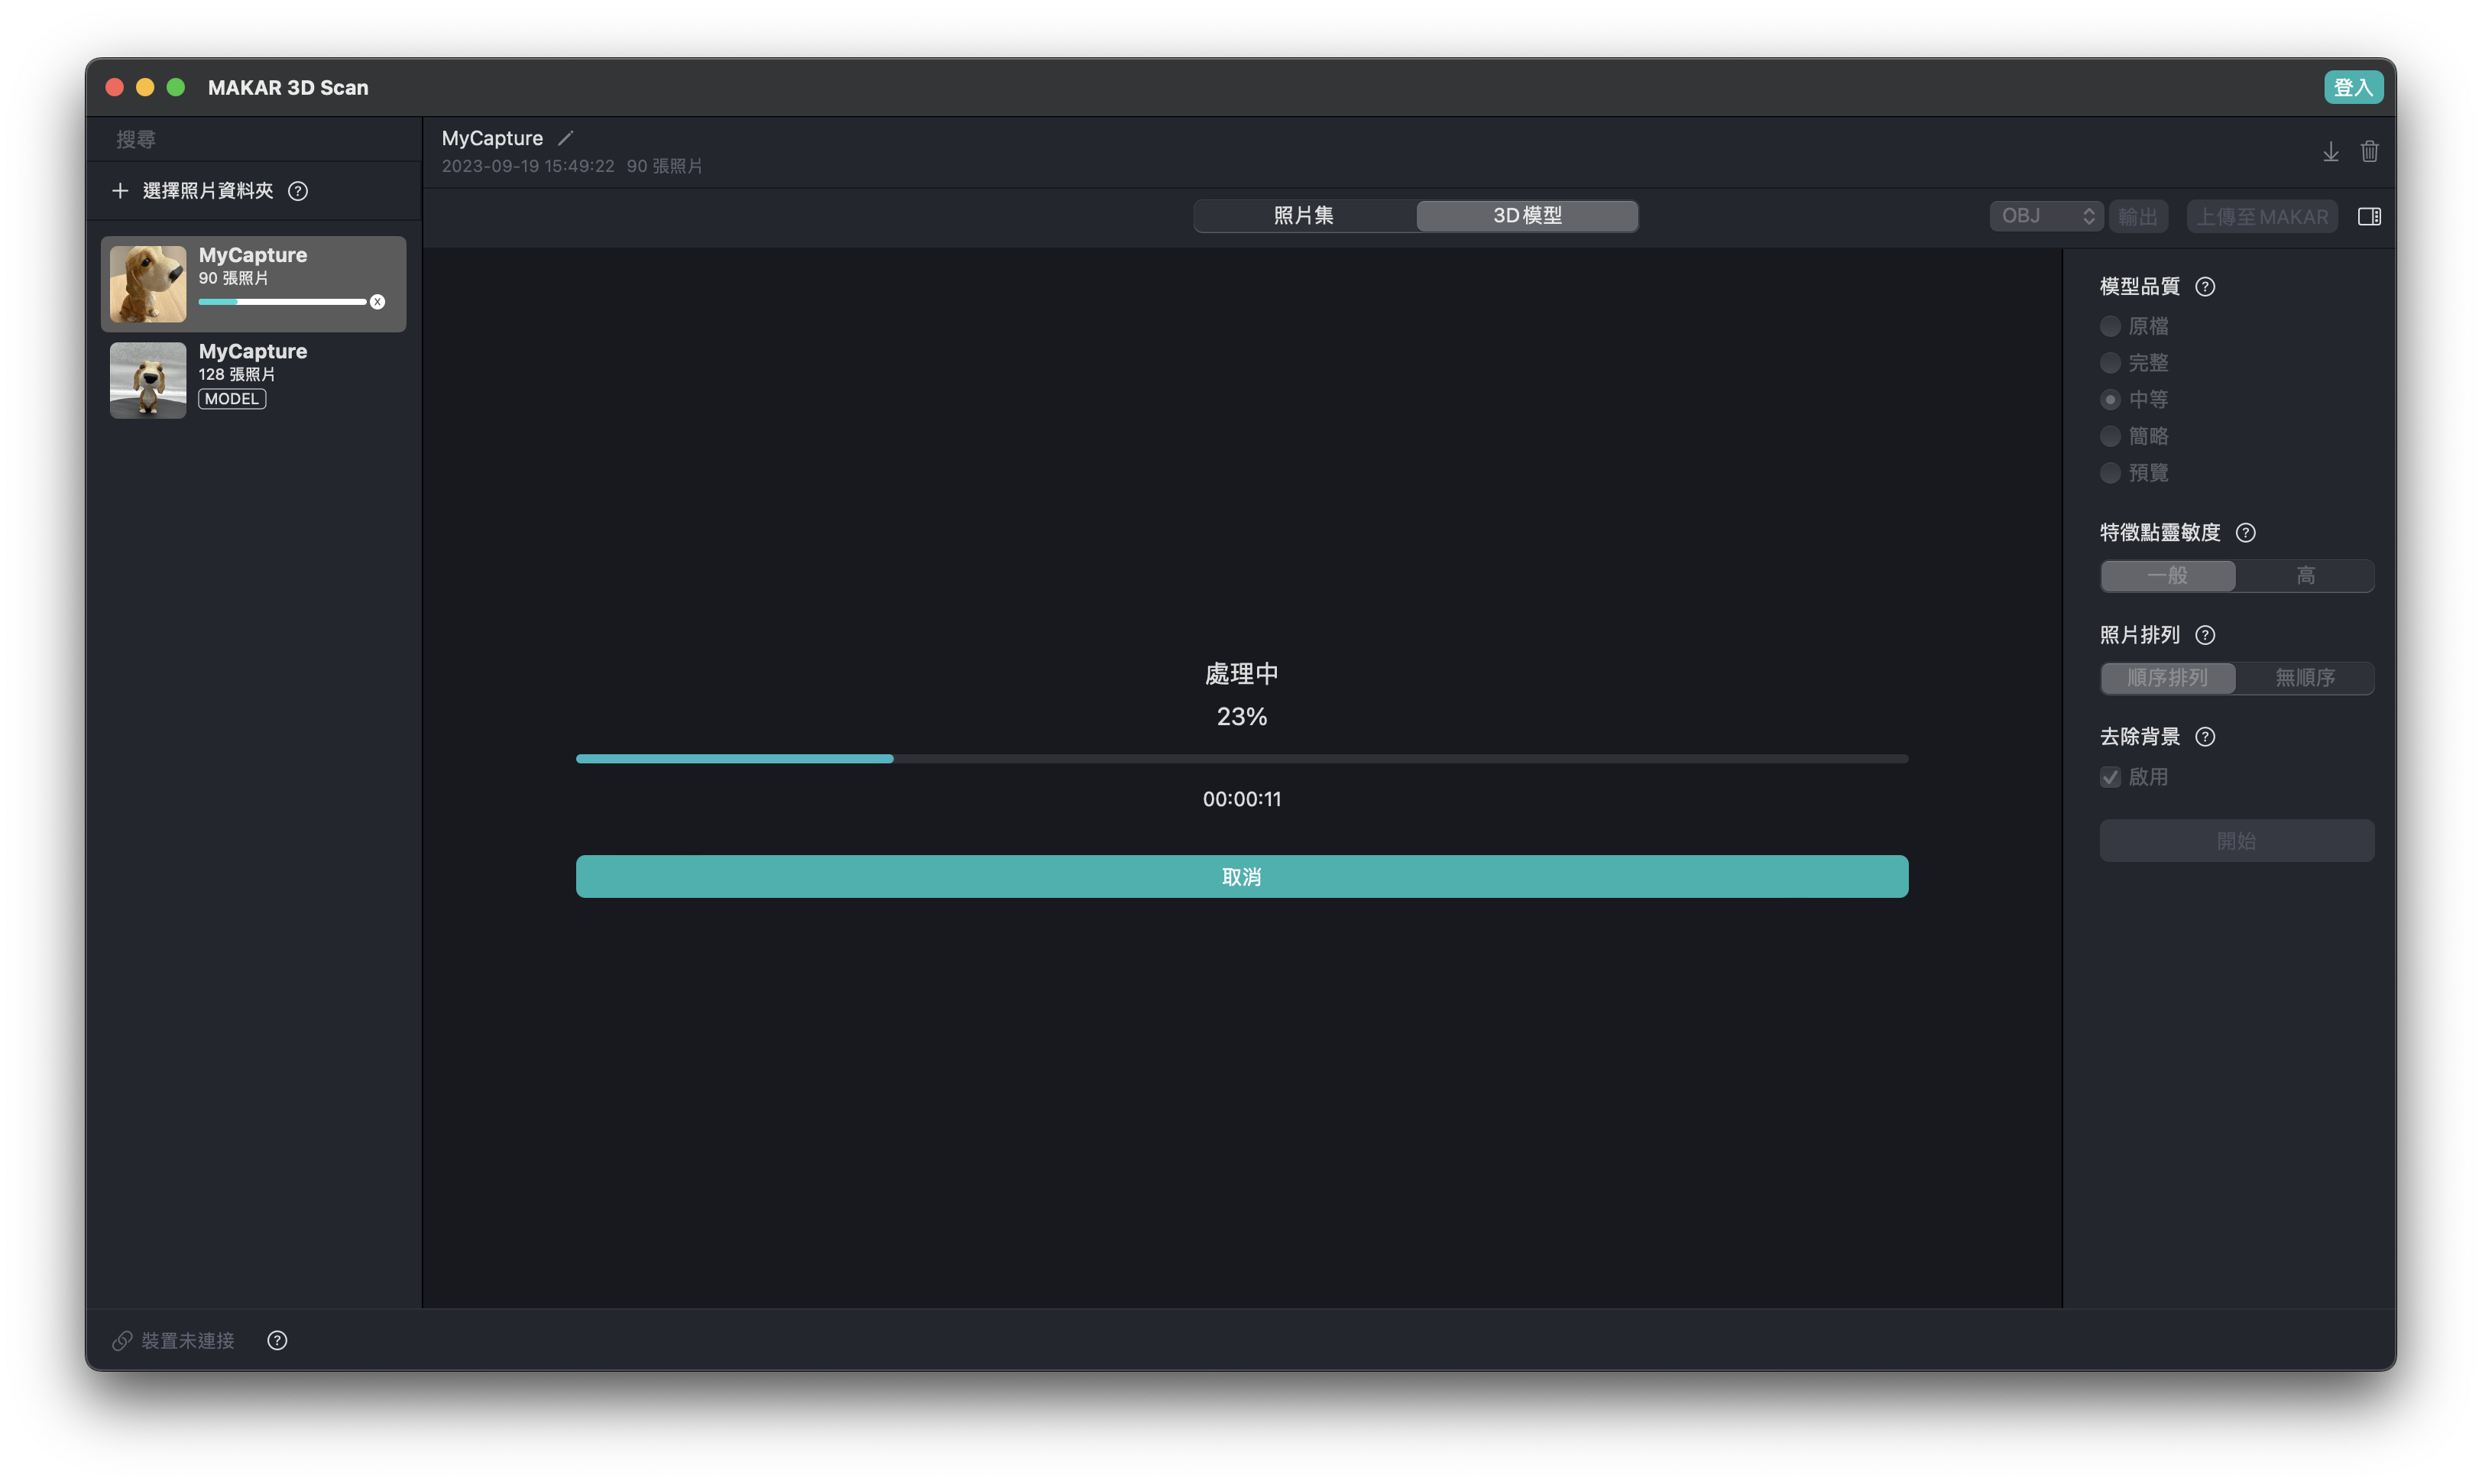

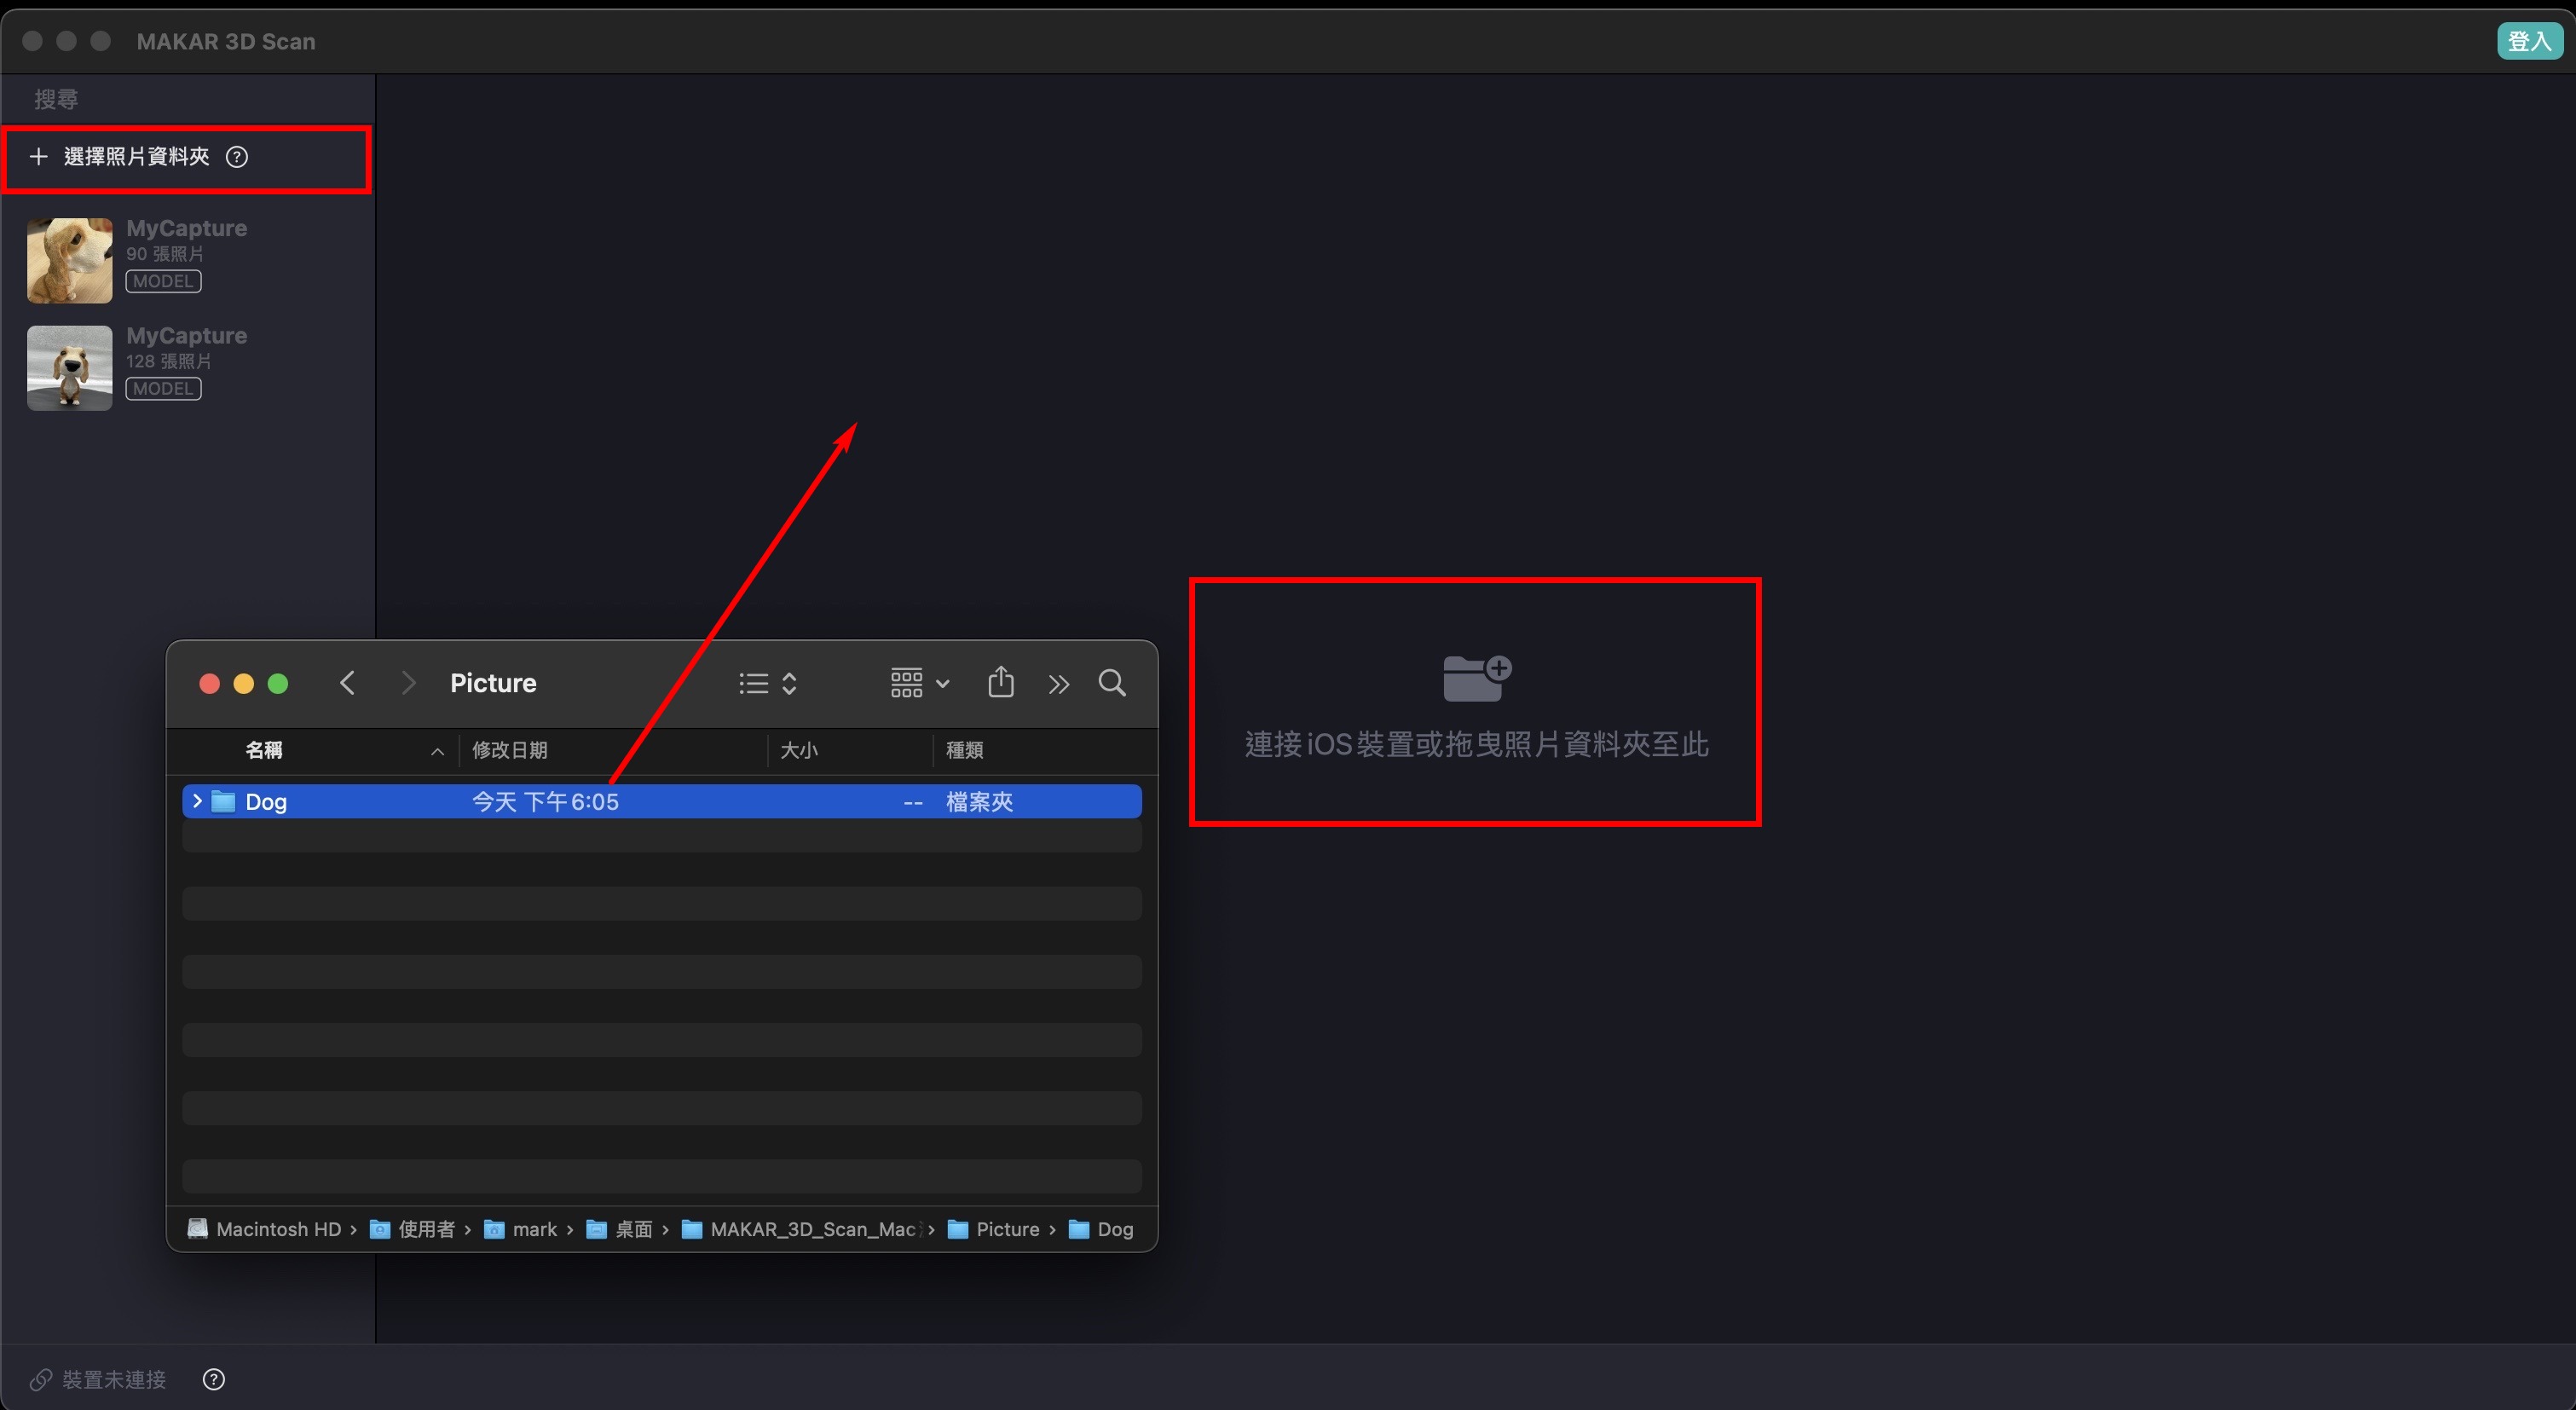
-
Once the modeling is complete, as shown below, you can modify the default name.
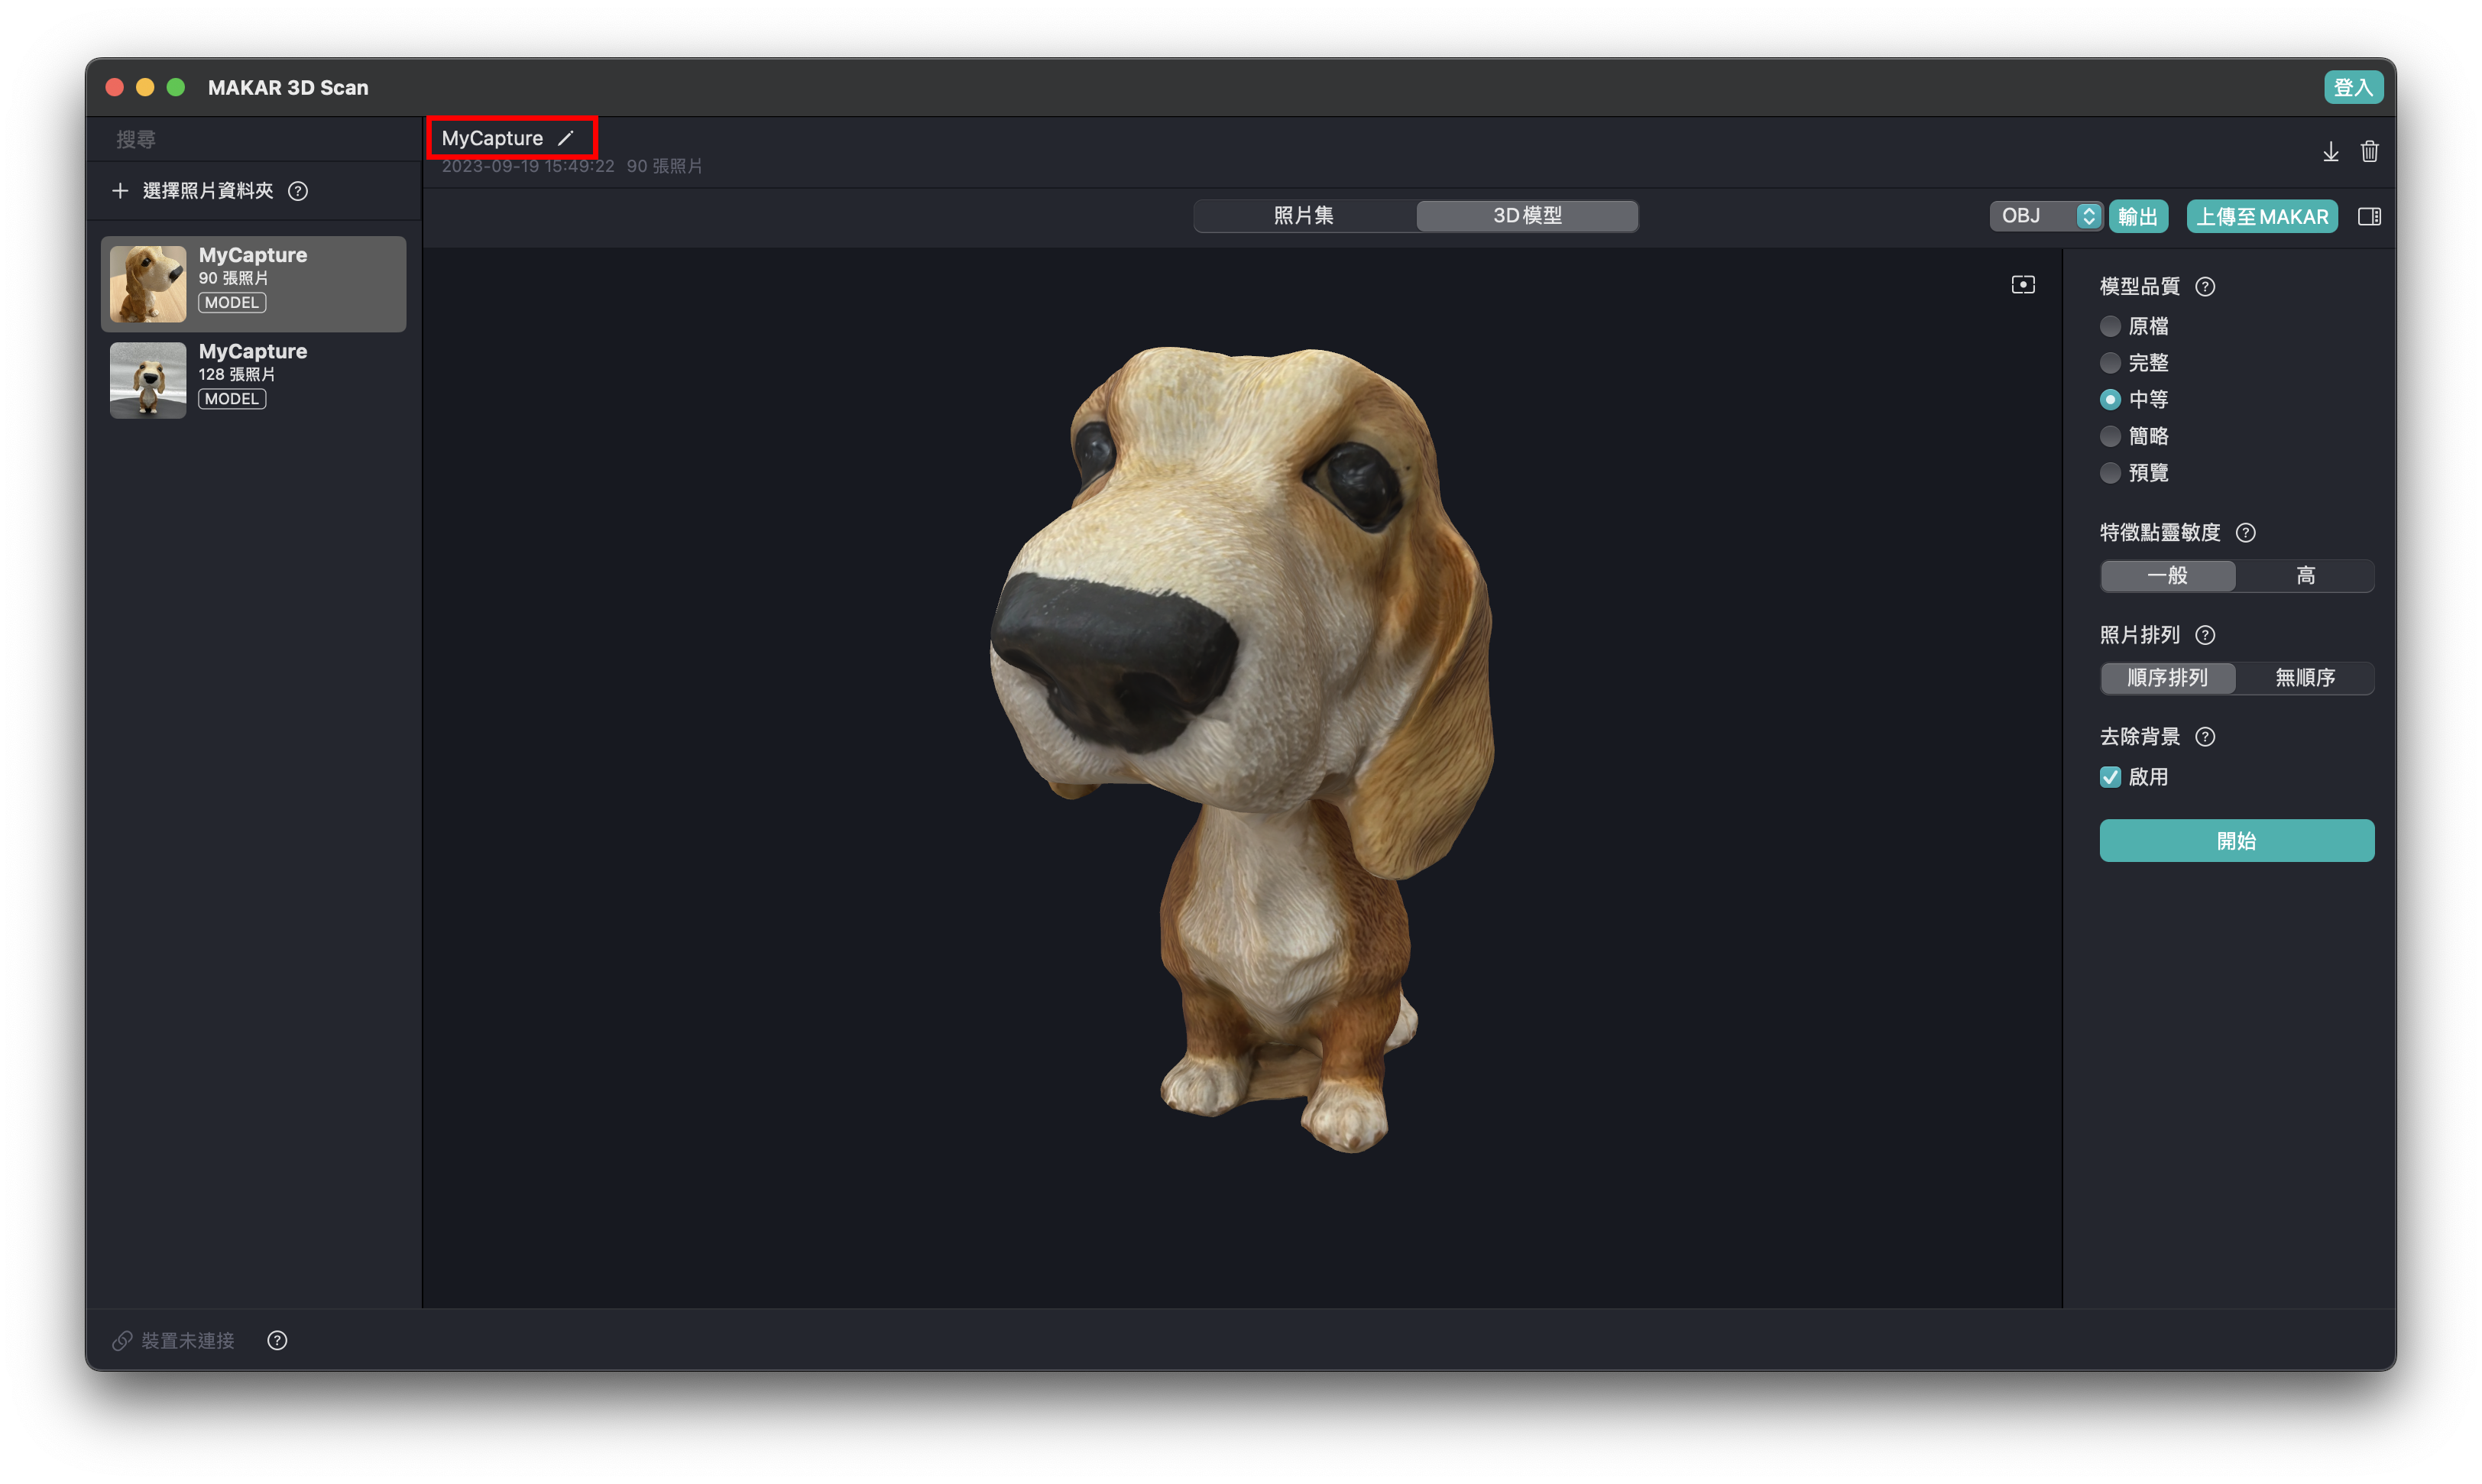
-
Adjust details and remesh according to your needs using the options on the right.
Item Descriptions:
-
Quality Scale: Five qualities are available from high to low. The higher the quality, the longer the modeling time. For a quick model preview, select "Preview."
-
Feature Point Sensitivity: Options are "Normal" and "High." If the target object lacks details, select "High" for more detailed processing, which takes more time.
-
Photo Order: Options are "Sequential" and "No Order." If taking photos around the target object, select "Sequential" to speed up the modeling process.
-
Background Removal: Select "Enable" to automatically remove the background.
※ Click the question mark in the red box for more detailed explanations.
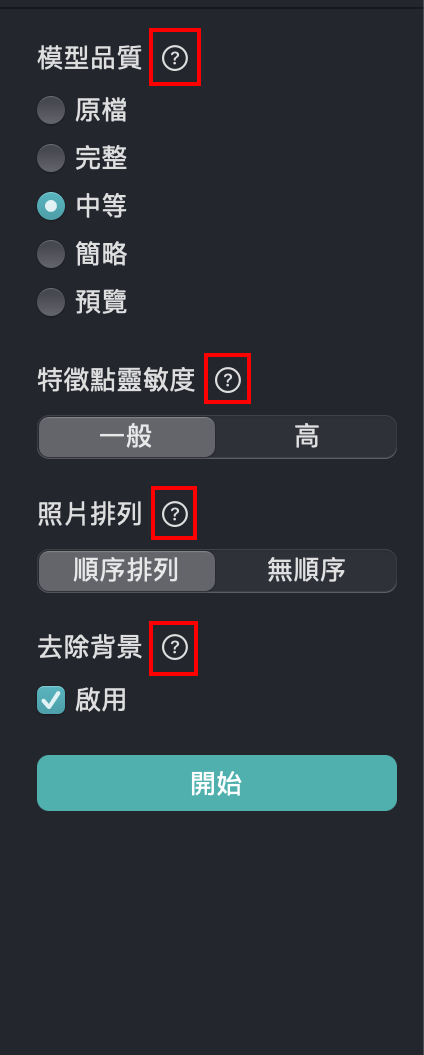
-
Select "Start" to begin modeling.
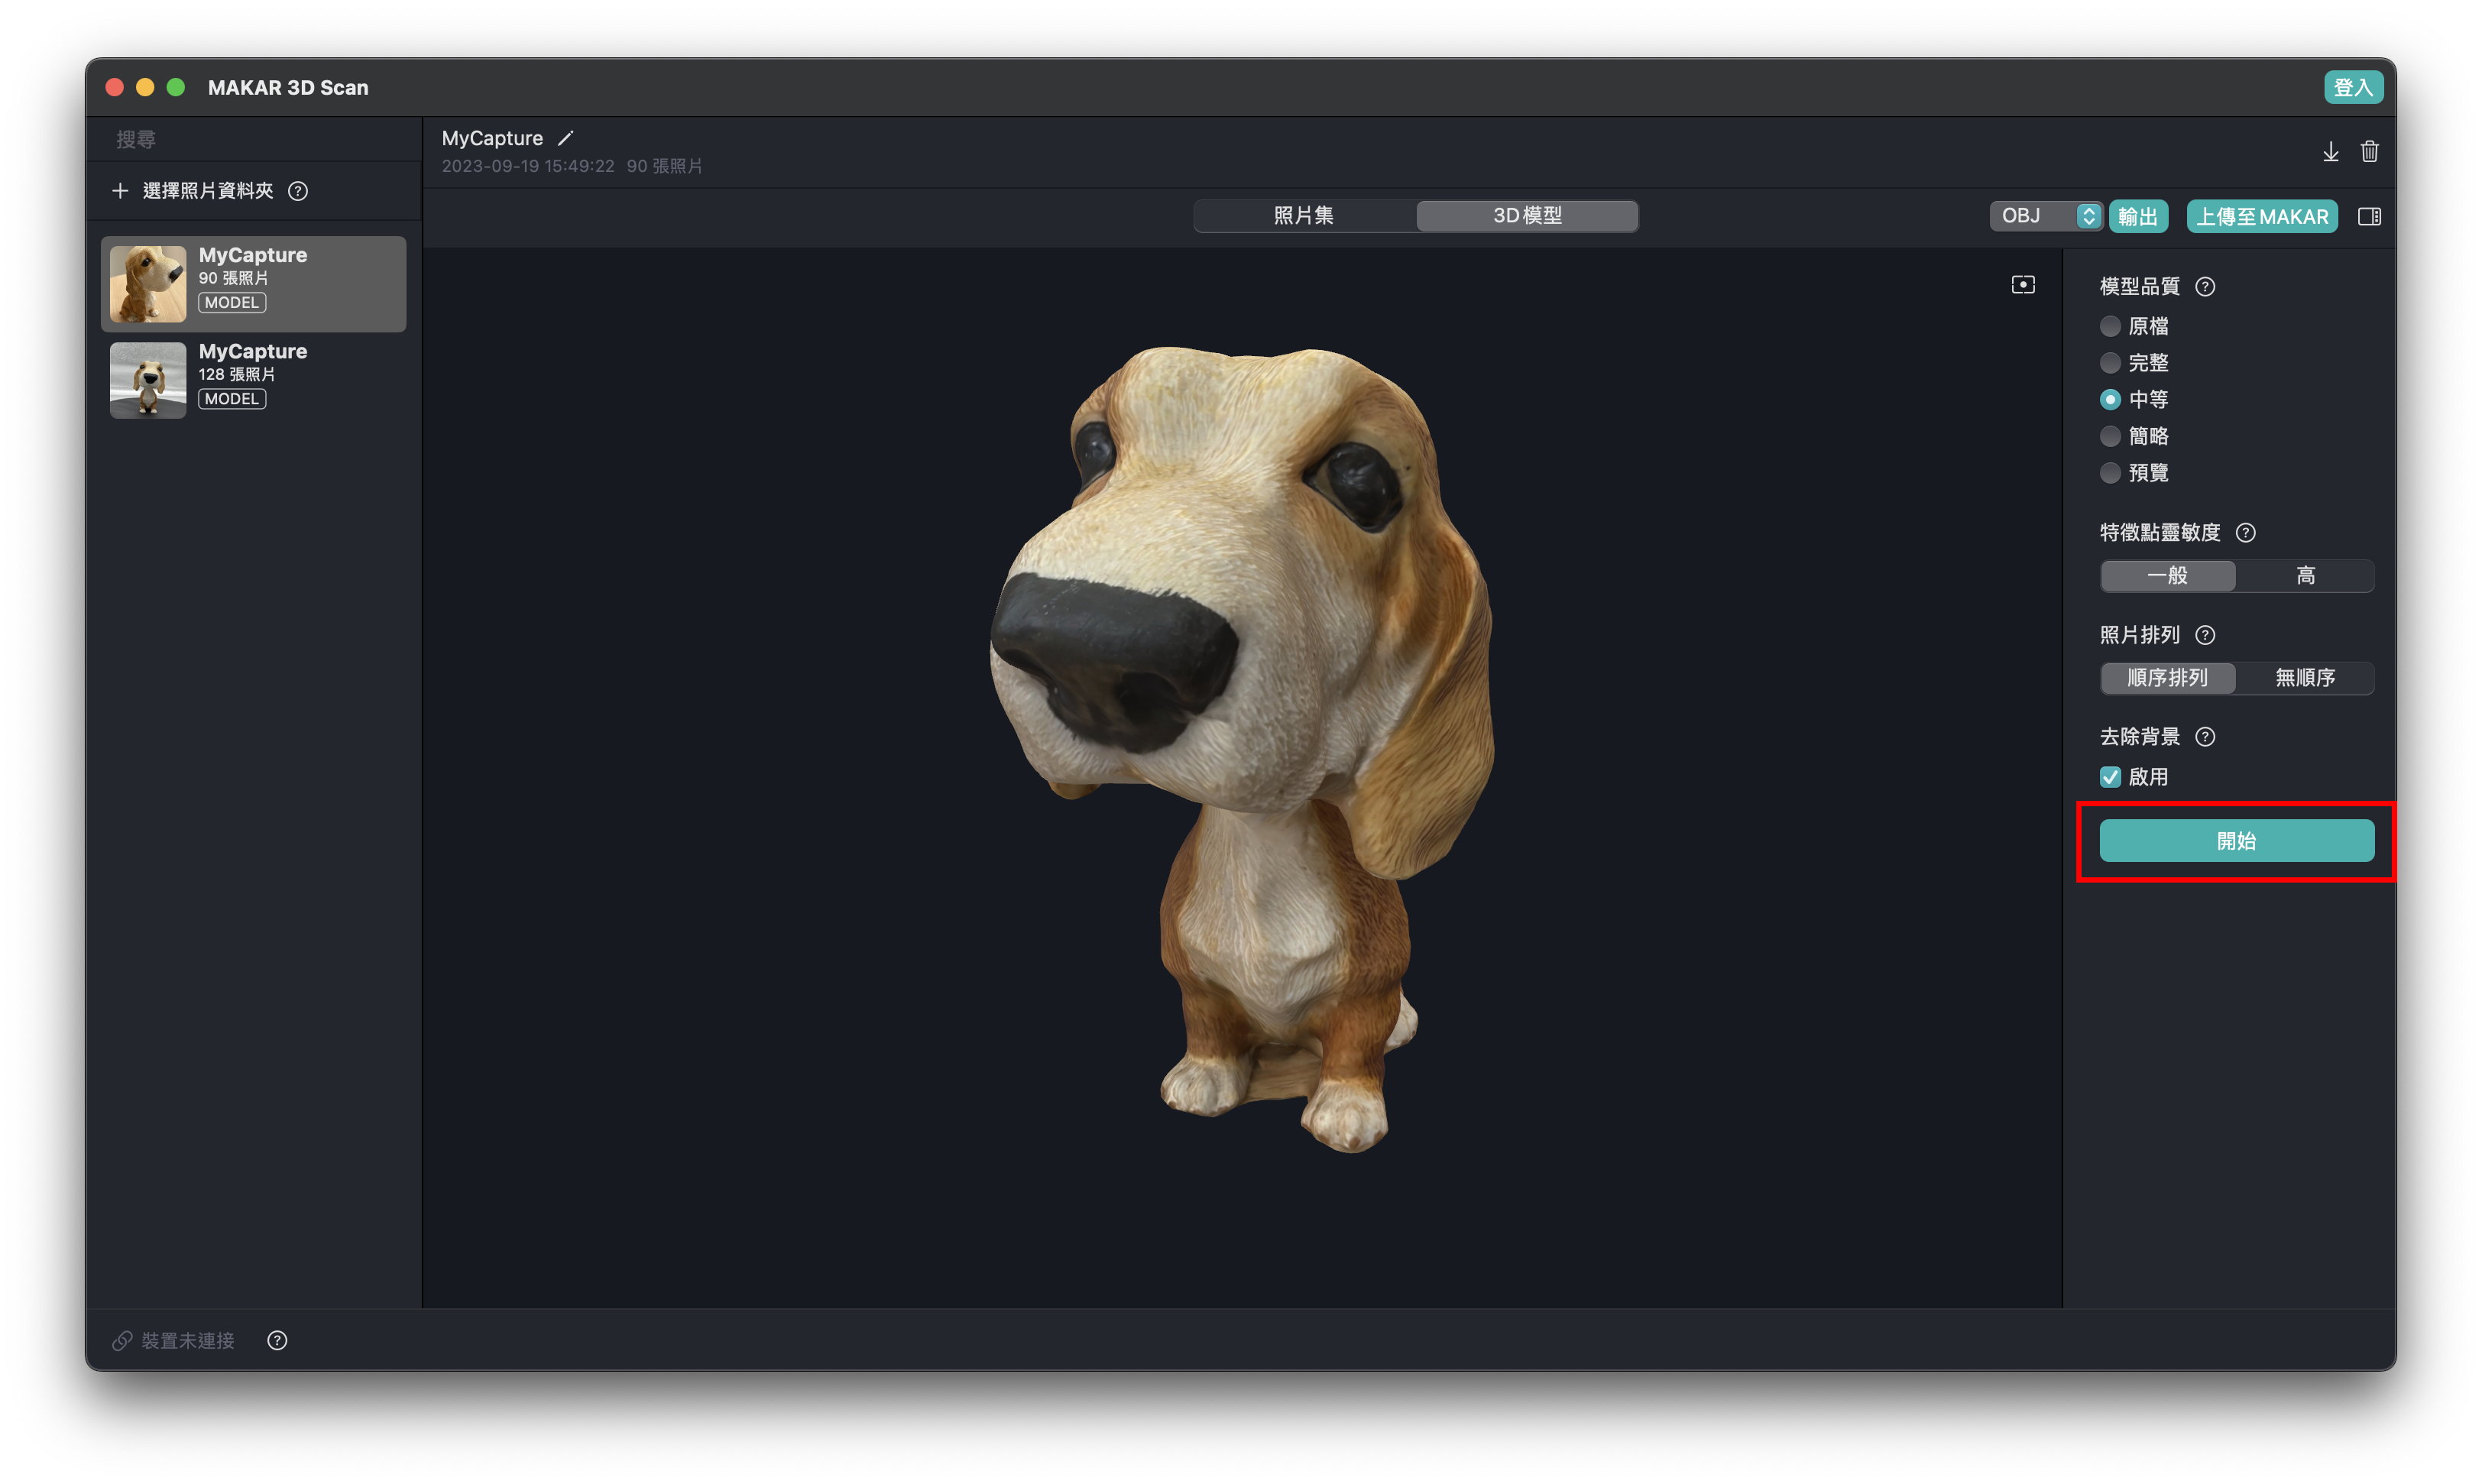
【Uploading 3D Models to MAKAR Editor】
-
Once modeling is complete, select "Upload to MAKAR" in the top right, log in, and upload to MAKAR Editor.
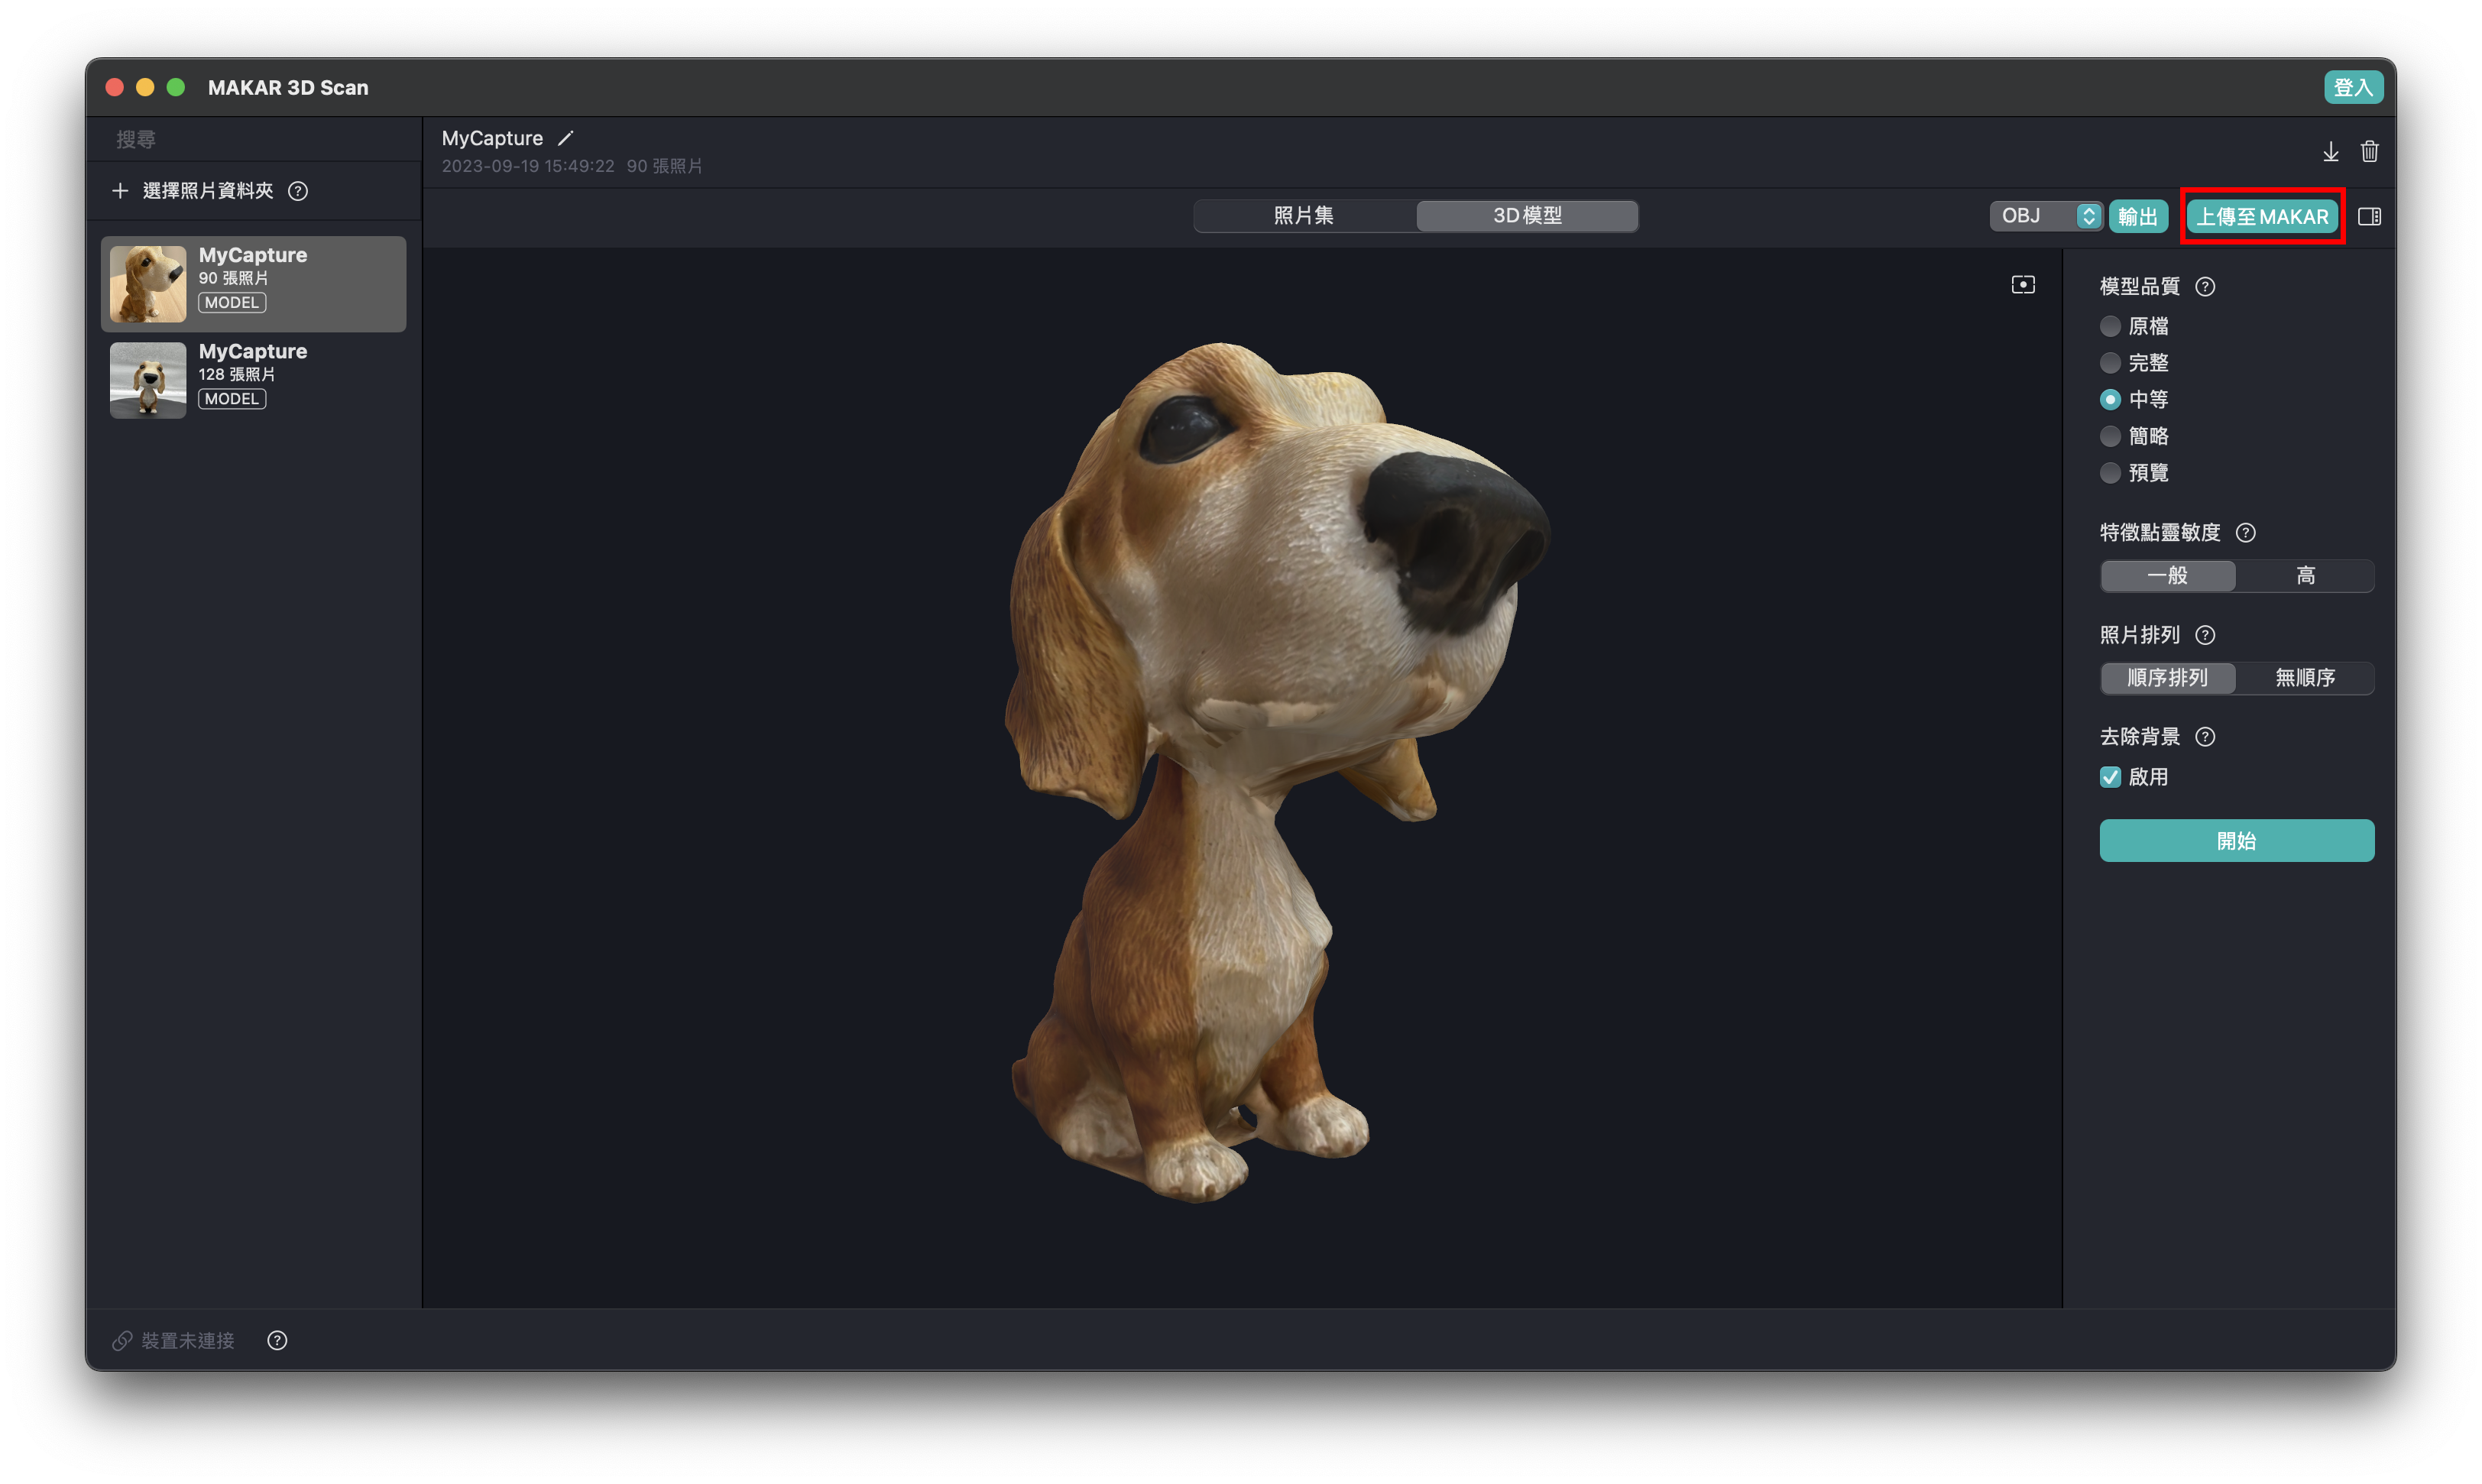
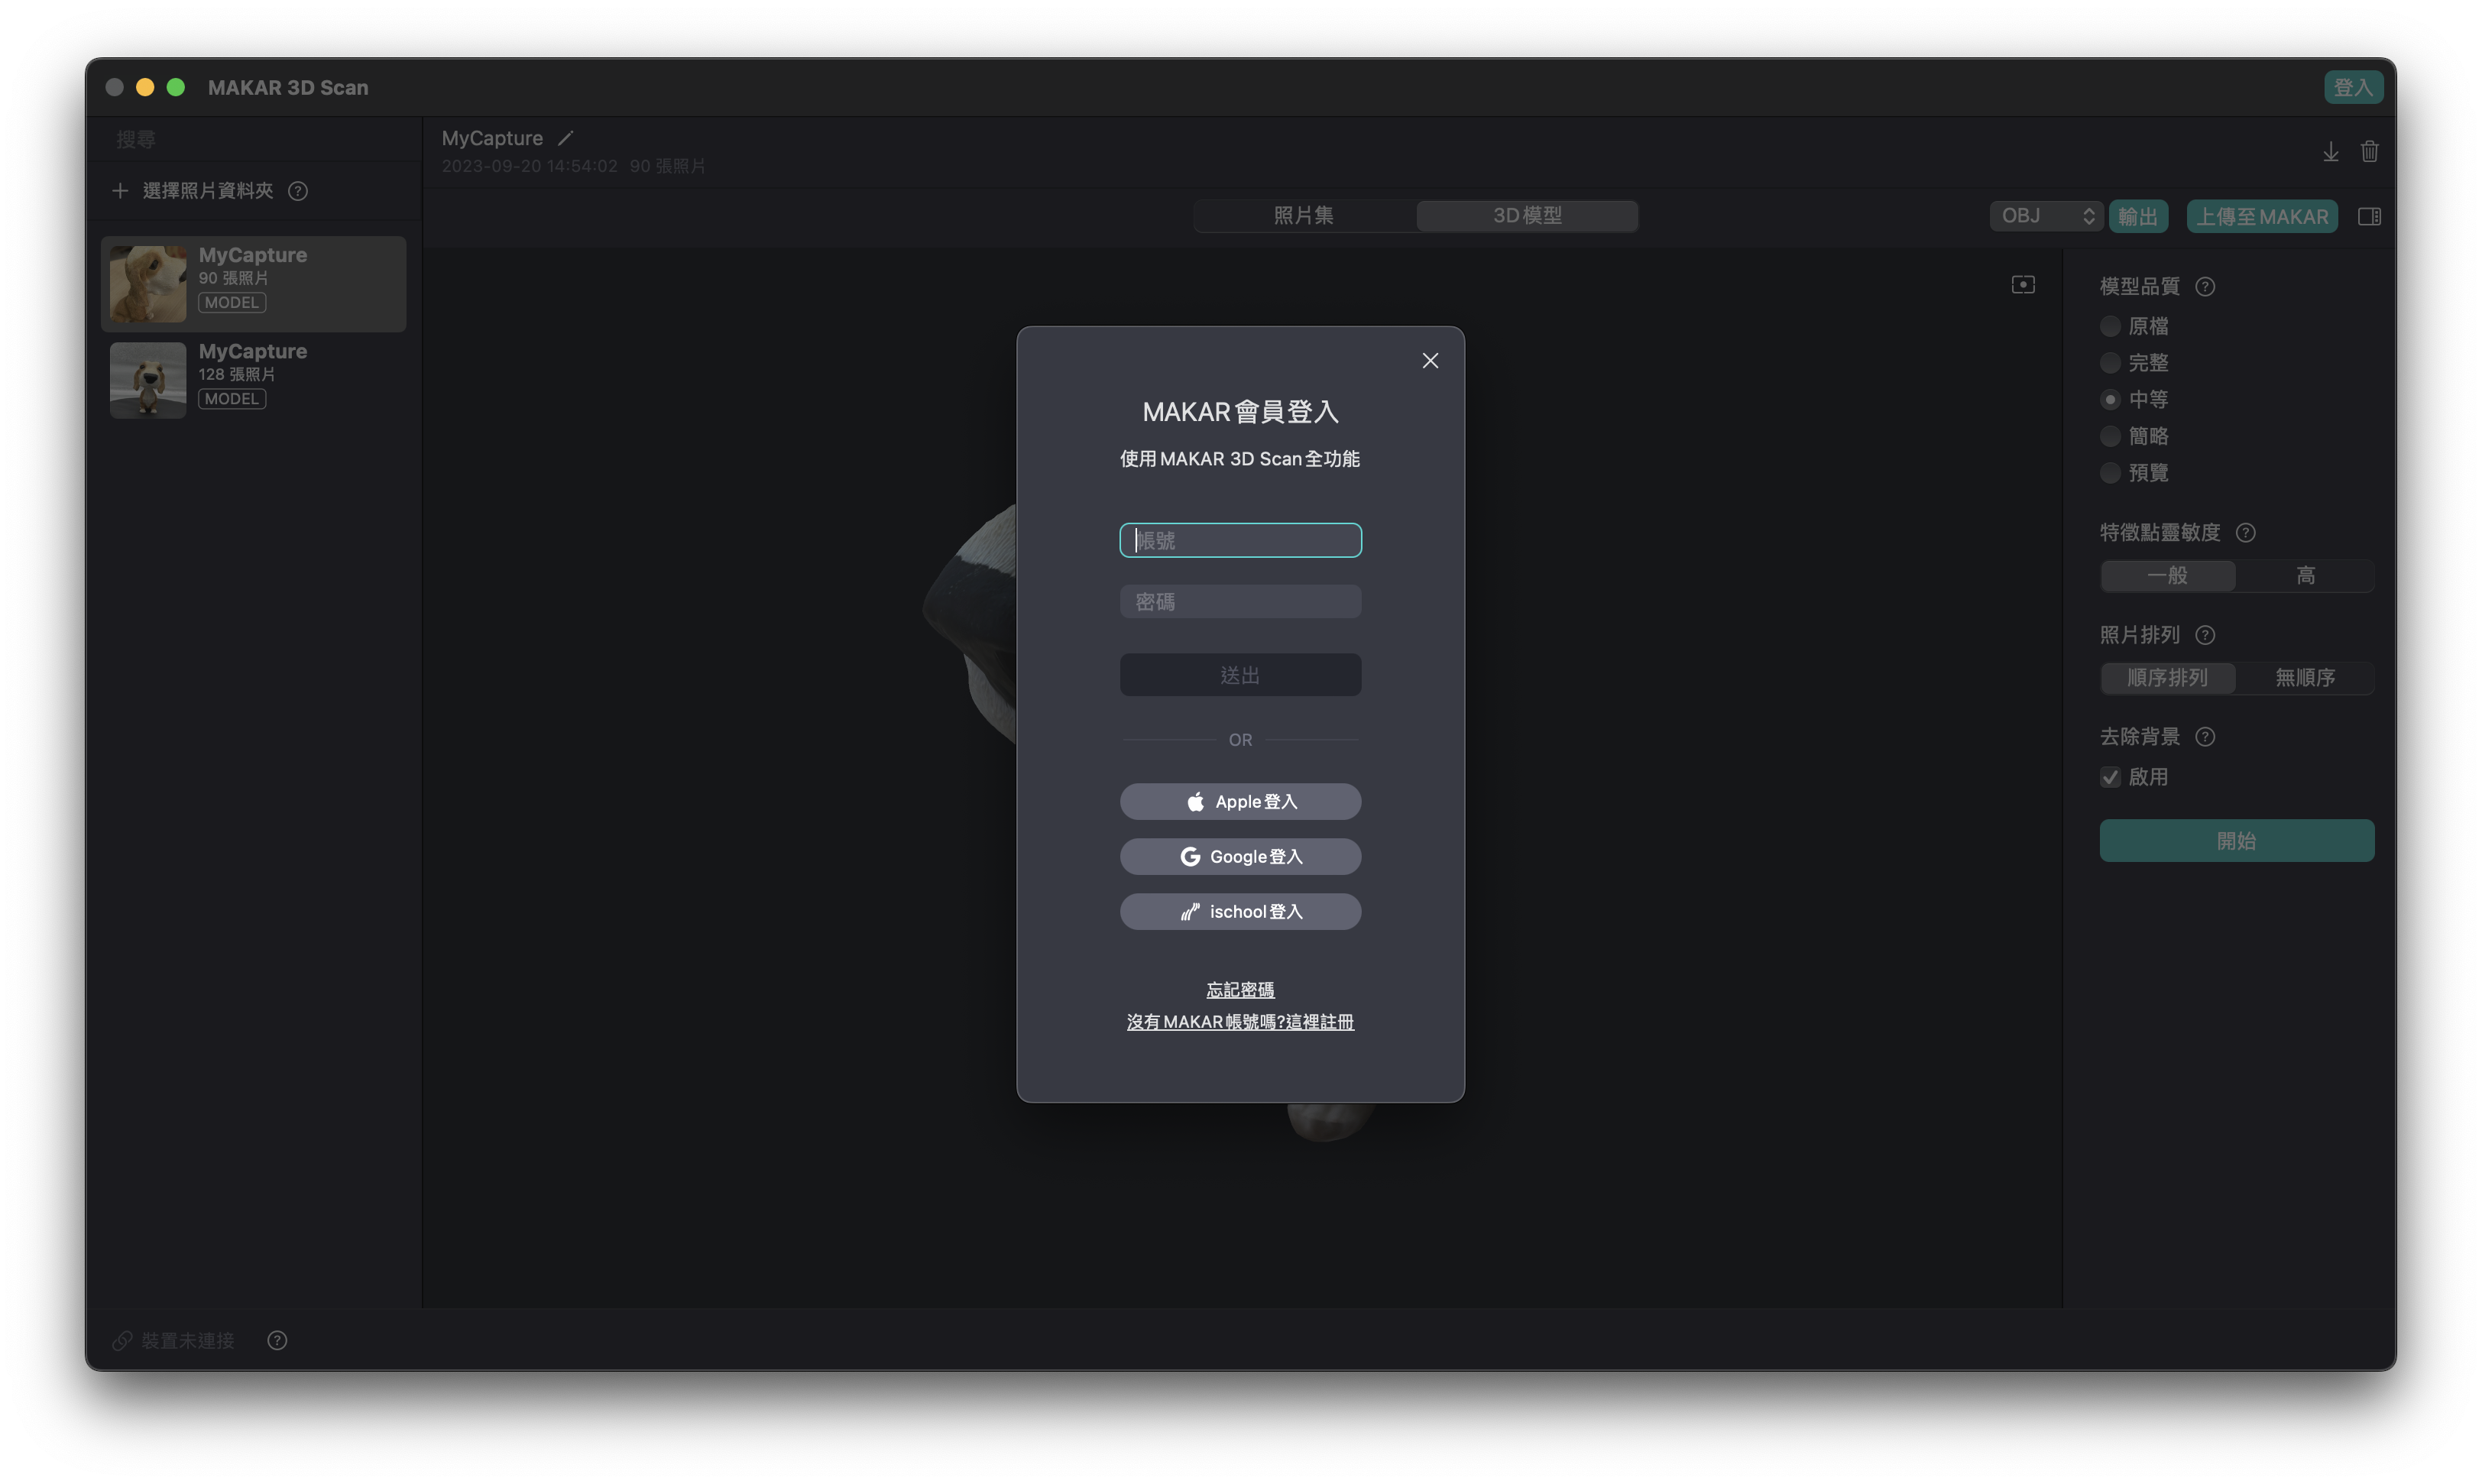
-
After uploading to MAKAR software, the model will appear in the Resources.
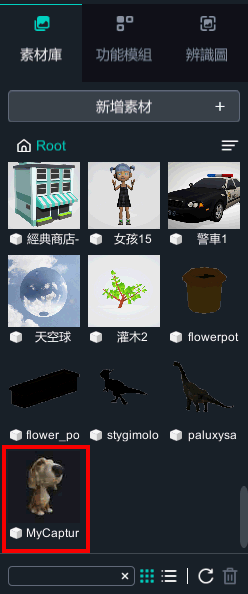
【Exporting 3D Model Files】
-
Select "Export" in the top right to support exporting 3D formats: OBJ, GLB, STL, USDZ.
※ Exporting models is a feature exclusive to MAKAR Professional Edition accounts.
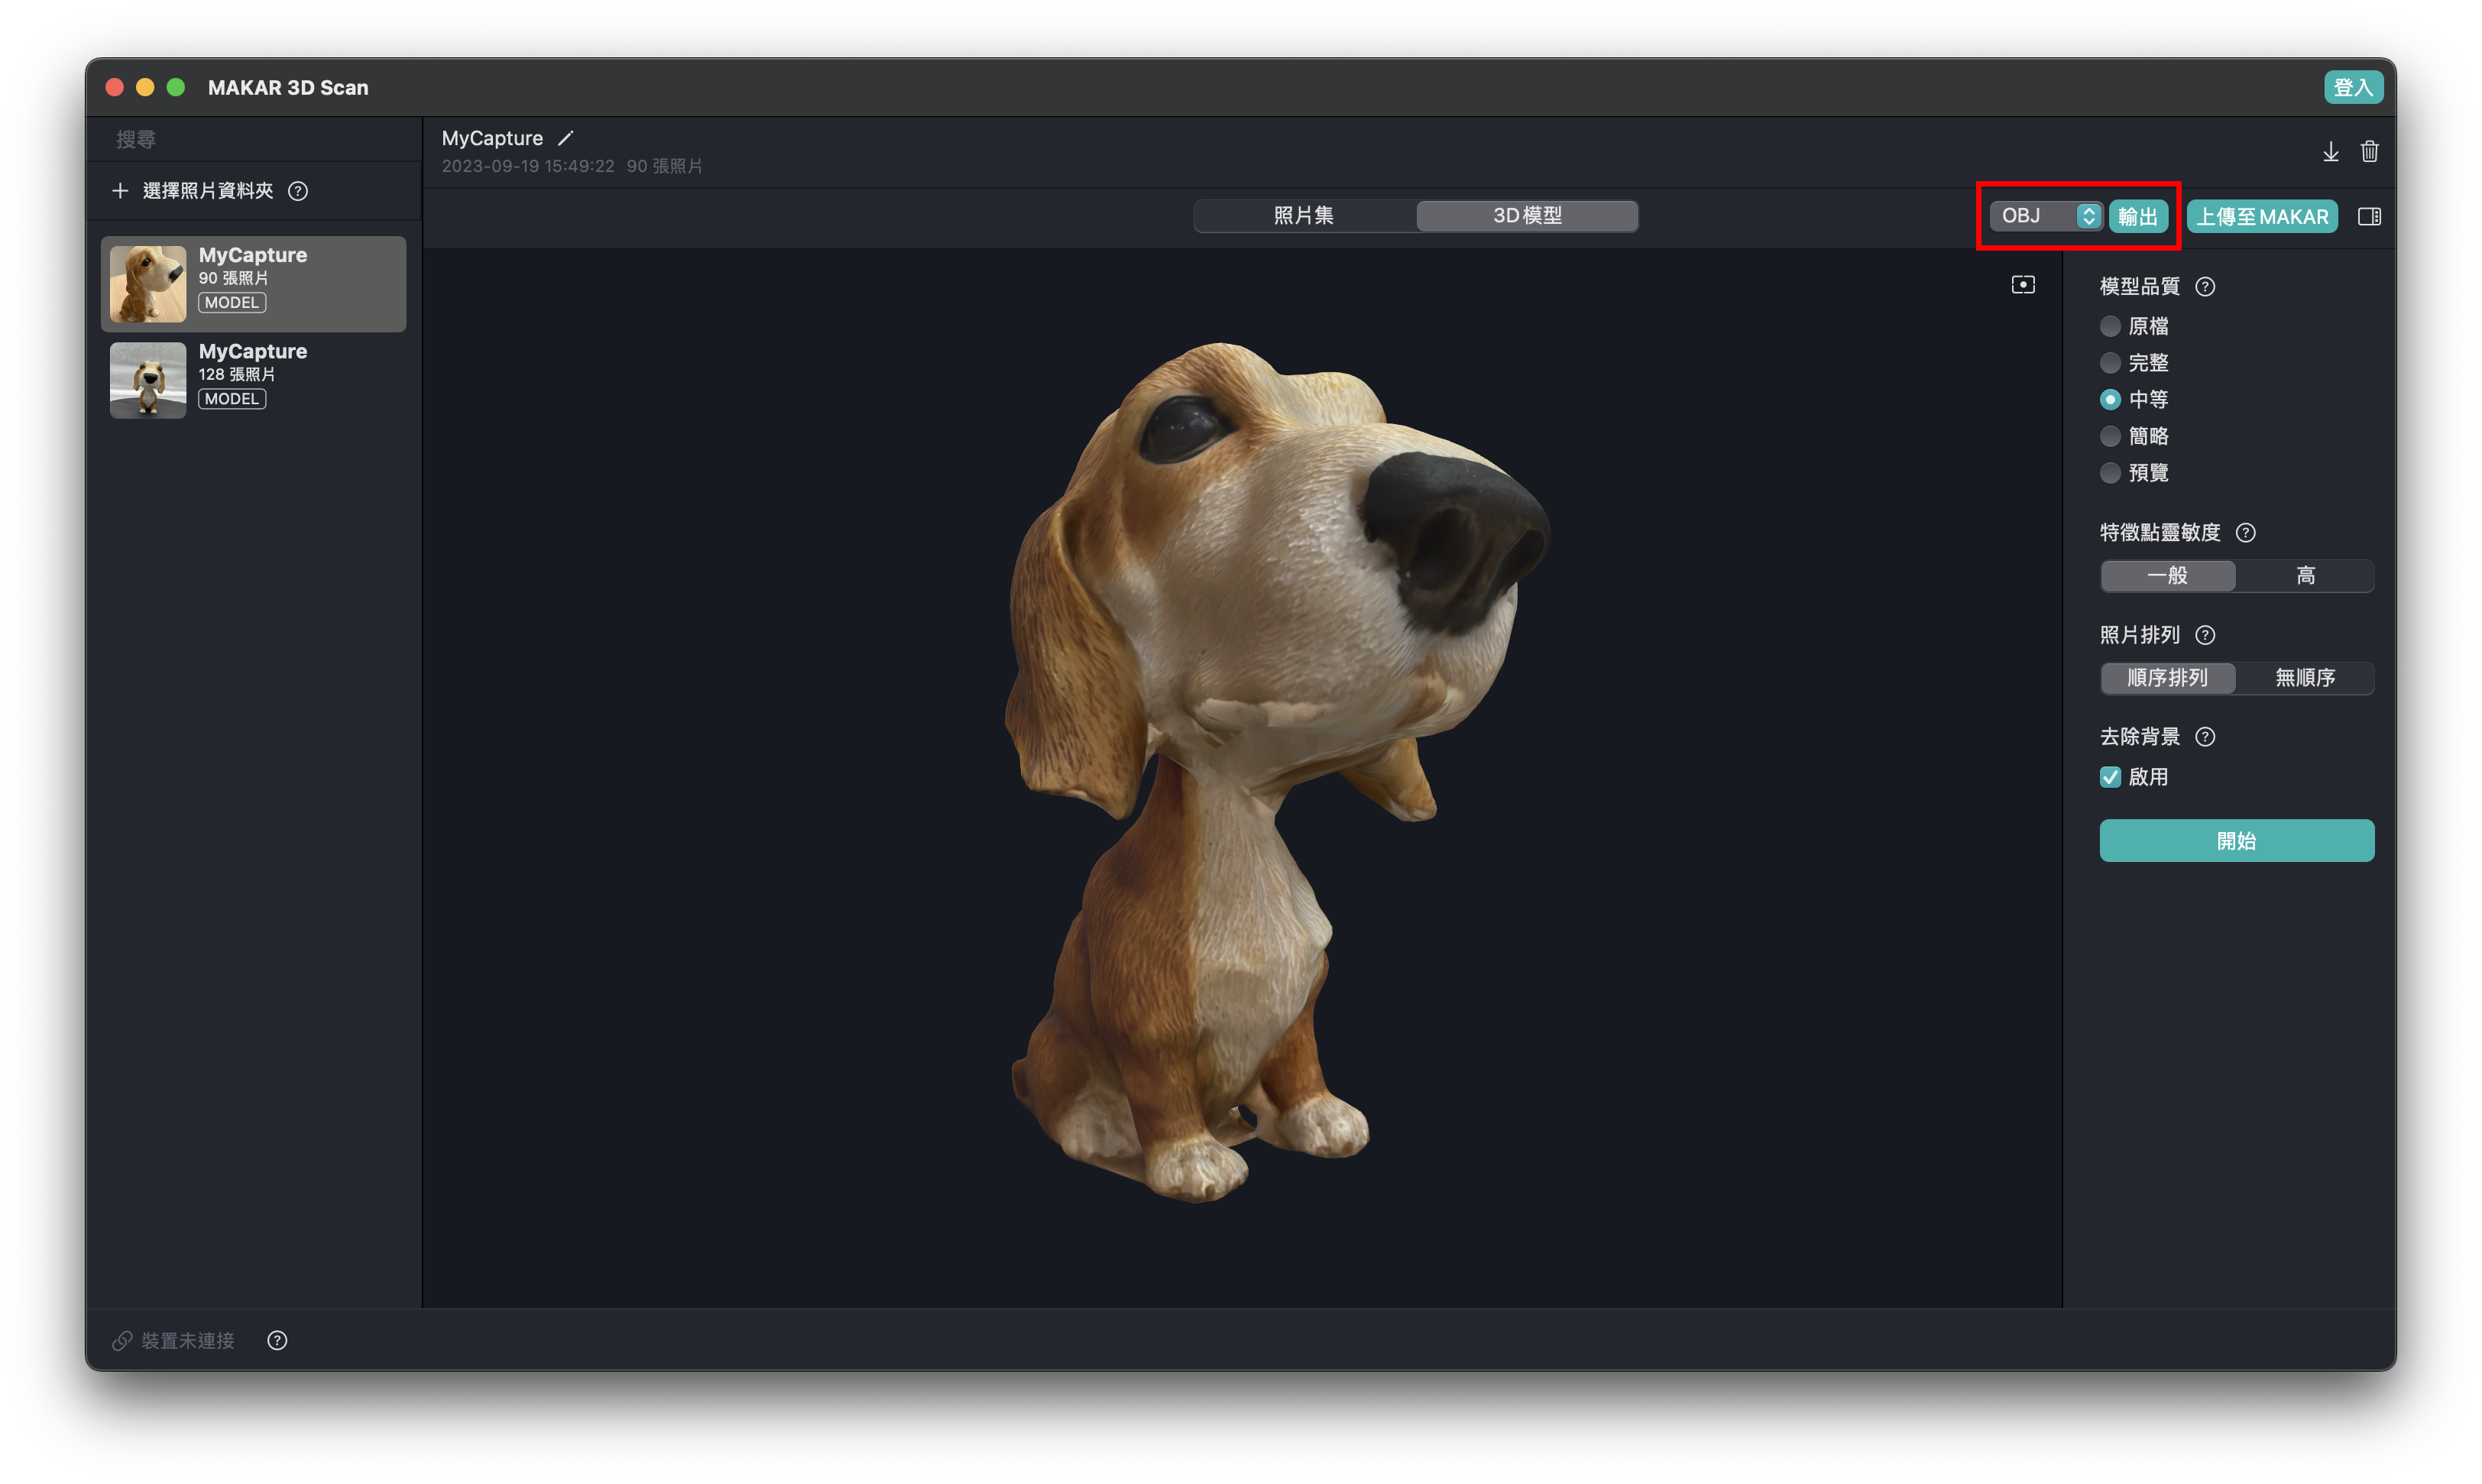
-
The appearance after export.
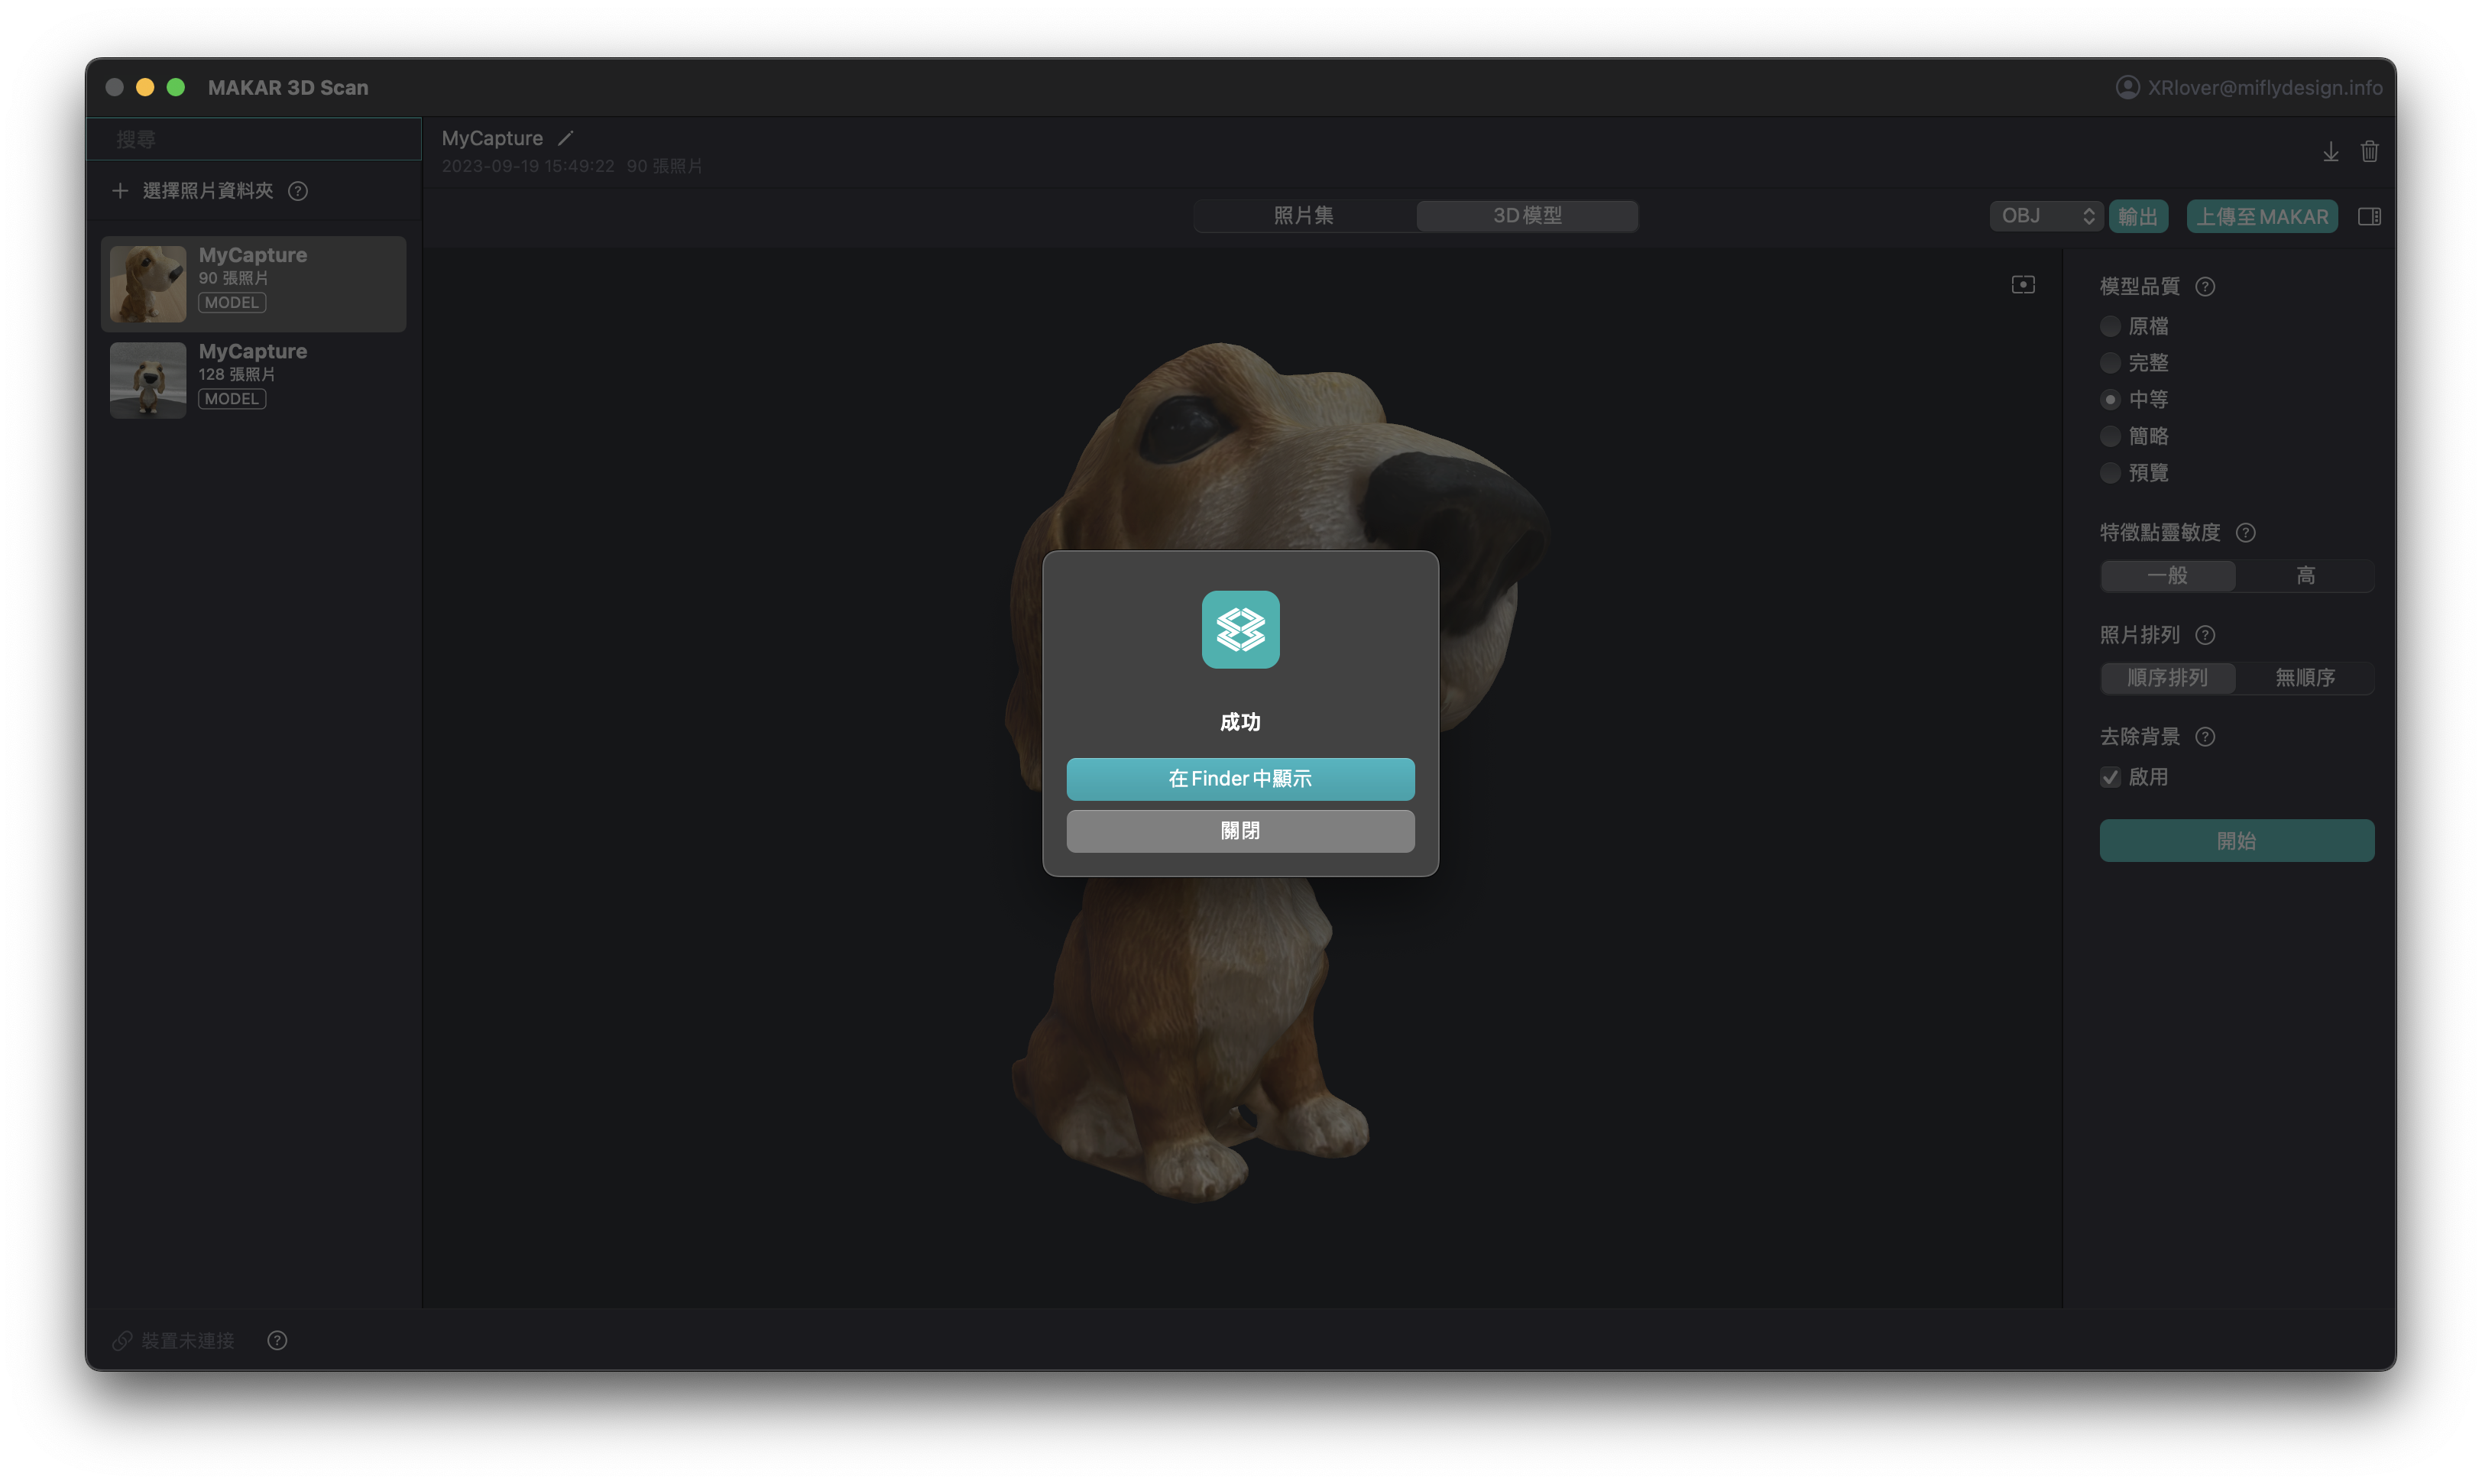
MAKAR Magic index
Abstract:
I will teach you how to use an AI tool to transform an image into motion graphic(video) in this lecture.
Introduction:
In Harry Potter’s wizard world, The Daily Prophet is definitely the most iconic character in this magical world. It’s not an ordinary newspaper, the photo on the paper will automatically replay the scenario, such as Sirius was arrested and sentencing into the jail, and he was furious. This effect has been created with AR technique before, and there are several methods can make it happen.
This lecture will use D-ID to merge text and photo, and make the person in the photo speak the words we type in the script. This tool can also change different languages, tones, and voice style.
We are going to use Harry Potter movie poster as the example. Please take note of the following notices: D-ID is a tool that targets human facial structure(two eyes, one noise, one mouth in the frontal face), it may not work if you chose other facial structure.
Download the source: https://drive.google.com/drive/folders/1XH2cvOhVXLsuEh77Q3BdpfSpqouIqrcc?usp=share_link
-
Go to website D-ID(https://www.d-id.com/) and click Login button.
.png)
-
Click the Guest 🡪 Login/Signup to register a new account.
.png)
-
After login the D-ID, click the Create Video
.png)
-
Click Add to upload the image, select the Harry Potter poster.
.png)
-
Paste the text in the Script, and change the Language into English(United Kingdom), voice into Ryan, then you can generate the video. Plus, if you want to record your own voice, it can be upload on “Audio” selection.
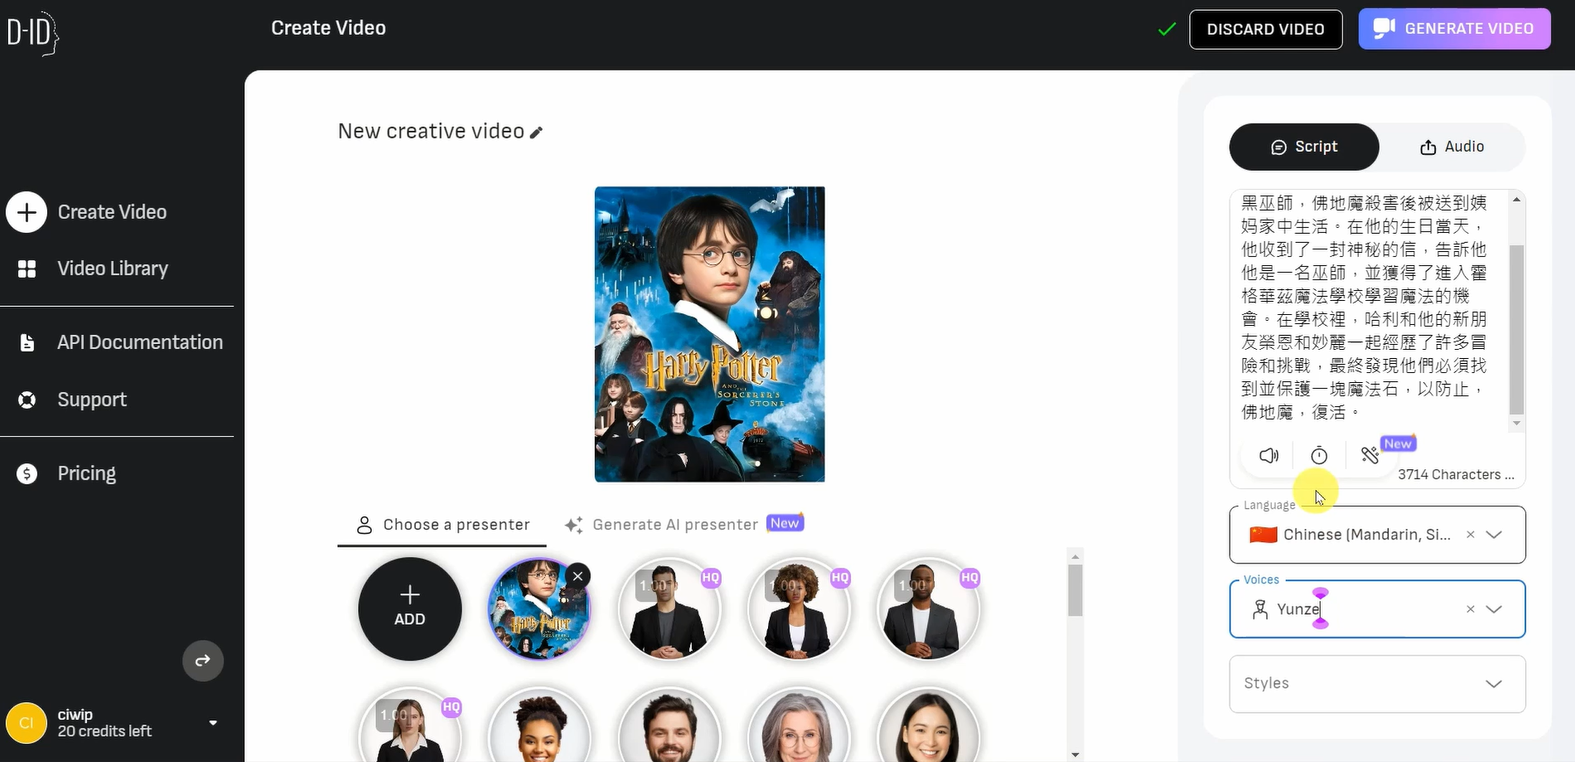
Additional:
The text was created by another popular AI tool “ChatGPT”, I ask ChatGPT to summarize the first episode of Harry Potter.
-
Open MAKAR editor, create a new project, select AR Target, upload the Harry Potter poster as image target. In editor version 3.4, “ category” selection is necessary, otherwise, you may not be able to publish your project.
.png)
-
Import the video created by D-ID into resource vault.
.png)
-
Drag the video into the canvas, adjust it parallels to target image, and
re-scale the size of video to cover the poster.
.png)
.png)
-
De-active the interactable of the video function and add Logic function.
.png)
-
Add Blockly in Logic editor.
.png)
.png)
-
You must close the eye of the video in the Scene objects(set the visibility of the video into False), so that the video will only appear and play when the camera see the target.
.png)
How to play
Click the application, type in the ID or scan the QR code to experience the AR/VR !
-
Install MAKAR application
-
Scan QRcodec or search ID: class06

.png)
-
Select「magic index」project,click「experience」to active and put the camera face forward the poster.
.jpeg)
.jpeg)
Spring Festival AR Animation Tutorial
Spring Festival AR AnimationAs the year of the Rabbit arrives in 2023, MAKAR has produced an AR interactive experience for Spring Festival.
The process is very simple and does not require complex animation techniques.
By using PPT and MAKAR's new masking function, you can create animation effects for setting off firecrackers and pulling Spring Festival couplets.
You can even change the text on the couplets and send unique New Year's greetings through AR!
Download materials:https://drive.google.com/drive/folders/1njYx6aOkR5U1D6cbf5LfMikc6Gt3IZ6r?usp=sharing
【Creating Animation with PPT】
- After importing the 2D firecracker into PPT, use the built-in "crop" function to cut it into six pieces and then reassemble it.
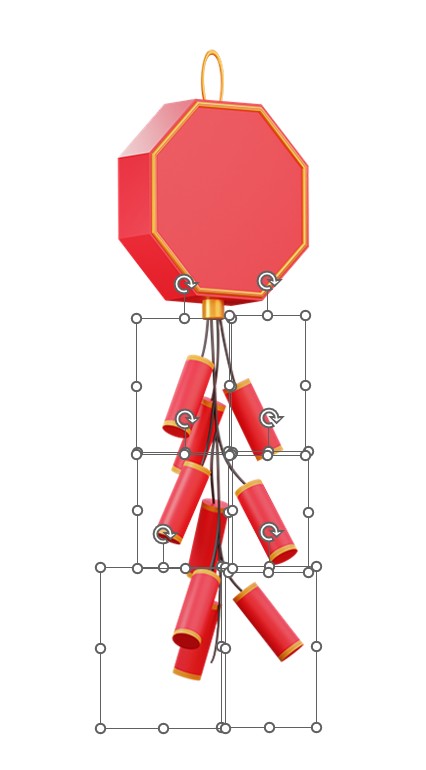
-
Go to "Animation" > "Wipe" and set the effect option to "From Bottom".
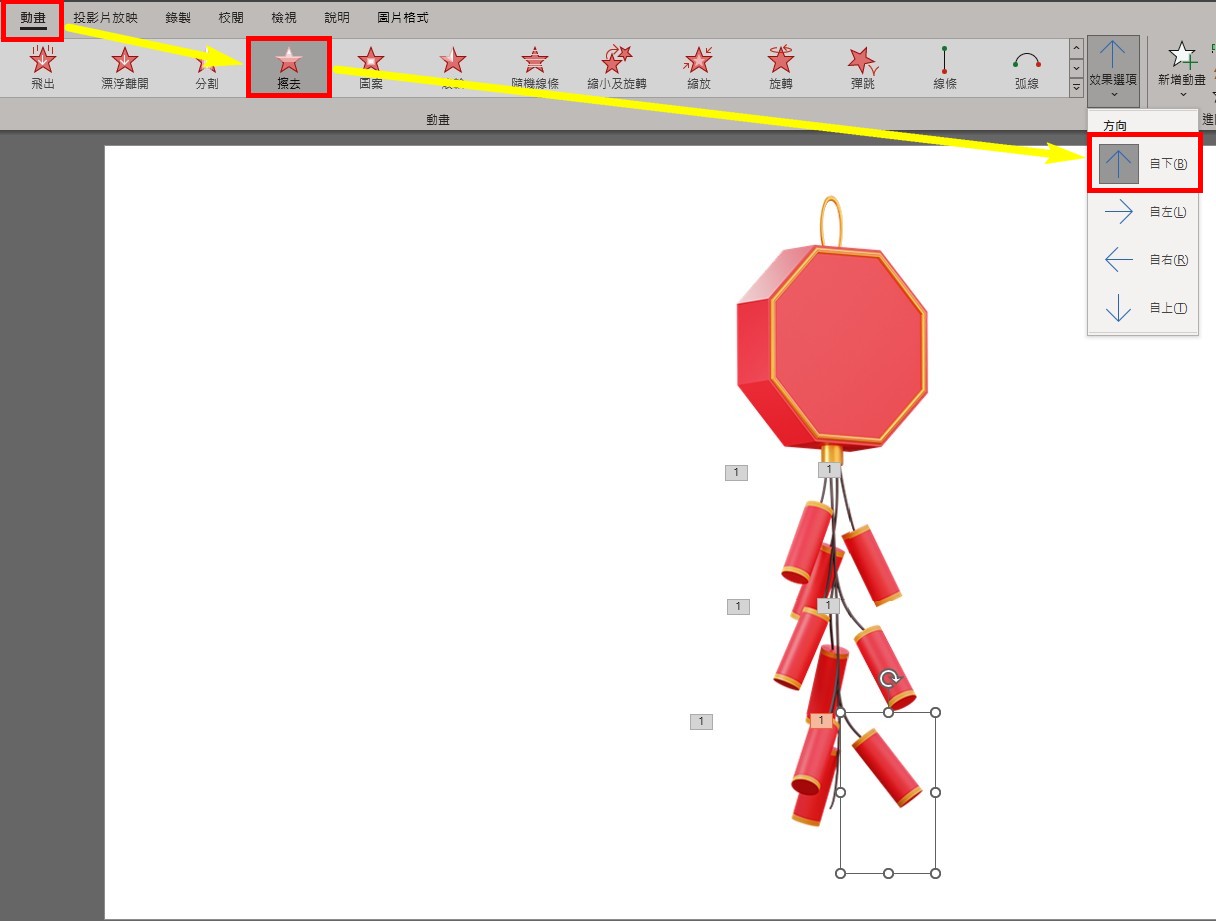
- If you need to adjust the timing of the animation, you can click on the "Animation Pane" to make adjustments.
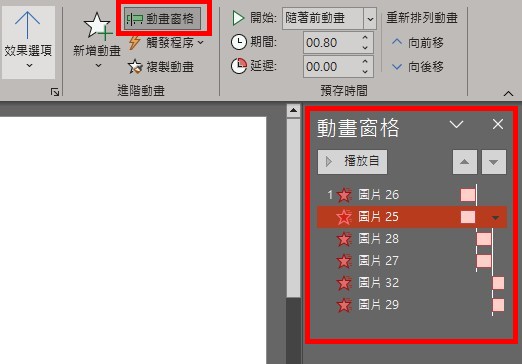
- After completing the process, click on "Export" > "Create a Video" to export the animation as a video file.
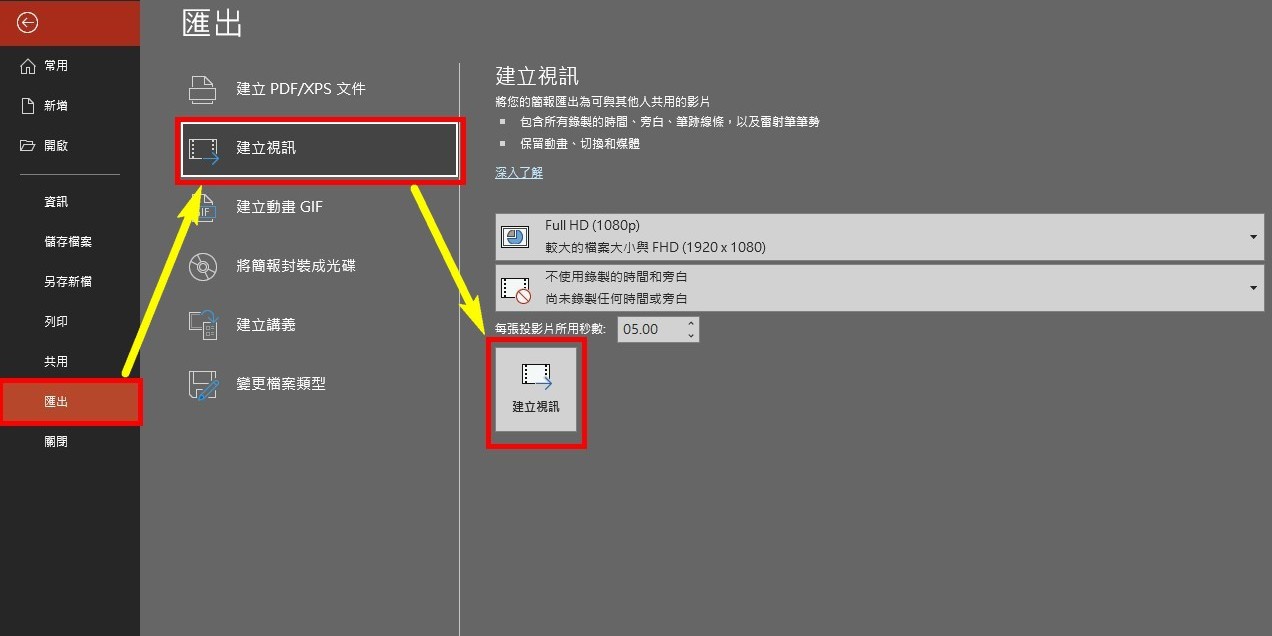
【Creating Spring Festival Couplets with PPT】
- To make the font look like calligraphy, you can download free commercial fonts from this website:http://www.ziti.net.cn/mianfeiziti/
After downloading, install into your computer.
For this example, we will use "KouzanBrushFont.ttf" font from "Hengshan Brush Font"."
- Import couplet materials into PPT, use downloaded font to add the couplet, and export it as a complete PNG image.
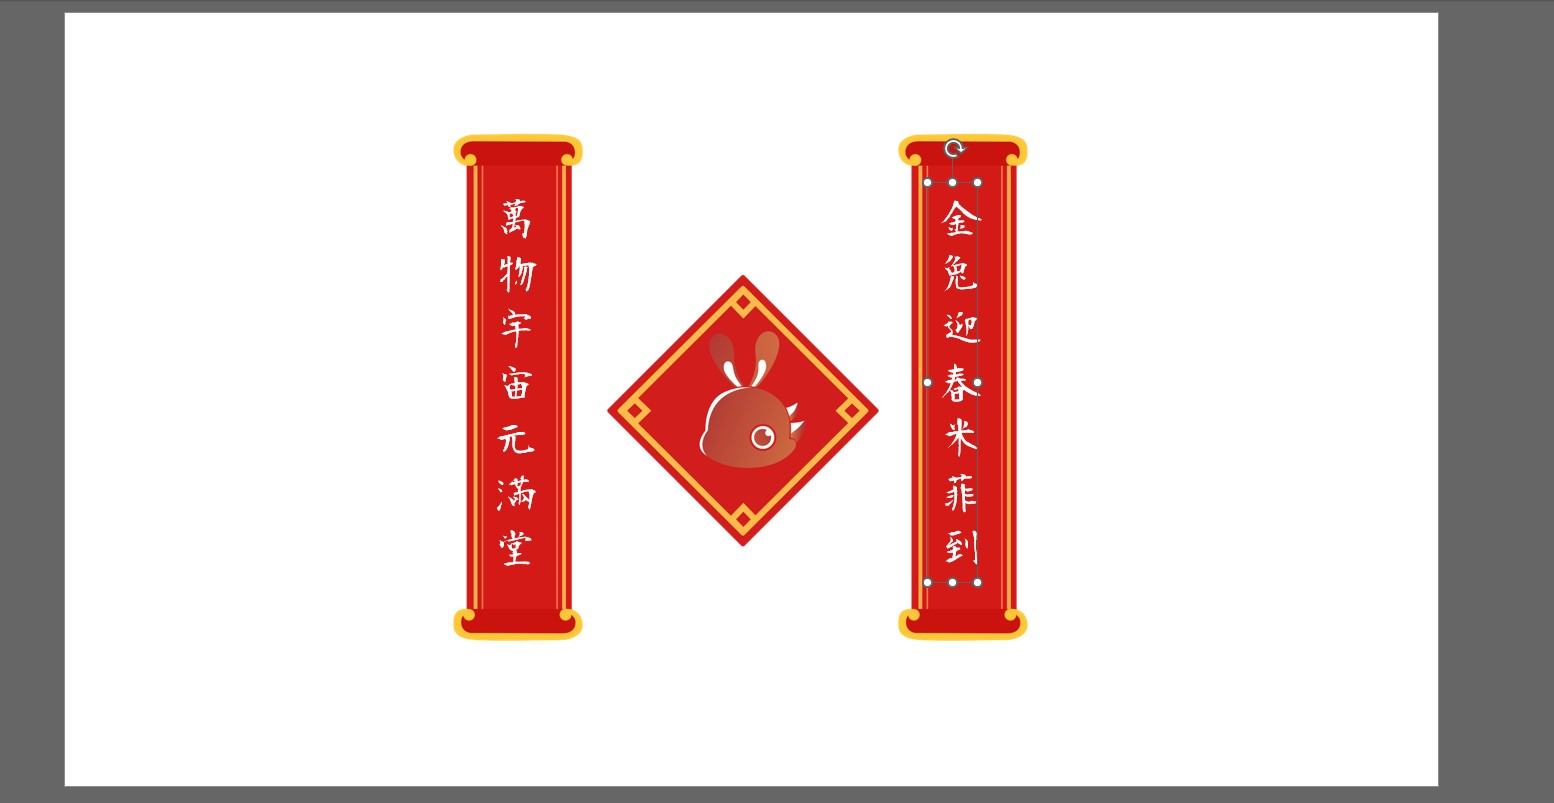
【Enter MAKAR】
- Import all the materials into MAKAR.
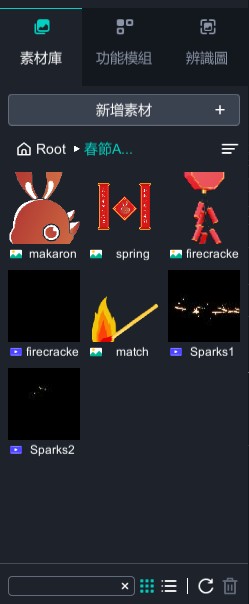
- Drag the firecracker animation into the editor. The background of the video is the white color of the PPT and needs to be removed.
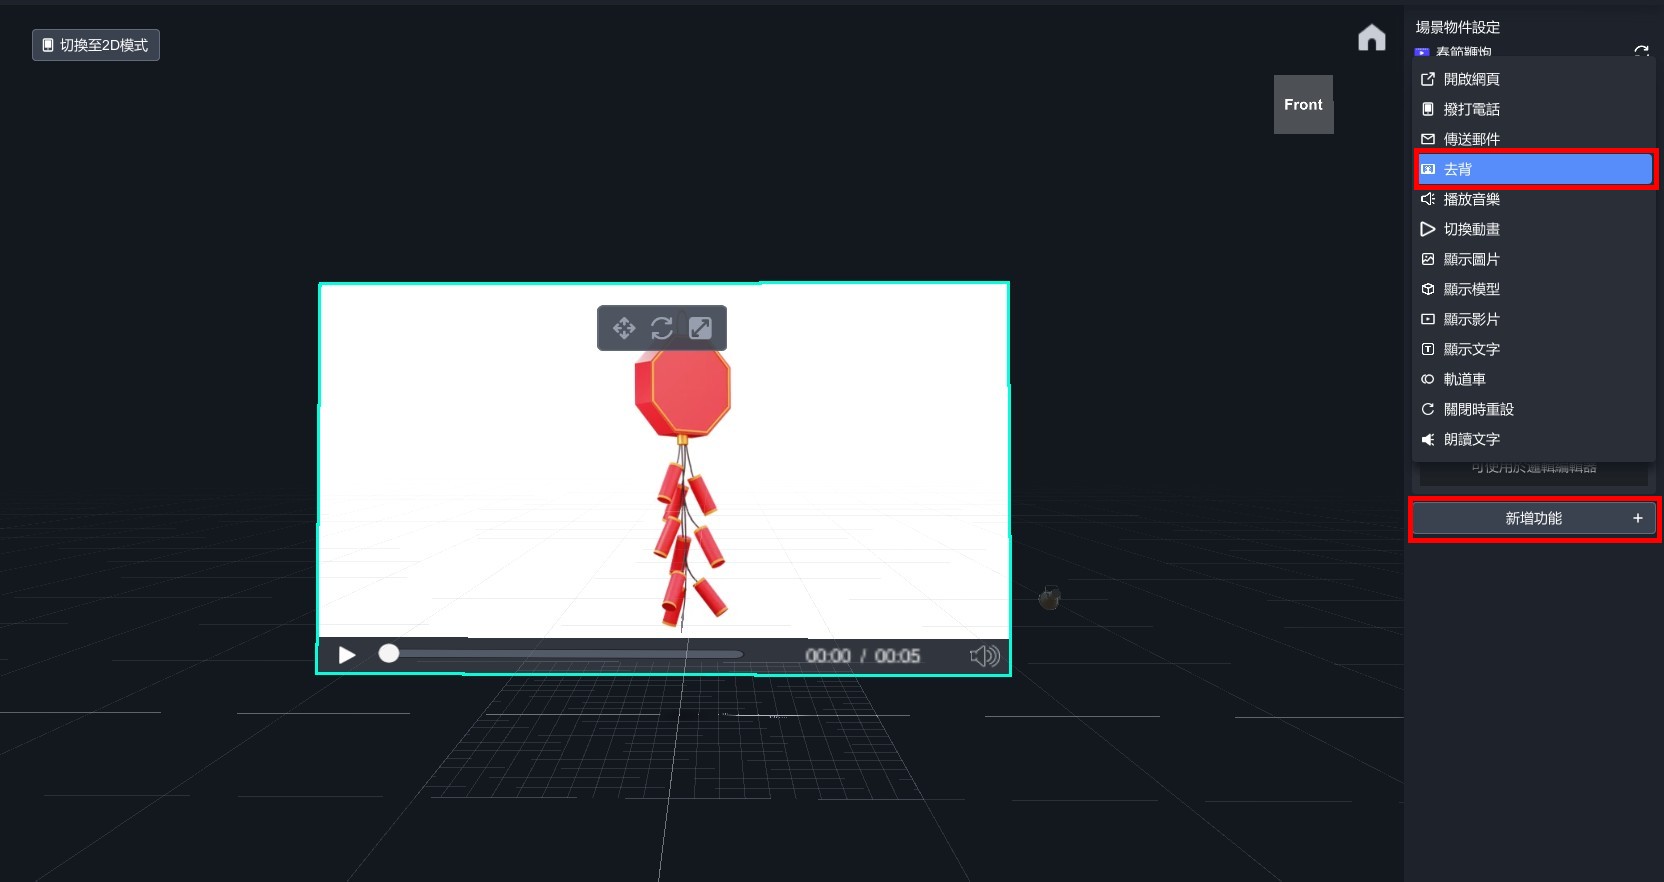
- Use a dropper to pick up the white background.

- Background removal is complete.
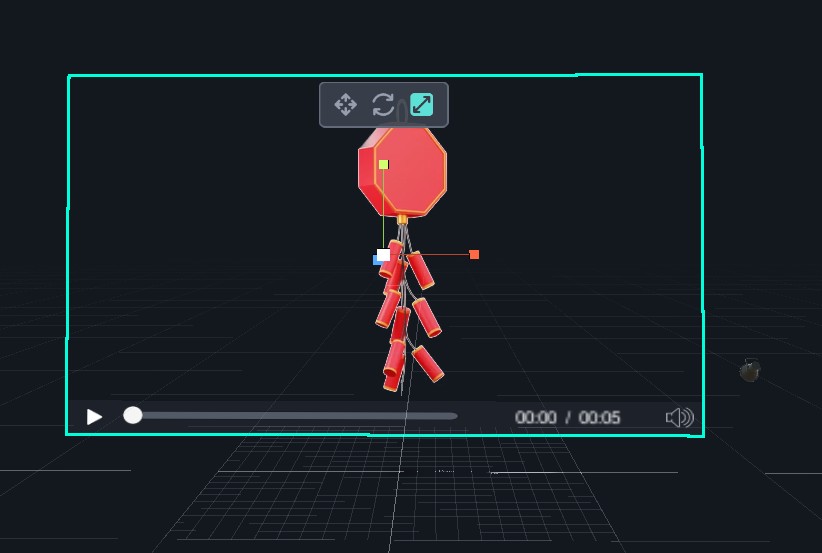
- Put icon and matchstick into the editor and arrange them in the order shown in the image.
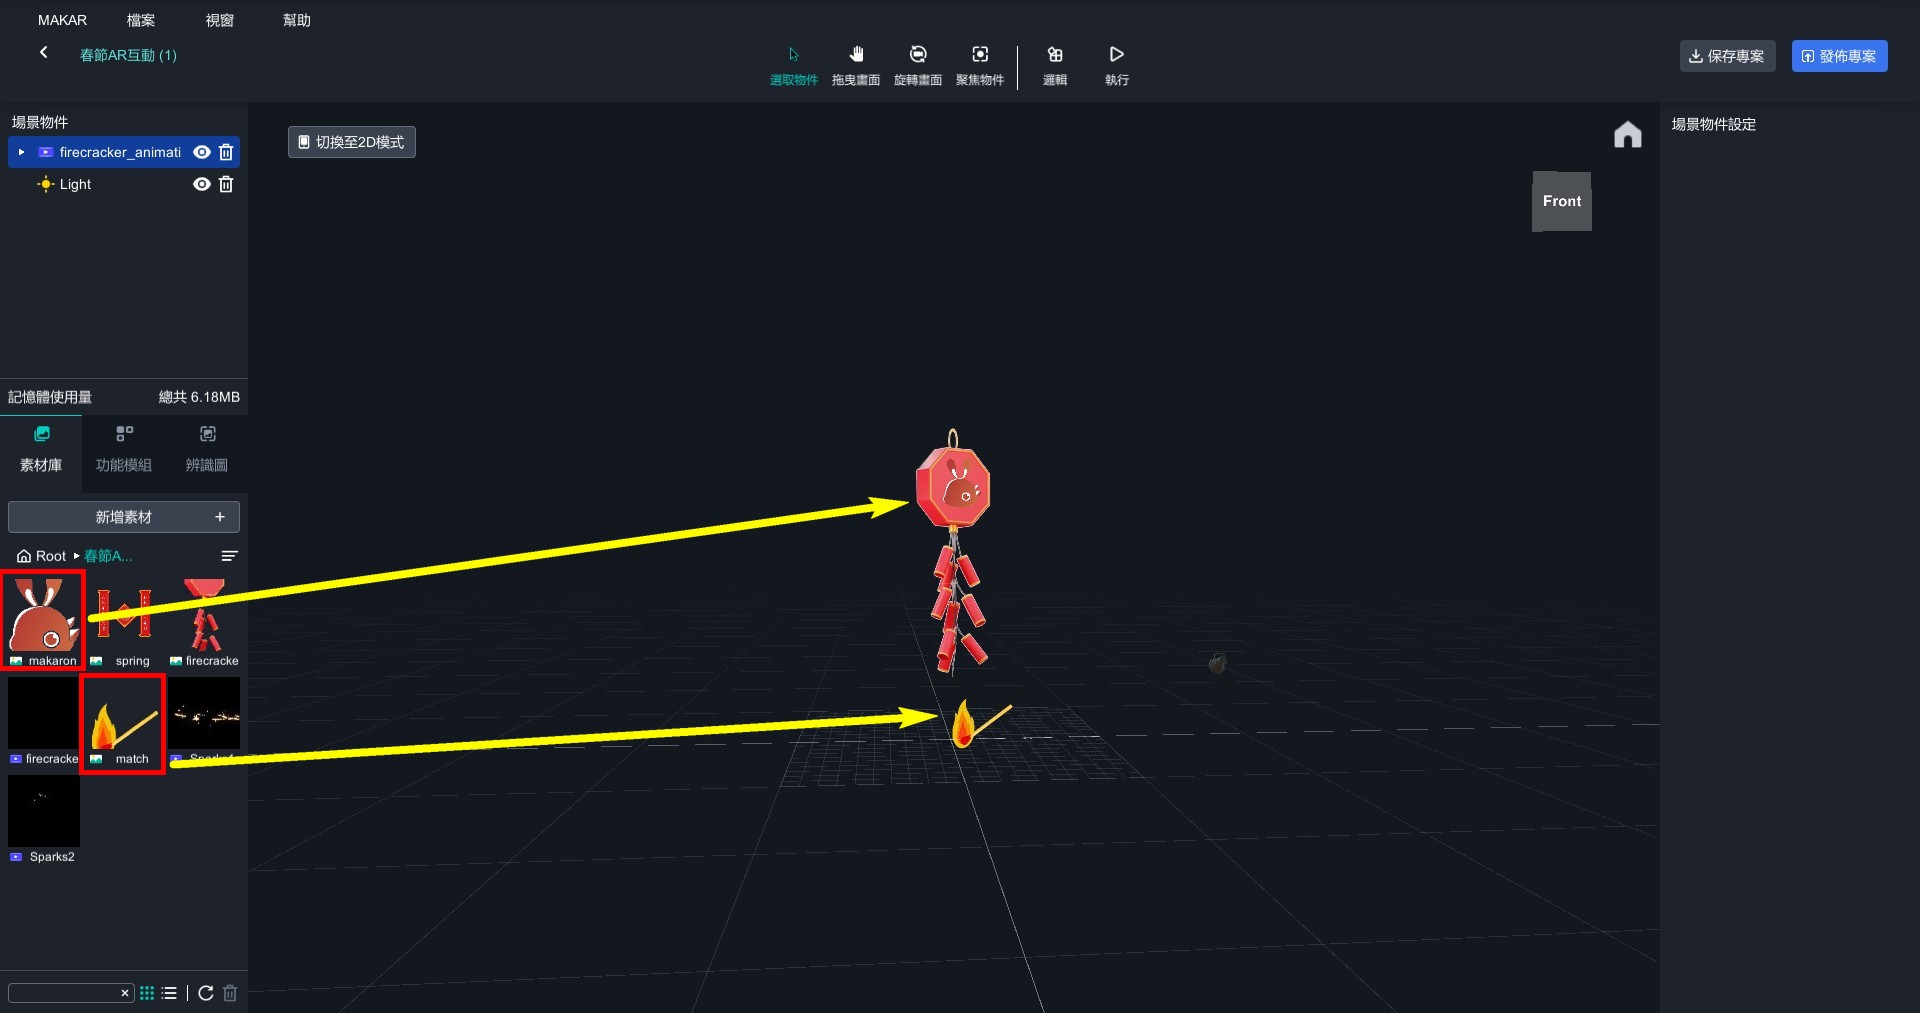
- Add a text editor and put it above the firecracker.
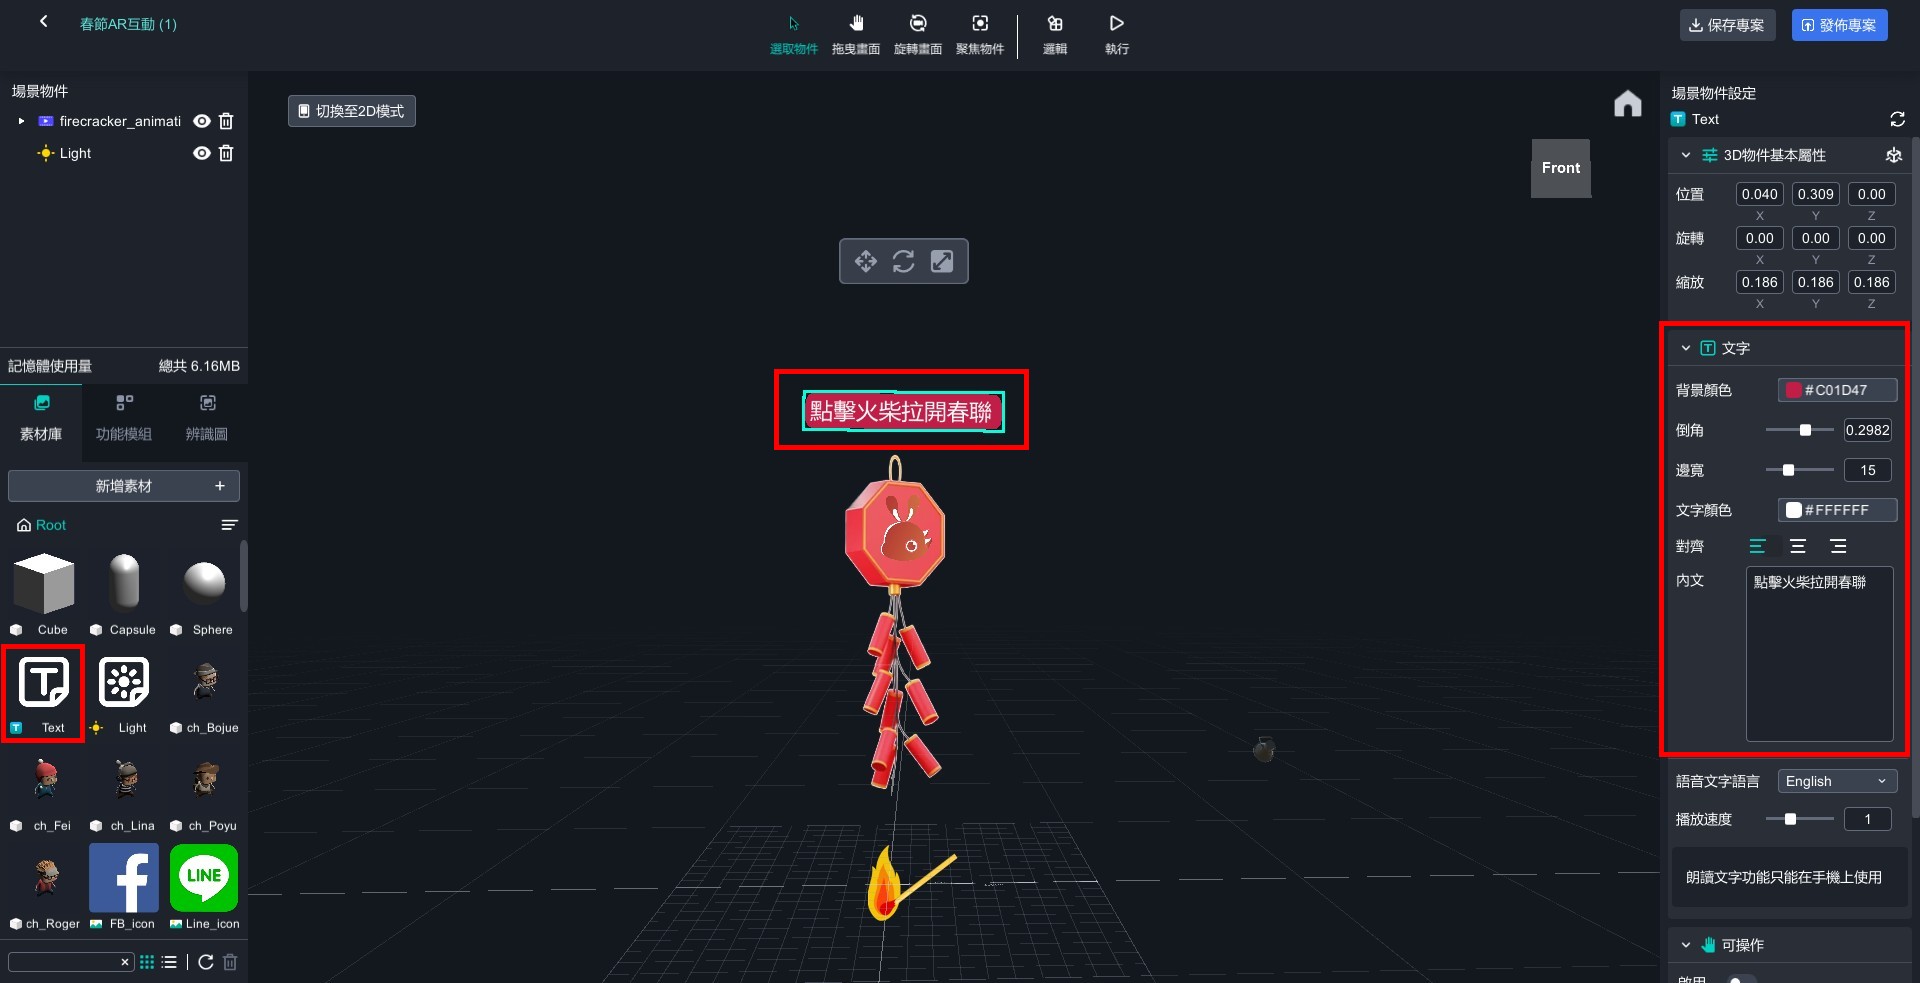
- Drag two fireworks videos into editor, adjust them to the appropriate positions, and remove their backgrounds in the same way.
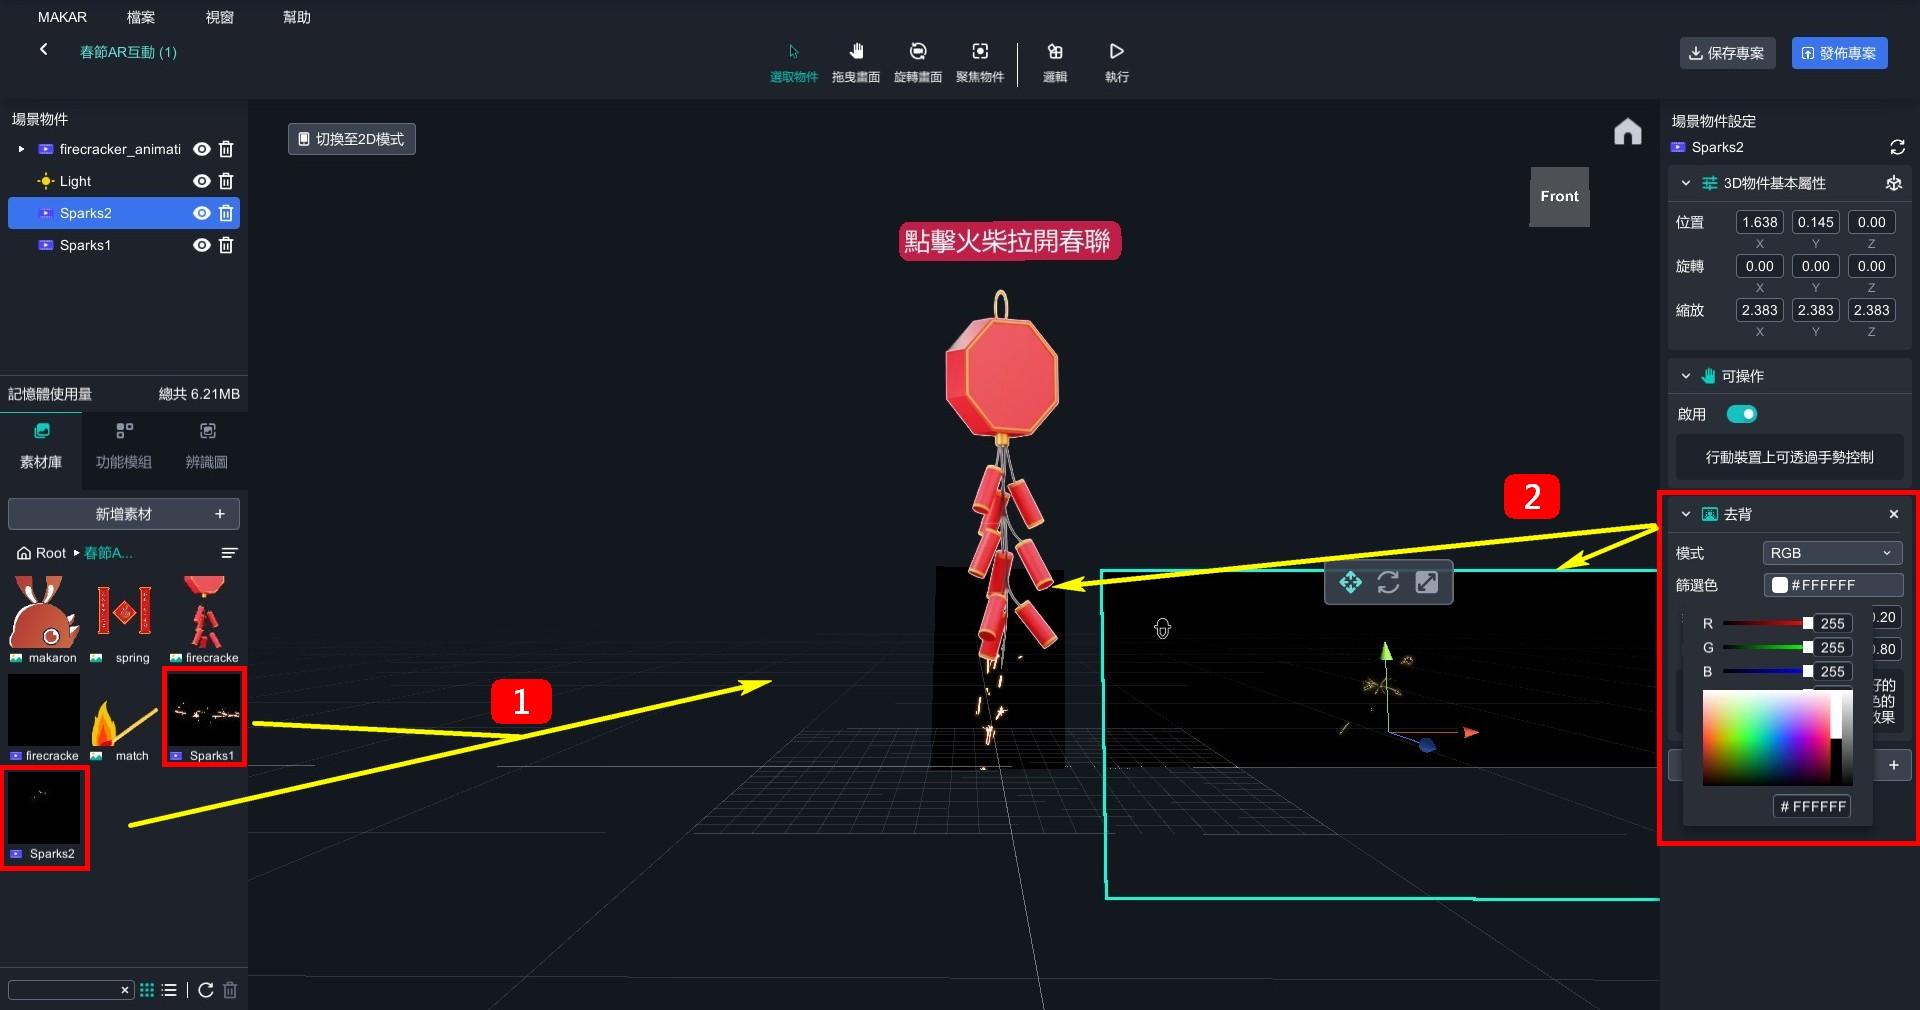
- Except for icon, matchstick, firecracker, and text, turn off other objects' visibility by clicking eye icon.
【Set up firecracker ignition】
- Drag a cube, compress it into a line, and put it under firecracker to disguise it as part of object itself.
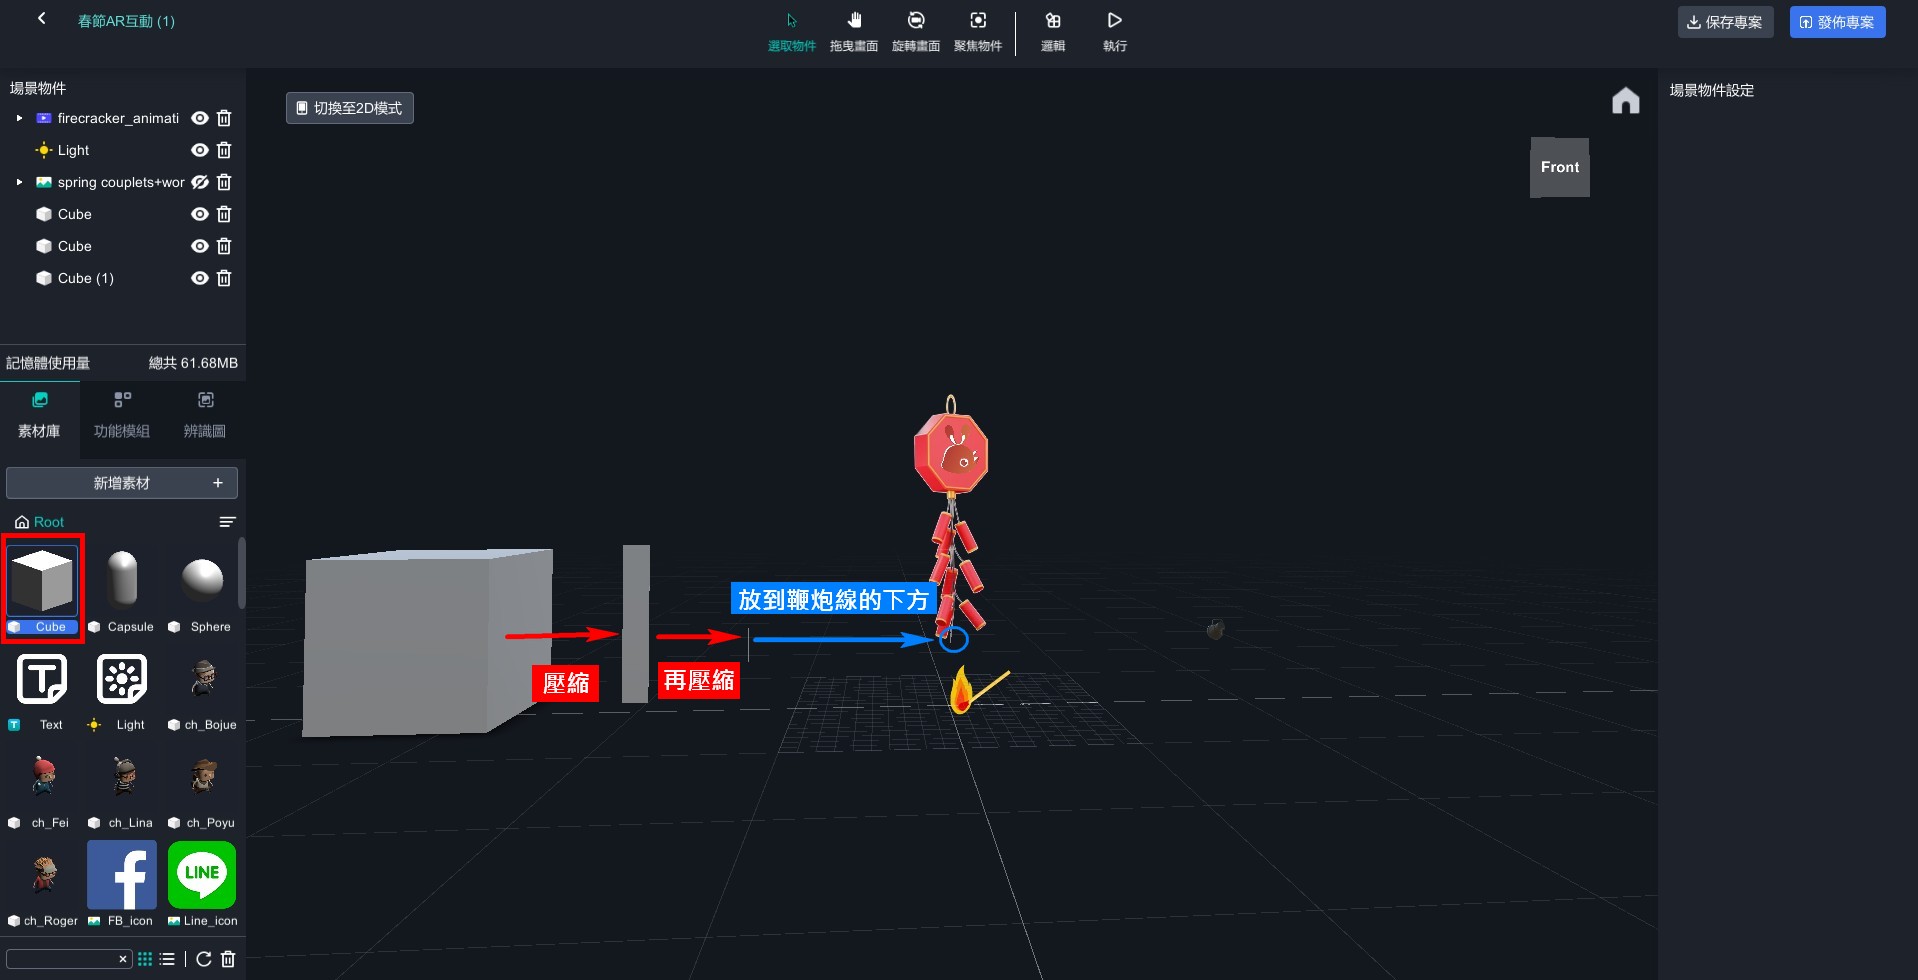
- Set a cube, matchstick, text, and firecracker animation video as individual logic objects.
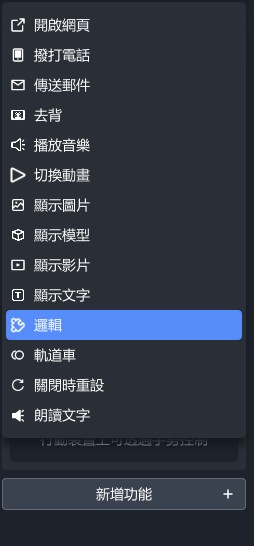
- Open logic editor and add controls such as visibility, click execution, movement, etc., and adjust them as shown in the figure.

【Set up firecracker】
- Add "when...collides with..., enter..." and "run parallel do... and do..." and set up a dynamic video of two fireworks when matchstick and cube collide.
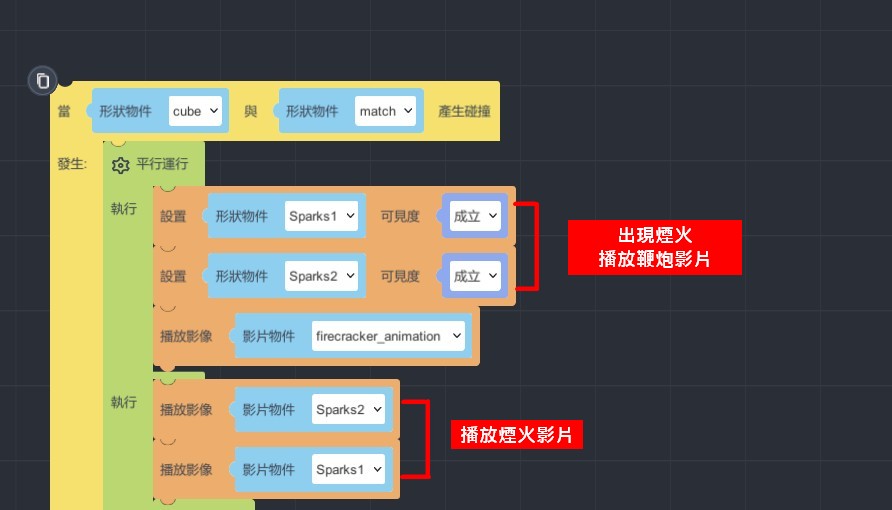
- Drag one more "run parallel do... and do...". Set the video of the fireworks to run upwards, and make both the fireworks and firecrackers disappear immediately after the firecrackers have finished. To prevent the upcoming couplets from appearing too abruptly, add a "wait for...second" control.
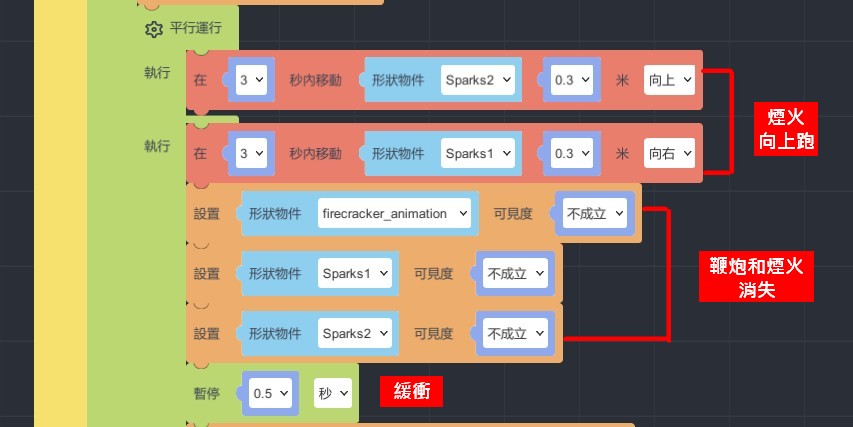
【Set up couplets】
- Set up controls to display Spring Festival couplets and masks, and set the mask to run downwards to create the effect of opening the couplets.

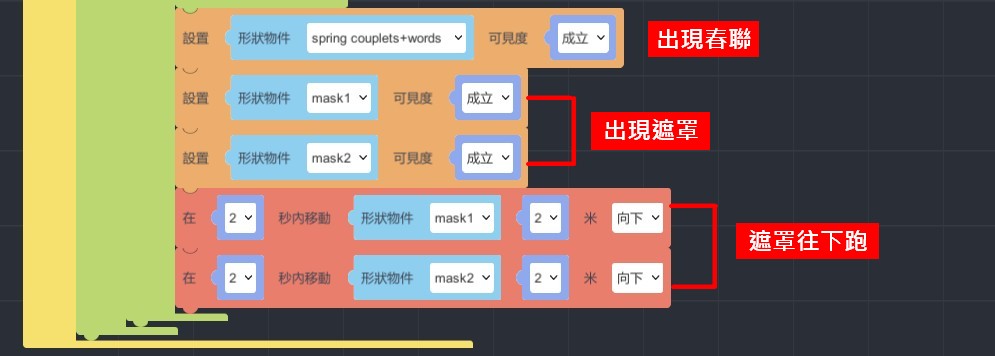
How to experience?
Pick up your phone and enter the ID, then start the experience~
1.Install the MAKAR APP
2.Scan QR code or search for ID:XRlover to select the author.


- Click on the AR space recognition "春節AR動畫" project to launch it, and then click "Start Experience".

4. After entering the project, clicking on "Share Project" allows you to obtain a project link, which you can quickly share with others.
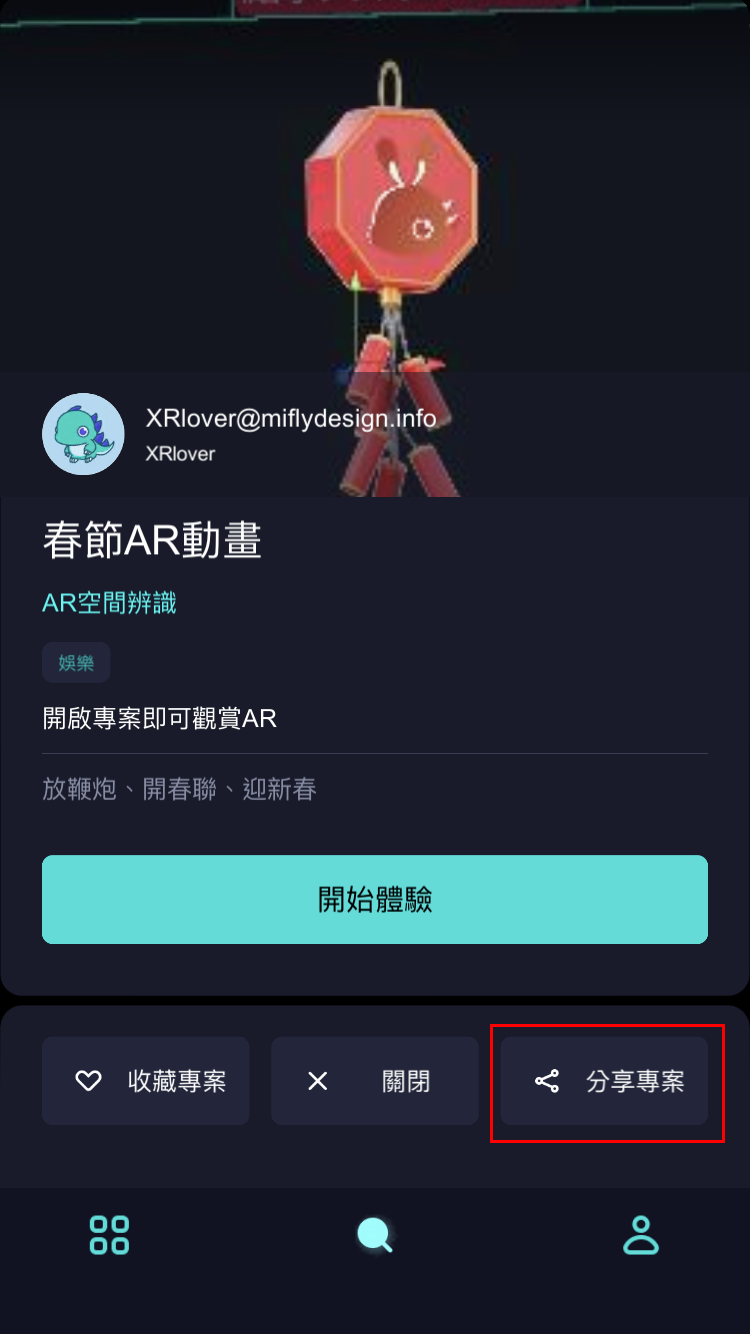
Logic-Macaron AR Animation
▲ Animation:rotation、scale、moving and jumping、collides、visibility
▲ Object:coin、mashroom、Macaron(walking)、street(you can all download on MAKAR resources)
- Drag the road and Macaron into the editor, and rotate Macaron.
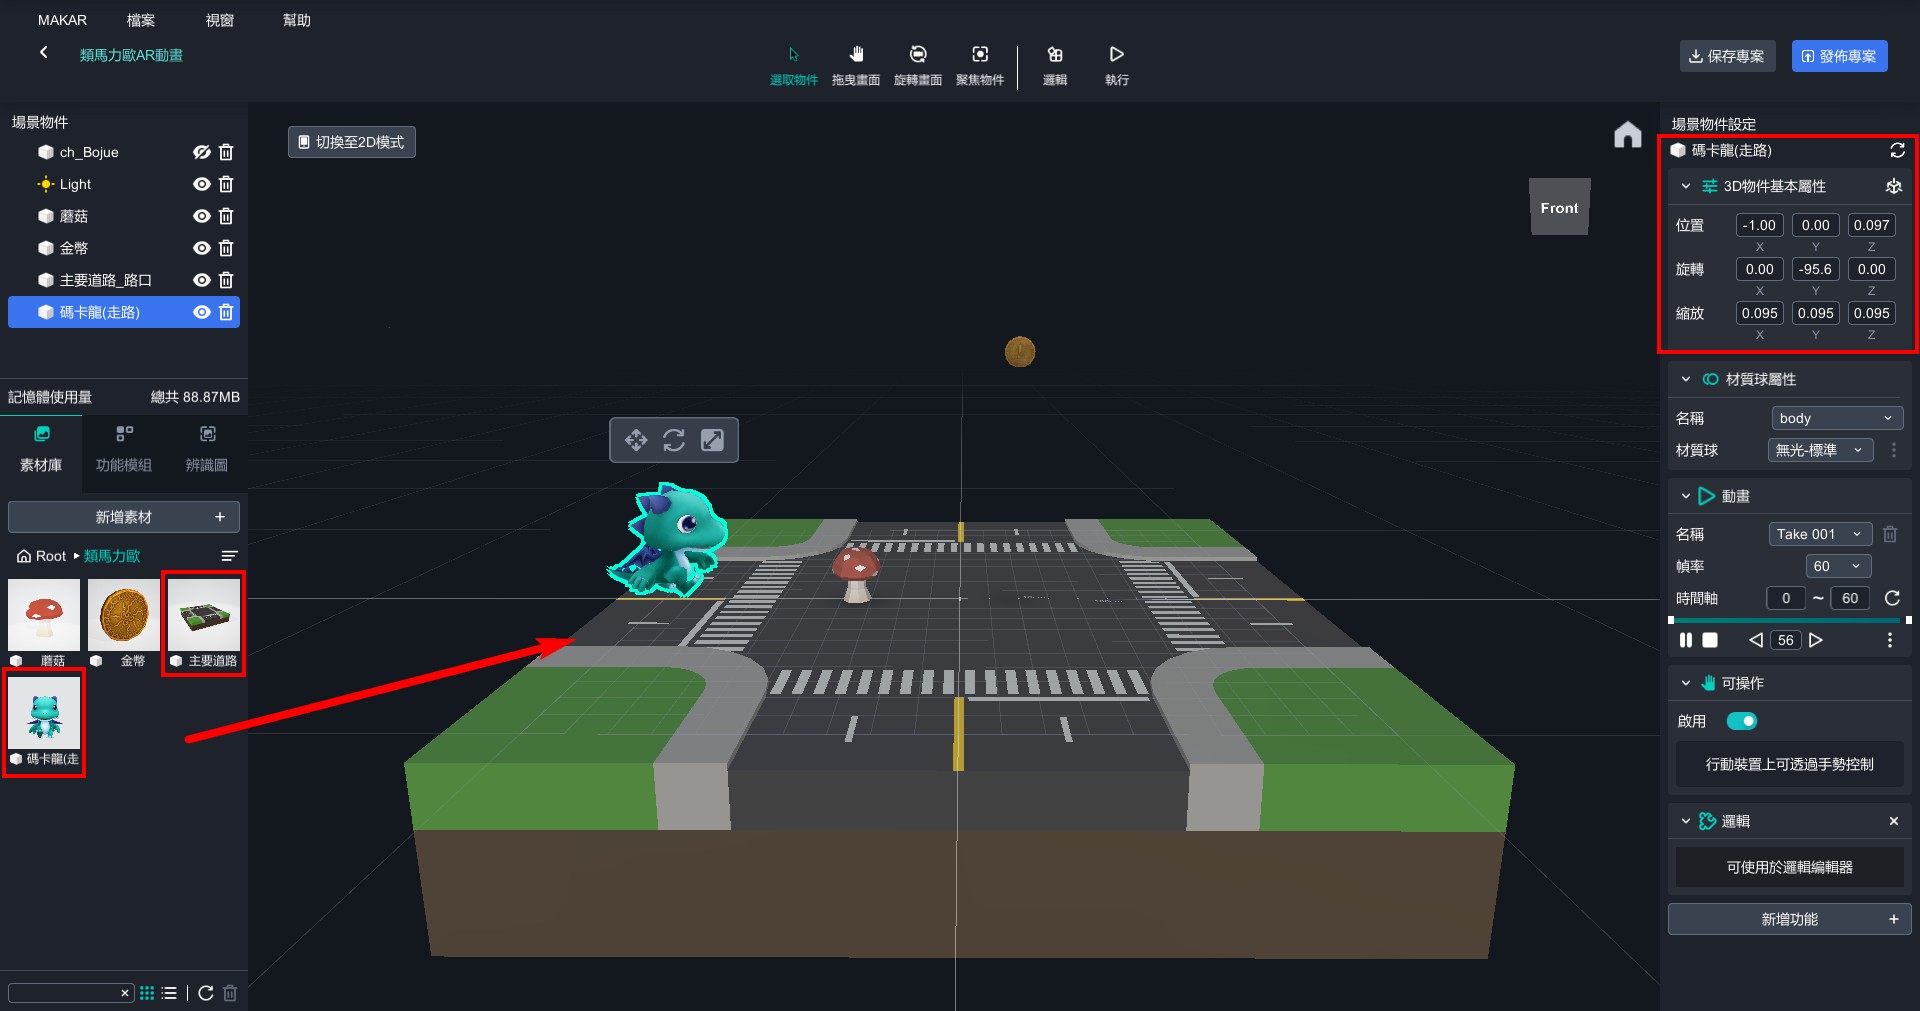
- Drag mushroom and coin into the editor and position them at appropriate distances.
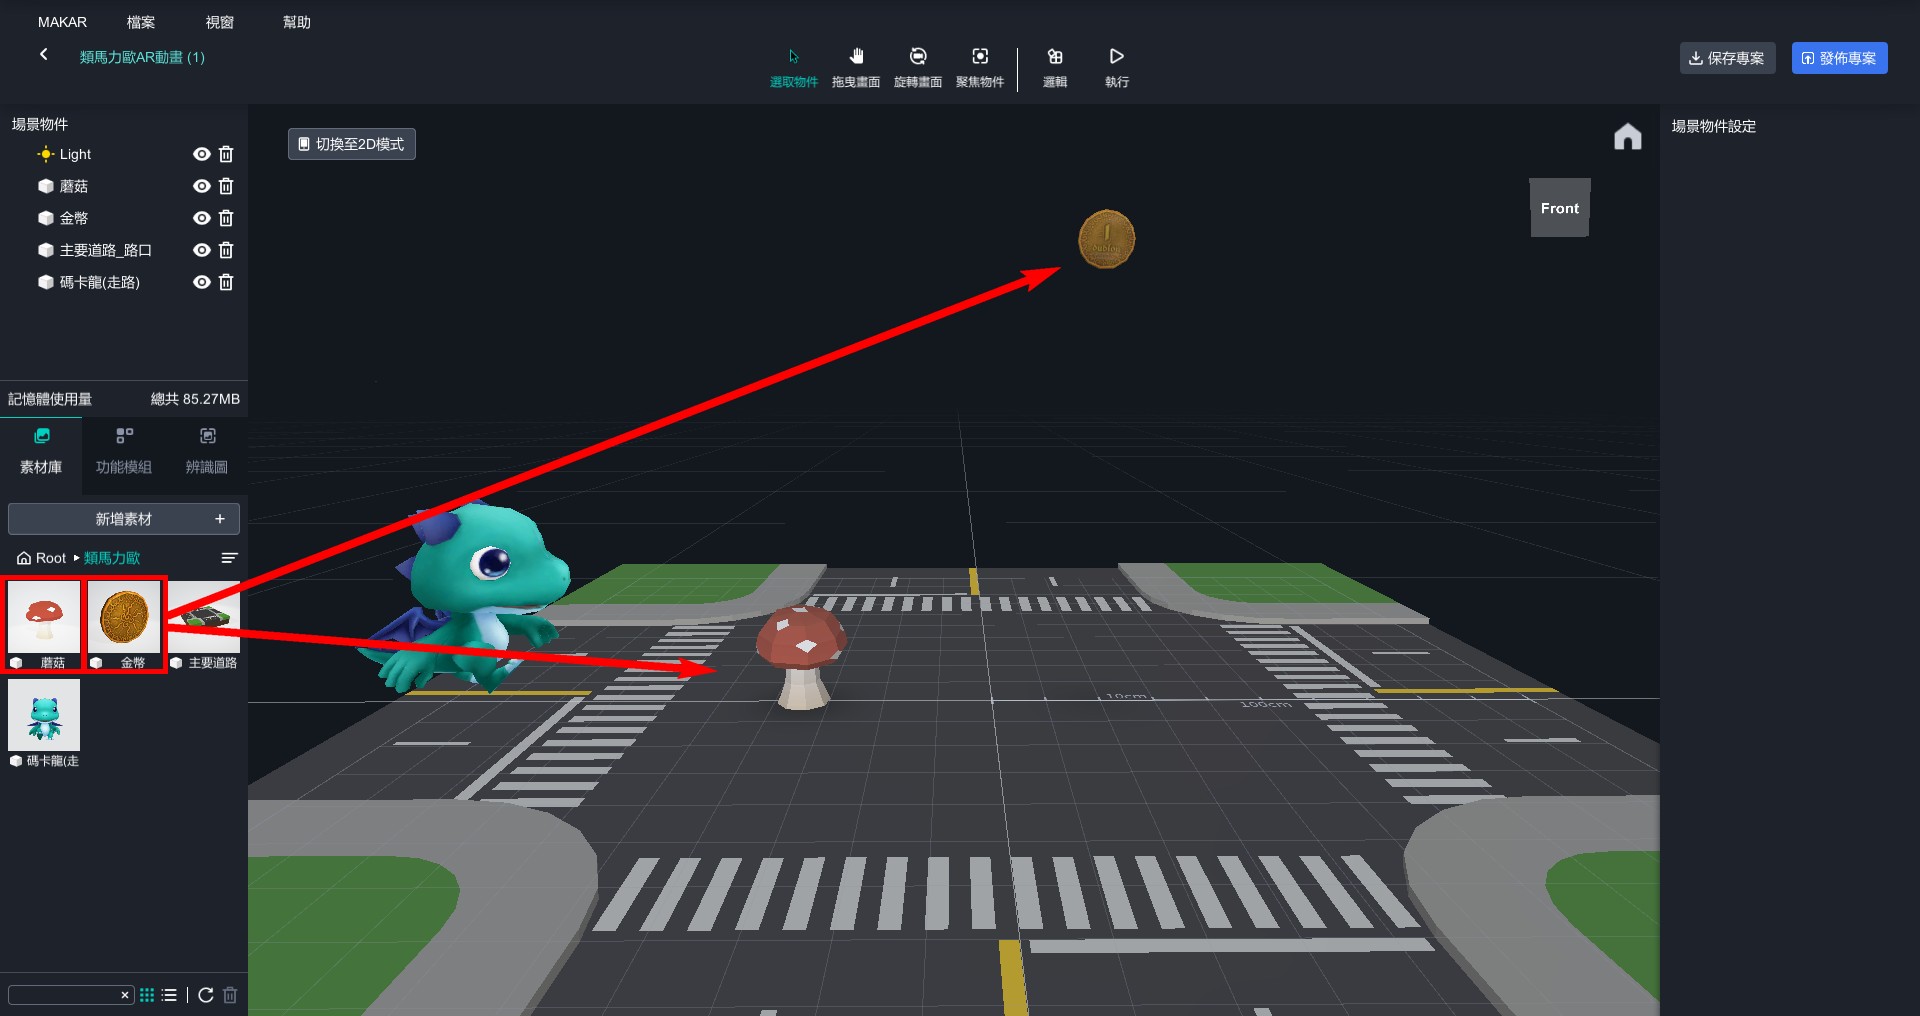
- Set Macaron, coin, and mushroom as logical object.
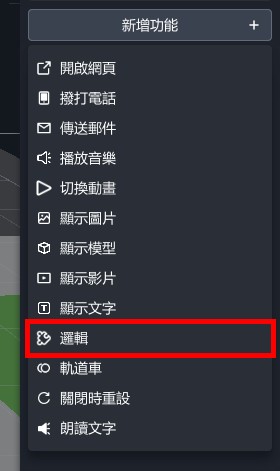
- Open the logic editor and start editing.
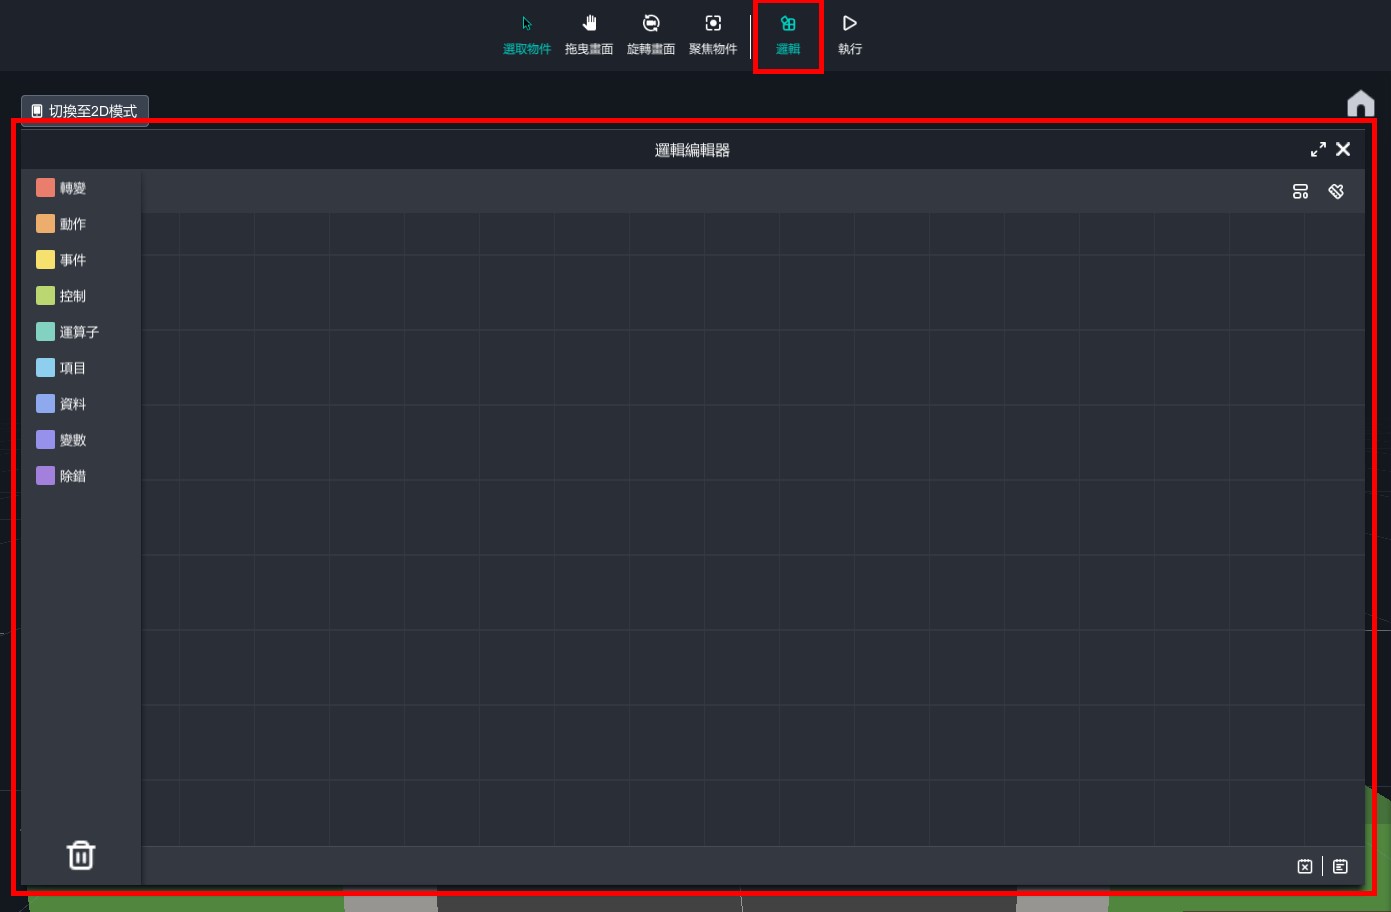
【Macaron Moving and Jumping】
- In the scene, one small square represents 10 centimeters and one big square represents 1 meter. Set the walking distance of Macaron based on this standard.
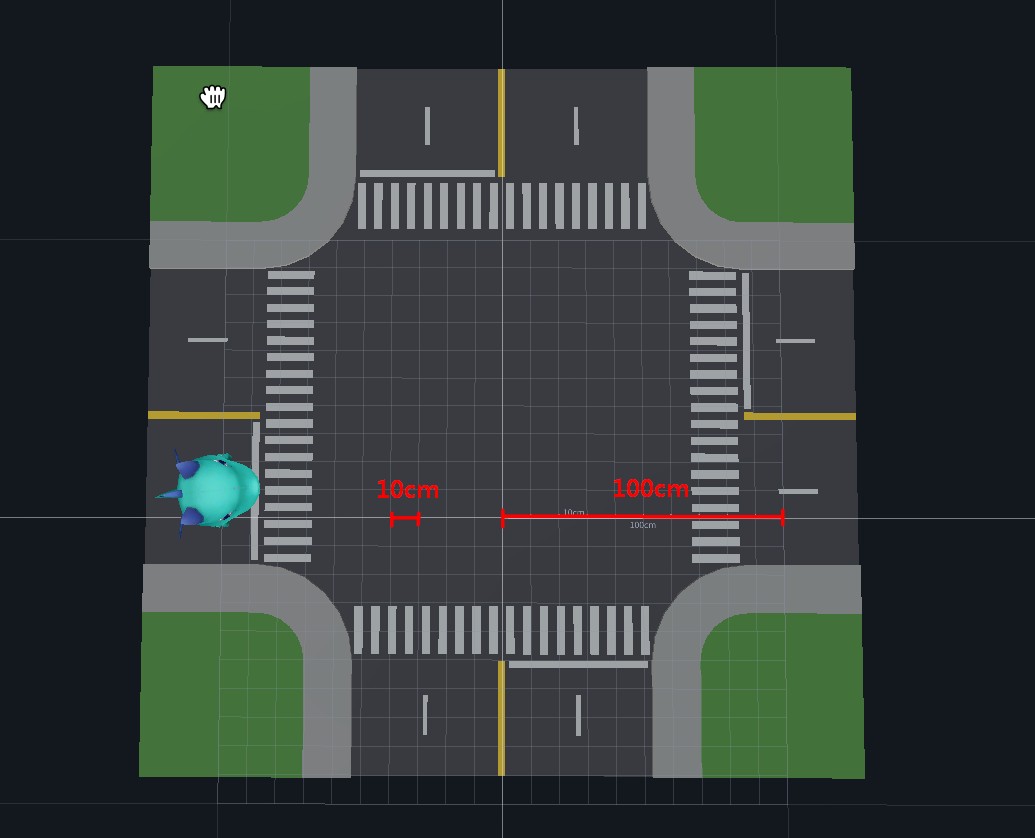
- From "Transform" > "Transitions", drag out "move...object...meters...in...seconds", and all subsequent actions will be executed based on this block.
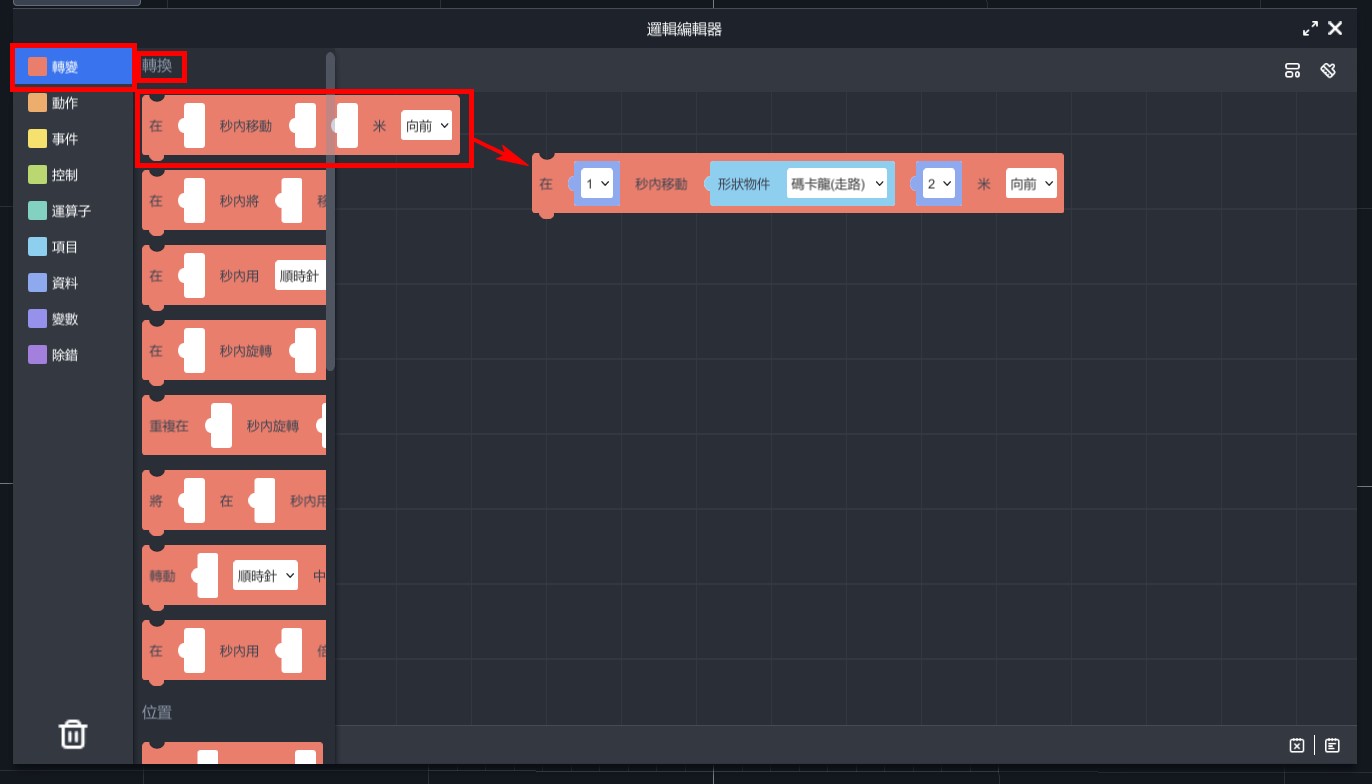
STEP(1)Walk a certain distance
Set block to "move Macaron (walking) 1 meter backward in 1 second". Although the coin is located 1.3 meters from the starting point, adjusting the distance to 1 meter and having Macaron jump forward can make it look more natural due to its larger size. You can adjust the distance according to the actual situation as needed.
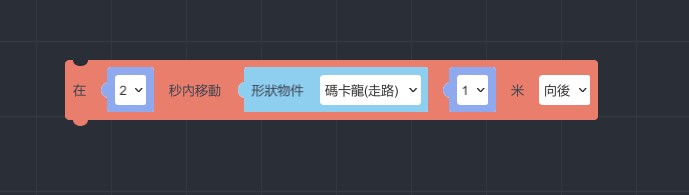
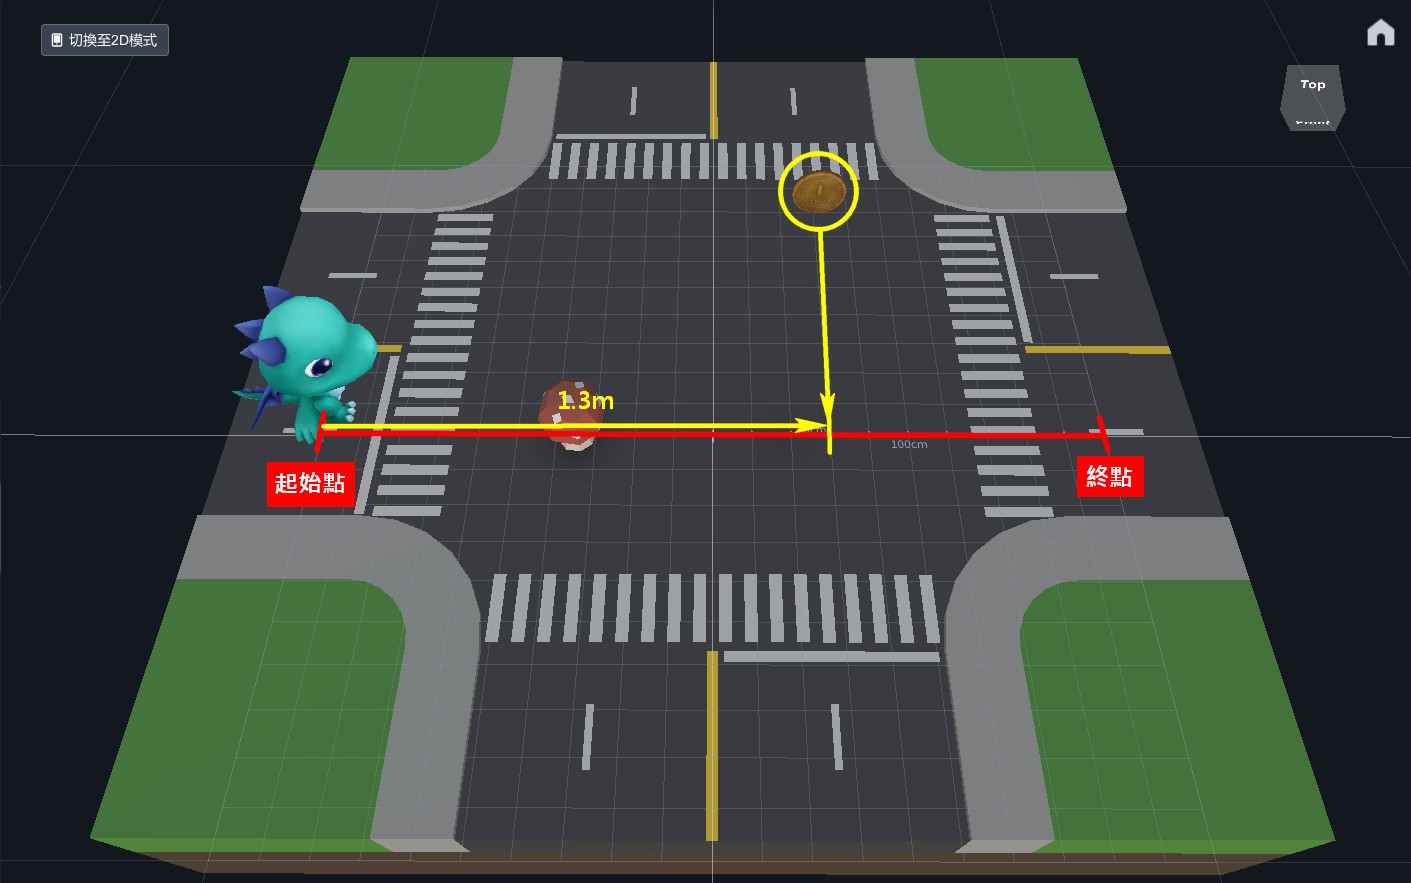
※ The object movement direction is set to "backwards", but the object appears to be moving towards the right. This is because the object's properties is not X=0, Y=0, Z=0 after rotating. Therefore, adjustments must be made based on the actual situation.
STEP(2)Jumping
Set the block to "move Macaron(walking) 0.4 meters up in 0.08 seconds" and duplicate it to set it to move downwards. You can adjust the distance and speed as needed.

STEP(3)Continue walking a certain distance
Set the block to "move Macaron(walking) 1 meter backwards in 1 second" to allow Macaron to continue moving forward naturally after eating the coin.

※ The blocks will execute the animations in the order they are arranged.
.gif)
【After eating the mushroom, Macaron grows in size and the mushroom disappears.】
- From "Transform" > "Scale", pull out "Set scale of...to..." and set Macaron scale to 0.18.

- From "Actions" > "Material", pull out "Set visibility of...to..." and set mushroom's visibility to false.
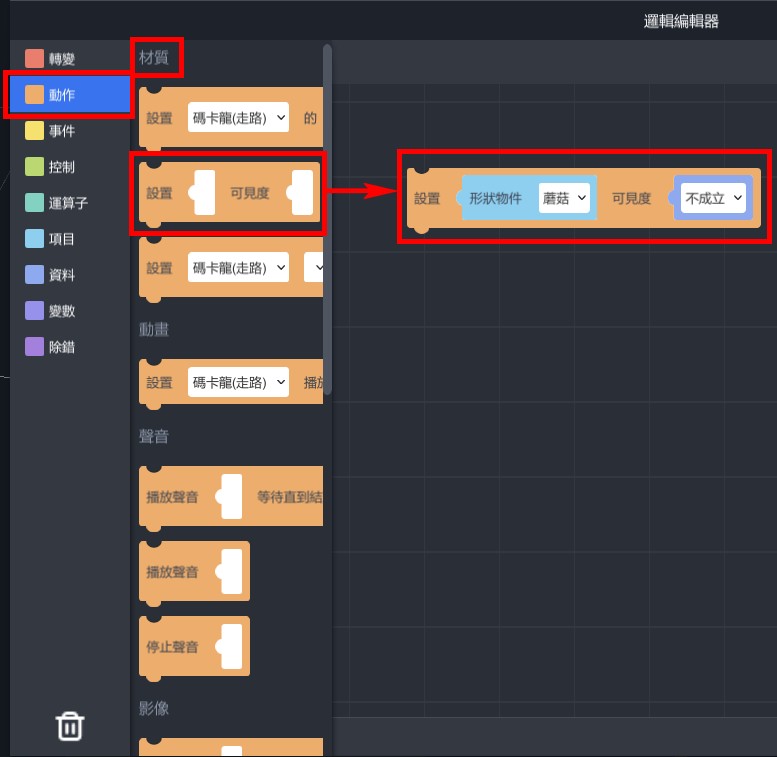
- From "Events" > "Collisions", drag out "When...collides with..., enter..." and place the previous two blocks inside it, and set the collision between Macaron and mushroom.
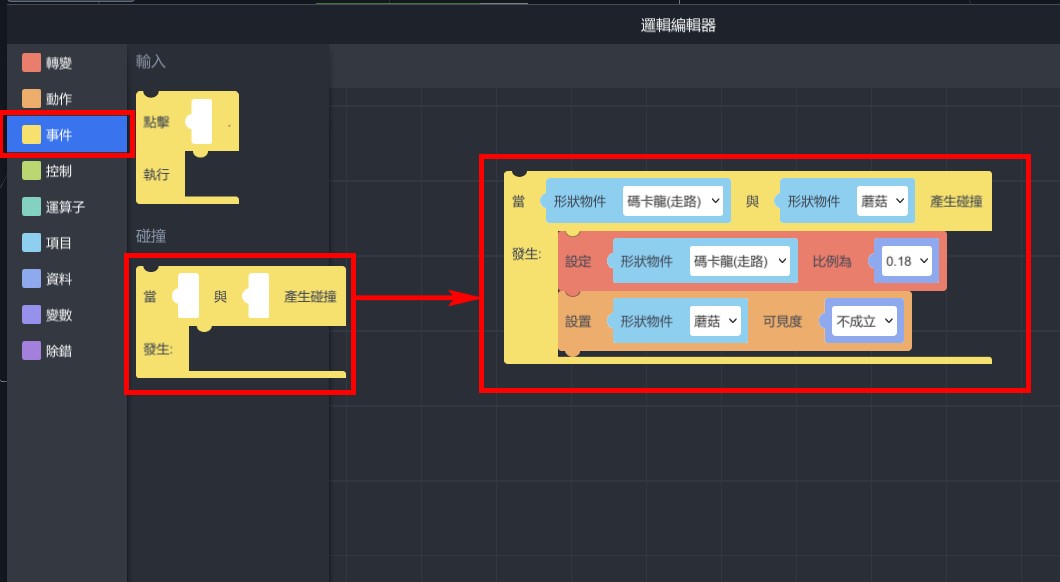
【The coin rotates on its own】
- From "Transform" > "Rotation", drag out "turn...object...clockwise by degree...in...sec", and set "turn coin clockwise by degree360 in 1 sec".
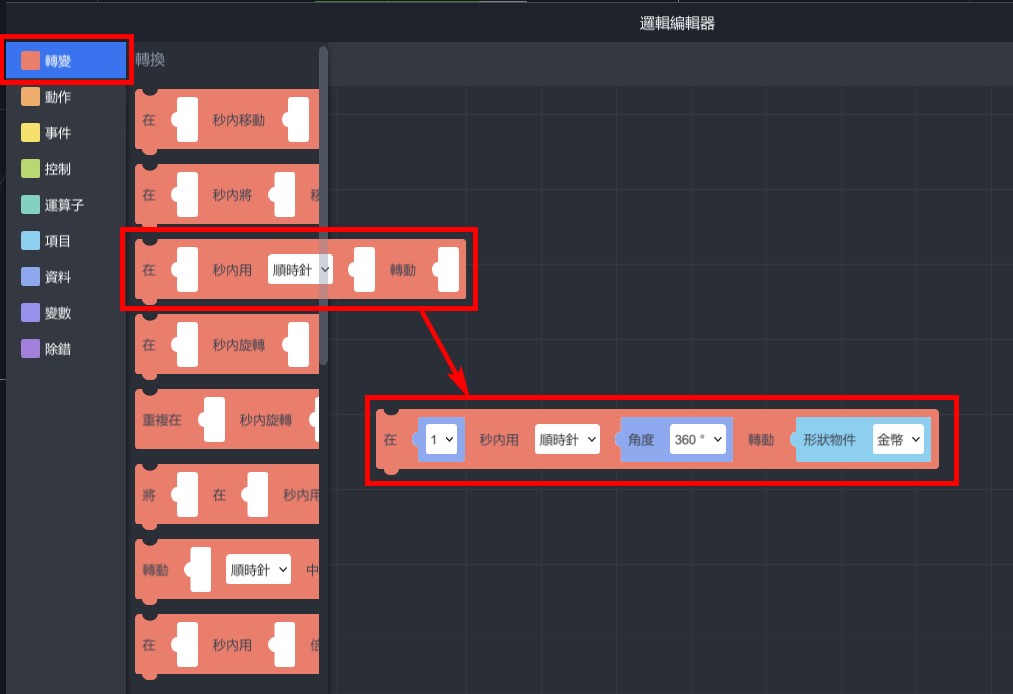
- From "Control" > "Loops," drag out "forever do..." and place the previous block inside.
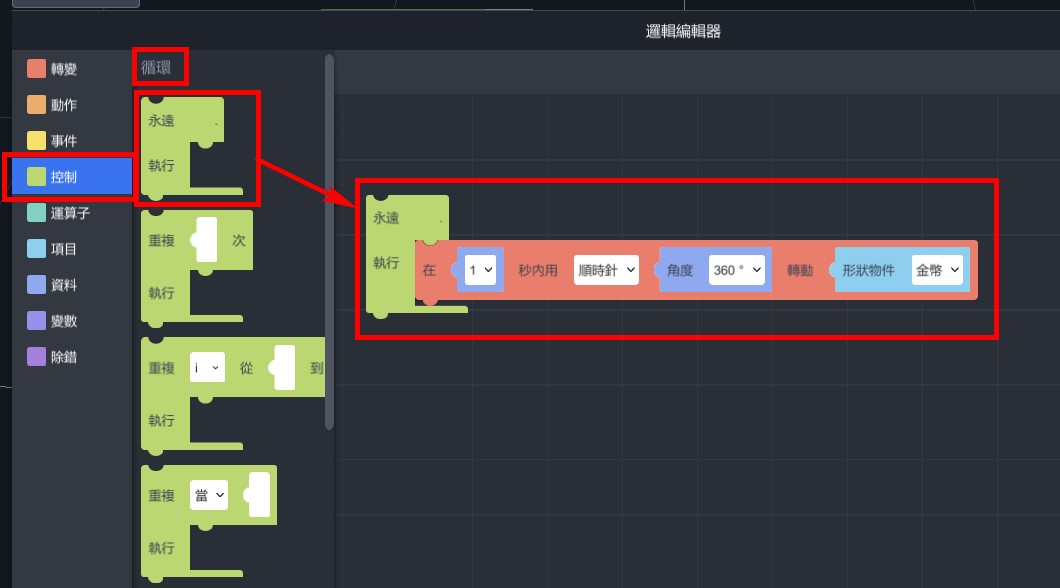
- The coin will keep rotating automatically.
【After eating the coin, it disappears.】
- From "Actions" > "Materials", drag out "Set visibility of...to..." and set the visibility of the coin to false.
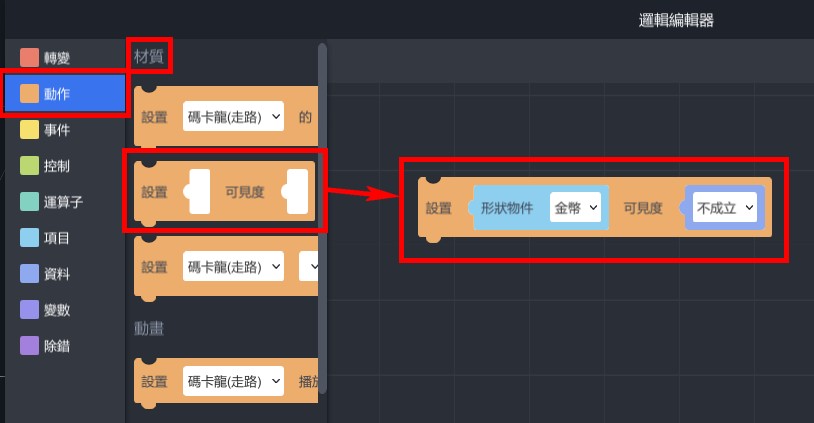
- From "Events" > "Collisions", drag out "When... collides with..., enter..." and place the previous block inside it. Set it to detect collisions between the dragon and the coin.
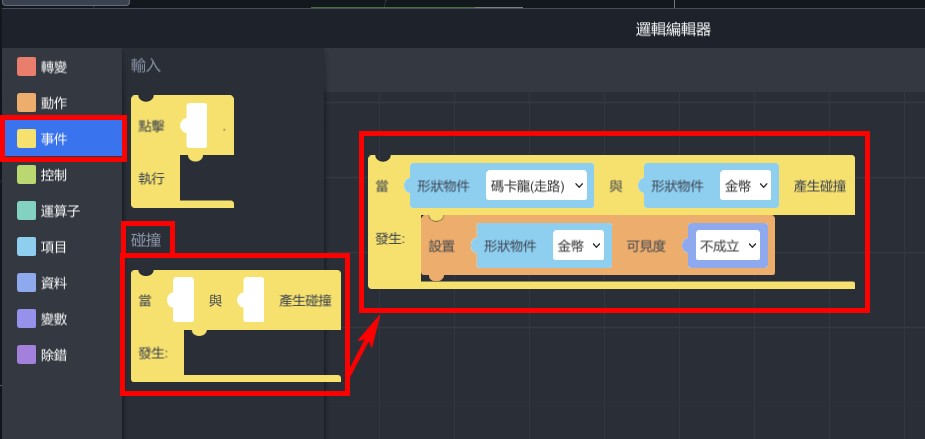
How to experience?
Pick up your phone, enter ID, and scan the recognition image to start the experience!
1. Install MAKAR APP
2. Scan QR code search ID:XRlover

3. Click on "Macaron AR Animation" project in the AR space recognition and click on "Start Experience".
MAKAR Mask project
Abstract:
In this lecture, there is going to demonstrate how to use Mask function in MAKAR editor v3.4 to create a project.
Introduction:
Mask is one of the new function in MAKAR editor, it’s similar to invisible cotton in Harry Potter. You will learn how to make a room invisible in this lesson.
1. Material: https://skfb.ly/6CGo8 license: CC Attribution
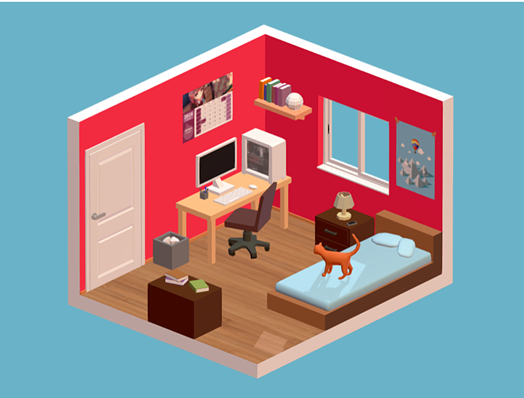
This is a kind of isometric scene material.
2. Download the file
We are going to download GLB file for this lesson, though the FBX file looks smaller, it need to conduct extra-process after you download it.
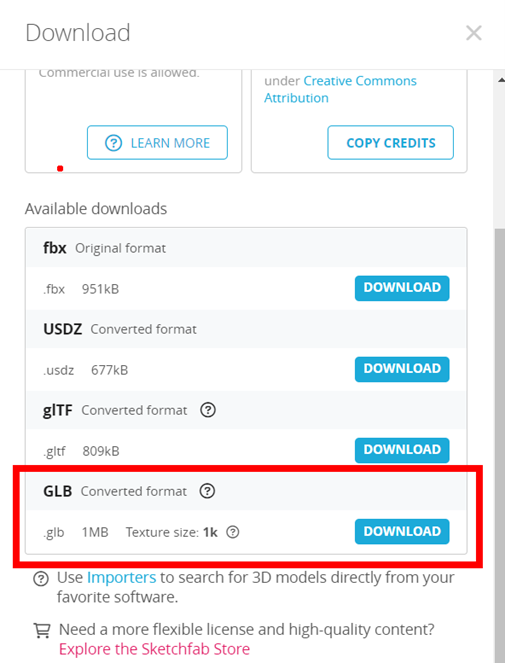
3. MAKAR editor
Make sure your MAKAR editor upgrade to at least version v3.4 or above.
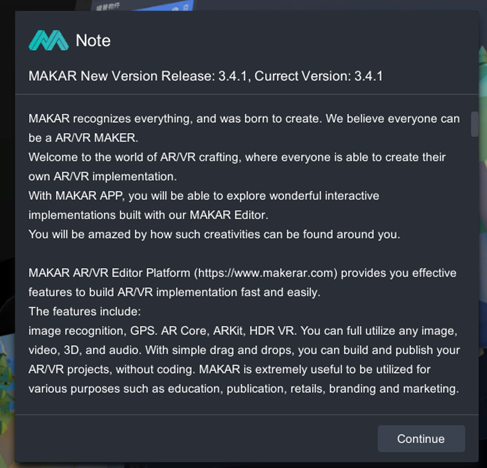
Create a AR Target project. It’s necessary to select a category in latest editor.
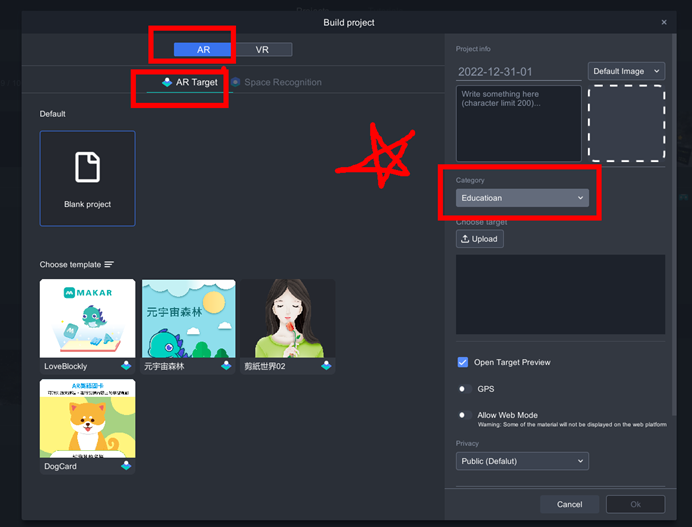
Extra: How to create a fire-star recognition target?
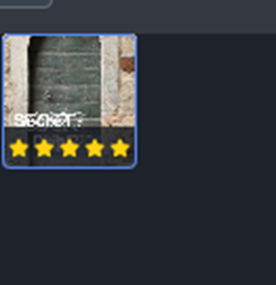
The star number in MAKAR represents the recognitive ability. There is a tutorial for AR recognition by Lina, you can check it out. https://becutelina.com/2022/03/24/ar/
In this lesson, I’m going to use the popular AI tool, DALL-E, to generate a unique image target, and use Zalgo text transformation for complicity.
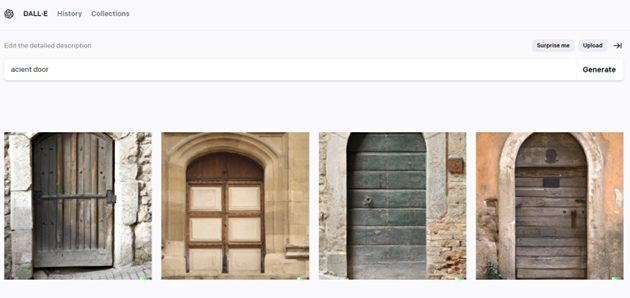
DALL.E (https://openai.com/dall-e-2/ )
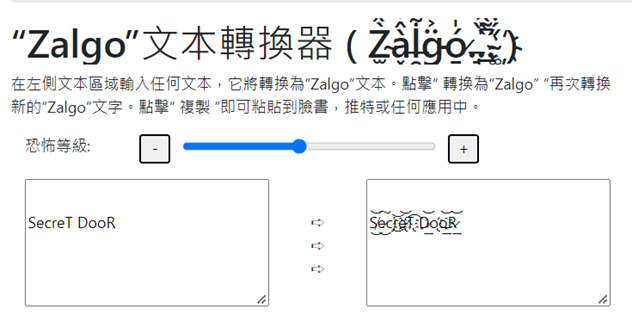
Zalgo text generator (https://tw.piliapp.com/cool-text/zalgo-text/)
4. Mask
You can change the 3D model’s material into Mask.
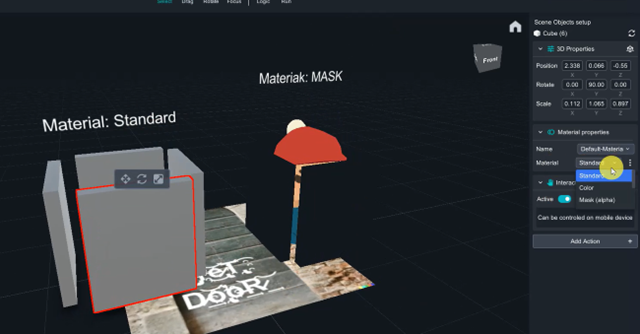
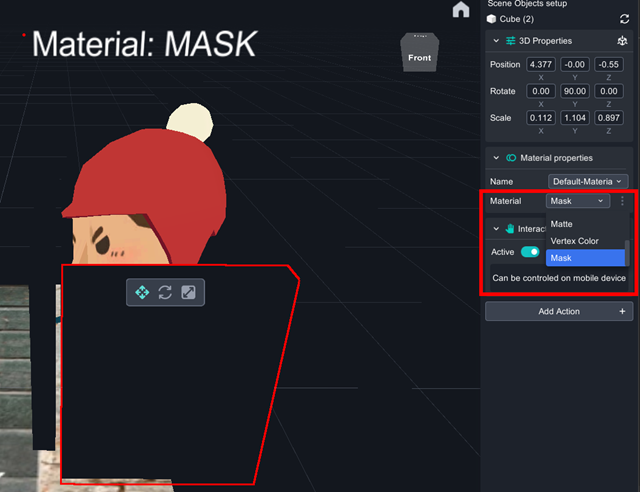
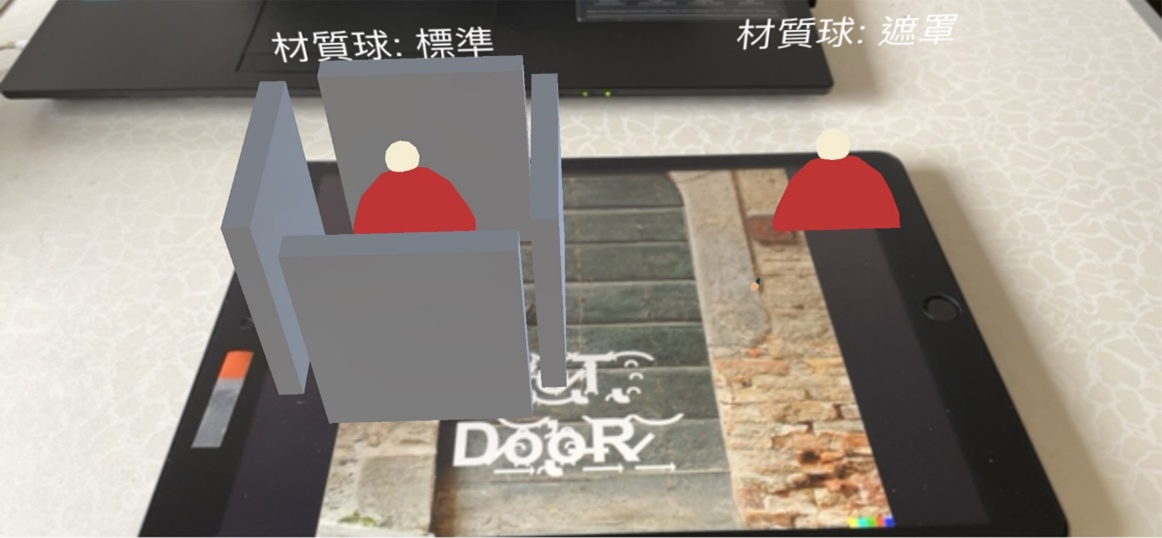
In reality, Mask can cover the object, make it become transparent, such as invisible.
5. Create an invisible room
Import the low_poly_room and drag it in to the scene.
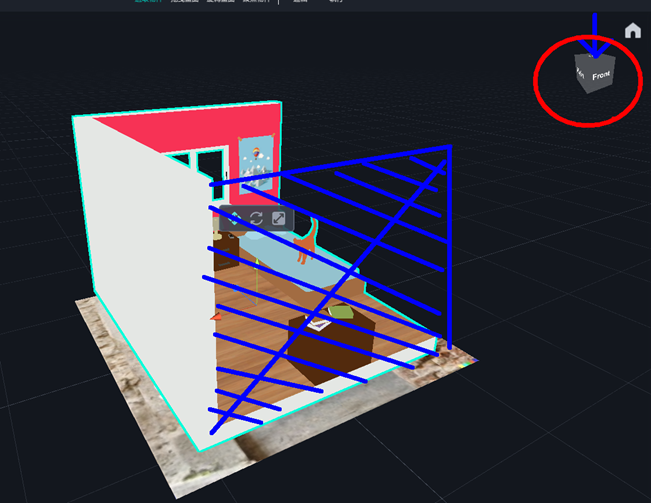
Adjust the Blue face to Top aspect.

As above.
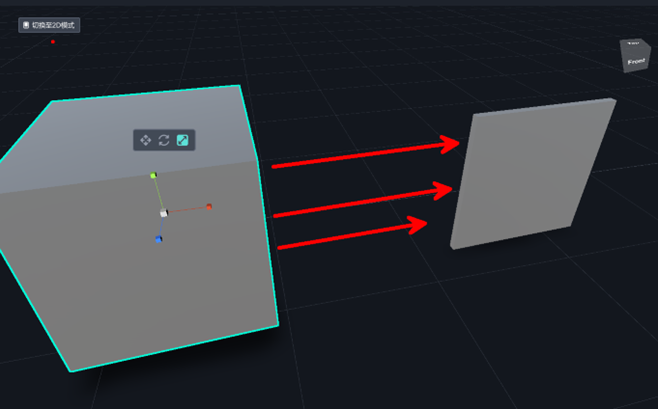
Transform the cube into flat square.
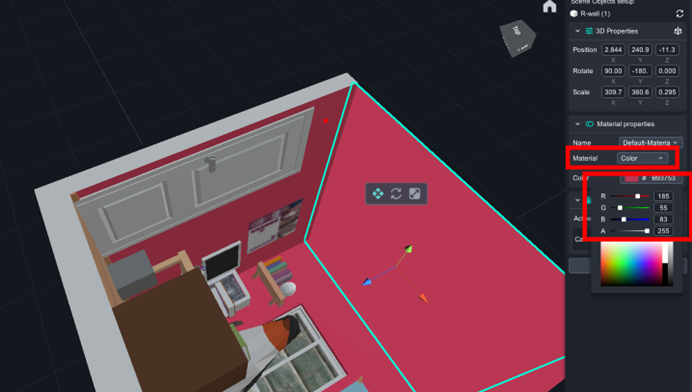
Set flat square as wall of the room, change its material into【color】, RGB=(185, 55, 83).
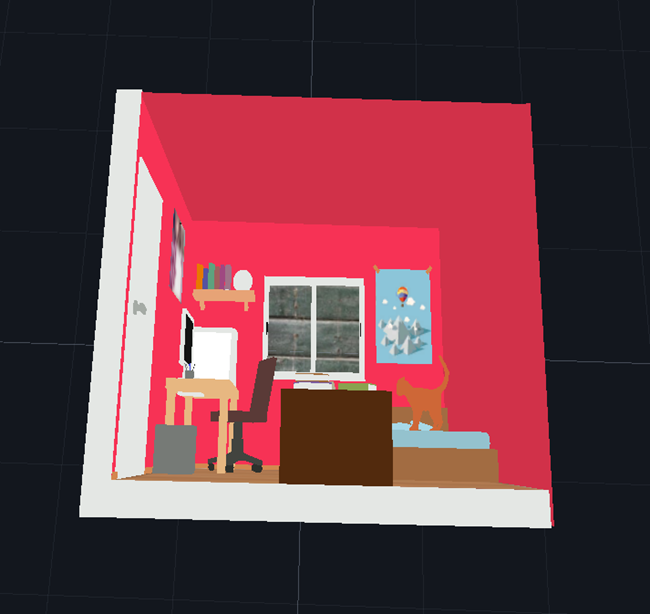
And set the ceiling as the same.
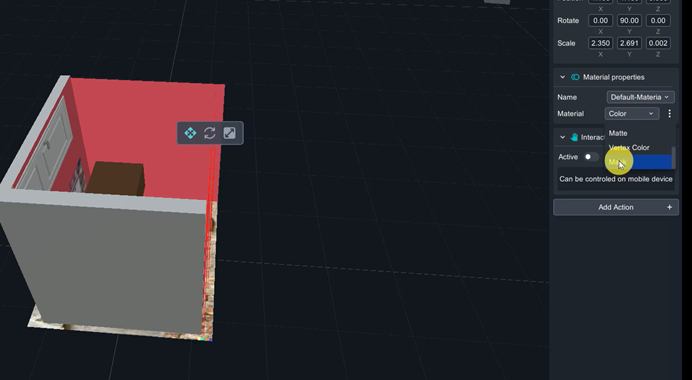
Add another walls as Mask material to cover whole room, so that it can make the room invisible.
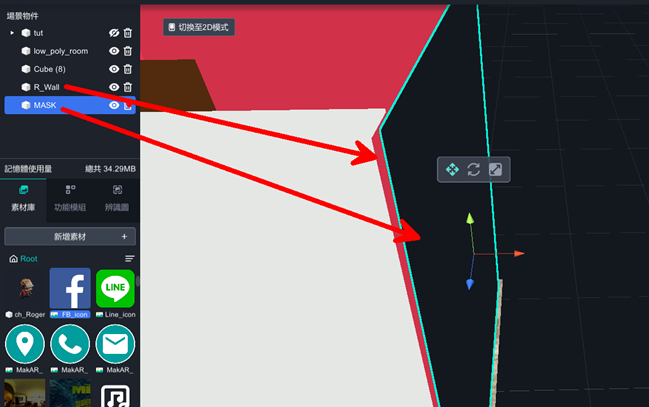
Mask should be a little bigger than walls, and be care for the gap between the wall and mask.
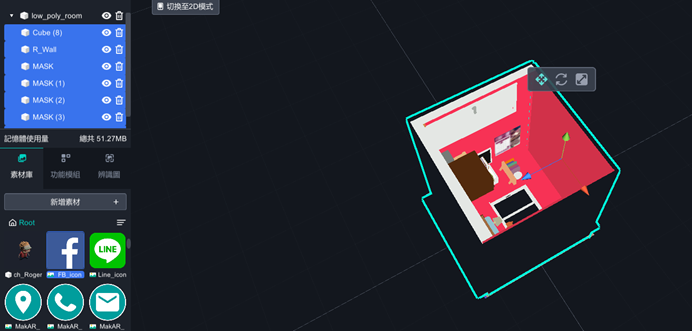
After cover the whole room except the Top aspect, select all elements and drag them into low_poly_room to group them, so that you can move all elements all together.
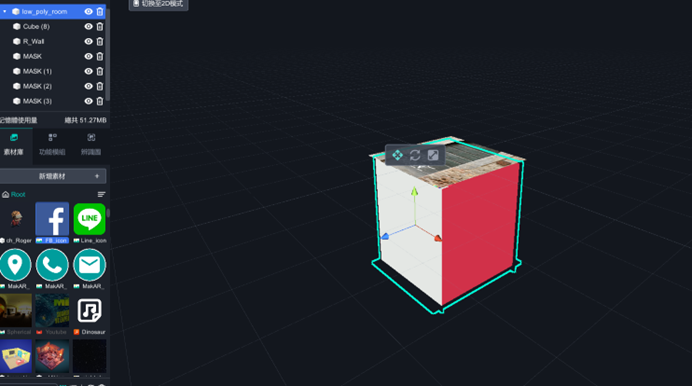
Select the room model, which is the group leader, move it down behind the Target
image. You will see the mask become transparent during the path, and you should not be worried. Adjust your viewpoint down to the ground(press the right button), you will find out it still invisible underground. And Well done!
6. Advance
There is a feature in MAKAR app. The camera scanned the target image, the room will show up, and if you move away from target, the room will still show up in the middle of your screen. Here is going to show you how to make the room appear only if you scanned the target.
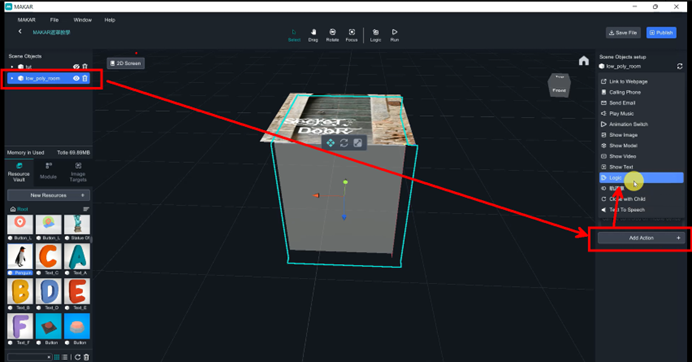
Select the room and add action, and add Logic function on it,
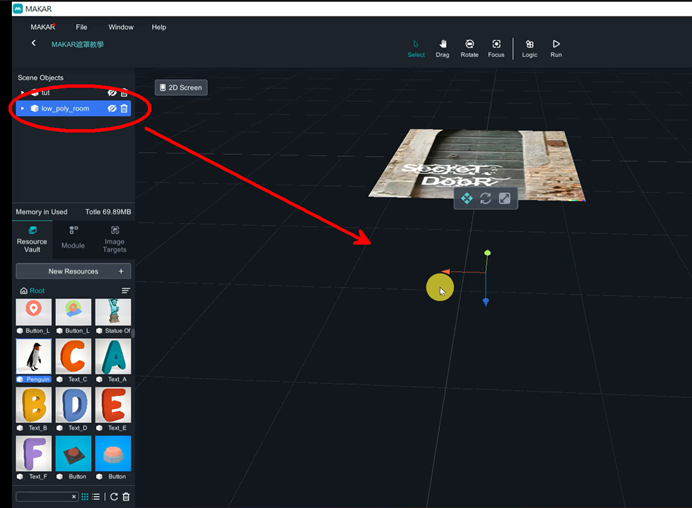
Close the room’s eye to make it disappear.
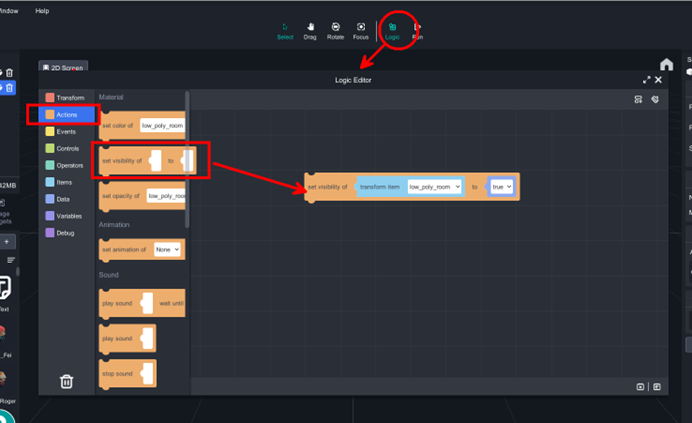
Click the logic on the top banner, you can turn on logic editor, select 【Action/ set visibility of ______to _____ 】, drag the blockly to the scene, and you just solve it.
Metaverse Draw Lots-Using Variable and Lists of MR Project
This tutorial includes logic of "Transform, Actions, Controls, Events, Events and List".We will learn about:
Keep from simultaneous click,
Come up draw lots after setting visibility to false
Randomly come up lot after clicking the box
- Open PowerPoint, edit image and export it.
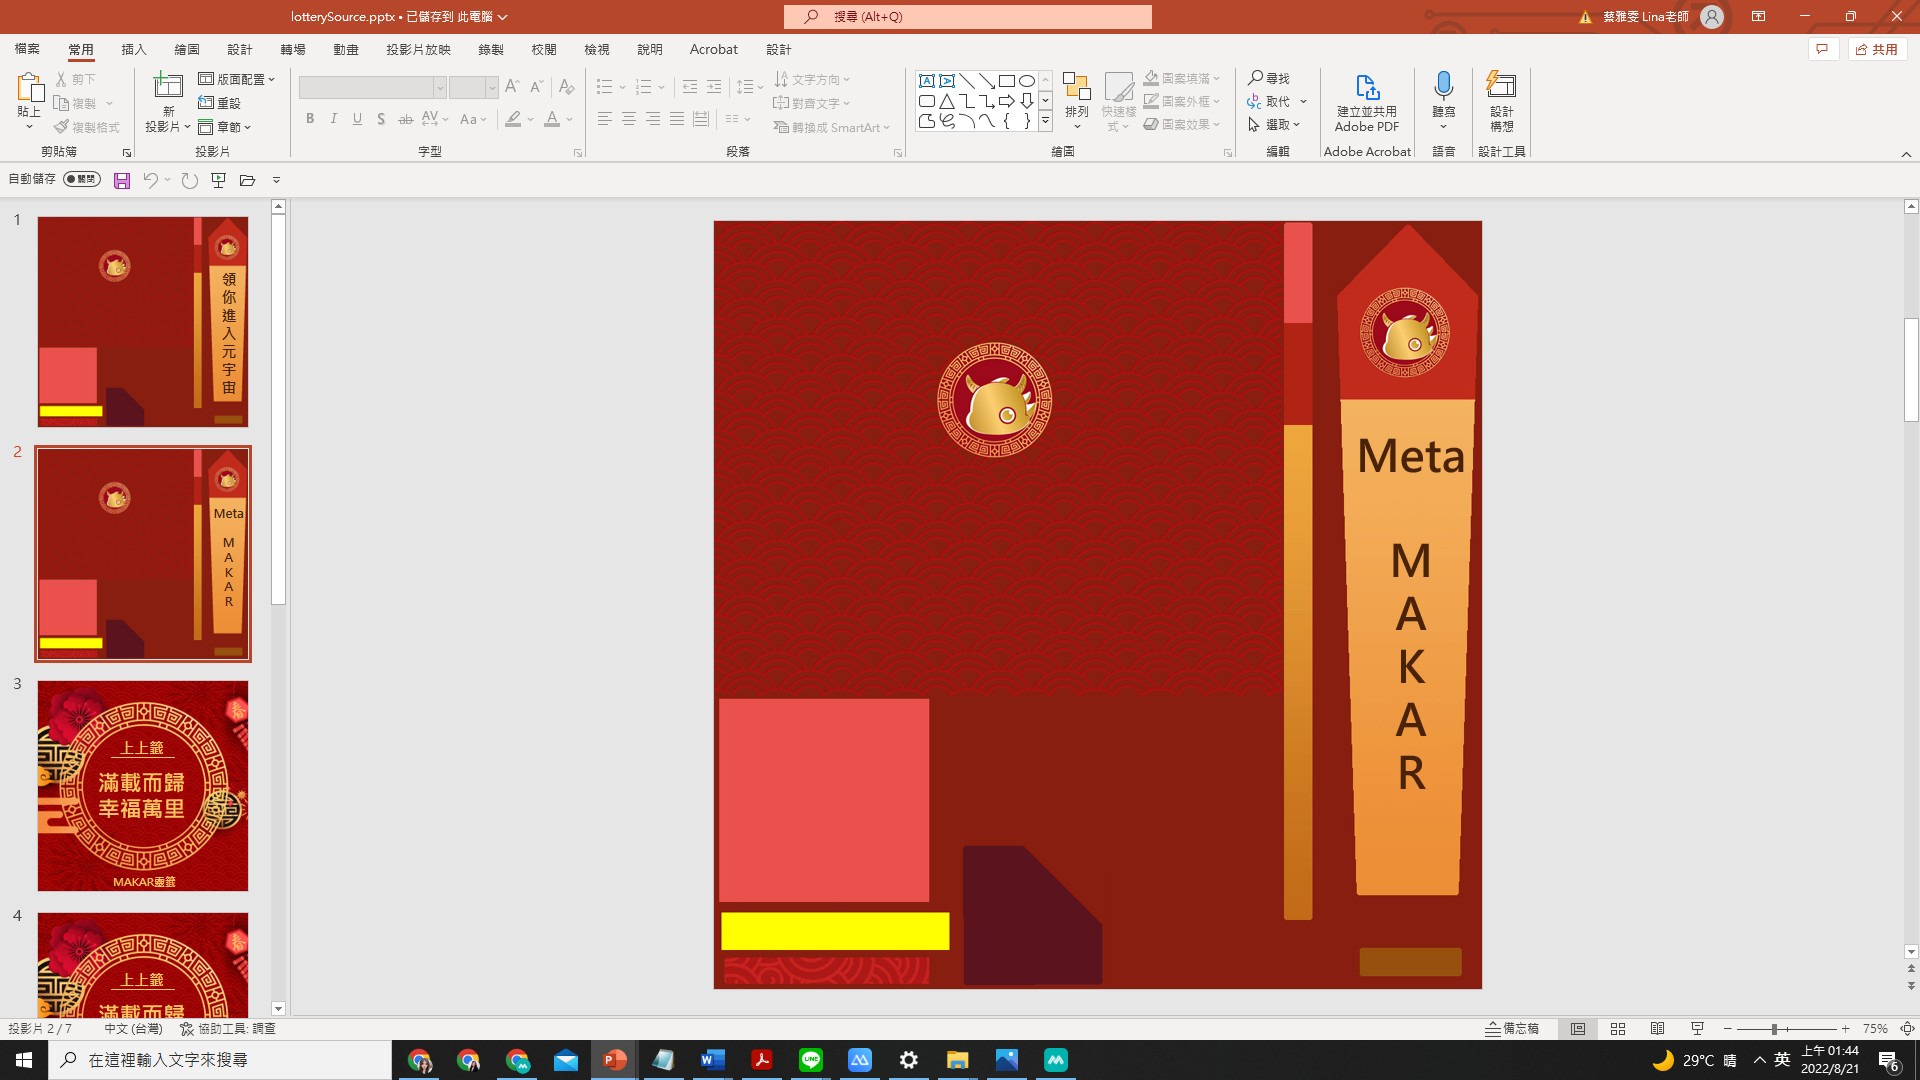
- file>save it to jpg
- open Blender>import FBX>shift to Shading>change the image
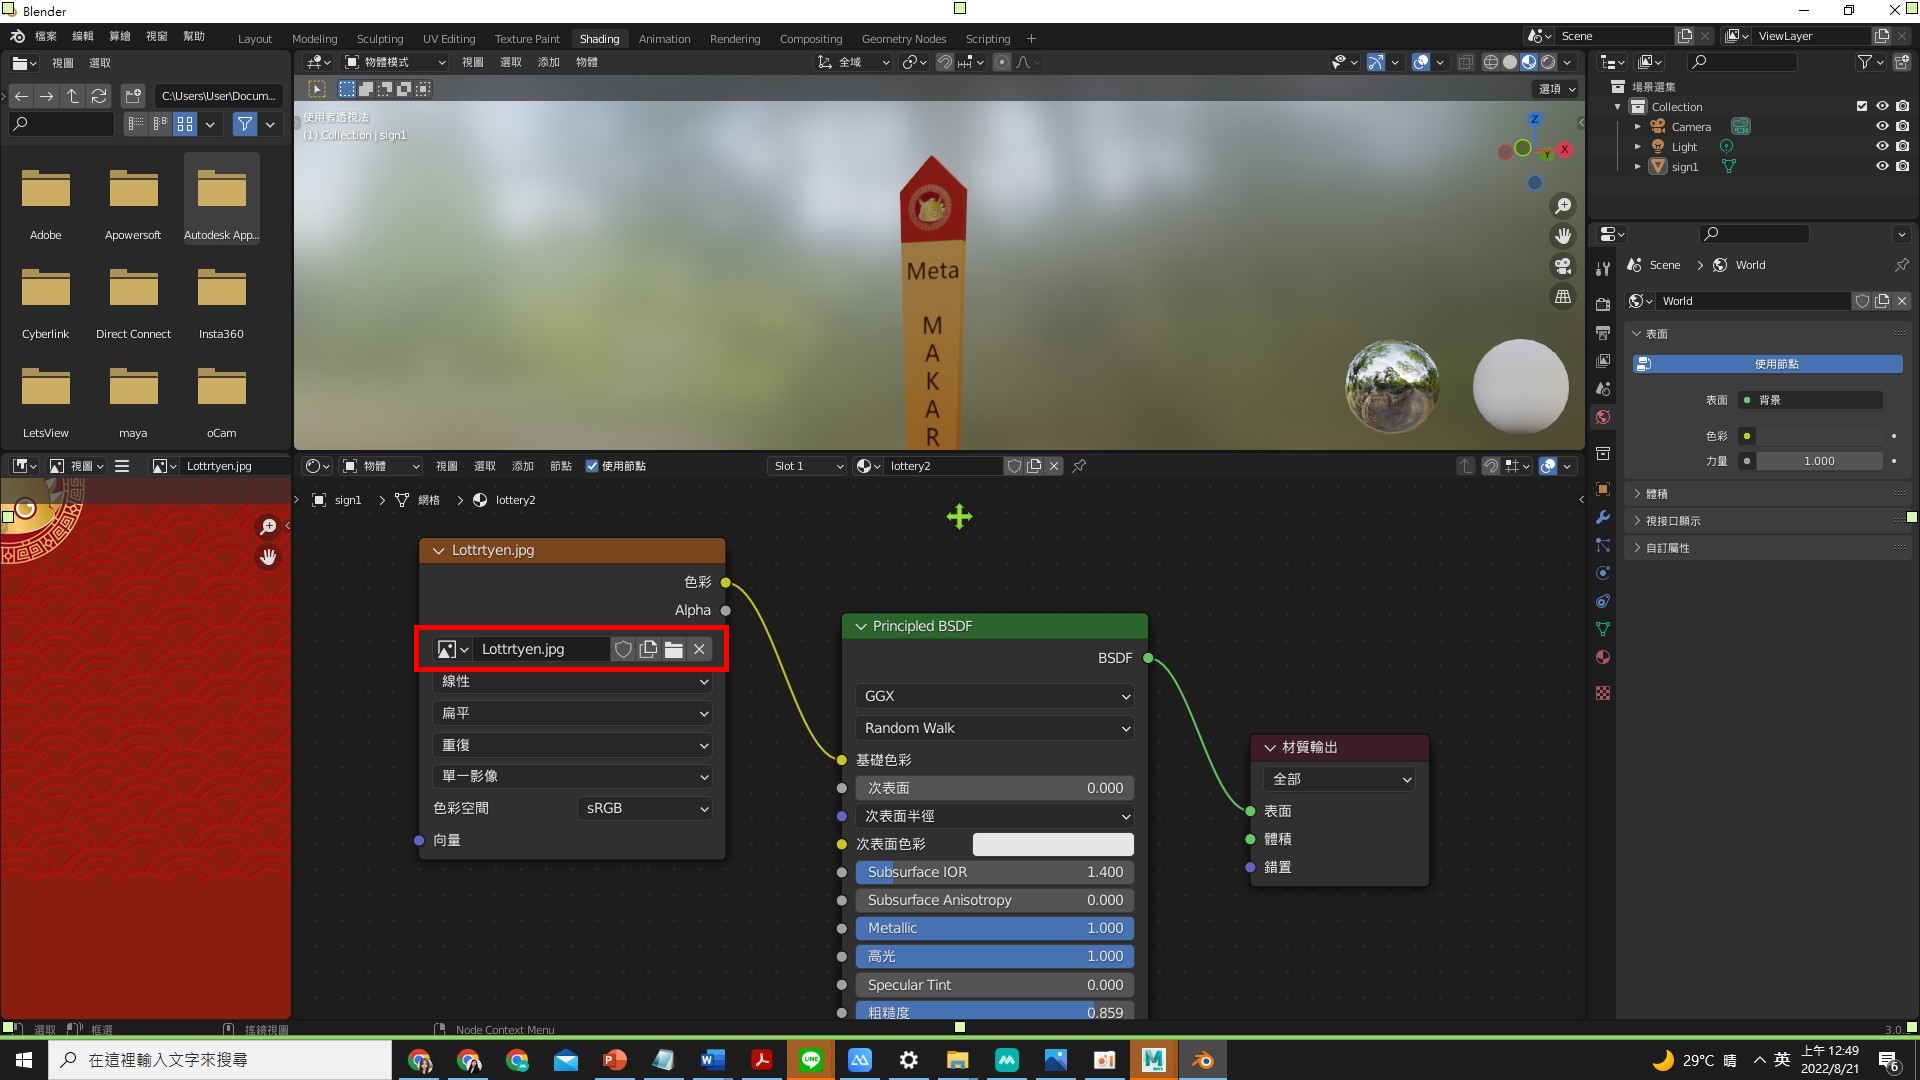
Object's basic setting
- Drag 3 model to the scene.
Add text of "correct " and "wrong".
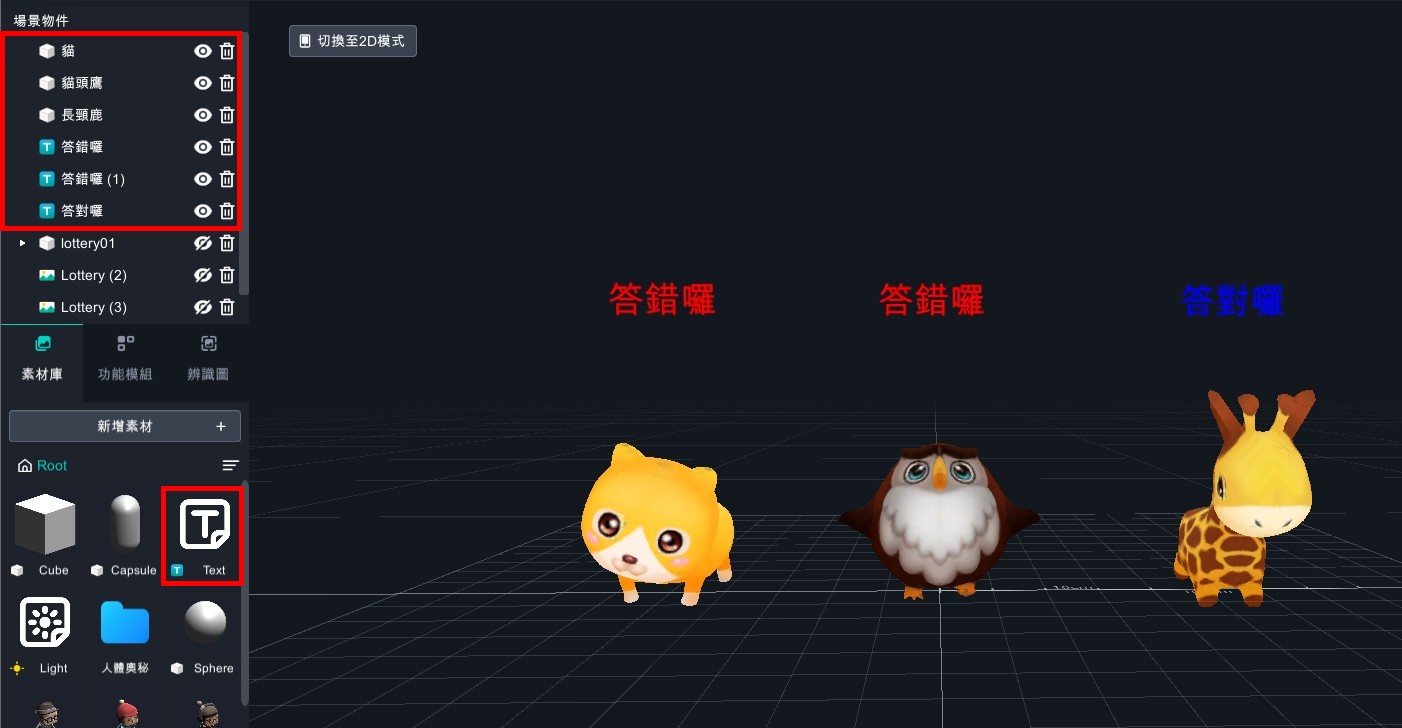
- Drag box to the scene, and put "lottery02、lottery02(1)、lottery02(2)" to lottery01.
- Put lots to the box and adjust the angle in needs.

- Close the objects besides 3 models.
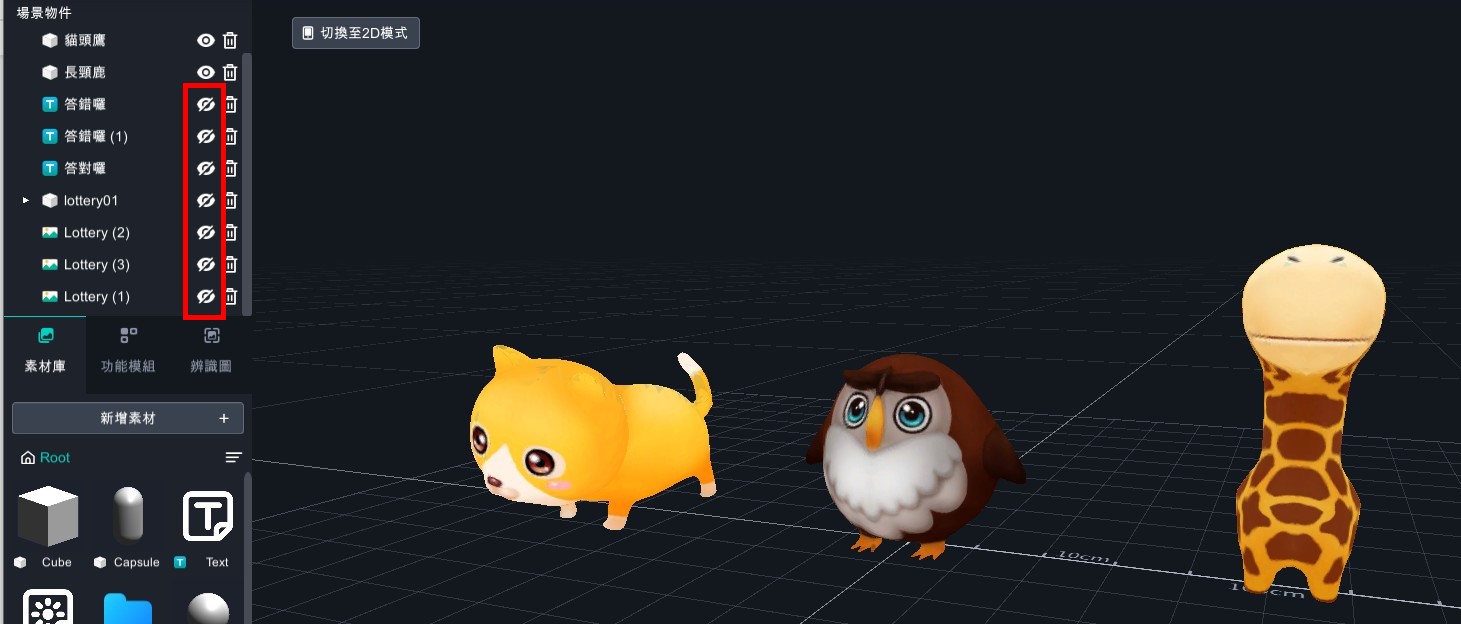
- Add all of object logic.
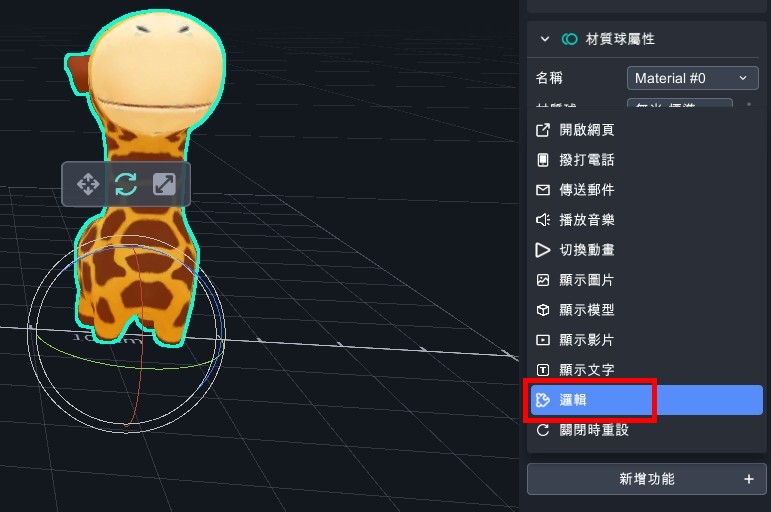
- Open the logic.
- Set the object's visibility to true.
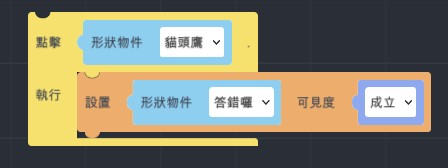
- Add variable>keep from simultaneous click and set the visibility to false.
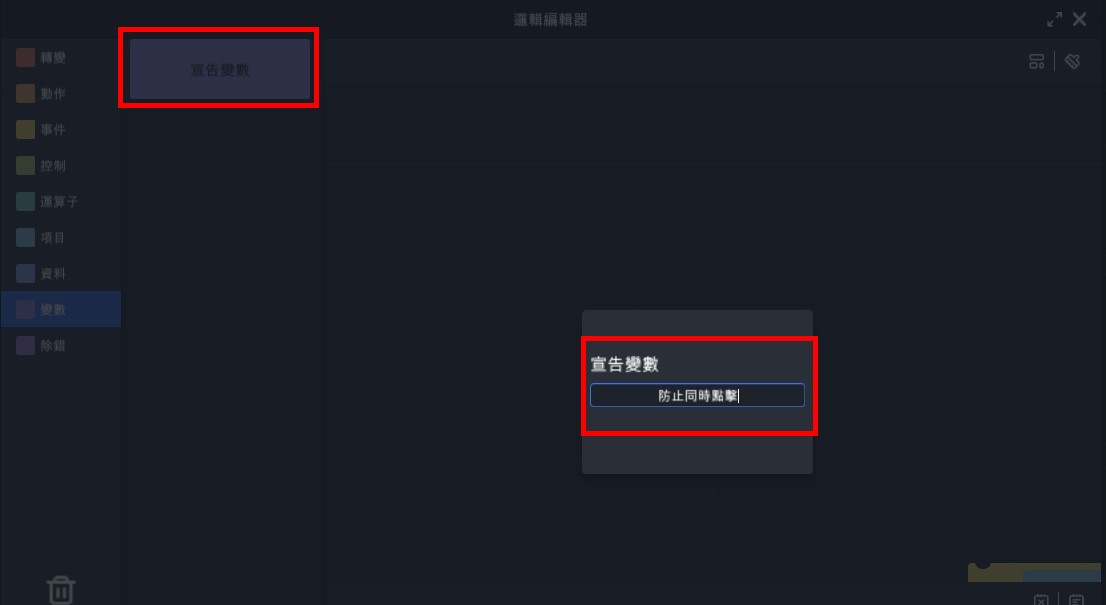
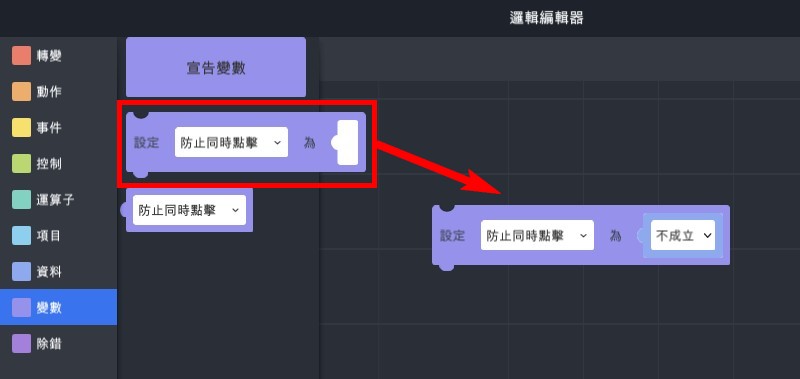
- Add "If…do" logic.
(2). Set object's visibility to true.
Note: add text of "wrong".
(3). Add variable "keep from simultaneous click=false".
Note: you can not click the objects before step4.
(4). Wait for 1 second.
(5). Set object's visibility to false.
Note: close the text of "wrong".
(6). Set "keep from simultaneous click=false".
Note: close the situation that can not click objects.
(7). Copy 2 and adjust the other object's trigger situation.
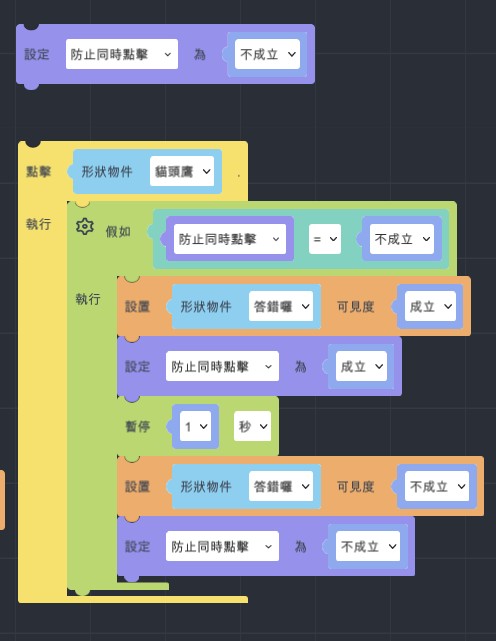
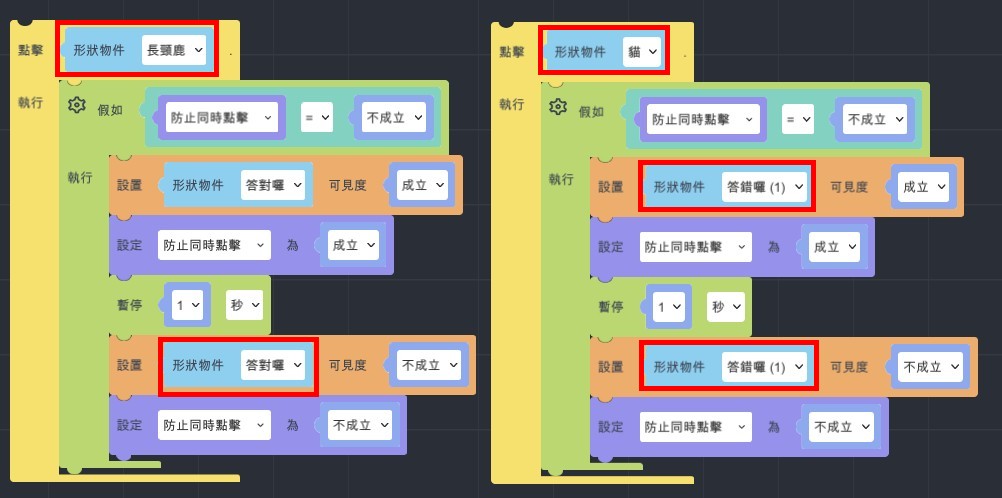
- Take the model of giraffe for example.
- Copy three model and set their visibility to false.
- Set lottery01 visibility to true.
- Add variables>start to draw lots >true.
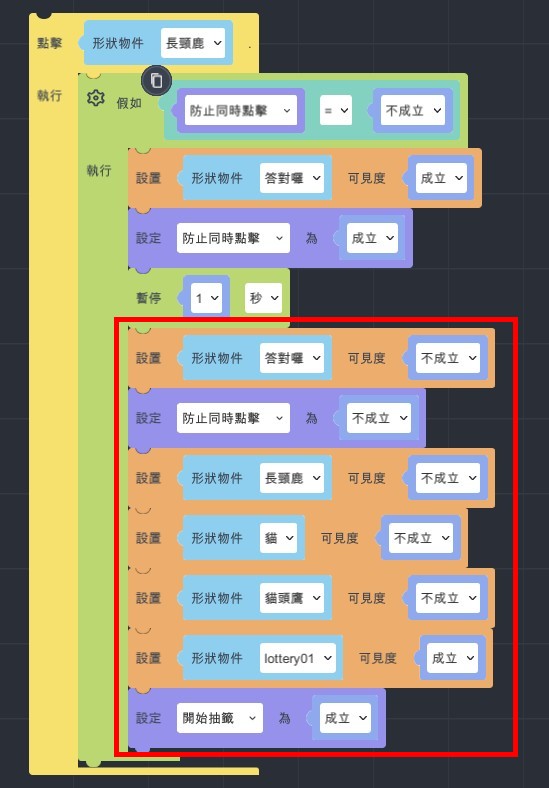
Draw Lots Setting
- Add "When…is clicked" >set the up moving animation.
- Add "If…do">set variable of start to draw lots to true. You can repeatedly click.
- Set click for once, add variable to false and put it on the animation's top.
- Add variable : lot result.
- Set lot result: operators>random number from …to…
- Set random number from 0 to 5.
- Set random number from 0 to 5 (01234) in logic.
- EX1: set 0~5, it will be 01234.
- EX2: set1~6, it will be 12345.
- EX3: set6~9, it will be 678.
- When setting lot’s visibility, you could know that the coming up of animation and lot is too close, so add wait for 1 sec.
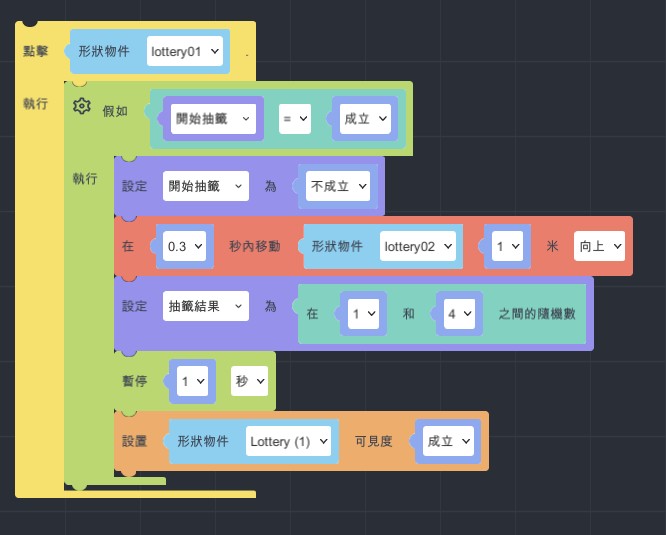
- Add "create empty list" and add "MyList" to variable.
- Add data>lists> add transform item to MyList.
- Copy 3 and put them behind create empty list.
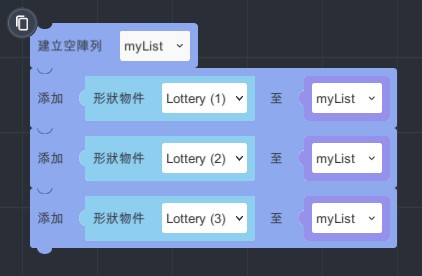
- Data>list>set set "add my list to lot result" visibility to true.
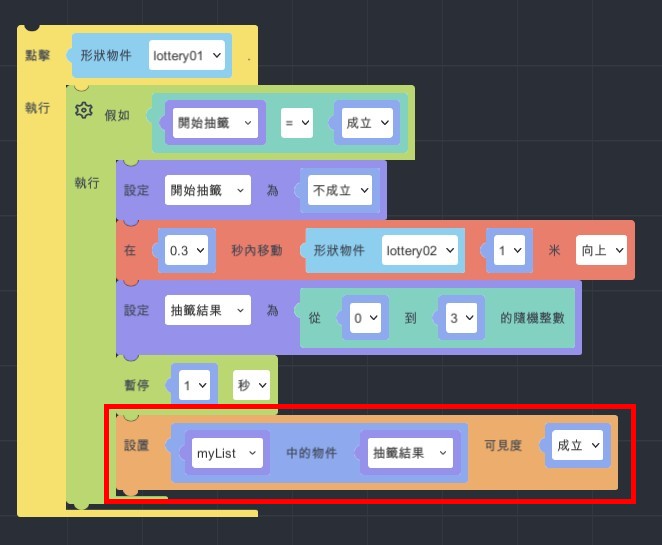
- Repeatedly click setting
- Event>when…is clicked.
- Set Lottery (1) visibility to false.
- Copy animation and change it to moving down.
- Set "start to draw lots" to true.
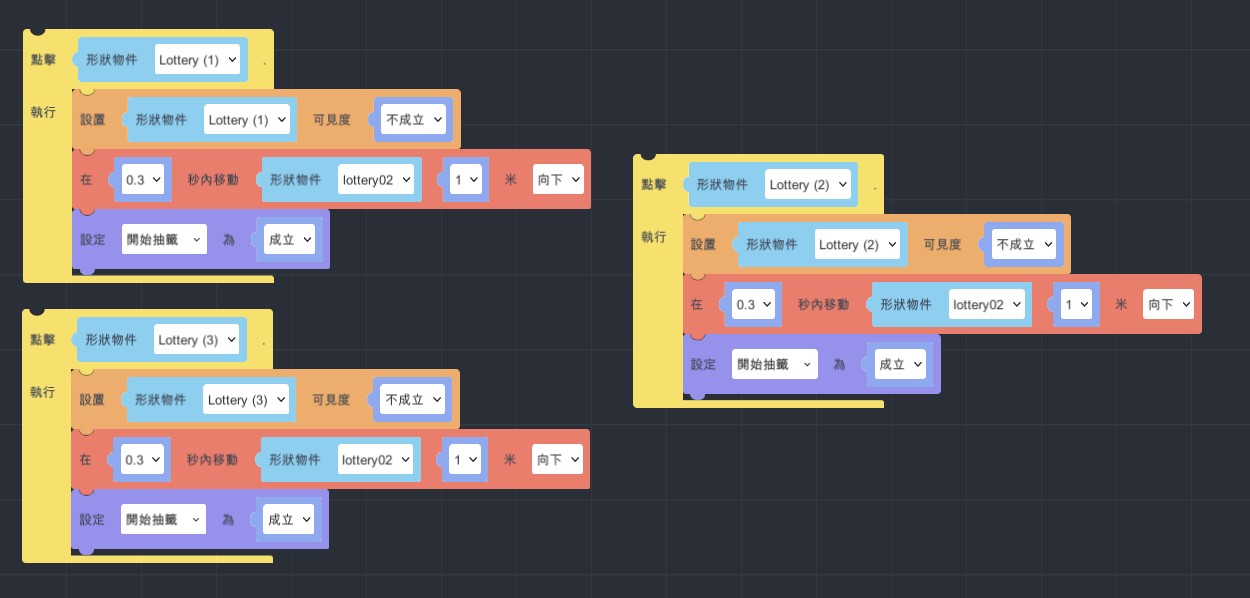
- Finish and start to experience!
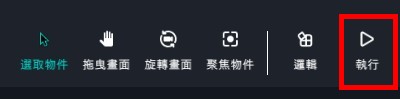
Use MAKAR to learn physics-Let's make an AR cannon!
1. Please download the file of cannon.zip and decompress it, import them to MAKAR.
https://drive.google.com/file/d/1HdJHrGcdfRRikf1zViDViWFNuRBjVmCz/view?usp=sharing
Click "New Project"> "Space Recognition", and enter the project name.
Click "OK".
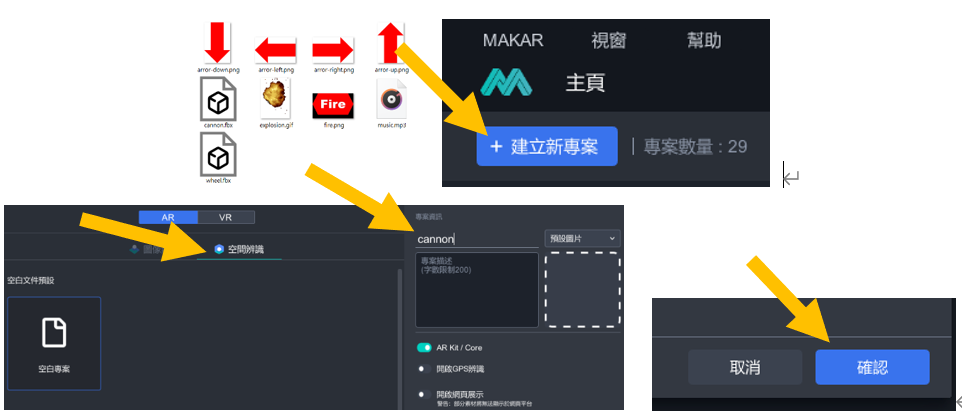
2. To the left side find and click "New Resources" > "3D Model"
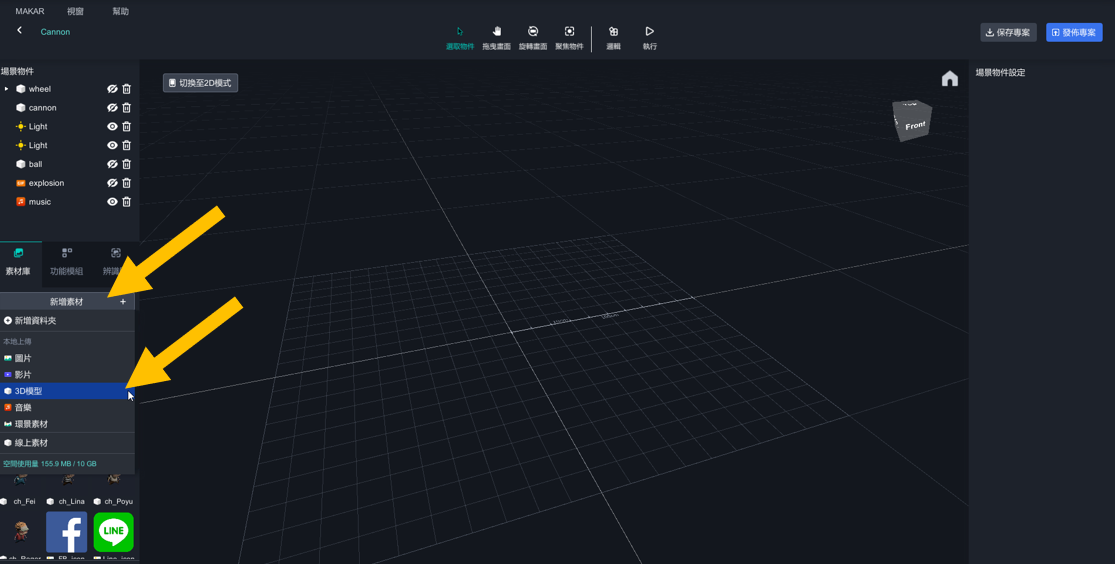
3. Find these two files and import them to the resources.
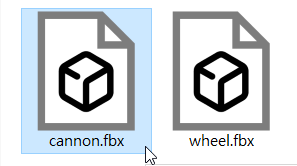
4. Import image and audio to the resources, Click "New Resources" > "image" and "New Resources" > "Audio".
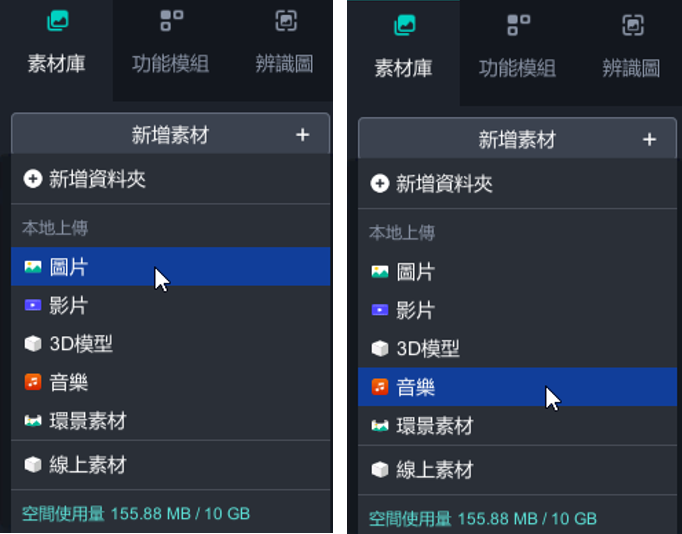

5. All of the resources were done, drag them to the scene and start to edit objects and arrange logic.
Drag the object of the cannon to the scene and edit position, rotate, scale. Cancel interactable and add action logic.
drag cannon to the scene.
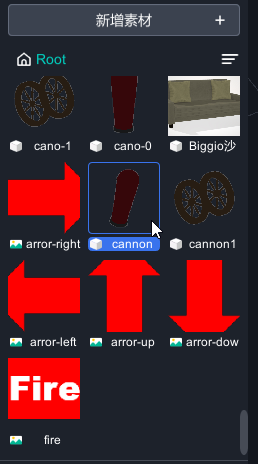
6. Set the position, rotate, scale on the right side. And turn off the interactable.
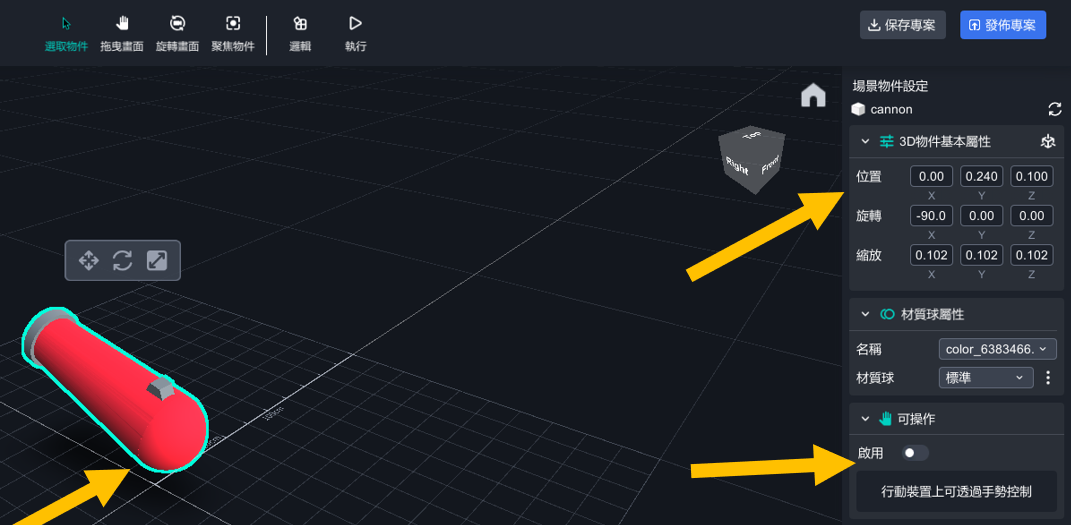
7. Click "Add Action">"Logic"
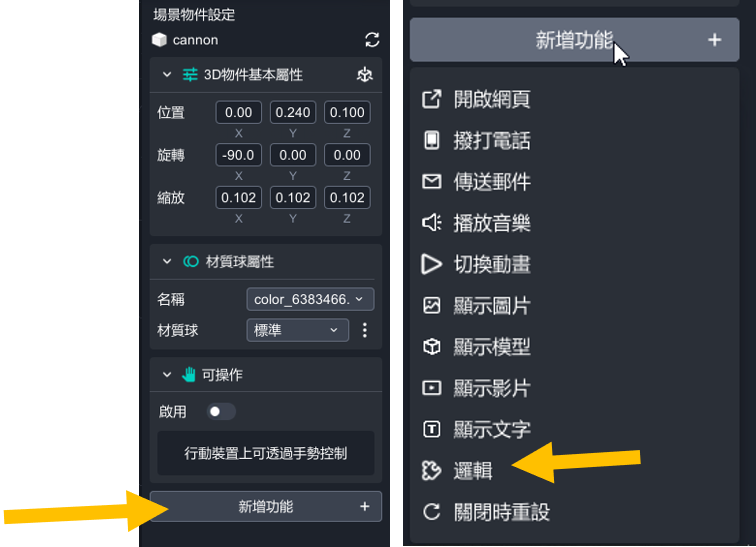
It's how it looked when you were done every steps.
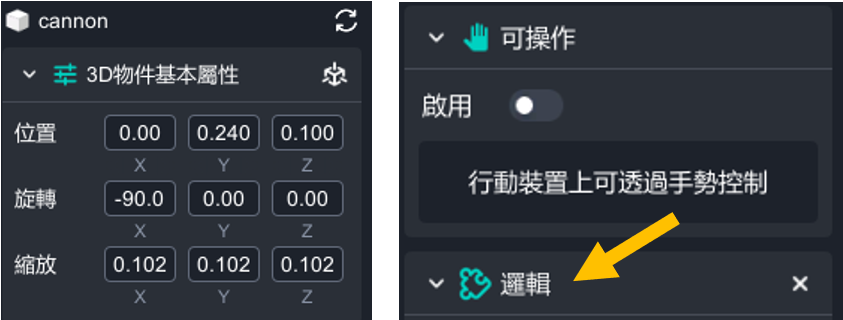
8. Drag the object of wheel to the scene and edit position, rotate, scale. Cancel interactable and add action logic.
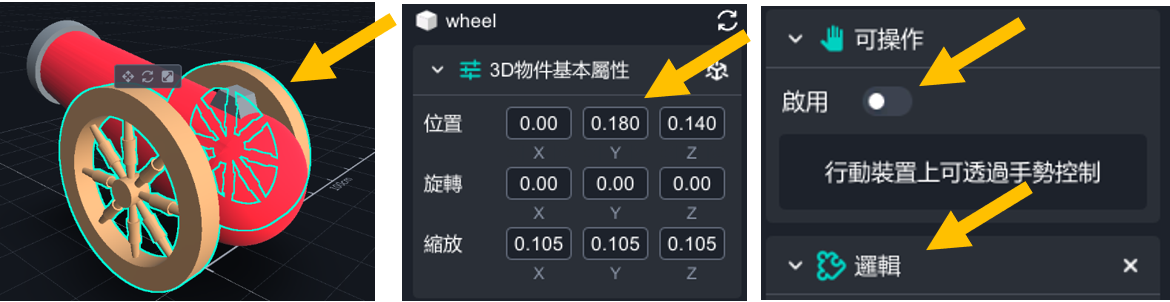
9. Next on, drag the image of arror-right,arror-left,arror-up,arror-down,fire to the scene, and edit position, rotate, scale.
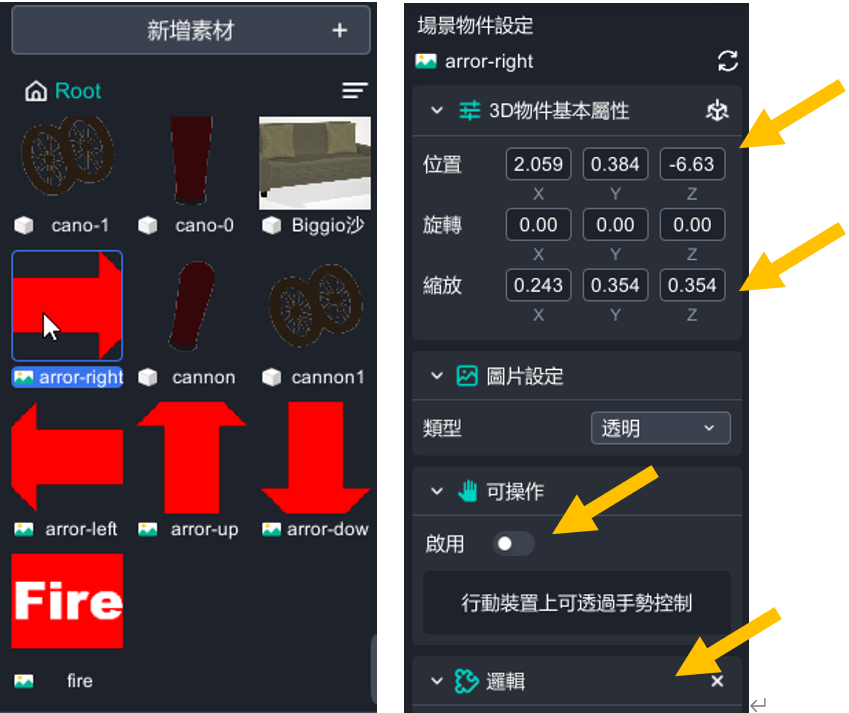
10. Cancel interactable and add action logic.
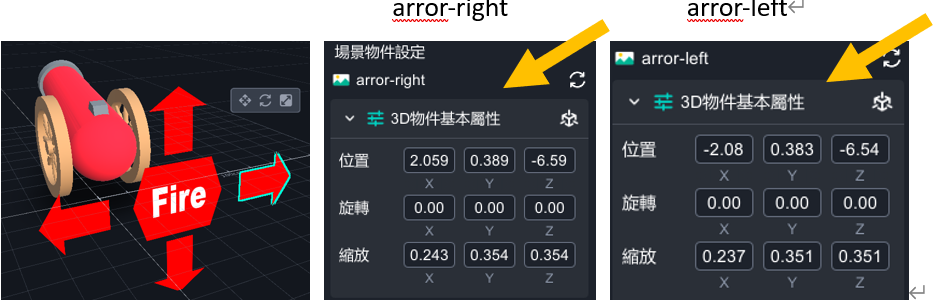
11. Drag the video of explosion to the scene, and edit position, rotate, scale. Cancel interactable and add action logic.
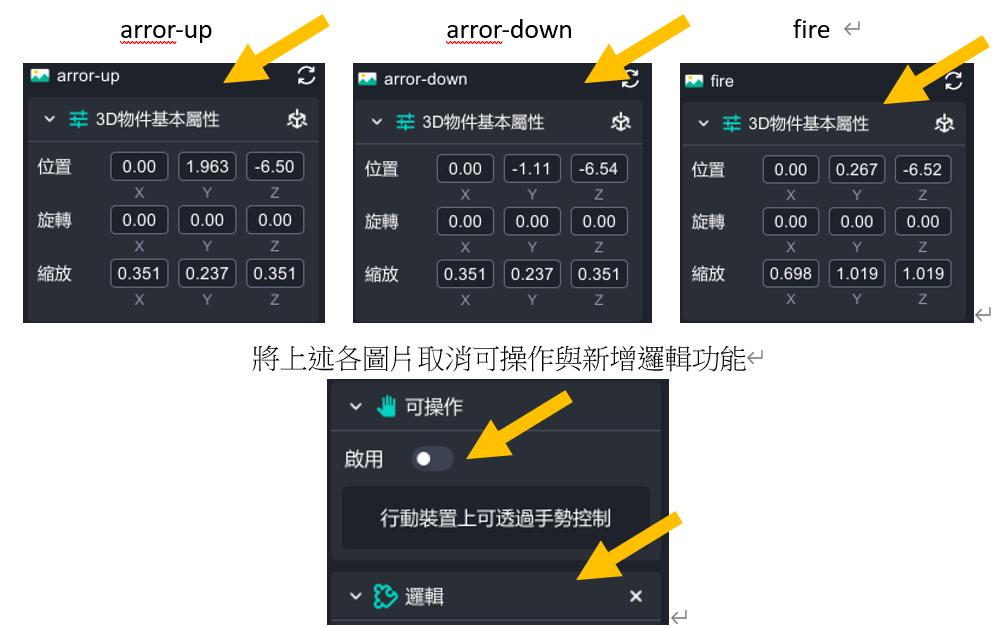
12. Drag the video of explosion to the scene, and edit position, rotate, scale. Cancel interactable and add action logic.
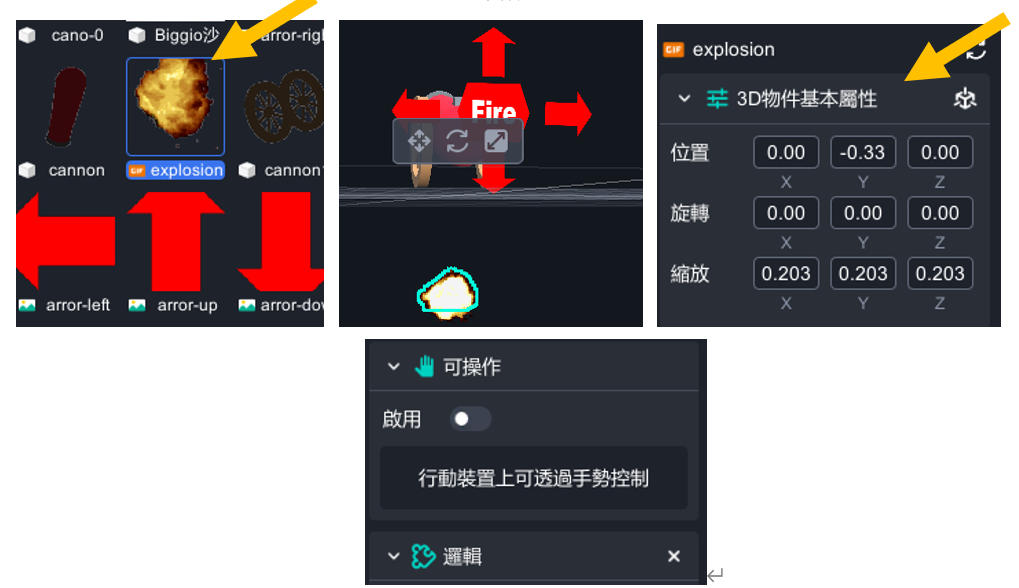
13. Drag the music to the scene and edit its position. Cancel interactable and add action logic.
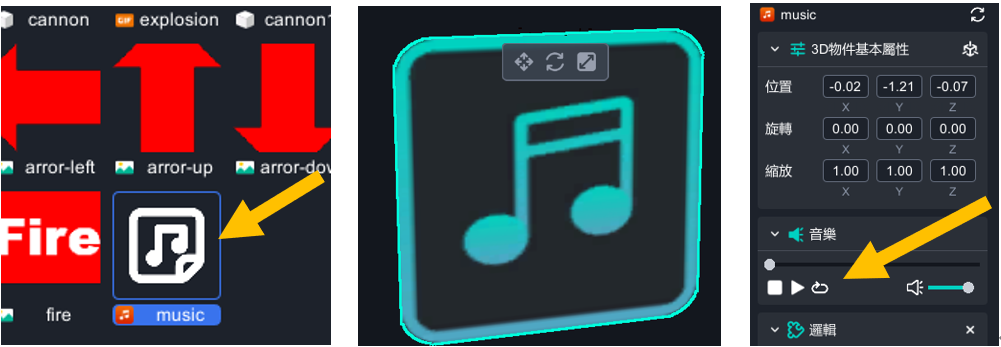
14. Add the light and drag it to the scene.

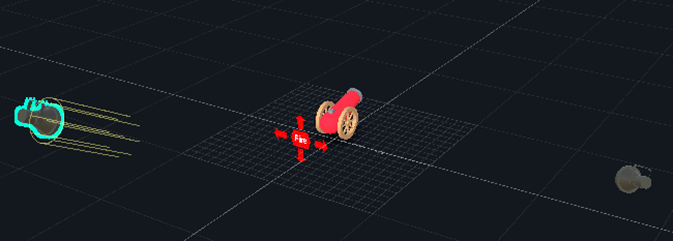
Edit the light’s position, rotate, and lighting strength.
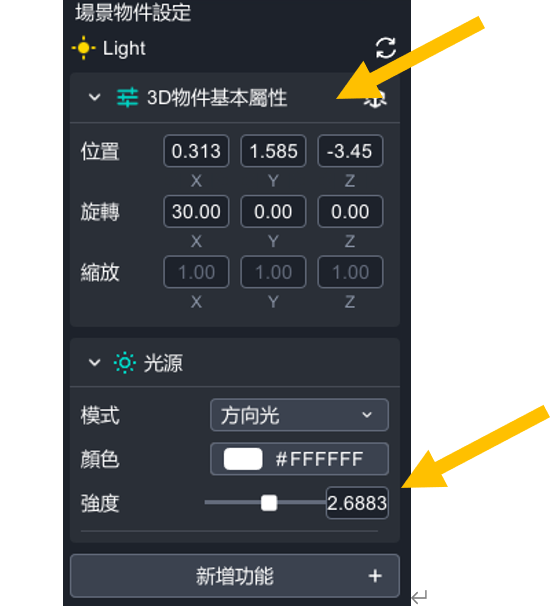
【Group】
arror-rightt, arror-left, arror-up, arror-down, fire, drag these five objects to the "wheel" object to make them become a group. Being a group is the most convenient way in MAKAR. So that there would be a triangle icon on the left top. You can open and close these objects easily.
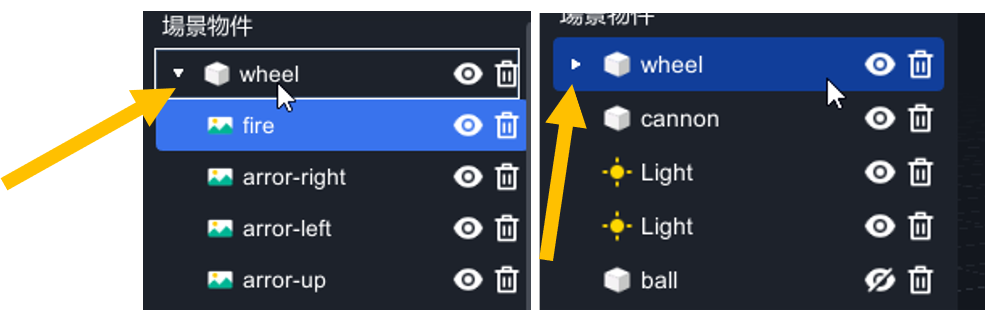
15. Drag Sphere to the scene, and edit the position and size. Cancel interactable and add action logic.
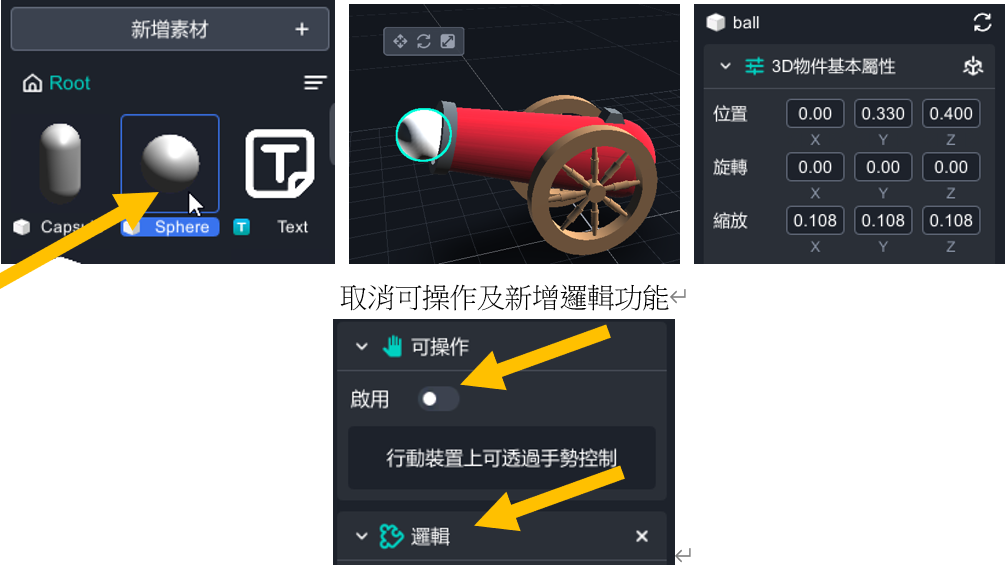
16. Click two times on the Sphere to edit the name into "ball”
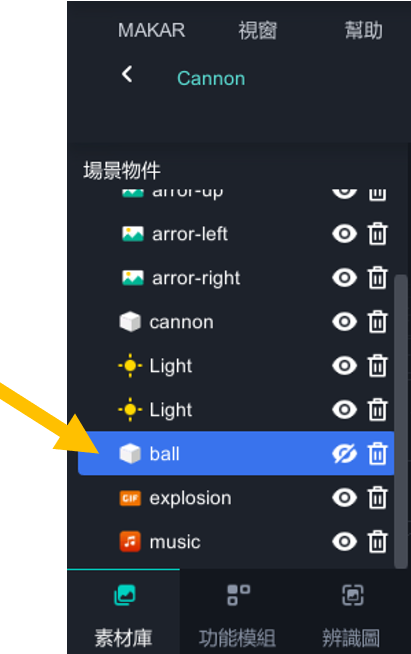
17. Click logic to arrange logic.
Logic:
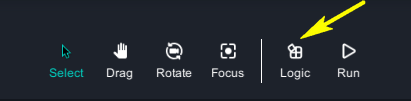
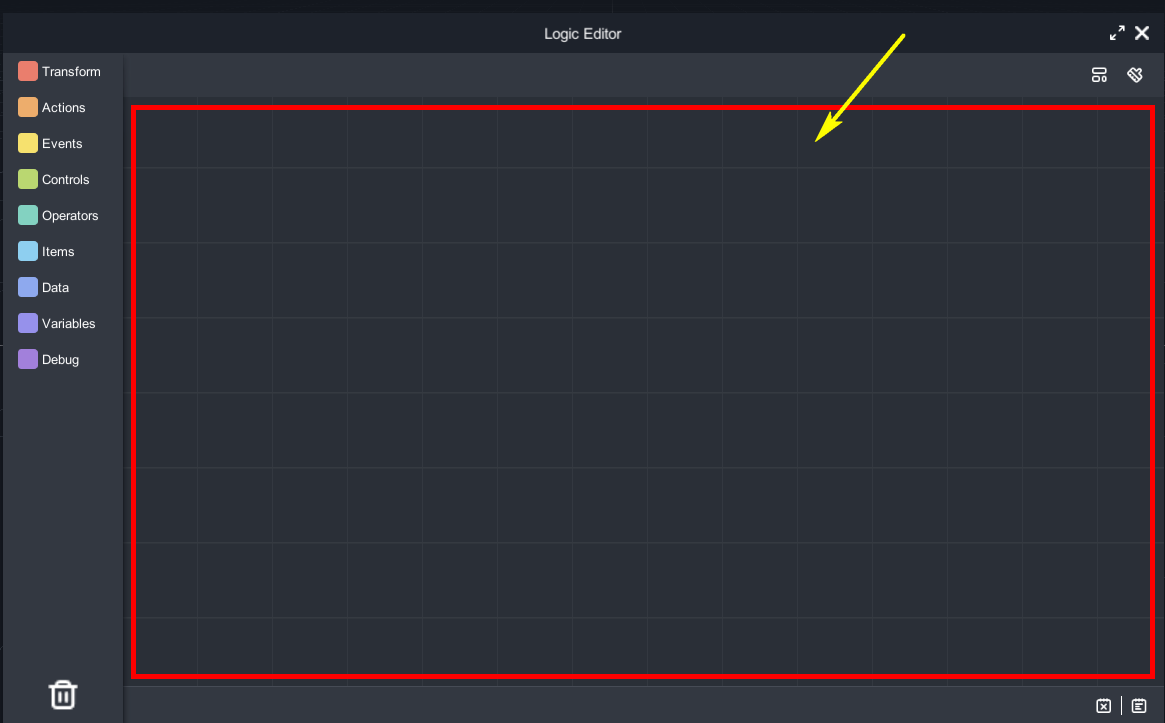
1. There are different blocklies on the left. Please drag one blockly into the blank space to start.

Use variables to design every deta.
| variables name |
|
value | variables name | project | value | |
| ax | cannon-x coordinates | 0 | vx | ball-x direction velocity | 0 | |
| ay | cannon-y coordinates | 0.24 | vy | ball-y direction velocity | 0.3 | |
| az | Cannon-z coordinates | 0.1 | vz | ball-z direction velocity | 0.4 | |
| bx | ball-x coordinates | 0 | dvy | ball-y direction velocity effected by carron's height | 0.1 | |
| by | ball-y coordinates | 0.33 | dvz |
|
0.05 | |
| bz | ball-z coordinates | 0.4 | xx | canoon right left moving distance | 0.1 | |
| cx | wheel-x coordinates | 0 | th | setting the angle of cannon's up and down | 10 | |
| cy | wheel-y coordinates | 0.18 | bx1 | ball-x coordinates staging value |
||
| cz | wheel-z coordinates | 0.14 | by1 | ball-y coordinates staging value |
||
| bz1 | ball-z coordinates staging value |
【About variables】
1. Drag the blockly of variables, and drop it to create a variable. Arrange every value according to this sheet.
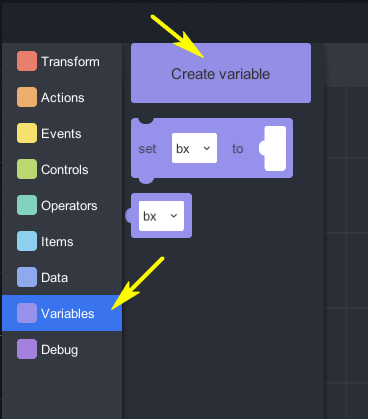
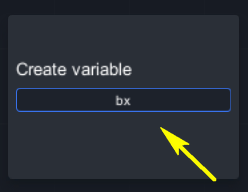
It is how it looked after creating variables.
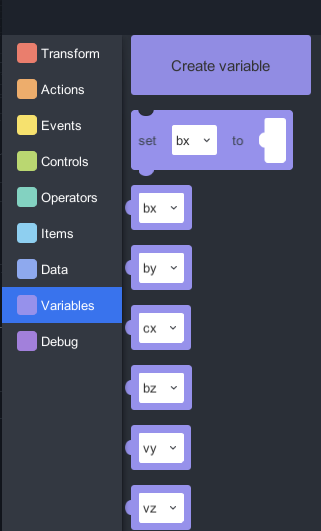
2. Drag bx blocky to the right.
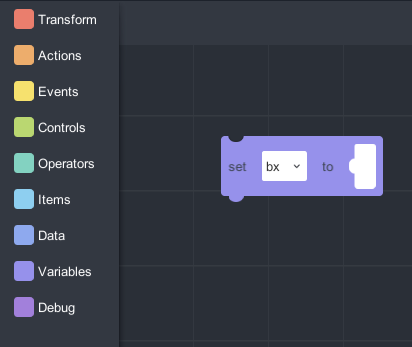
3. Click ”Data” > “1”, and drag it to the bx blockly’s right side. Edit value to 0.
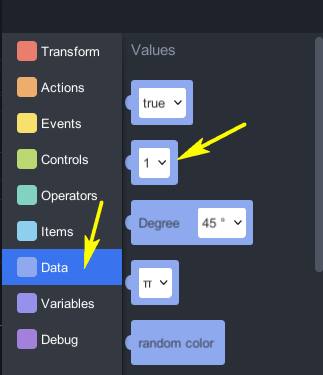
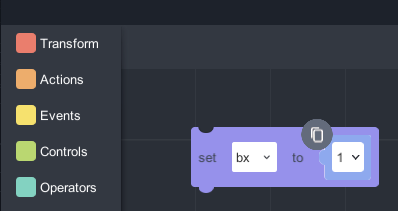
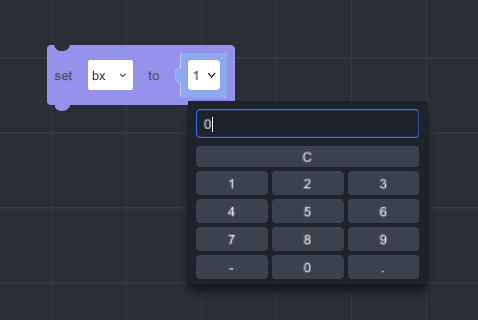
【Editting Variables】
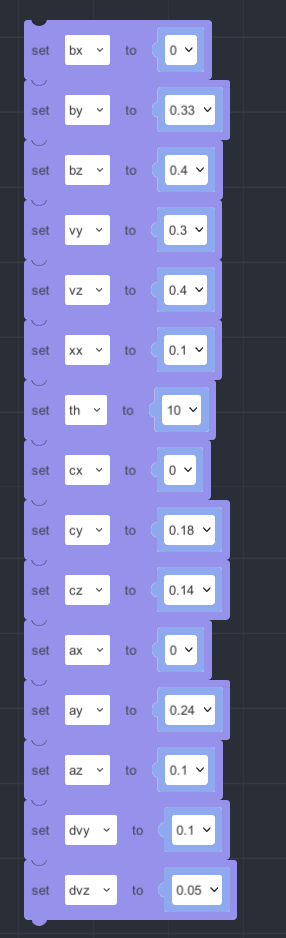
〔Click the right arrow and the cannon will be moved right.〕
1. Click and drag “Events” > "when…is clicked". Choose “arror-rijgt”for the transform item.
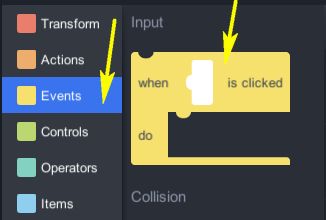
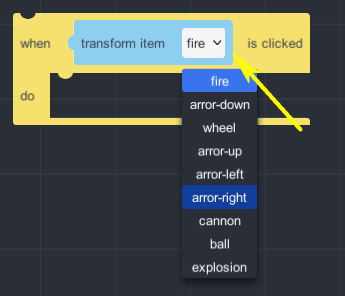
2. Click and drag “Controls” > “If…” to the editing space.
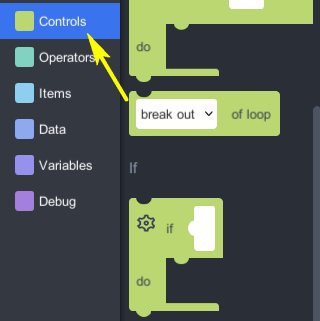

3. Click and drag “Variables” > “bx blockly” like this.
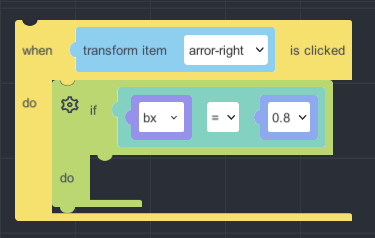
4. Click and drag “Transform” > “move…to…in…sec” to the editing space
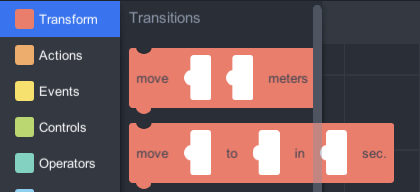
5. Click and drag “Operators” > “...+...” to the editing space.
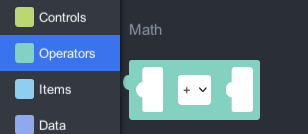
6. Click and drag “Variables” > "set…to…", and edit its different variables.
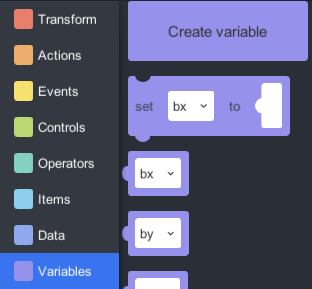

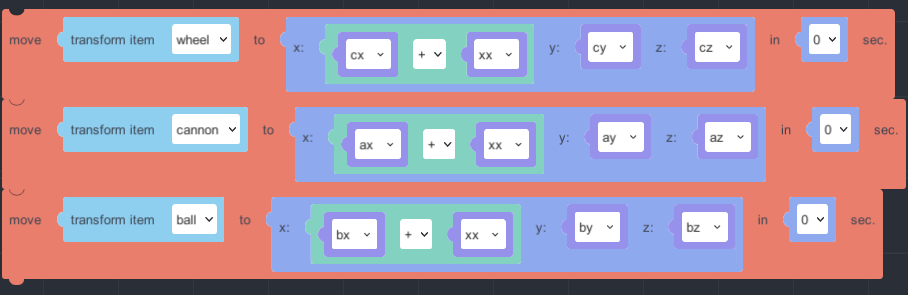
7. Please edit the last variables to finish moving right.
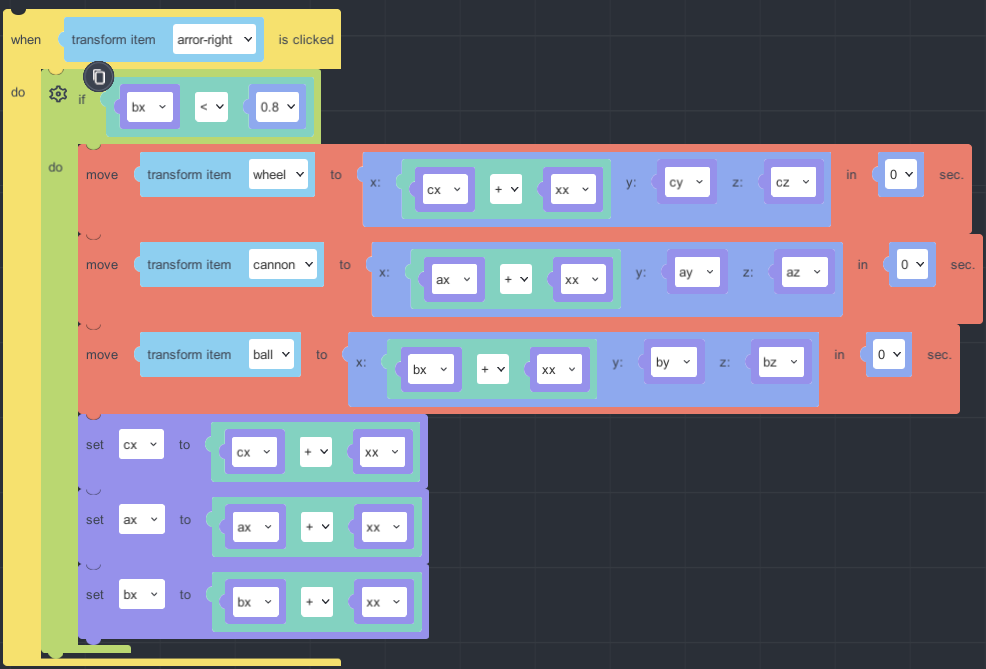
8. Click the copy icon on the left up side. So that it will come up a whole blockly.
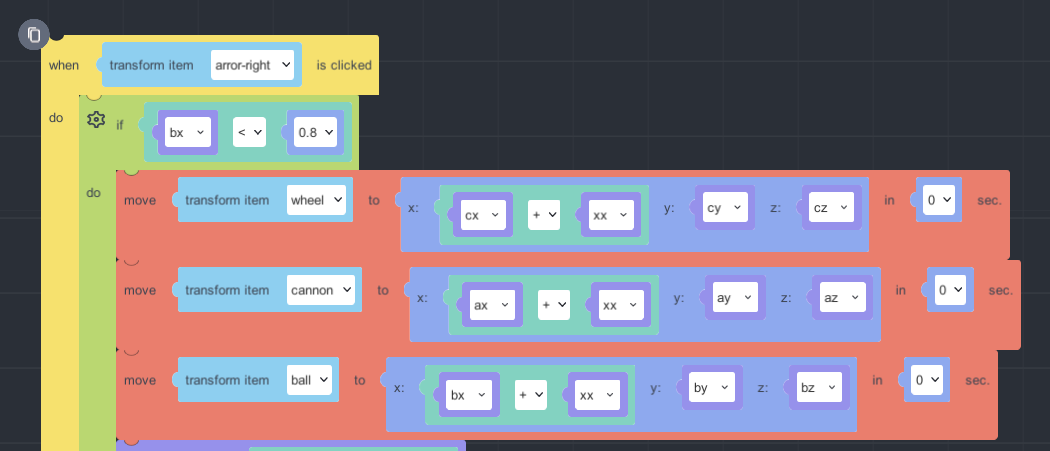
【Click the left arrow and the cannon will be moved left.】
Coped blockly can be edited for moving left.
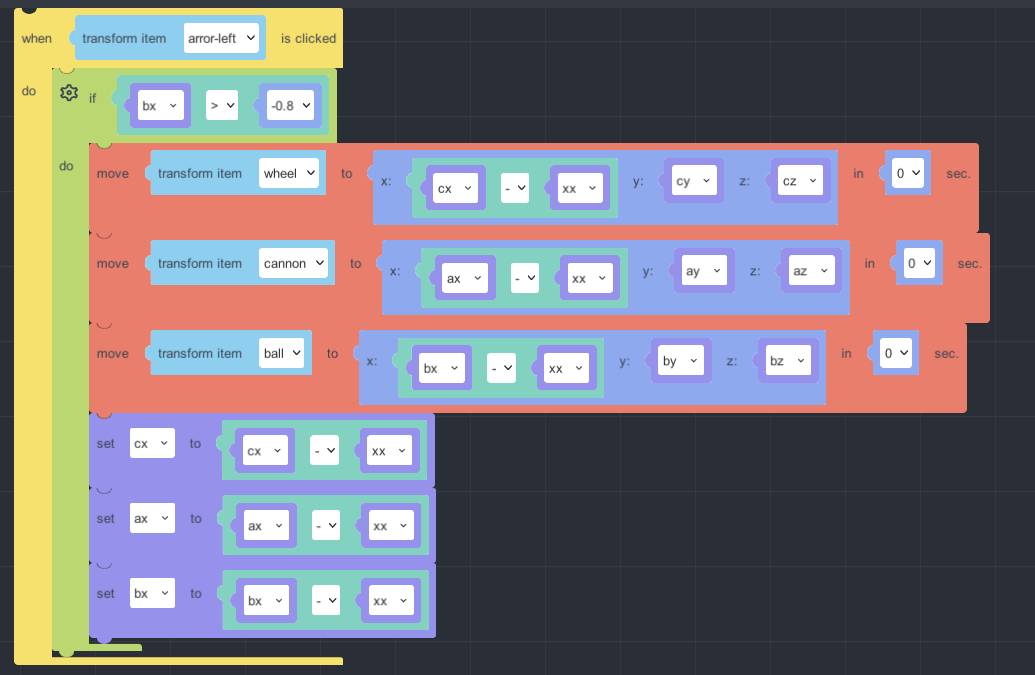
【Click the up arrow and the cannon will be upped.】
When by value is bigger than 0.6, it will be stopped.
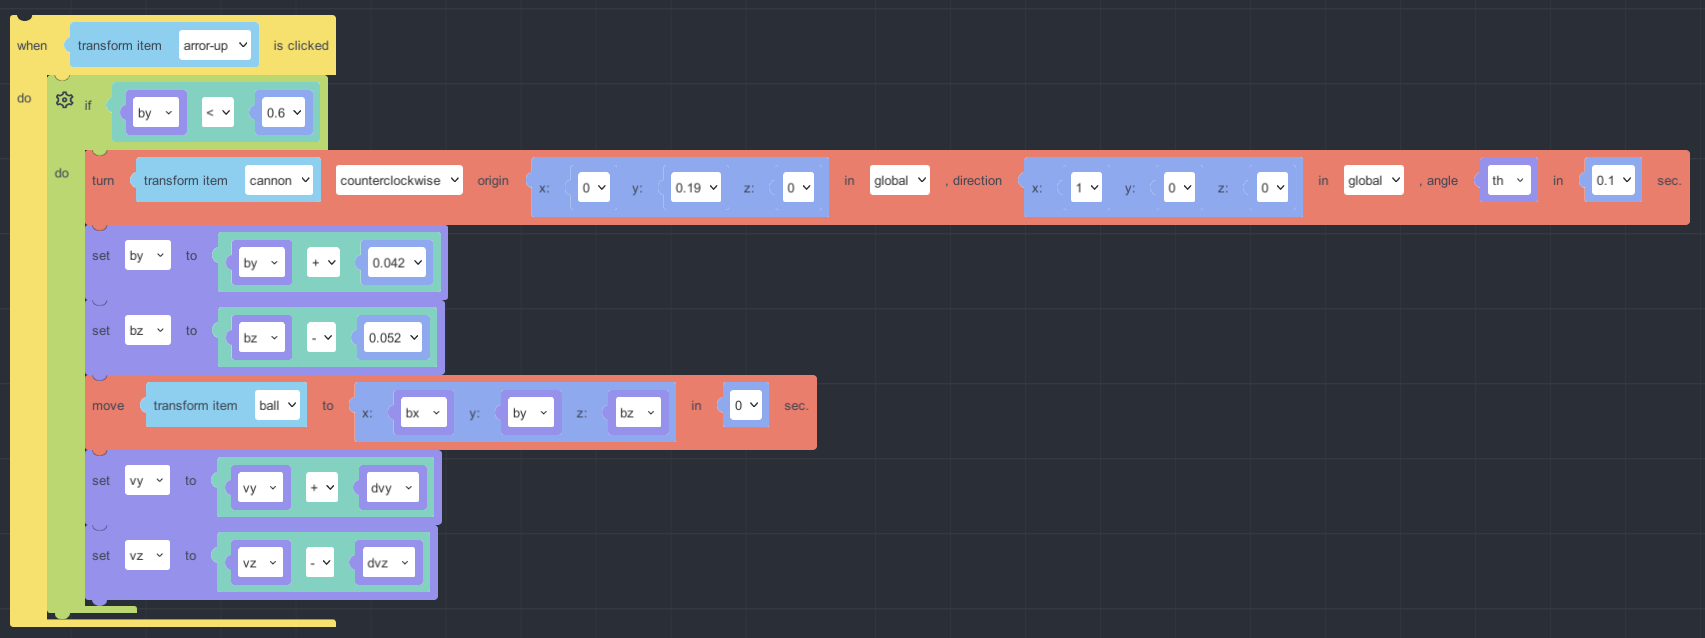
【Click the down arrow and the cannon will be raised.】
When by value is smaller than 0.331, it will be stopped.
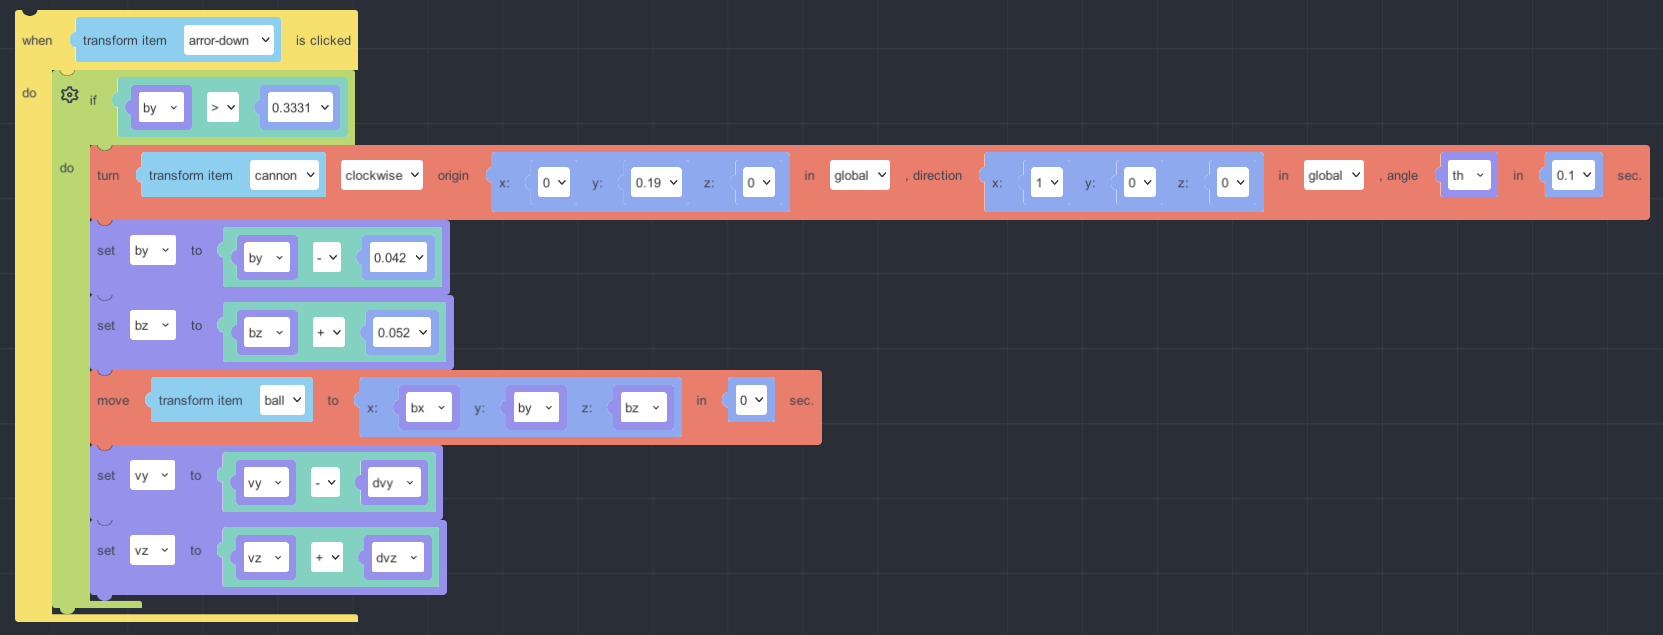
【Trajectory of a cannon】
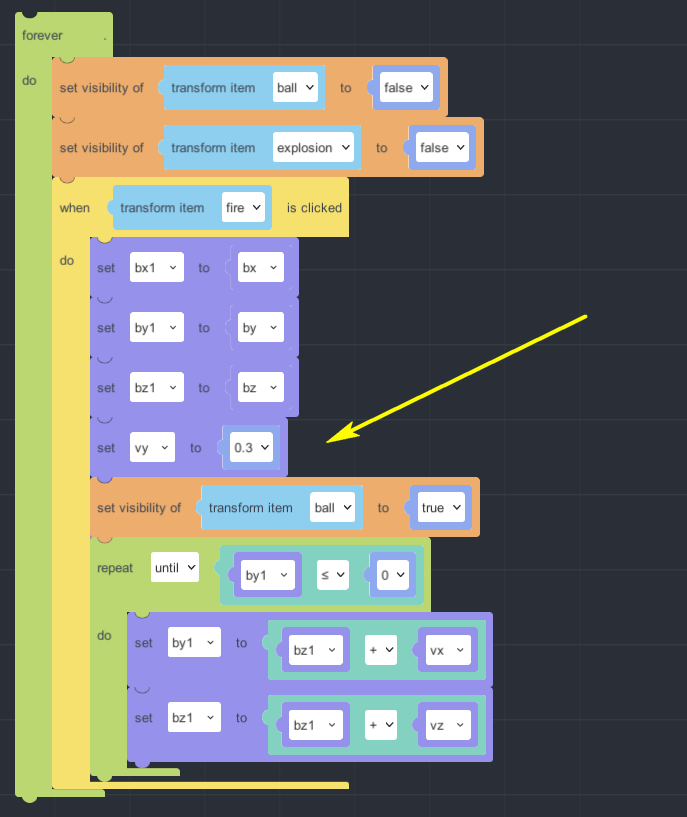
※ vy value is the same as the variables of vy value.
1. vx value could be 0 because there is no speed of x direction for cannon.
vz is the z direction, when vz is bigger speed will faster.
Therefore every loop will go straight regulately.
z direction is motion with constant velocity.
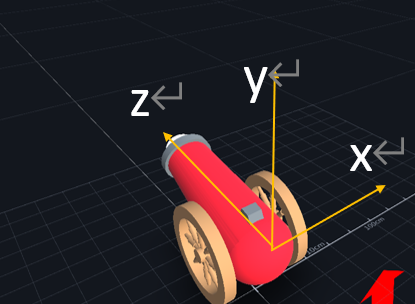
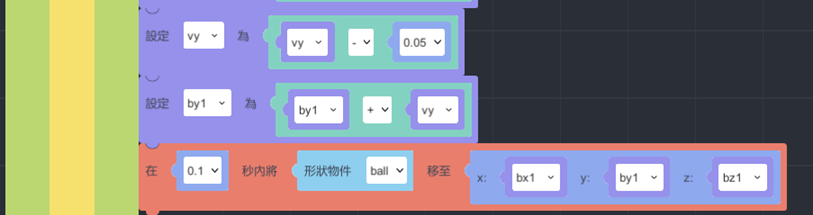
2.
y direction, after the cannon is shooted, it will be affected by gravity.
Up speed will be more and more small unitil achieving the max. And starts to go down.
vy value, it is original speed of going up, so that the more vy value it goes, the far height is.
And the vy value is going small by getting higher. It will decrease by 0.05 each time it is looped.
by1, it is y direction of updating staging value,the more by value increases, the less vy value decreases.
When height is going to max, vy value will go to minus, and then the cannon will go down.
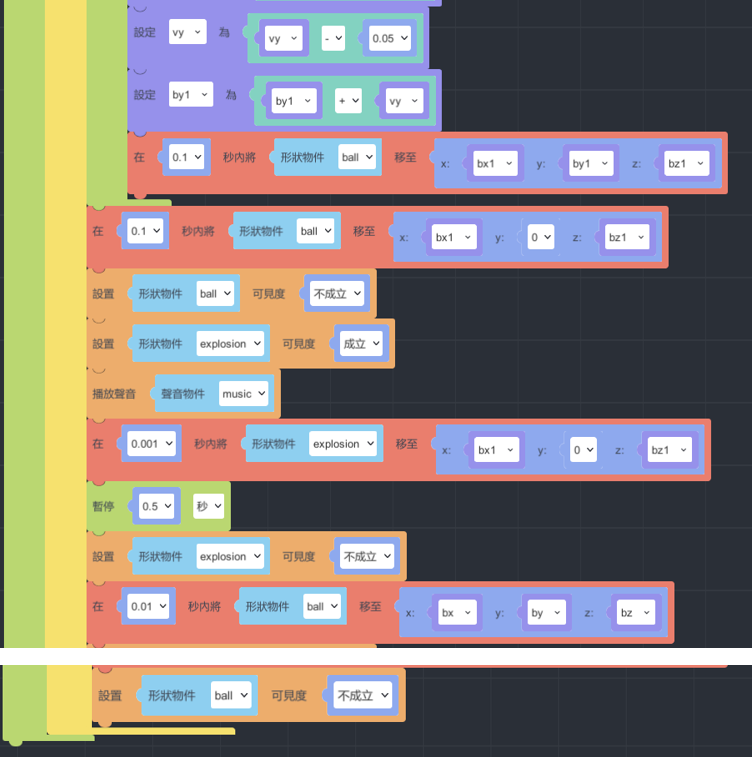
3. Finish all of canonn design.
Finally, close the eye of “ball” and “explosion” to not show them.
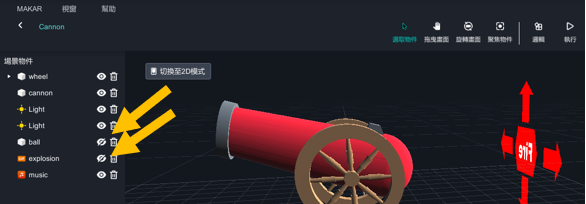
4. Click “Publish”.

Cooperative Learning in MAKAR_Portal
Abstract
This tutorial gives an example of connecting different projects via project link, and it can be achieved the purpose of cooperative learning.
1. Introduction
In the past, it’s not available to have multiple creators to create a huge or complex task in the same project at the same time. Therefore, here is another method you can do. Separate a big project into several small parts, and link each other with “portal ”. This method may help to decrease the loading compared with only one person is responsible for making the entire project.
For the demonstration, there three students (A, B, C). Student A and B are individually create two VR projects. We used the templates in MAKAR editor for this tutorial(Green Island & Moon Phase).
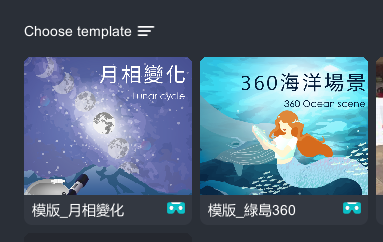
2. Project link
On mobile device(iPad/iphone), after selecting the project. There is a “sharing button” on the top right corner, then you can copy the link after you tapped the sharing button. And send this link to the student who is responsible for integrating the whole project(student C).
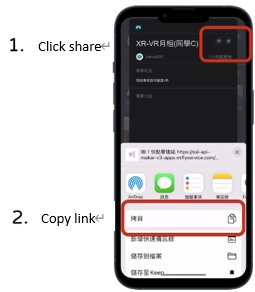
Student A(Green Island):https://is.gd/WdjCSk
Student B(Moon Phase):https://is.gd/zj1Rg5
3. Create an integrate project
Click top left corner, “+New Project”
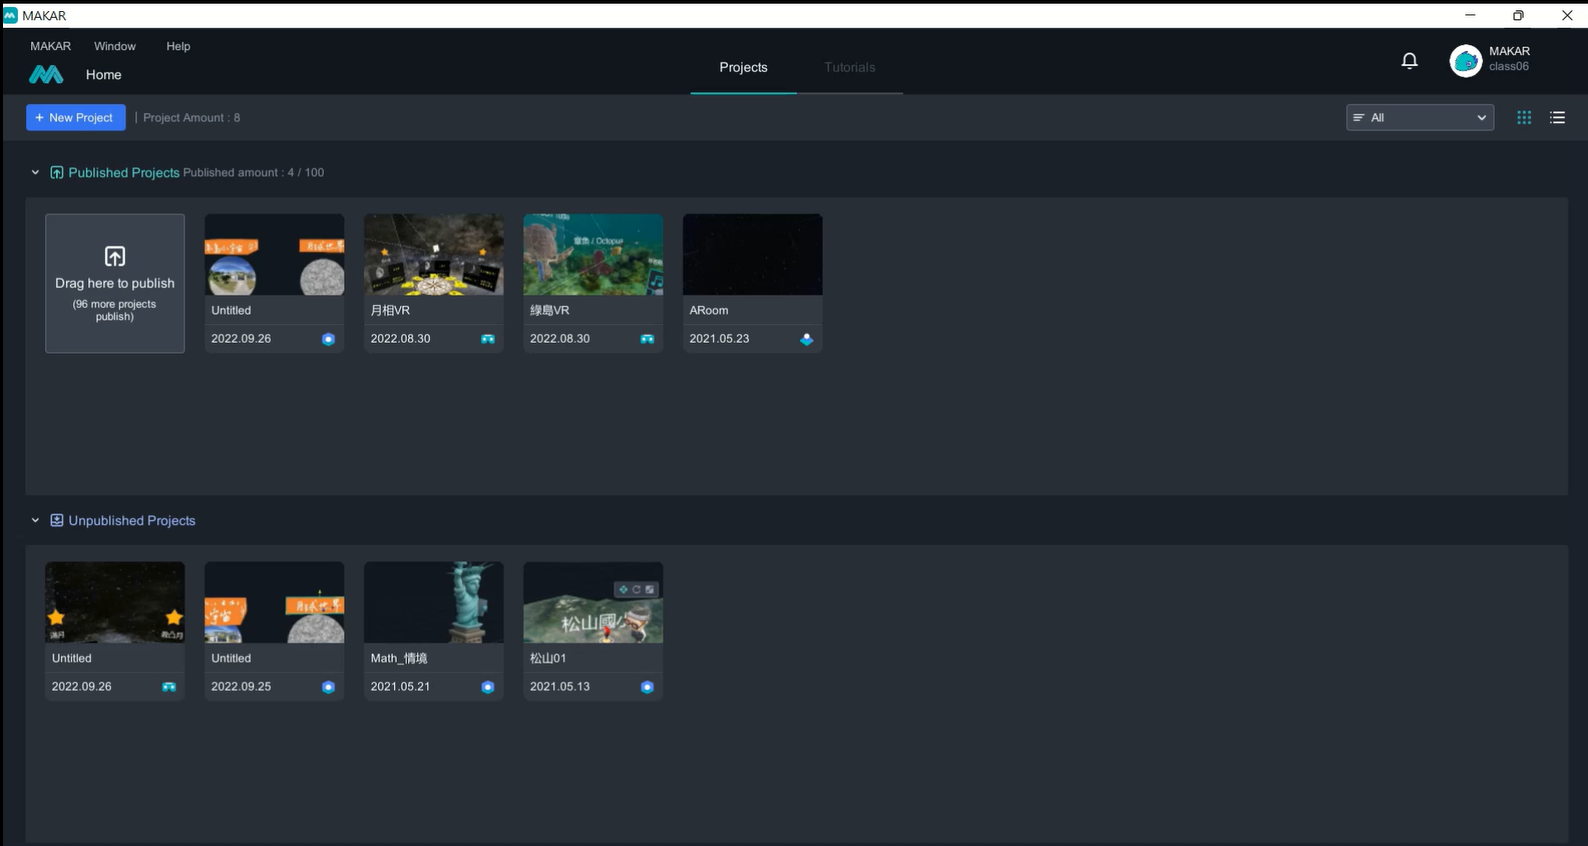
4. Space Recognition
In AR area, chose space recognition for this project, then click “ok” button

5. Import material
Material download link:
(a) In this tutorial, I will use sphere as a trigger. A panorama sphere is for Green Island project ( panorama image: https://goo.gl/maps/epfZf1cypG91sBK86 by Larry); Moon Phase project will use the 3D model provided by MAKAR online resource.
(b) Image material: there are created by PowerPoint.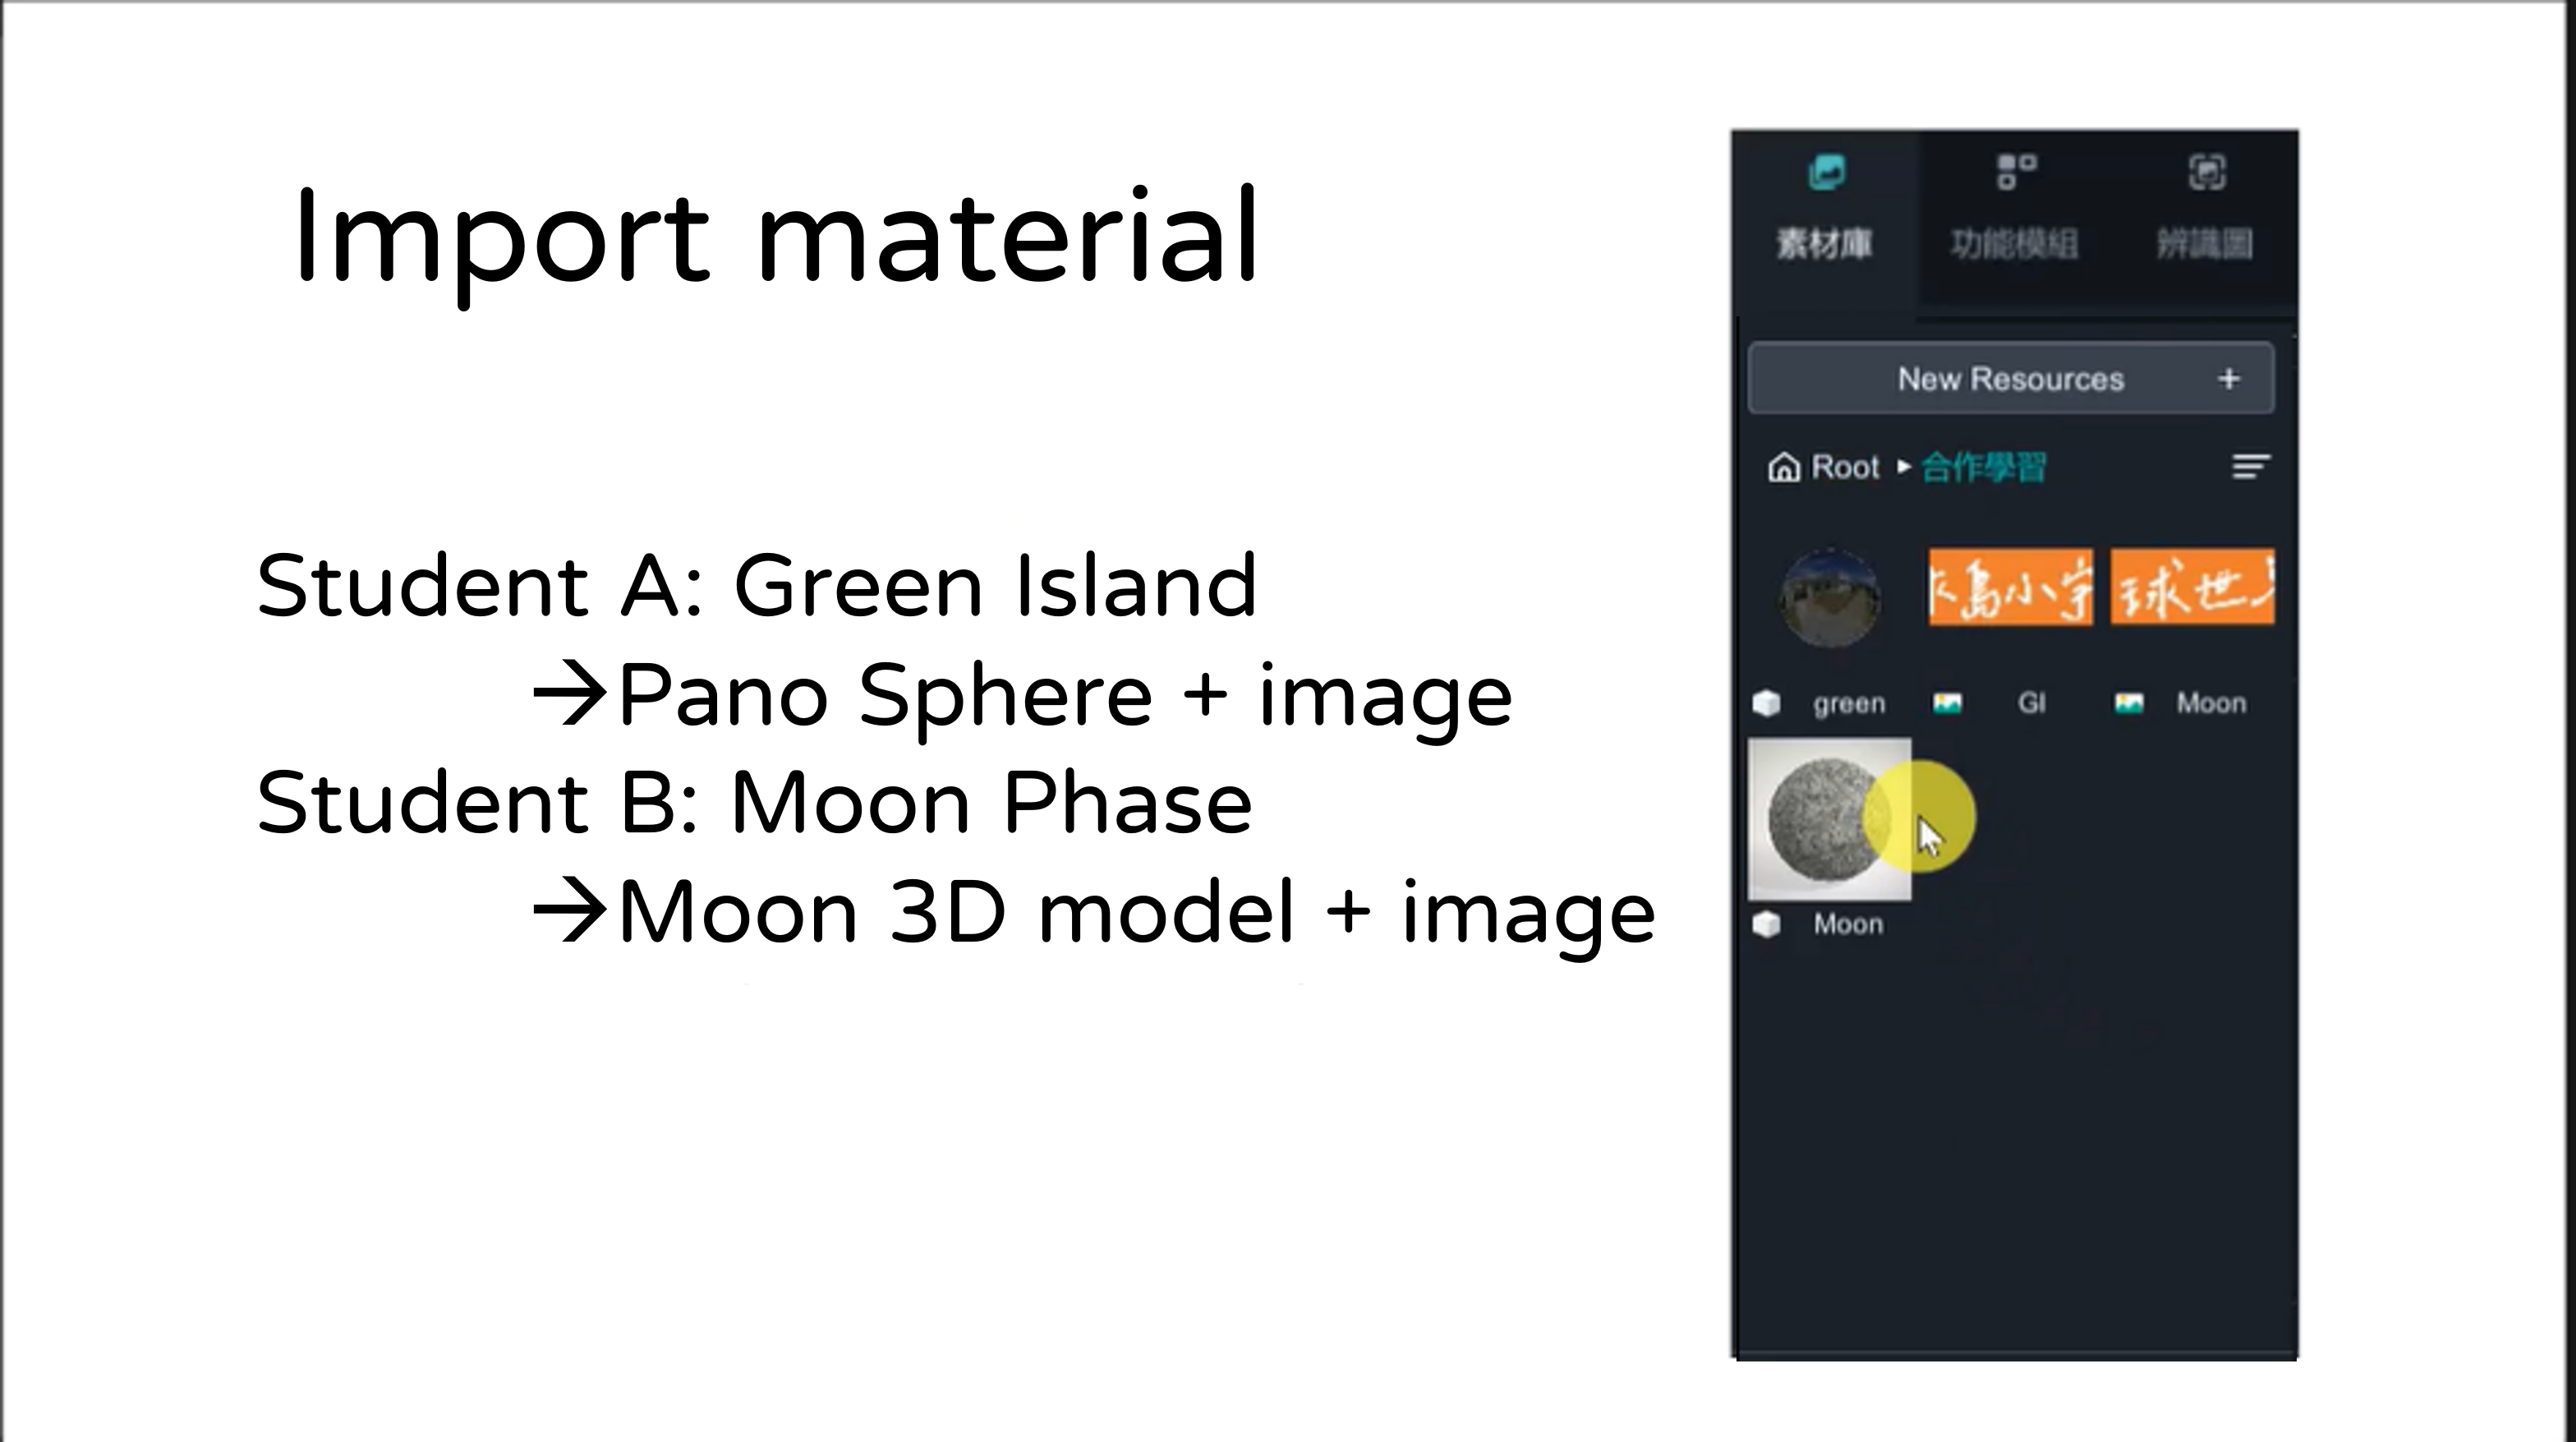
(c) Put 3D models in the canvas, rescale(Hotkey” R ”) their diameter around 10 cm may easily demonstrate on ordinary table. There is a scale in the center of the canvas if you zoom in. Later, if you need to demonstrate for full size, such as human body, then you can group them all and rescale them.
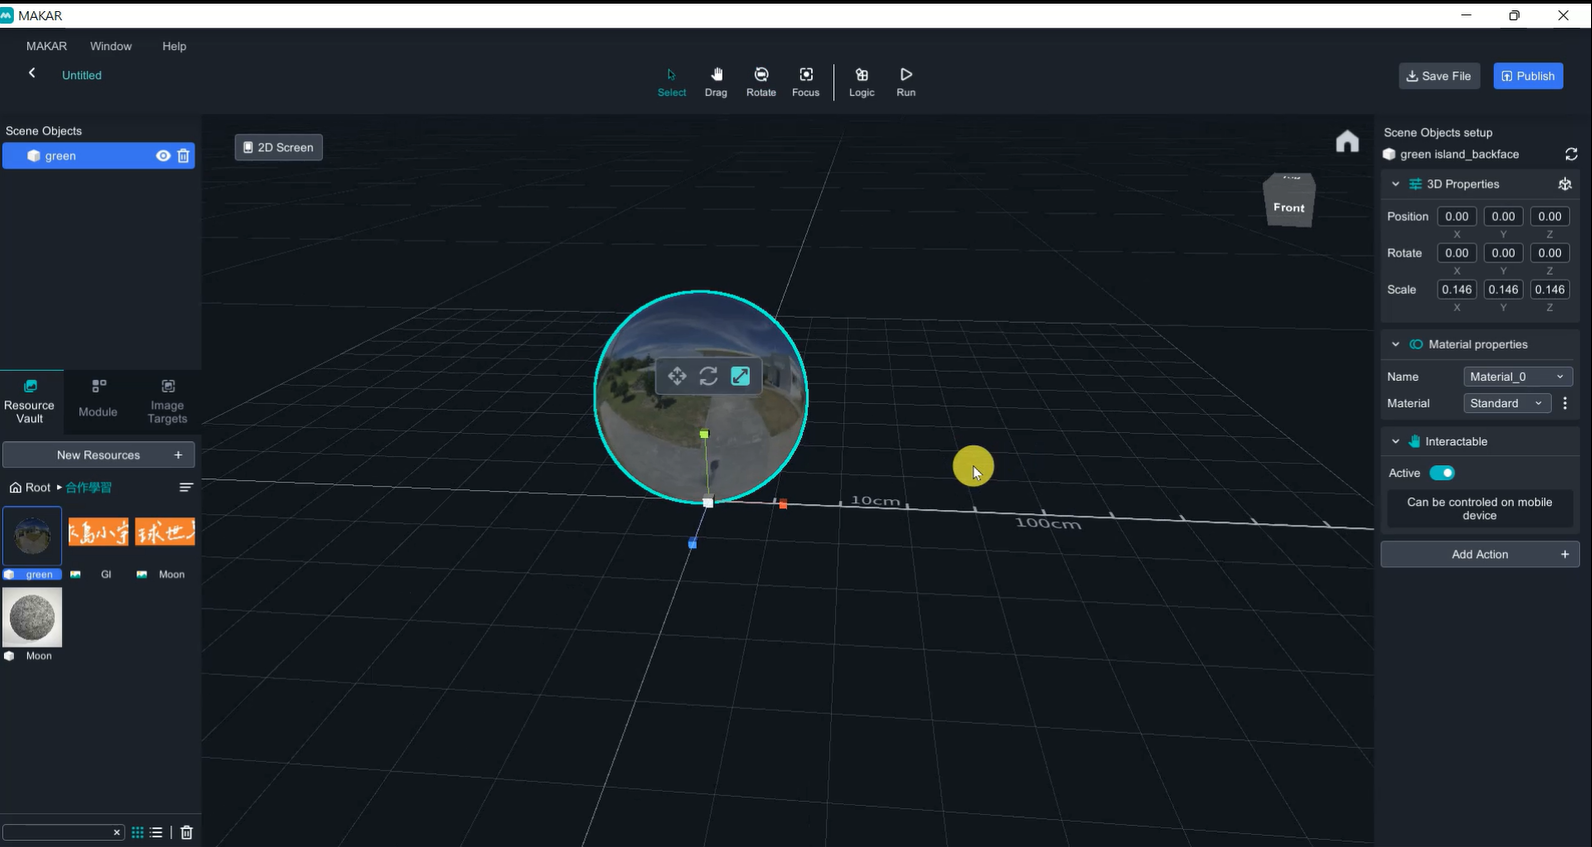
(d) Model action
- Tap the sphere to show image: Select sphere🡪 Add action🡪 Show image 🡪 select the image
- Tap the image to teleport to another project: Select image🡪 Add action🡪 Link to Webpage🡪 Paste the project link.

Material Link
Student A(Green Island):https://is.gd/WdjCSk
Student B(Moon Phase):https://is.gd/zj1Rg5
(e) 2D image simulates 3D object
2D image only shows full information in certain angle in 3 Dimensional world, which is very angle sensitive. Therefore, if we create a box with 2D images to mimic 3D object, it can almost cover every angle.
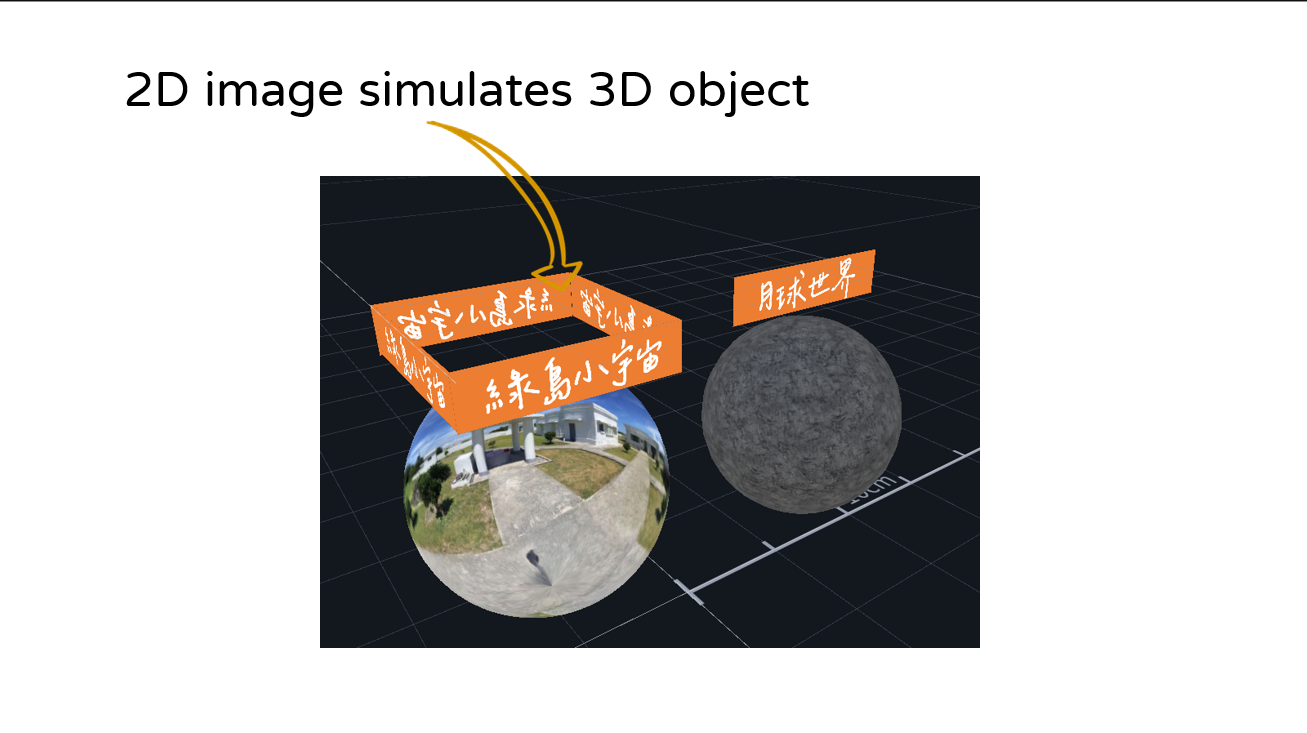
(f) Forbid image movement
Inactive the interactable will forbid the object be moved , it will reduce user accidently change the object in the canvas. Once the interactable is lucked, the action can still work, such as link to webpage and logic programming function.
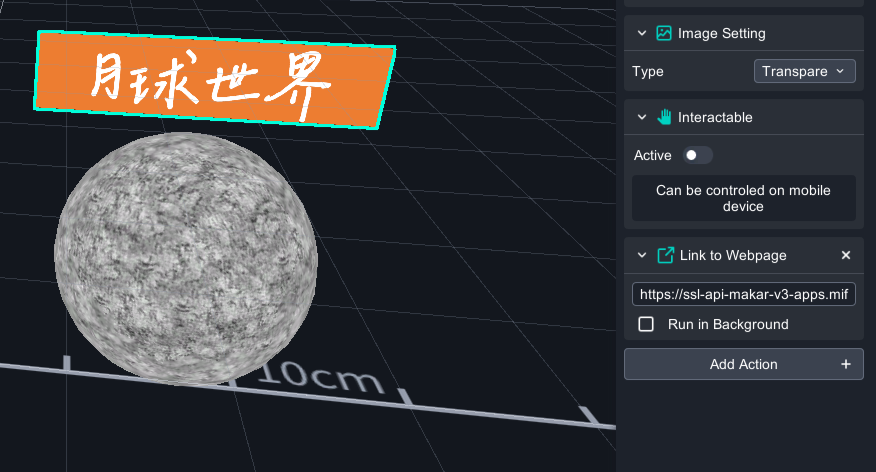
(g) Finish
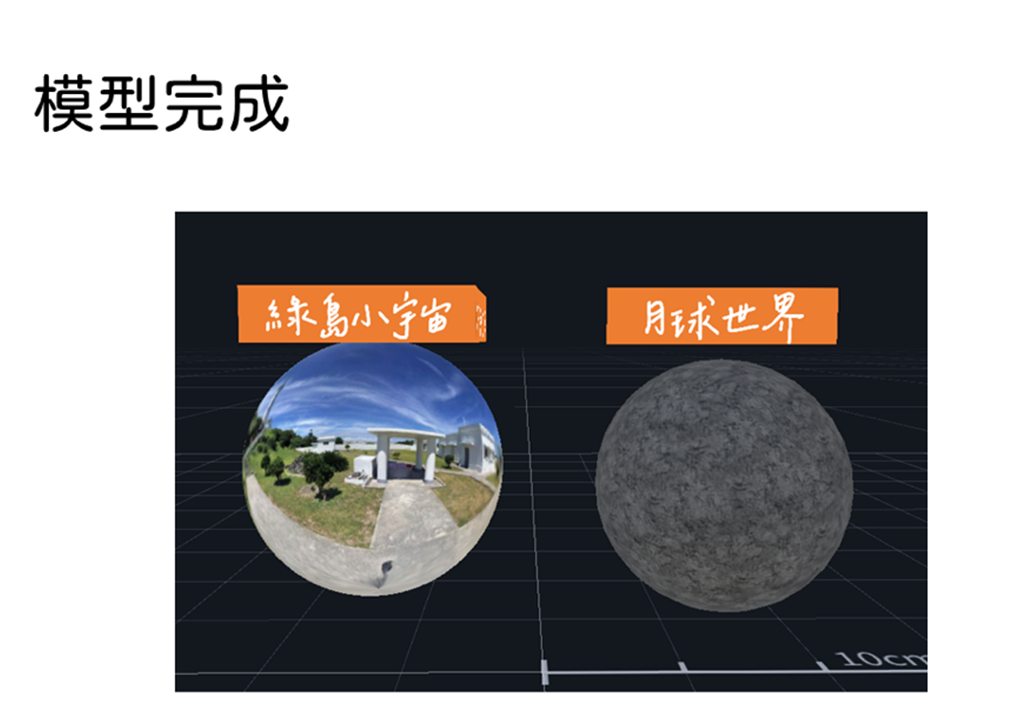
How to play
Click the application, type in the ID or scan the QR code to experience the AR/VR !
1. Install MAKAR application2. Scan QRcodec or search ID: class06

3. Select“ Project portal”, Click “ Start ”to activate.
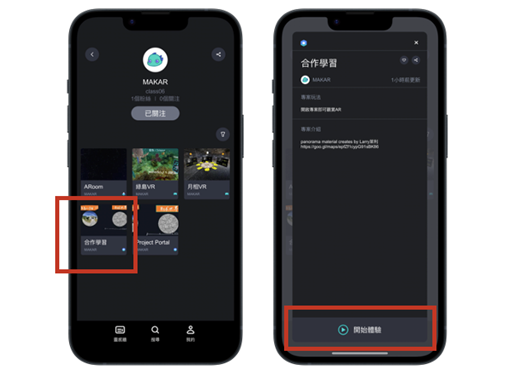
Demo
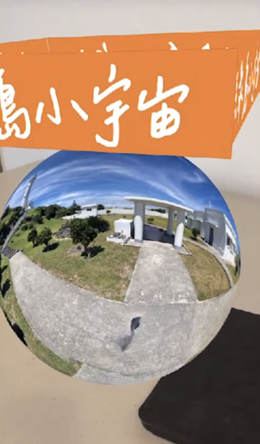
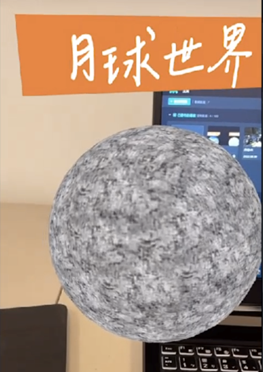
※ Please keep in mind
1. The portal trick is only for IOS device so far, it’s unavailable for Android device.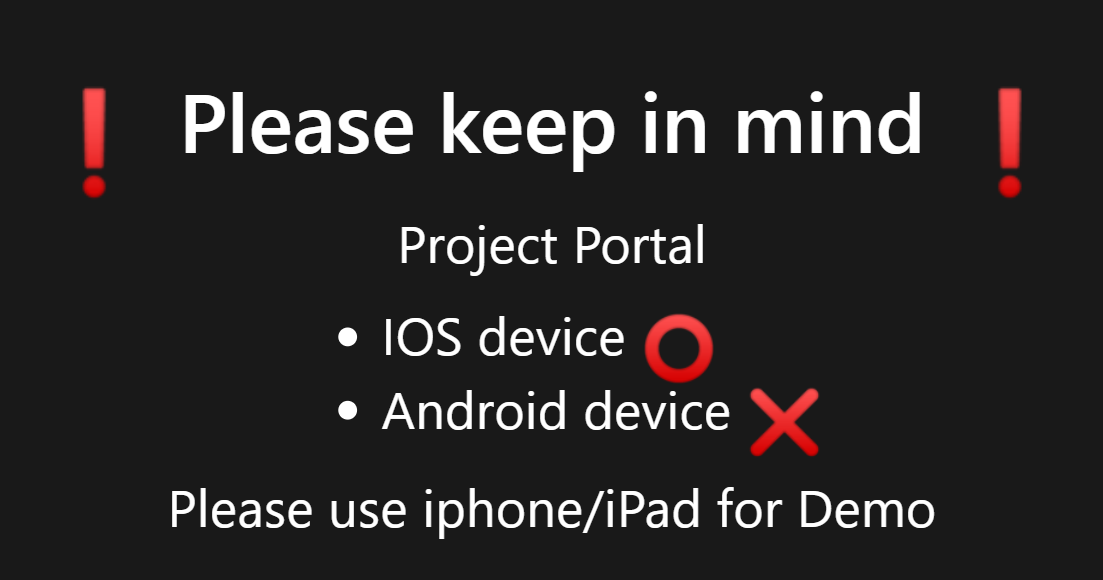
2. Project portal (Available)
- Account:Projects in same account, Projects in different account
- Project type:AR(AR target), AR(space recognition), VR are all available for teleporting to each other
Multimedia Applications in the Metaverse Format Analysis
In this era of digital content, how can you apply a variety of software combined with AR/VR editing to achieve a more complete effect?Today, let’s discuss the diverse formats of digital multimedia and explore the application methods of Windows 3D Viewer and 3D Paint. Next, we will challenge the Metaverse AR/VR/MR remote control platform and learn about digital content creation! When creating AR/VR applications, digital content is the most important aspect, but which software can be used to create these digital contents?
File Conversion Tips
Use Windows 3D to launch 3D models, and choose "Save As" to obtain the GLB format, which can be applied in MAKAR.
● MAKAR AR/VR/MR editing tools, import GLB for project application, and publish in real-time for experience.
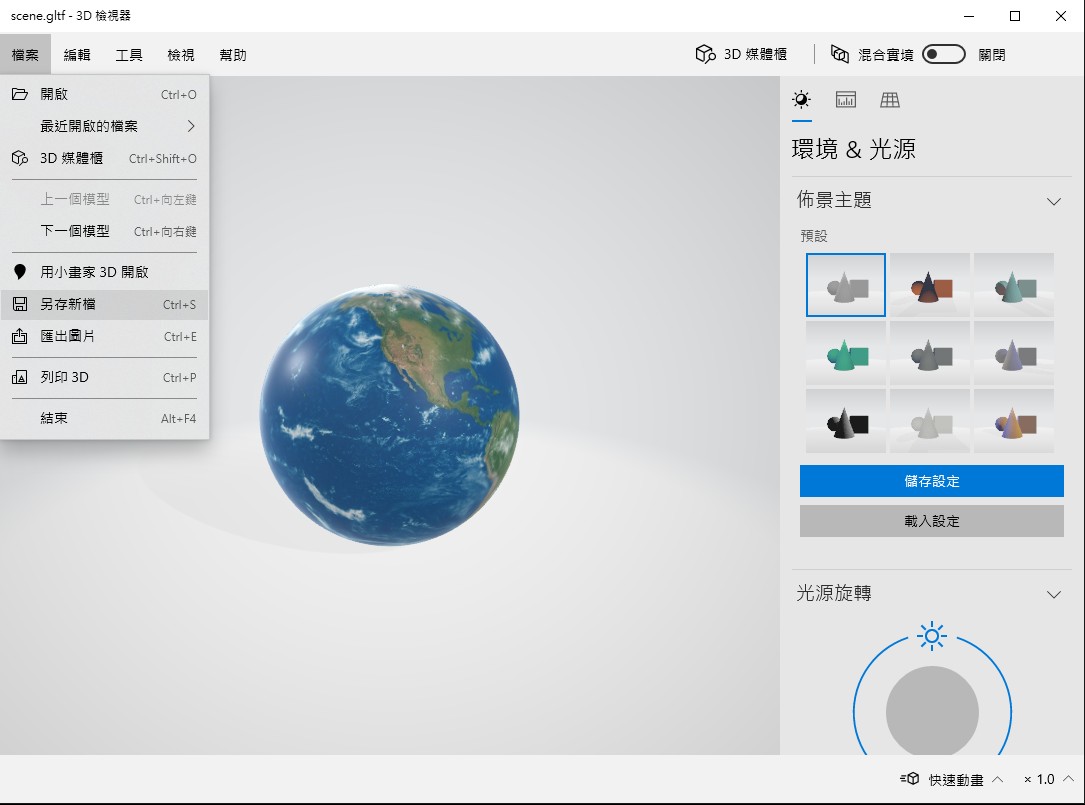
The application of 2D software is very diverse, and we briefly introduce Adobe and Pixlr online.
● Pixlr is an online editing software that can edit various graphic formats.
https://pixlr.com/tw
● Adobe offers a variety of services, including 2D, 3D, and animation editing software, which can output and build complete designs.
https://www.adobe.com/tw
.JPG)
There are many rules in multimedia formats, which vary depending on the software chosen, resulting in different corresponding output formats.
In 2D flat graphic file formats, it can include Alpha or animation formats.
● JPG: JPEG, also known as JPG, is a lossy compression method and does not support transparency.
● PNG: Portable Network Graphics, a lossless compressed bitmap graphic format, supports indexed, grayscale, and Alpha channel (supports transparency).
● GIF: Graphics Interchange Format, a lossless compression technique, maintains image quality with fewer than 256 colors, supports multi-frame animation effects and transparent backgrounds.
.JPG)
The application of 3D software is usually focused on model construction. After creating the model, the next steps include material texture mapping and animation setting based on needs. Creators will provide corresponding design plans depending on various requirements, such as animation, physical effects, cloth simulation, deformers, particle effects, etc. These applications may require different output formats, including universal formats like FBX, OBJ, GLB, GLTF, etc.
● Blender https://www.blender.org
● Autodesk https://www.autodesk.com.tw
● REALLSION https://www.reallusion.com/tw
● C4D https://www.maxon.net/zh/cinema-4d
(1).JPG)
There are many rules in multimedia formats, which vary depending on the software chosen, resulting in different corresponding output formats.
In 3D model formats, it can include animation, material textures, etc.
● FBX: Contains animation and materials, suitable for support in various development software, including model, motion, and material texture output.
● GLTF: Contains animation and materials, supports a wide variety of frameworks, including development software, cross-platform web support formats. It's an OpenGL-loaded format, consisting of JSON, images, graphics, textures, etc.
● OBJ: Contains materials, suitable for mutual import and file conversion between software, with OBJ containing jpg textures.
.JPG)
In recent years, video editing software has become increasingly diversified, with more mobile app editing options available. However, many professional users still prefer to use the computer version for editing. Therefore, depending on the need, one can choose to use the mobile version or the computer version of the editing method. Most video software can output various formats, such as mp4, mov, wav, avi, etc., with the most common being the .mp4 format. Of course, depending on the different needs, the format chosen may vary. If original files or uncompressed formats are required, one might choose avi or mov formats.
● PowerDirector https://tw.cyberlink.com
● Adobe offers a variety of services, including 2D, 3D, and animation editing software, which can output and build complete designs. https://www.adobe.com/tw
● Reallusion Cartoon Animator https://www.reallusion.com/tw/cartoon-animator/default.html
(1).JPG)
MAKAR Making an AR language learning card
This fun video shows you how to use simple assets to create AR flash card for language learning. Make learning easy and fun with MAKAR AR!
Tutorial of 3D AR Dinosaur Oreo!
Can you believe?We can eat oreo with ARtech!
Just use Oblatum with dinosaur AR target image, and stick it on oreo, we can call out AR dinosaur and make the sound while clicking on it.
Let's see how to make it!
Plan
time: about 2hr
item: scissors, Pad or cellphone, your favorite cookies![]()
Please download the AR resource here
-
Download MAKAR (download here )
- Log in your Google Account
- Upload target image
-
Download 3D dinosaur and its voice
-
Tailoring Oblatum and stick it onto cookies
-
Experience this AR dinosaur project and enjoy your cookie!

Steps on MAKAR editor
- Build up new project
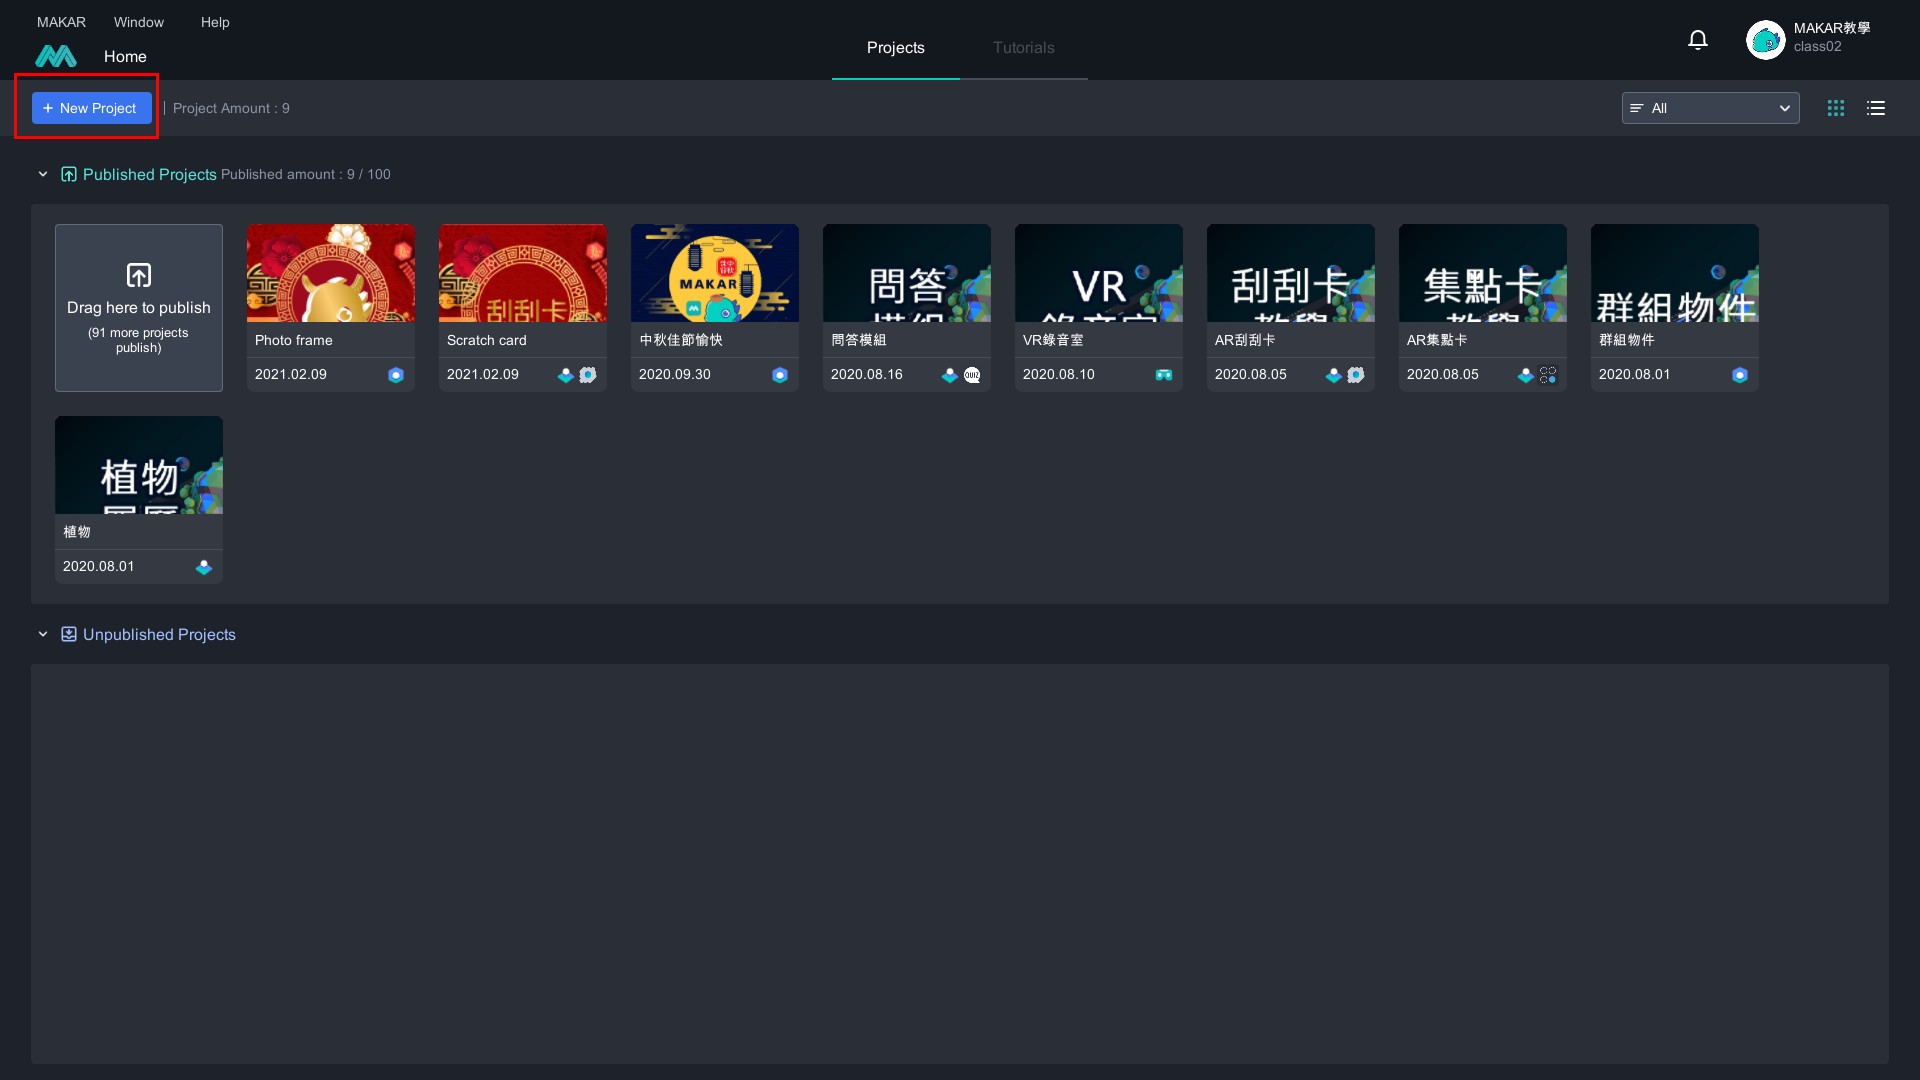
- Create project's name, and upload target image, then click "OK"
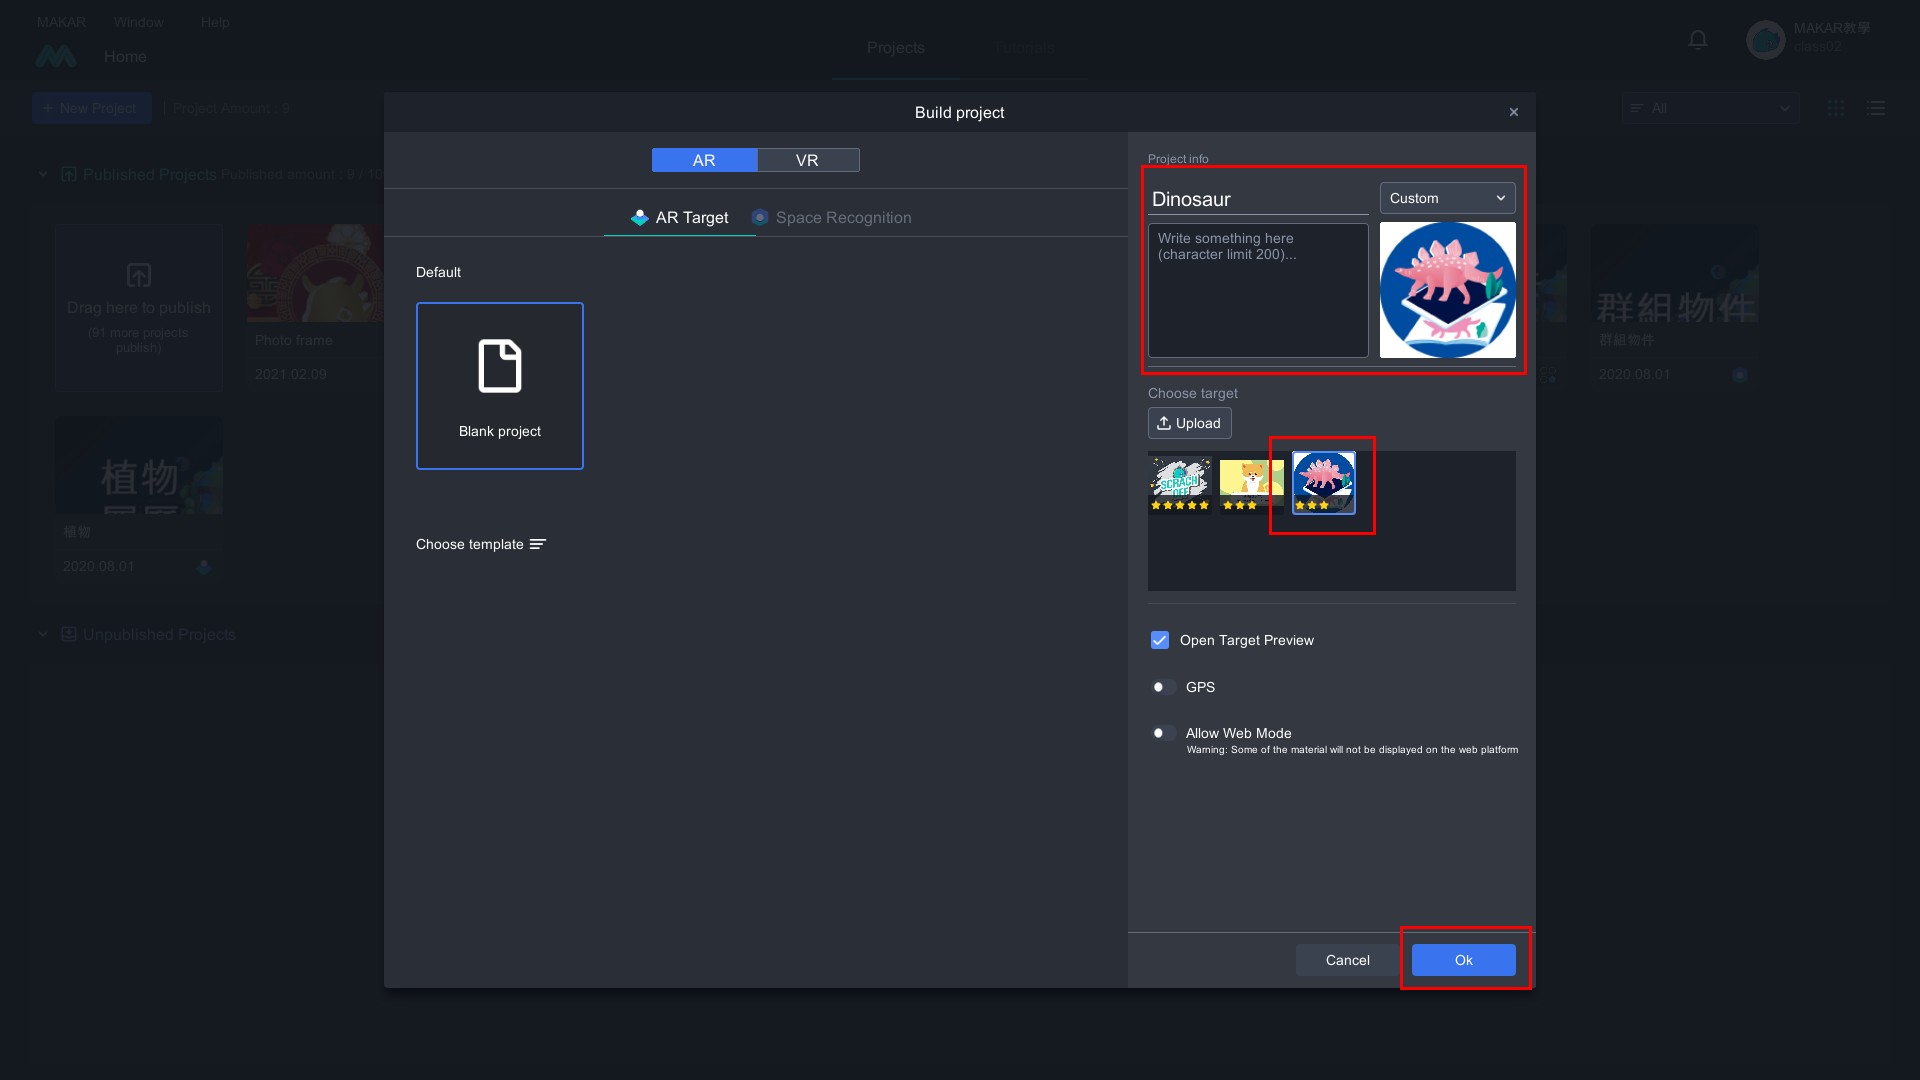
- Add online resources
- Find out "Stegosaurus" and download. There's implication of Stegosaurus on the left-column
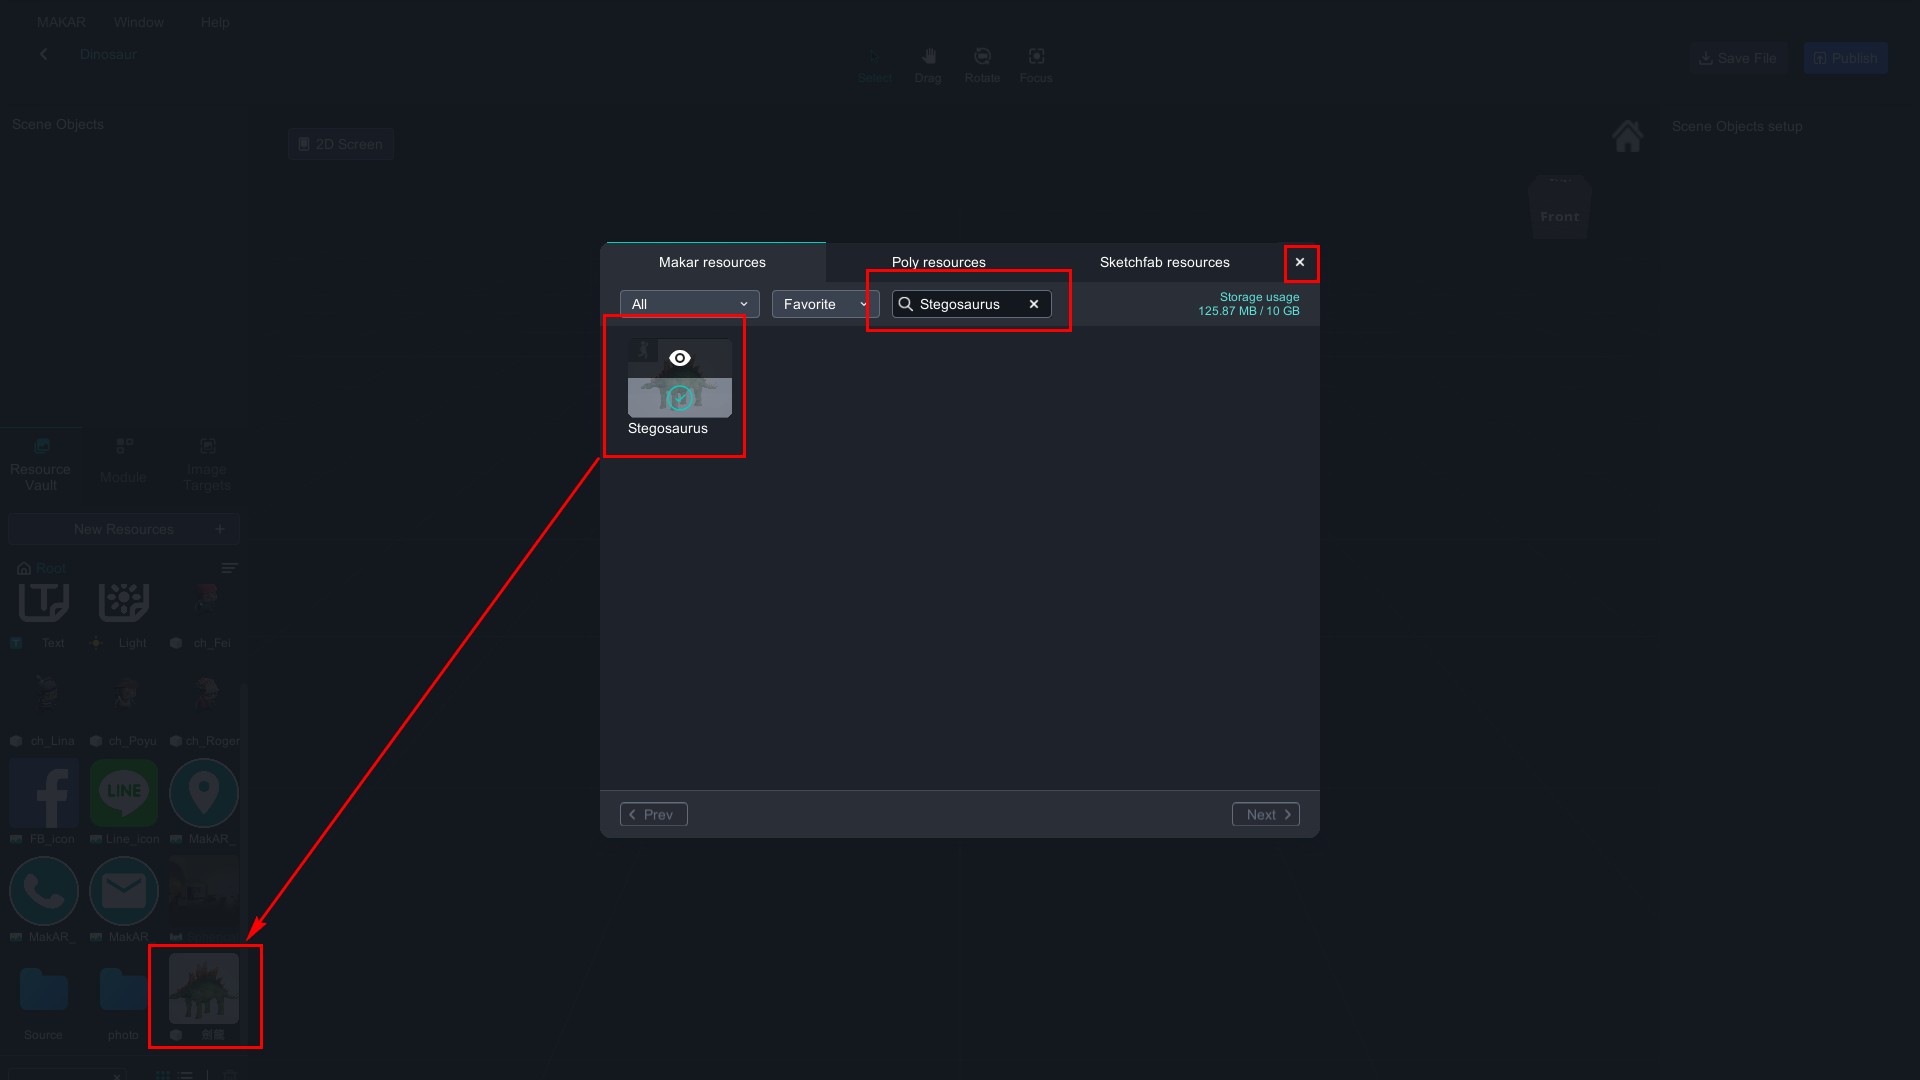
- Drag Stegosaurus to the interface and select "Matte" form
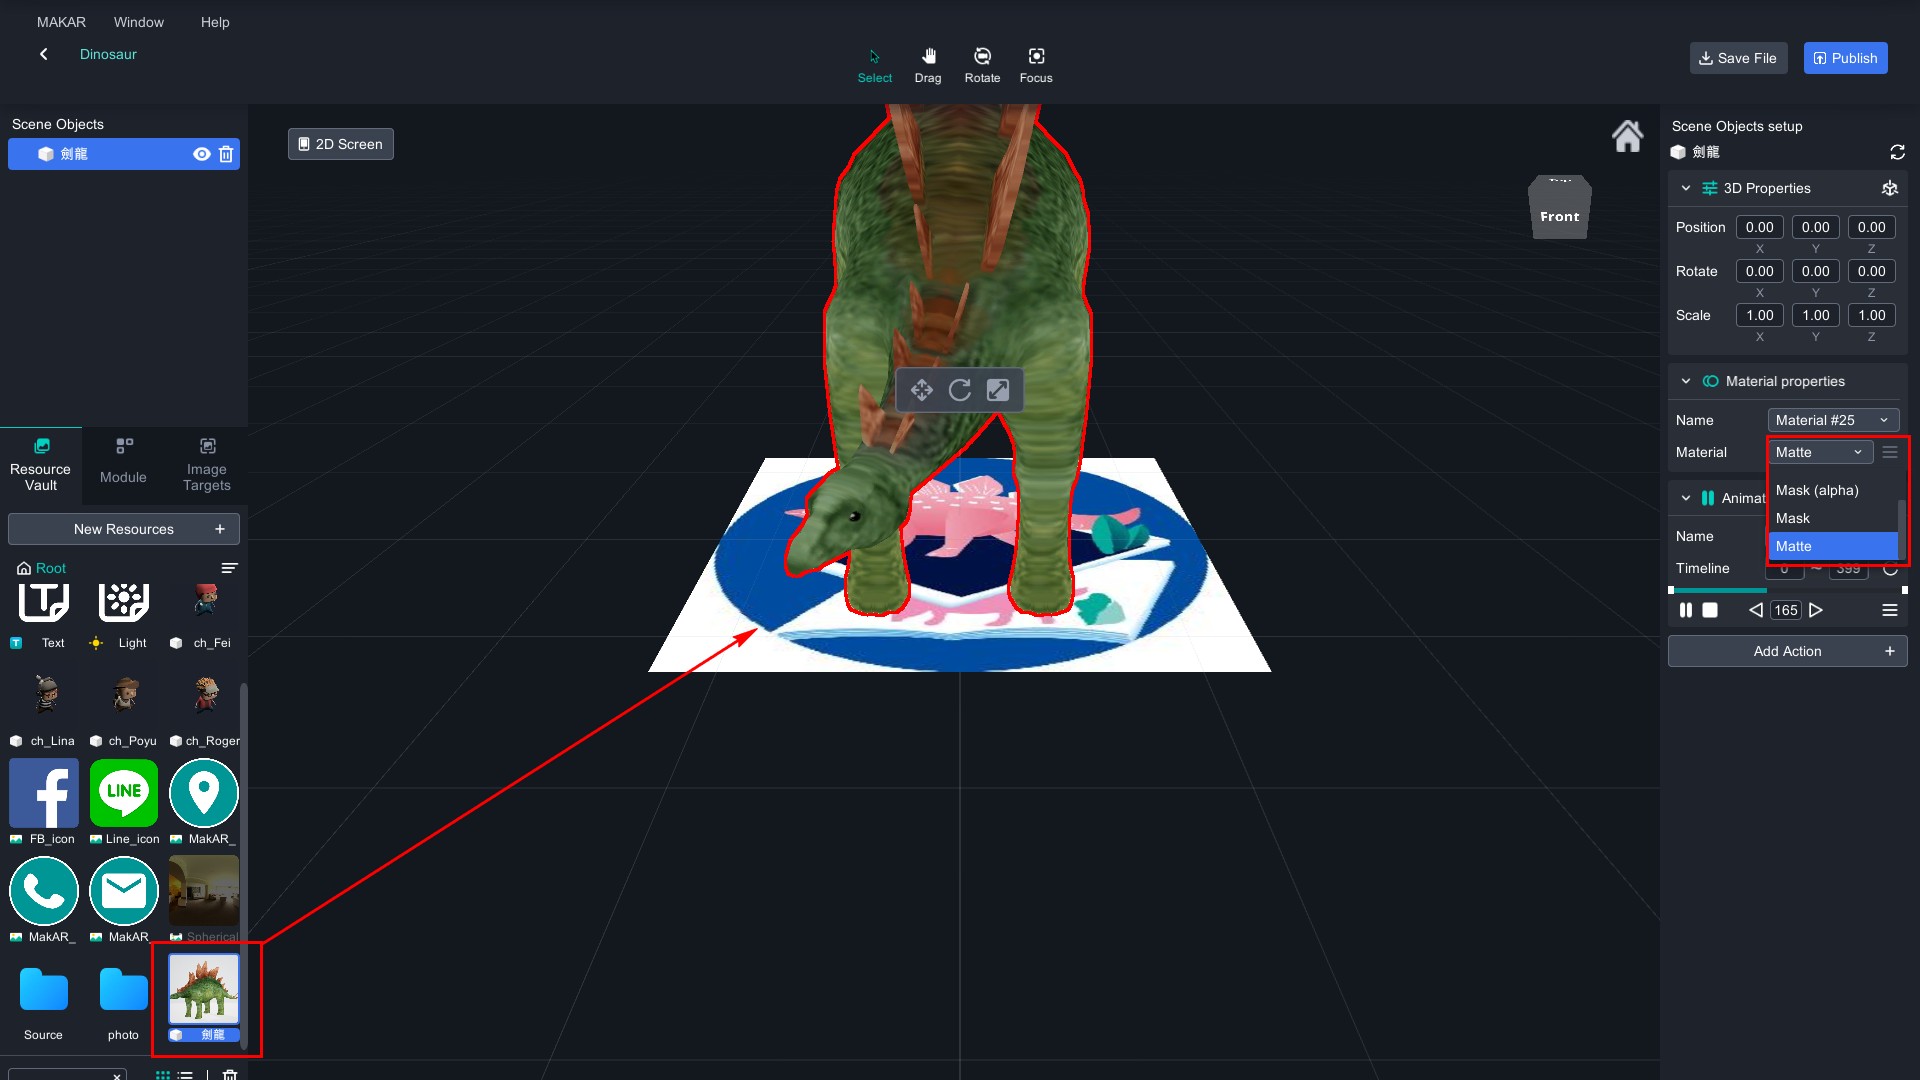
- To "Auto" and upload "DinosaurMusic.mp3"
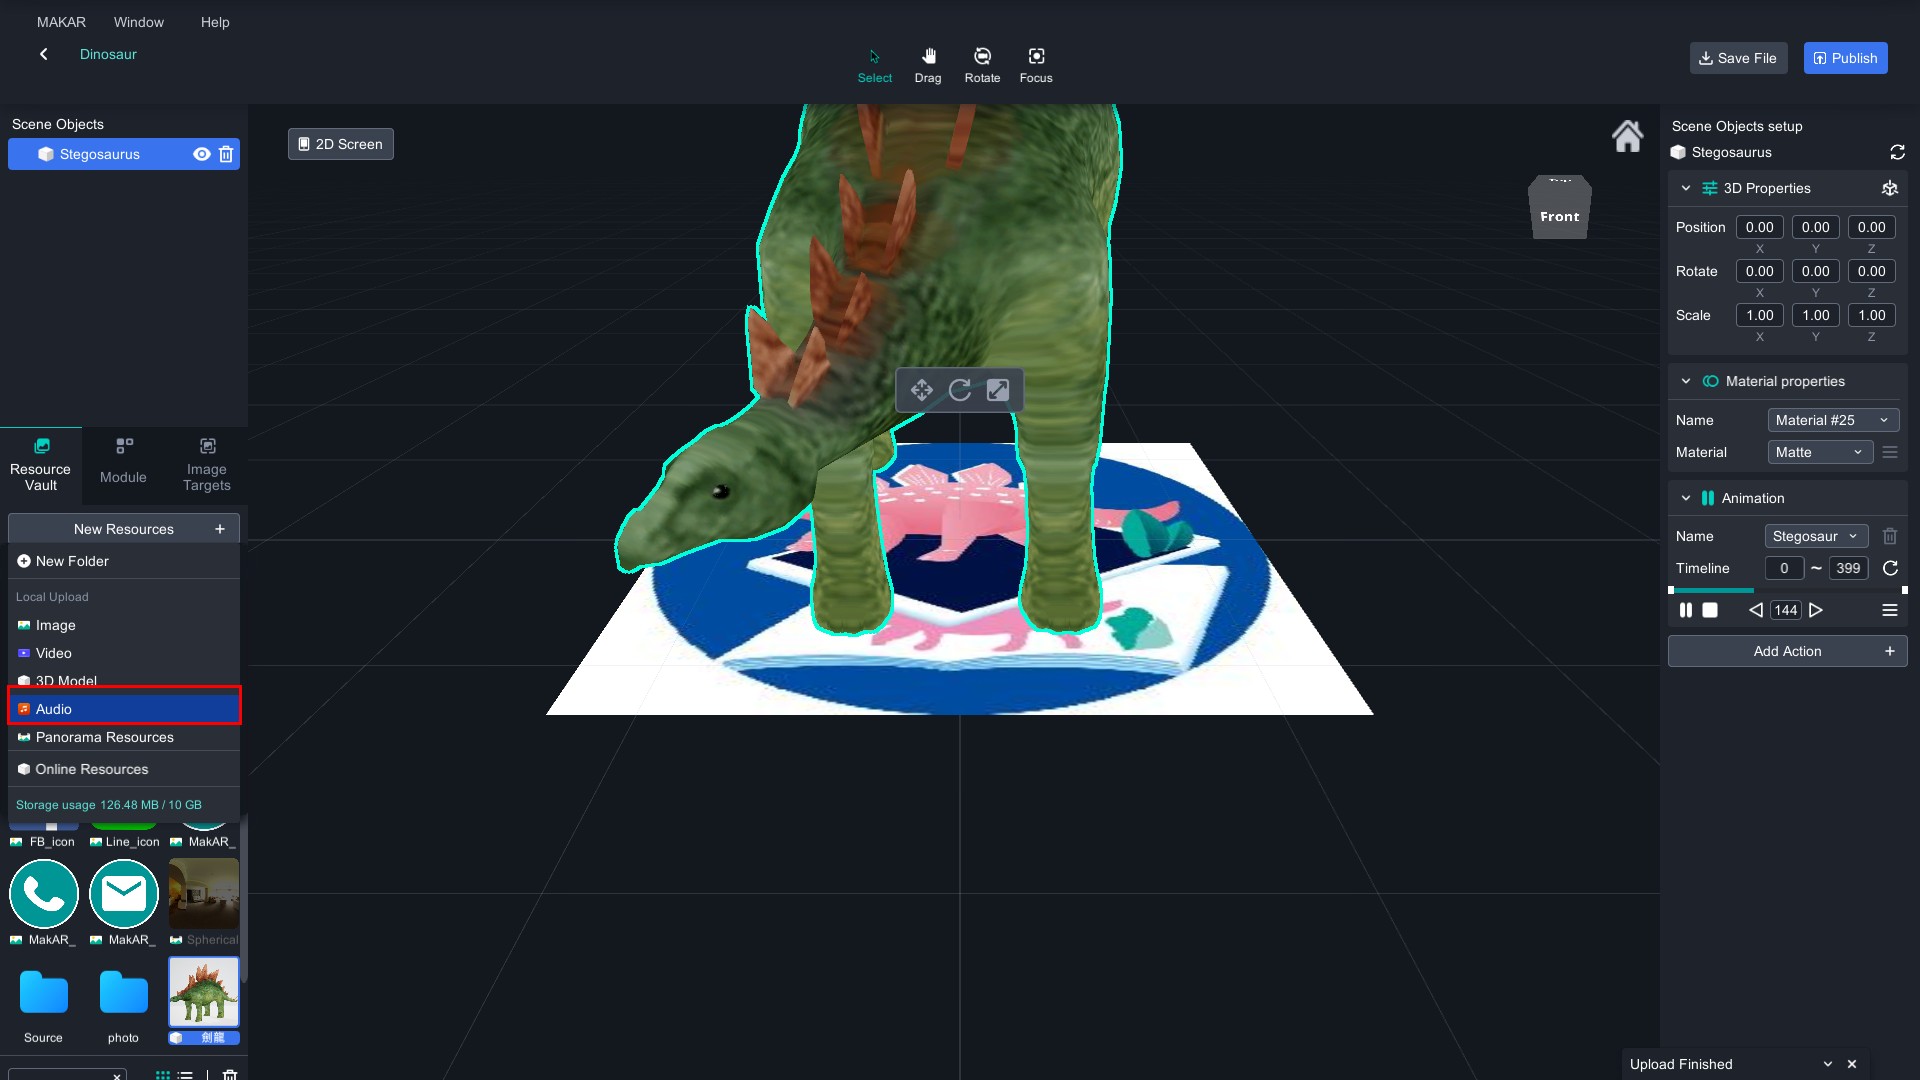
- Click Stegosaurus and play music
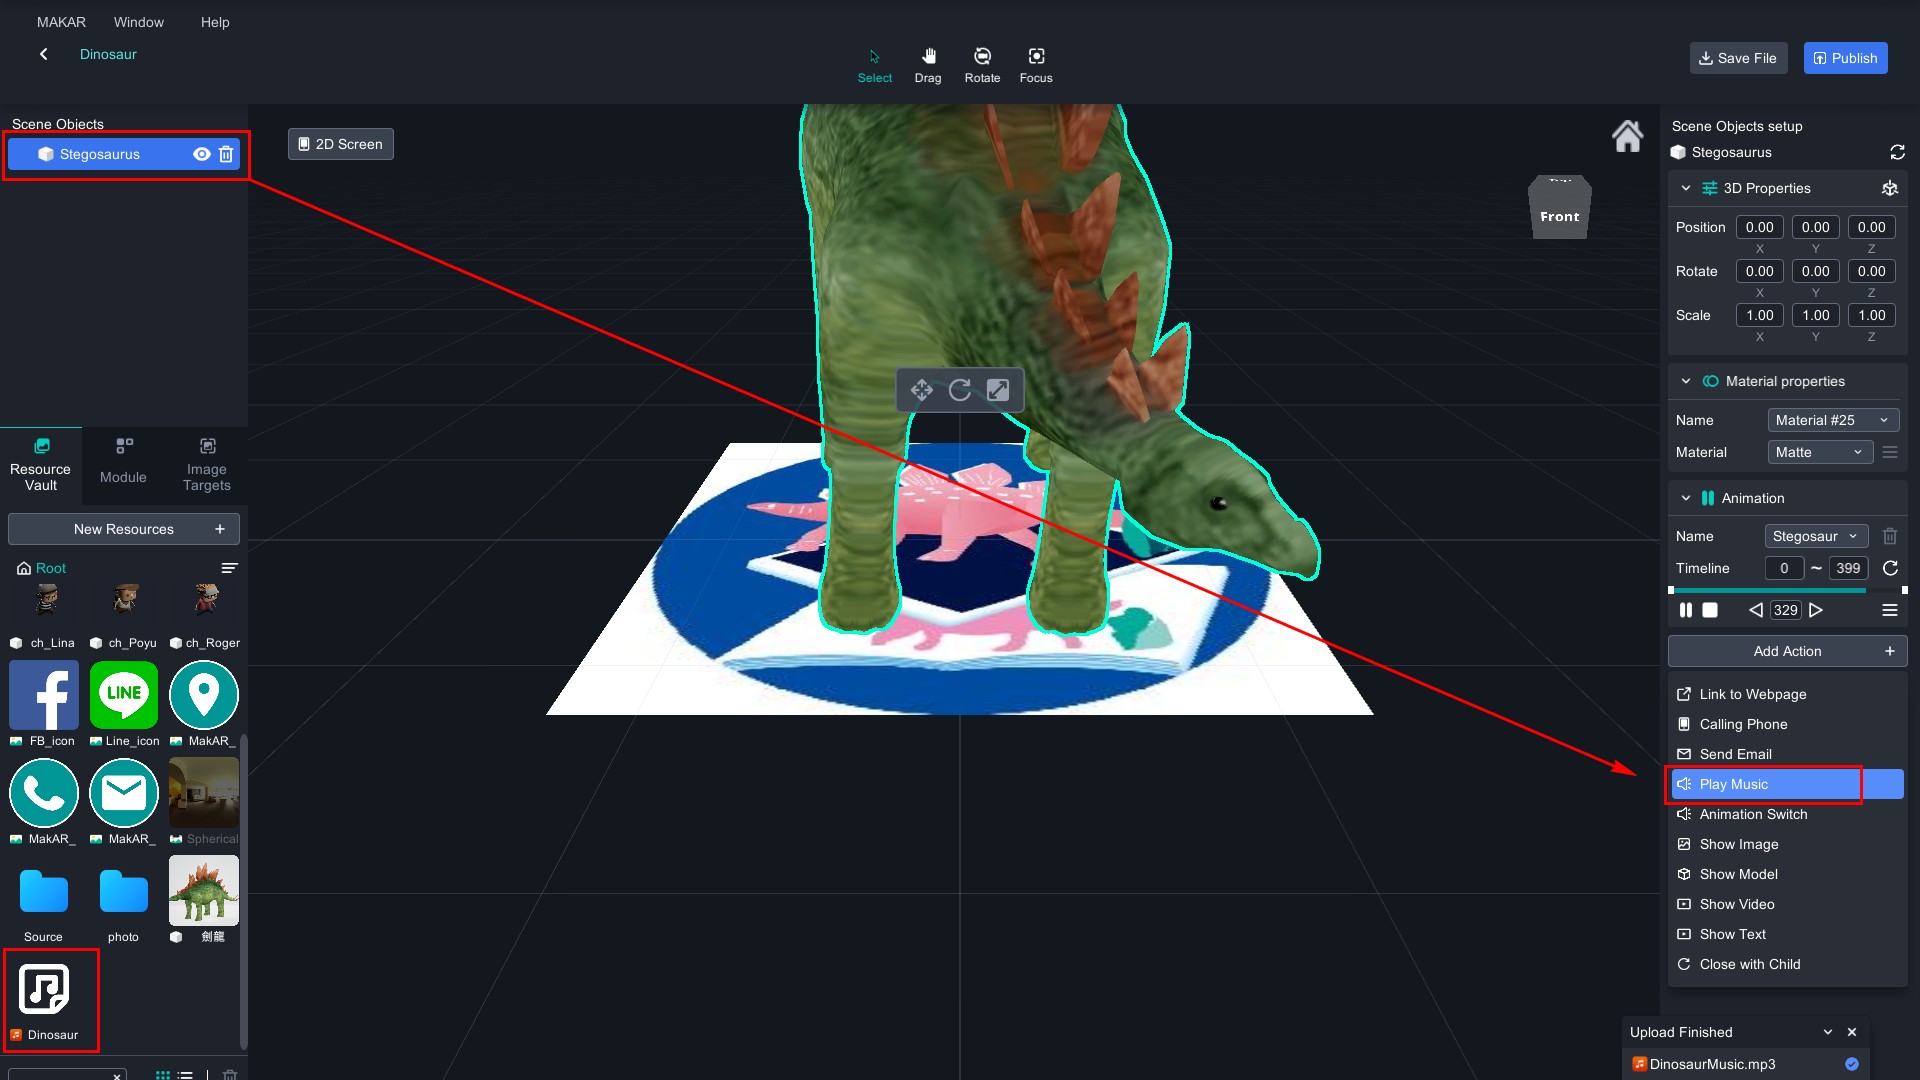
- Choose DinosaurMusic .mp3 and confirm
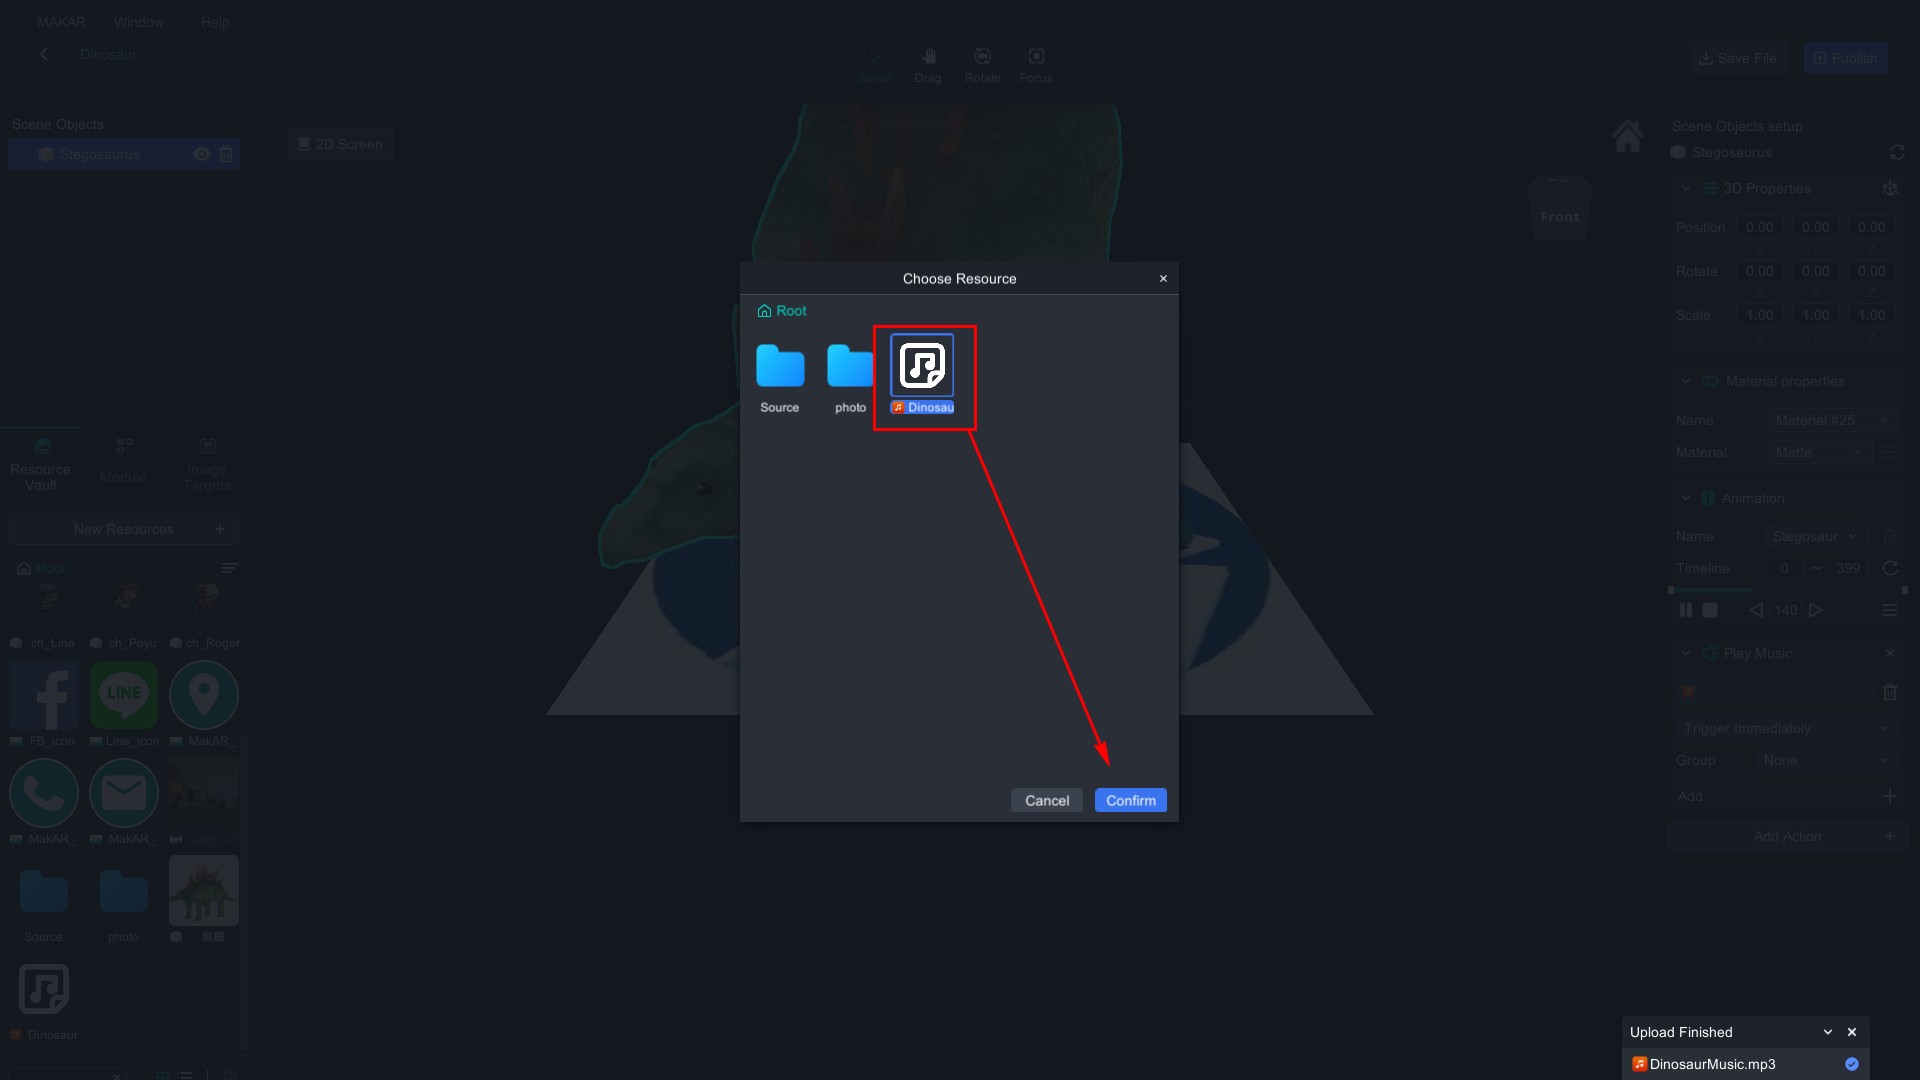
- It's sucessful if you can find out your music resource on Source Objects! Click publish
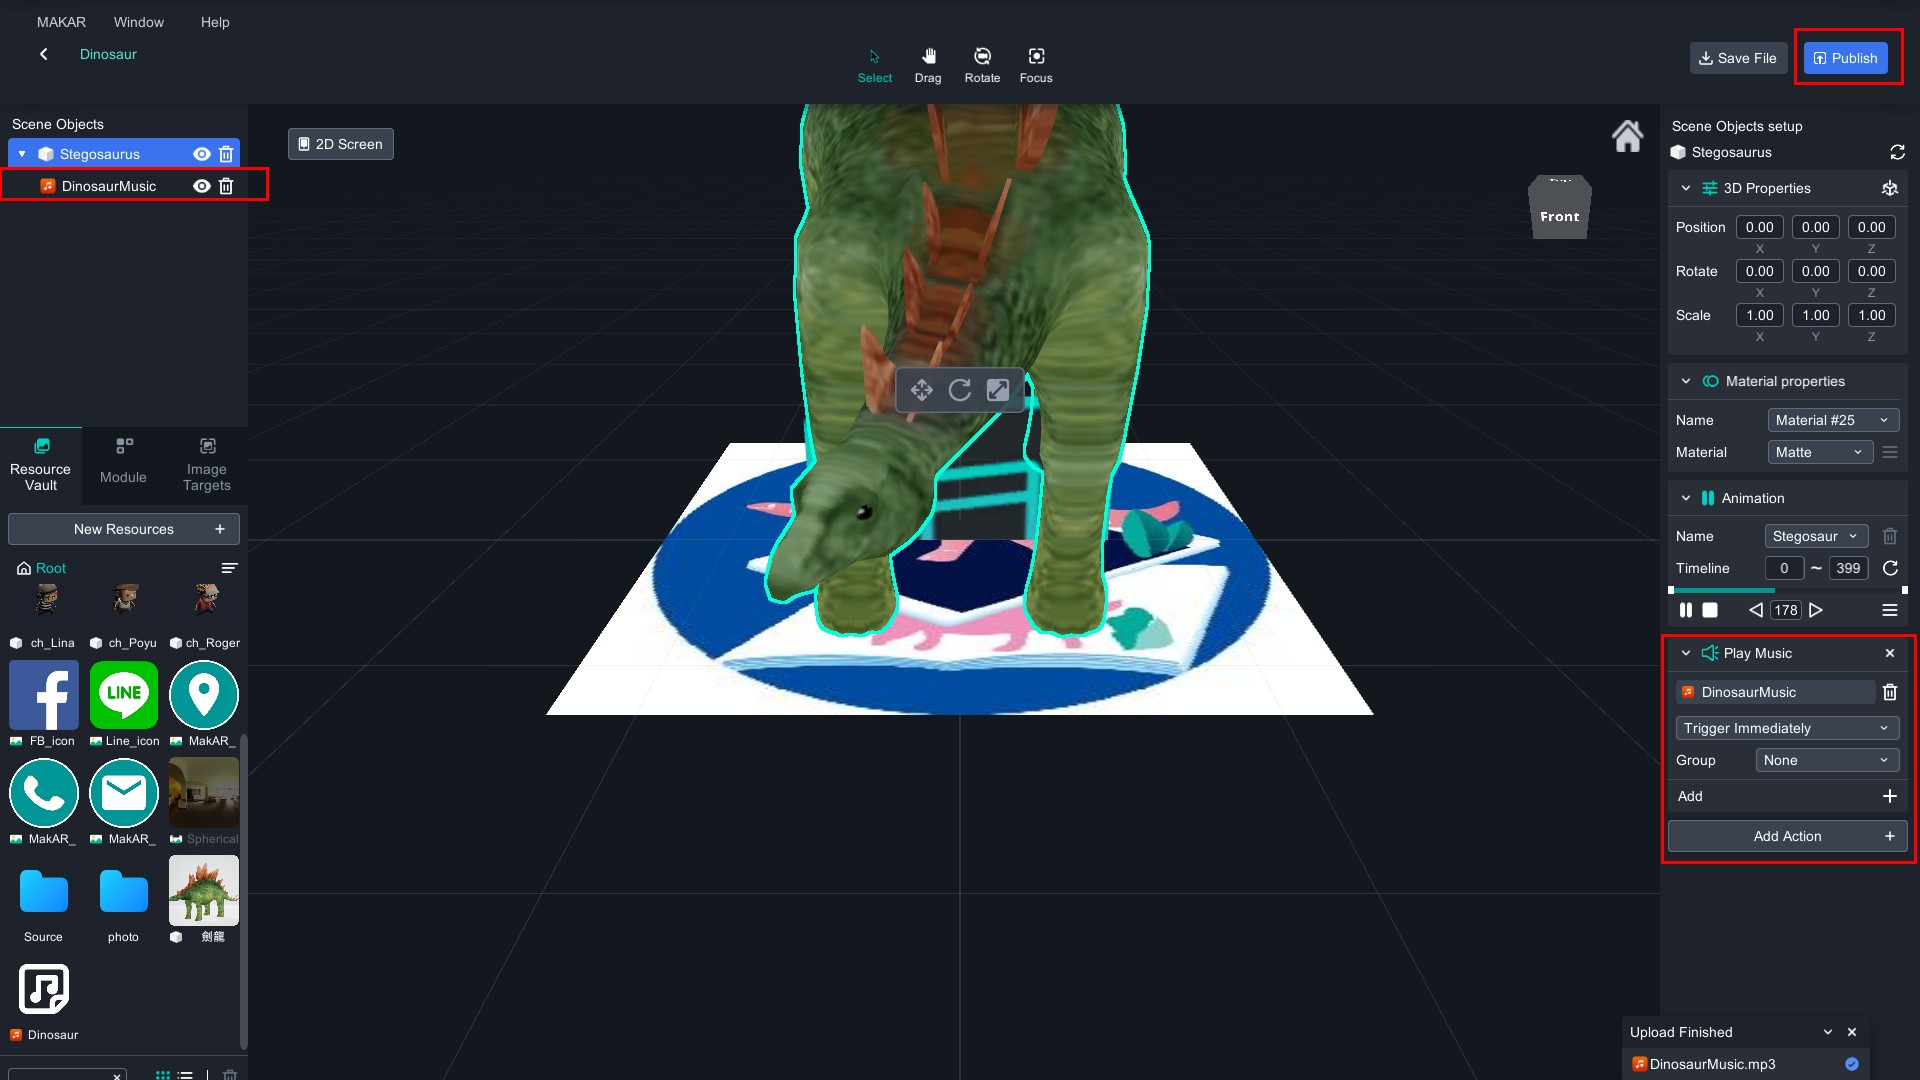
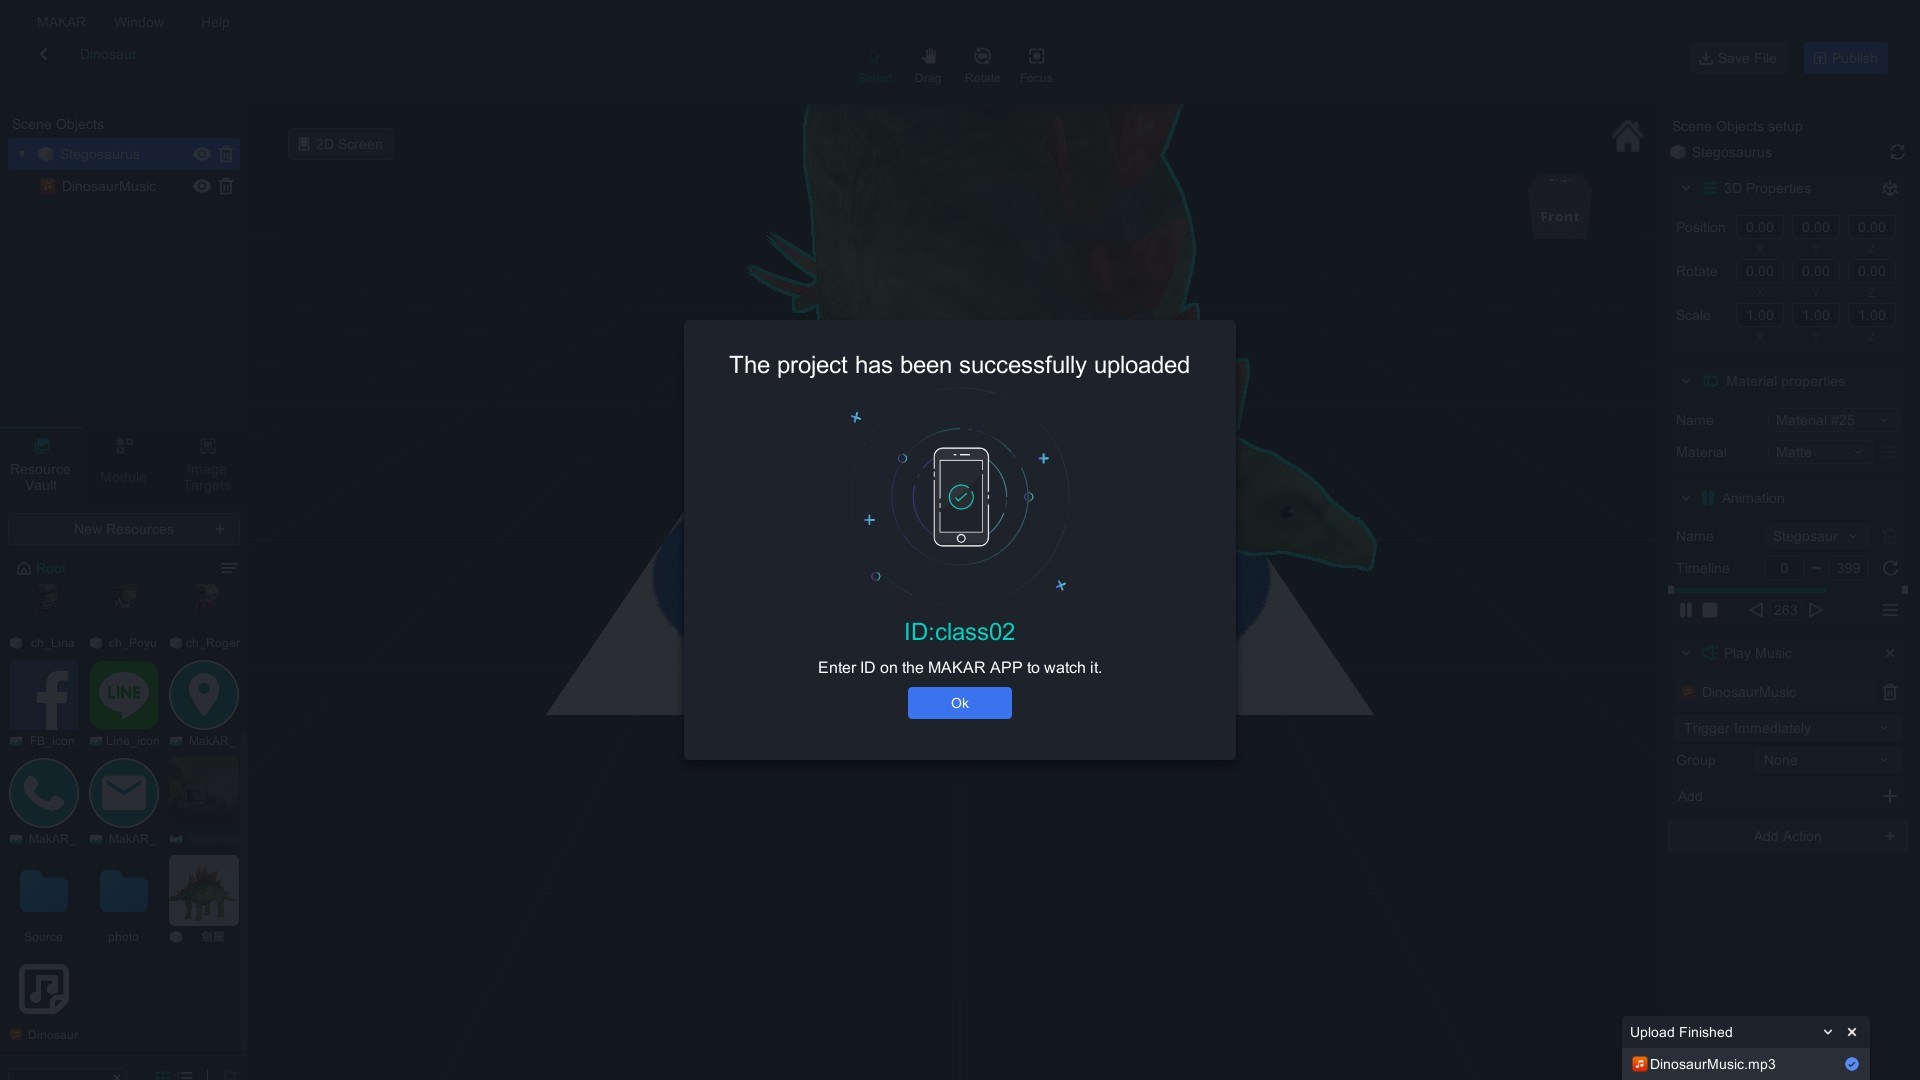
To Experience
Use your smartphone, enter your ID and start experiencing after scanning on target image.
- Install MAKAR APP
- Click Link to trigger / or scan the QRcode below

- Scan target

- Start your AR experience!
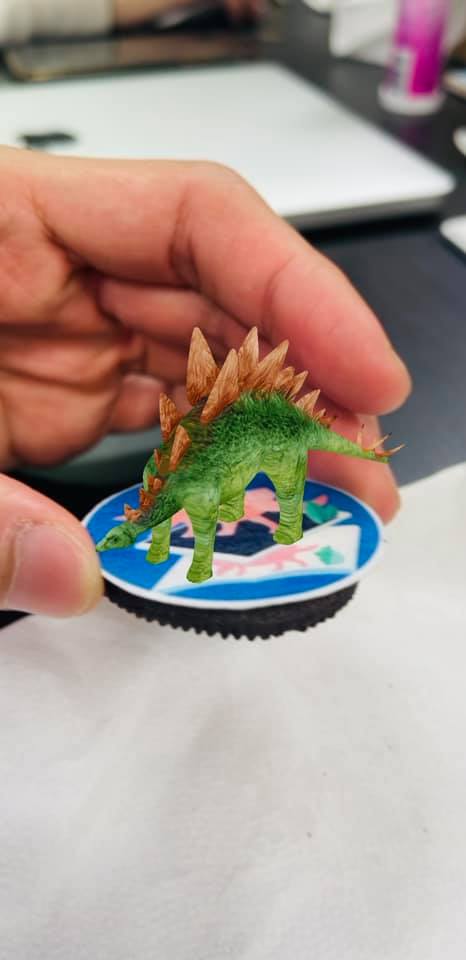
AR Image Recognition-English card
1. Open the App and allow access to your camera
2. Click “Search” and enter MAKAR ID: animalabc
3. Click on the author that project you want to experience
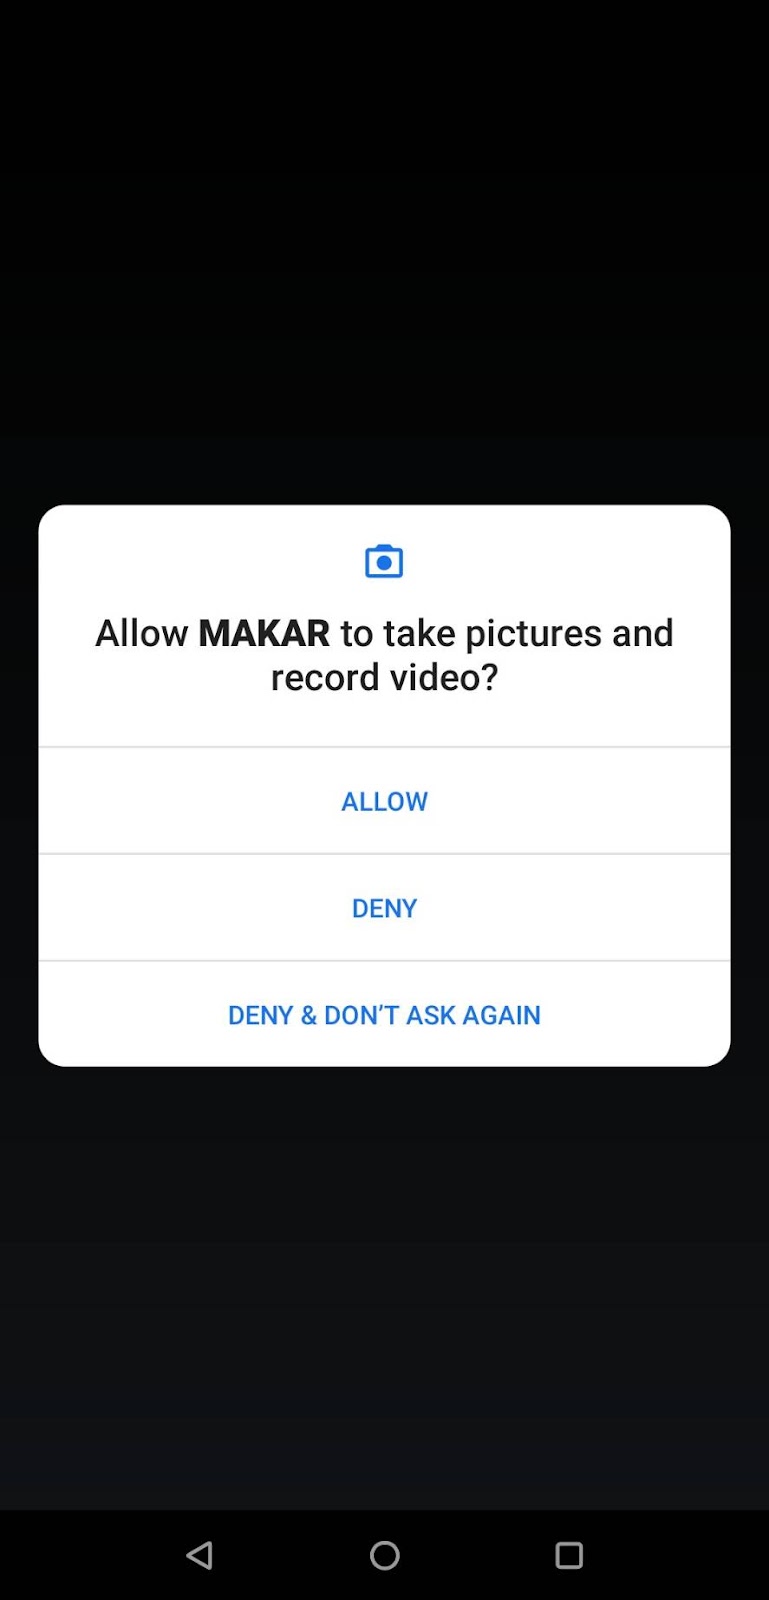


4.Click on the project you want to experience after entering the page. This time we will take Giraffe as an example
5.Click to open the experience


6. Enter the AR camera
7. After the screen appears, scan the target image to watch AR

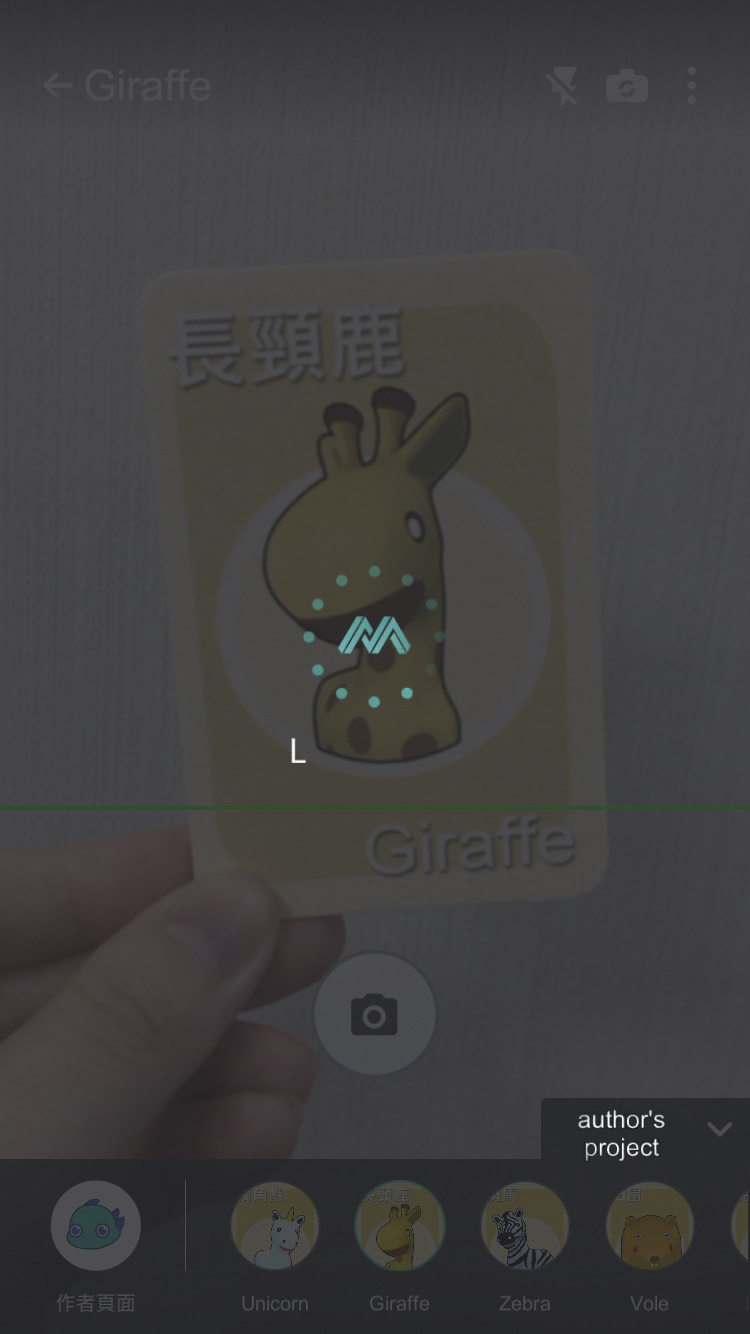

Let’s experience the lovely English card!
Alpaca

Cat

Dog
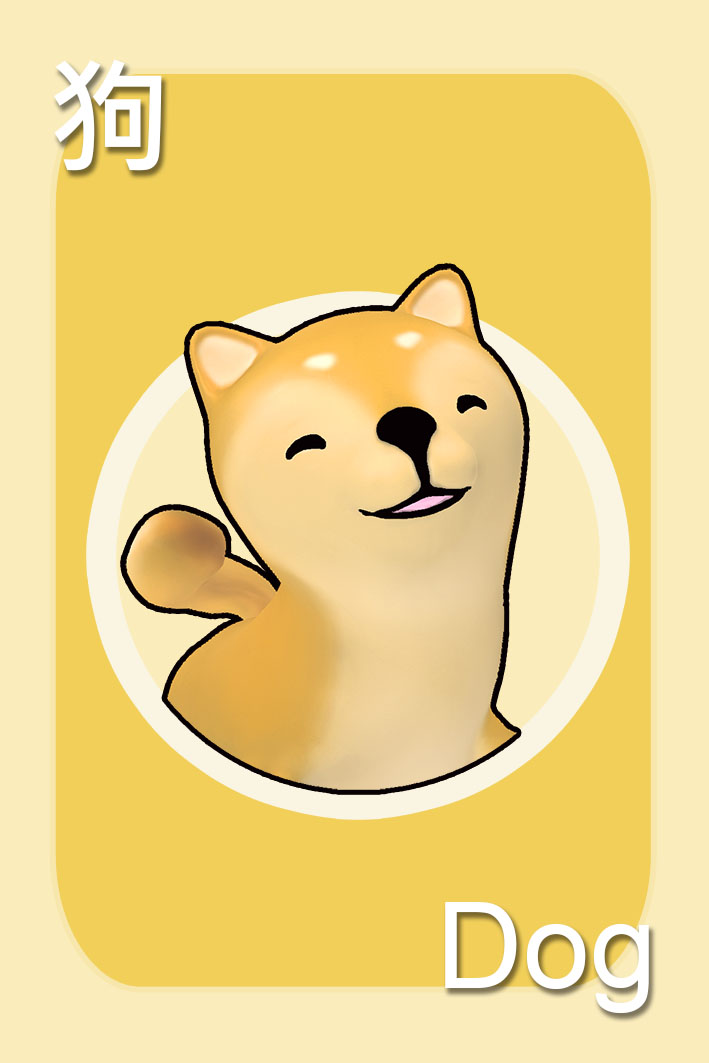
Giraffe

Whale


109 Changhua Pinghe AR Graduation Ceremony AR Shows Teaching Achievements
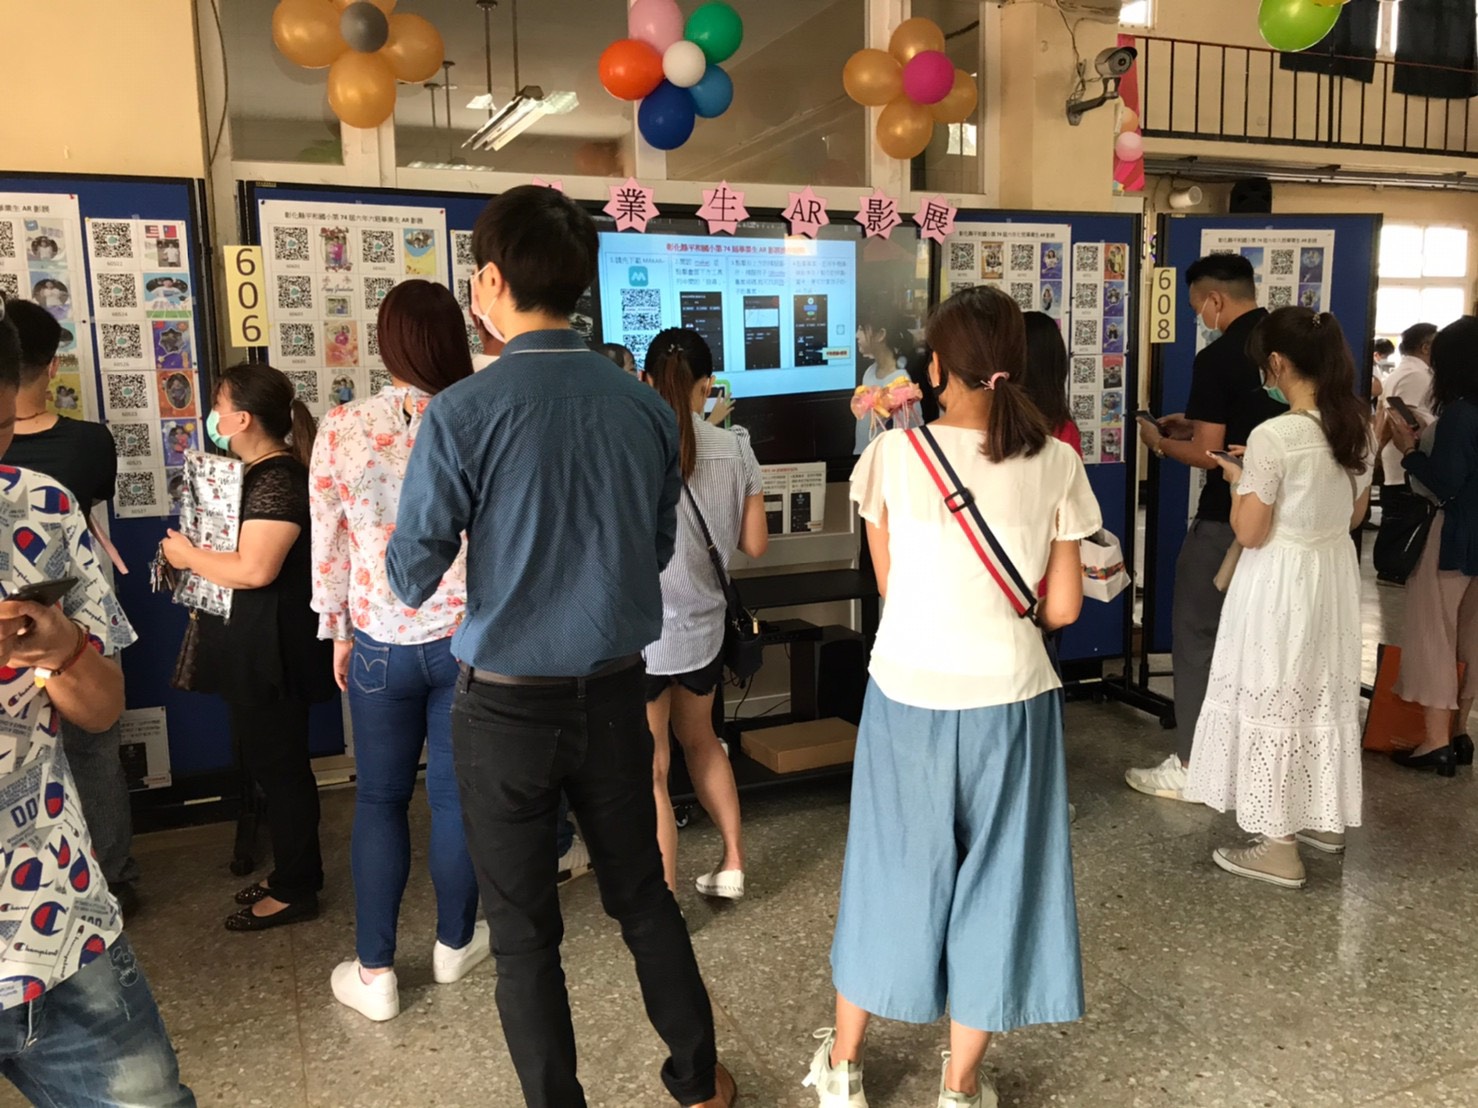
[✨]Graduation ceremony , dreams take off
Changhua Pinghe Elementary School Graduation Ceremony, hoping to break the dream and set off. The school especially hopes that children can display their graduation works with the latest technology AR.

The graduates of Changhua Elementary School not only made their own, but even acted as an instructor. They did not hesitate to explain how to use MAKAR to watch AR's clear explanation and make a film to show! Spontaneous and creative performance to Taiwan education Bring more hope!
前瞻計畫ARVR教材開發重點
近年來因應數位化的學習,許多學校已經融入VR相關的硬體規劃,其中包含手機、平板、HTC VIVE(PC VR)、HTC Focus及EPSON AR…等,過去通常使用相關的現成AR/VR教材或內容,前瞻2.0許多單位大規模導入AR/VR硬體設備,卻苦無數位內容之開發平台,過去許多老師在製作數位教材都需要學習程式語言技術,需要花費大量的時間與成本,透過MAKAR進行數位教材的創建,並且於創建完成後,發佈到各個不同的行動載具中進行觀看。
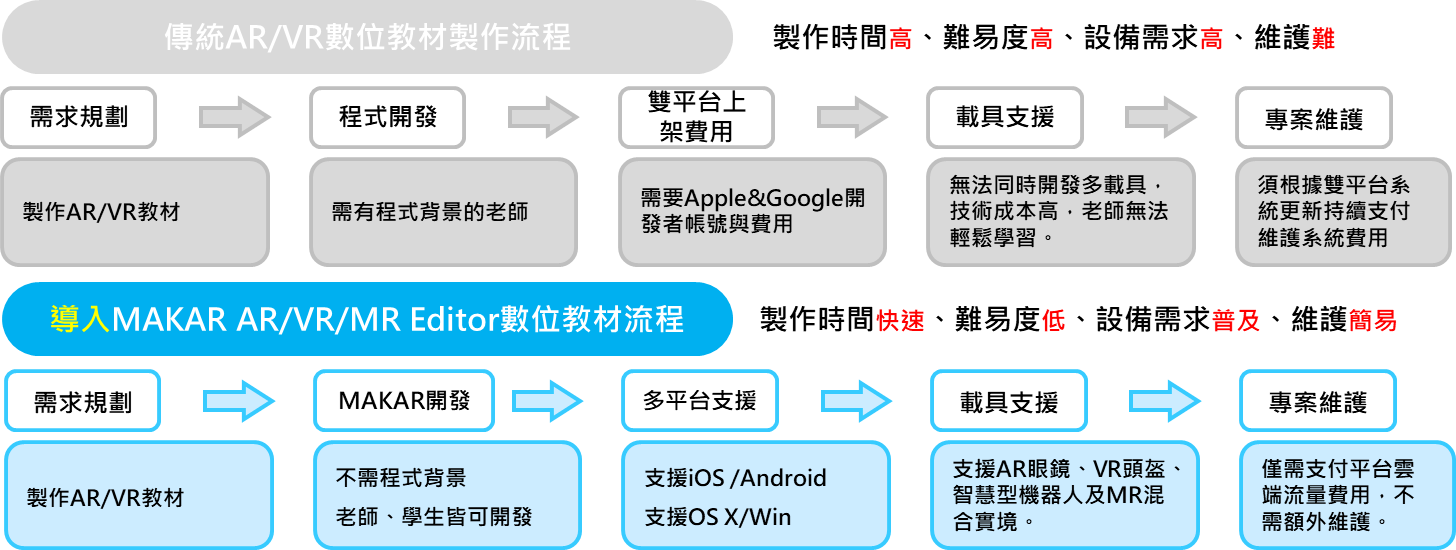
行動載具分析表
在前瞻計畫中,相信已經有許多學校已經採購了大量的平板電腦及VR頭盔的行動載具,本圖表針對近年來許多學校已採購之硬體提出行動載具分析表,透過本分析表,能夠了解在硬體上的搭配與使用狀況。
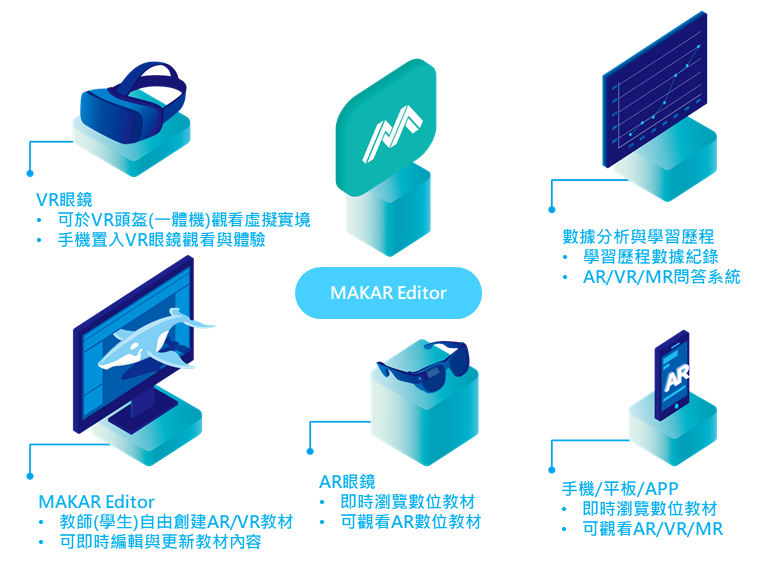
| 行動載具分析表 | ||||
|---|---|---|---|---|
| 型號 | 類型 | 外接 | 載具支援 部分教育雲教材支援 |
MAKAR 支援 |
| HTC Focus Pro | PC-VR | - | VR | 無 |
| HTC Focus / Focus Plus | 一體機-VR | - | VR | 支援 |
| Oculus Quest 2 | 一體機-VR | - | VR | 支援 |
| XRSPACE | 一體機-VR | - | VR | 支援 |
| Cardboard | 手機VR | 手機 | VR | 支援 |
| EPSON AR Glass |
AR眼鏡 | 有控制器 或攝影機 |
AR/VR | 支援 |
| 手機/平板 | 支援空間辨識 | - | AR/VR/MR | 支援 |
| 手機/平板 | 陀螺儀 | - | AR/VR | 支援 |
教育雲ARVR教材表
因應前瞻基礎建設實施計畫,教育部數位教材支援表(以ARVR支援條列)
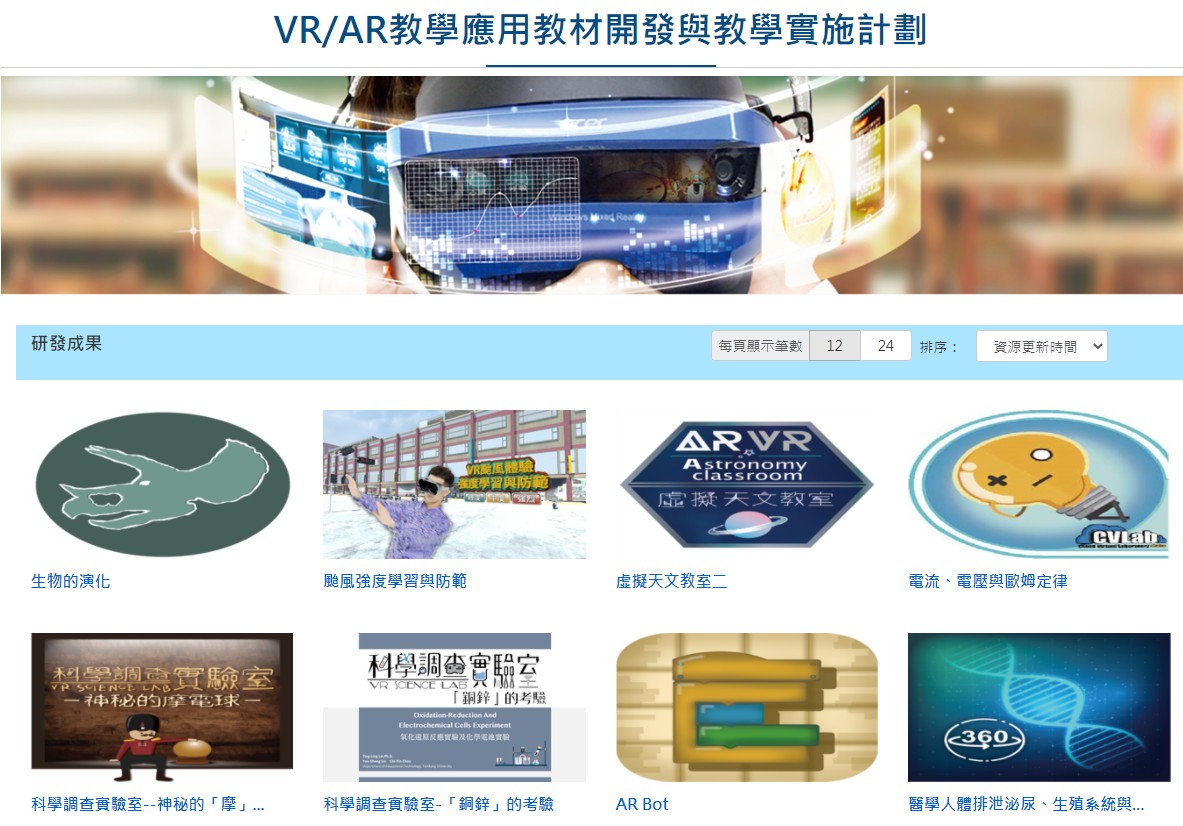
| 課程編號 | 課程名稱 | 行動載具 | AR眼鏡 | VR頭盔 | |||||
| 智慧型手機 | Android 手機 |
平板電腦 | Epson AR BT-40S | HTC FOCUS | Oculus | Acer VR | VR頭盔(VICO) | ||
| 108-A01 | 我的寵物是蝴蝶 | V | V | V | V | - | - | V | - |
| 108-A02 | 探索水生生物世界的秘密 | V | V | V | V | - | - | V | - |
| 108-A03 | 太陽與植物世界課程之AR教材 | V | V | - | V | - | - | - | - |
| 108-A04 | AR Bot | V | V | - | - | - | - | - | - |
| 108-A05 | 翻轉教室YOUTUBER | V | V | - | V | - | - | - | - |
| 108-A08 | 單軸經緯儀之主軸模型結合擴增實境於工程測量課程 | V | V | - | V | - | - | - | - |
| 108-T01 | 虛擬天文教室二 | V | V | V | V | V | - | V | - |
| 108-T02 | 飛閱臺灣體繪地形 | V | V | V | V | - | - | V | - |
| 108-V01 | 酸鹼鹽之化學虛擬實境教材開發與教學 | - | - | - | - | - | - | - | - |
| 108-V02 | 科學調查實驗室--神秘的摩電球 | - | - | V | - | - | - | V | - |
| 108-V03 | 太陽系大發現日心月相星座 | V | V | - | - | V | - | - | - |
| 108-V04 | 電腦硬體組裝虛擬實境教材開發 | - | - | V | - | - | - | V | - |
| 108-V05 | 醫學人體排泄泌尿生殖系統與植物運輸系統之介紹 | V | V | - | - | - | - | - | - |
| 108-V06 | 穿越時空學電子 | - | - | - | - | V | - | - | - |
| 108-V07 | VR工業配線實習 | - | - | - | - | - | - | - | - |
| 108-V08 | 動物的循環系統VR探索之旅 | - | - | - | - | - | - | - | - |
| 107-A01 | 台灣海岸環境變遷 | V | V | V | V | - | - | V | - |
| 107-T01 | 百年好合萬金盟 | V | - | - | V | V | - | - | - |
| 107-T02 | 國中理化第三冊之電池與電解 | V | V | - | V | V | - | - | - |
| 107-T03 | 自然科學 - 植物課程 | V | V | - | V | - | - | - | V |
| 107-T04 | 天文觀測 原名 : 科學科技虛擬一點通 | - | - | - | V | V | - | - | - |
| 107-T05 | 虛擬天文教室二 | V | V | - | V | V | - | - | - |
| 107-T06 | 生物的演化 | V | V | - | - | V | - | - | - |
| 107-V00 | 電流電壓與歐姆定律 | - | - | - | - | - | - | - | - |
| 107-V01 | 地球科學天文探祕之虛擬星象館 | - | |||||||
3131922-5G New Technology Learning Demonstration School Series Study
- #Research
- #AR
- #VR
- #NationalTeacherResearchCenter
- #XR
- #RealityEducation
- #Teachers
- #VRCourses
- #ARCourses
- #TeacherResearch
- #MAKAR
| Course Information |
|
||||||||||||||||||||||||||||||||
| Registration Information |
|
||||||||||||||||
| Course unit |
|
||||||||
| other |
|
3088204- XR Practice Application (Advanced)
- #Research
- #AR
- #VR
- #NationalTeacherResearchCenter
- #XR
- #RealityEducation
- #Teachers
- #VRCourses
- #ARCourses
- #TeacherResearch
- #MAKAR
| Course Information |
|
||||||||||||||||||||||||||||||||
| Registration Information |
|
||||||||||||||||
| Course unit |
|
||||||||
| other |
|
3088200- XR Practice Application (Beginner)
- #Research
- #AR
- #VR
- #NationalTeacherResearchCenter
- #XR
- #RealityEducation
- #Teachers
- #VRCourses
- #ARCourses
- #TeacherResearch
- #MAKAR
| Course Information |
|
||||||||||||||||||||||||||||||||
| Registration Information |
|
||||||||||||||||
| Course unit |
|
||||||||
| other |
|
.JPG)
.JPG)
.JPG)
.JPG)
.JPG)
.JPG)
.JPG)
3124796-VR reality design practical application course (online course)
- #Research
- #AR
- #VR
- #NationalTeacherResearchCenter
- #XR
- #RealityEducation
- #Teachers
- #VRCourses
- #ARCourses
- #TeacherResearch
- #MAKAR
| Course Information |
|
||||||||||||||||||||||||||||||||
| Registration Information |
|
||||||||||||||||
| Course unit |
|
||||||||
| other |
|
Link :Course code 3124796
Beishi Yanxizi No. 1100712009

| Approval number | Beishi Yanxizi No. 1100712009 |
| Study name | 110 Taipei Teachers e-textbook Innovation and Teaching Research Workshop: Development and Application of PowerDirector's Textbook-AR Augmented Reality |
| Study hours | 3 |
| organizer | Taipei Teachers' Research Center |
| Study object one | 109 school year Taipei teacher e-textbook development teacher and Taipei City teacher |
| Study object two | Open Inter-School Registration |
| Study object three | other |
| Number of students | 0 people every school 0 people |
| Study start date | 2021/7/26 |
| End of study | 2021/7/26 |
| Study unit address | Online meeting room  |
| Study classroom | Online course |
| Study goals | In line with the promotion of the 108 syllabus, promote the application of augmented reality (AR) and virtual reality (VR) to the teaching scene to enhance teachers' innovative teaching mode. |
| Study method | |
| ways of registration | Online registration |
| Selection instructions | 109 school year Taipei teacher e-textbook seed teachers are given priority admission |
| Study undertaker | Lin Qiuwan |
| Undertaker phone | 28616942#236 |
| Implement the plan |
Study Information
.jpg)
.jpg)
.jpg)
.jpg)
.jpg)
.jpg)
.jpg)
.jpg)
.jpg)
.jpg)
.jpg)
.jpg)
.jpg)
.jpg)
XR Practical Applications Course (Basic)
XR practical applications course (Basic)
Approval Number:Taipei City seminar No. 1100129033
Seminar:XR practical applications course (Basic)
Organizer:Taipei Municipal Nanmen Junior High School
Date:2021/4/23~2021/4/23
This course is designed to learn how to make VR campus digital tours through VR 360 photography, VR storyboard, and by making 2D materials. After finishing materials making, import MAKAR to create AR,VR learning plans or contents. Teachers can edit VR campus tours by themselves, and promote VR campus popularization in Taipei City effectively.
Learning Goals:
1.AR/VR experience
2.VR360 making
3.VR photoes taking
4.VR project planning
5.Basic VR project making
Visit Taipei City Teachers’ In-Service Information
Select Unit Of Issued and search:Taipei Municipal Nanmen Junior High School
XR Practical Applications Course (Advanced)
XR practical applications course (advanced)
Approval Number:Taipei City seminar No. 1100129034
Seminar:XR practical applications course (Advanced)
Organizer:Taipei Municipal Nanmen Junior High School
Date:2021/4/30~2021/4/30
Targets of seminar: 20 teachers enrolled by recommendation from their schools
-----This course is designed to learn how to make VR campus digital tours through VR 360 photography, VR storyboard, and by making 2D materials. After finishing materials making, import MAKAR to create AR,VR learning plans or contents. Teachers can edit VR campus tours by themselves, and promote VR campus popularization in Taipei City effectively.
Learning Goals:
1.Advanced VR production
2.Scene-to-scene transition and setting
3.VR Q&A production
4.Project experience and display
Visit Taipei City Teachers’ In-Service Information (Mandarin only)
Select Unit Of Issued and search "Taipei Municipal Nanmen Junior High School"