MAC Version MAKAR 3D Scan User Guide
MAKAR has released the computer version of "MAKAR 3D Scan" software, making it easy to create 3D models using a MAC! Simply by photographing objects and importing the photos into the software, you can quickly generate 3D models. This guide will detail how to use the MAC version of MAKAR 3D Scan software.
Table of Contents |
|---|
Introduction to MAC Version MAKAR 3D Scan Features
-
Scan Everything with Phone and Computer: Simply take photos of the object you want to convert into a 3D model, rotate it 360 degrees, and import the photos into MAKAR 3D Scan. Through a simple process on both your phone and computer, you can quickly scan and generate a 3D model.
-
Customizable Scan Precision: Worried that your 3D model is too large or lacks detail? MAKAR 3D Scan offers customizable options for model precision and background removal, allowing you to scan and create 3D models according to your specific needs.
-
Supports Multiple 3D Format Exports: 3D models created with MAKAR 3D Scan can be exported in formats such as USDZ, OBJ, GLB, and STL, enabling seamless integration across various platforms.
-
Direct Integration with MAKAR Editor Resource: Log into your MAKAR account, and 3D models scanned with MAKAR 3D Scan will automatically be imported into your MAKAR Editor asset library, requiring no additional steps, and allowing you to quickly explore XR editing in the Metaverse.
-
Unlocking the Boundaries of XR Metaverse: Easily enter the infinite world of XR. MAKAR 3D Scan bridges the gap between reality and virtuality, unleashing your creativity in an immersive, expansive augmented reality world.
Minimum Hardware Requirements and Download for MAC Version MAKAR 3D Scan
【Software Name】: MAC Version MAKAR 3D Scan
【Software Language】: Traditional Chinese, English
【Minimum Requirements】: macOS Monterey or above, M1 chip, 16GB, 16GB RAM, 4GB VRAM
【Download Location】: Download from the MAC App Store
MAC Version MAKAR 3D Scan User Guide
【Taking Photos with iPhone/iPad and Importing into the Software】
-
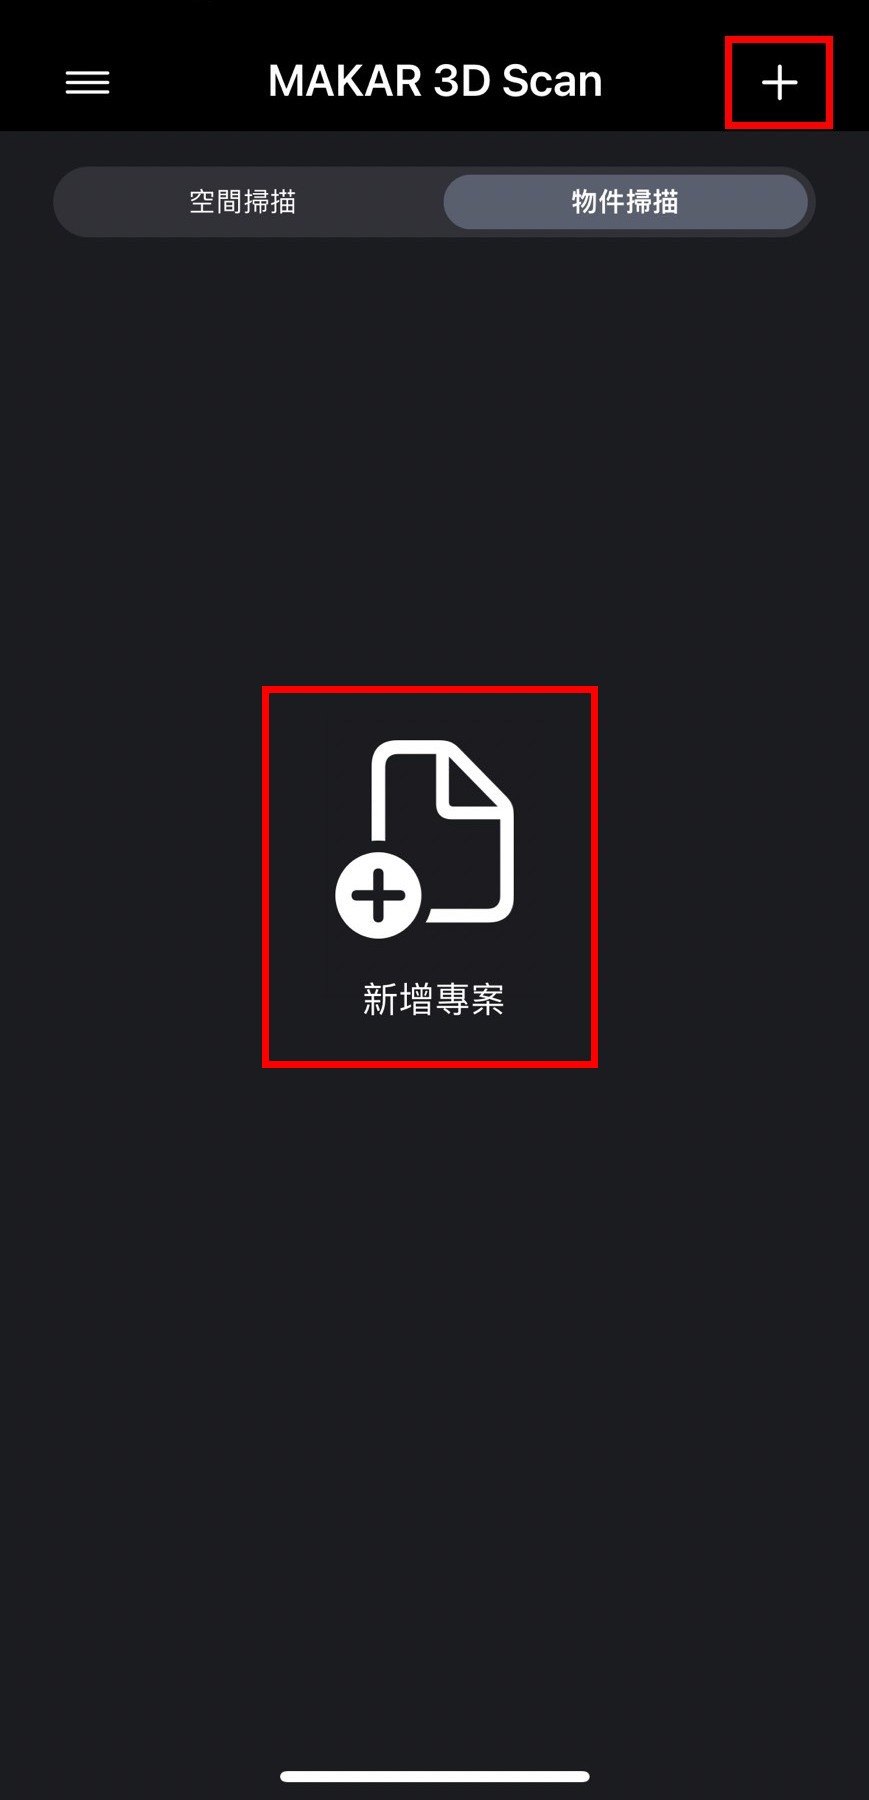
Open the mobile version of MAKAR 3D Scan on your iPhone or iPad, and select "New Project" in the middle or the "+" in the top right corner.
-
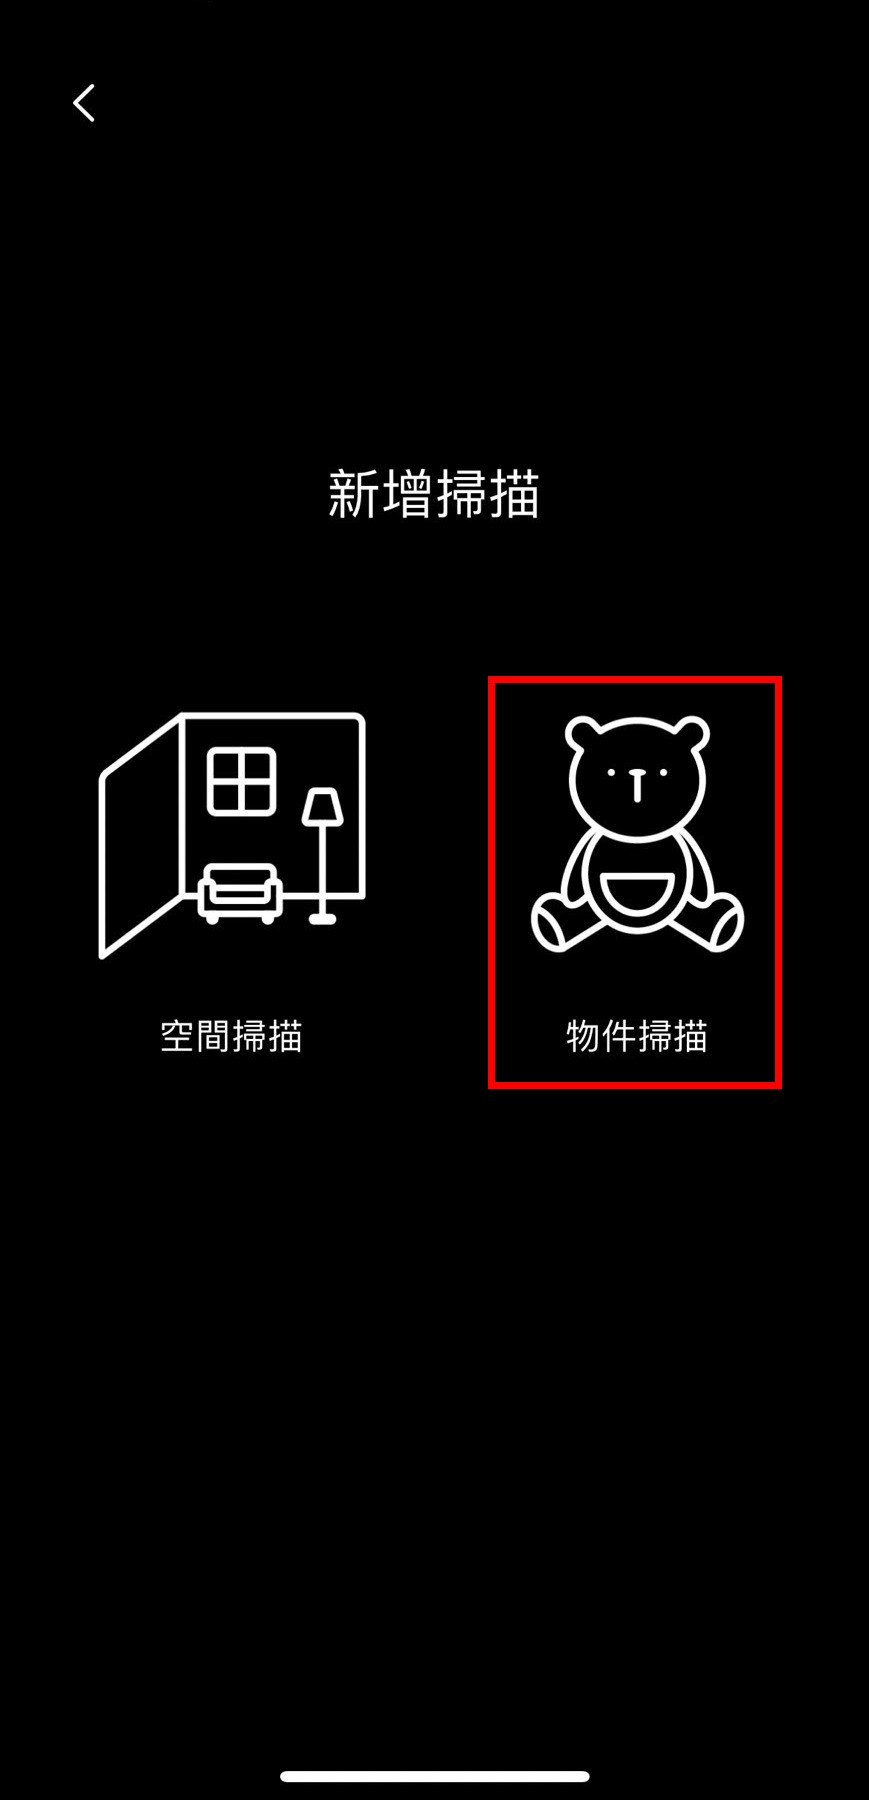
Select "Object Scan" on the right side.
-
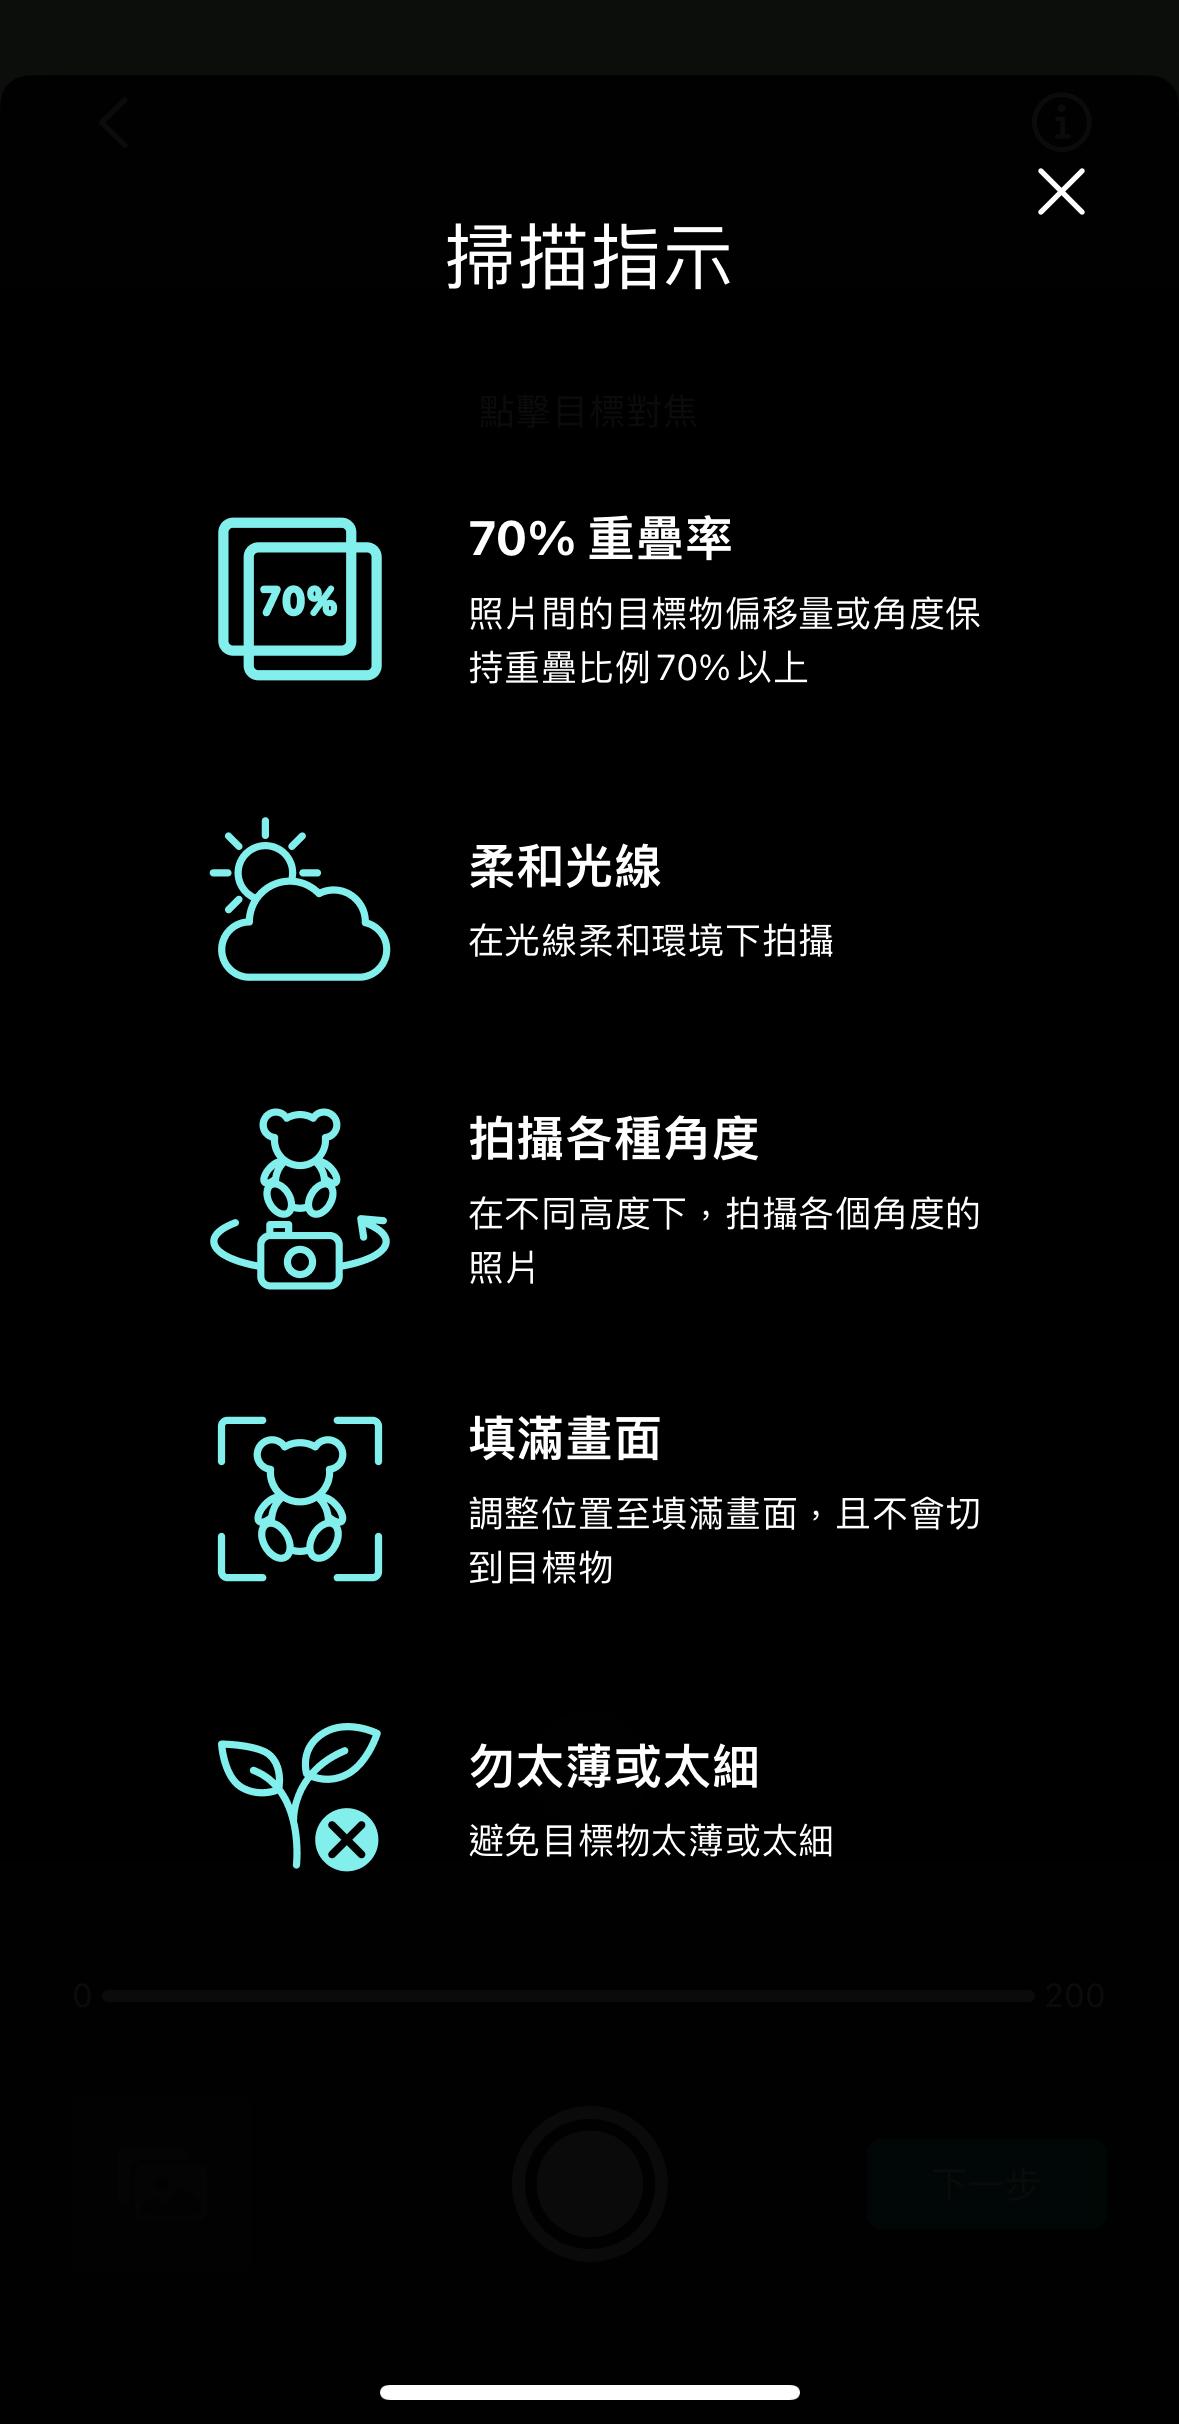
A notice will pop up with scanning tips, aiming for clear shots, maintaining 70% overlap, and filling the frame.
-
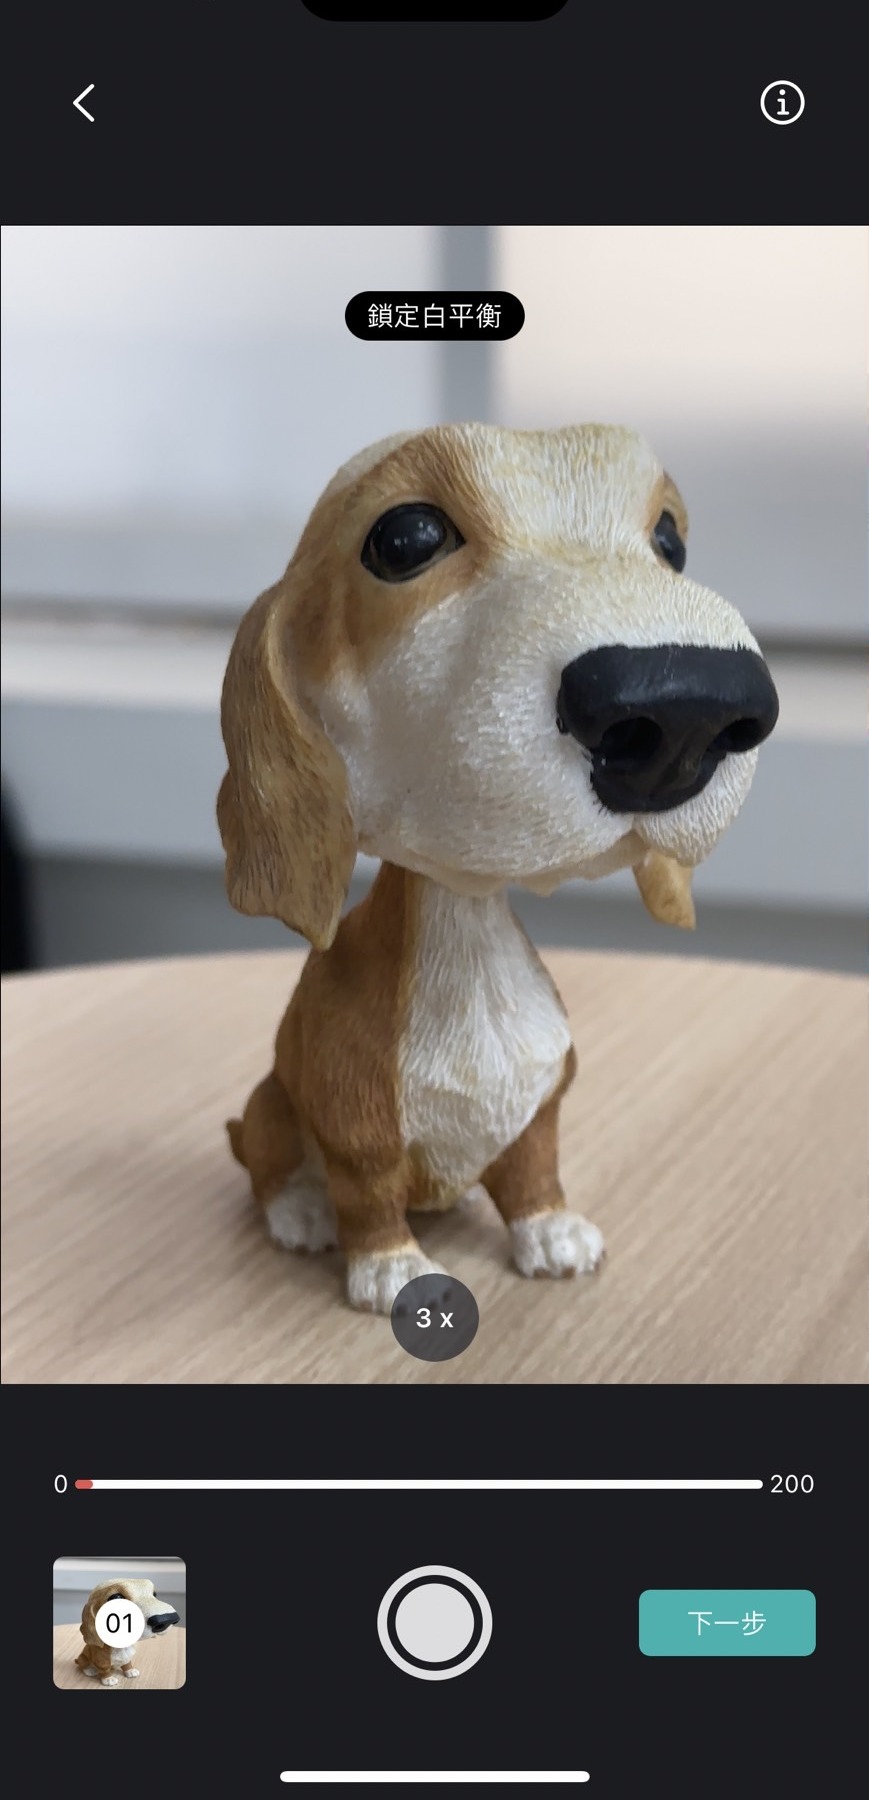
Enter the shooting page and start taking photos of the object.
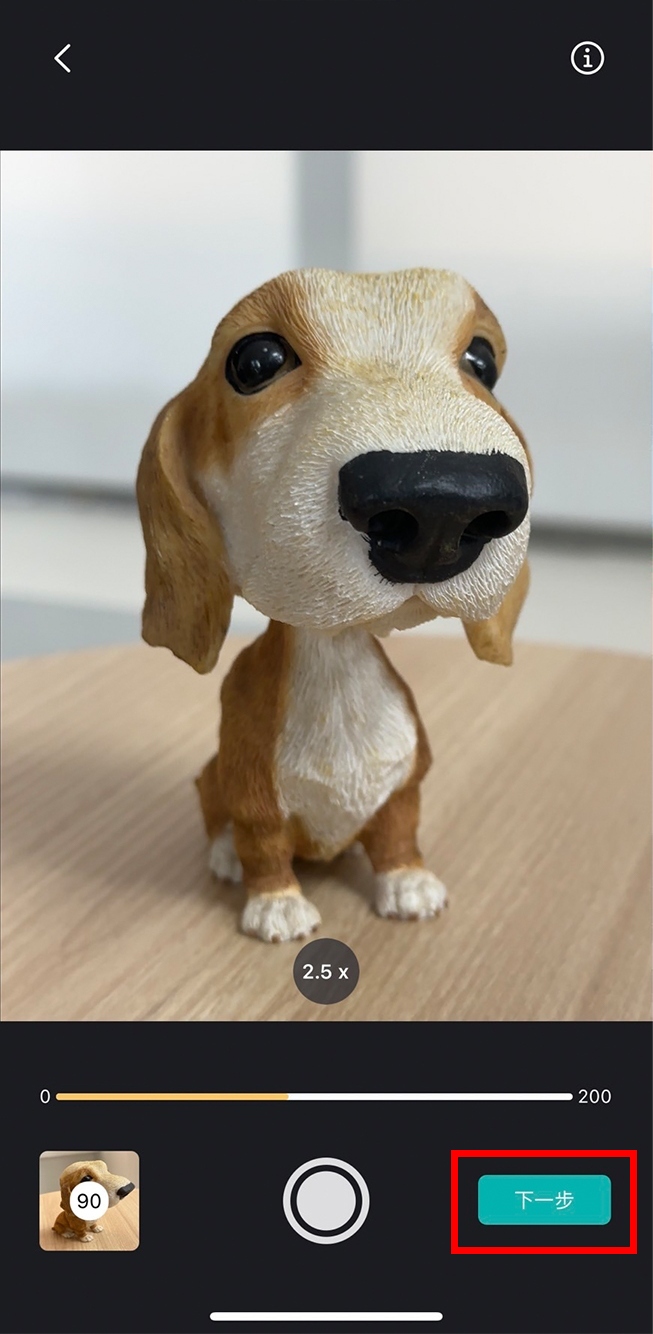
Focus on the object by tapping on the screen, and zoom up to 3X. Capture the object from different heights, rotating 360 degrees, taking at least 40 photos to meet the conditions for the next step.
-
After taking the photos, select "Next" on the right side.
-
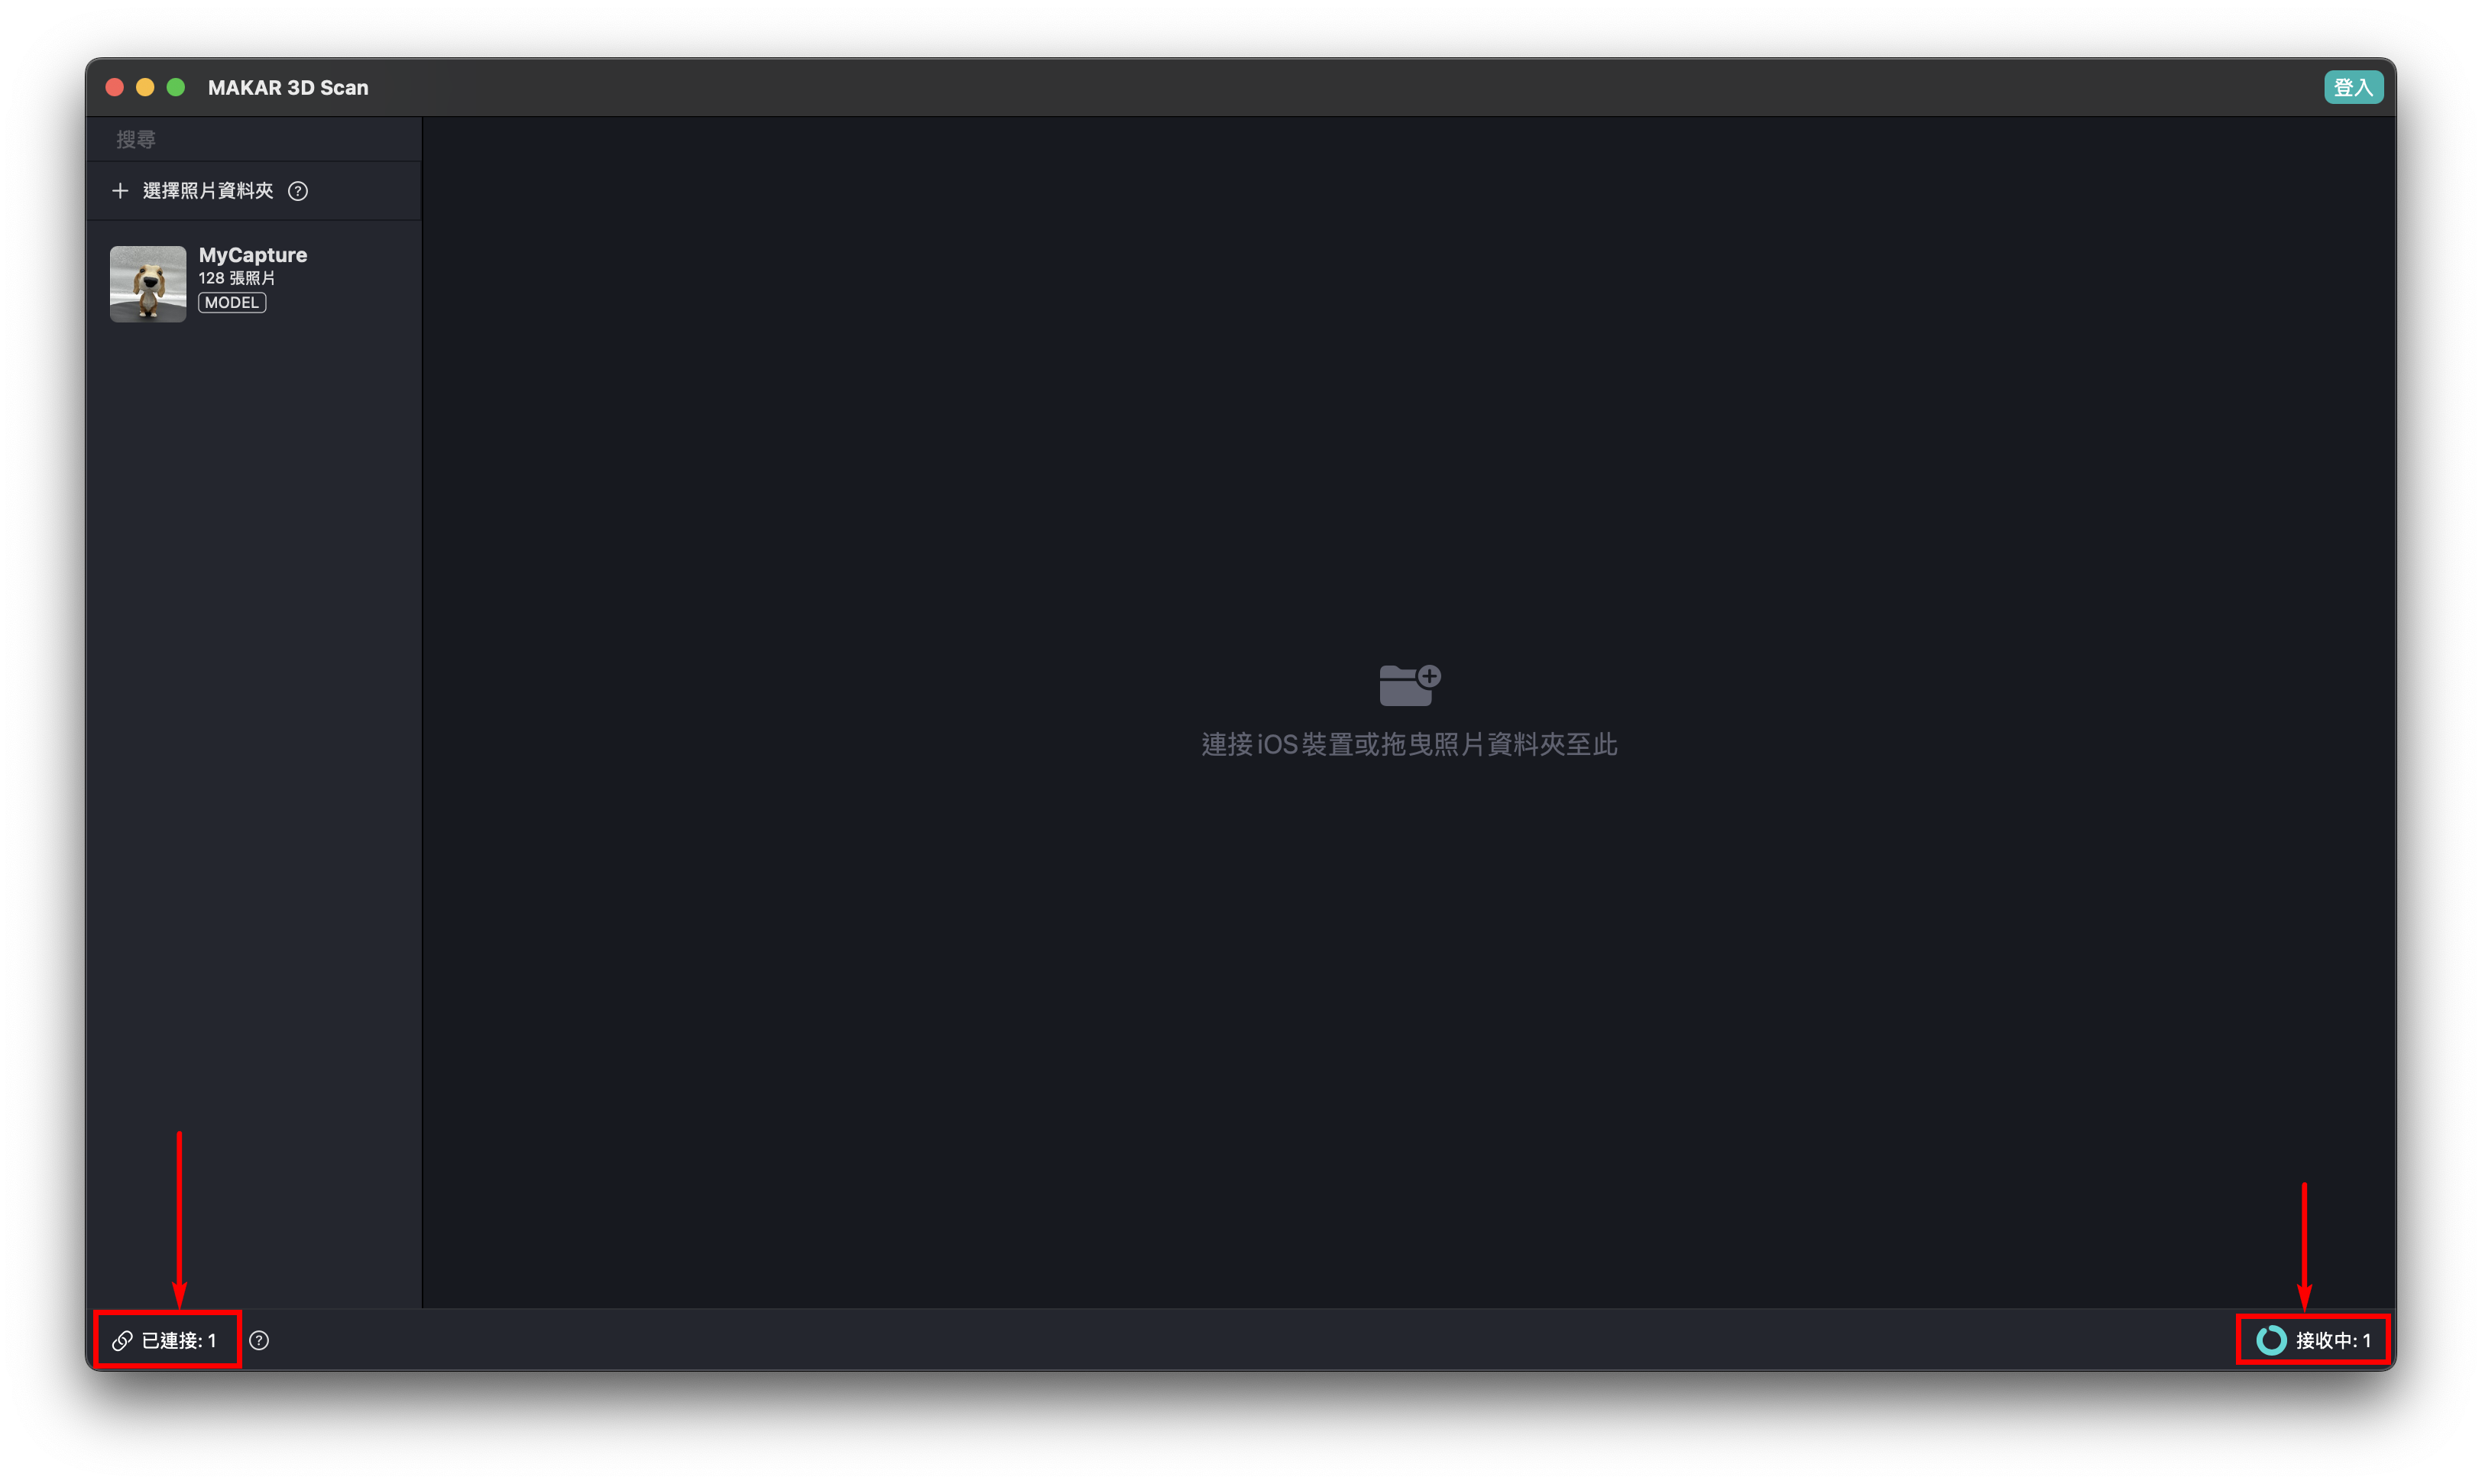
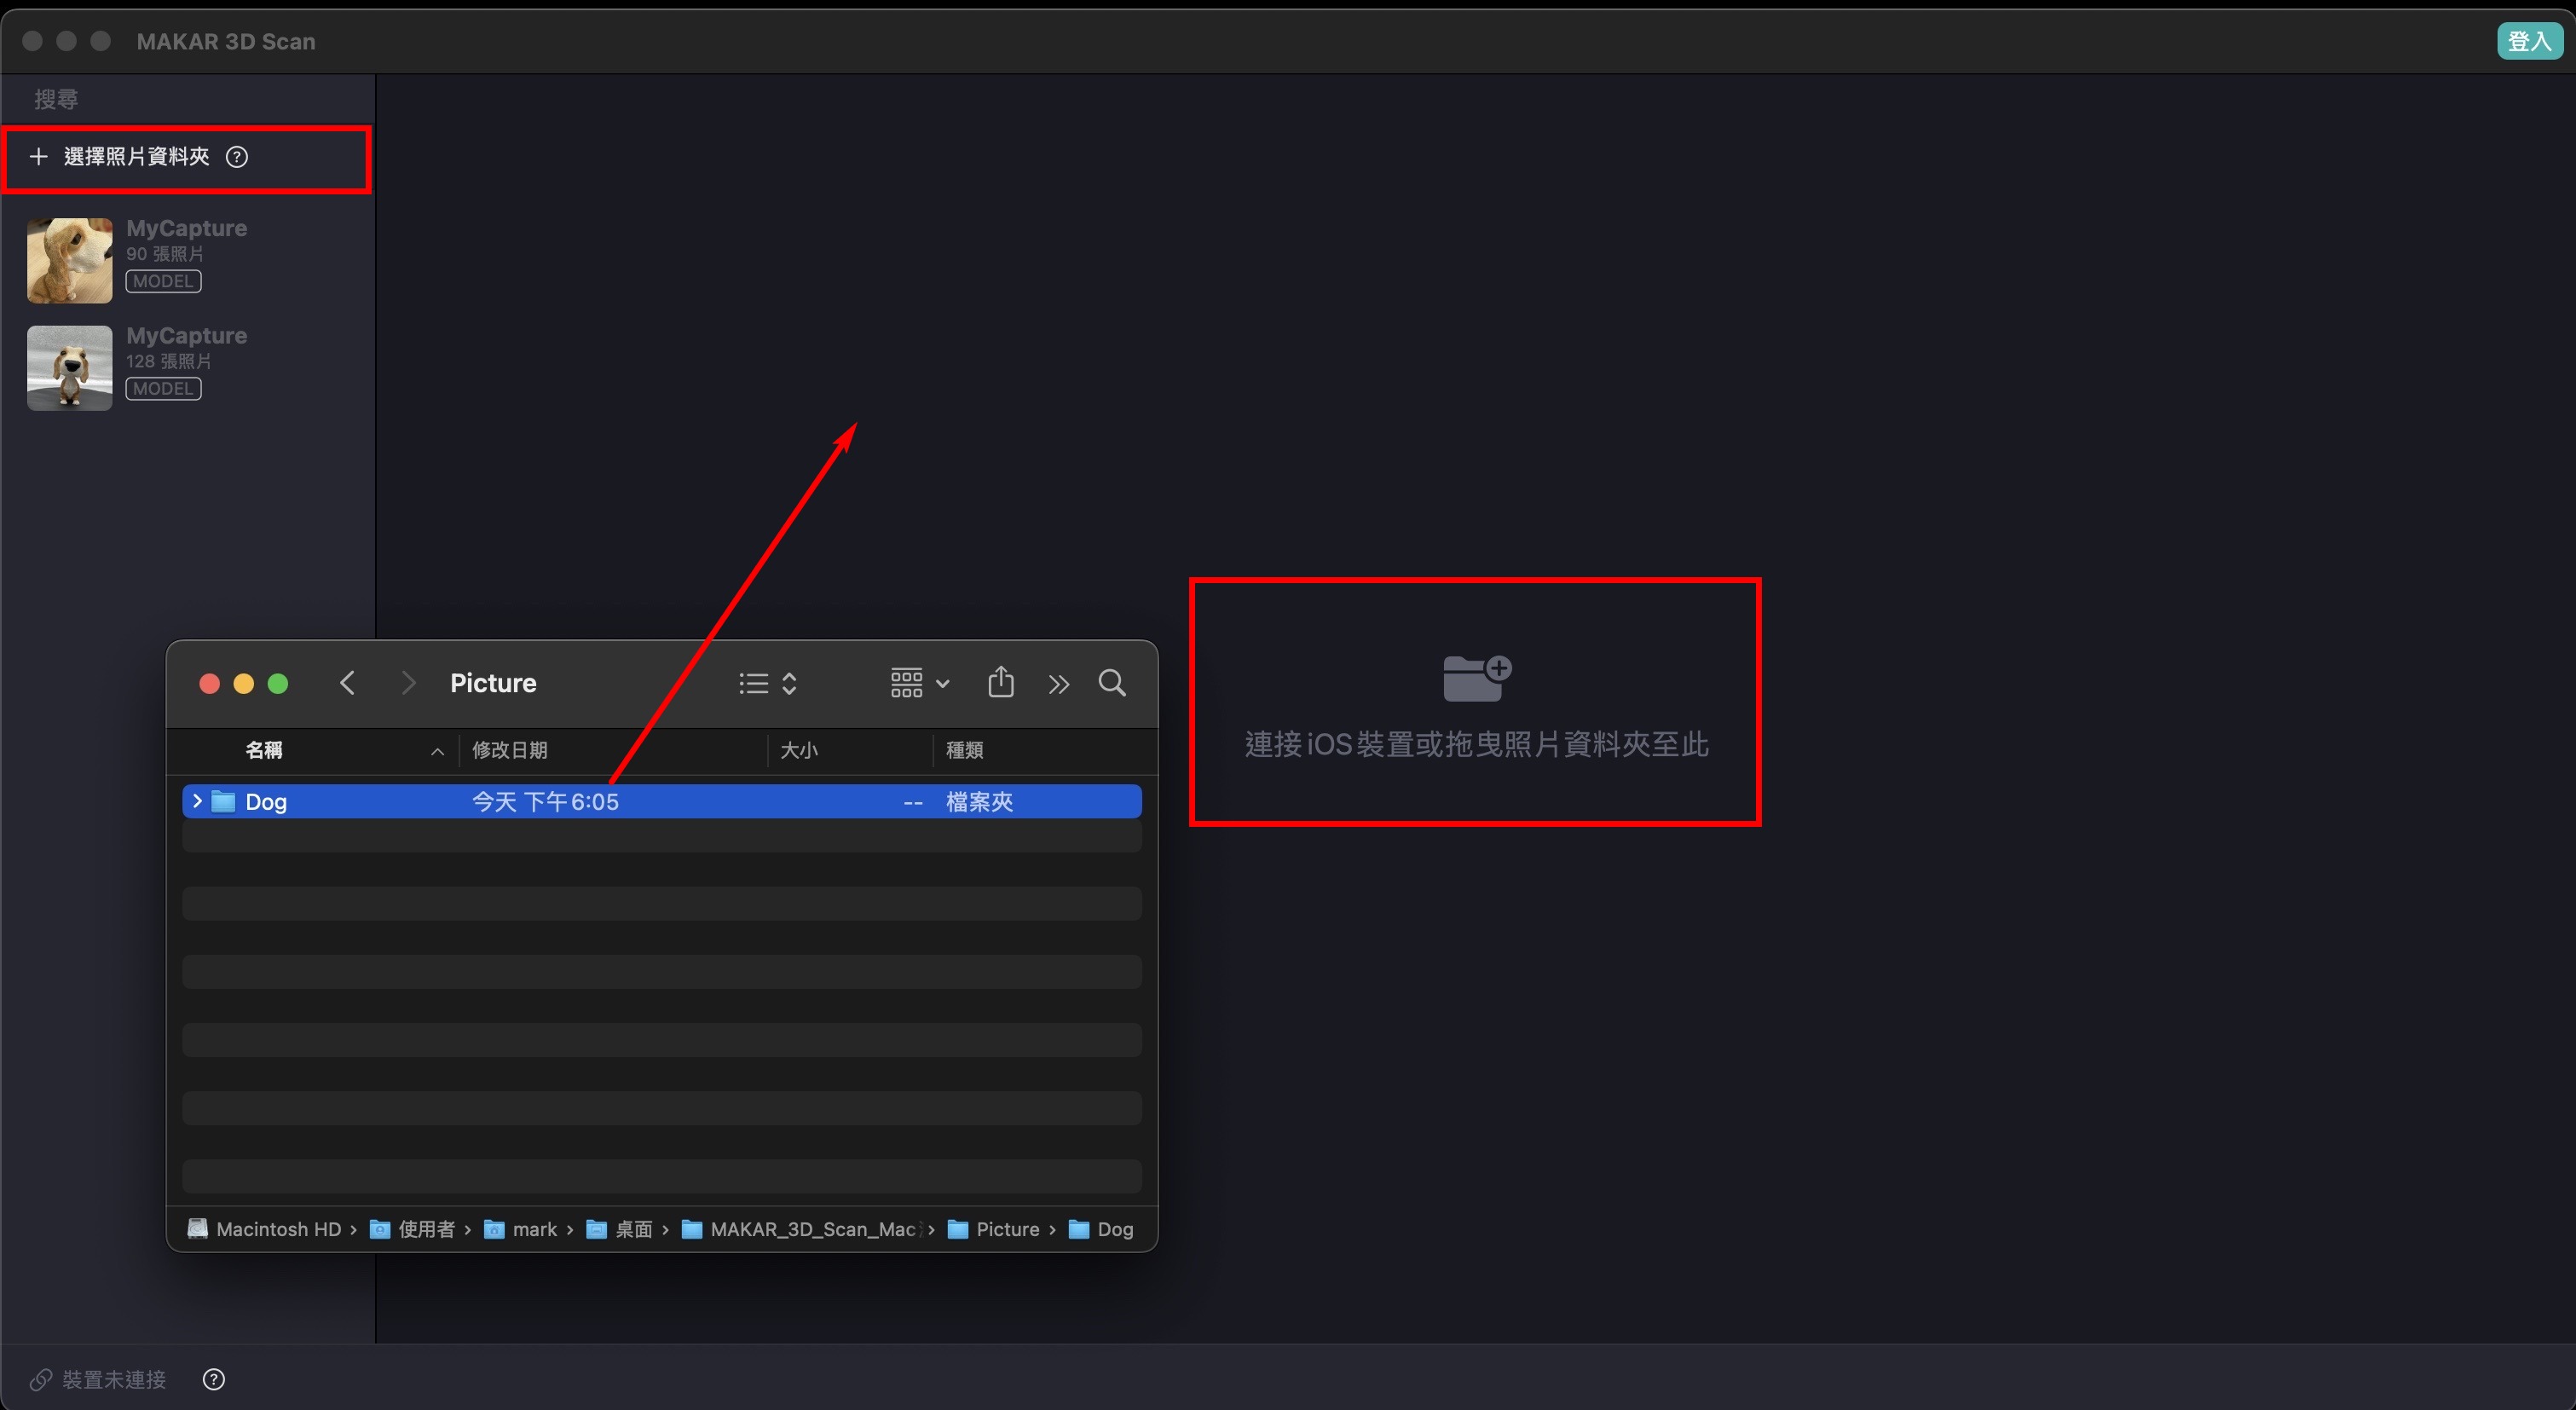
Then, open MAKAR 3D Scan on your MAC, and return to your iPhone/iPad to select "Wi-Fi Transfer" to start transferring files to the MAC version of MAKAR 3D Scan.

【Creating 3D Models Using the Software】
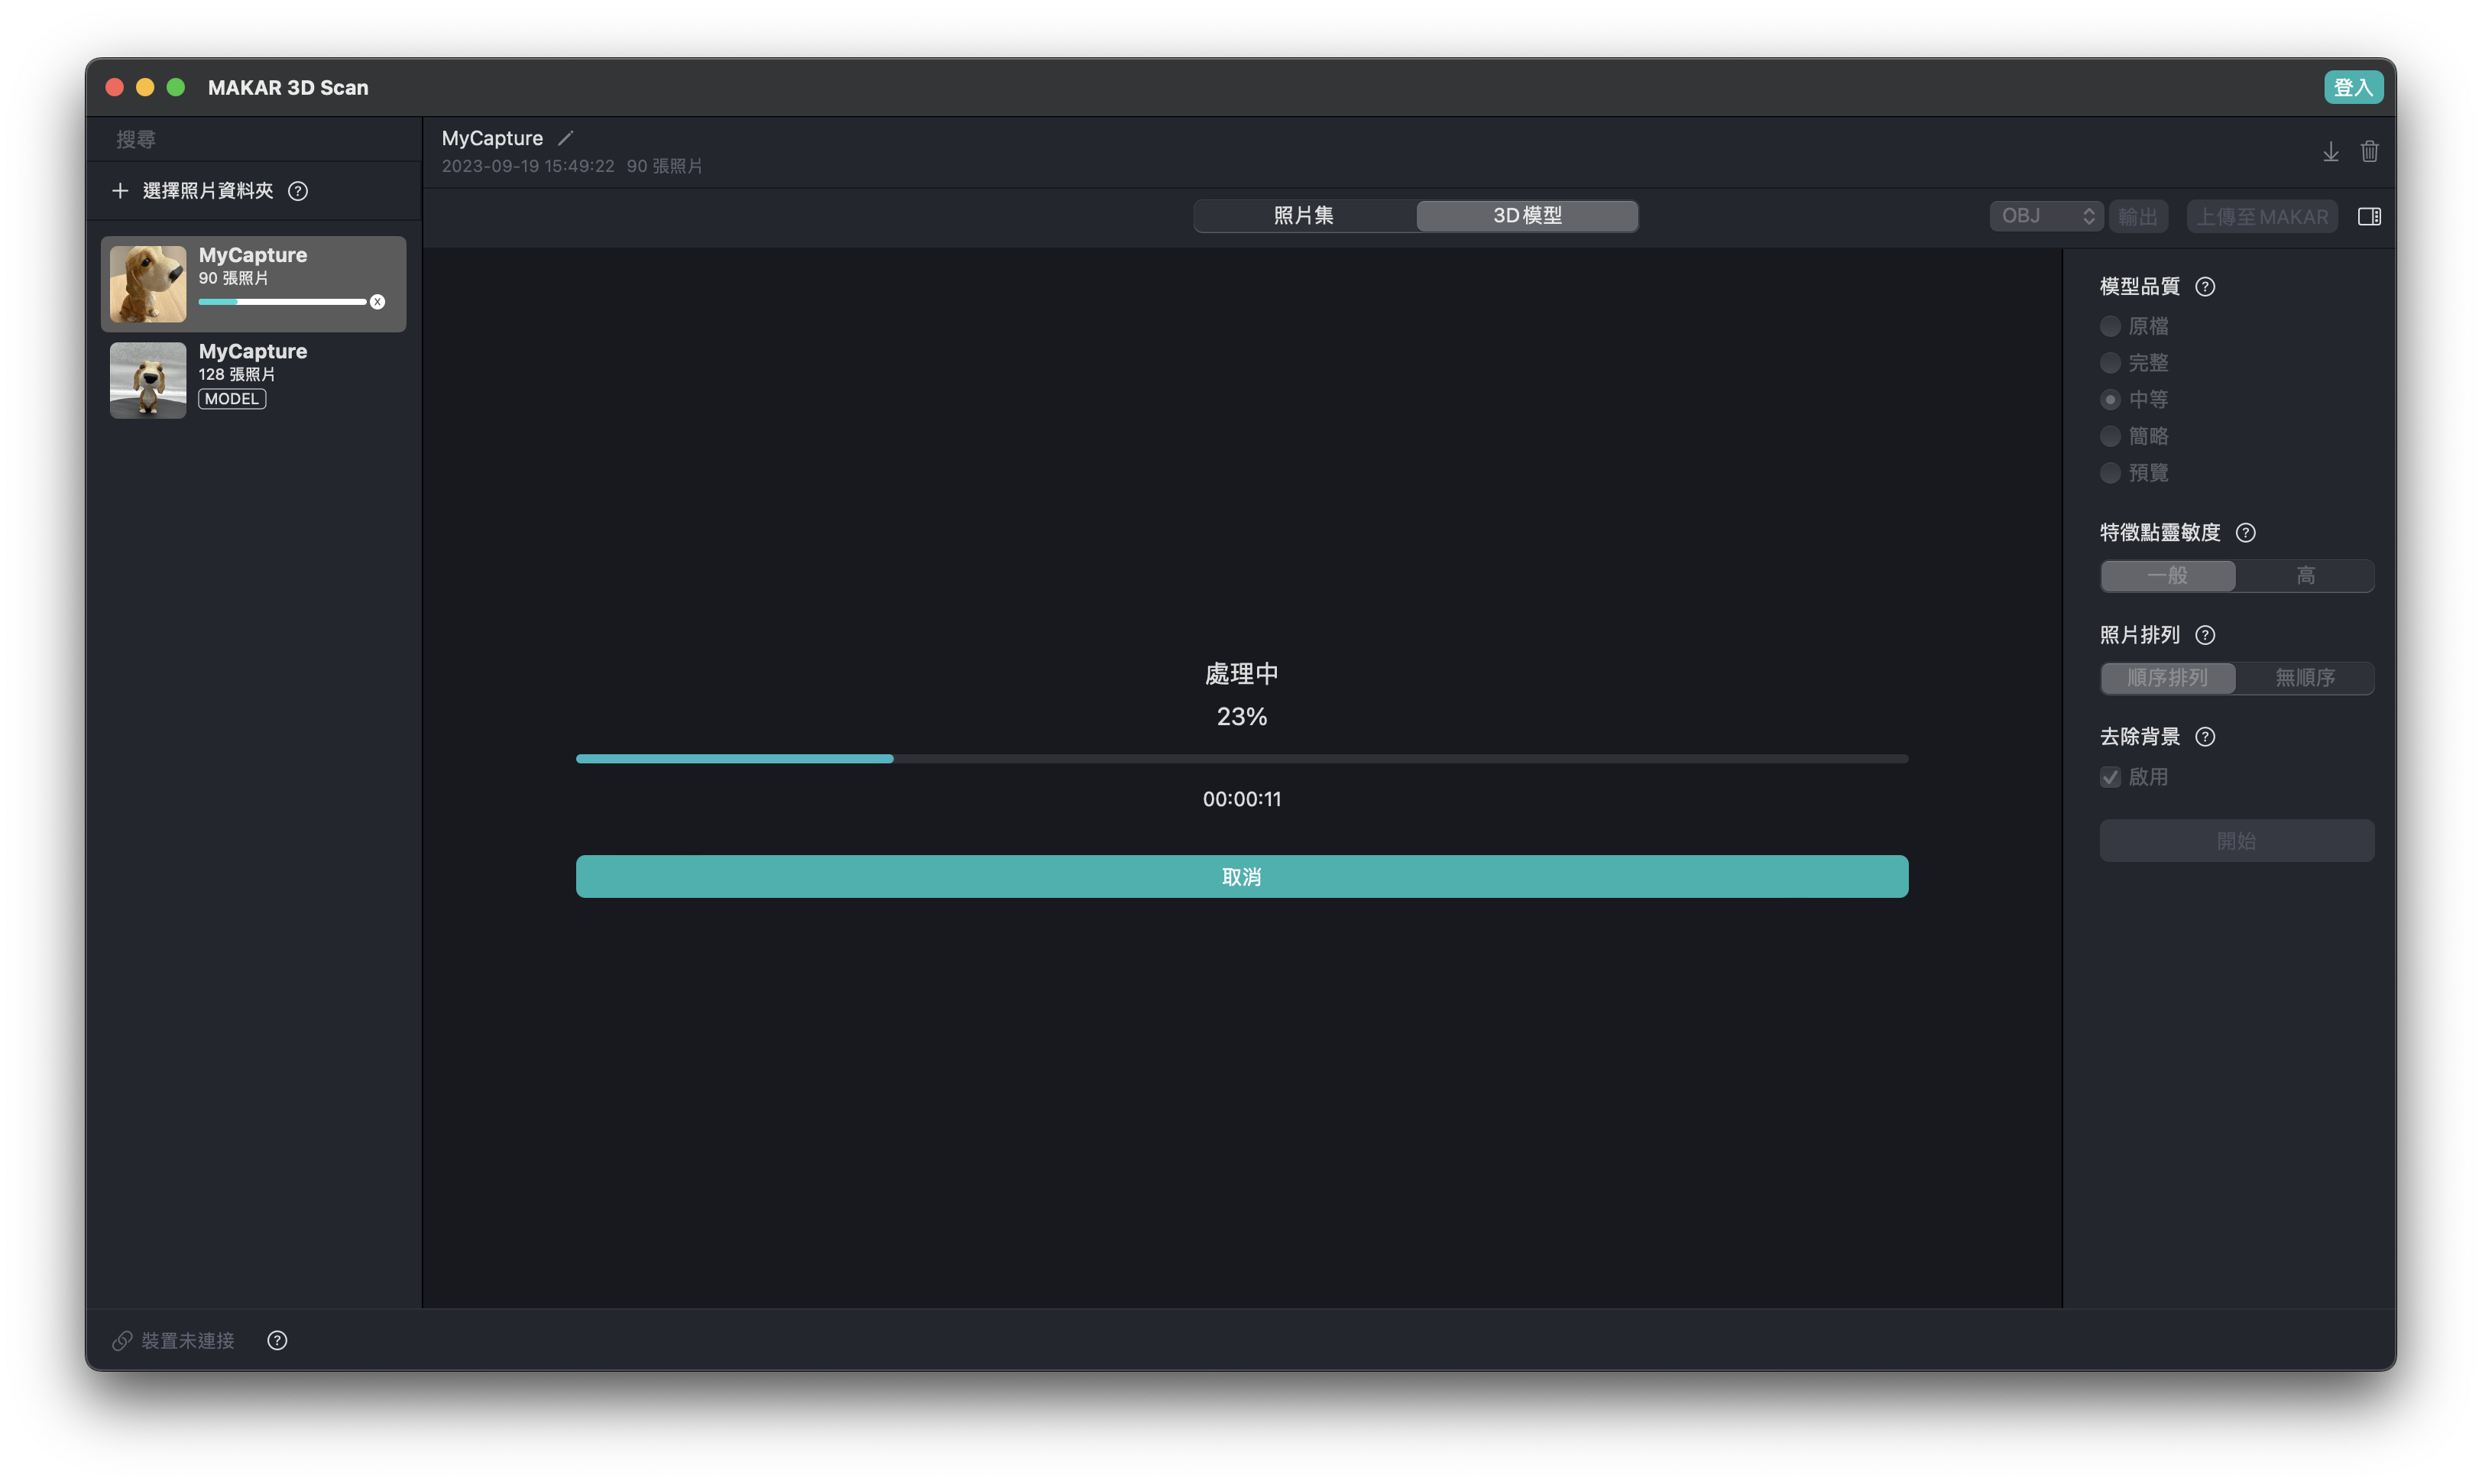
- Upload via "Wi-Fi Transfer," and you can see the transfer progress in the status bar below.
- After uploading, the automatic modeling process begins. You can check the progress from the main screen or the Dock.

-
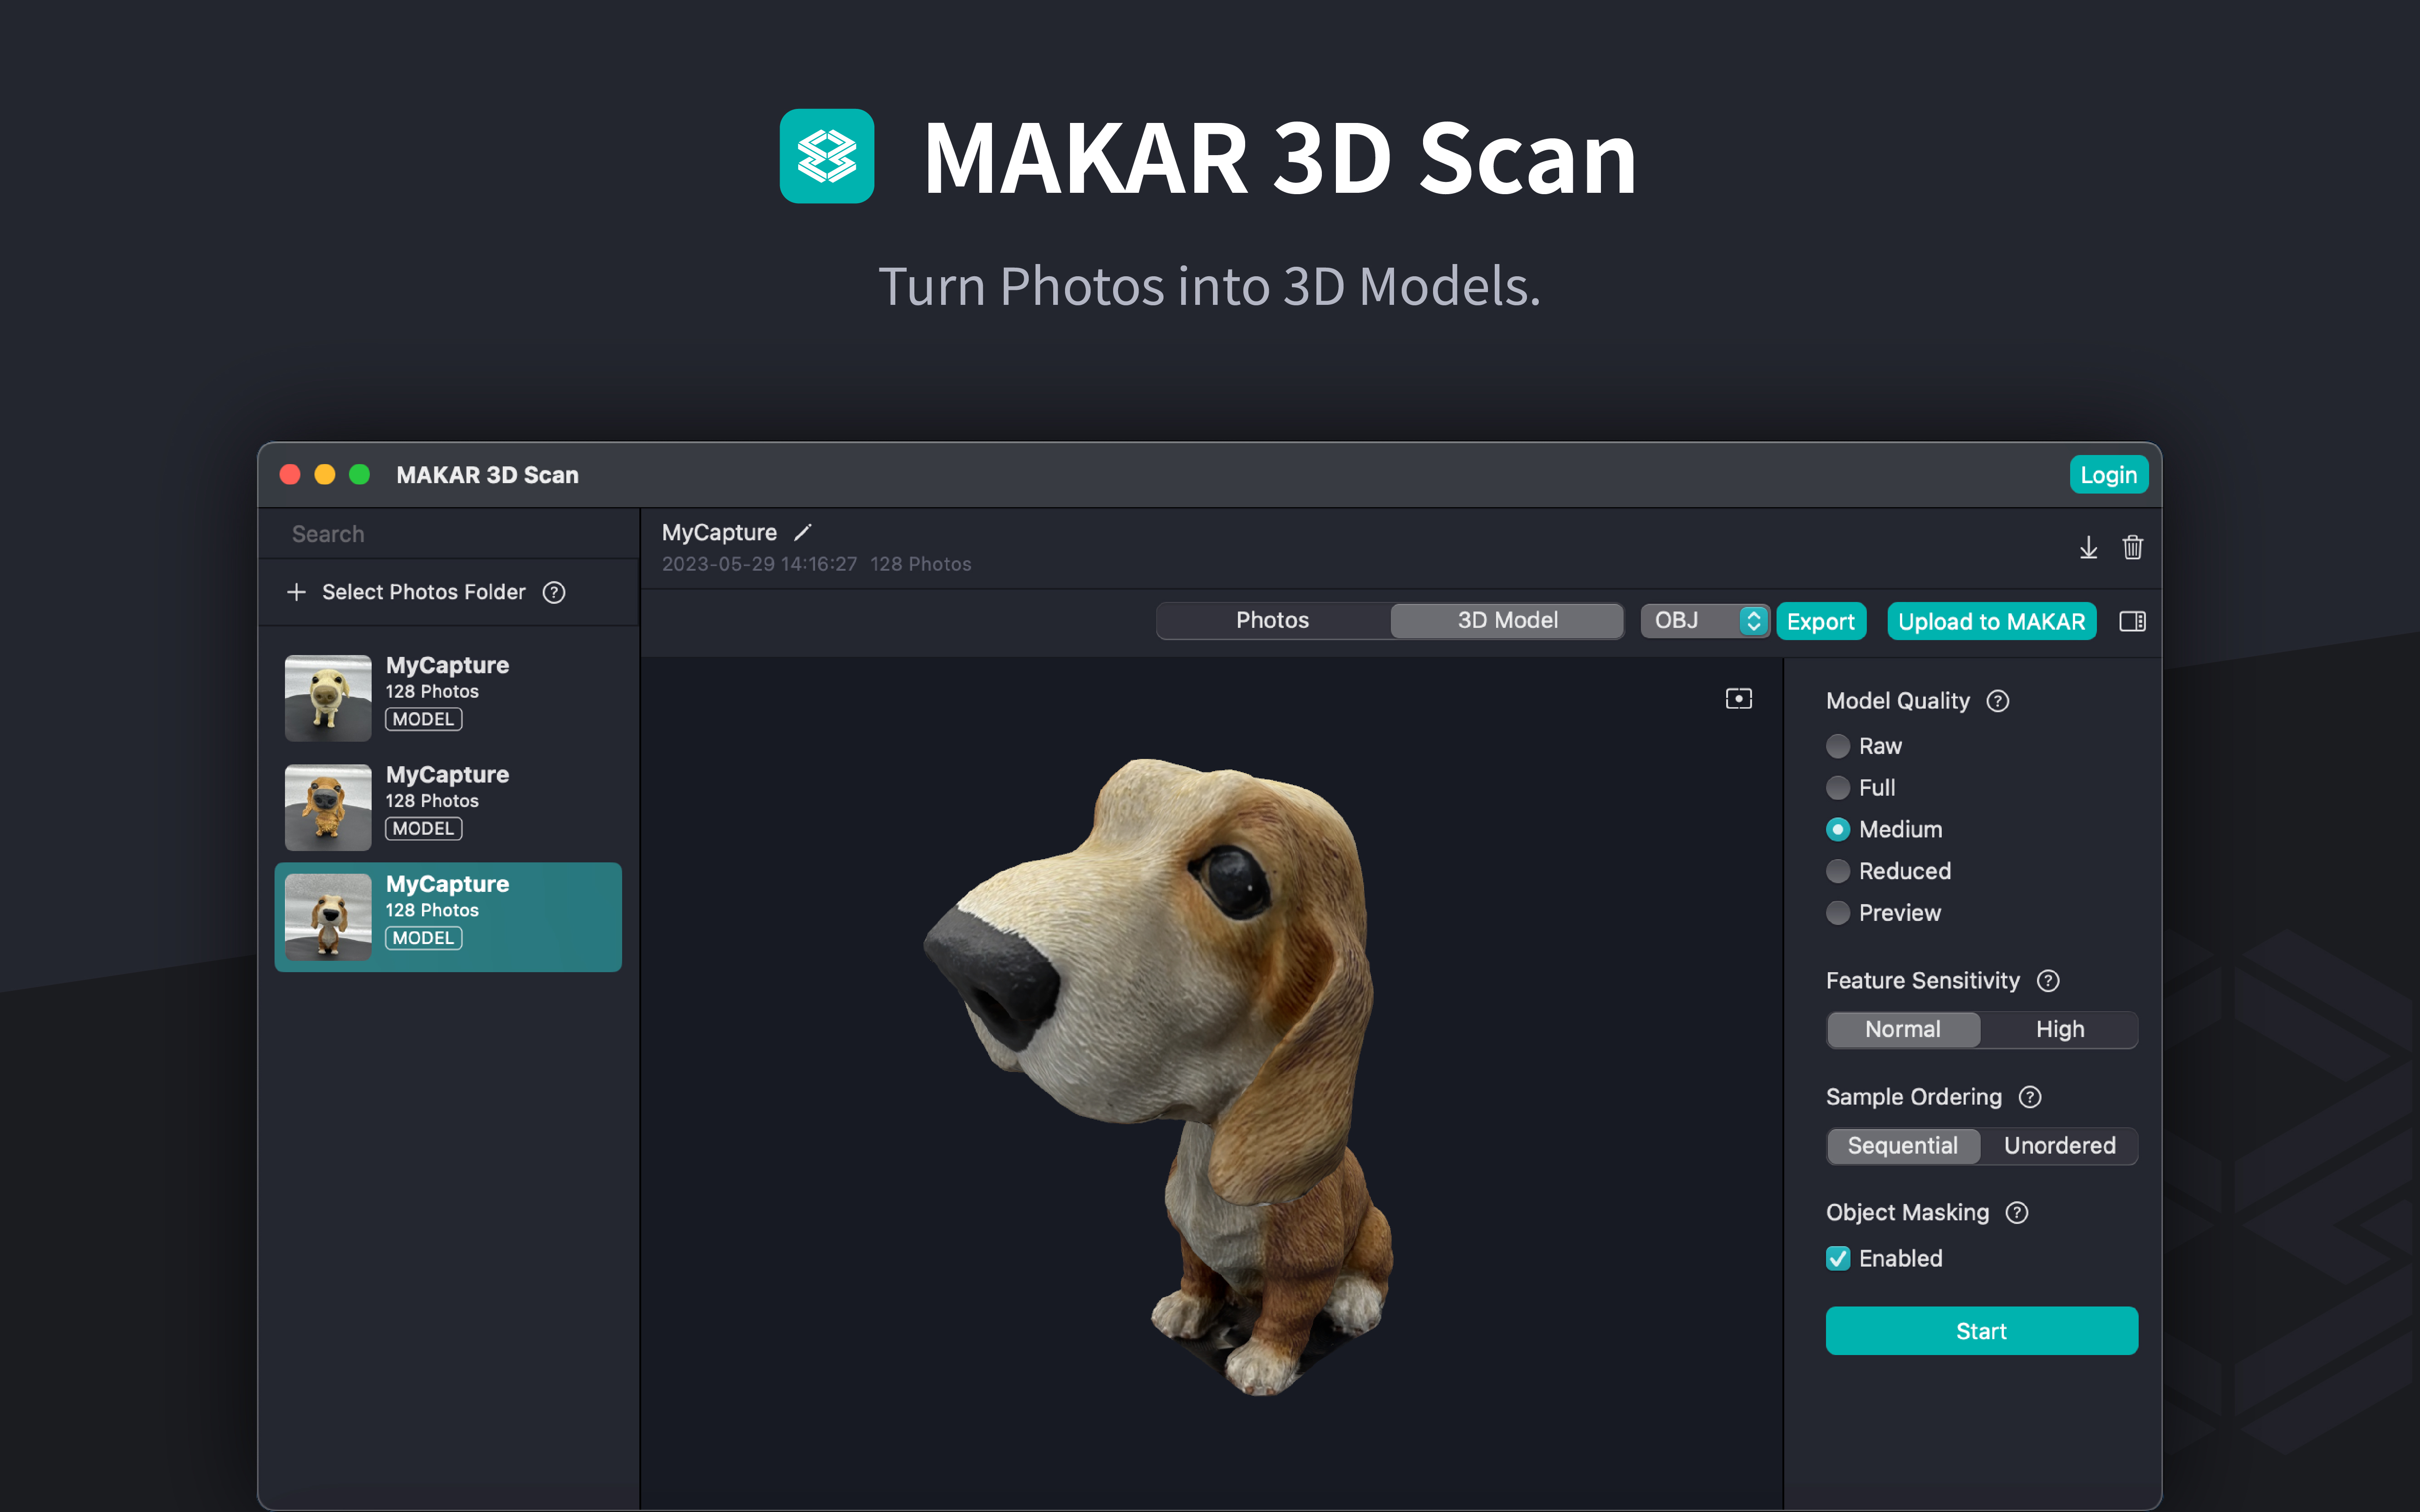
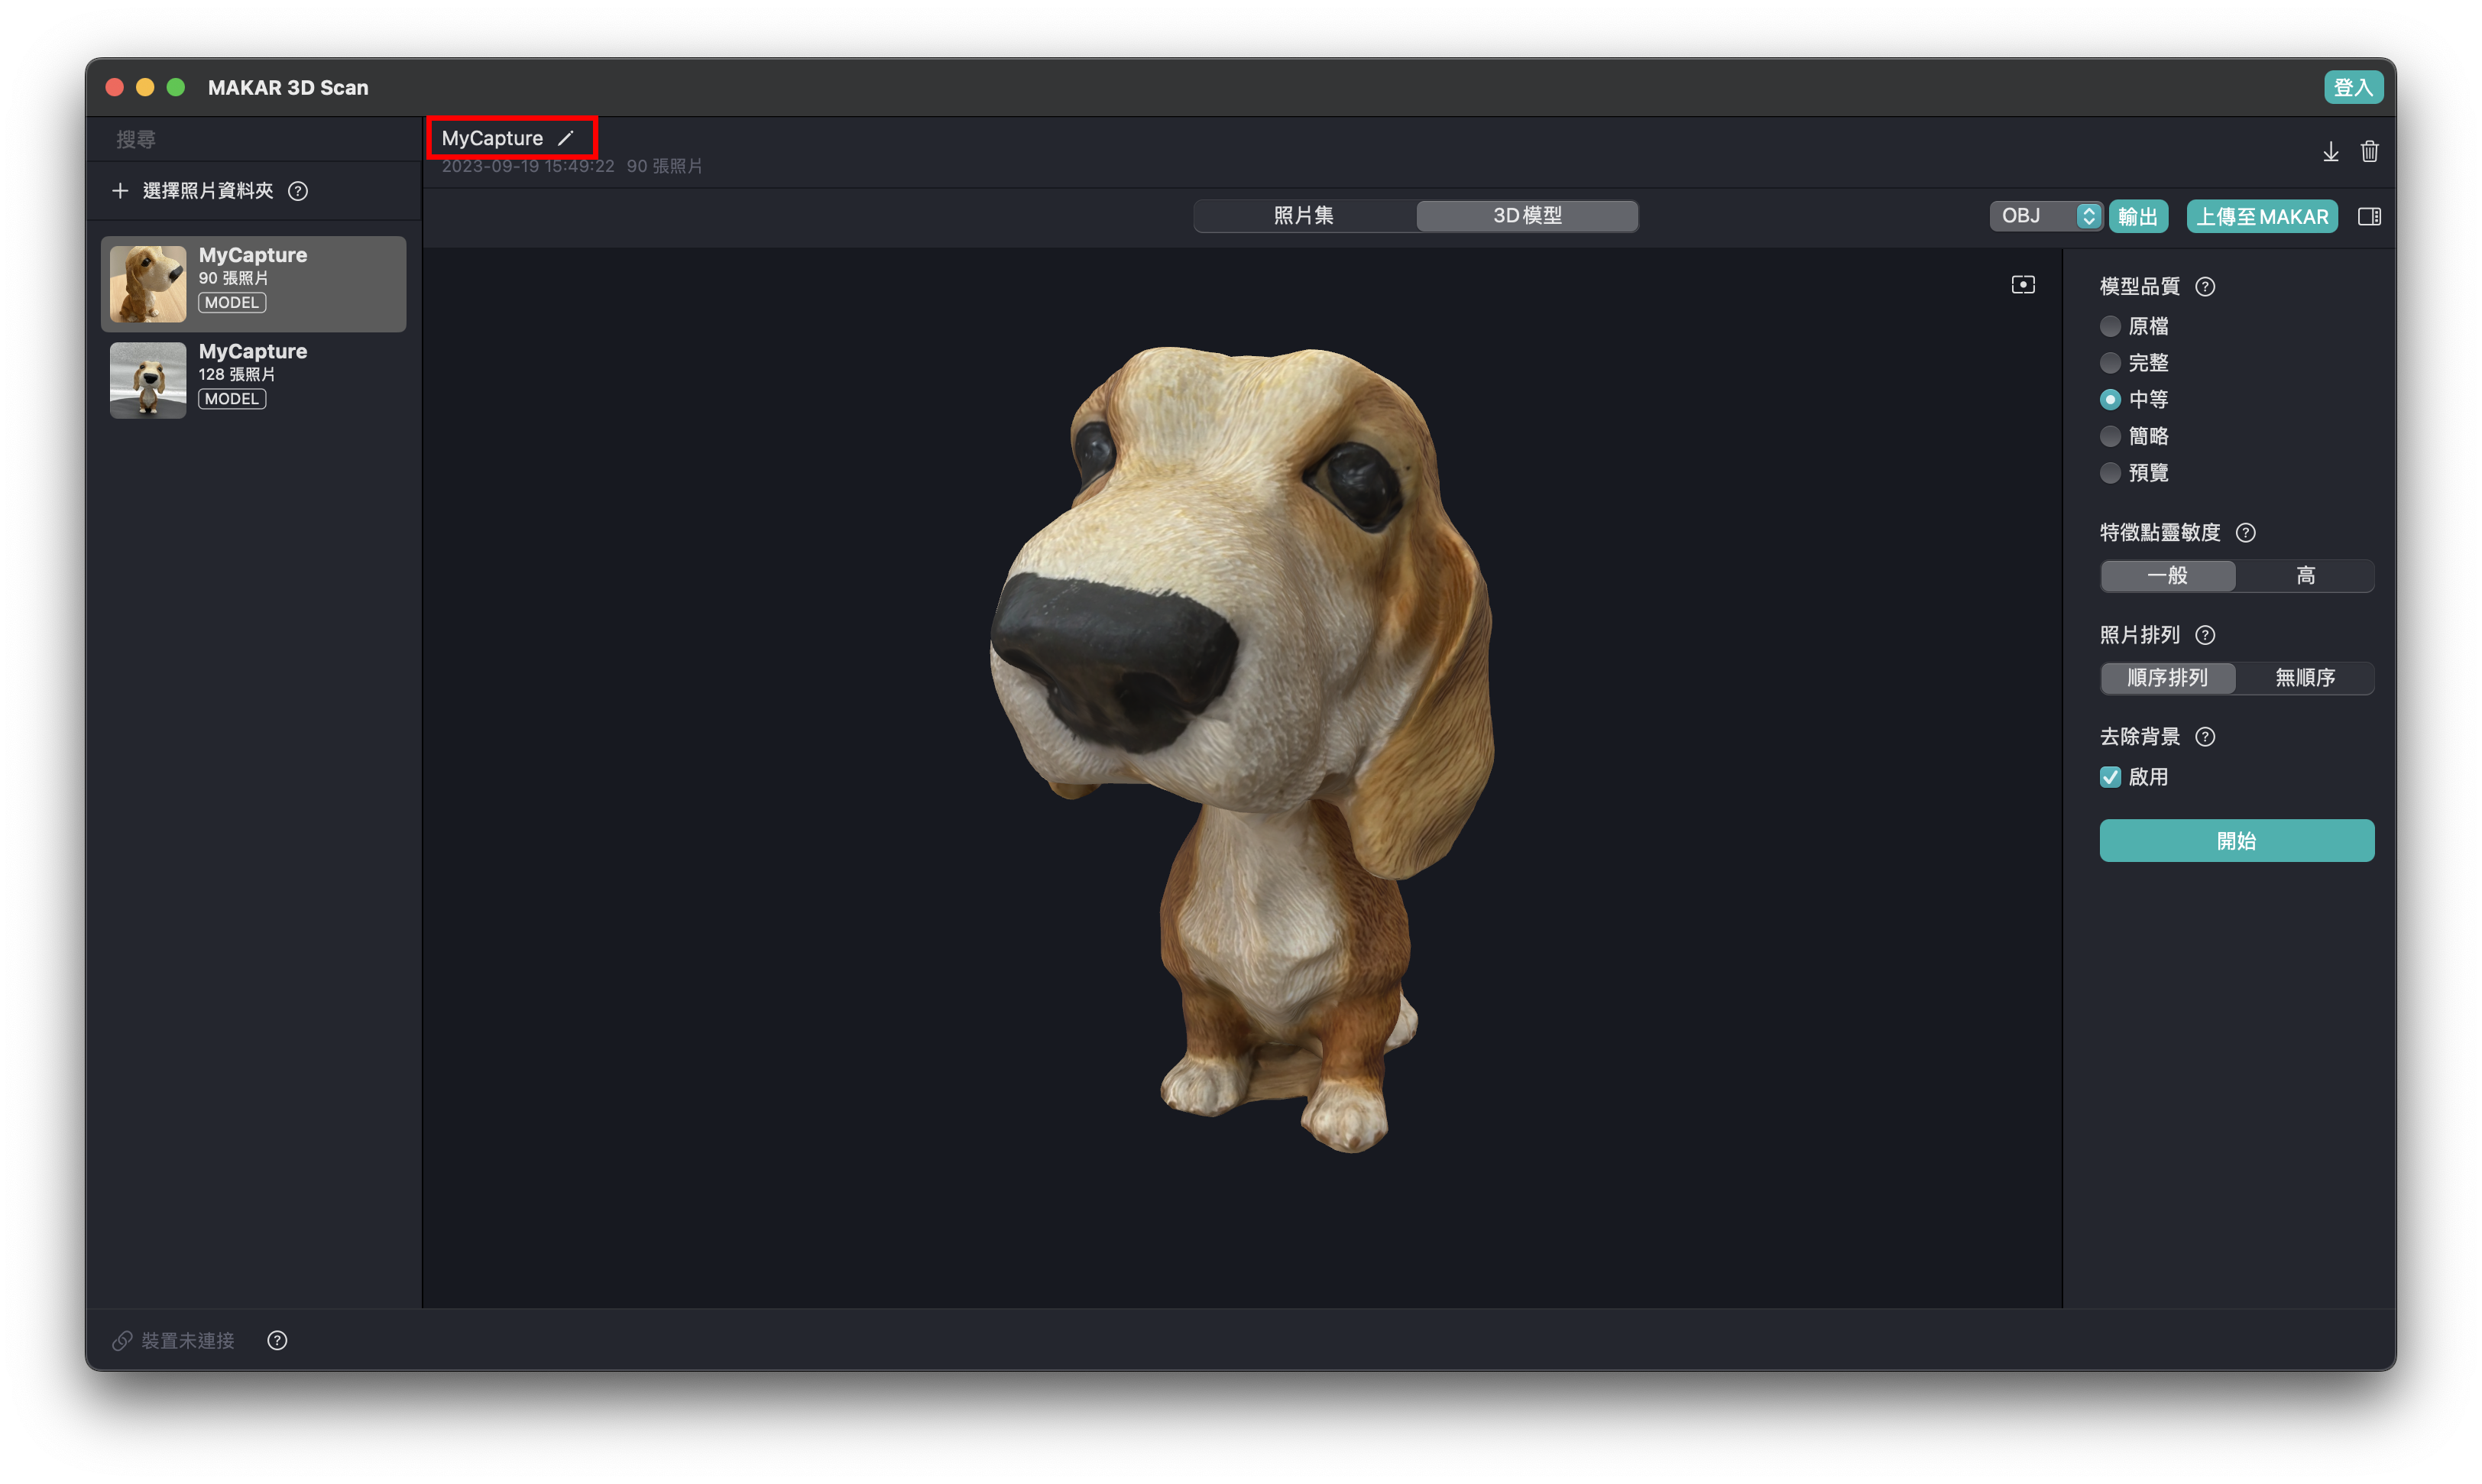
Once the modeling is complete, as shown below, you can modify the default name.
-
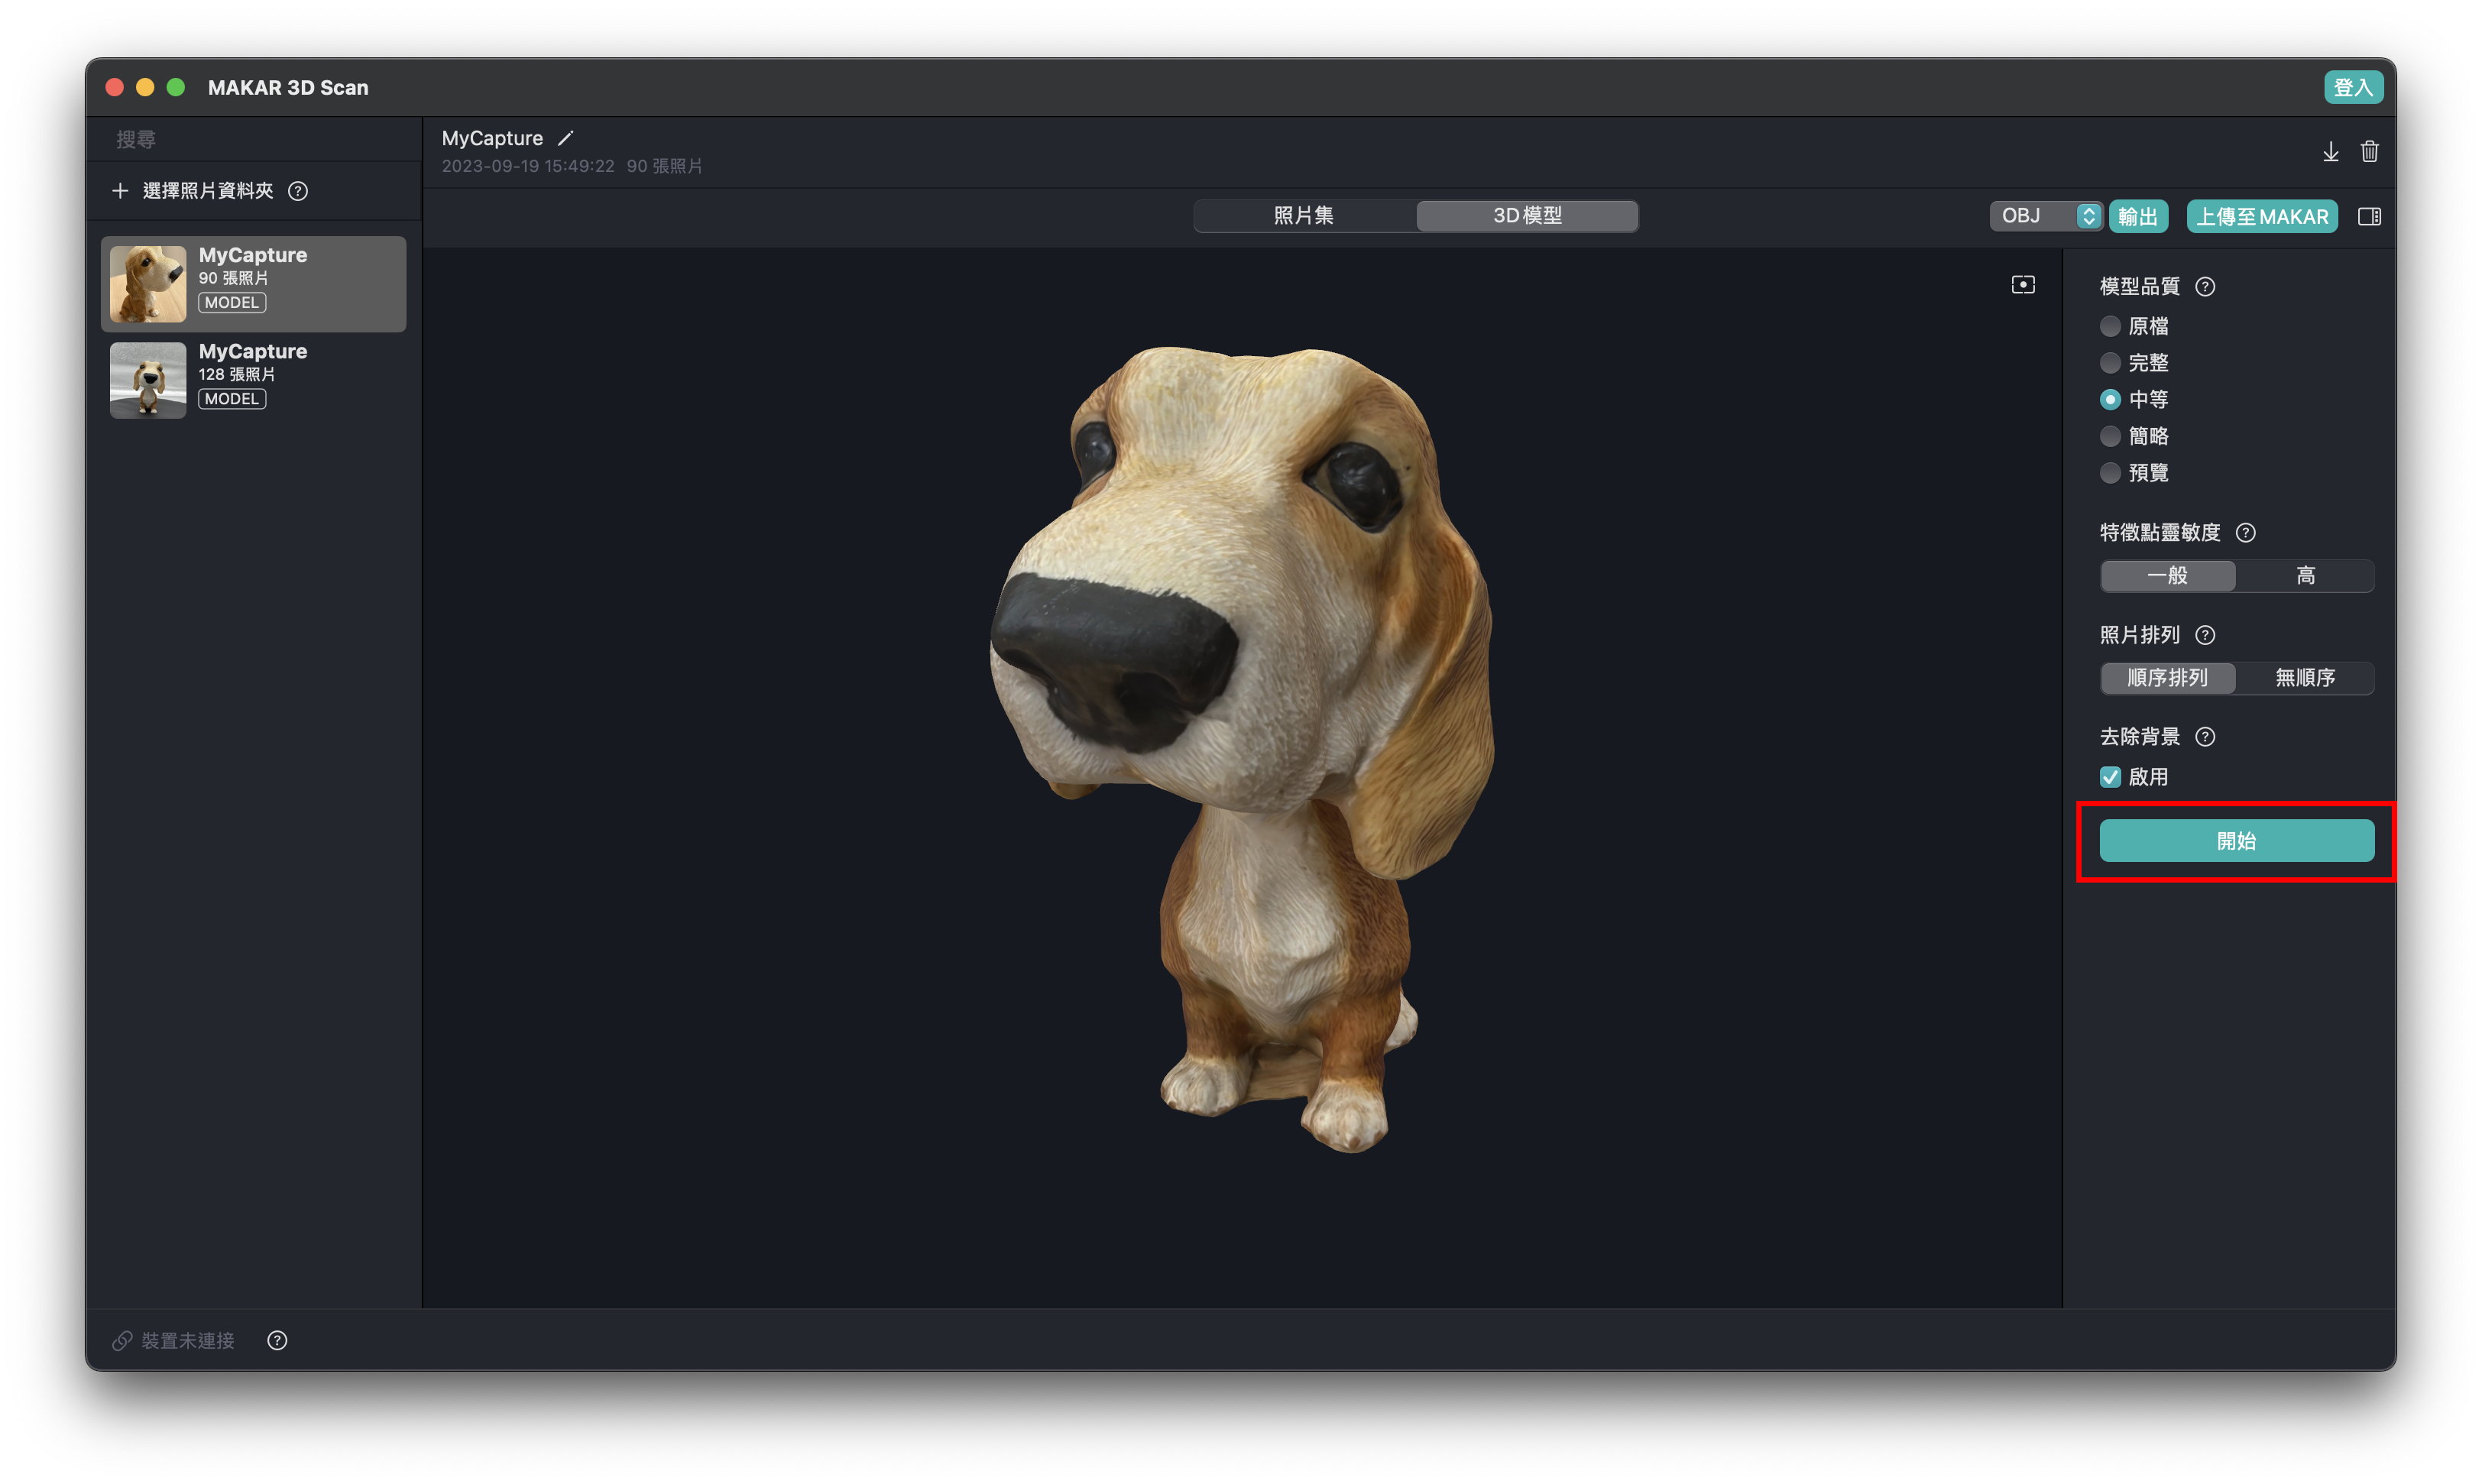
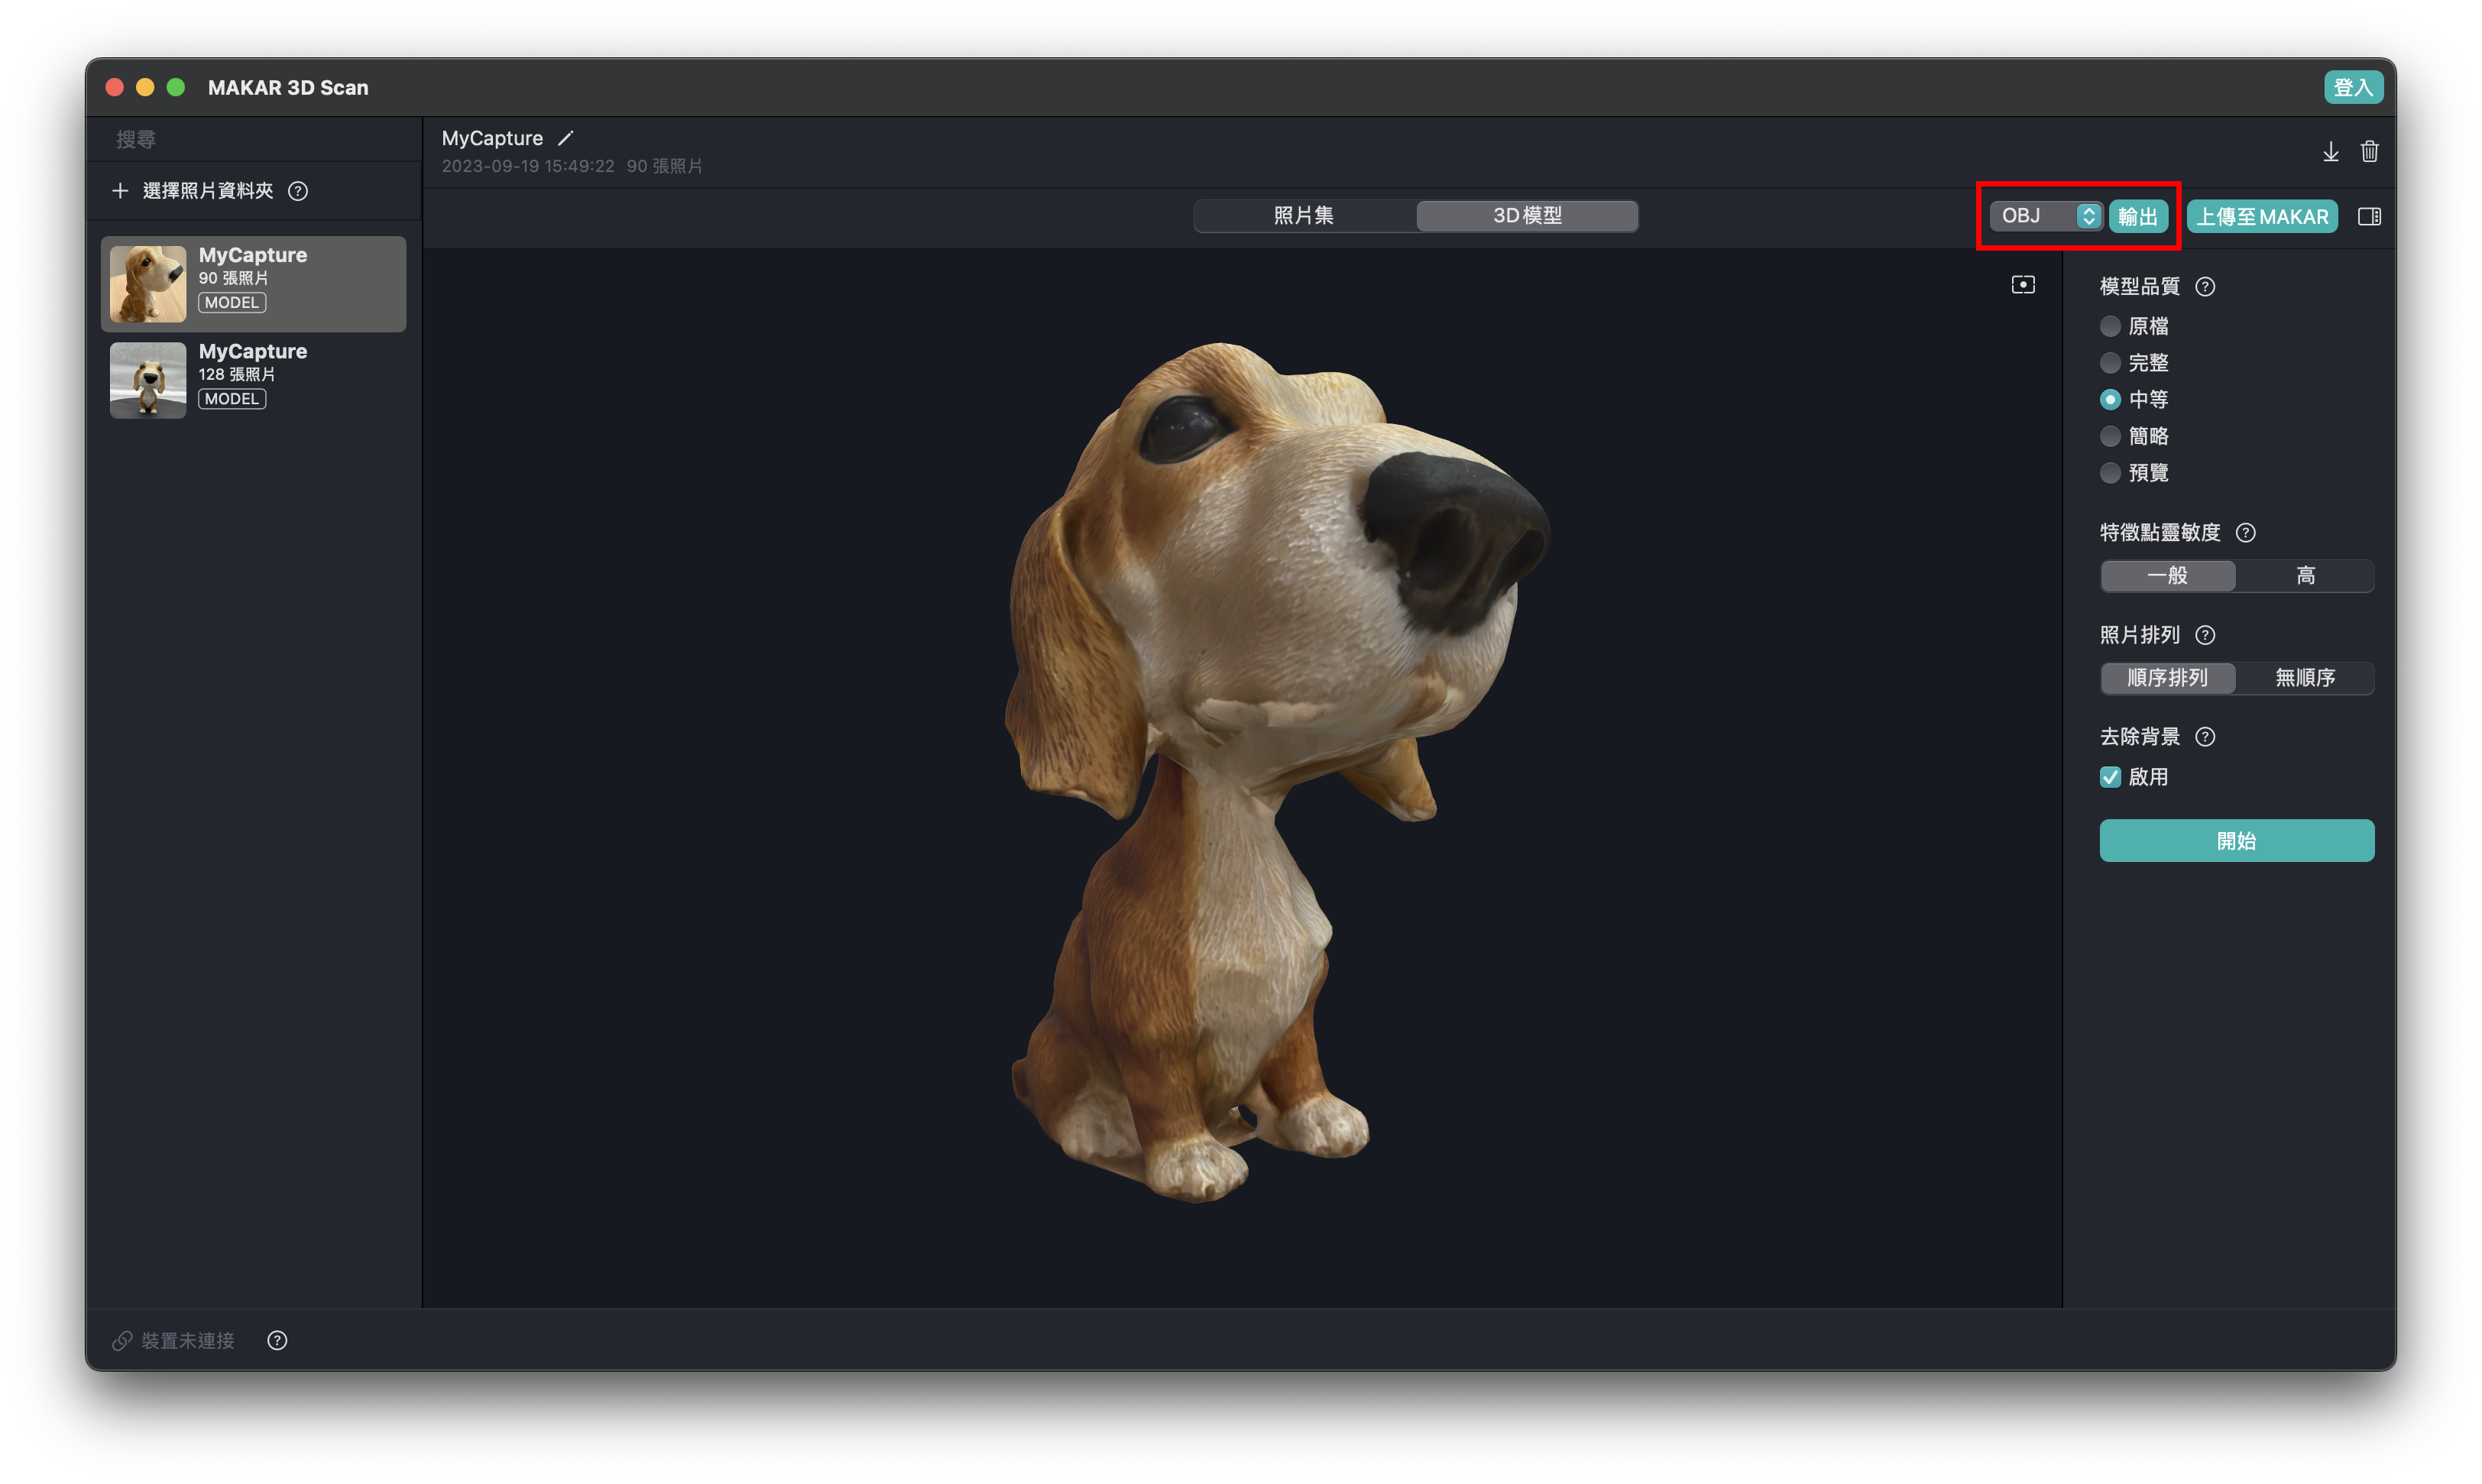
Adjust details and remesh according to your needs using the options on the right.
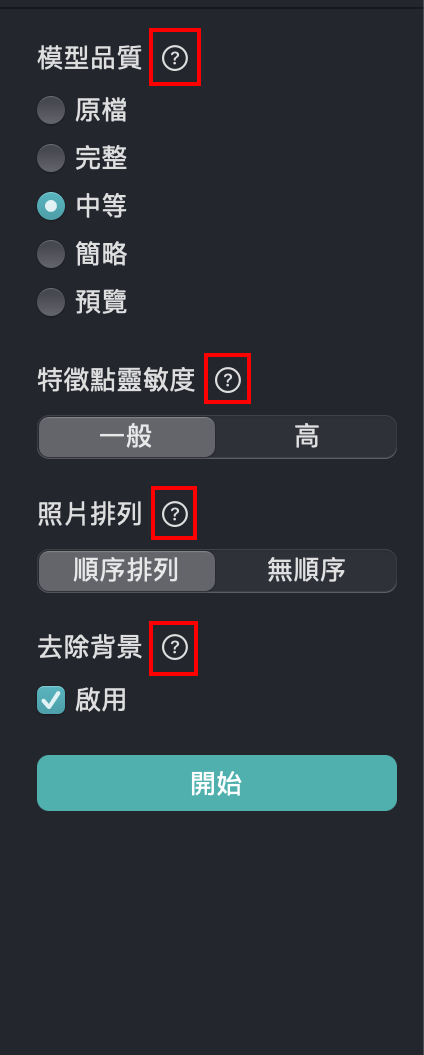
Item Descriptions:
-
Quality Scale: Five qualities are available from high to low. The higher the quality, the longer the modeling time. For a quick model preview, select "Preview."
-
Feature Point Sensitivity: Options are "Normal" and "High." If the target object lacks details, select "High" for more detailed processing, which takes more time.
-
Photo Order: Options are "Sequential" and "No Order." If taking photos around the target object, select "Sequential" to speed up the modeling process.
-
Background Removal: Select "Enable" to automatically remove the background.
※ Click the question mark in the red box for more detailed explanations.
-
Select "Start" to begin modeling.
【Uploading 3D Models to MAKAR Editor】
-
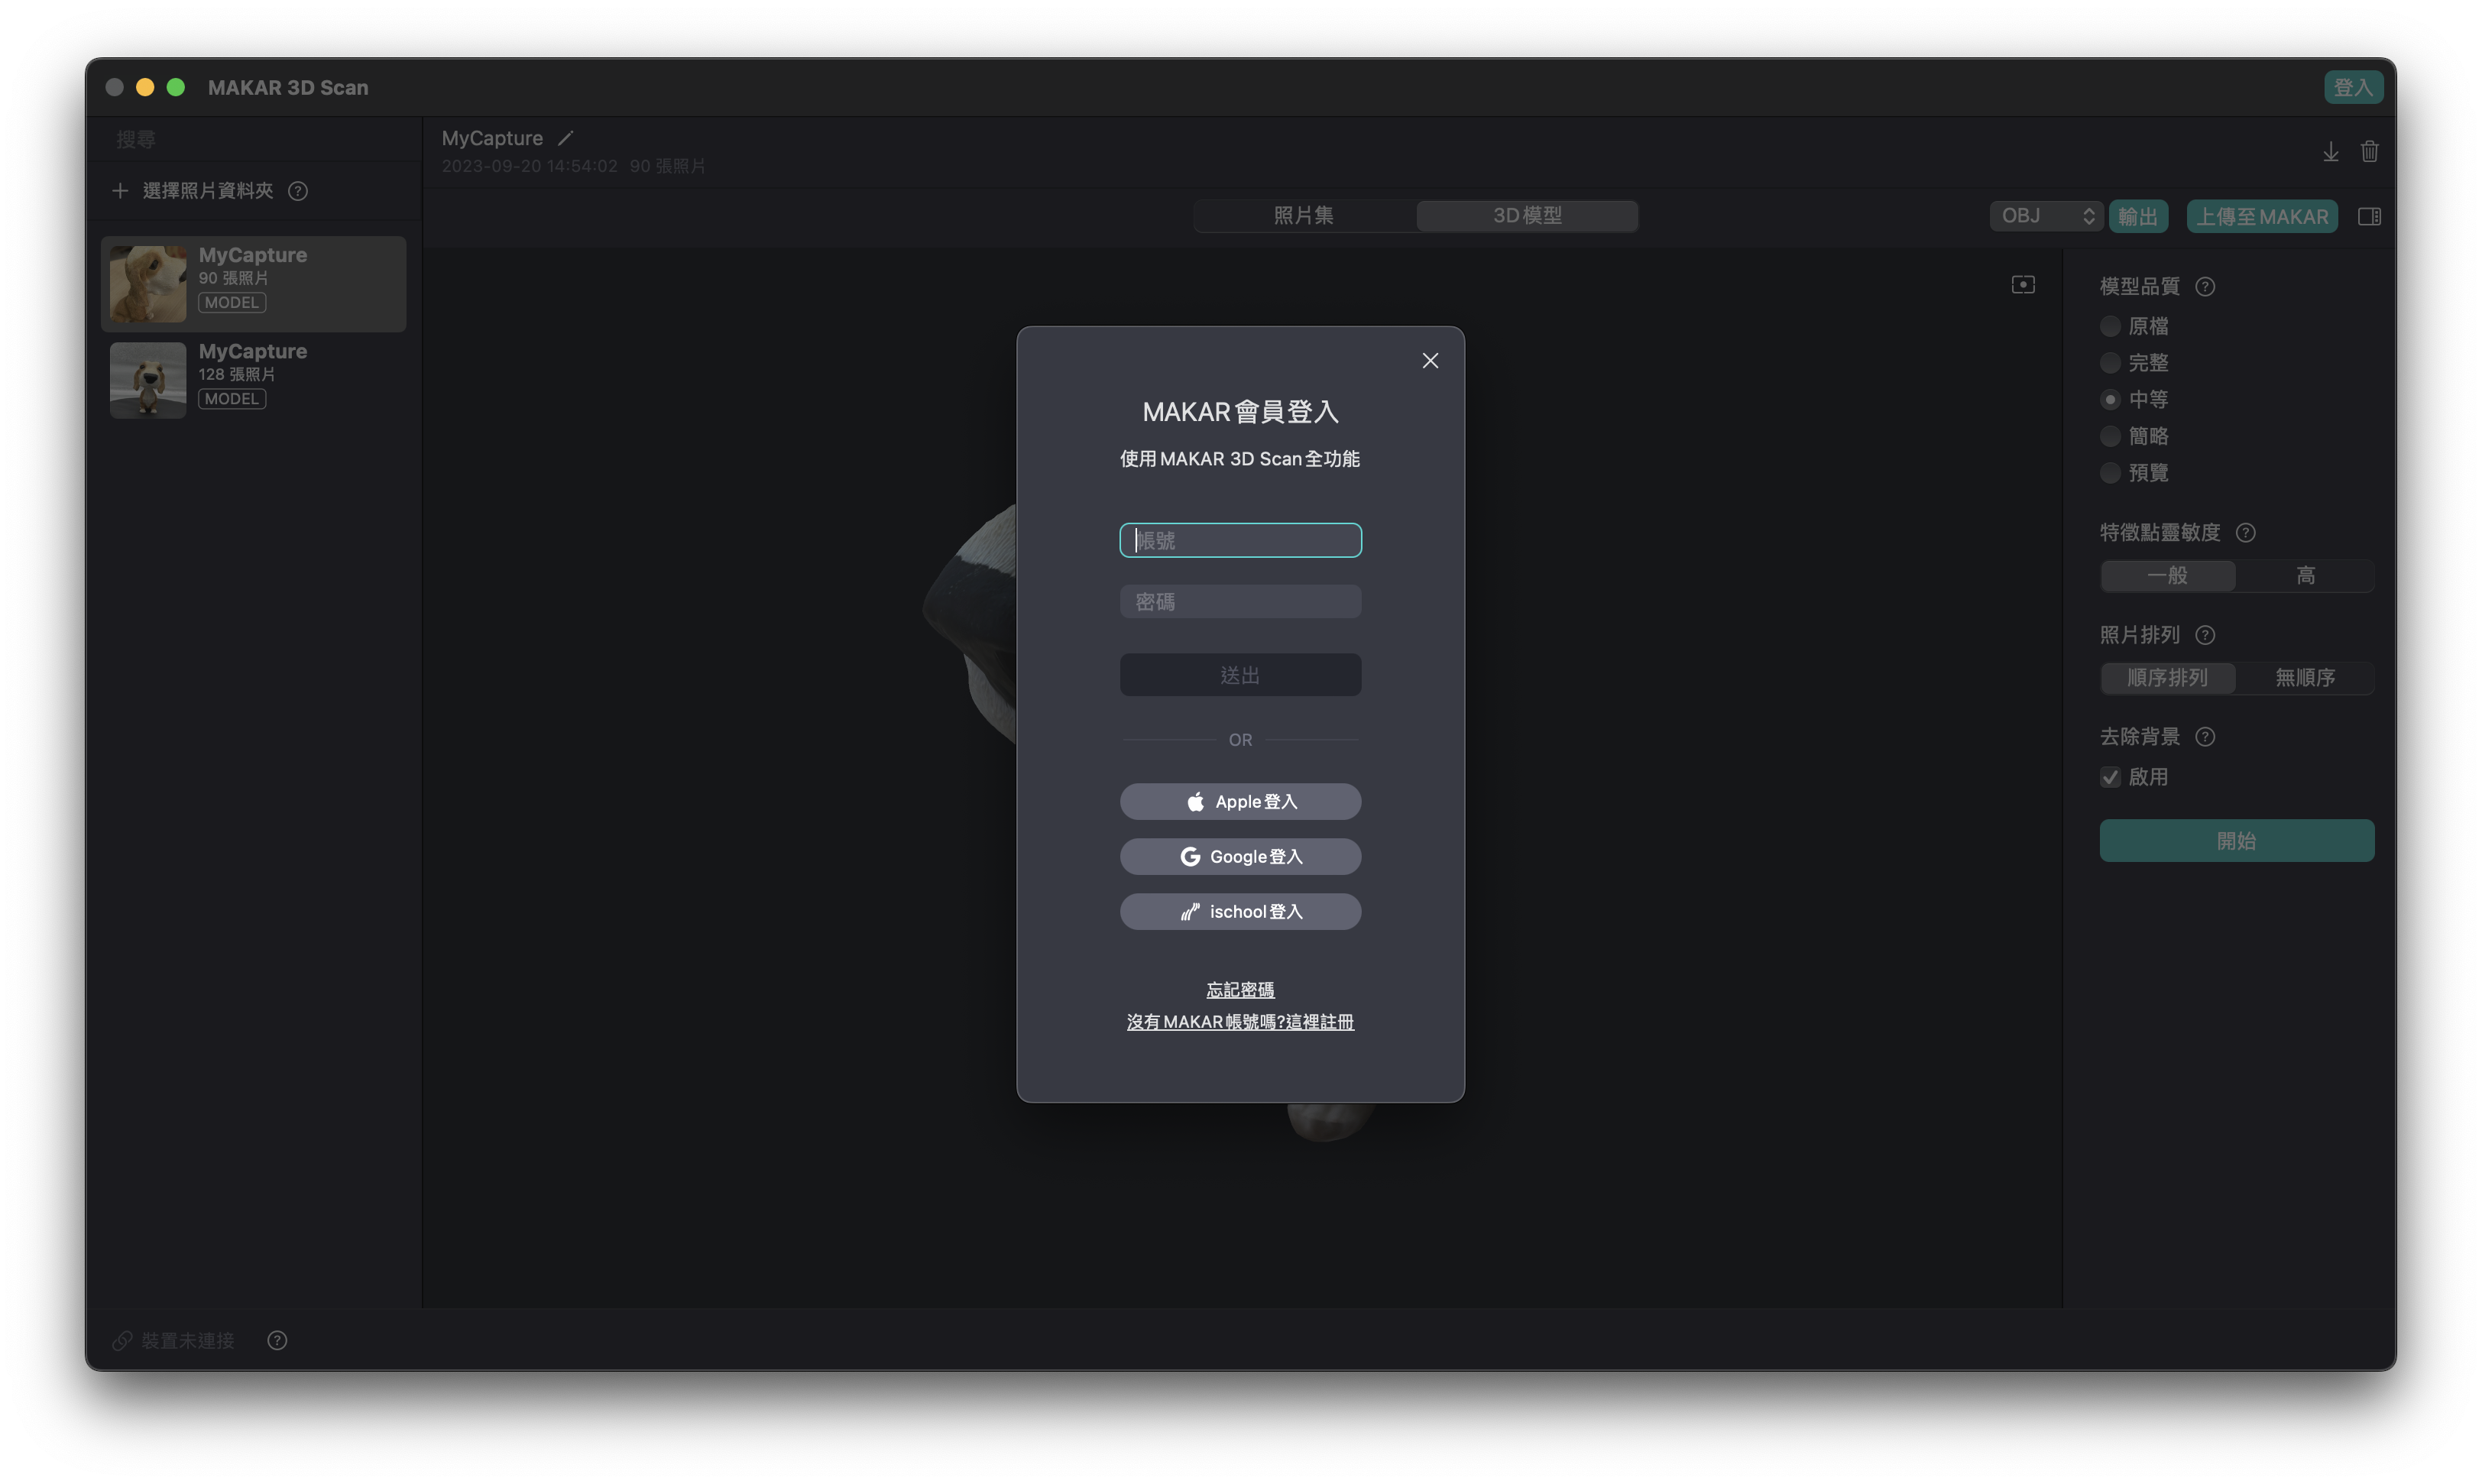
Once modeling is complete, select "Upload to MAKAR" in the top right, log in, and upload to MAKAR Editor.
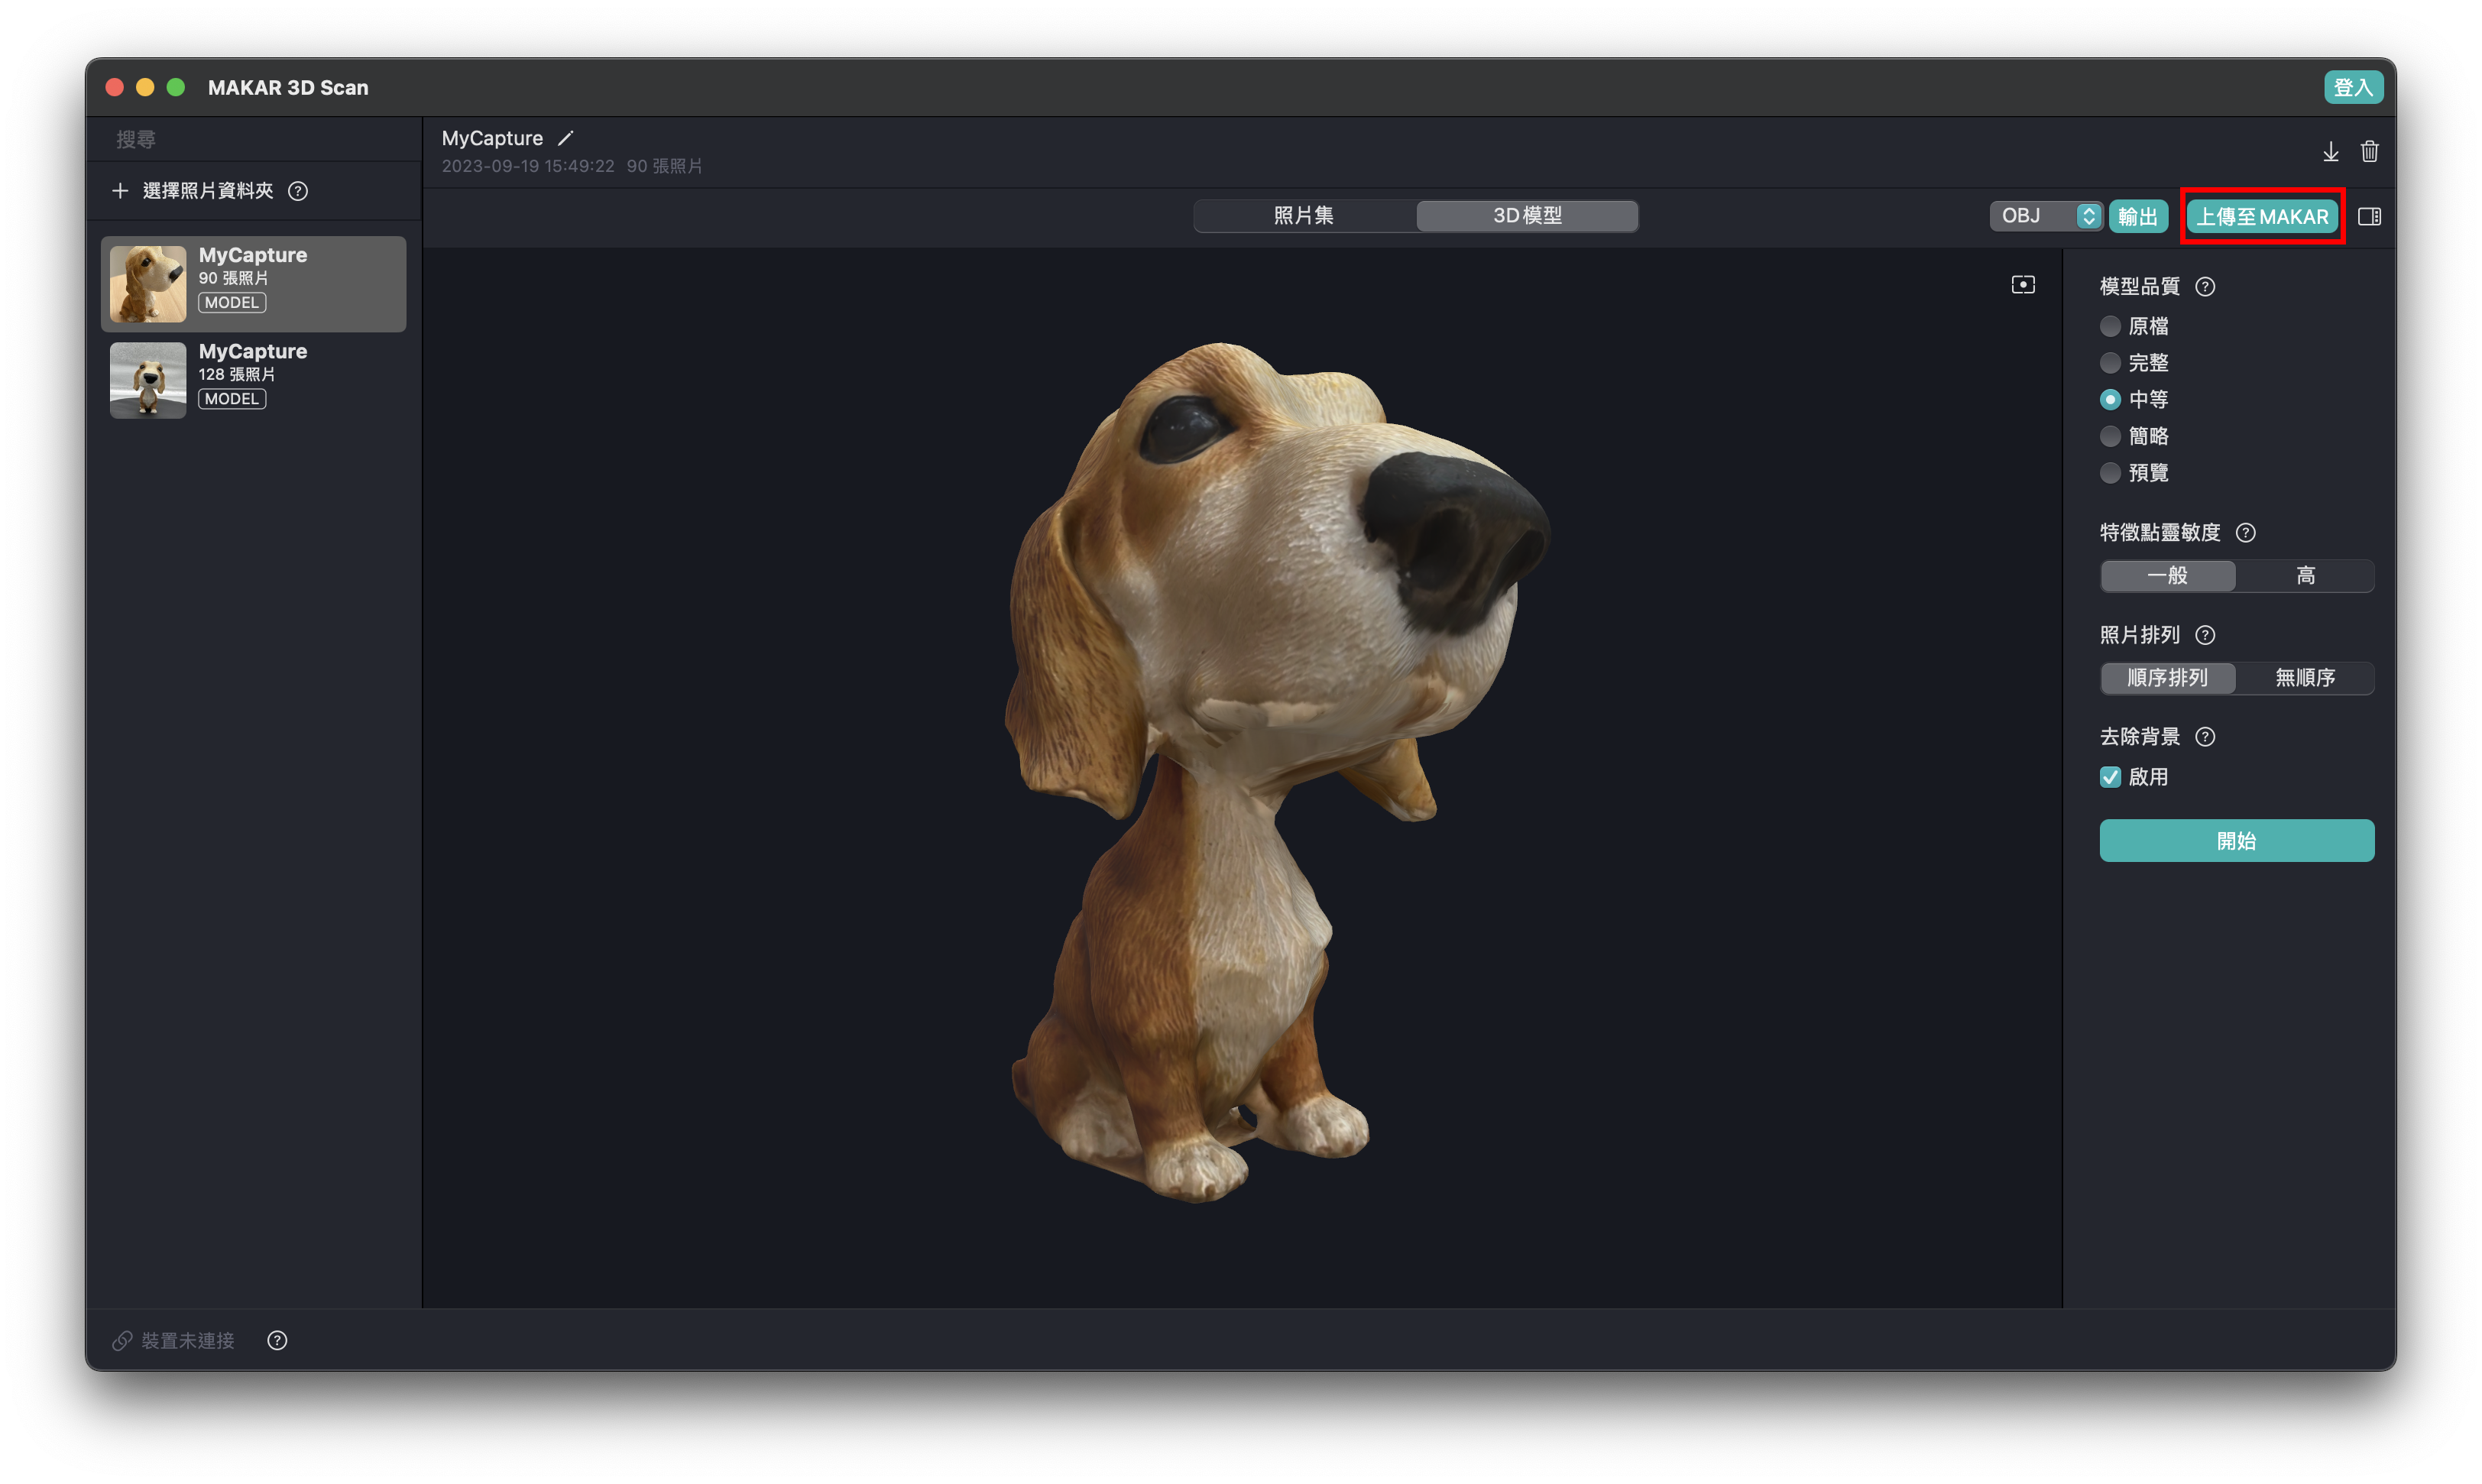
-
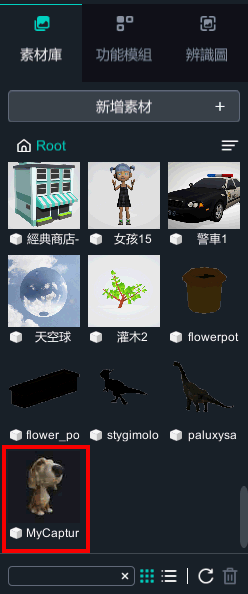
After uploading to MAKAR software, the model will appear in the Resources.
【Exporting 3D Model Files】
-
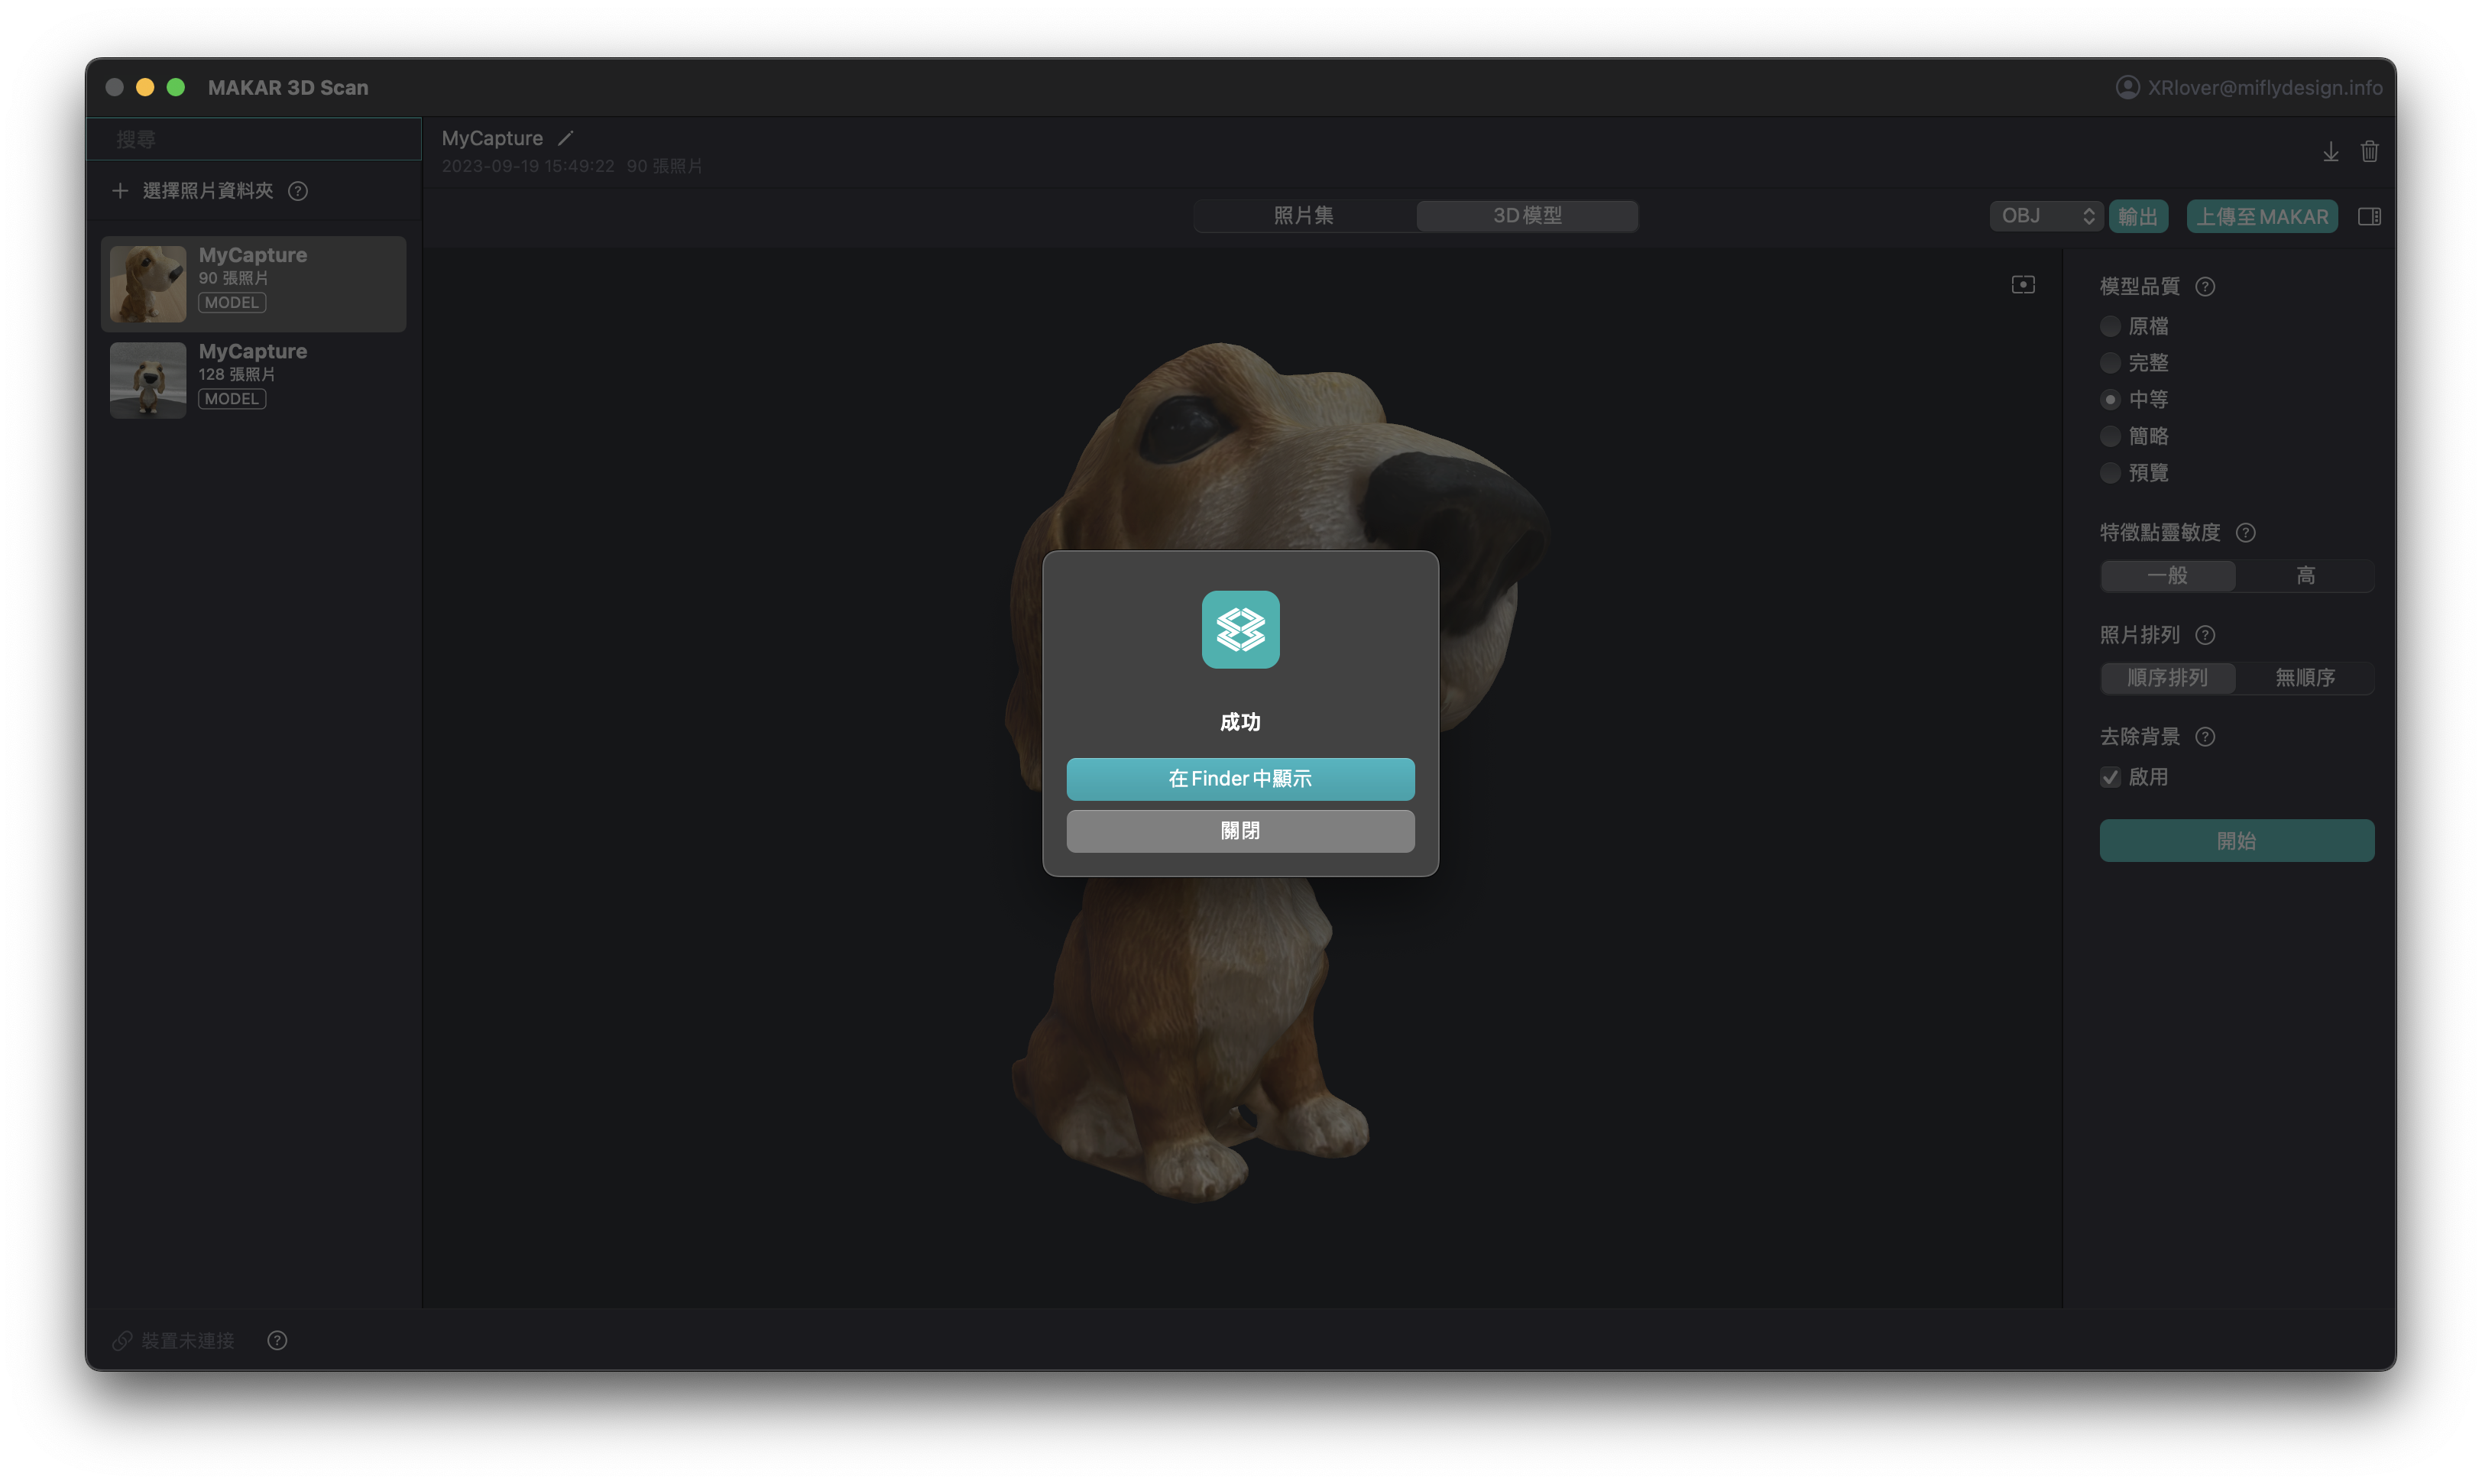
Select "Export" in the top right to support exporting 3D formats: OBJ, GLB, STL, USDZ.
※ Exporting models is a feature exclusive to MAKAR Professional Edition accounts.
-
The appearance after export.