iPhone/iPad MAKAR 3D Scan User Guide
MAKAR introduces the iPhone/iPad version of the "MAKAR 3D Scan" app. Without any additional equipment, you can scan and create 3D models with just an iPhone or iPad, transforming your favorite spaces or objects into models quickly and easily, making it a powerful tool for XR creators. This guide will detail how to use the iPhone/iPad version of the MAKAR 3D Scan app.
Table of Contents |
|---|
iPhone/iPad MAKAR 3D Scan Features Introduction
No additional equipment is needed—creating 3D models is that simple! In the future of the metaverse, everyone should be able to quickly enter the XR world, and MAKAR 3D Scan is the gateway from reality to virtuality, and the most powerful 3D modeling tool for every XR creator.
Here are the detailed features of the MAKAR 3D Scan app for iPhone/iPad:
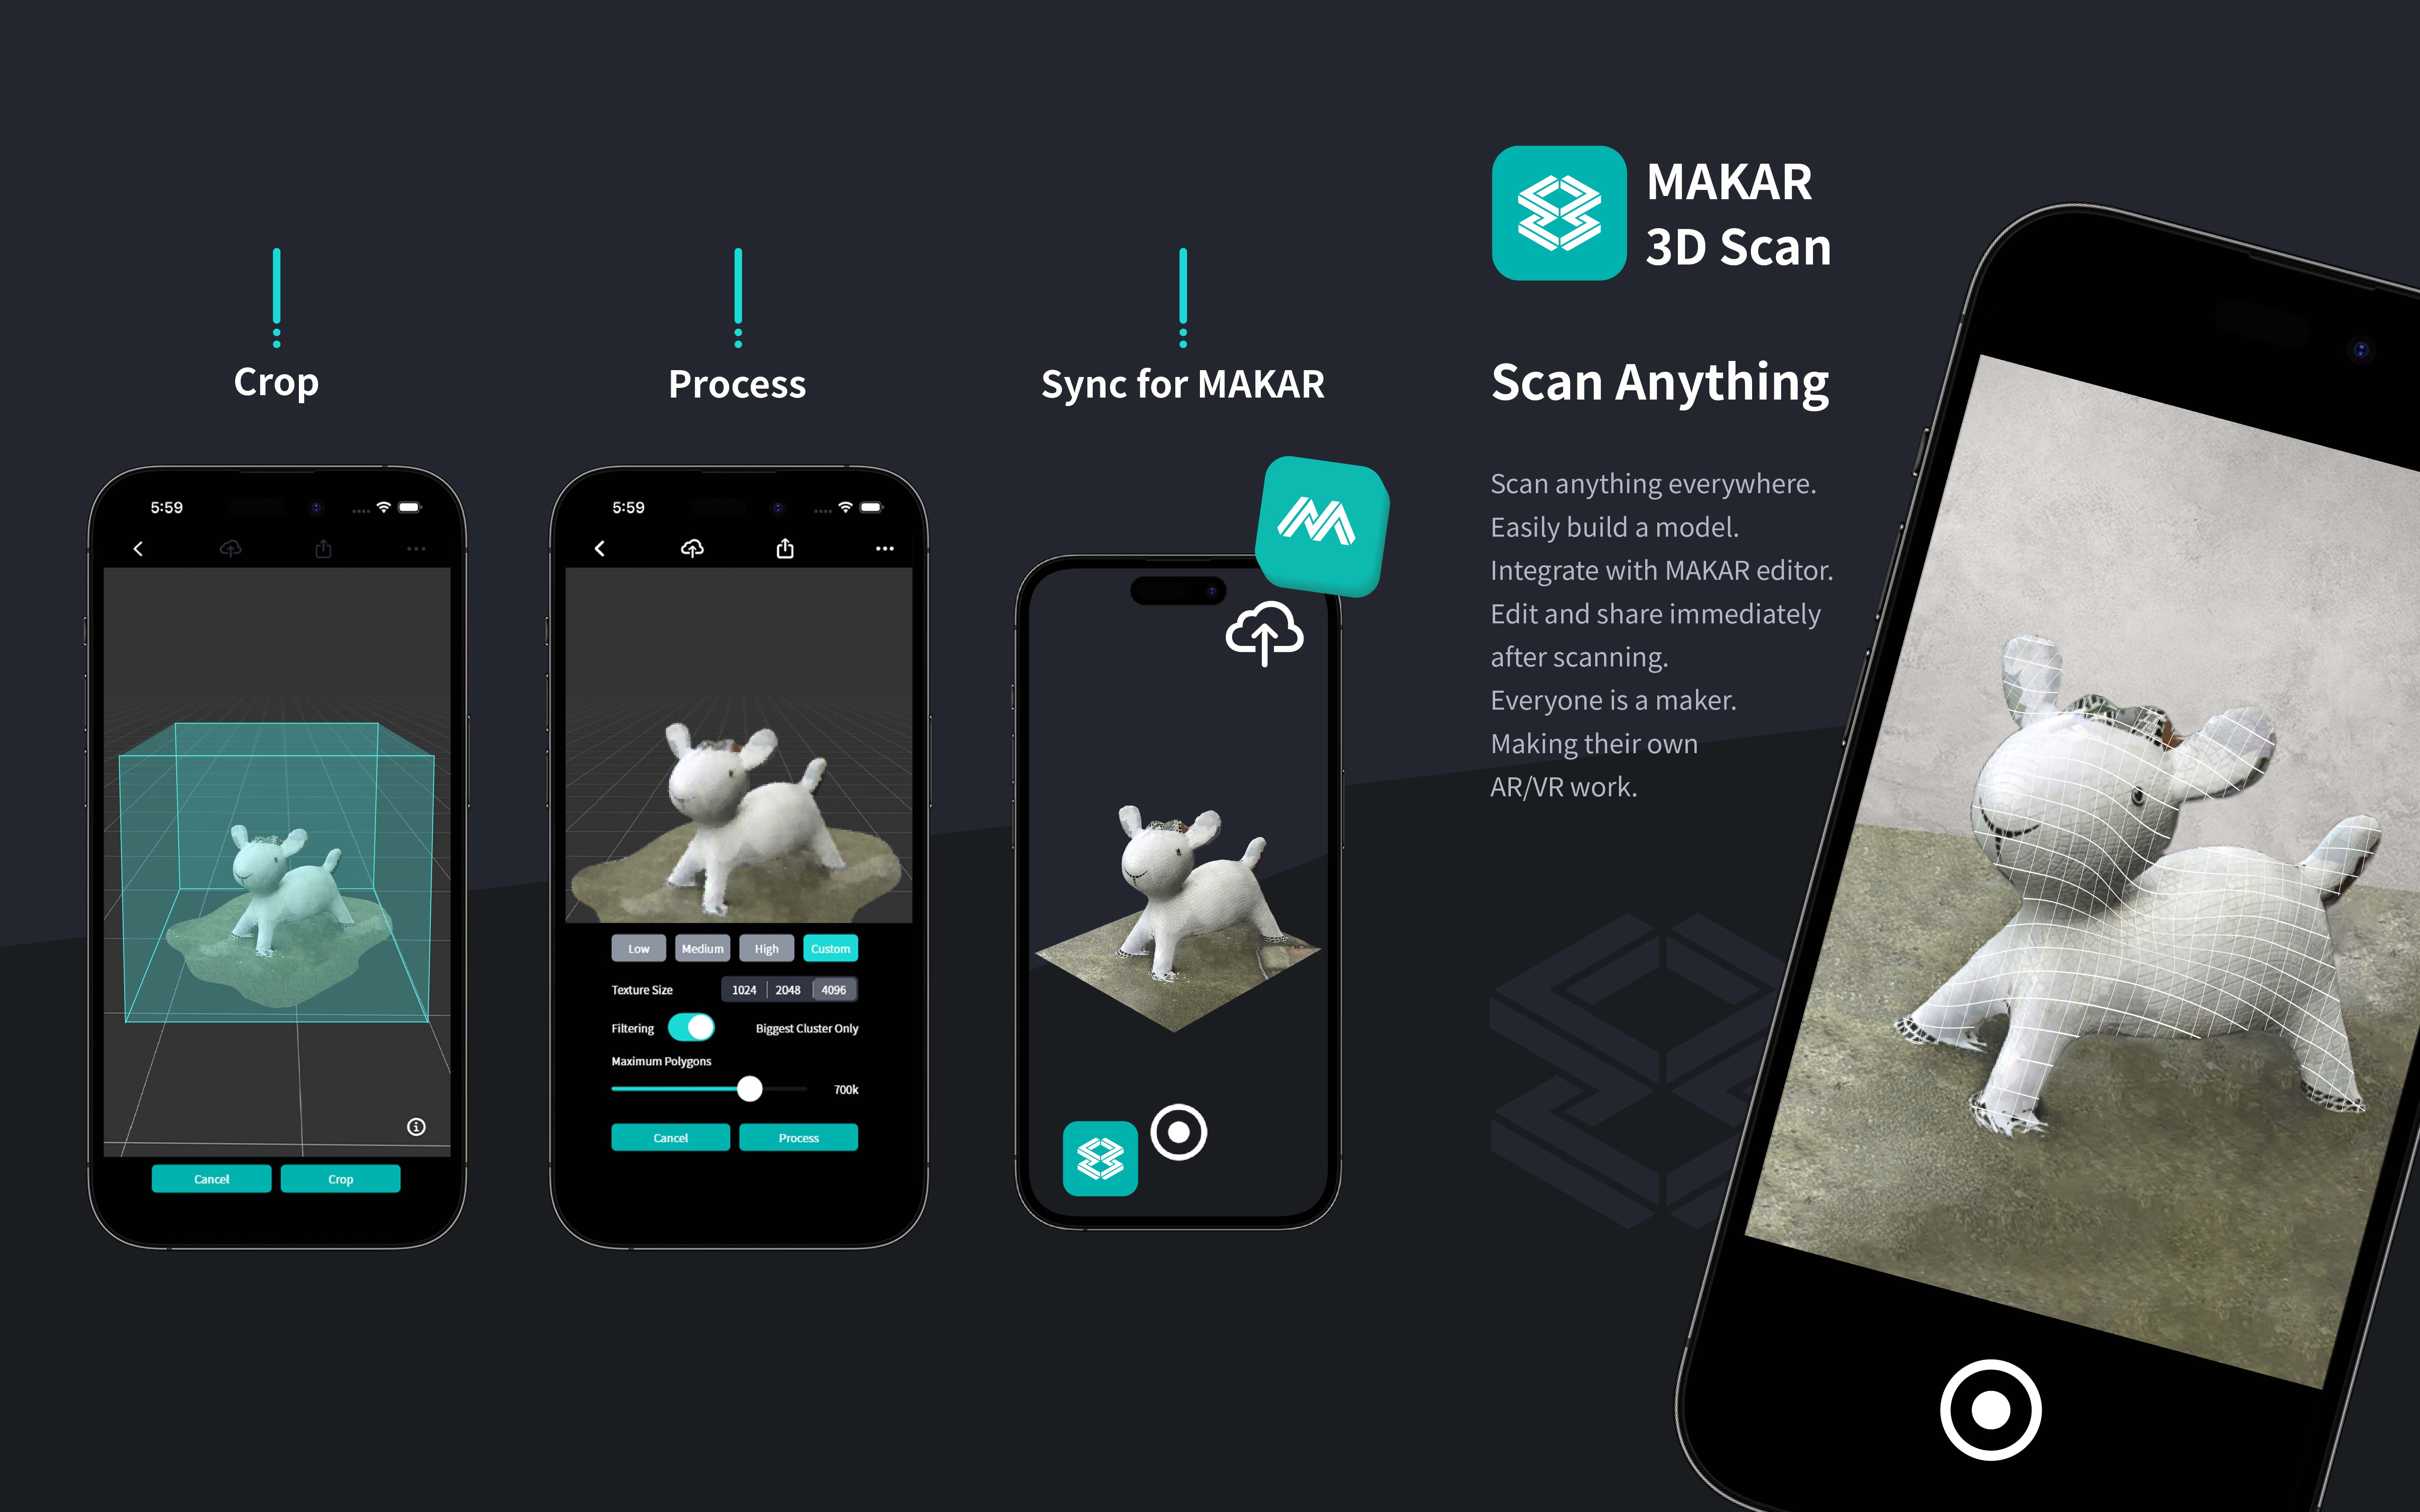
1.Scan Everything with Your Phone and Computer: Take photos around the object you want to turn into a 3D model, import the photos into MAKAR 3D Scan, and with just a phone and a computer, you can quickly scan and produce a 3D model.
2.Customizable Scan Precision: Worried that your scanned 3D model might be too large or not detailed enough? MAKAR 3D Scan offers options for model precision and background removal, allowing you to adjust the 3D model according to your needs.
3.Supports Various 3D Format Outputs: The 3D models created with MAKAR 3D Scan can be exported in USDZ, OBJ, GLB, and STL formats, making it easy to apply them across different platforms.
4.Direct Integration with MAKAR Editor Library: Log in to your MAKAR account, and the 3D models scanned with MAKAR 3D Scan will automatically be imported into your MAKAR Editor library, allowing you to quickly start editing in the metaverse XR without any additional steps.
5.Unlock the Chains of the XR Metaverse: Easily enter the infinite XR world. MAKAR 3D Scan builds a bridge between reality and virtuality for you!
Minimum Hardware Requirements and Download Instructions for iPhone/iPad MAKAR 3D Scan
【Software Name】: MAKAR 3D Scan for iPhone/iPad
【Language】: Traditional Chinese, English
【Minimum Requirements】: Space scanning requires a LiDAR camera; object scanning (Scan Wizard) requires LiDAR functionality and an A14 Bionic chip or later, running on iOS or iPadOS 17 or higher.
【Download Location】: iOS Download
iPhone/iPad MAKAR 3D Scan Tutorial
【Basic Features Introduction】
➤ Scan Settings
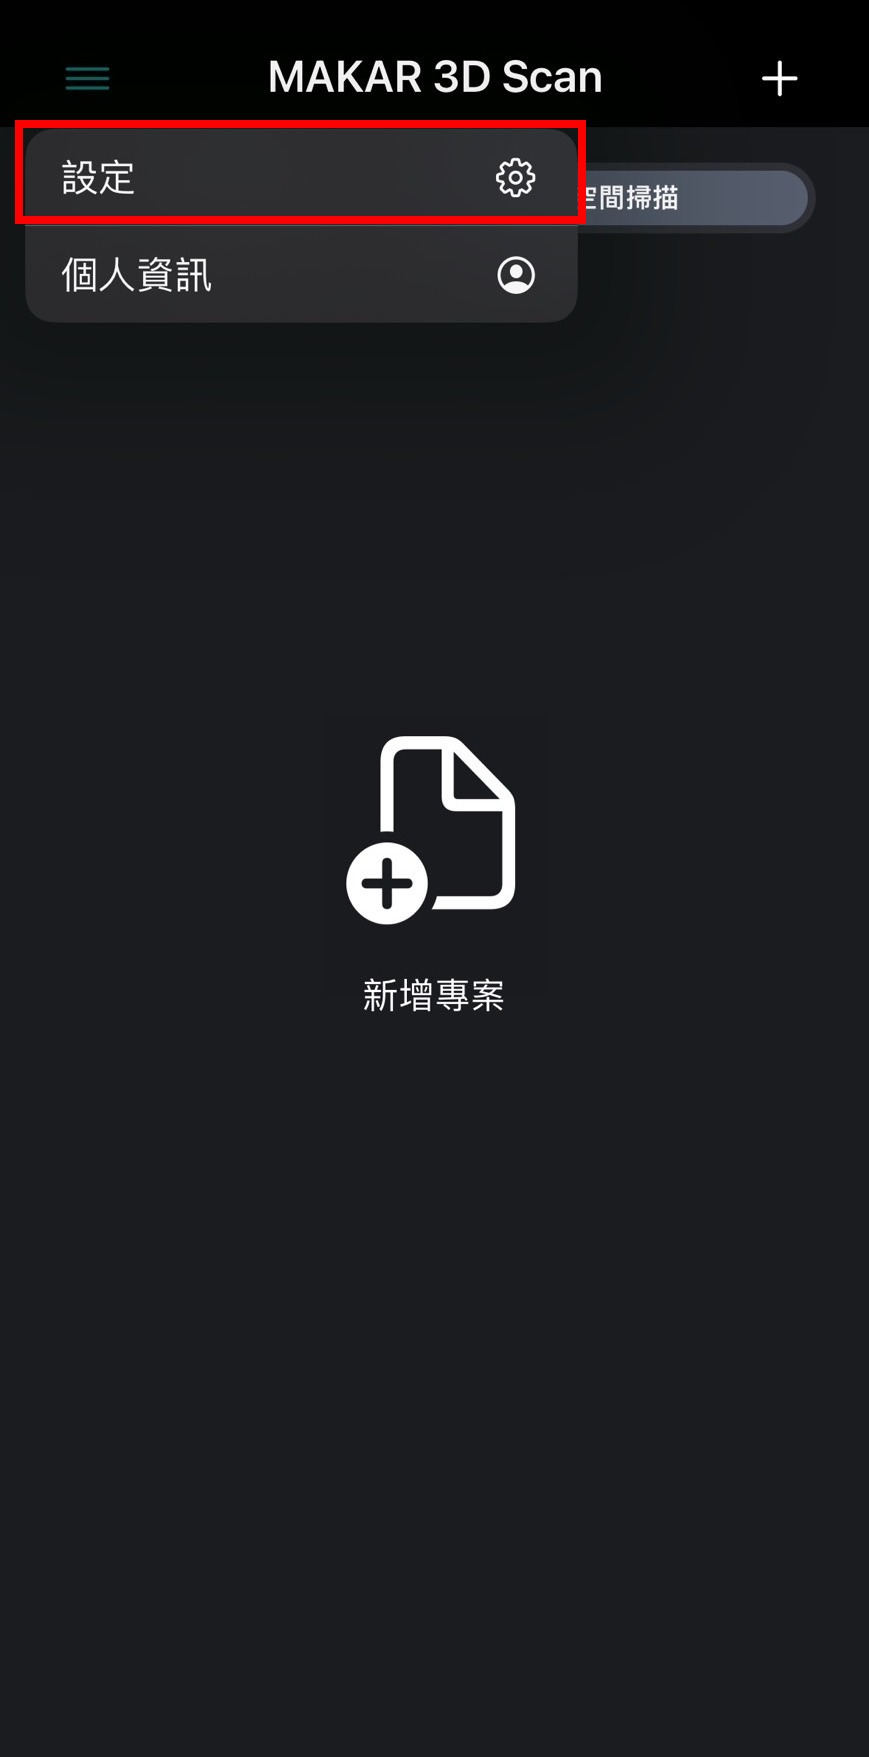
1. Click the menu icon in the upper left corner, then select "Settings".
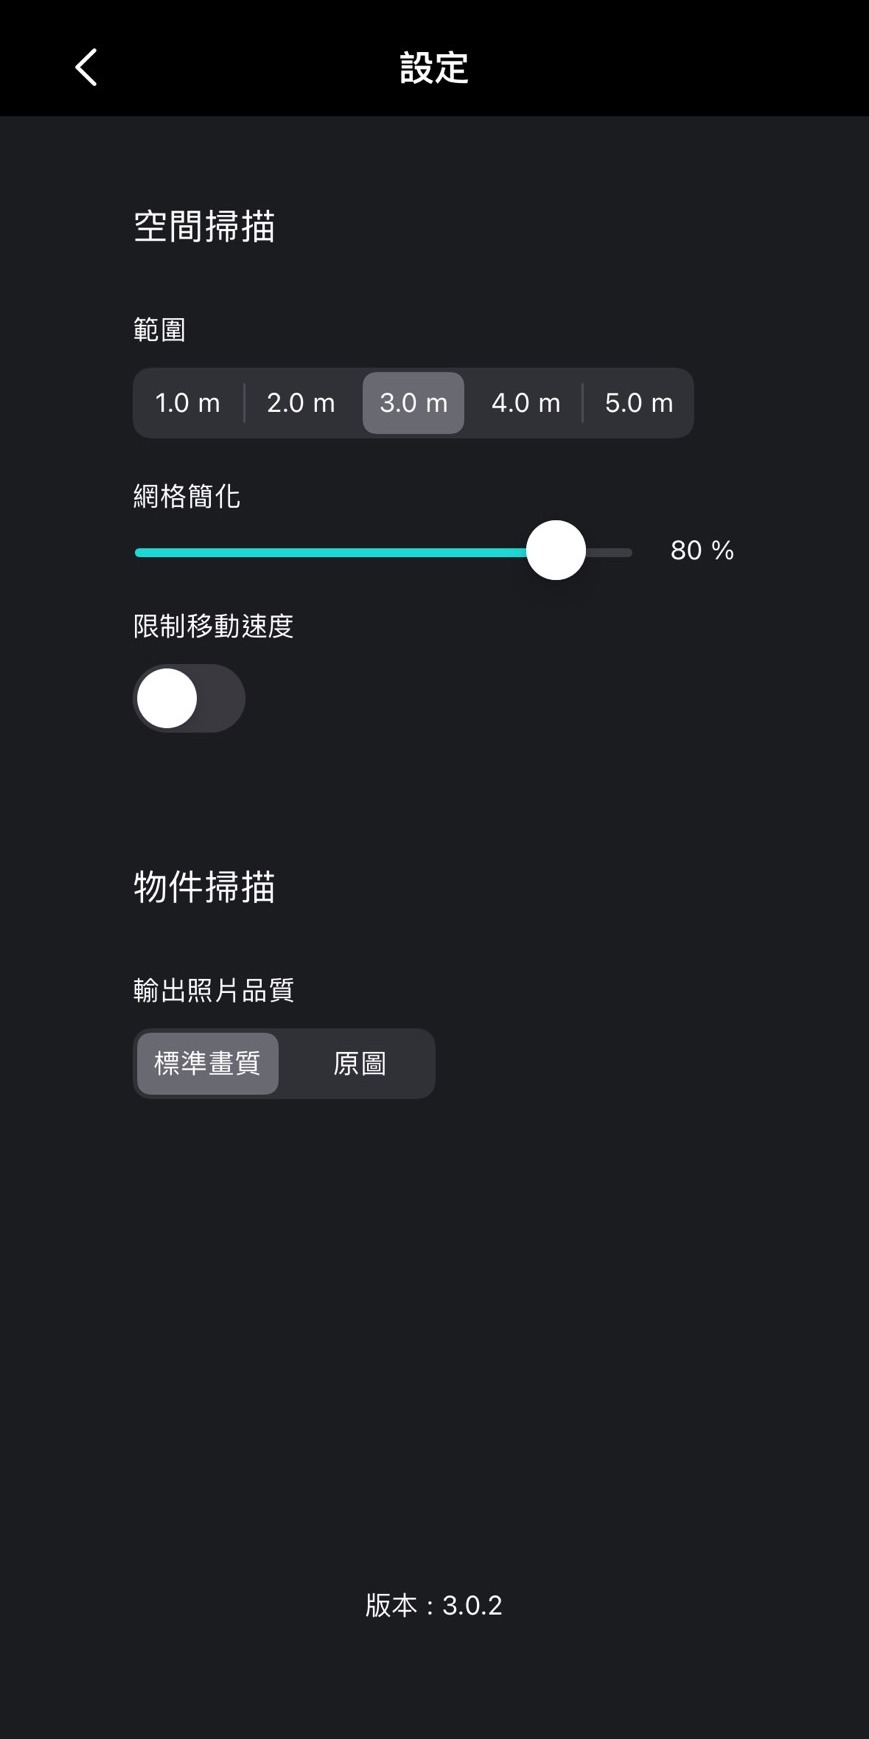
2. You can set the range and mesh simplification for space scans, and the photo quality for object scans.
➤ Logging into MAKAR Account
1. Click the menu icon in the upper left corner, then select "Personal Information".
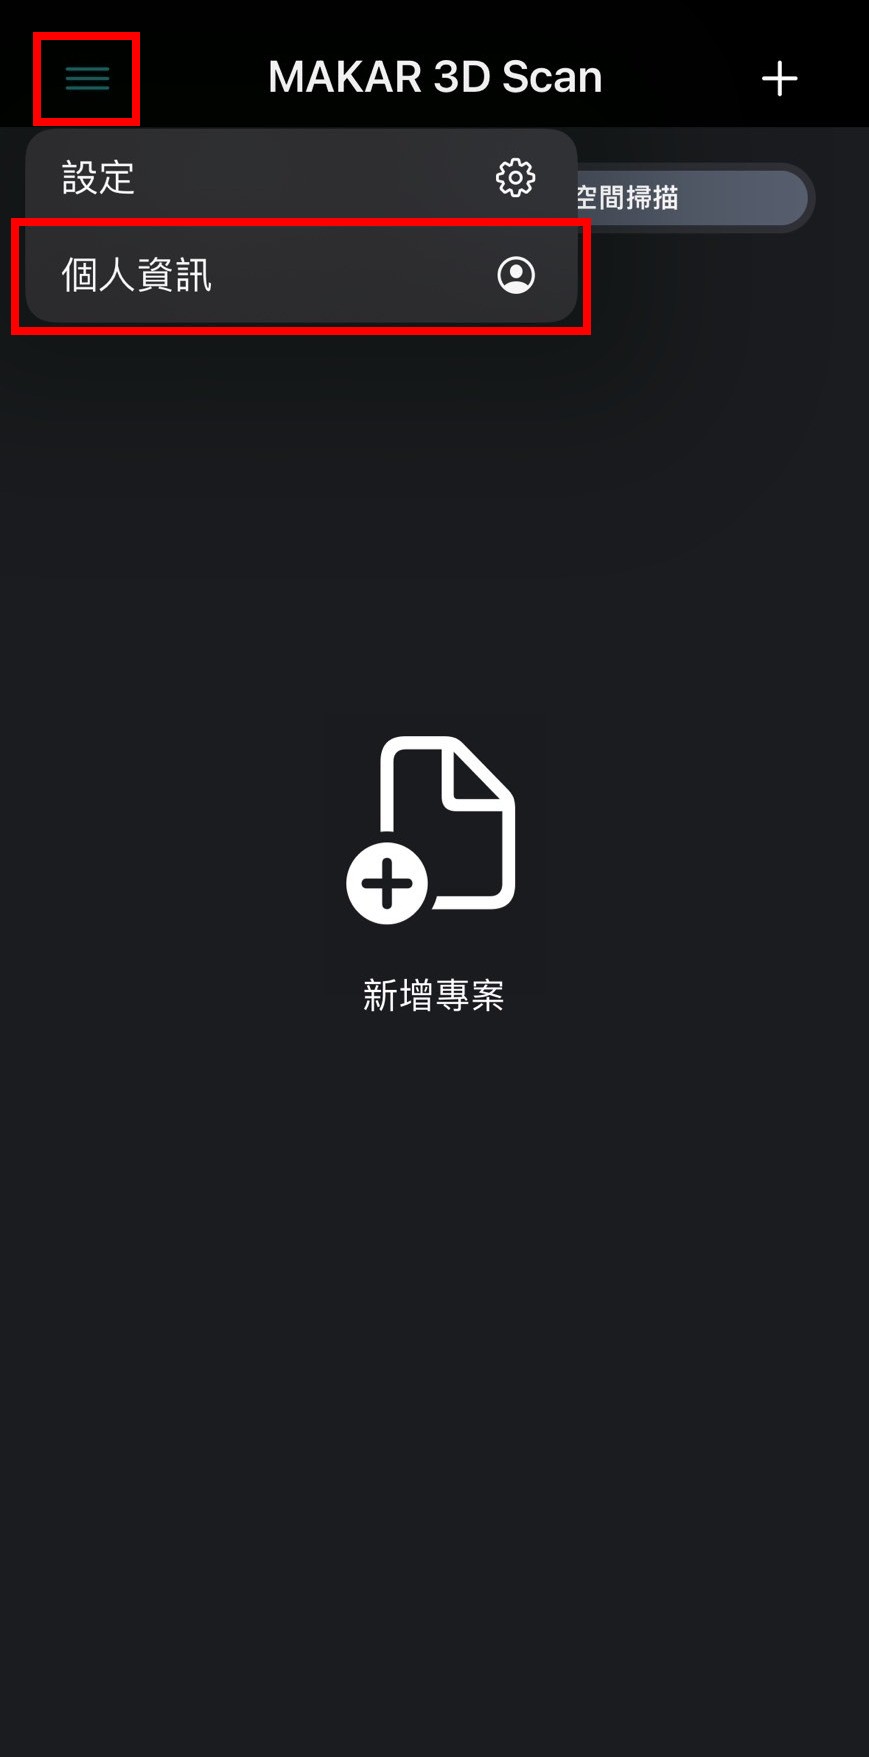
2. After logging into your MAKAR account, the created 3D objects can be directly uploaded to the MAKAR Editor.
➤ Renaming Projects
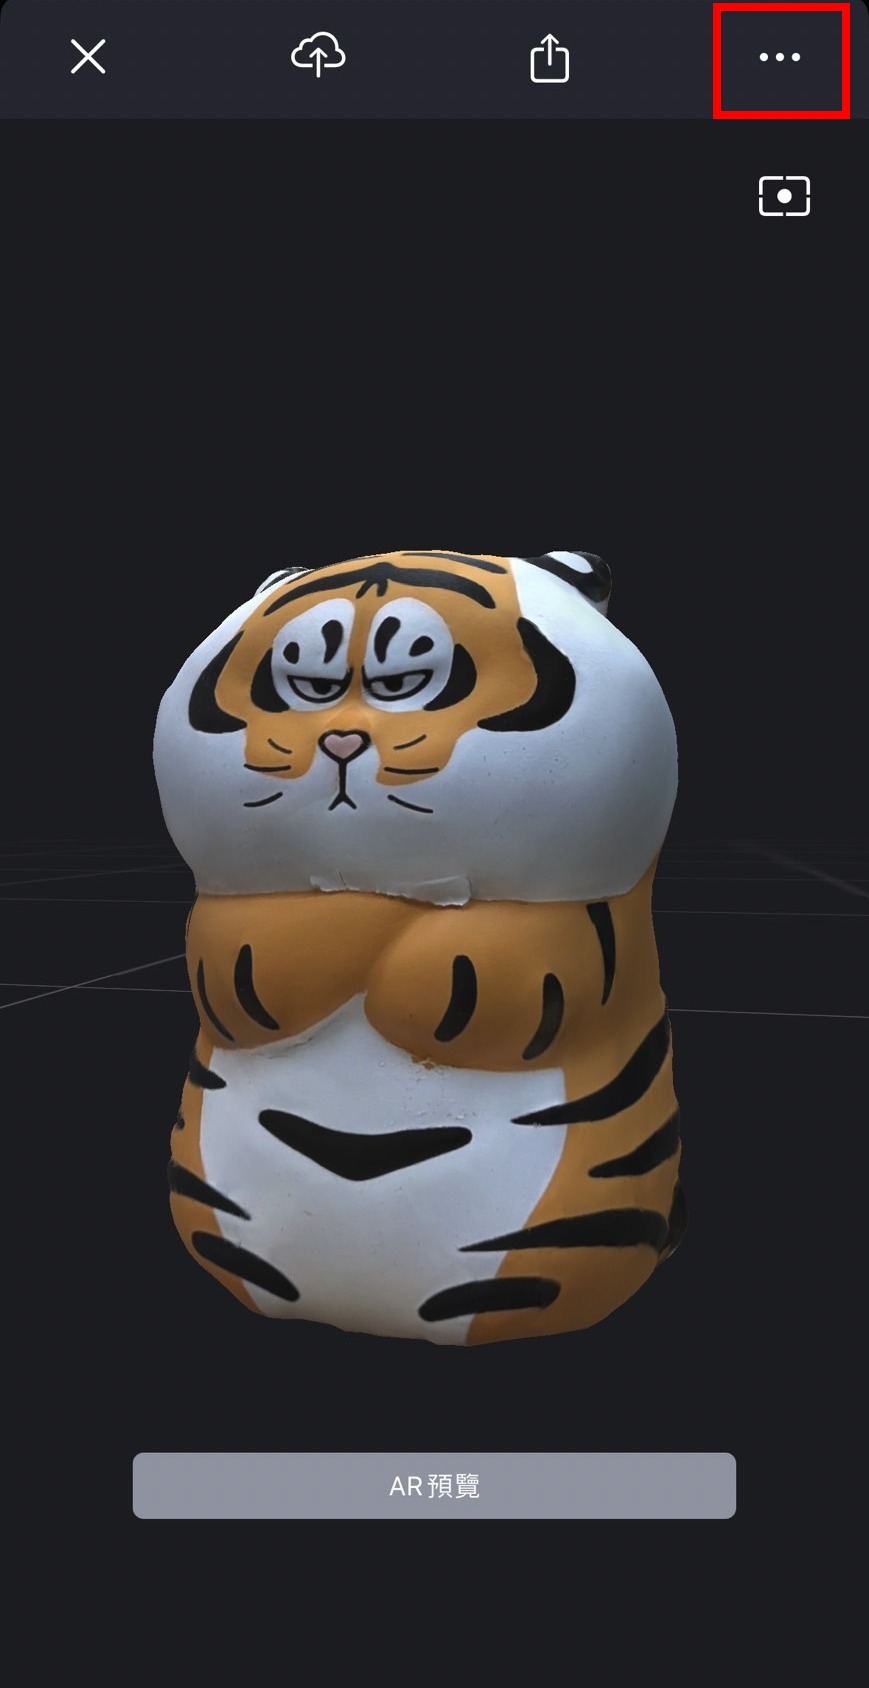
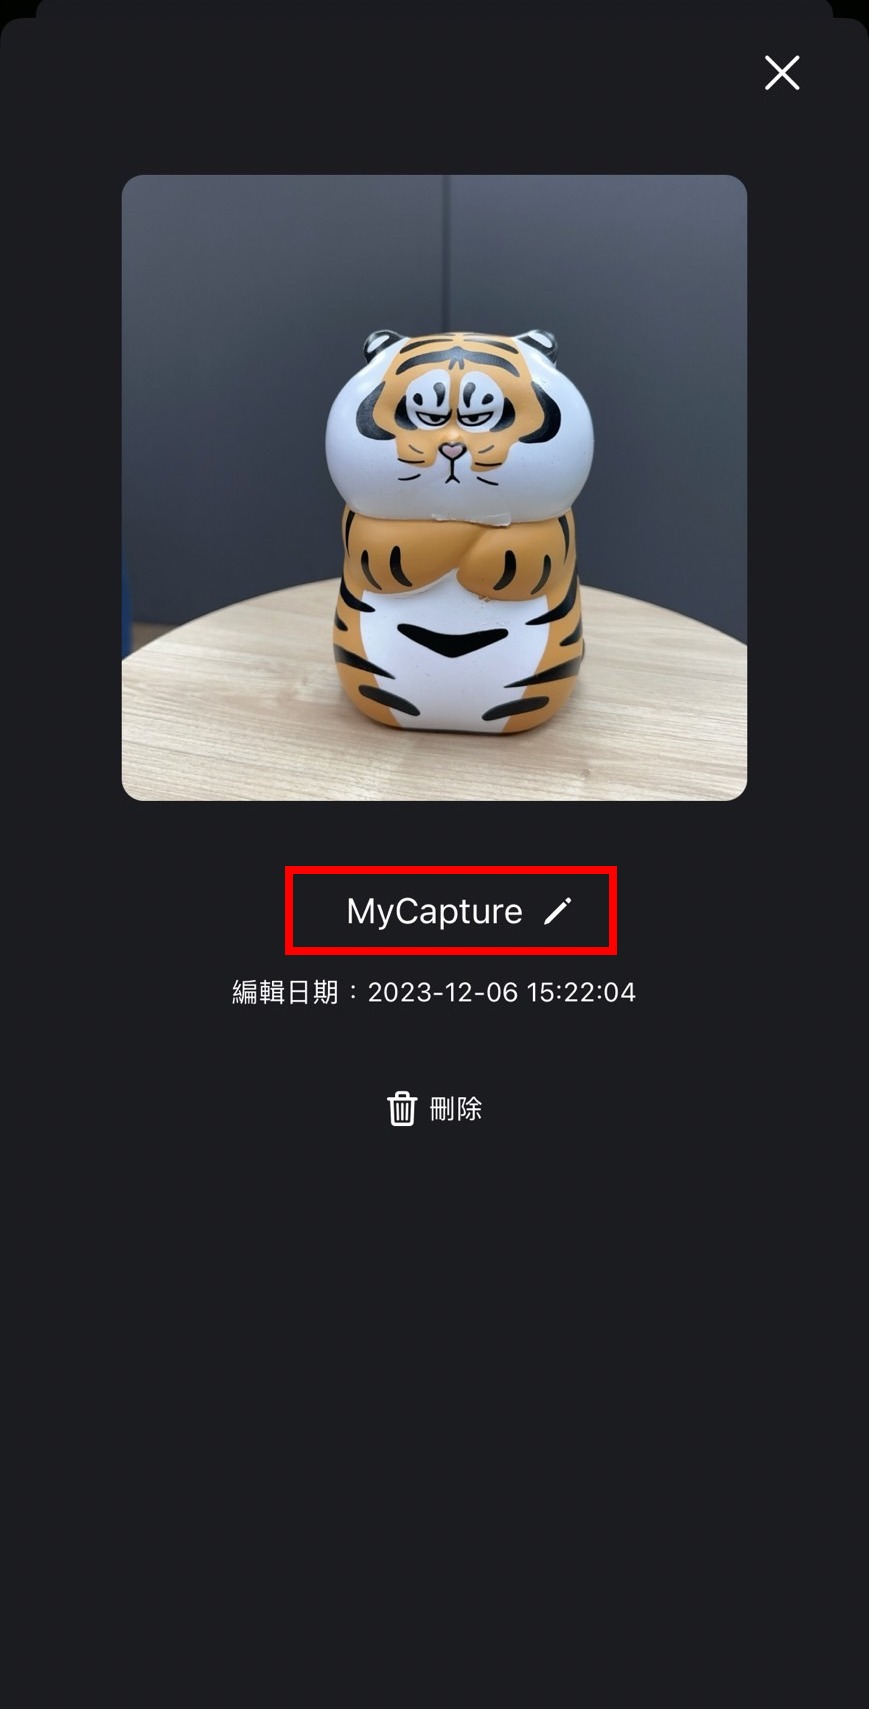
1. After the 3D object is created, click the icon with three white dots.
2. Click the project name to rename the project.
【Room Scan】
1. Open the MAKAR 3D Scan app on your iPhone or iPad, and tap the "+" icon in the upper right corner.
.jpg)
2. Select "Room Scan" on the right.
.jpg)
3. Enter the scanning space, align with the scene to be created, and press the red button to start scanning. Once the data is successfully captured, the scene will gradually be constructed with a grid while the red area disappears. It is recommended to move around and let the system capture the space until it is fully captured, then press the white button.
.jpg)
.jpg)
4. Then enter the "Post-Processing" step. The screen will display resolution options. You can choose low, medium, high, or custom for automatic post-processing by the system.
.jpg)
.jpg)
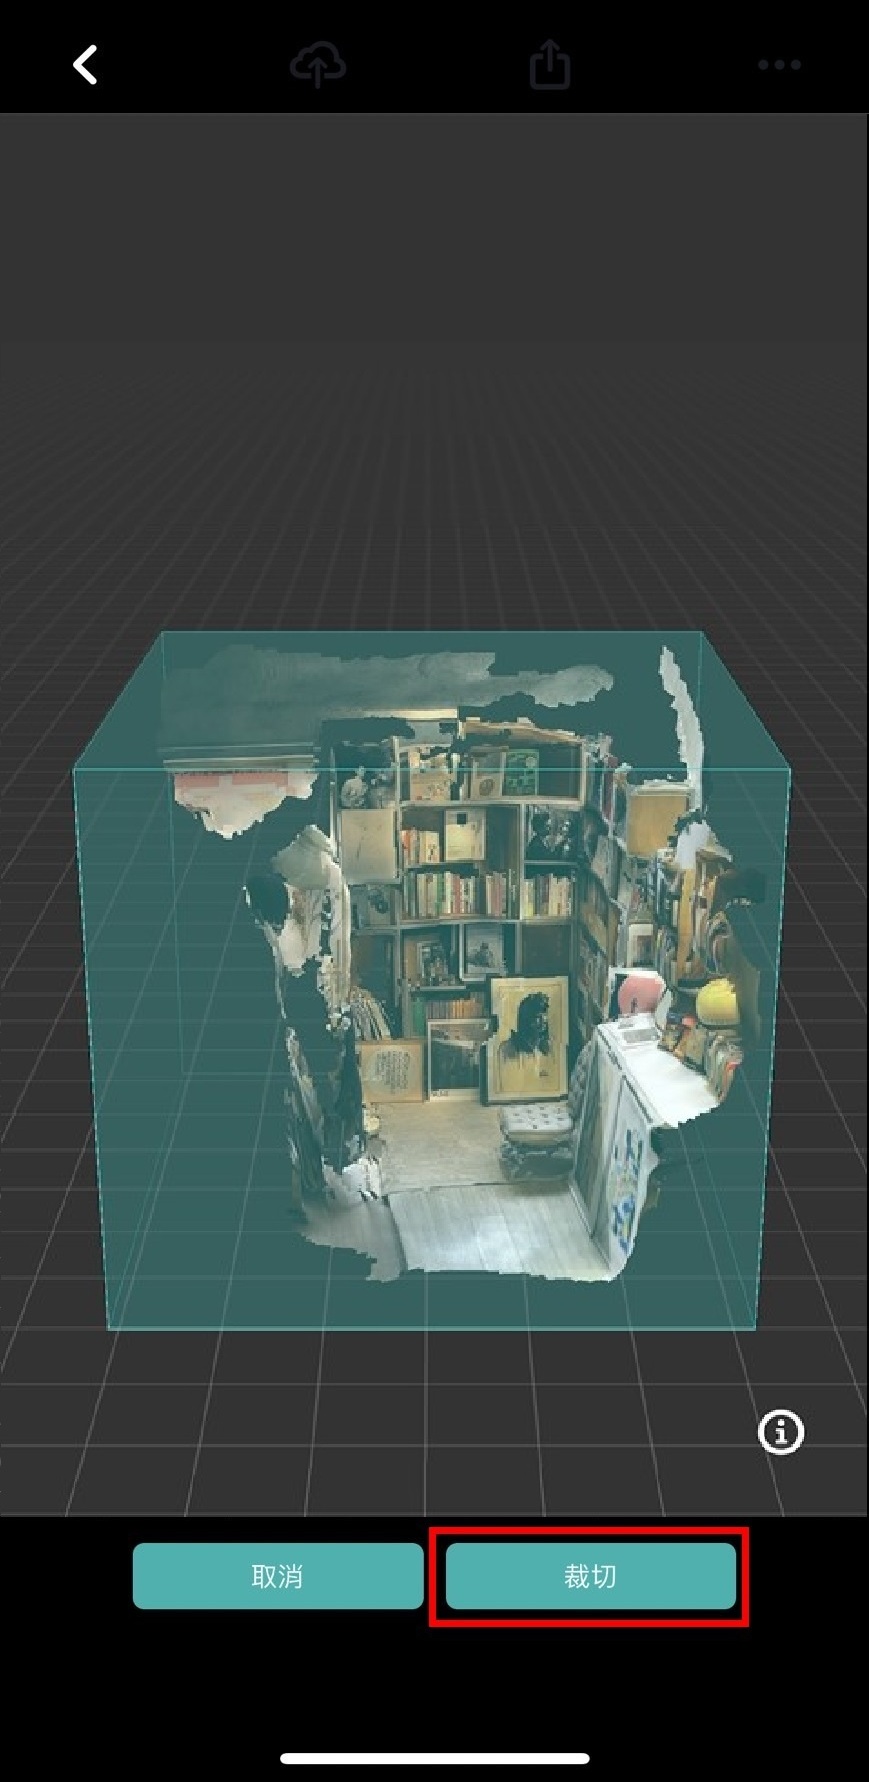
5. Next, click "Crop" to enter the cropping step.
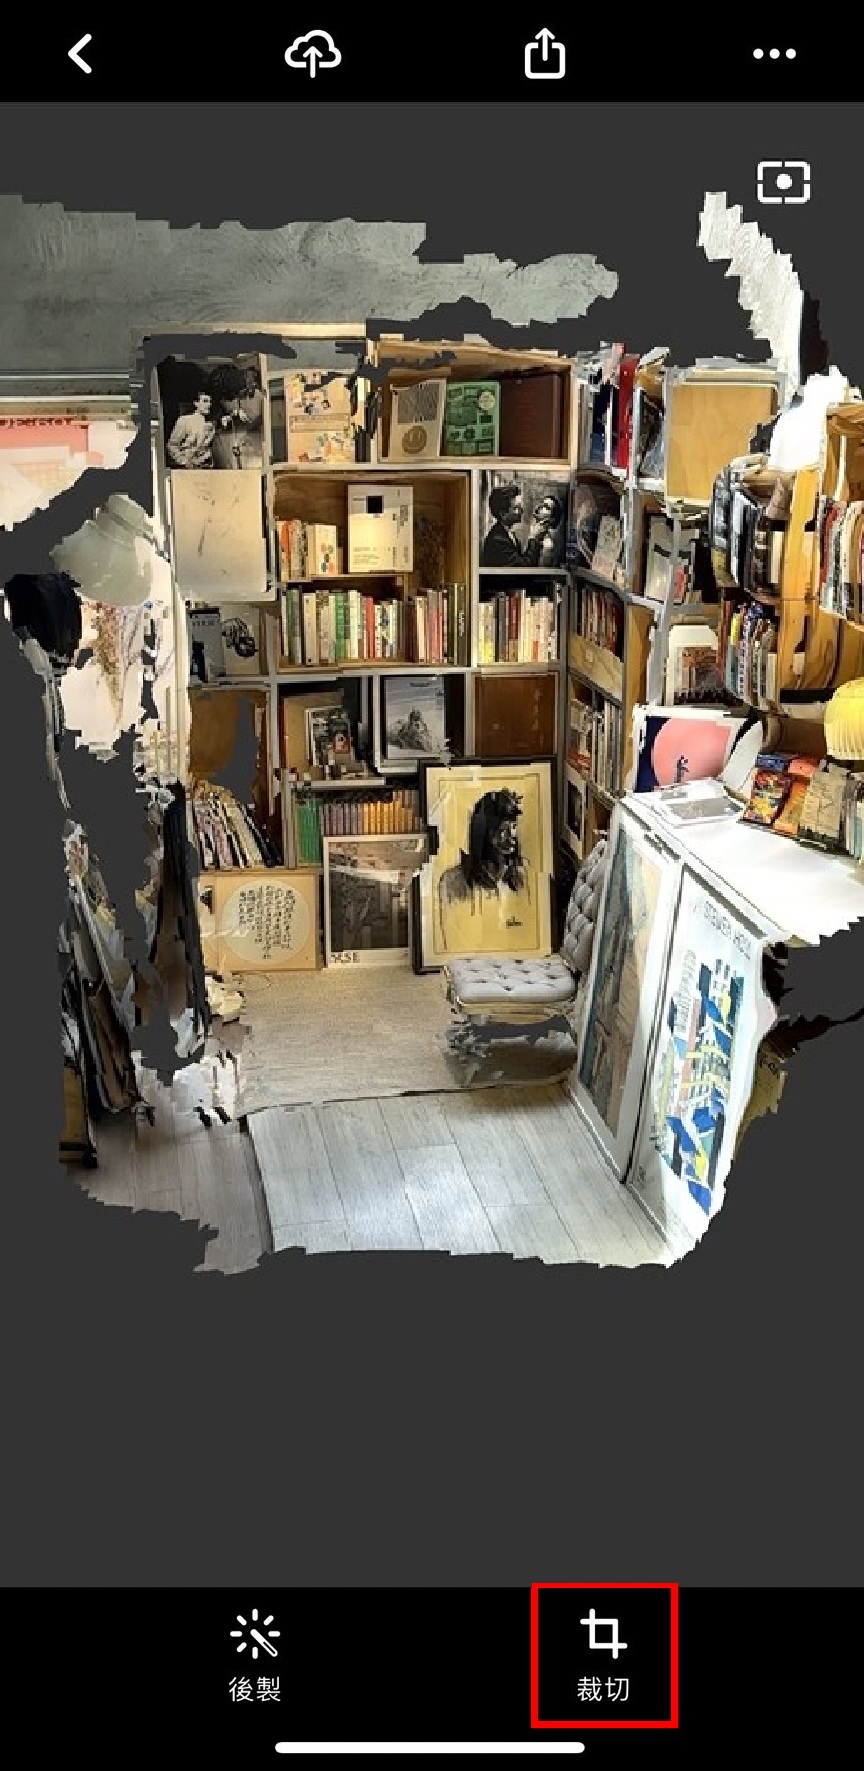
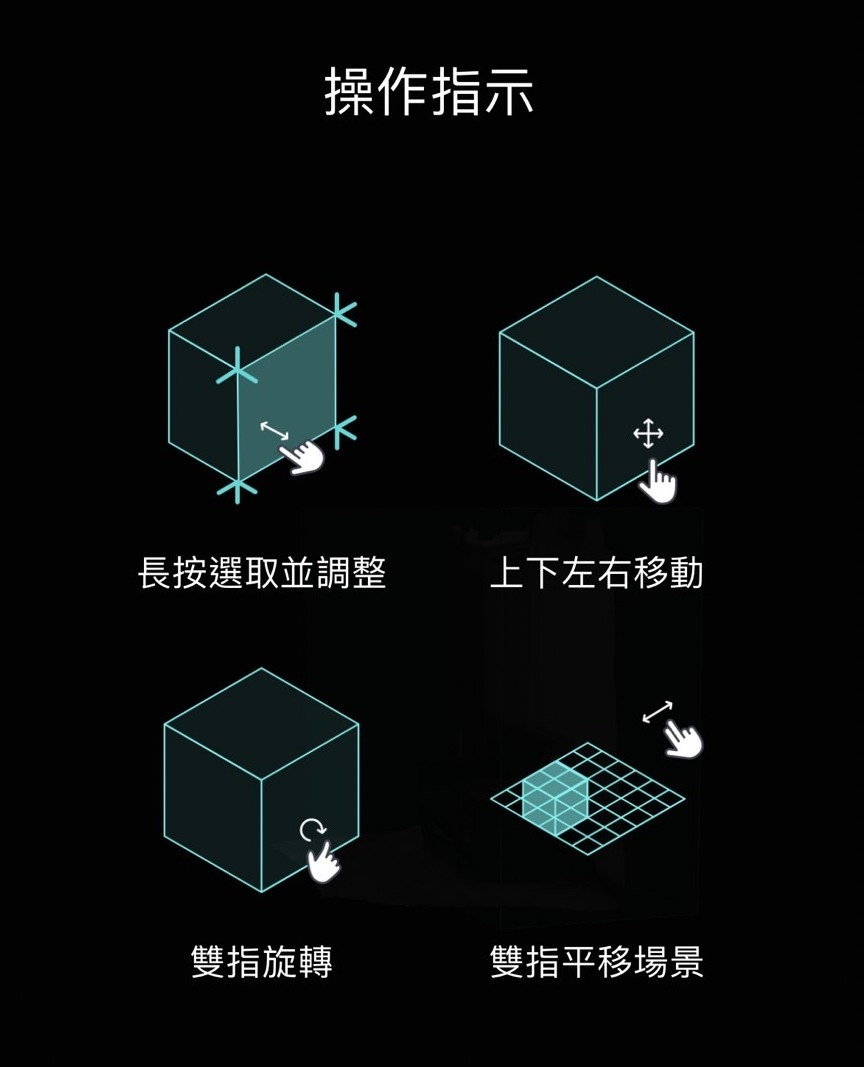
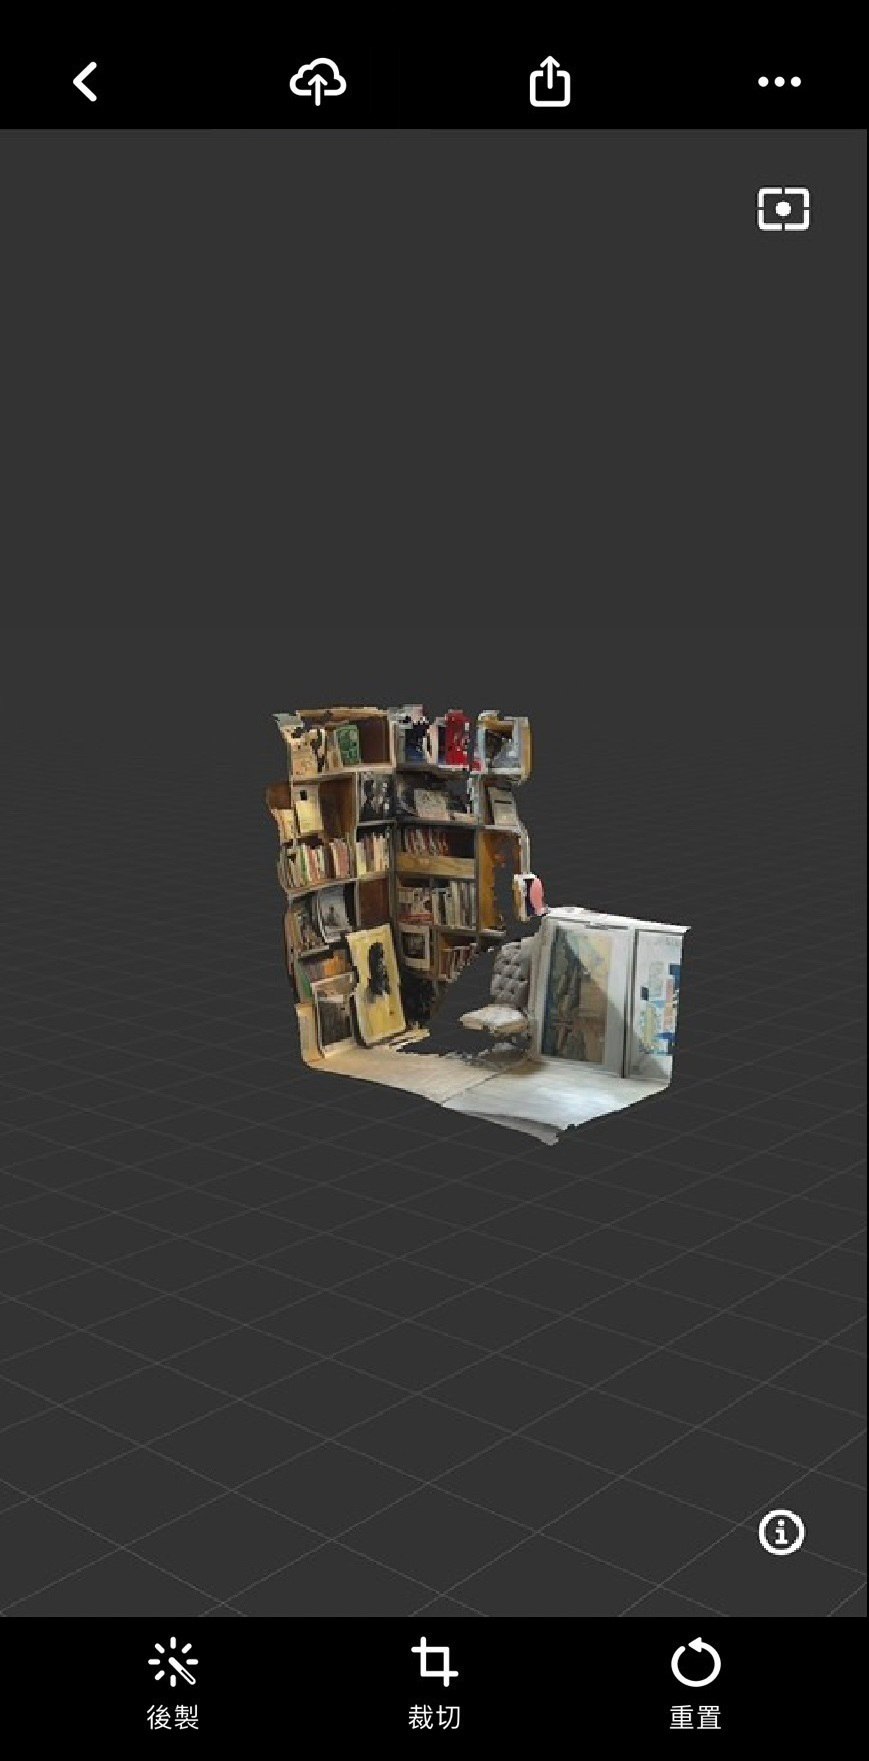
6. Follow the instructions to trim the scene to the appropriate size, then press "Crop" to complete. If you need to reprocess the resolution or recrop the scene, you can click "Post-Processing" and "Crop" to adjust.
7. Once the scene is created, if reprocessing or recropping is needed, you can adjust it again.
【Object Scan】
MAKAR 3D Scan's object scanning is divided into "Scan Assistant" and "Manual Capture" functions. Scan Assistant requires devices with LiDAR functionality and A14 Bionic chip or higher, and iOS or iPadOS 17 or higher; Manual Capture only requires a camera to create models. Manual Capture tutorials have also been introduced in the MAC version of MAKAR 3D Scan.
Using Scan Assistant provides more depth information, making the model almost identical to the real object. Manual Capture allows for simple photo scanning, which is more convenient. The following explains how to use both "Scan Assistant" and "Manual Capture".
➤ Scan Assistant
1. Open the MAKAR 3D Scan app on your iPhone or iPad, and tap the "+" icon in the upper right corner.
2. Select "Object Scan" on the left.
.jpg)
3. Select "Scan Assistant" on the left.
.jpg)
4. Approach the target and center it, then click lock.
.jpg)
5. A white frame appears around the object. You can adjust the lock size with your finger. Once confirmed, press "Start Scan".
.jpg)
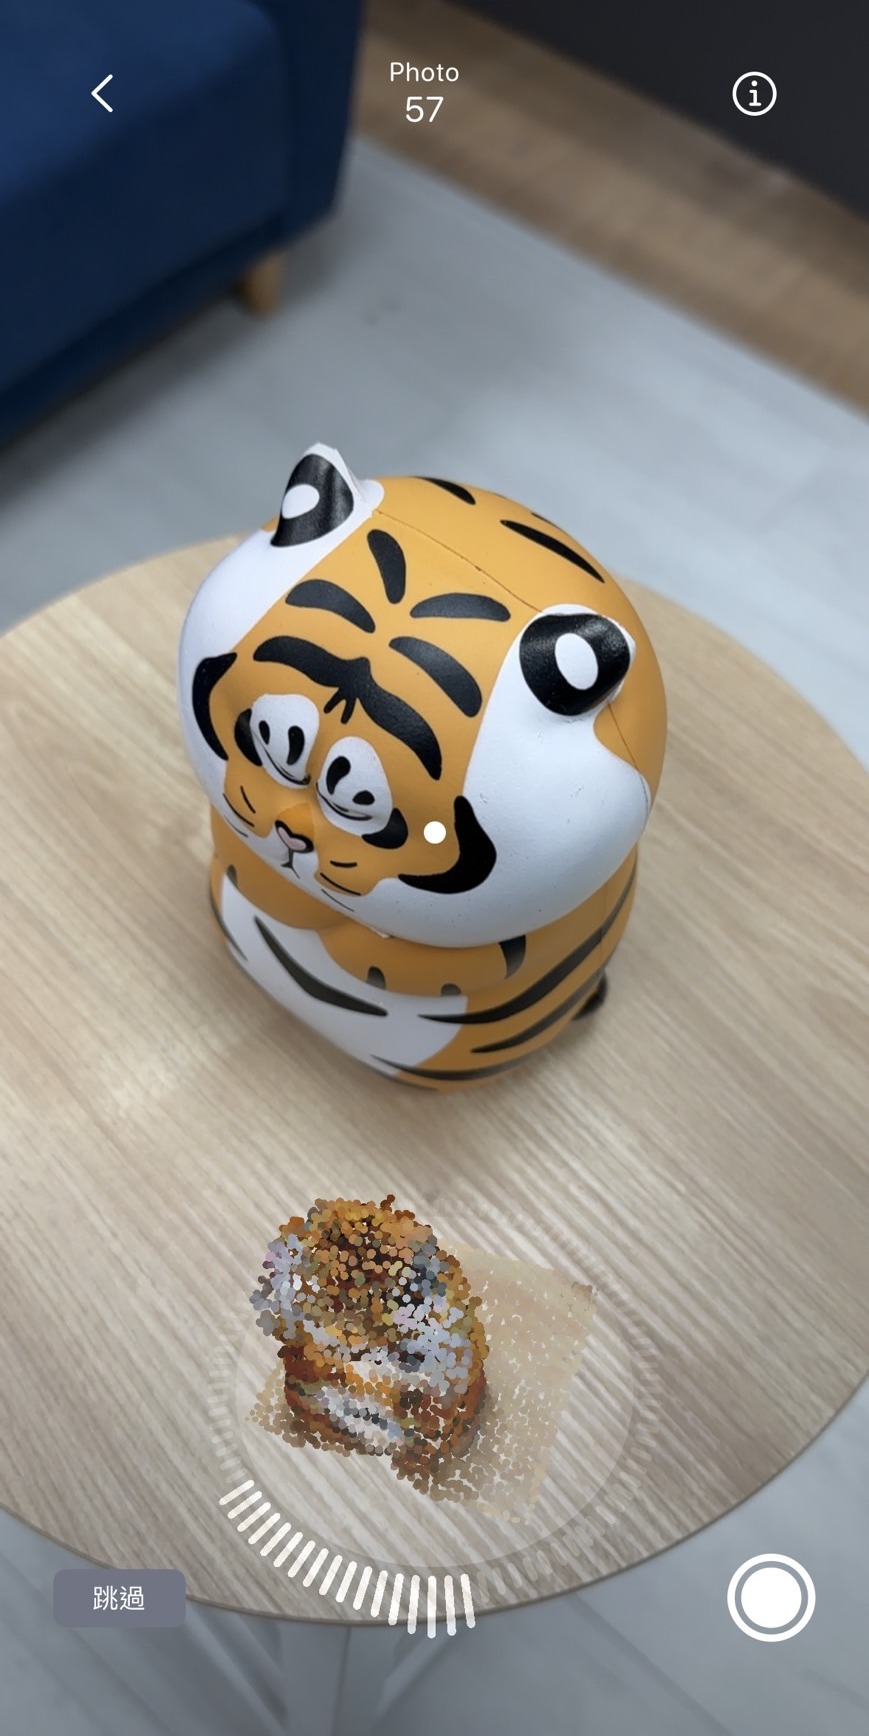
6. Enter the scanning page. The white dot serves as the scanning center. Move around the object to scan and fill the scale track. The screen bottom synchronizes the scanning status, with white representing the filled scale. Once the scale is filled, proceed to the next step.
.jpg)
.jpg)
7. Aim to maintain distance and fill the scale while scanning the object, requiring at least 20 scans. If distance is too far or movement is too fast, small prompts will appear above the object to remind the user.
.jpg)
.jpg)
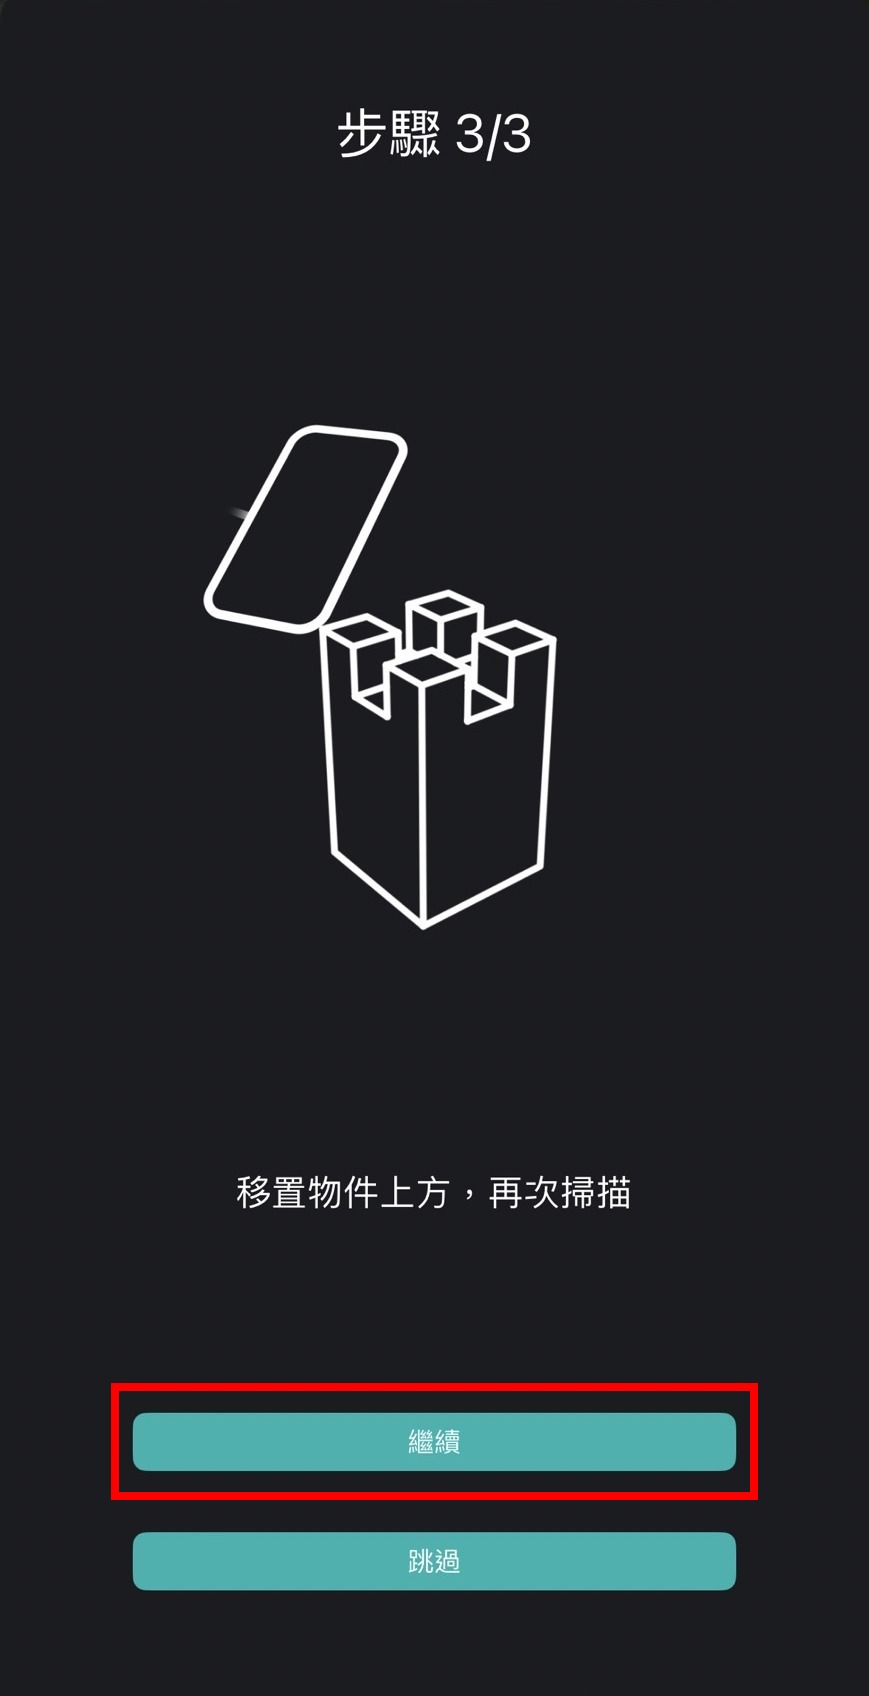
8. Once the scale is filled, the screen automatically enters the second scanning step. Click "Continue" to scan parallel to the object again.
.jpg)
9. Once the scale is filled, the screen automatically enters the third scanning step. Click "Continue" to scan from above the object again.
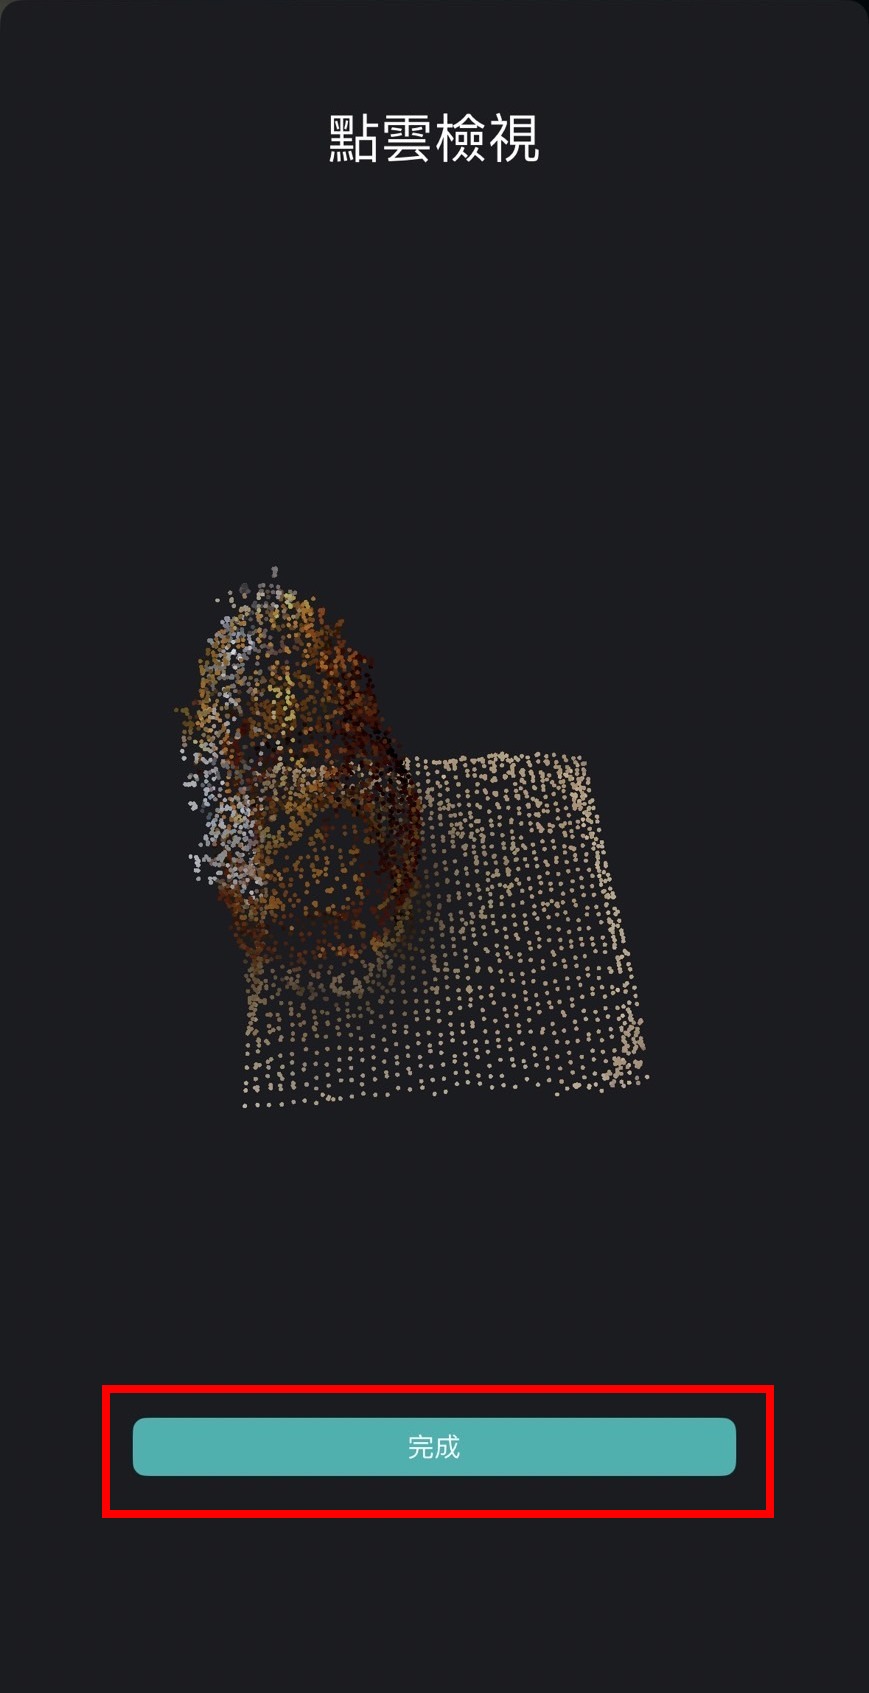
10. After completion, a preview of the object point cloud appears. Click "Finish".
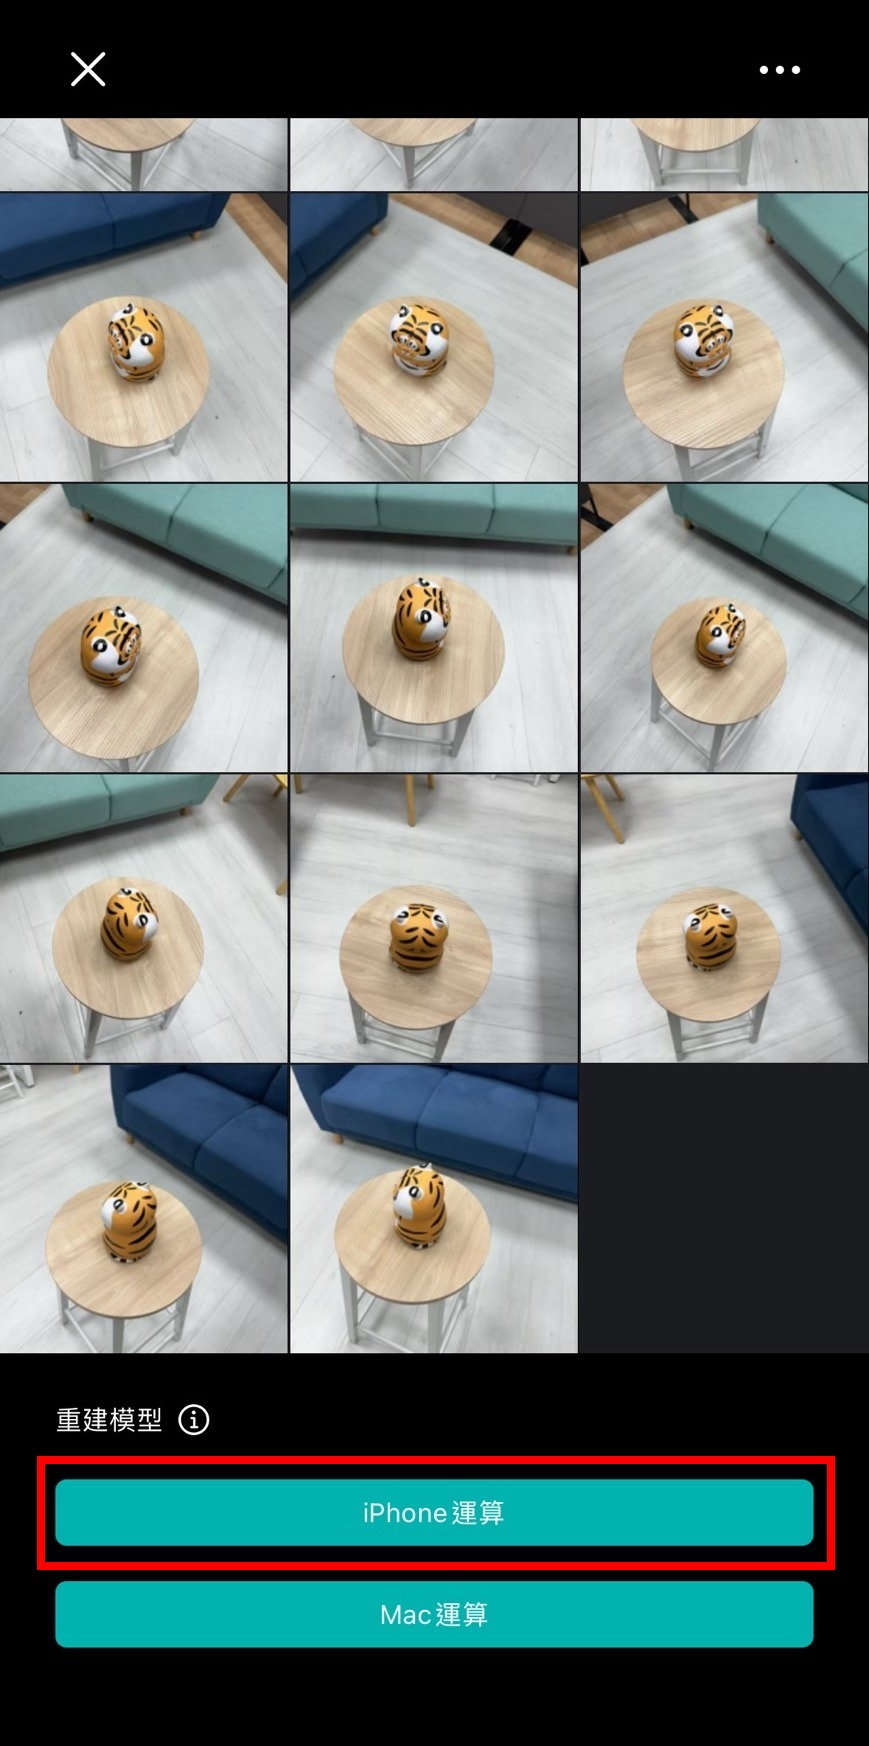
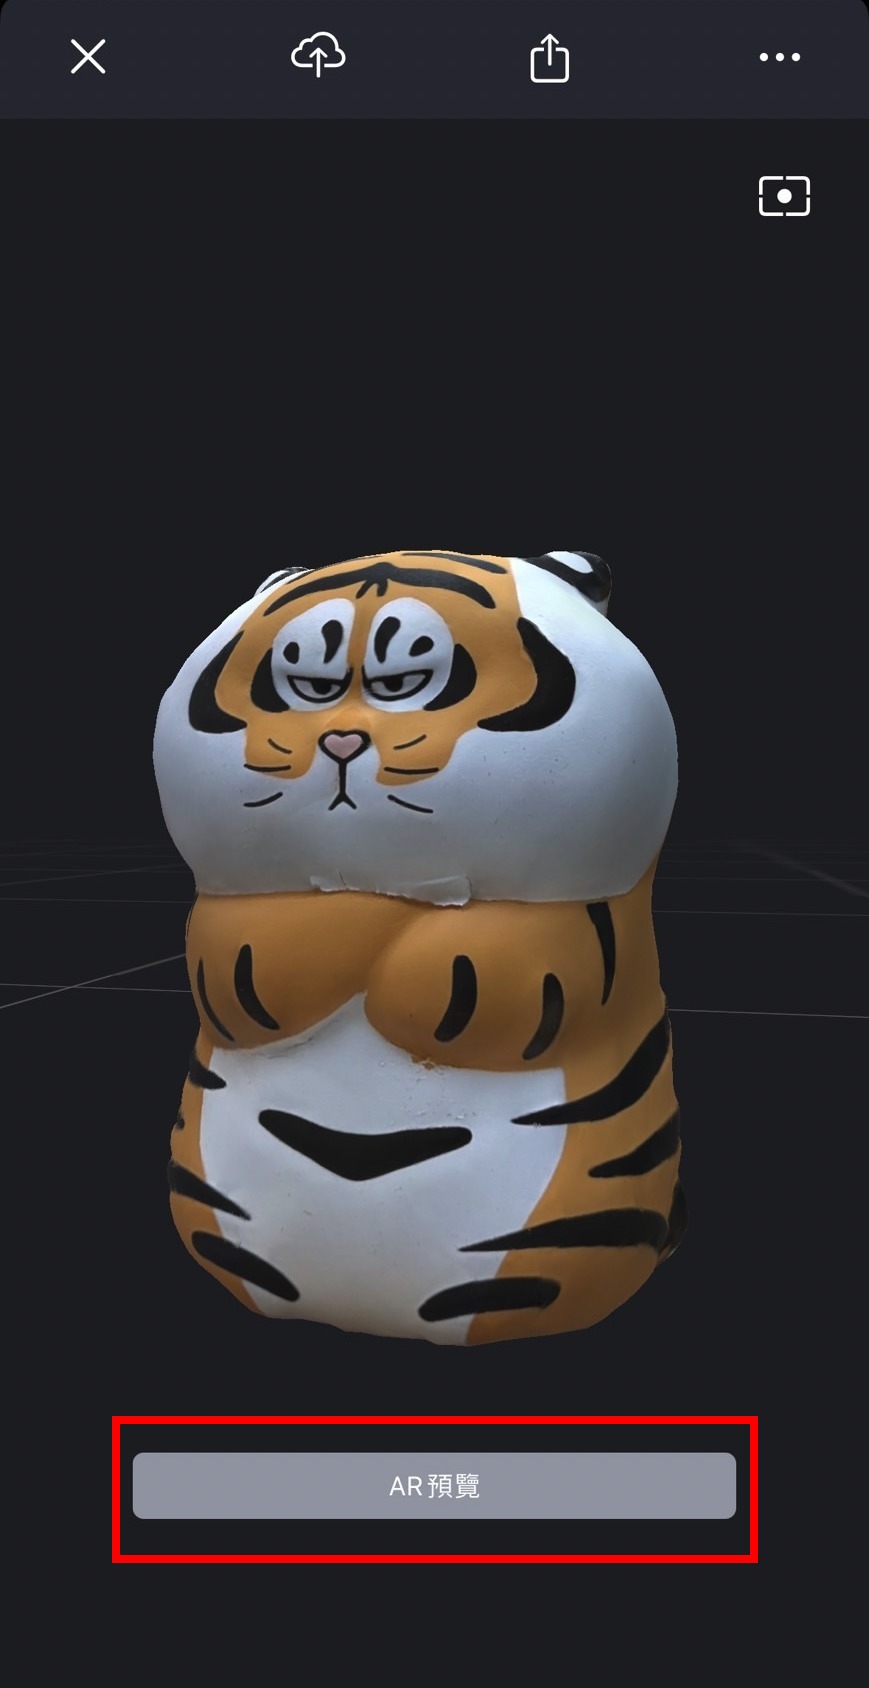
11. Click "iPhone Computing" to create the model.
12. Once the object is created, click "AR Preview" to view the object in augmented reality on your phone.

➤ Manual Cpature
1. Open the MAKAR 3D Scan app on your iPhone or iPad, and tap the "+" icon in the upper right corner.
.jpg)
2. Select "Object Scan" on the left.
.jpg)
3. Select "Manual Capture" on the right.
.jpg)
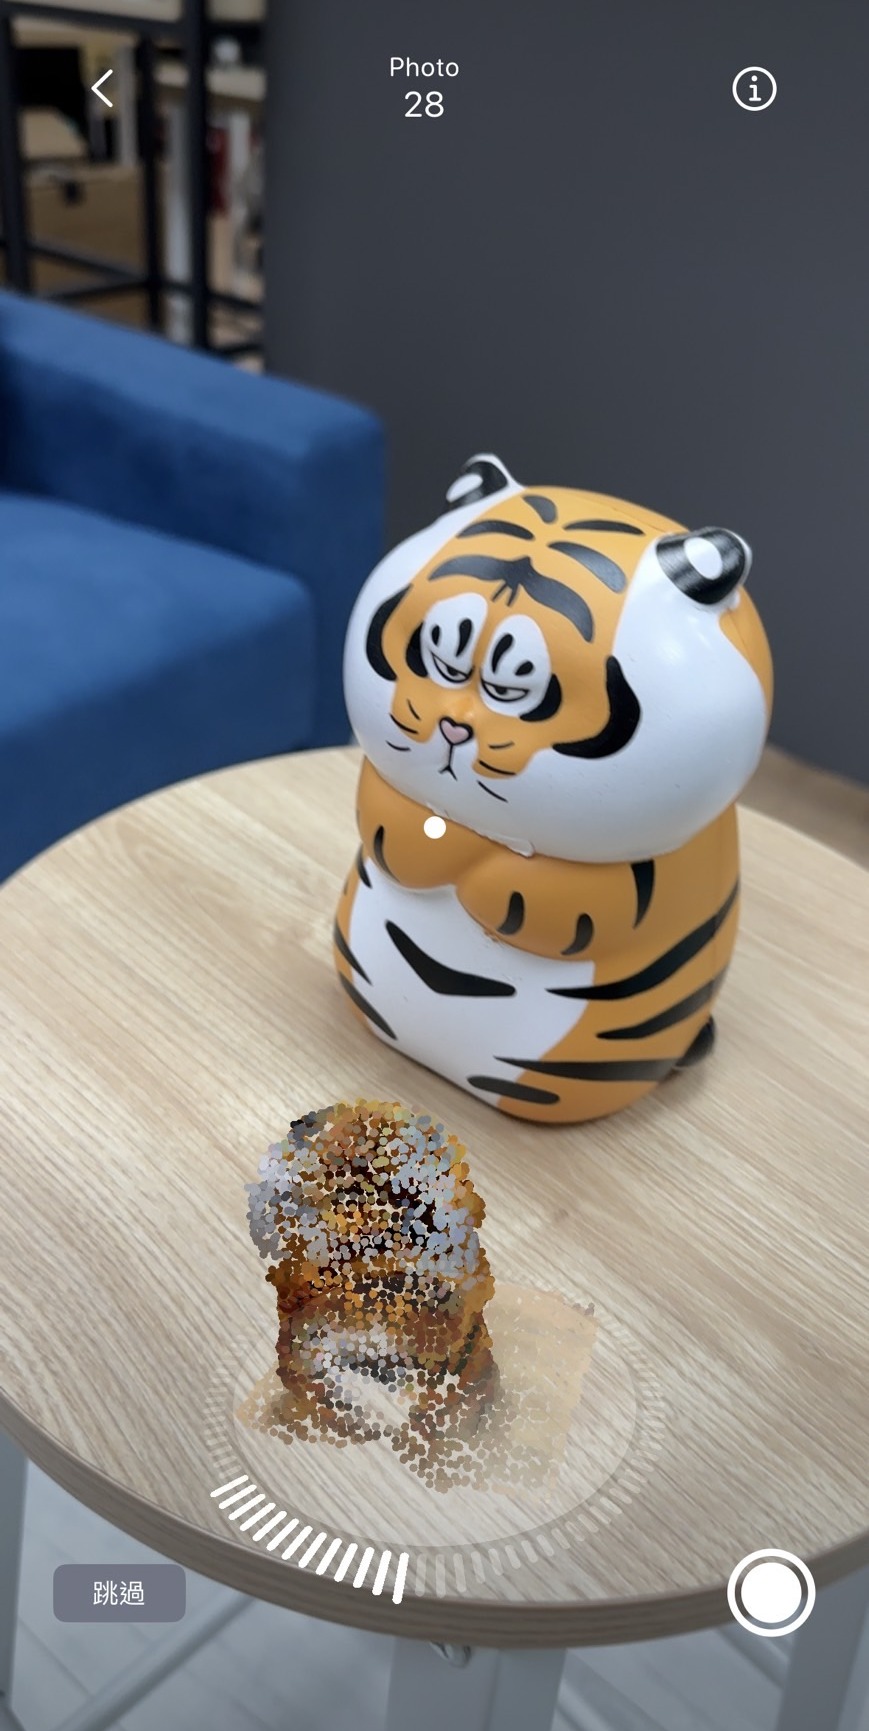
4. Aim for clear shots, filling the frame, and maintaining 70% overlap. Use the white button to take pictures around the object. It is recommended to take at least 20 shots each from the front, top, and bottom for the next step.
※ The more shots taken, the better the modeling details. Up to 200 shots can be taken.
.jpg)
.jpg)
5. Click "iPhone Computing" to create the model.
.jpg)
6. Once the object is created, click "AR Preview" to view the object in augmented reality on your phone.
.jpg)
.jpg)
【Uploading 3D Models to MAKAR Editor】
1.Click the red frame icon to directly upload the scanned object to the MAKAR Editor.
※ Requires logging into a MAKAR account.
.jpg)
.jpg)
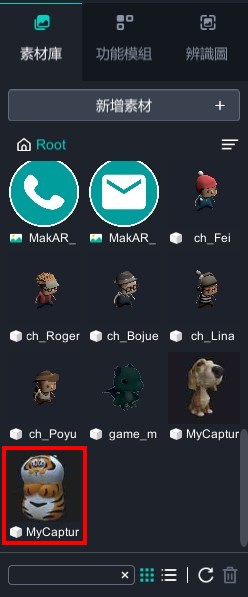
2. After uploading to the MAKAR software, the model will appear in the asset library.
【Exporting 3D Model Files】
The iPhone/iPad version of MAKAR 3D Scan supports exporting the completed 3D models, facilitating XR project creation. To learn more about the differences and conversion methods of 3D file formats, refer to the guide on Understanding GLB, OBJ, STL, and Other Common 3D File Formats, with Blender Conversion Tutorial Included!
1. Click the red frame icon to support exporting 3D formats: USDZ, OBJ, GLB, STL.
※ Exporting models is exclusive to MAKAR professional account users.
.jpg)
.jpg)
2. If the account is not upgraded but wants to export 3D models, you can first upload the 3D model to the MAKAR Editor. Click "Window" → "My Resources", select the created 3D model, and finally click the red icon to download it to the computer.
※ This function only supports downloading in GLB format.
.jpg)
.jpg)