Understanding GLB, OBJ, STL, and Other Common 3D File Formats, with Blender Conversion Tutorial Included!
When working with 3D models, you may have encountered file formats like FBX, OBJ, GLB, etc. Each file format has its own usage and applicable scenarios. This tutorial will guide you through understanding common 3D formats, which formats MAKAR supports, and how to convert them into suitable formats to save time when handling models.
Content Overview |
|---|
Introduction to Various 3D File Formats
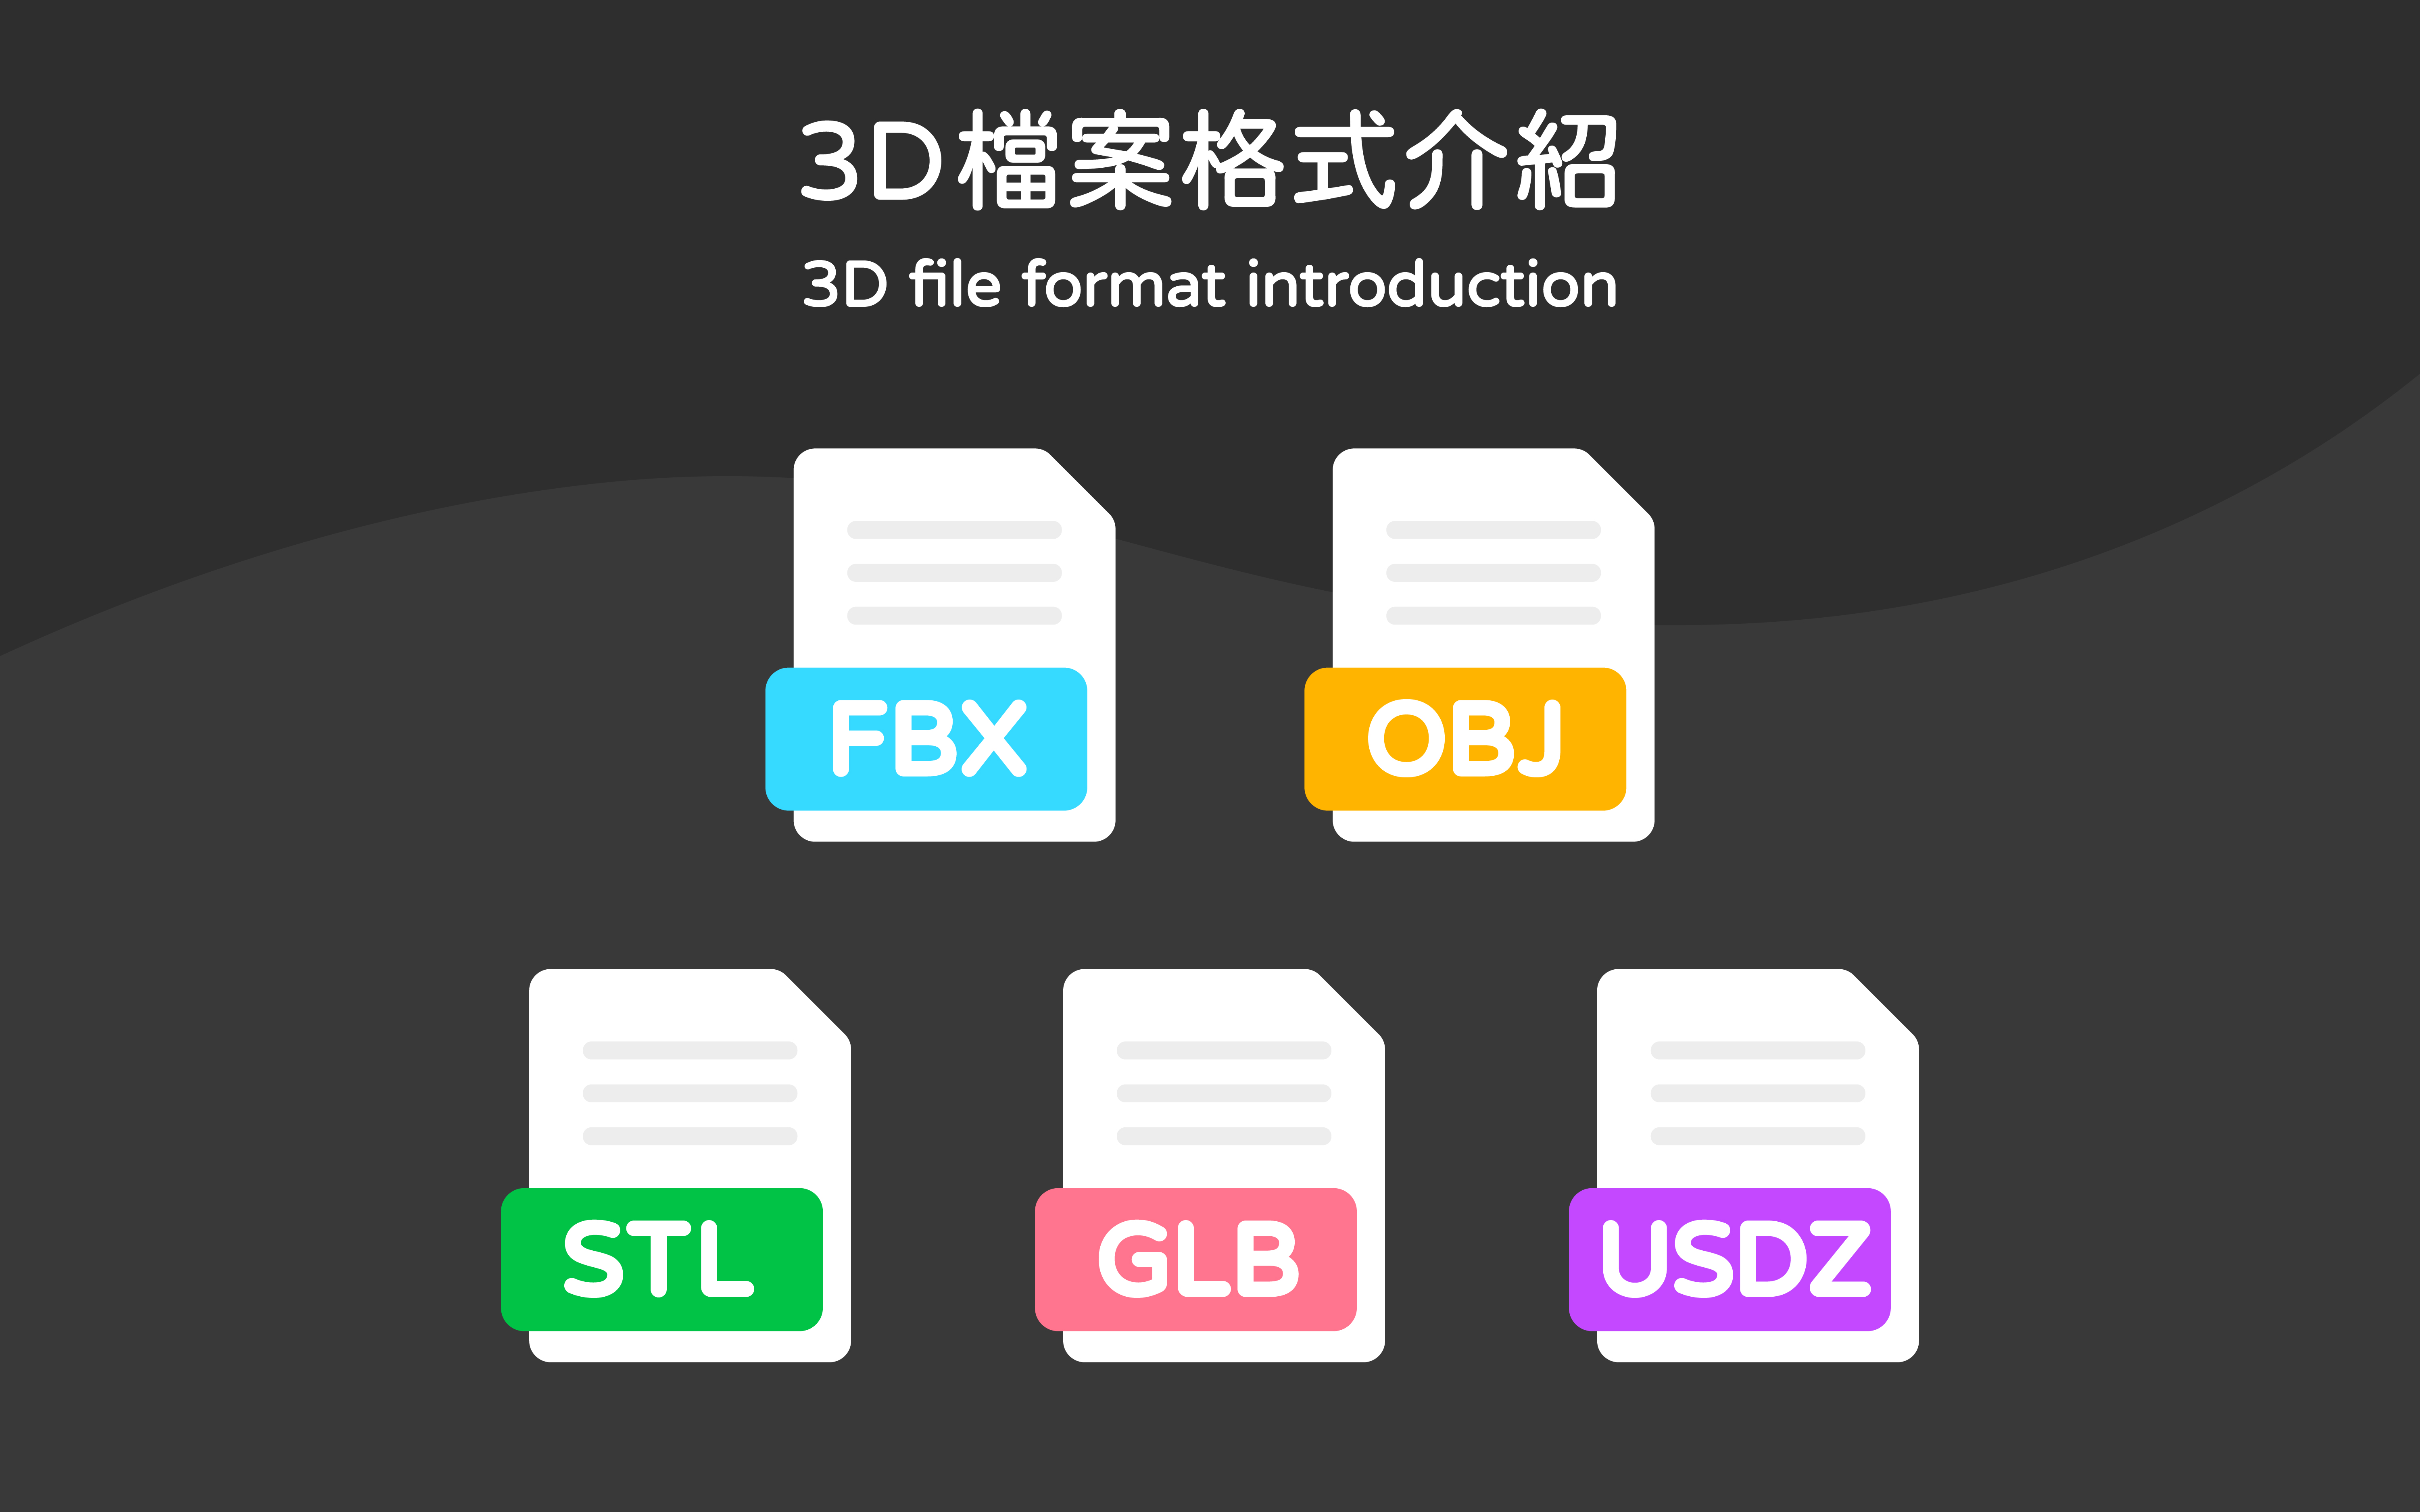
【 FBX、OBJ、STL、GLB、USDZ 】
FBX|A 3D file format released by AutoDesk.
The file supports 3D geometry, textures, skeletons, and also supports music and video elements.
If you need to export dynamic 3D models, it is recommended to use FBX.
OBJ|A 3D file format released by Wavefront Technology.
The file supports 3D geometry and texture data but does not support animation, music, or video elements.
Since it can record fewer types of data compared to FBX, the data volume is relatively smaller.
If you need to export static 3D models, it is recommended to use OBJ.
STL|A 3D file format released by 3D Systems.
Mainly used for 3D printing and computer-aided design (CAD), it does not support 3D texture data.
Typically, STL data is loaded into 3D printers for printing, assisting designers in producing prototype parts.
GLB|A 3D file format released by Khronos Group.
An optimized model format that can merge model materials, textures, and animation information into a single file.
It can easily display 3D content on the web and is sometimes referred to as the JPEG of 3D.
The file supports simple animations and is usually smaller in size.
USDZ|A 3D file format released by Pixar Animation Studios and Apple.
Specifically used for storing AR images, including playing music. iPhone and iPad can use AR Quick Look to browse USDZ, but it is limited to iOS products.
【3D File Format Comparison Table】
|
File Format |
Purpose |
Texture |
Animation |
Media |
File Size |
|---|---|---|---|---|---|
|
FBX |
3D Modeling |
External Texture |
Supports Animation |
Supports Music, Video |
Larger |
|
OBJ |
3D Modeling |
External Texture |
Static |
Not Supported |
Moderate |
|
STL |
3D Printing |
Not Supported |
Static |
Not Supported |
Smaller |
|
GLB |
Display 3D Models on the Web |
Texture included in one file |
Supports Animation |
Not Supported |
Smaller |
|
USDZ |
Display 3D Models on Apple Devices |
External Texture |
Supports Animation |
Not Supported |
Smaller |
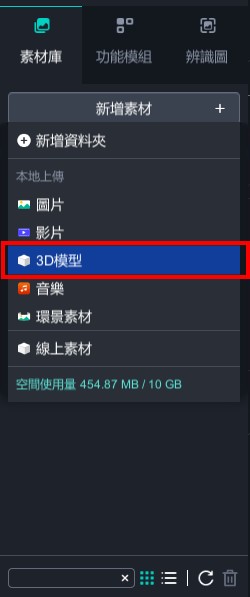
3D File Formats Supported by MAKAR
【 Supported Types in MAKAR Editor 】
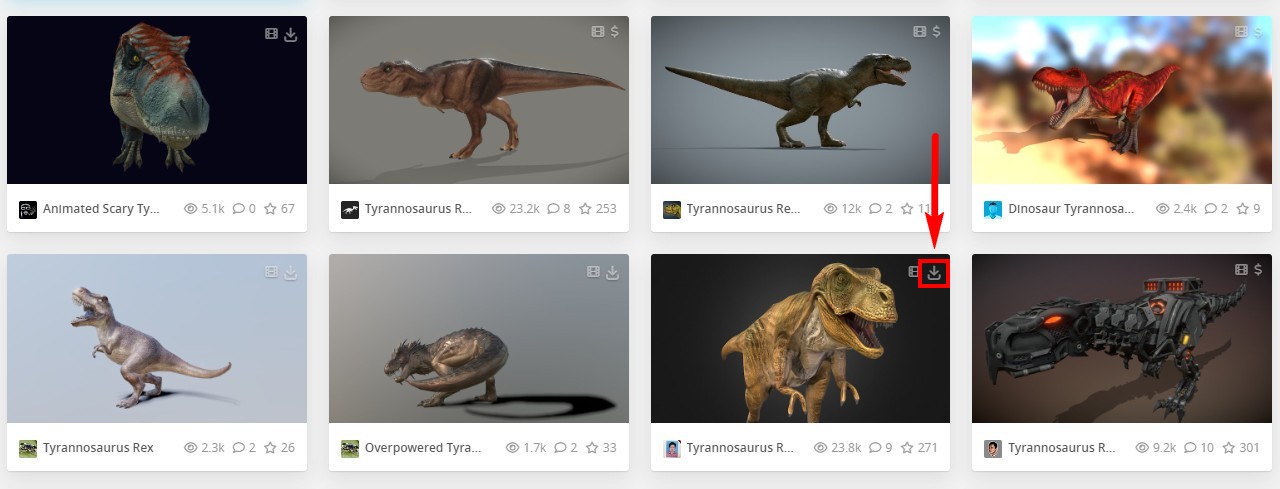
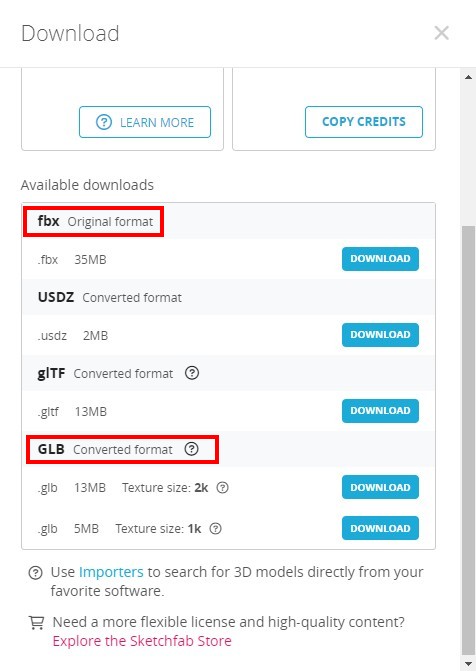
The MAKAR Editor now supports uploading both FBX and GLB 3D file formats. You can upload your own 3D models or download free objects from 3D asset websites like Sketchfab. Simply search for the desired object, select the downloadable option, and choose either FBX or GLB format to download.
※Although the MAKAR Editor's online asset library provides direct access to Sketchfab models for easy one-click downloads, these models often have their file sizes maximized by default, leading to larger project files. To make your files more lightweight, it’s recommended to download models from the Sketchfab website directly.

Open the MAKAR Editor, click "Add Asset" ➔ "3D Model" and upload the GLB or FBX file. Once uploaded, the model will appear in your asset library, ready to be dragged to the center for editing. It is recommended to upload GLB files for smaller size and faster processing.

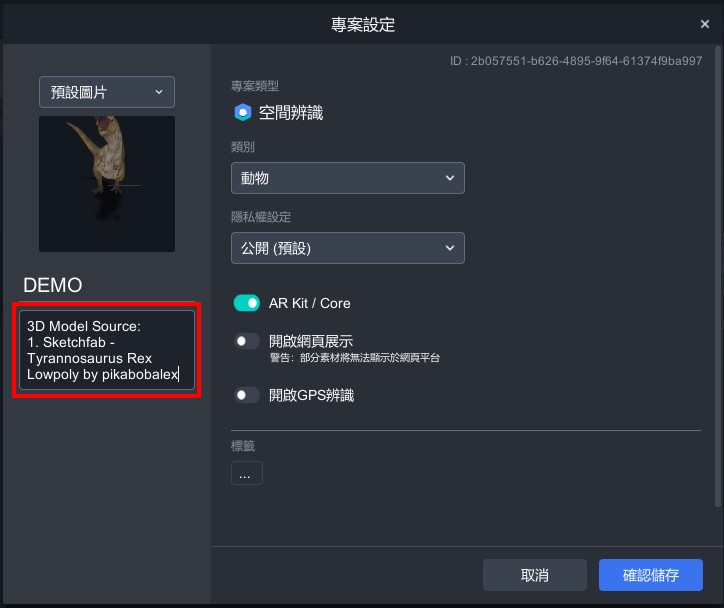
For any free models downloaded from external websites, please credit the author in the "Project Settings" description field.
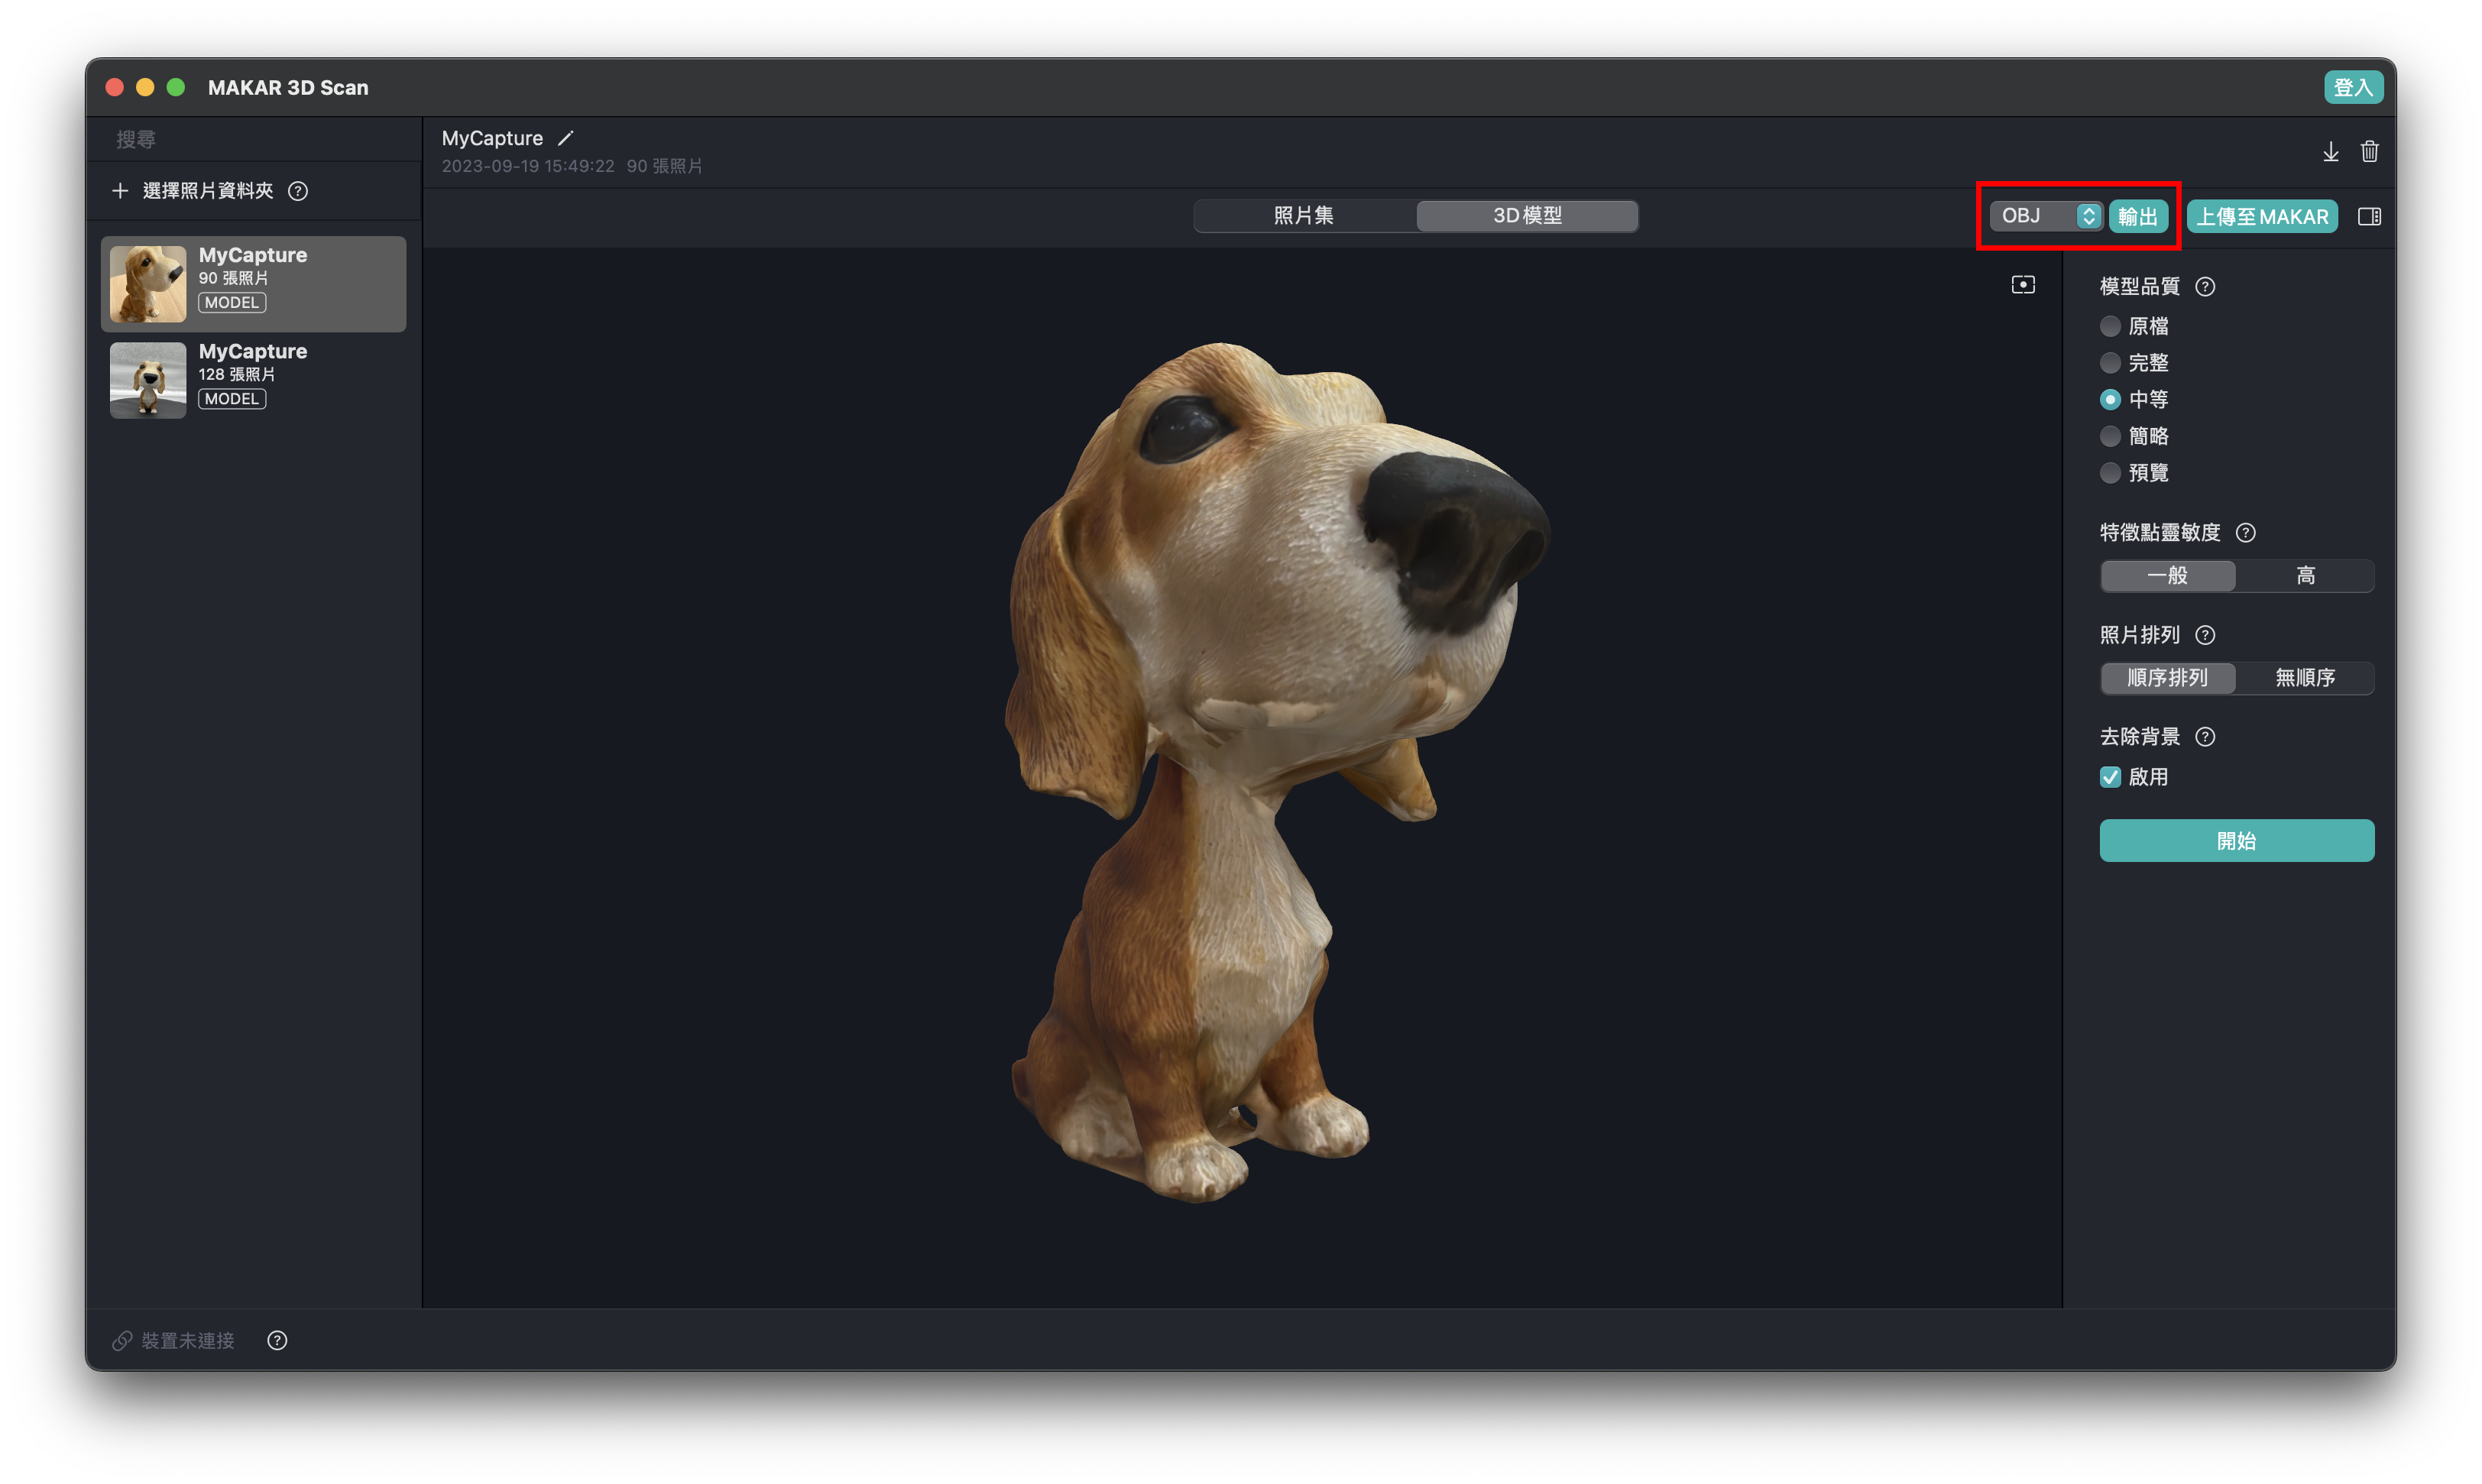
【 3D Model File Export in MAKAR 3D Scan 】
Whether using the iPhone/iPad version or the MAC version of MAKAR 3D Scan, upon completing a scan and model, MAKAR professional account users can export 3D files in USDZ, OBJ, GLB, and STL formats.
▼ iPhone/iPad MAKAR 3D Scan Export Location

▼ MAC MAKAR 3D Scan Export Location
Blender Conversion Tutorial
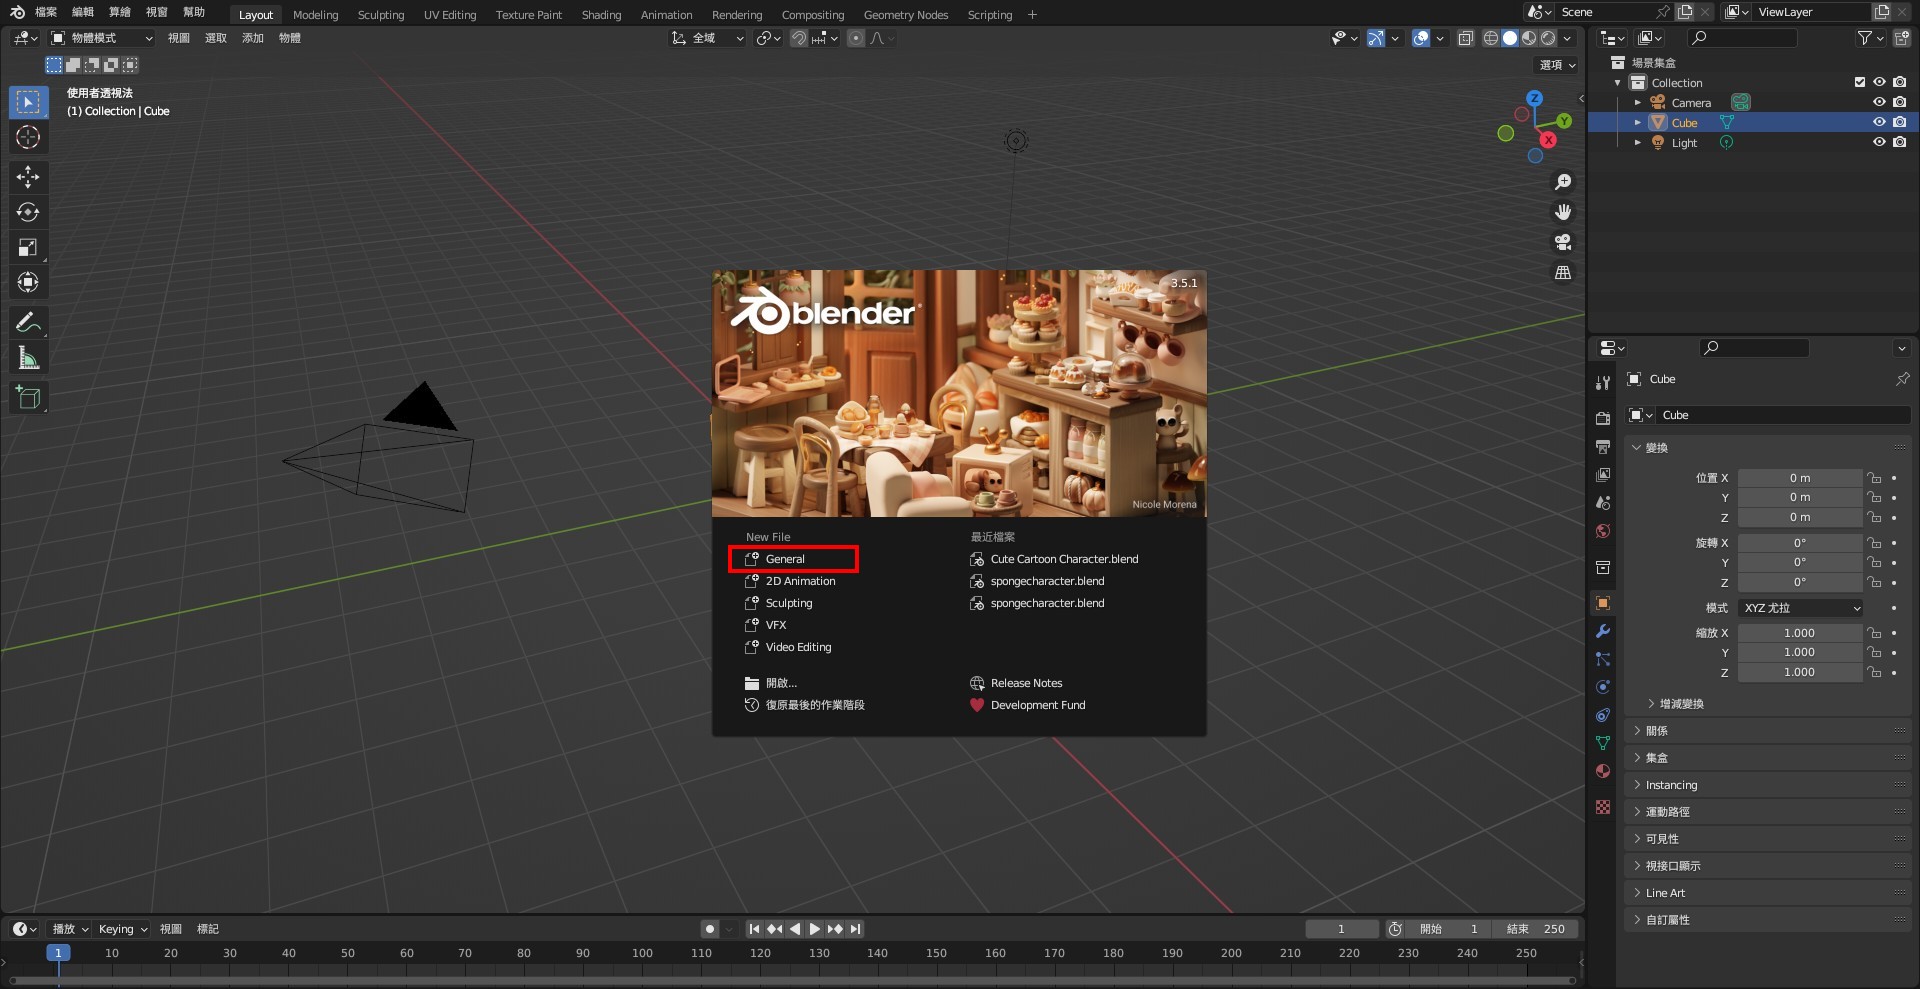
現今雖有許多線上 3D 轉檔的網站,方便了 XR 創作者使用,但線上轉檔往往有很多不確定性,造成模型毀損、動態失效等狀況時有所聞,若是想要洽當處理 3D 模型,使用 3D 軟體是最佳的選擇,而 Blender 是一個強大且免費的 3D 軟體,任何你在網路上得到的 3D 模型都可以用 Blender 檢查並轉檔,下列將以 Sketchfab 的 恐龍模型(created by pikabobalex) 為範例,敘述如何使用 Blender 軟體轉檔,讓 XR 創作更加輕鬆上手。
【 Converting GLB to FBX 】
▌ Check the File
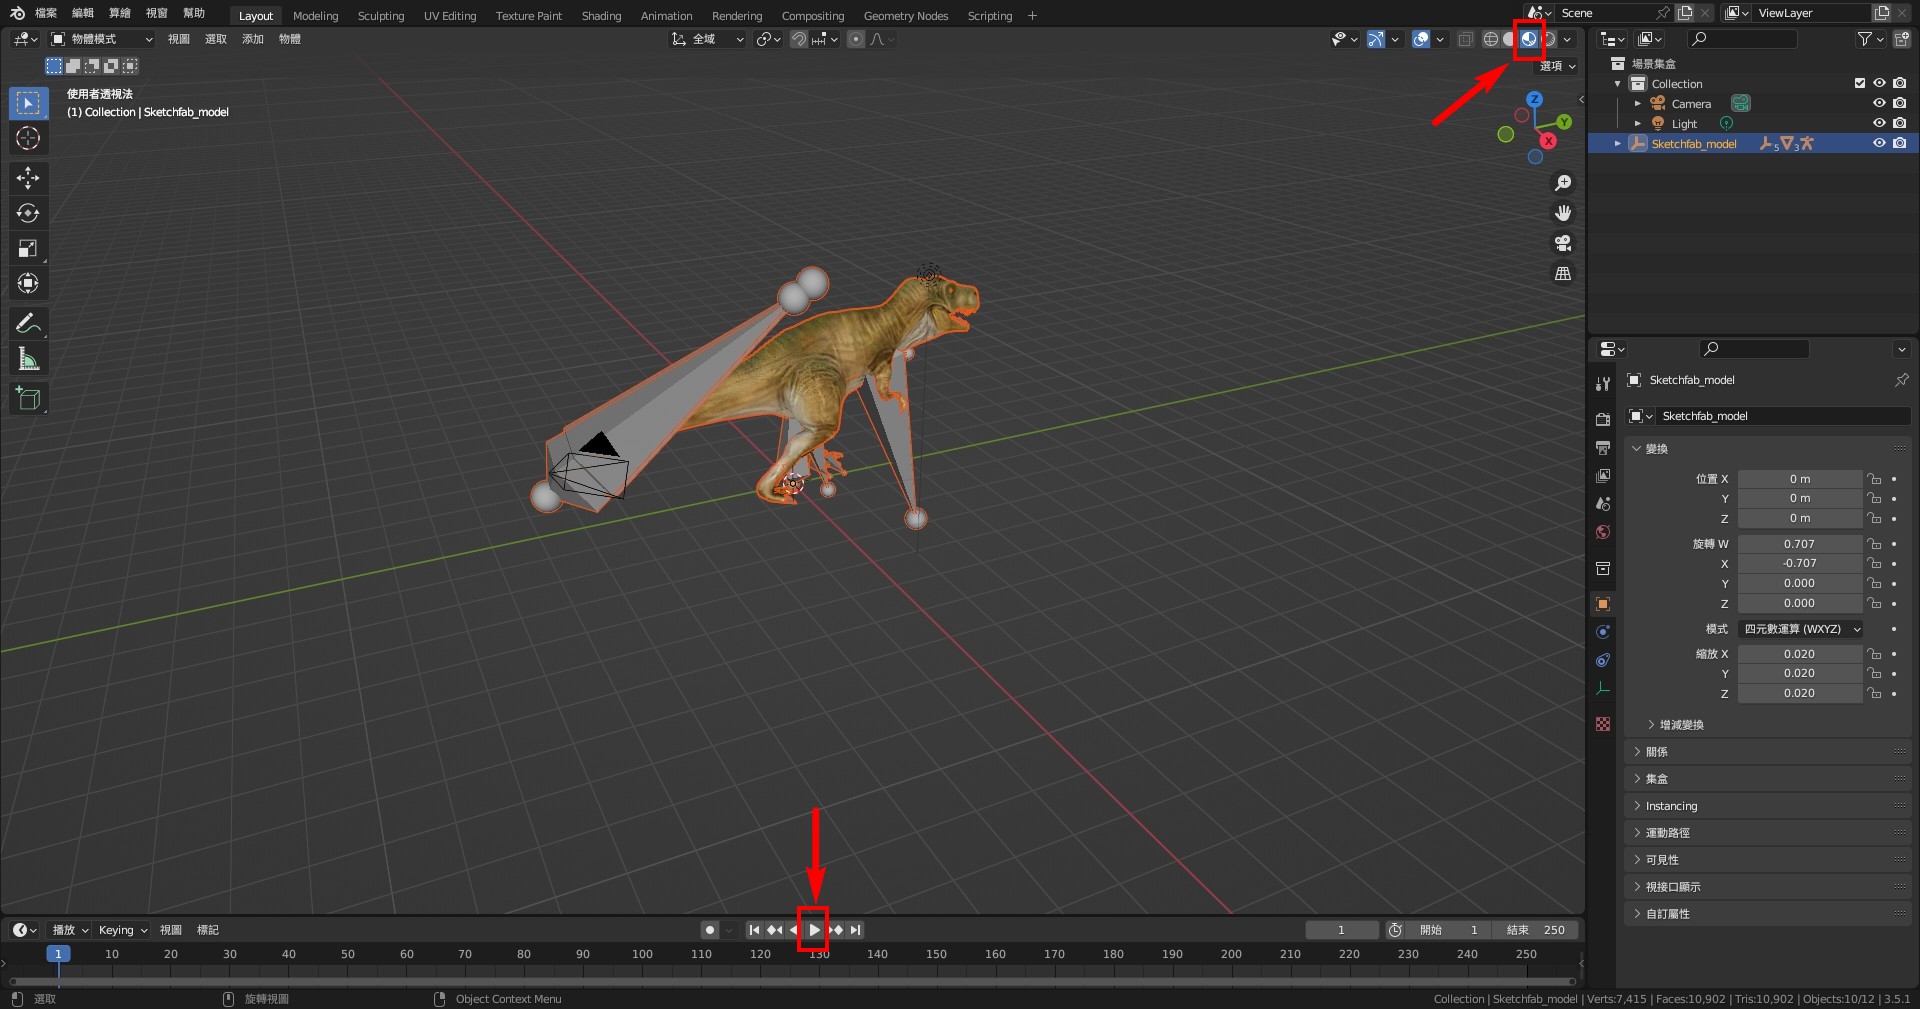
1. Open Blender and select "General."
2. Delete the default cube by selecting it and pressing delete.

3. Select "File" ➔ "Import" ➔ "glTF 2.0" to import the 3D model you want to convert.
※ Model names must be in English; Chinese filenames cannot be imported.
.jpg)
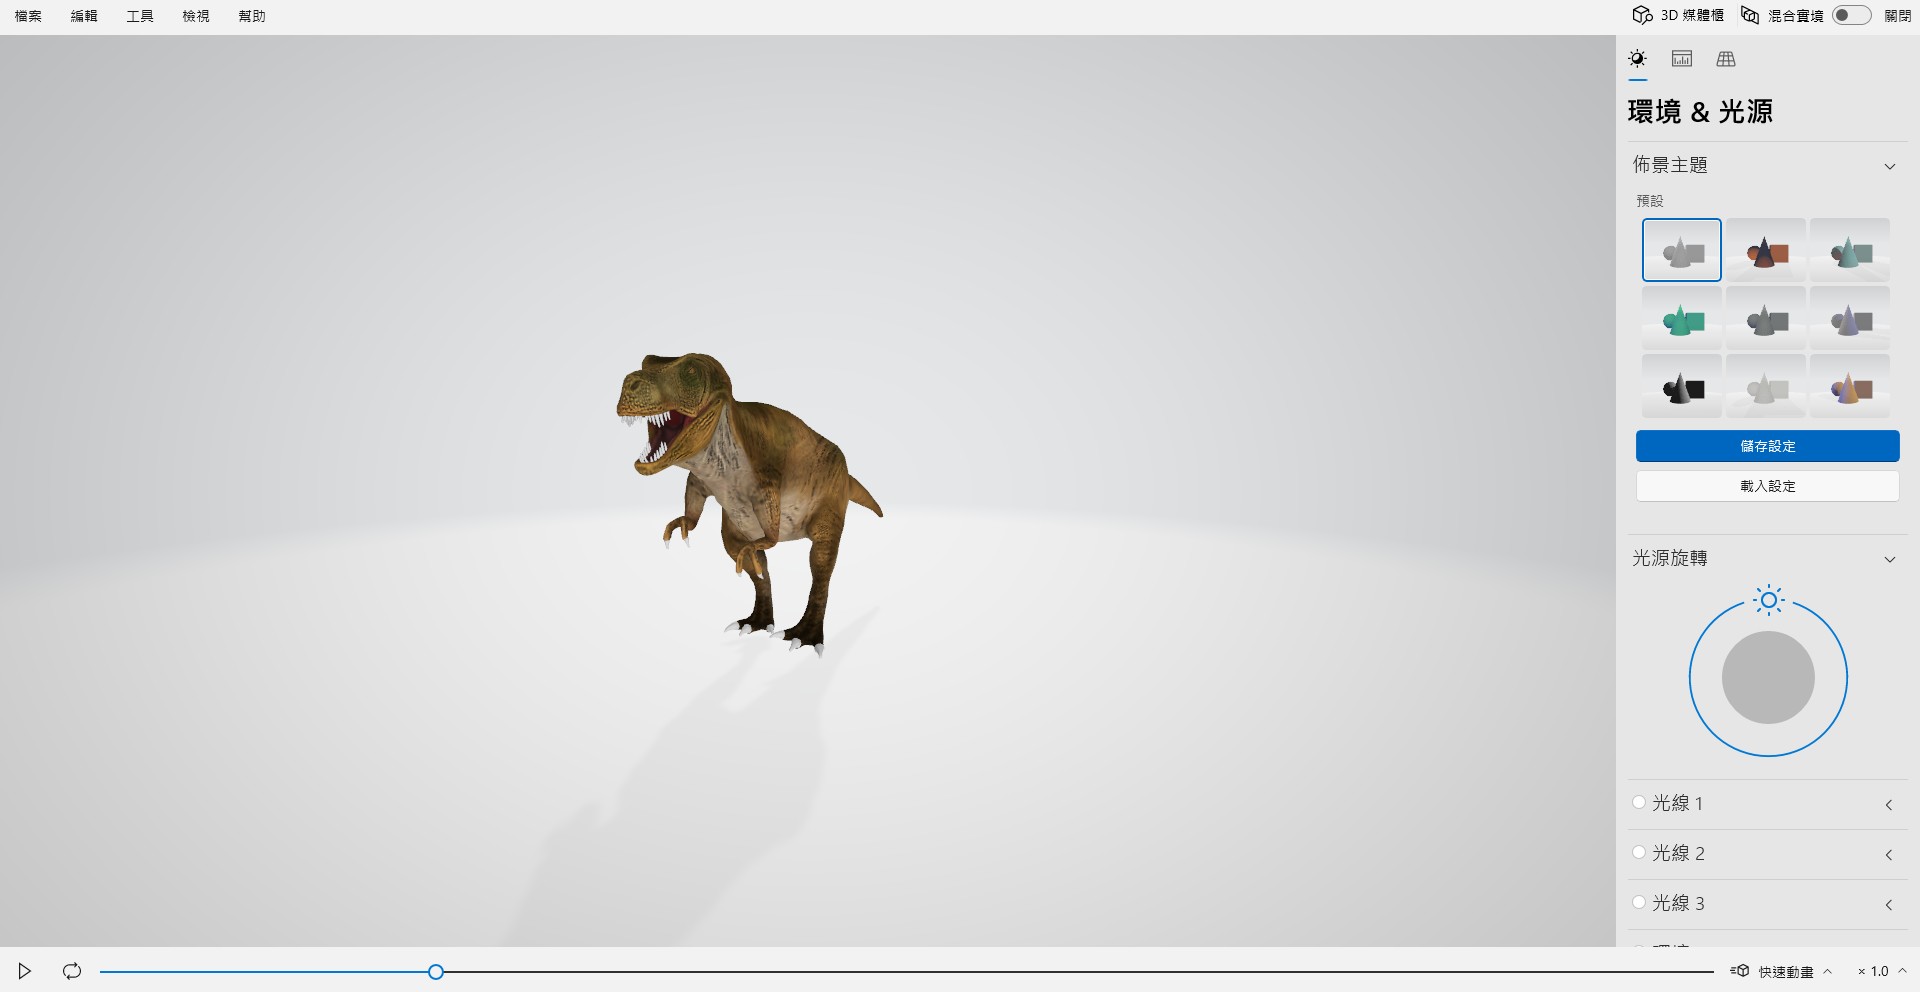
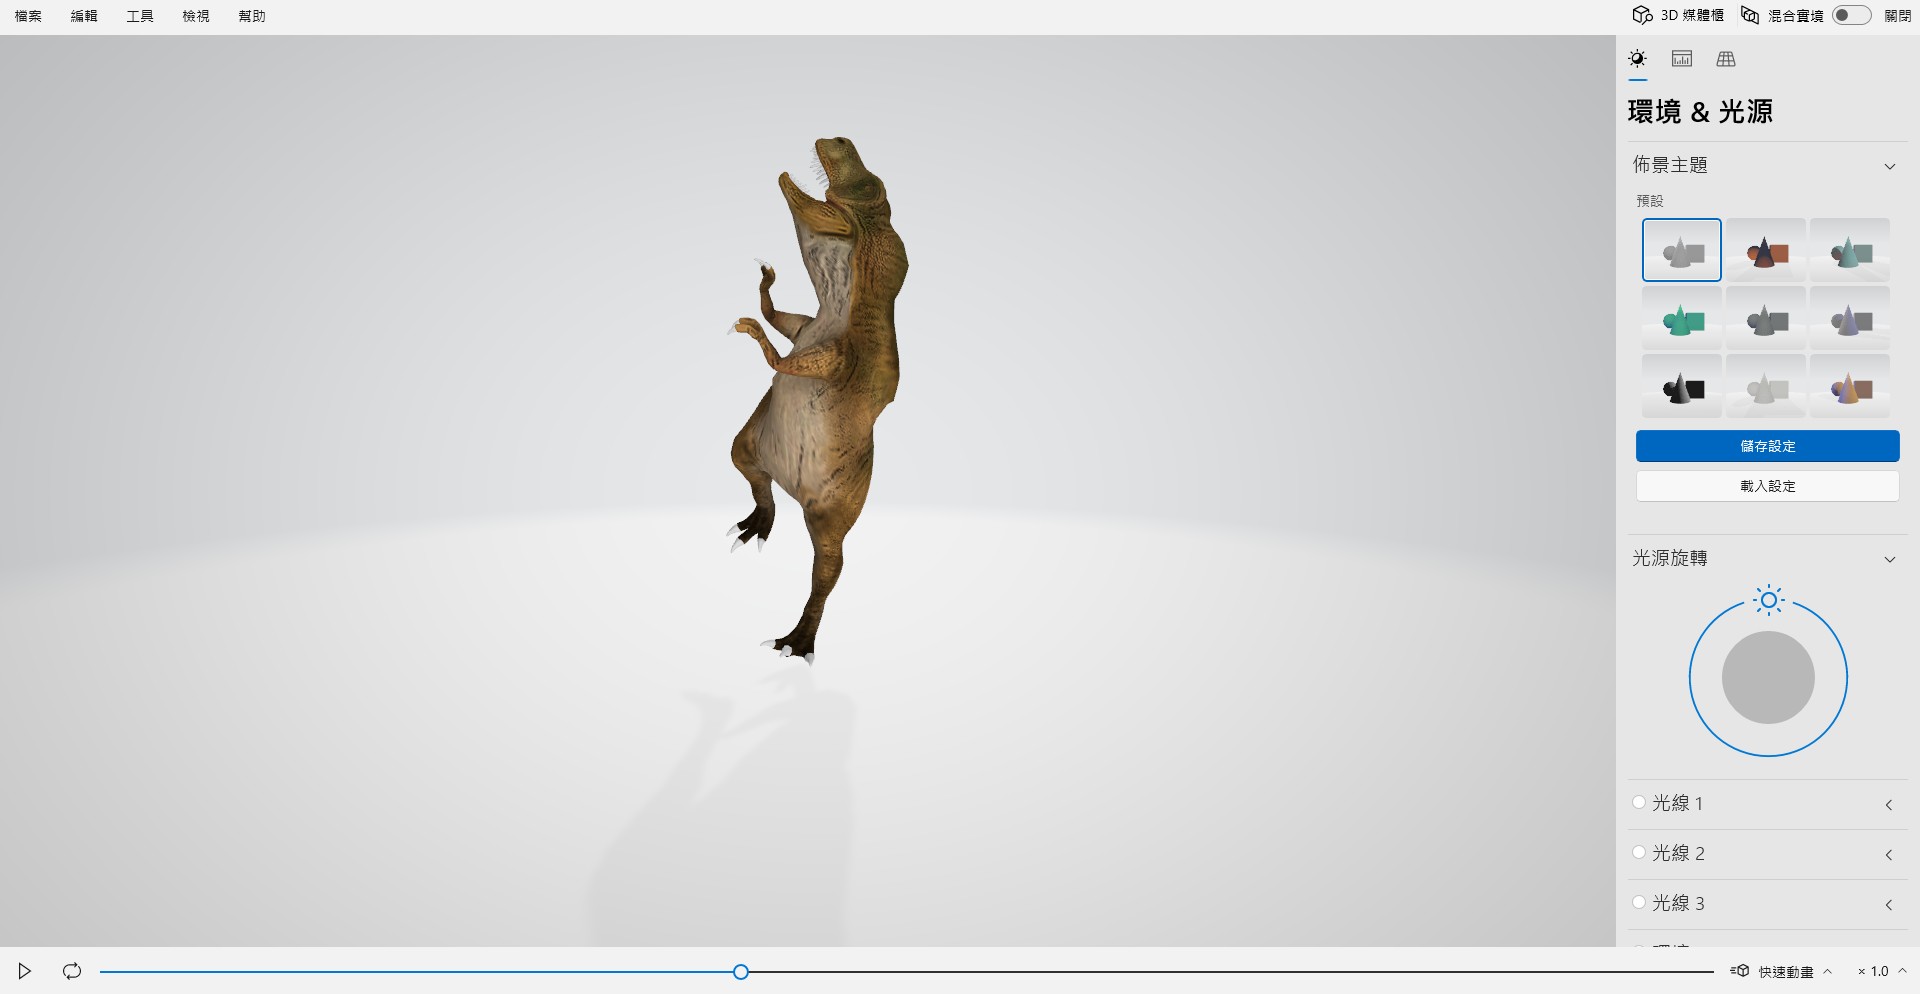
4. Click "Viewport Shading" to check if textures are applied correctly and play the animation to ensure it's working.
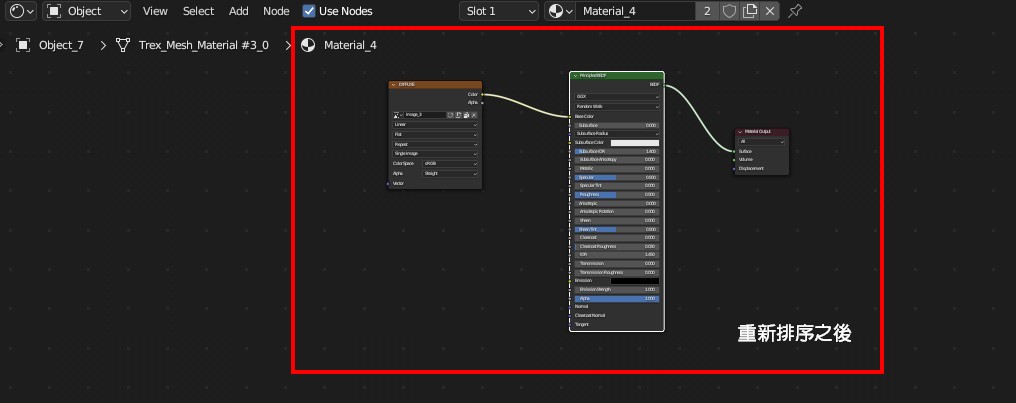
▌ Rearrange Nodes
Due to FBX handling fewer effects compared to GLB, converting directly may cause texture issues. Therefore, it's necessary to reduce the effect nodes before conversion.
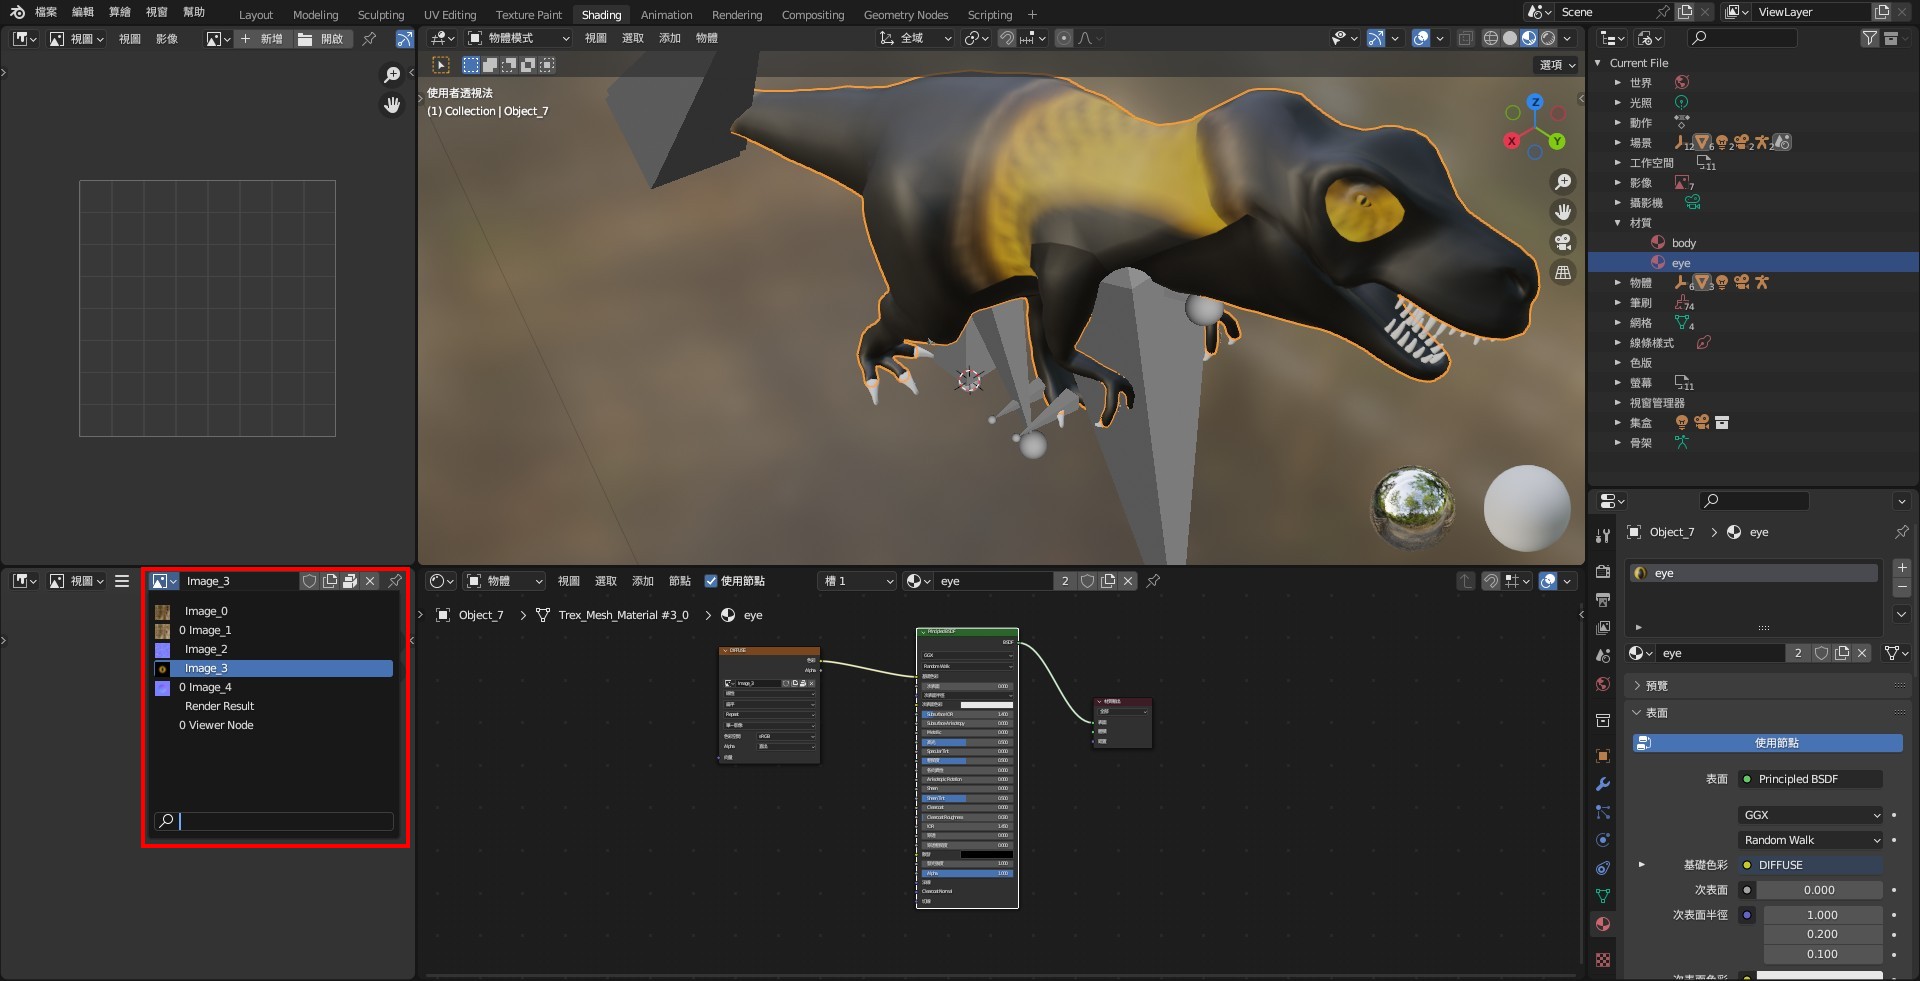
1. Switch to the "Shading" workspace, select the model, and check the nodes connected.
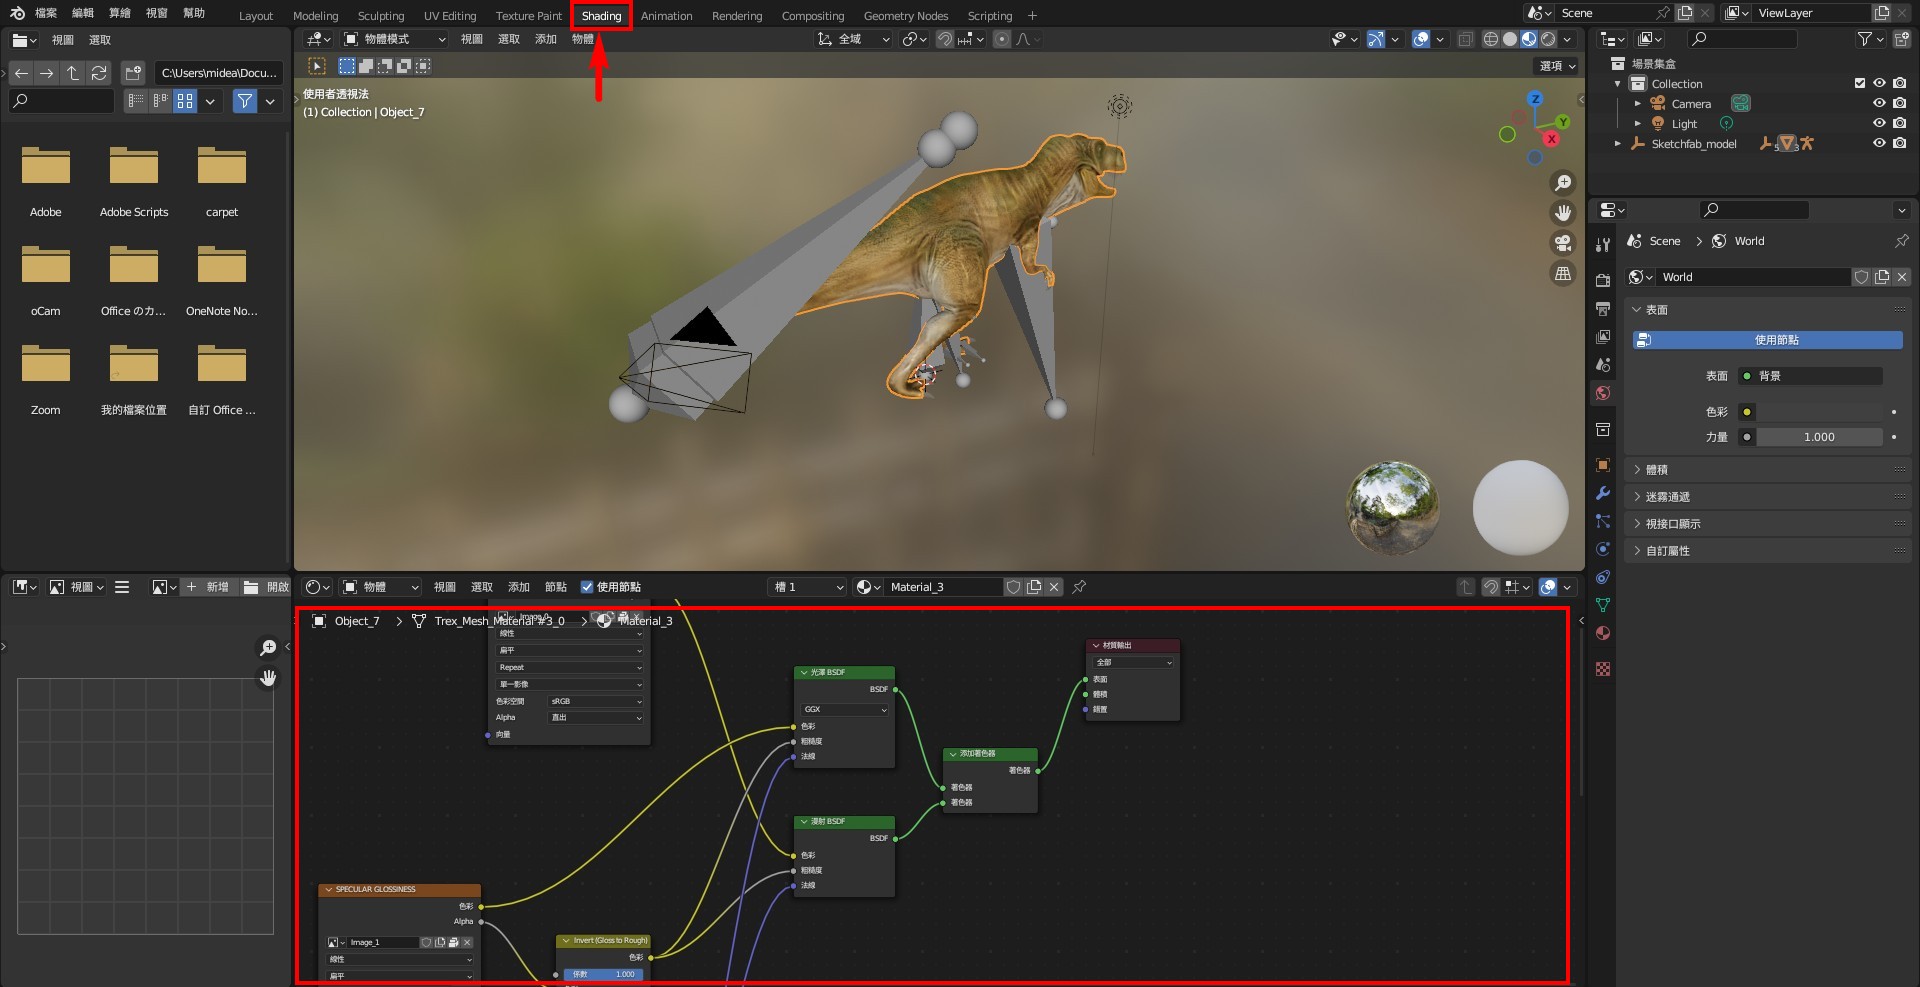
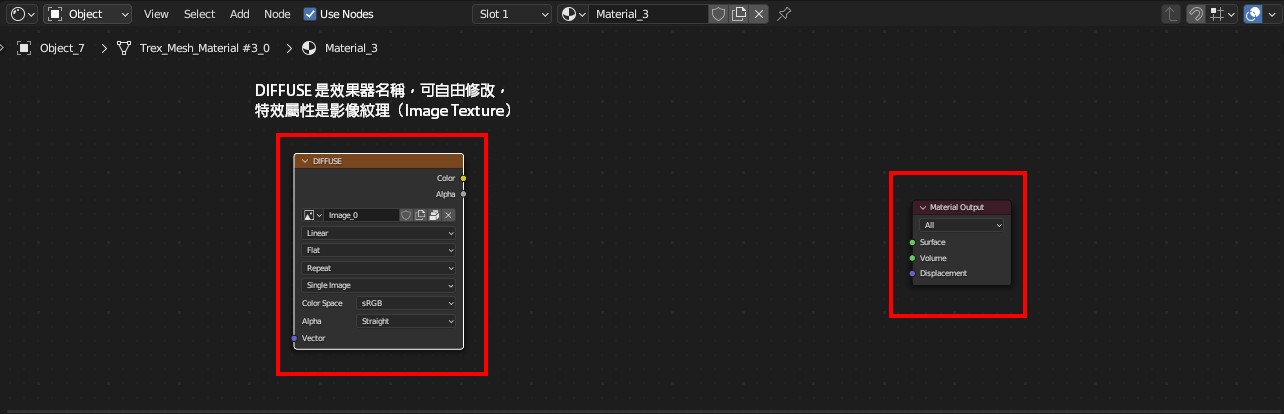
2. Retain the "Material Output" and "Image Texture" nodes, and delete the other effect nodes. If multiple "Image Texture" nodes are present, keep the main one and delete the others.
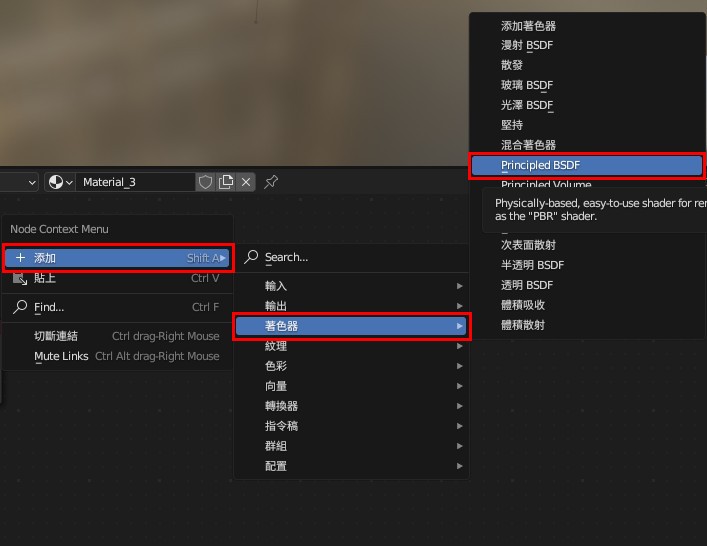
3. Right-click on the black area, select "Add/Add" ➔ "Shader/Shader" ➔ "Principled BSDF", and place it in the middle.
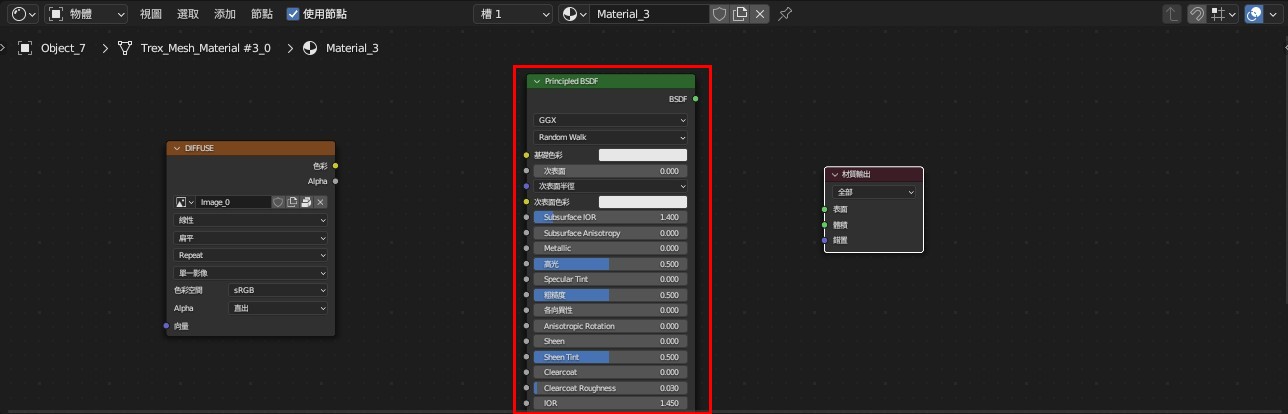
4. Connect "Image Texture/Image Texture" to "Base Color/Basic Color", and "BSDF" to "Surface/Surface" of "Material/Material Output".
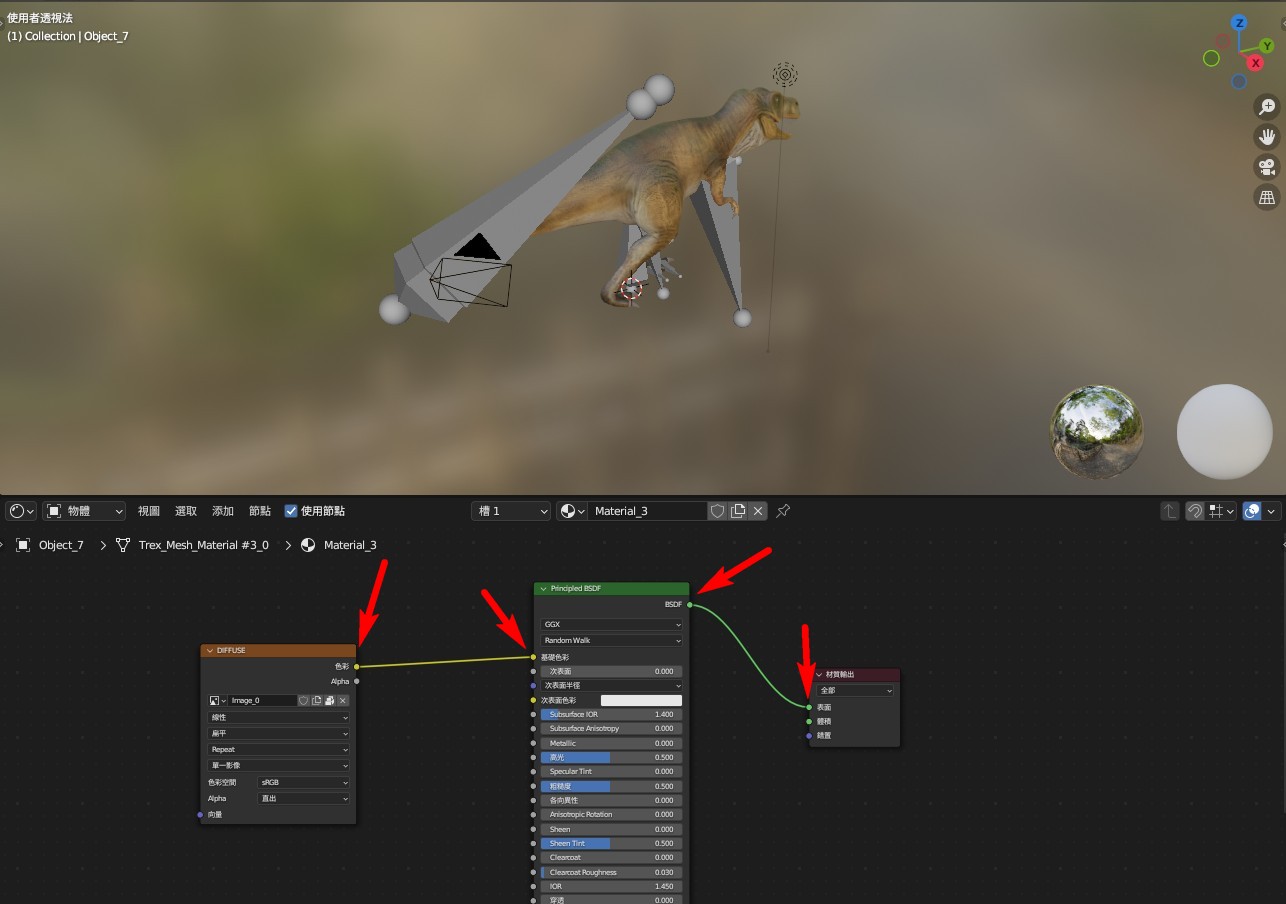
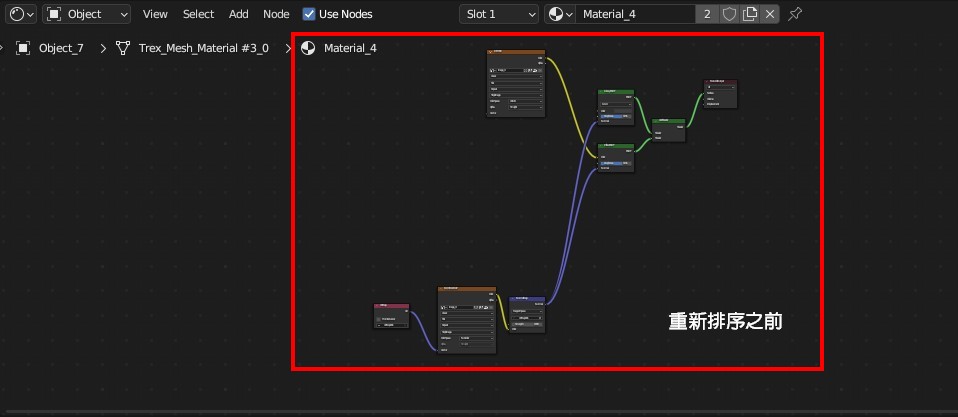
5. The block within the red frame contains various material balls in the model, which will switch to different sequences. Perform the above reordering action on each valid material ball.
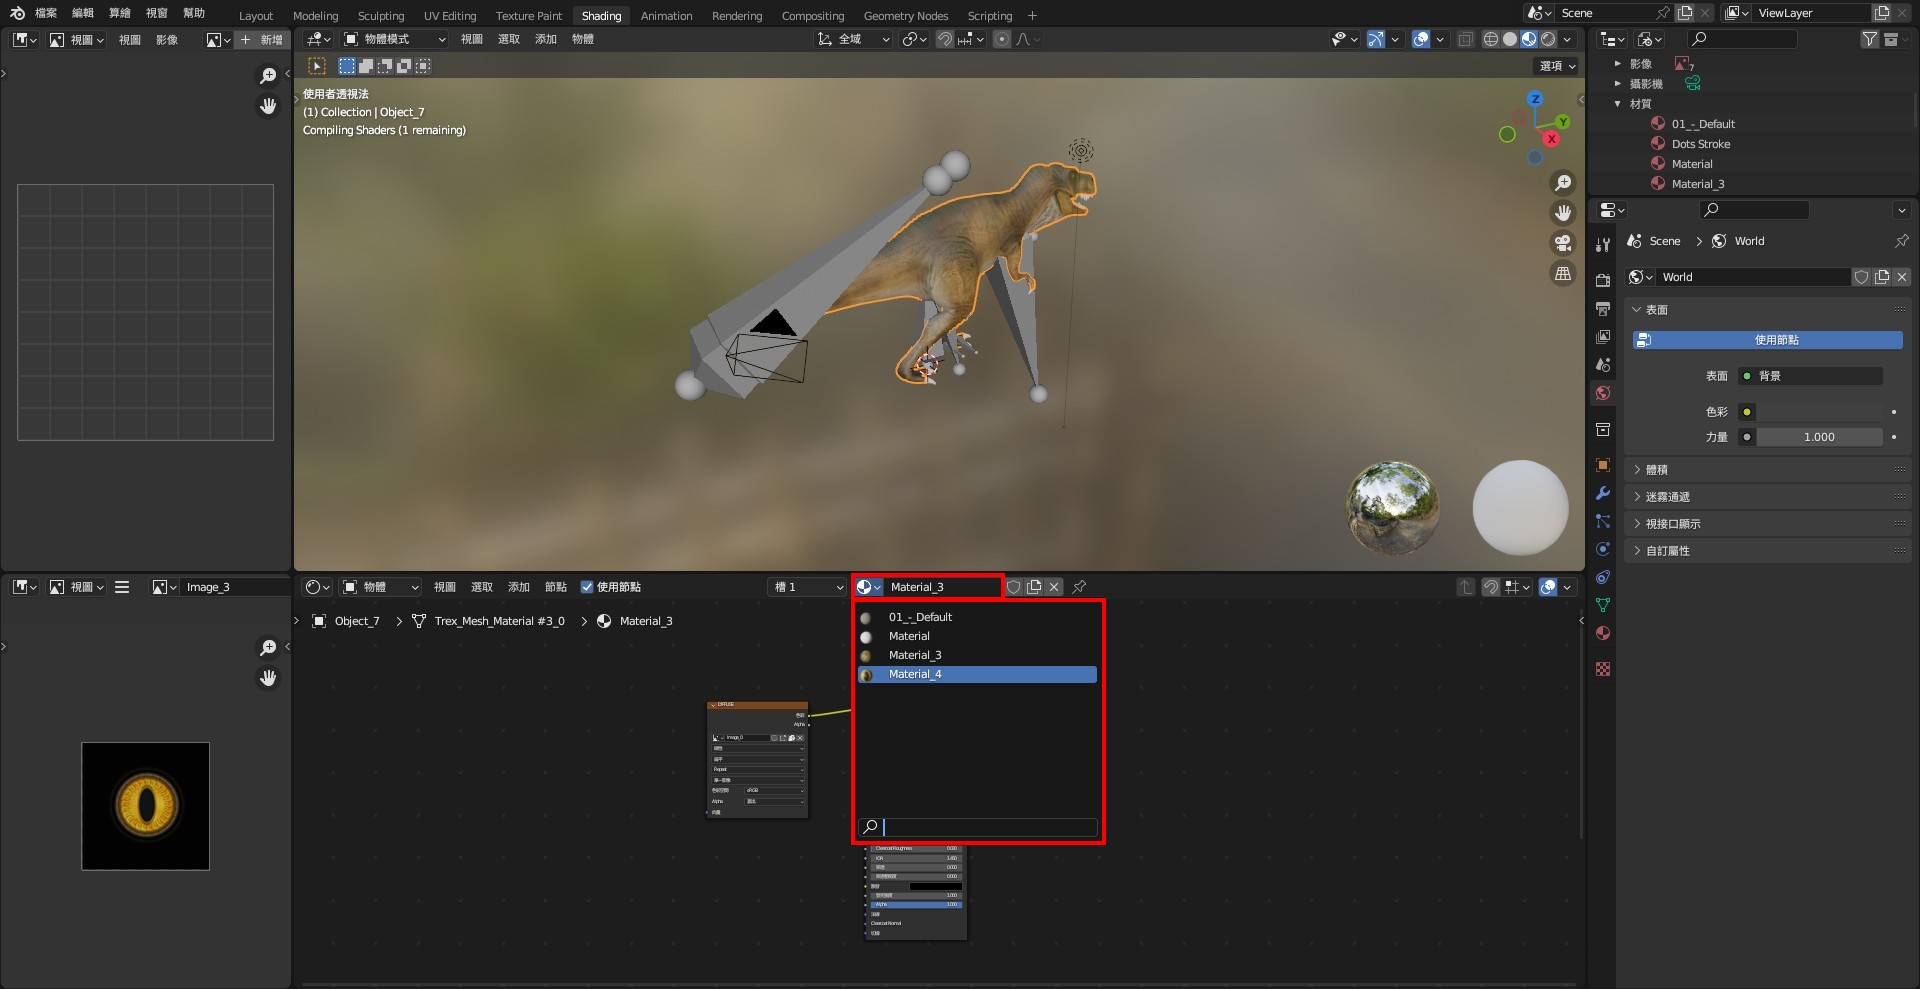
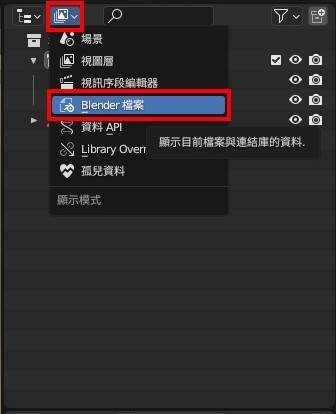
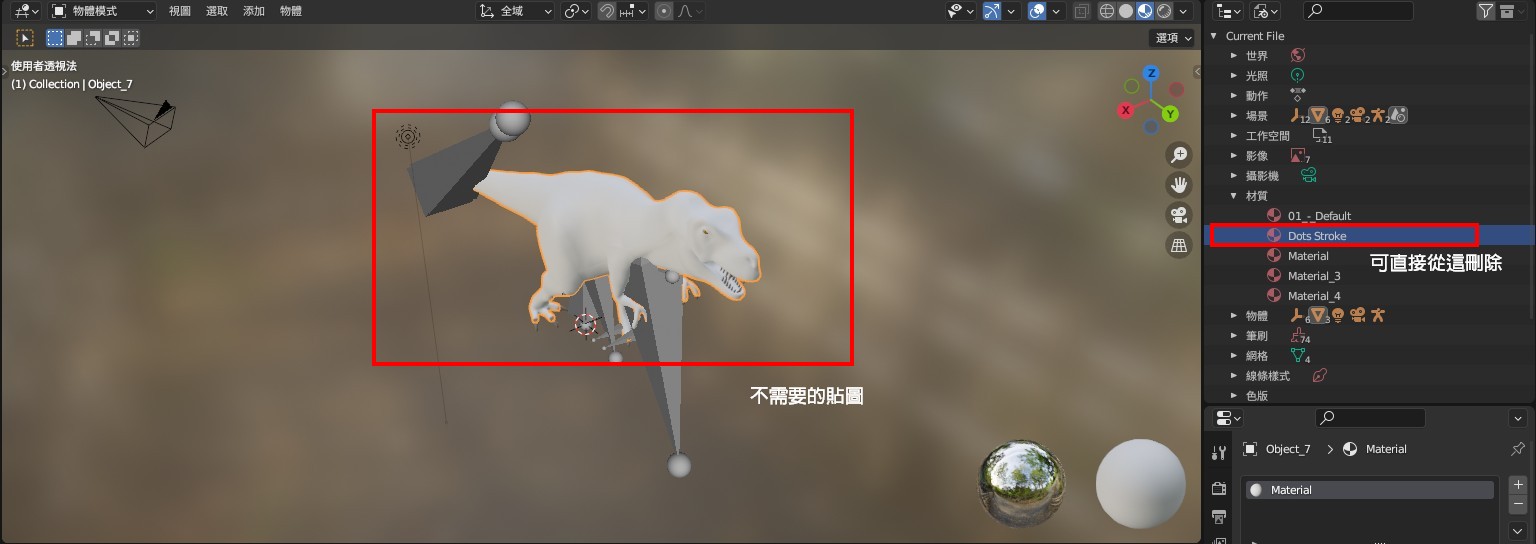
6. If the texture displayed by the material ball is unnecessary, it should be deleted for organization. Click the red frame icon in the upper right corner, then select "Blender File" ➔ "Materials" to find all the material balls in the model. Right-click to delete the unnecessary material balls.

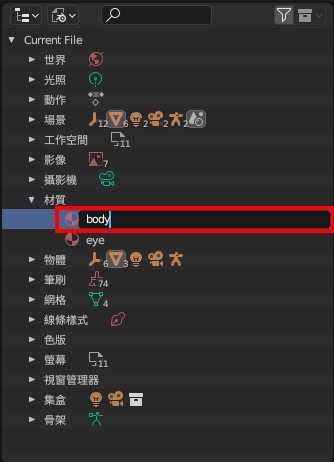
7. You can also rename the material balls here for better organization.
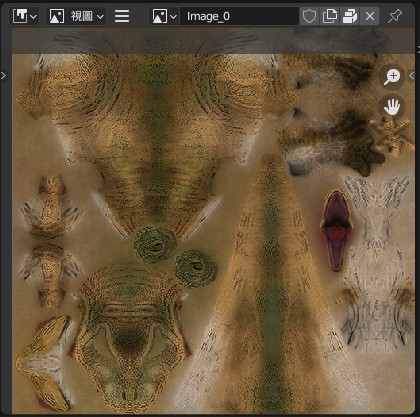
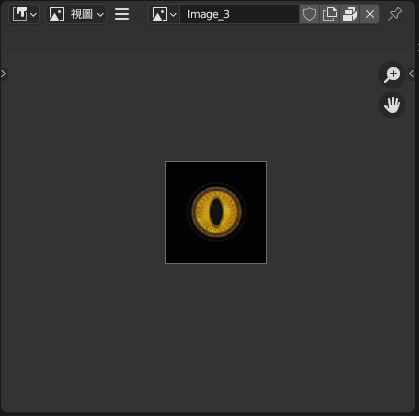
▌ Packing Texture Images
When downloading 3D models from external sources, there is a high possibility that textures might be missing. Therefore, it is recommended to "pack texture images" when handling 3D models to ensure that the models display the correct textures. Here’s how to pack the texture images for your models.
1. The area within the red box indicates the texture images. First, determine if the images are suitable for packing. In this example, you should save the images for the dinosaur's skin and eyes.
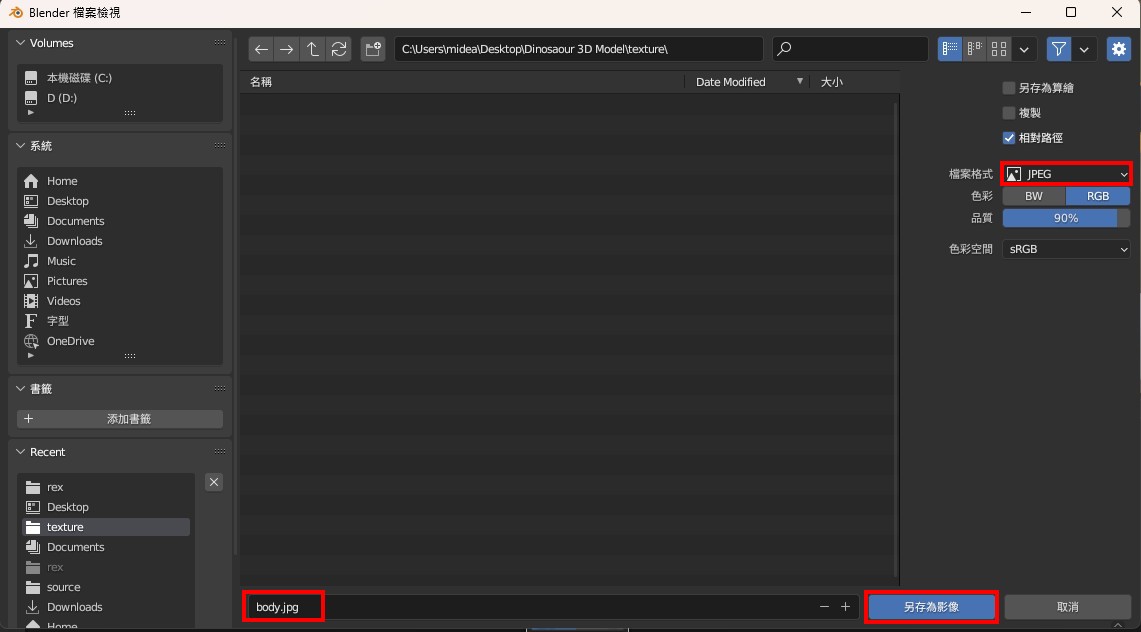
2. Click on the icon within the red box, then select "Image" ➔ "Save As".
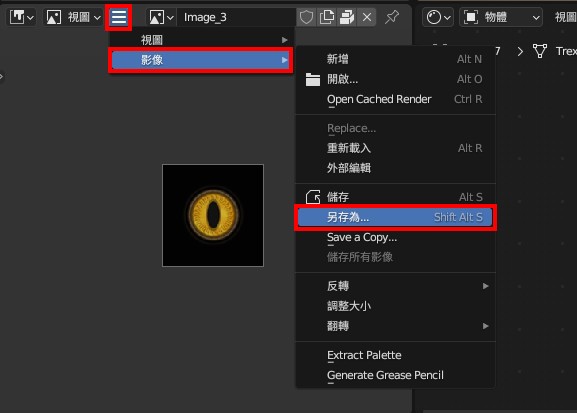
3. Choose the JPEG format, rename the images appropriately, and save them. Save each suitable image as described above.
※ Please use English filenames for naming.
▌ Exporting FBX Files
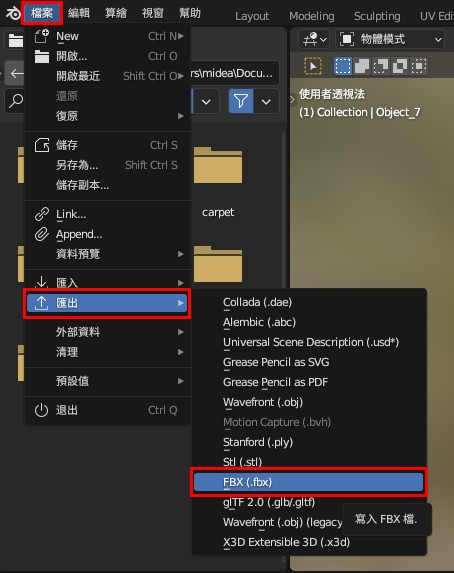
1. Once the above steps are completed, you can export the file. Click "File" ➔ "Export" ➔ "FBX".
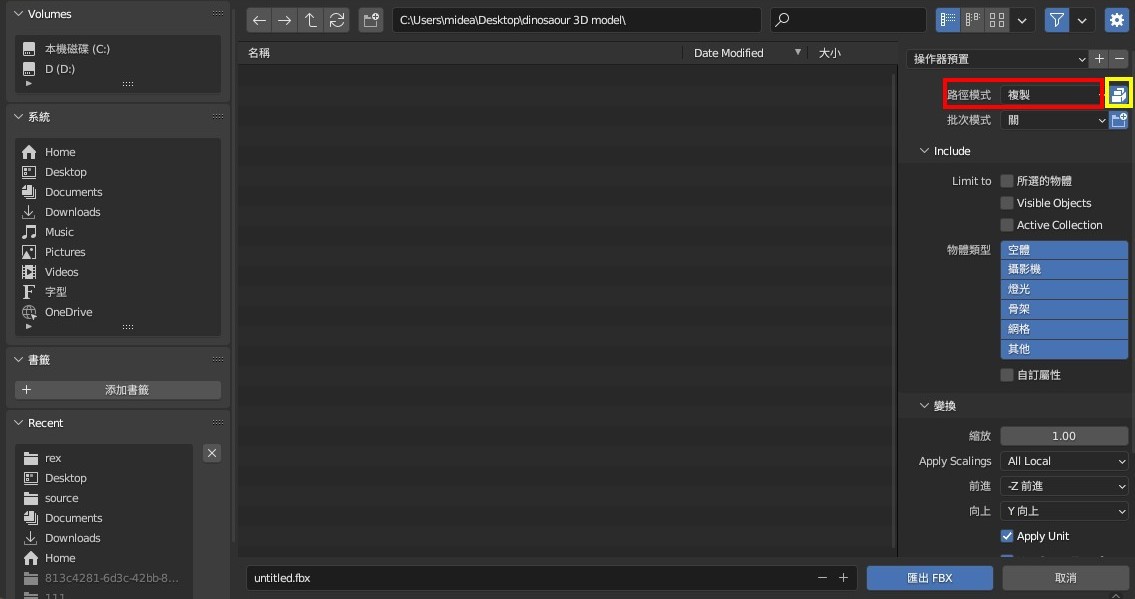
2. In the Path Mode, select "Copy" and open the adjacent box to ensure all data is properly packed.
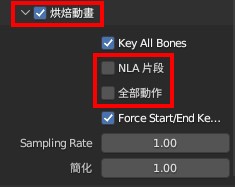
3. If the object has animations, expand the "Bake Animation" section, then uncheck "NLA Strips" and "All Actions".
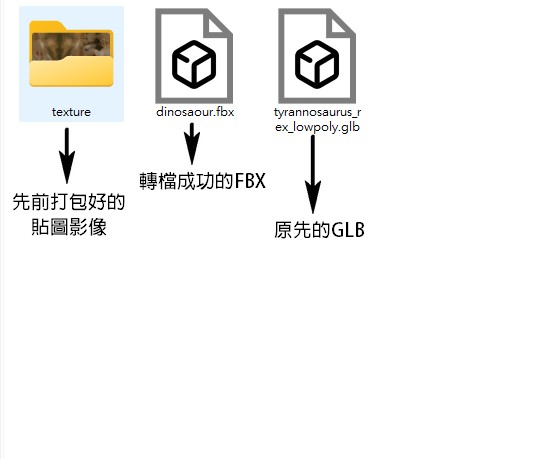
4. Save the file in the main folder (which contains the packed texture images), and finally, click "Export FBX".

5. Successfully convert GLB to FBX!
【 Converting FBX to GLB 】
1. Click on "Viewport Shading" to check if the texture is displayed correctly; if the texture is visible, it is working correctly. Click the play button below to check if the animation is functioning properly.

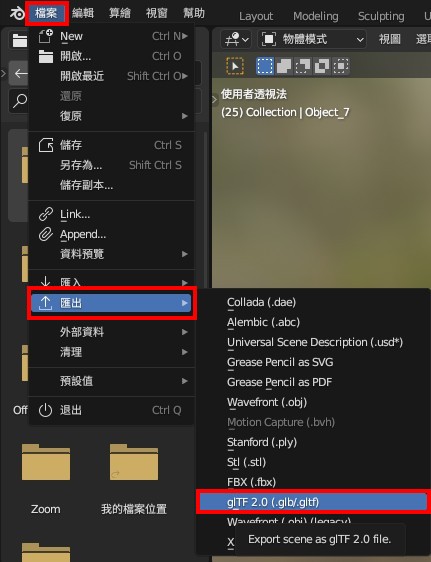
2. Click "File" → "Export" → "glTF2.0".
3. Successfully convert FBX to GLB!