AR Envelope for Beginner –New Year Rabbit
|
Abstract: Introduction: This project is a response to the Eastern New Year culture, applying AR technology to red envelopes, so that they not only have traditional cultural significance but also incorporate modern technology. |
1. Image target
The image target for this project was created using Midjourney, an AI tool that generates images from text. This tutorial also introduces other similar tools and prompts currently available, as well as recent examples of people using ChatGPT to generate more complete prompts, and then incorporating Midjourney to create even better images.
The image target gets a five-star recognition in MAKAR editor.
In order to add animated effects to the rabbit in the target, it was necessary to remove the rabbit from the original image. Here, we used an online and free AI tool called Magic Eraser to quickly erase unwanted objects or parts from the image. This tool automatically recognizes the background using AI and seamlessly fills in the removed parts, making it easy to remove unwanted objects from images.
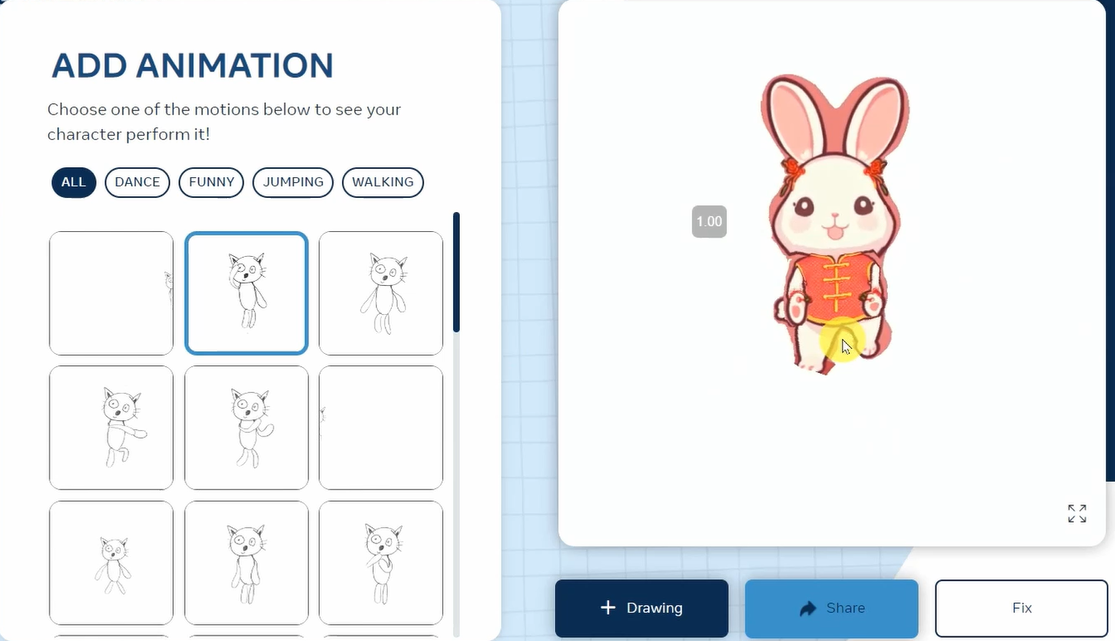
This is a free AI tool that can animate 2D images. By uploading a character image with similar human-like limbs to the website and going through simple processing, the website will bind a skeleton to the character. To increase the liveliness and interactivity of the project, Midjourney was used to generate a rabbit for 2D interaction.
By choosing the appropriate action, you can download the video. The video will have a white background, and you can use the "remove background" function in the MAKAR editor to make the background transparent after importing it.
3. MAKAR Editor
New project 🡪 AR 🡪 AR Target
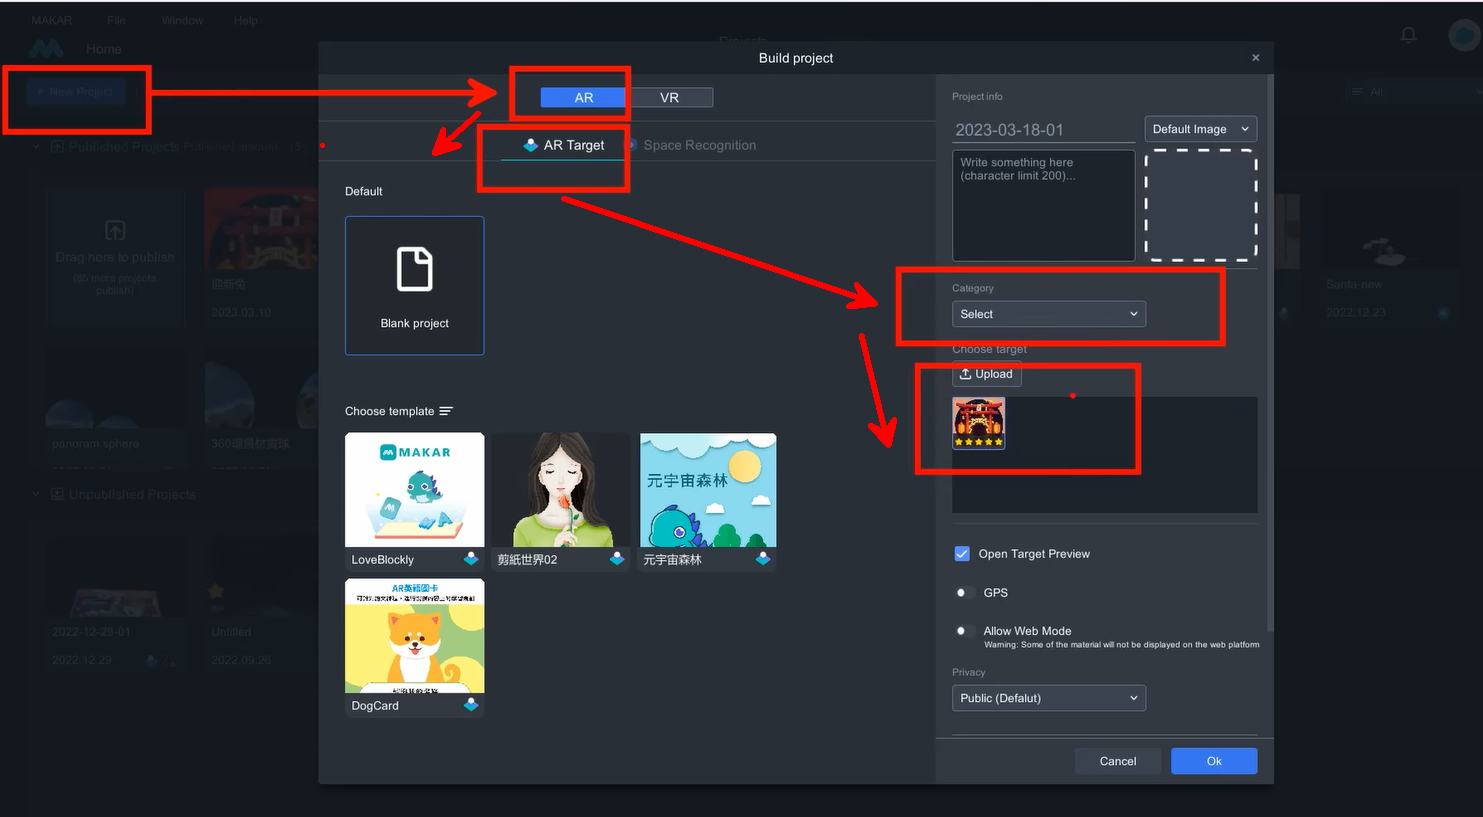
After creating the project, you can import materials, including images, videos, 3D models, and audio, to the resource vault.

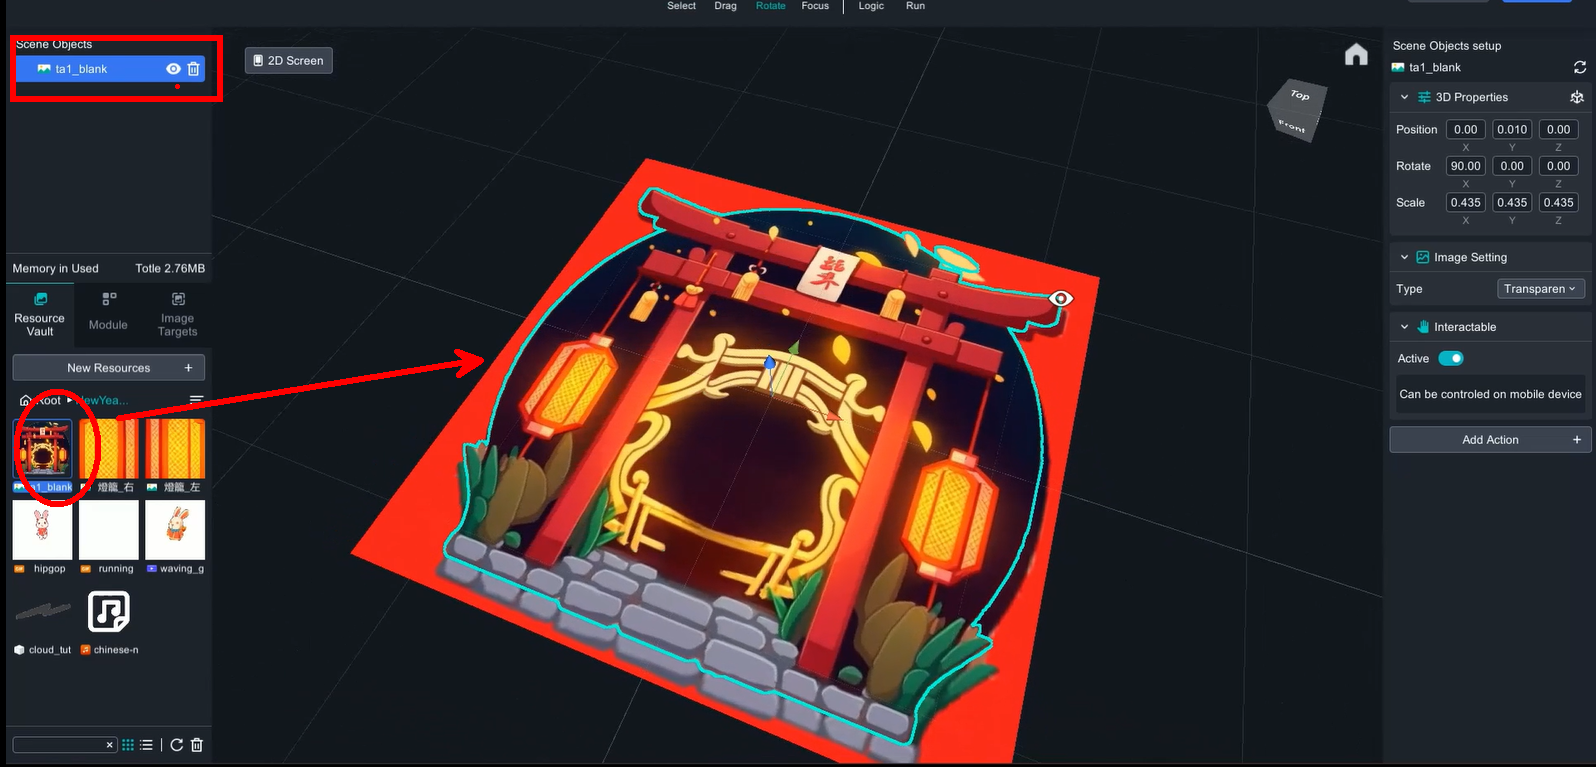
Drag ta1_blank on top of the target to cover it.
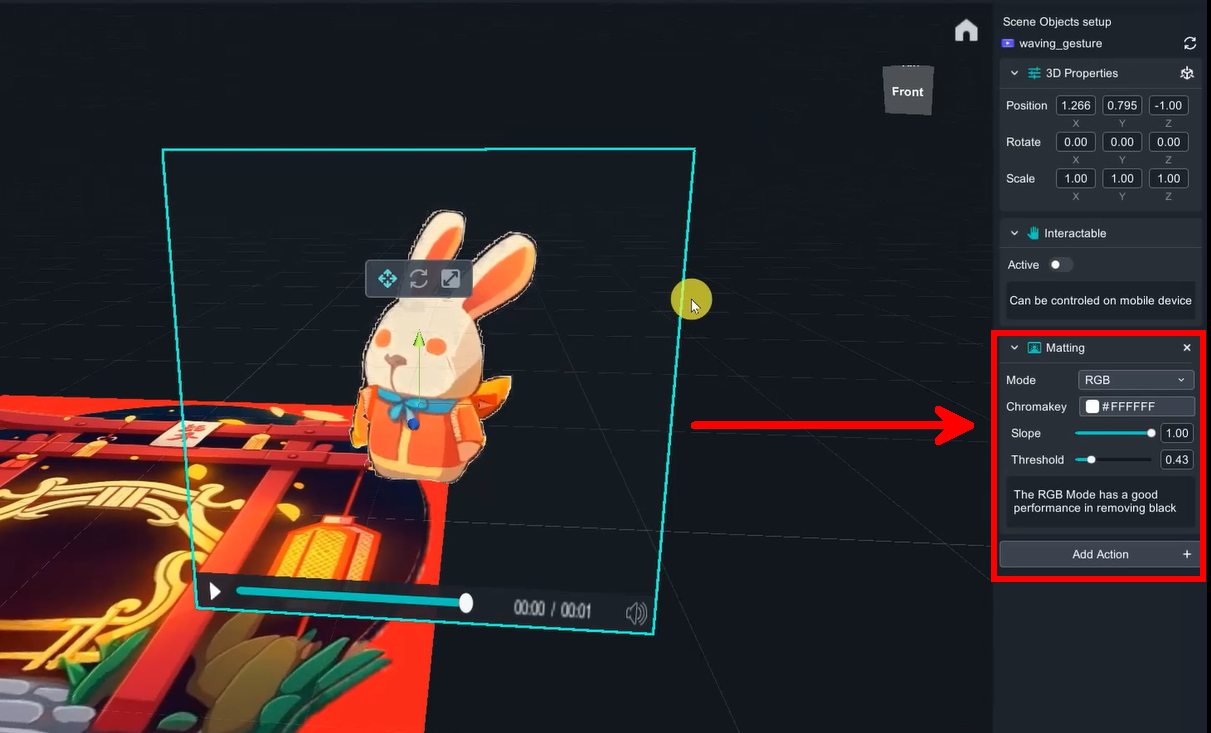
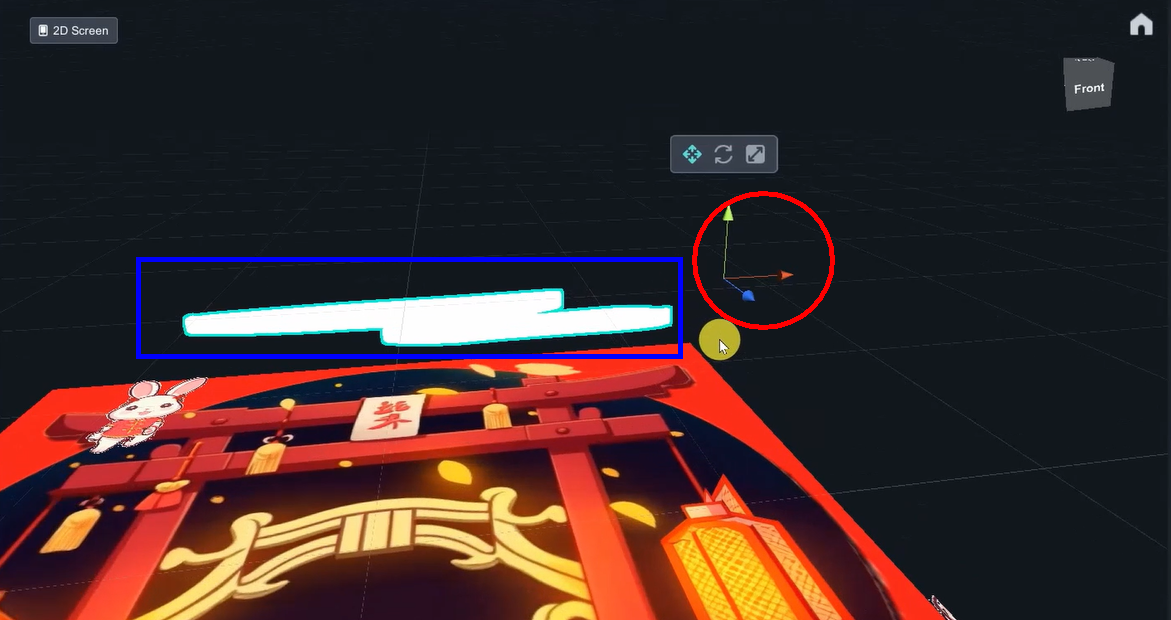
Drag waving_guesture video in the scene, and use matting to remove background.
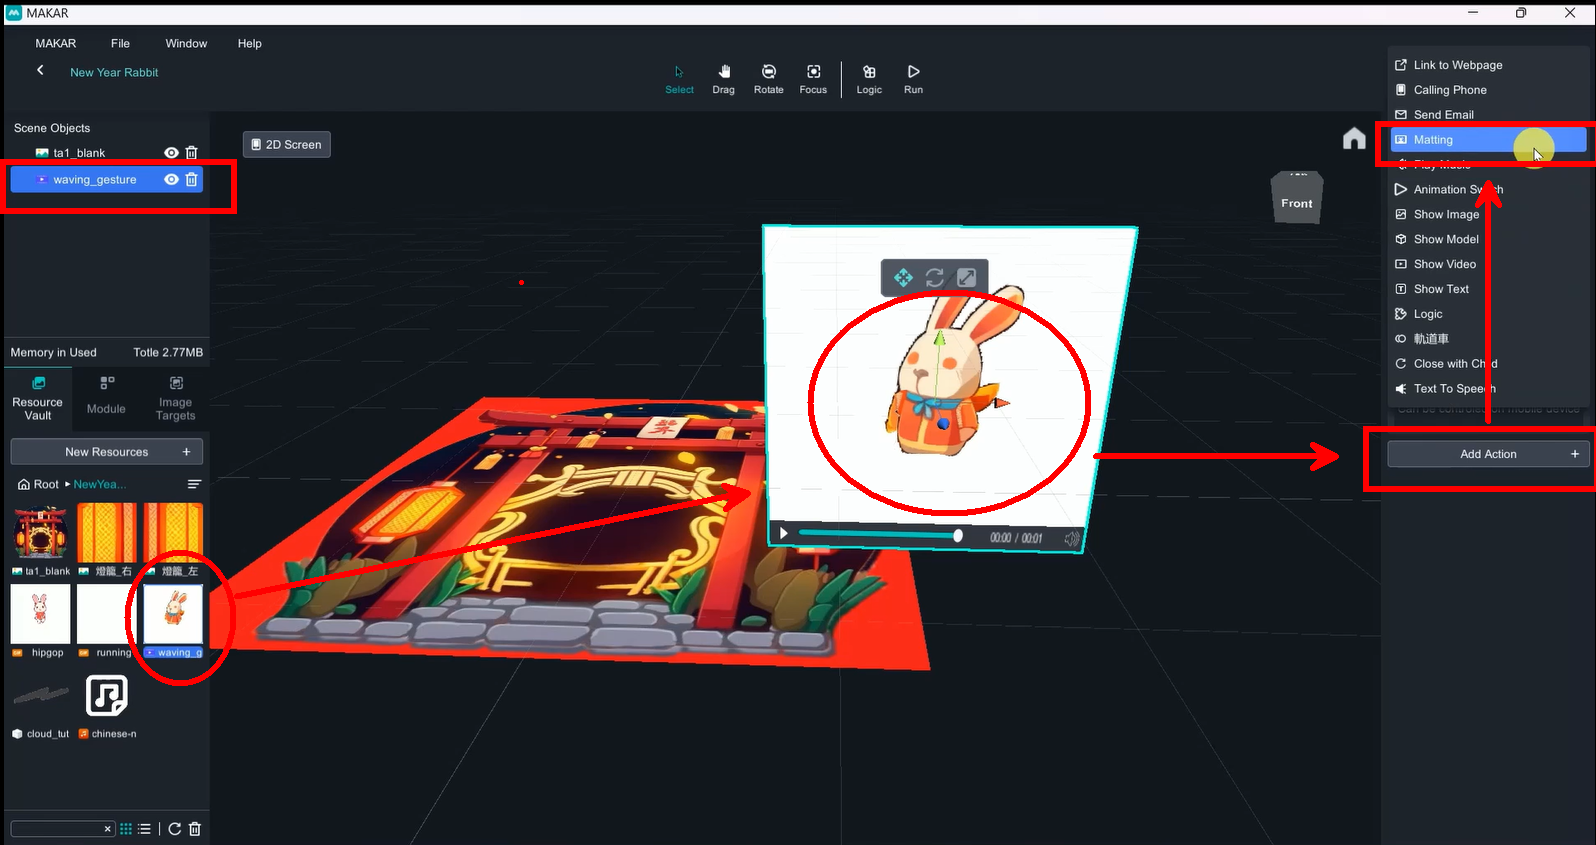
Matting value(Mode: RGB, Slope:1.00, threshold:0.43)
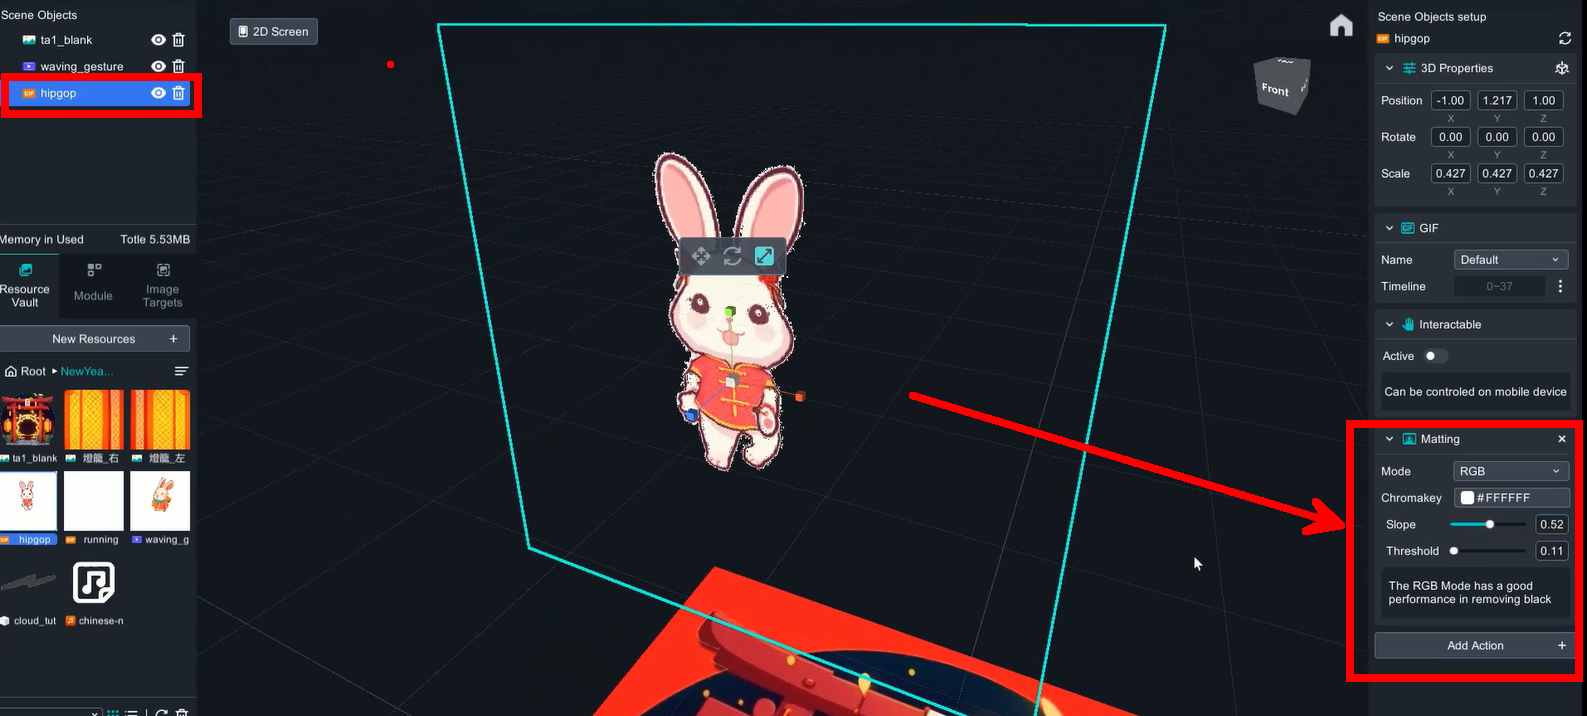
Rabbit (Hipgop) matting value(Mode: RGB, Slope:0.52, threshold:0.11)
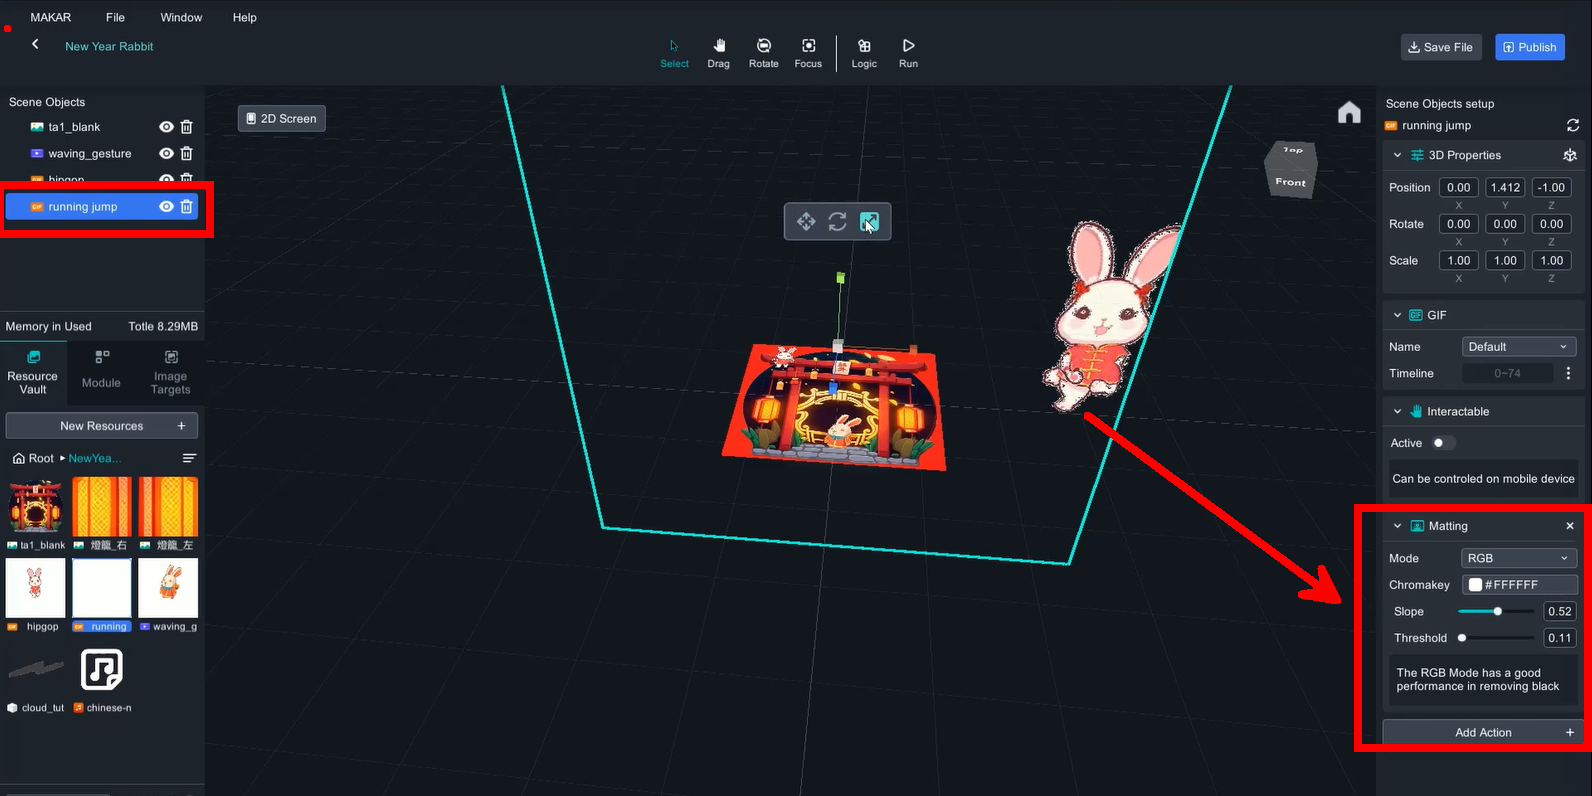
Rabbit(running jump) matting value(Mode: RGB, Slope:0.52, threshold:0.11)
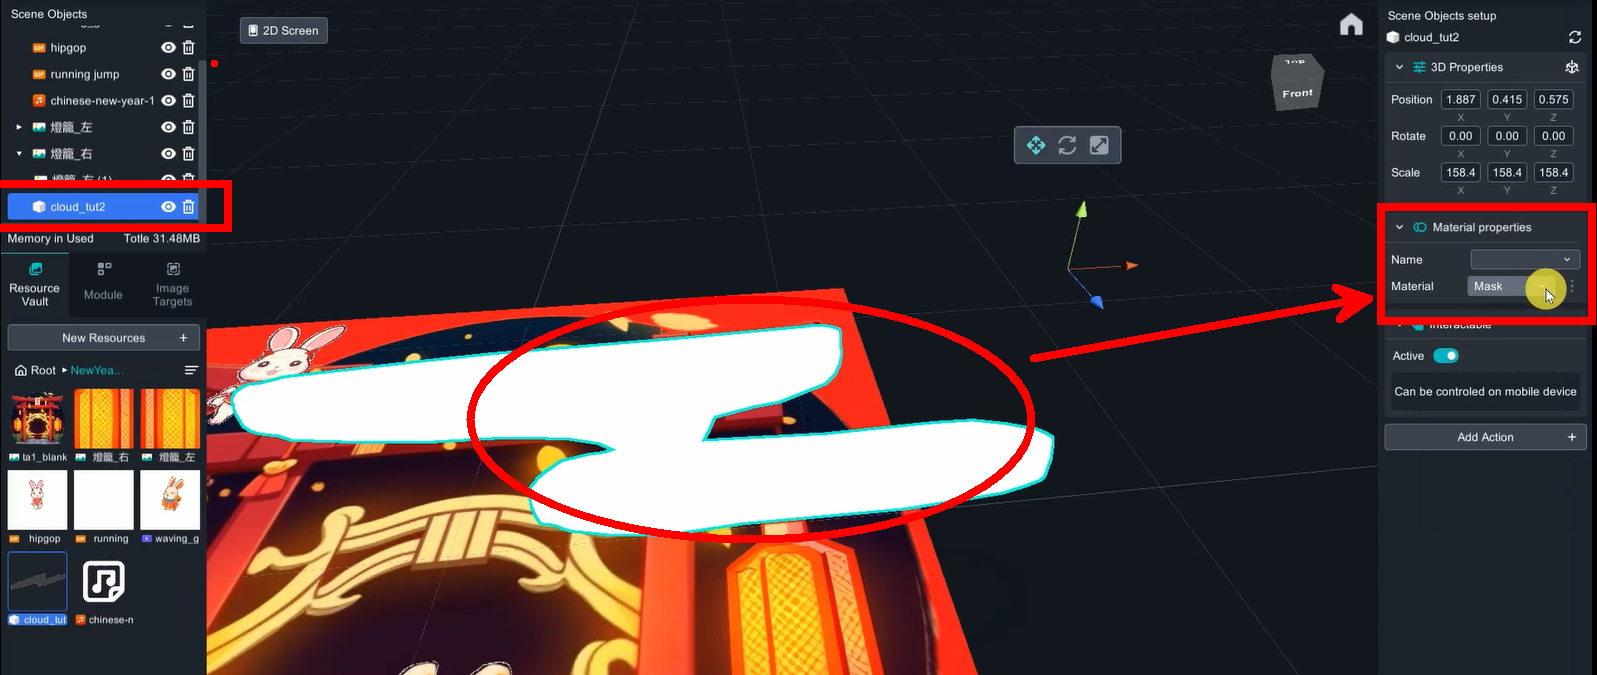
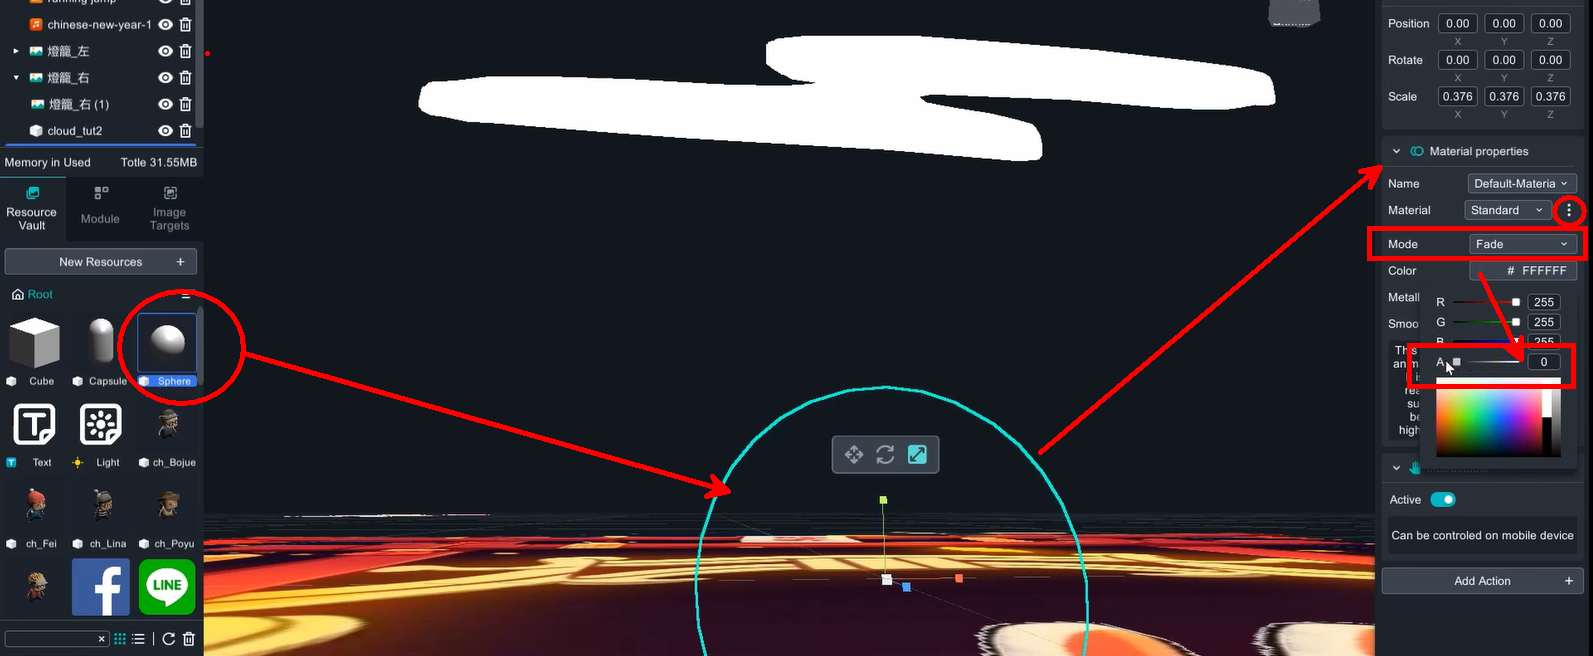
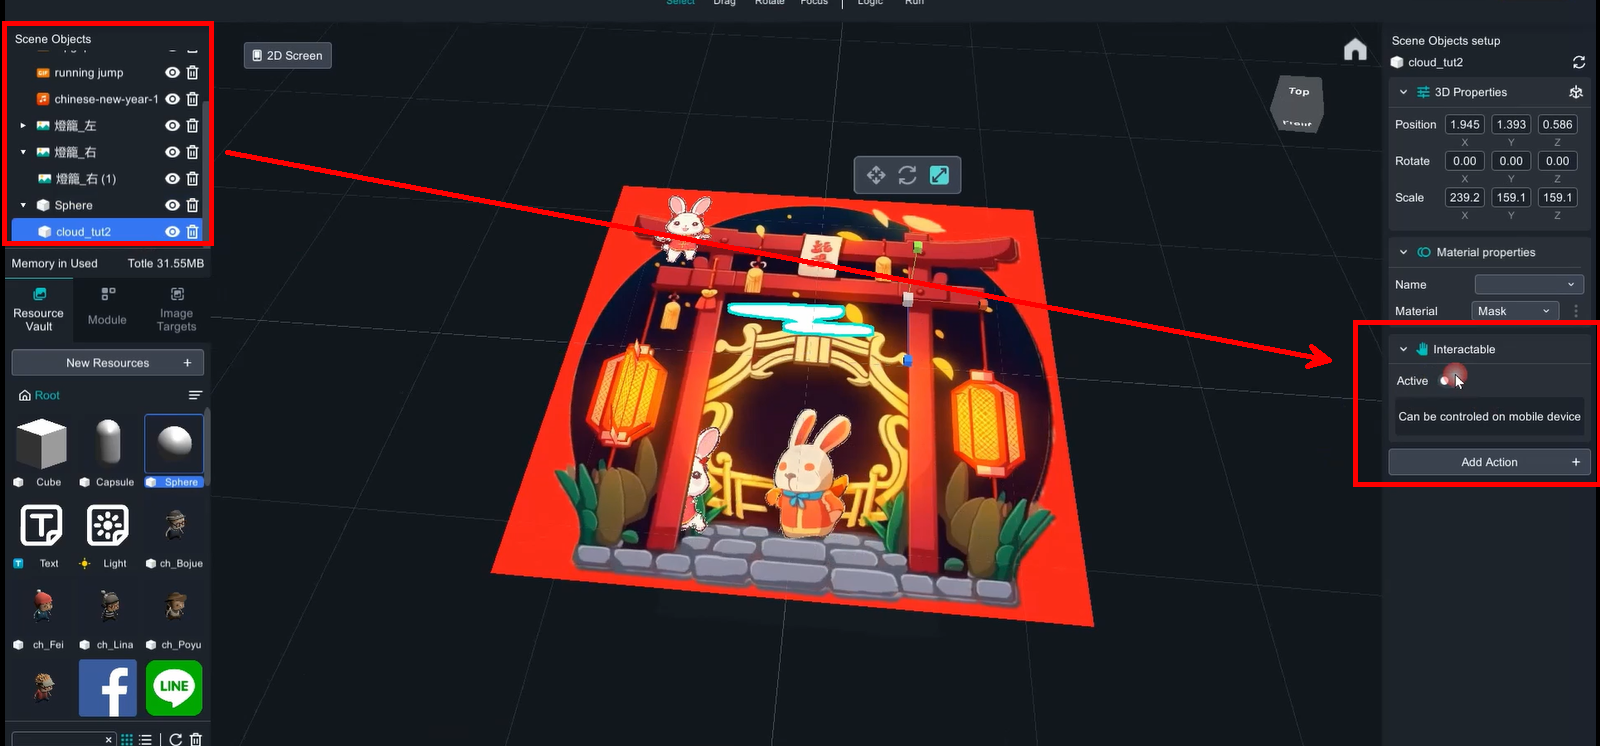
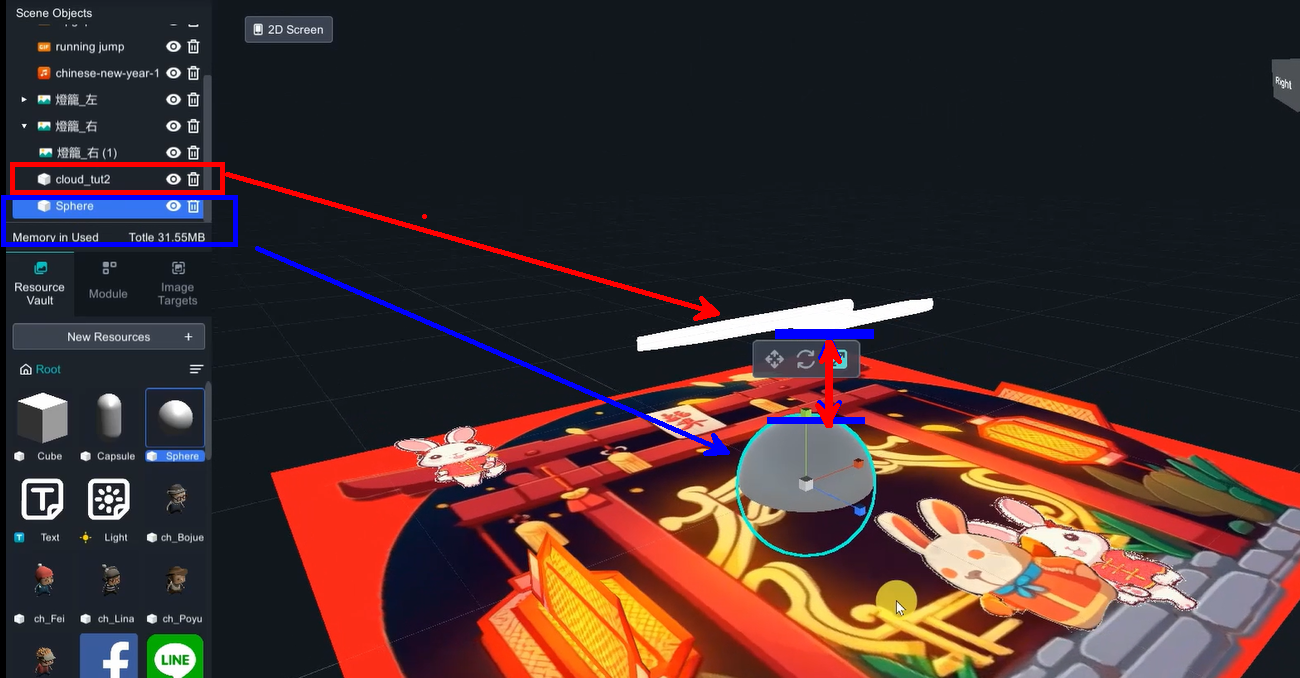
3D model (cloud): change material into Mask.
Due to a slight offset in the center point (the intersection point of the three axes) of this model, an additional transparent sphere was added to enclose the cloud for ease of control. Transparent sphere: Click the three dots on the right side of the material ball, change the mode to "Fade”, click on the color, decrease the A (alpha) value to 0.
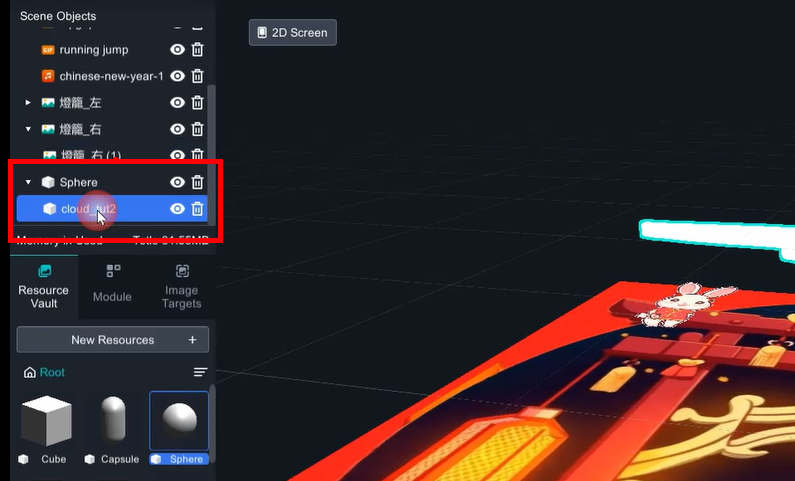
In scene objects, drag cloud_tut2 into sphere to group them together.
Two clouds will be created here, so you only need to duplicate the completed cloud and paste it. The pasted object will be separate, so it needs to be brought closer to the sphere again.
4. 2D image mimics 3D object
Drag the lantern image , cover perfectly on top of the lantern in target.
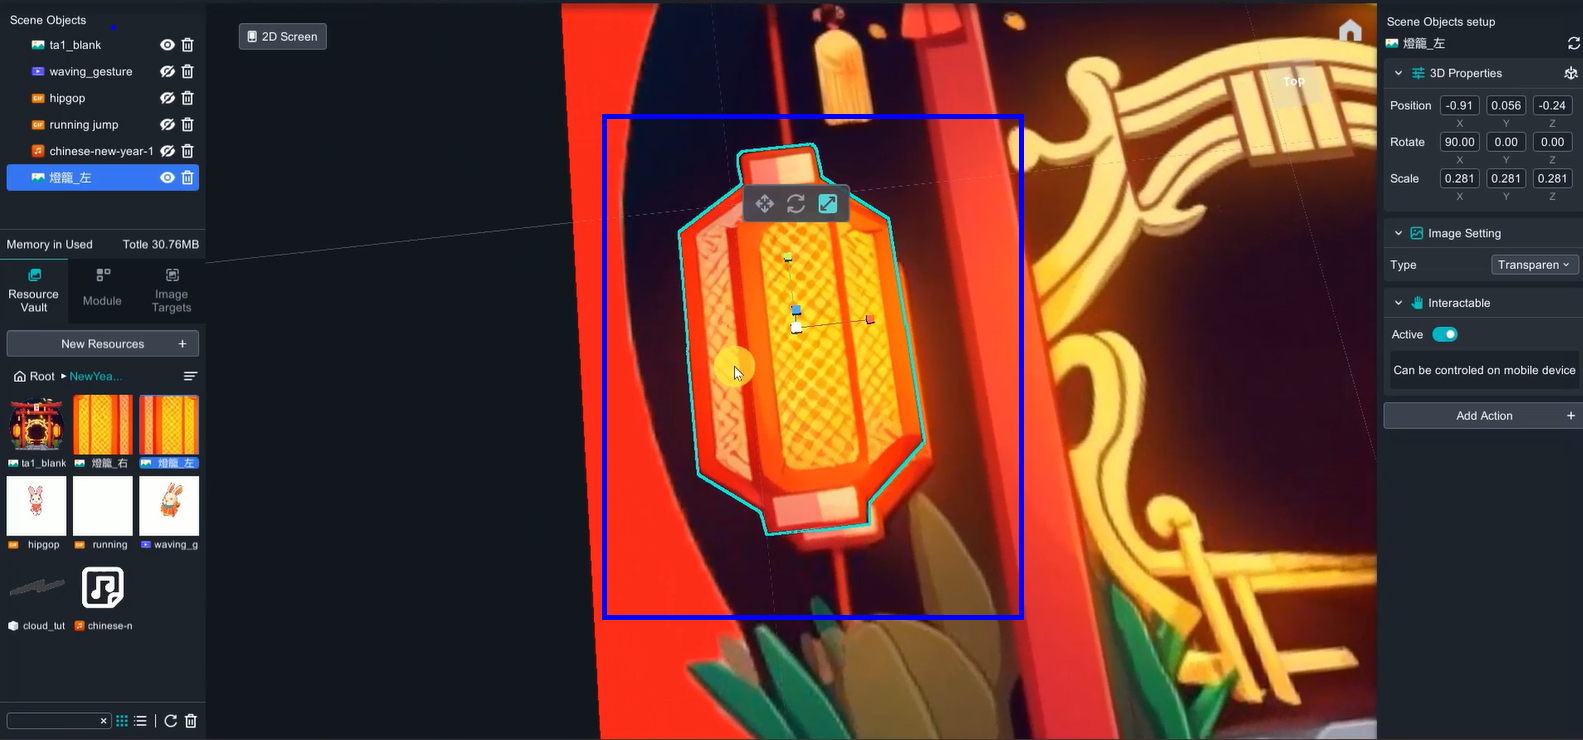
Duplicate another image, and rotate 90 degree, so that both images perpendicular to each other.
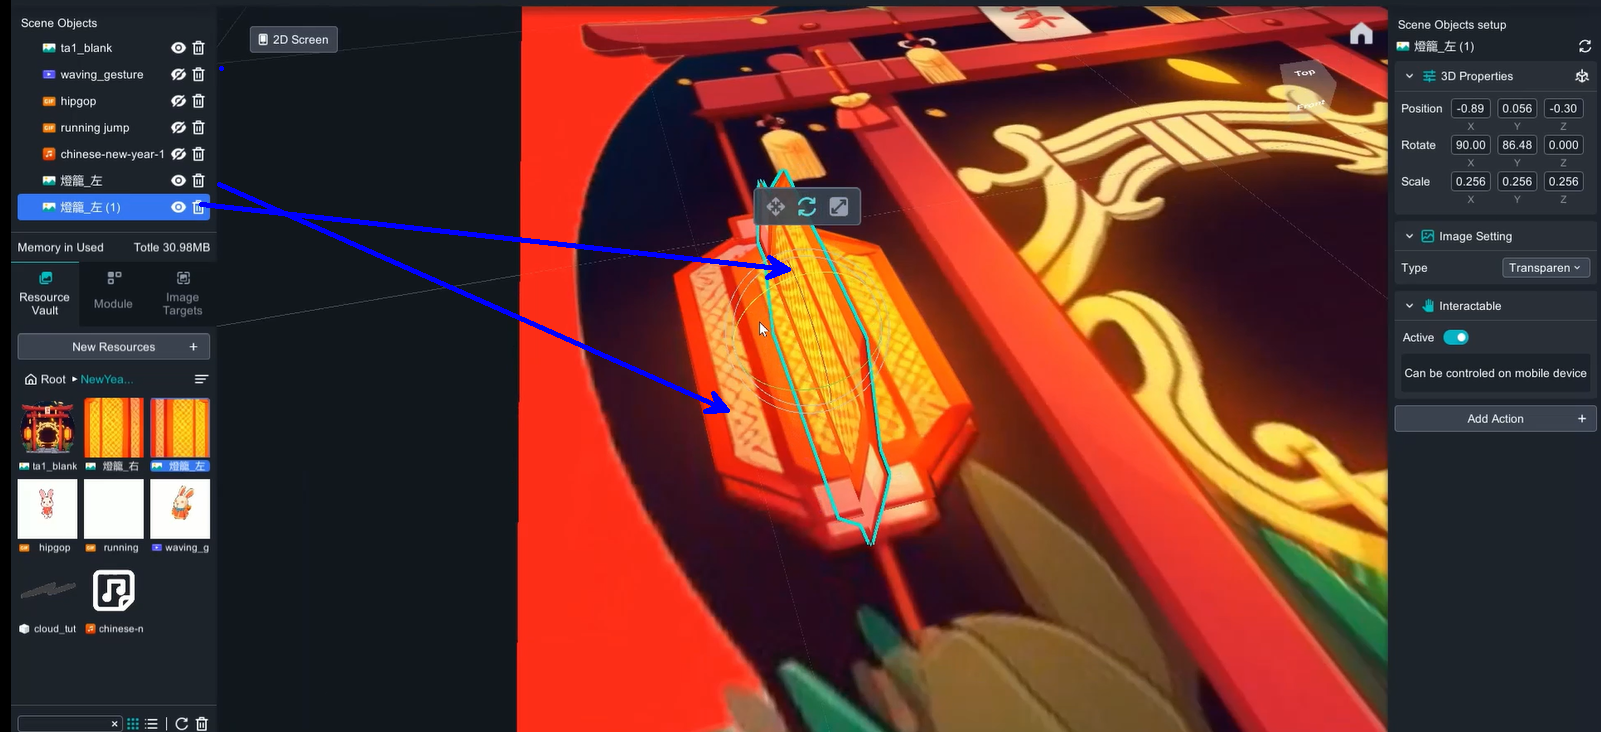
Drag the second image into the first one to group them.
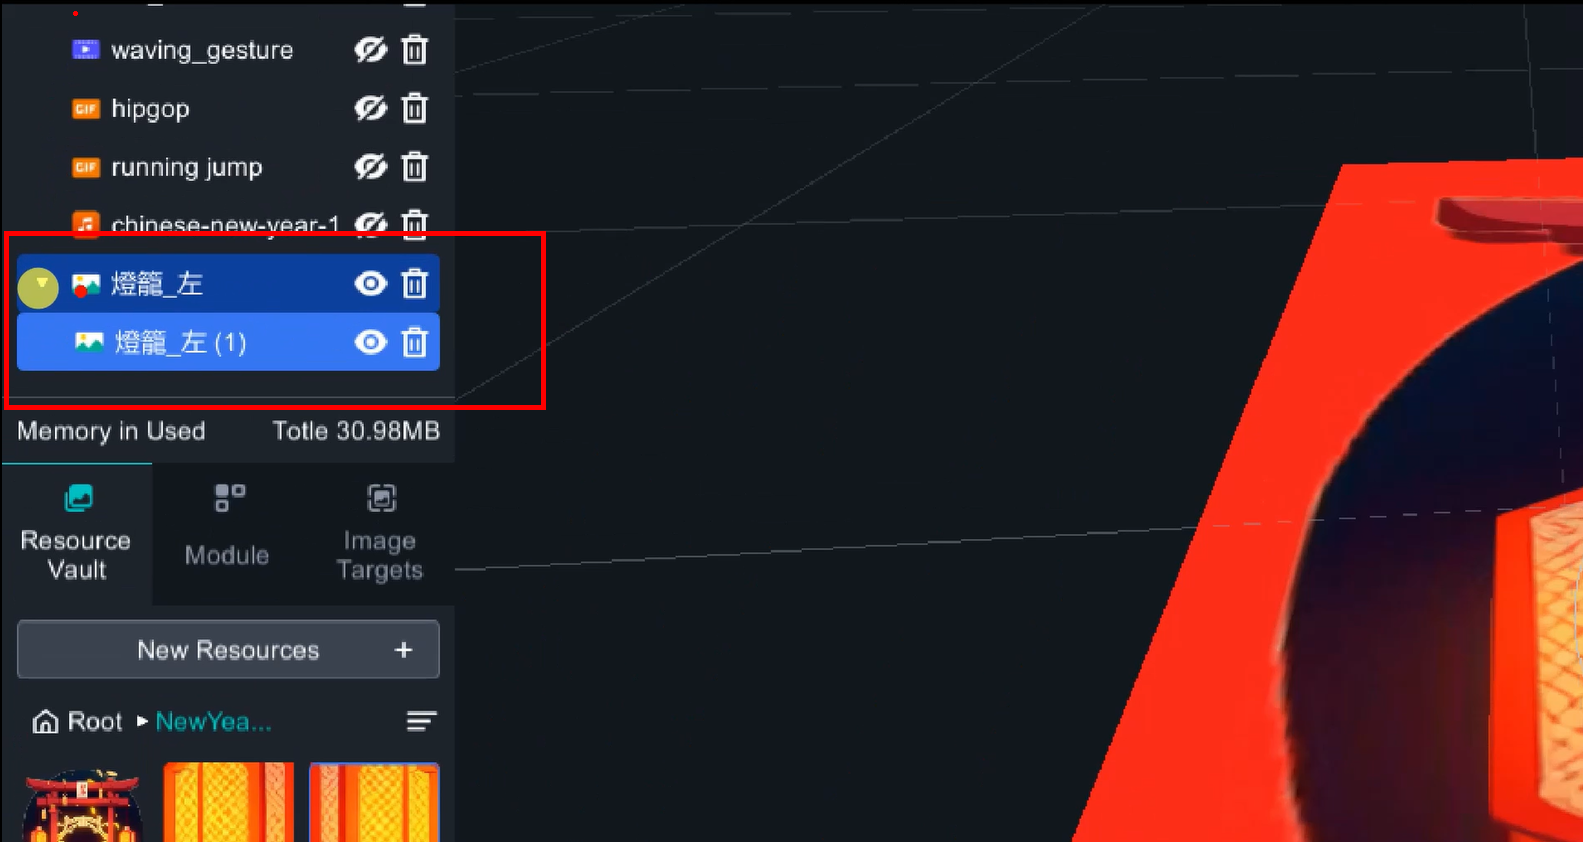
There are two lanterns in this project, and the method is the same.
5. De-active interactable function
Interactable feature allows users to move, rotate, and scale the augmented objects by hand when they appear on the screen. However, this feature has been disabled here to prevent accidentally moving the objects while viewing and losing the best experience.
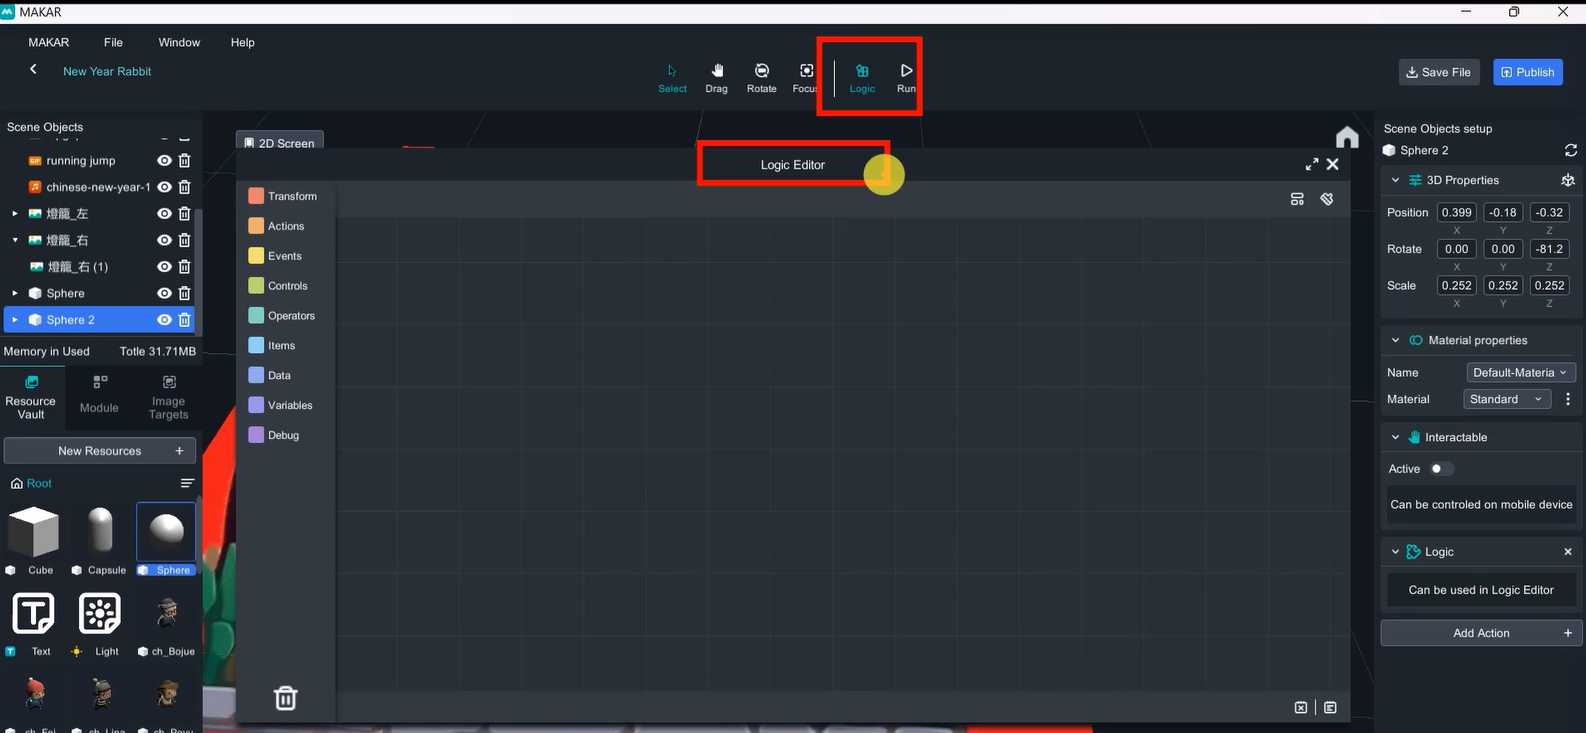
6. Logic function
Add logic function to all objects in the scene (Add Action -> Logic). For grouped objects (clouds, lanterns), only the outermost layer (with the white triangle) needs to be given a logic function, while the elements inside the group do not need it.
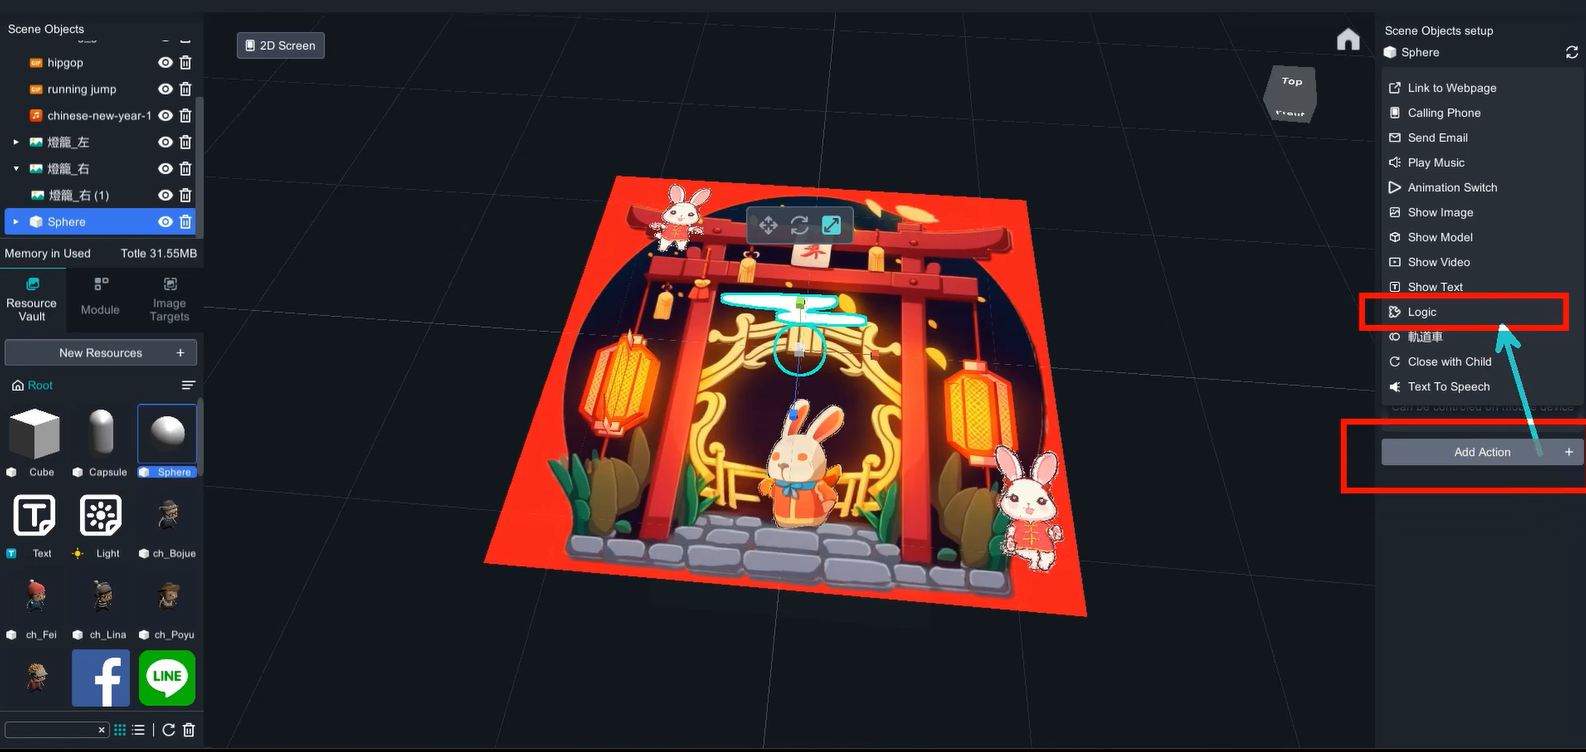
Click the Logic on top menu to open logic editor.
a. Cloud
Transform 🡪 Transitions 🡪 the sixth blockly
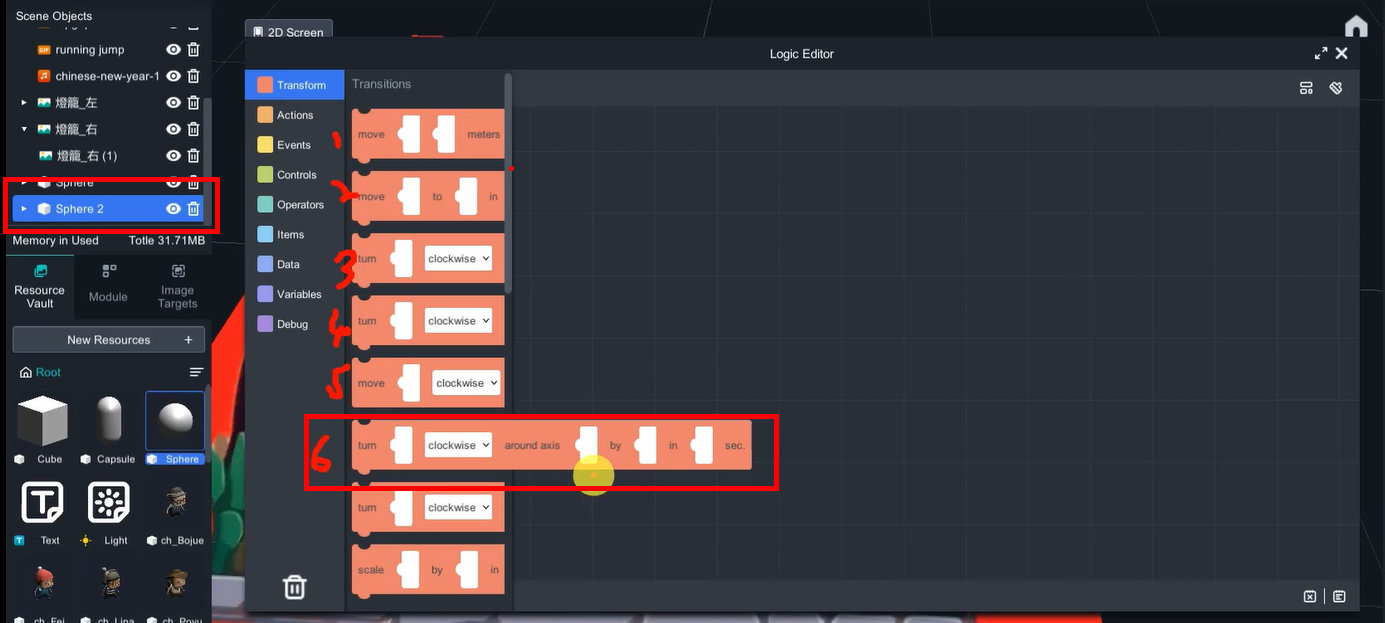
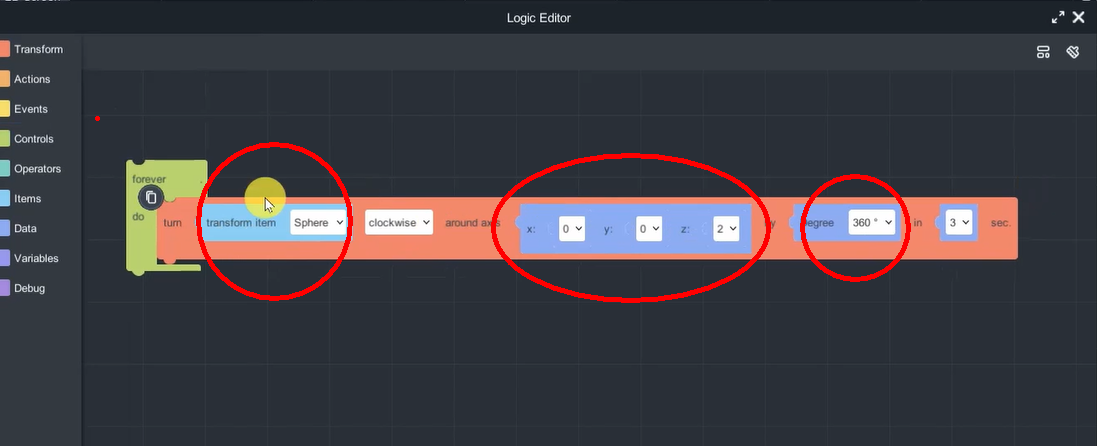
Transform item: sphere, rotate axis(0,0,2) by 360 degree.
Add a " Forever do" loop outside(Control🡪Loops🡪 first blockly)
〈Little detail〉
To create the effect of clouds appearing and disappearing, the distance between the clouds and the sphere was increased, which in turn increased the rotation radius.
To create a sense of visual hierarchy between the two clouds appearing at different times, one of the clouds can be rotated 90 degrees.
b. Lanterns:
Duplicate the blocklys from cloud, and change the transform item and rotate axis(0,1,0).
c. Audio:
Drag audio into scene and de-active interactable and add logic function.
Actions 🡪 Sound 🡪 first blockly
d. Video:
Waving_guesture video: Actions 🡪 Vidoe 🡪 first blockly

Finally, disable the visibilty of all the item in the scene objects, except audio material. And use the blockly to control all the item.
This method ensures that no augmented objects will appear on the screen when the mobile camera is not pointing at the target image.
The project is now complete and ready for publishing.
How to play
Click the application, type in the ID or scan the QR code to experience the AR/VR !
1. Install MAKAR application
2. Scan QRcodec or search ID: class06


3. Select「迎新兔」project,click「experience」to active and put the camera face forward the poster.

