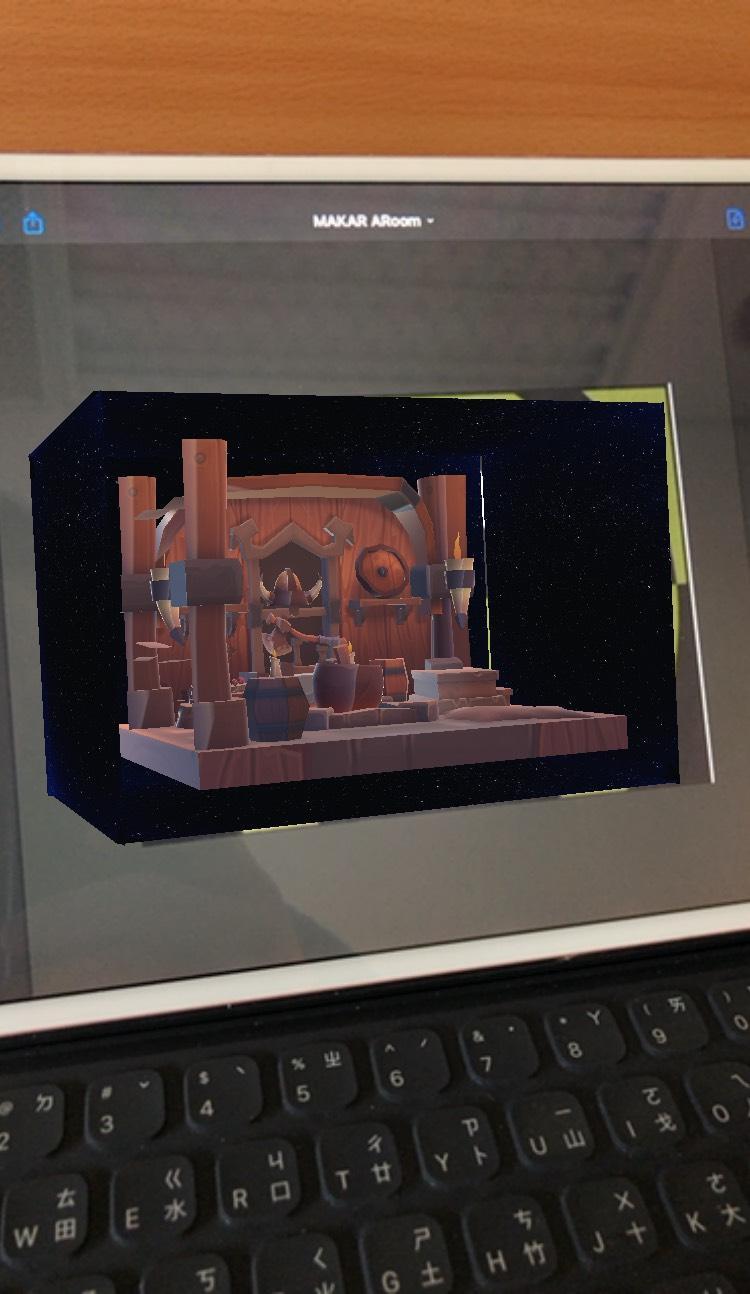
AR 3D Zoom
MAKAR ARoom
Course Description:
This course takes AR image recognition as an example, combining Sketchfab’s material library, importing material to MAKAR for AR creation, and through the simple process of 3D materials settled in Blender, which makes the learning of creating more easily.
1.Create a new project
Click “+New Project” on the top left.

2.Select AR Target
Select “AR Target”, set the project name and choose the target image, and click “Ok” to finish the process.

3.Project production
Selecting the 3D model, MAKAR provides two ways for users to import FBX model material.
[Method 1]Users upload model materials by themselves
a.Select the appropriate material from the Sketchfab website, some of which are available for free download and a CC license. Search the keyword isometric.

b.Selecting the FBX file to download.(The model website used in this tutorial:https://skfb.ly/VAKF )
There are many file types for 3D models, but currently MAKAR editor only supports the FBX, so if the file does not provide this file type, you may need to change files or materials by yourself.

c.The downloaded FBX may not have the texture on it, so it can be quickly viewed in Paint 3D in Windows. It can be previewed directly with the blank key in Mac.
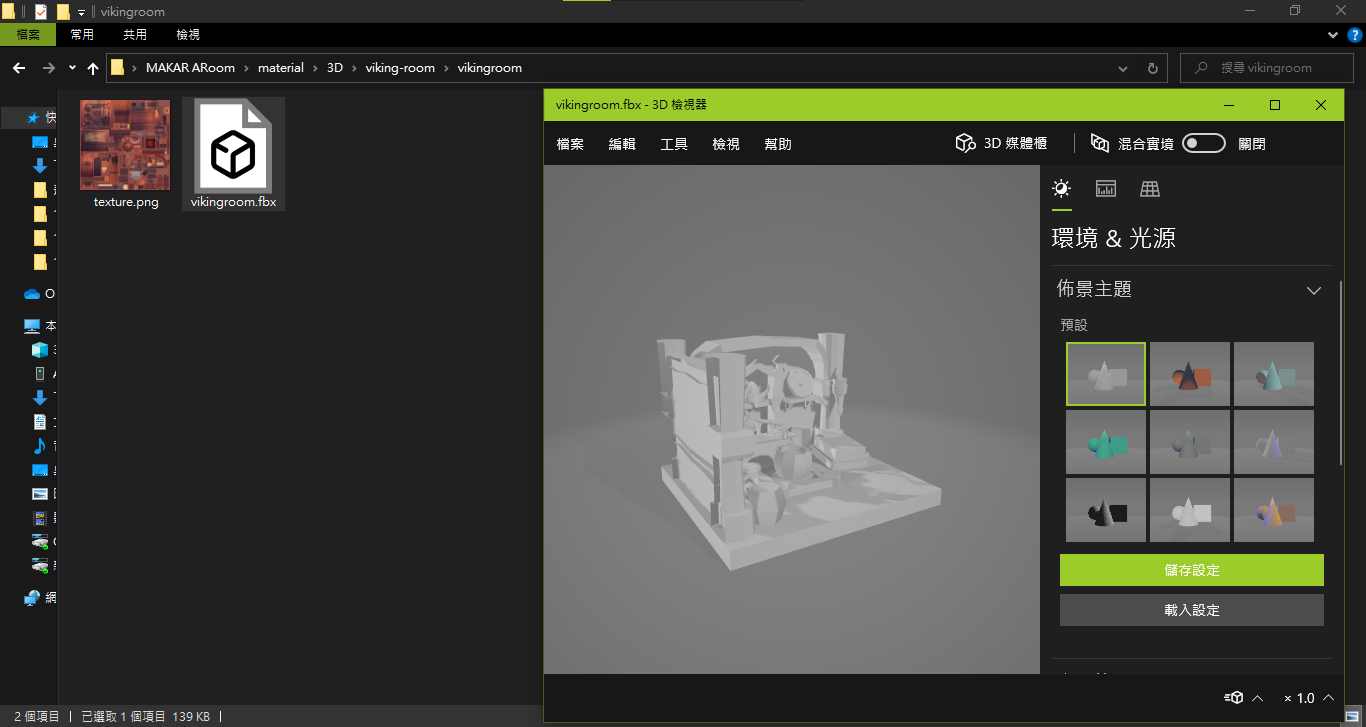
If it is an FBX without material on it, you need to use modeling software (Maya, 3ds Max, Blender, etc.) to paste the material and then save it as FBX. Here is going to be a demonstration of applying materials in Blender
(Blender V2.92https://www.blender.org/download/Blender2.92/blender-2.92.0-windows64.msi/ )。
d.Open Blender and import the FBX file.
File > Import >FBX

e.Click “Shading” on the top, and then click on the imported model (magenta block). A connected window will appear at the bottom.

f.Find the window that links to Base Color, click on the folder and open the texture map.


Material shows up.
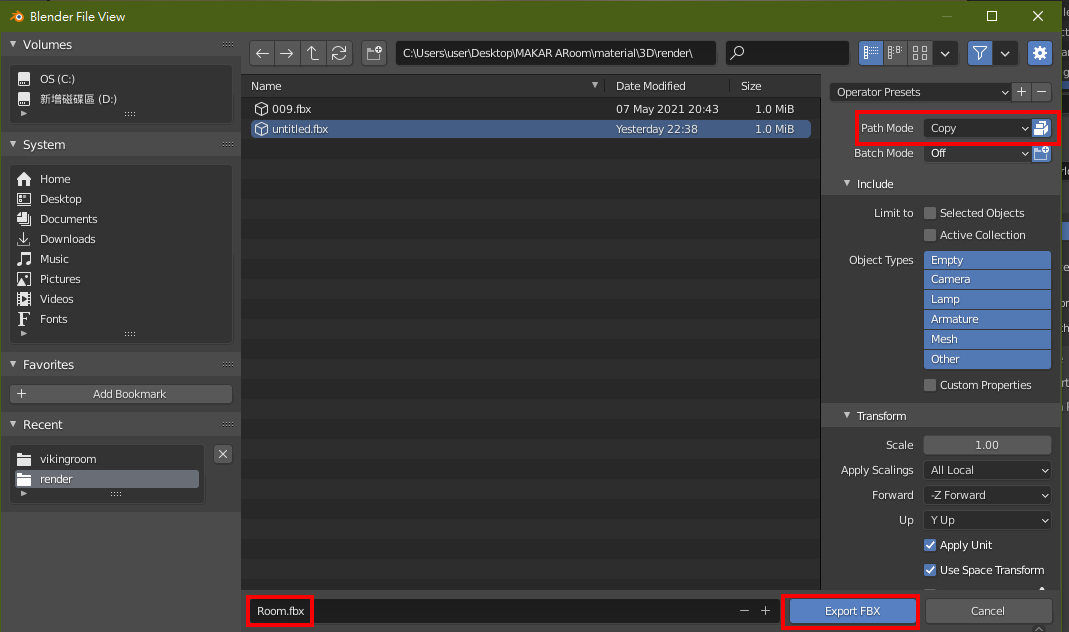
g.Export the FBX file
File>Export>FBX

Path Mode change to Copy, click Embed texture on the right side, name the file.
Click "Export FBX" to export the file.
After export, it can quickly confirm with Paint 3D whether the material has been applied.
h.Import FBX material in MAKAR editor.
Resource Vault>Click “New Resources”>3D Model

[Method 2]Online model material
a.Take Sketchfab for example again, click “New Resources”, “Online Resources”.

b.There are MAKAR resources , Poly resources , and SketchFab resources. SketchFab resources require an account to be used.
After selecting the needed model, the download icon will appear when the mouse moves on it.

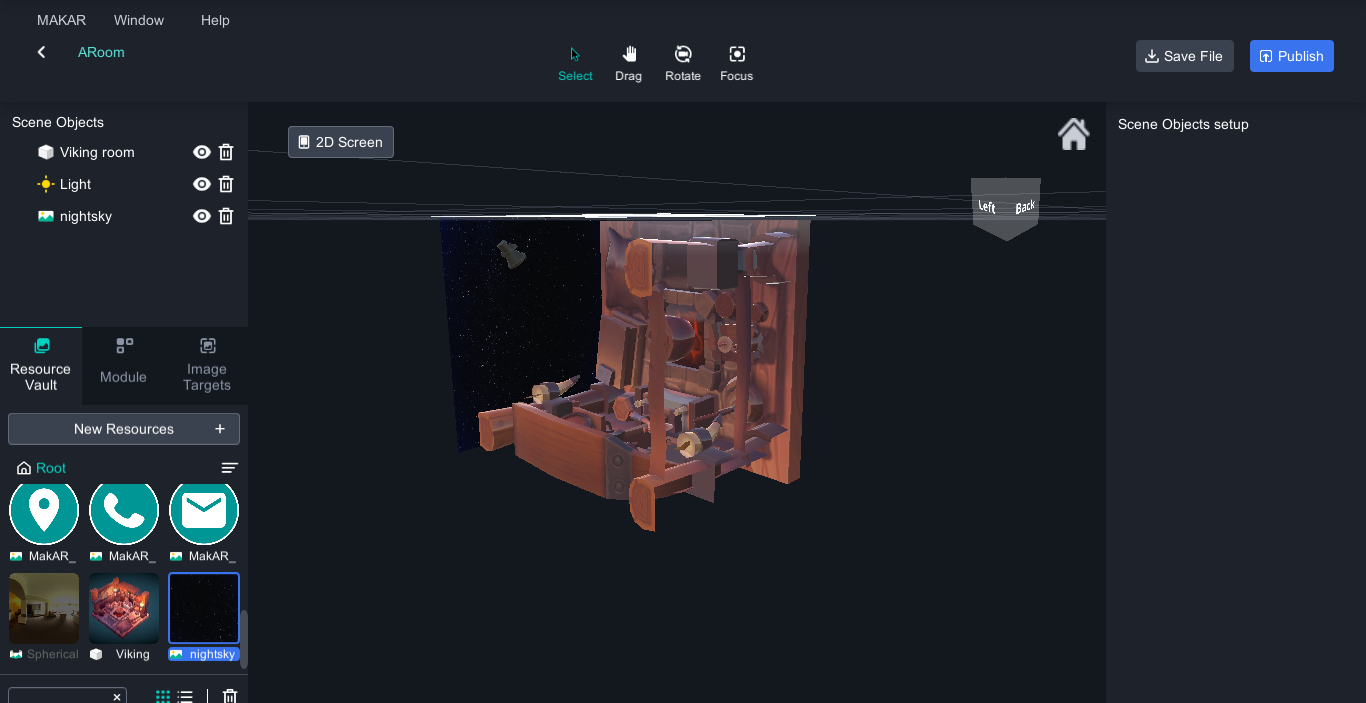
4.Import material into the scene
Drag the material into the scene.

Through “Scale(R)” adjust model smaller than the target image, click “Move(W)” to move the model below the target image, close but no more than it, and then through"Rotate(E)"to rotate the model in the correct direction.

Add a light, making sure the light is direct on the model.

5.Import environment surround
Click “New Resources”>Image, select a starry night background image.

(Reference material: https://pixabay.com/images/id-2695569/ )
Use the starry sky background to wrap around the model.
Totally 5 sides should be covered, except for the target image side.

Make good use of the direction map in the upper right and try to make all seams as close as possible.
How to experience
Open your MAKAR App, input the ID or scan QRcode below, then you can experience the project!
1.Install MAKAR App
2.Scan the QRcode to enter the project

3.Click ARoom project to start

4.Click Experience and scan the target image below


Target Image
Example